Loading
Deckards Blaster - Blade Runner
Published 2015-03-03T16:58:27+00:00


-
Group-A-Deckards-Gun-A00
-
Group-A-Deckards-Gun-A00
-
Group-A-Deckards-Gun-A00
-
Group-A-Deckards-Gun-A00
-
Group-A-Deckards-Gun-A00
-
Group-A-Deckards-Gun-A00
-
Group-A-Deckards-Gun-A00
-
Group-A-Deckards-Gun-A00
-
Group-A-Deckards-Gun-A00
-
Group-A-Deckards-Gun-A00
-
Group-A-Deckards-Gun-A00
-
Group-A-Deckards-Gun-A00
-
Group-A-Deckards-Gun-A00
-
Group-A-Deckards-Gun-A00
-
Group-A-Deckards-Gun-A00
-
Group-A-Deckards-Gun-A00
-
Group-A-Deckards-Gun-A00
-
Group-A-Deckards-Gun-A00
-
Group-B-Deckards-Gun-B00
-
Group-B-Deckards-Gun-B00
-
Group-B-Deckards-Gun-B00
-
Group-B-Deckards-Gun-B00
-
Group-B-Deckards-Gun-B00
-
Group-B-Deckards-Gun-B00
-
Group-B-Deckards-Gun-B00
-
Group-B-Deckards-Gun-B00
-
Group-C-Deckards-Gun-C00
-
Group-C-Deckards-Gun-C00
-
Group-C-Deckards-Gun-C00
-
Group-C-Deckards-Gun-C00
-
Group-C-Deckards-Gun-C00
-
Group-C-Deckards-Gun-C00
-
Group-C-Deckards-Gun-C00
-
Group-C-Deckards-Gun-C00
-
Group-C-Deckards-Gun-C00
-
Group-C-Deckards-Gun-C00
-
Group-C-Deckards-Gun-C00
-
Group-C-Deckards-Gun-C00
-
Group-D-Deckards-Gun-D00
-
Group-D-Deckards-Gun-D00
-
Group-D-Deckards-Gun-D00
-
Group-D-Deckards-Gun-D00
-
Group-D-Deckards-Gun-D00
-
Group-D-Deckards-Gun-D00
-
Group-D-Deckards-Gun-D00
-
Group-D-Deckards-Gun-D00
-
Group-D-Deckards-Gun-D00
-
Group-D-Deckards-Gun-D00
-
Group-E-Deckards-Gun-E00
-
Group-E-Deckards-Gun-E00
-
Group-E-Deckards-Gun-E00
-
Group-E-Deckards-Gun-E00
-
Group-E-Deckards-Gun-E00
-
Group-E-Deckards-Gun-E00
-
Group-E-Deckards-Gun-E00
-
Group-E-Deckards-Gun-E00
-
Group-F-Deckards-Gun-F00
-
Group-F-Deckards-Gun-F00
-
Group-F-Deckards-Gun-F00
-
Group-F-Deckards-Gun-F00
-
Group-F-Deckards-Gun-F00
-
Group-F-Deckards-Gun-F00
-
Group-F-Deckards-Gun-F00
-
Group-F-Deckards-Gun-F00
-
Group-G-Deckards-Gun-G00
-
Group-G-Deckards-Gun-G00
-
Group-G-Deckards-Gun-G00
-
Group-G-Deckards-Gun-G00
-
Group-G-Deckards-Gun-G00
-
Group-G-Deckards-Gun-G00
-
Group-G-Deckards-Gun-G00
-
Group-G-Deckards-Gun-G00
-
Group-G-Deckards-Gun-G00
-
Group-G-Deckards-Gun-G00
-
Group-G-Deckards-Gun-G00
-
Group-G-Deckards-Gun-G00
-
Group-H-Deckards-Gun-H00
-
Group-H-Deckards-Gun-H00
-
Group-H-Deckards-Gun-H00
-
Group-H-Deckards-Gun-H00
-
Group-H-Deckards-Gun-H00
-
Group-H-Deckards-Gun-H00
-
Pegs-Deckards-Gun-P001
-
Pegs-Deckards-Gun-P001


Deckards Blaster - Blade Runner
Published 2015-03-03T16:58:27+00:00
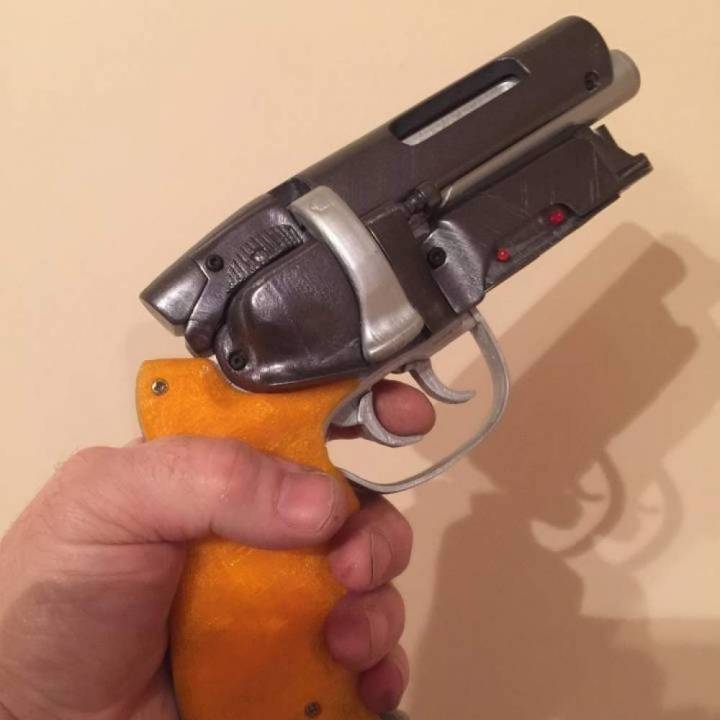
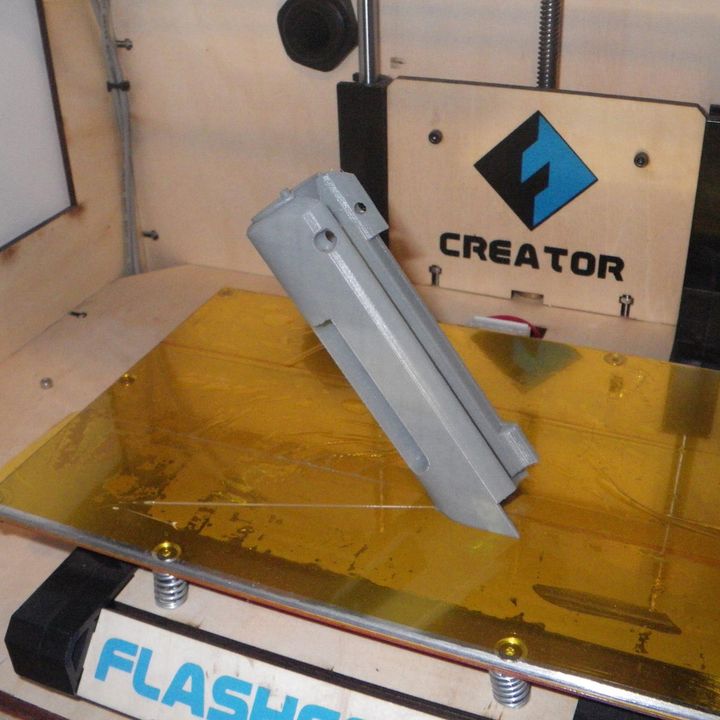
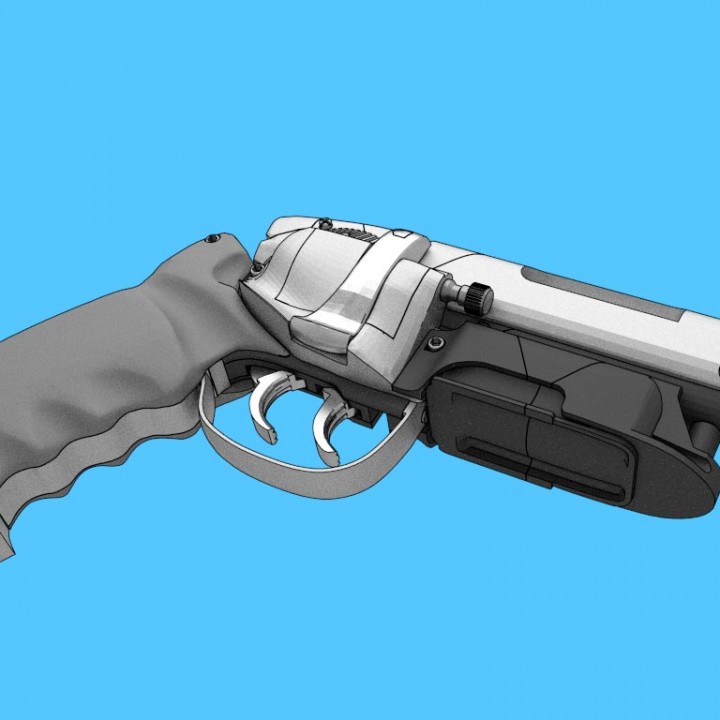
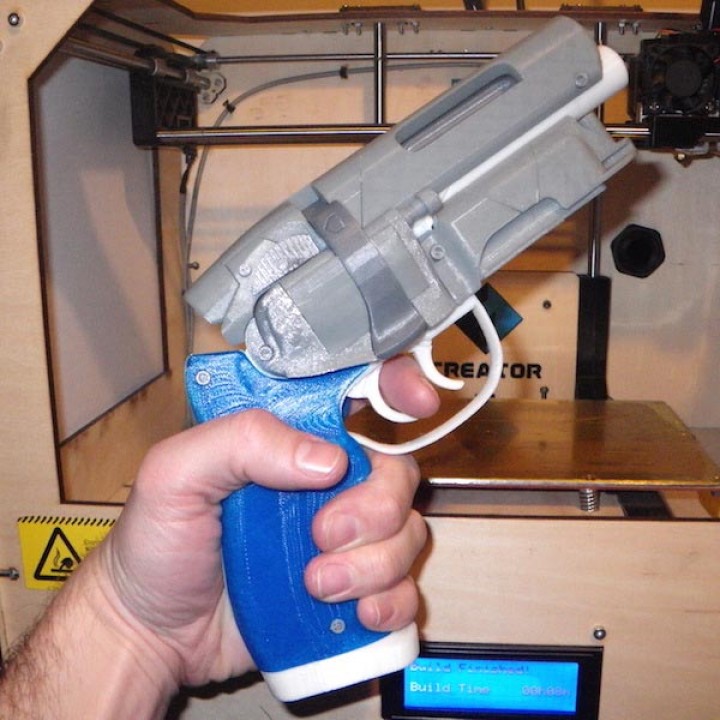
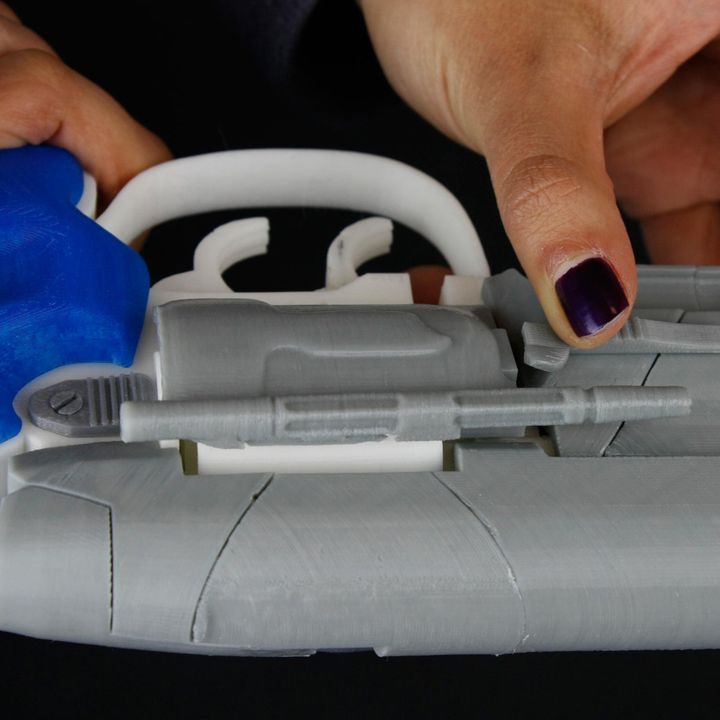
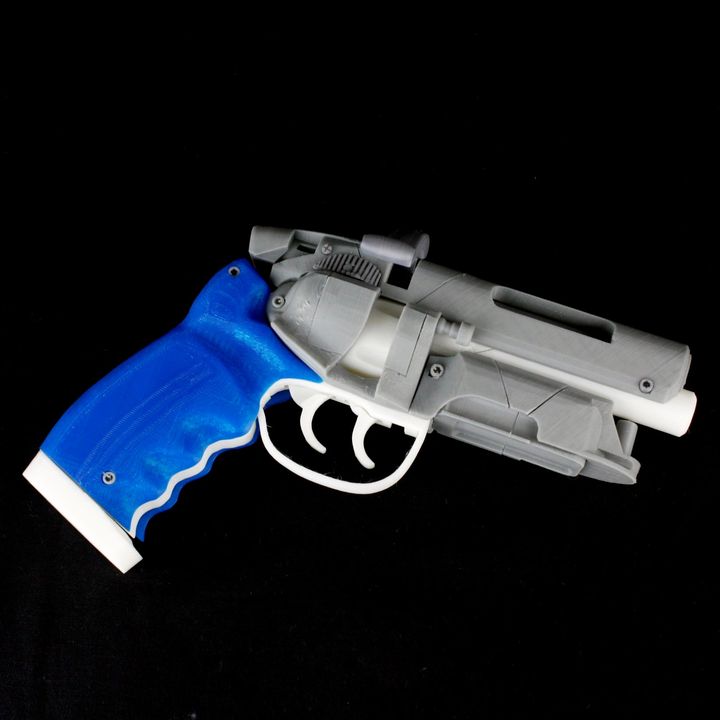
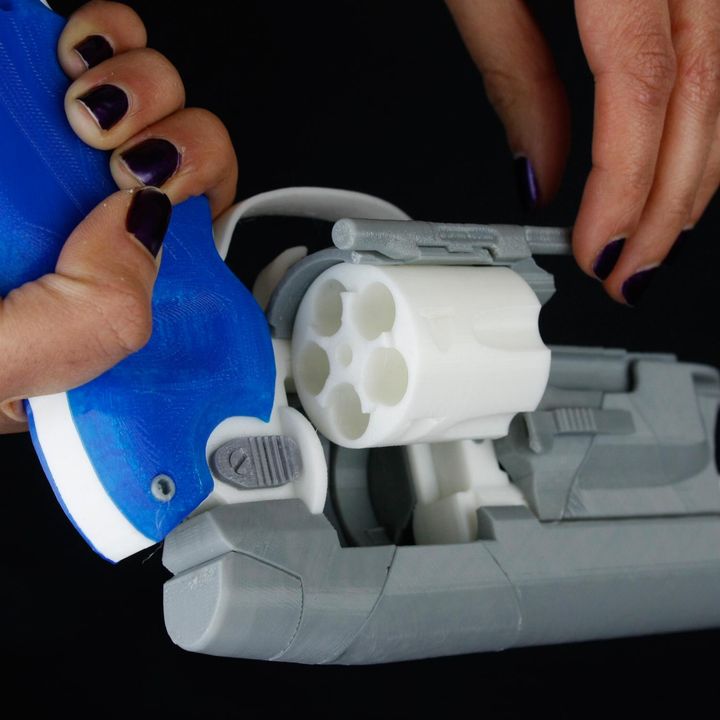
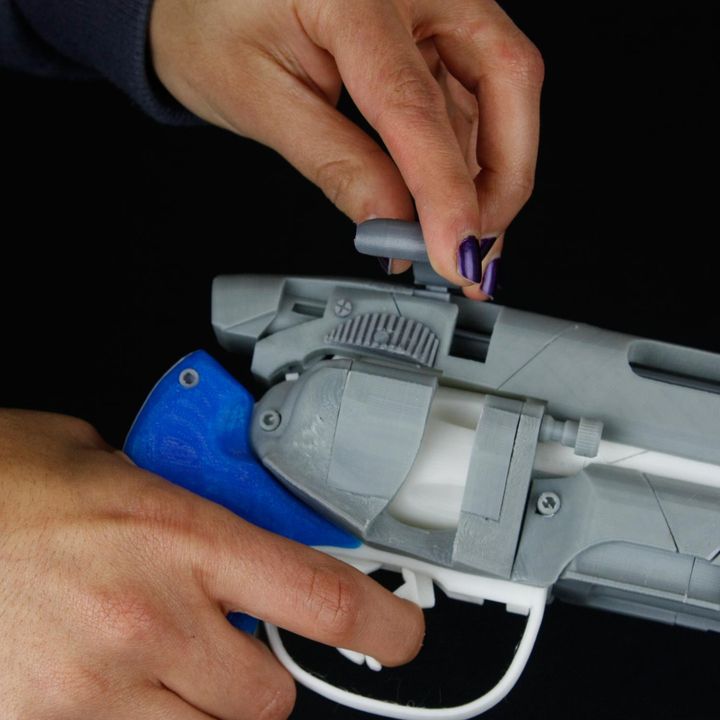
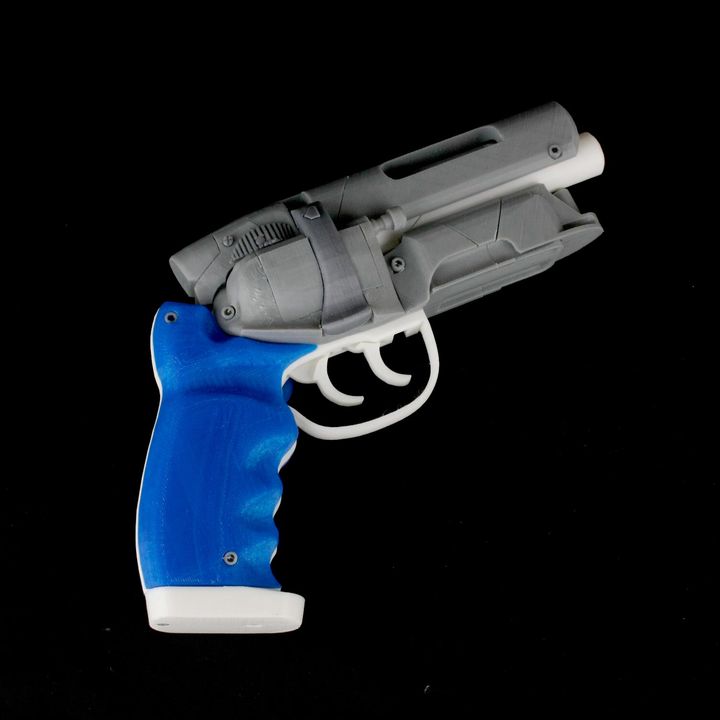
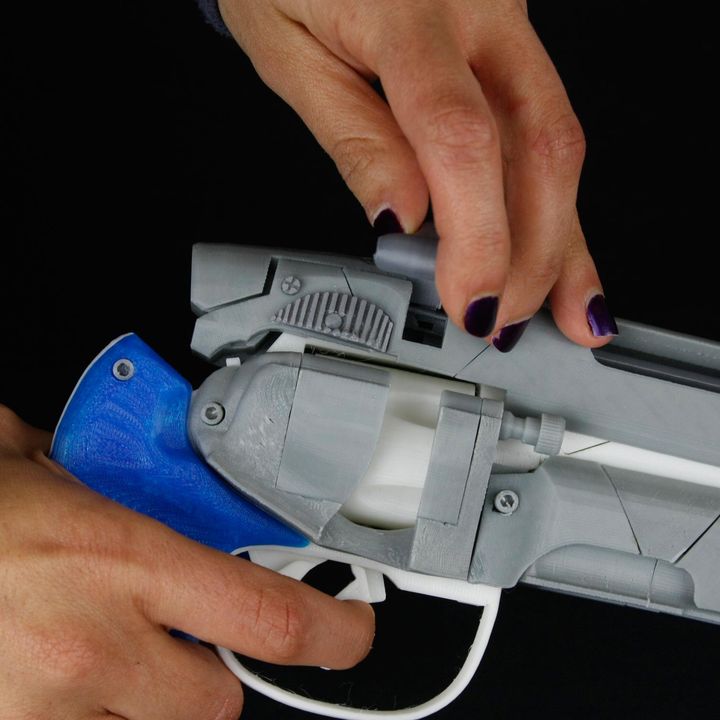
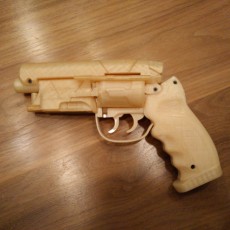
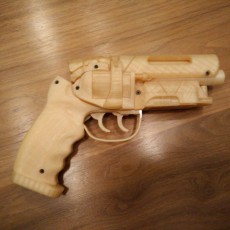
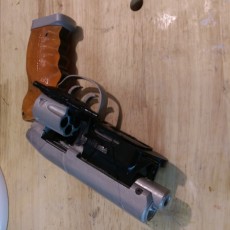
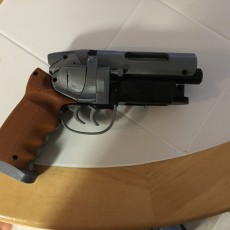
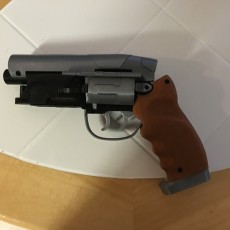
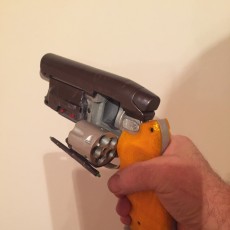
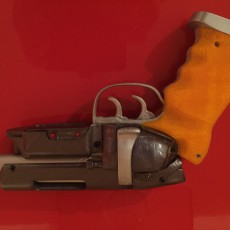
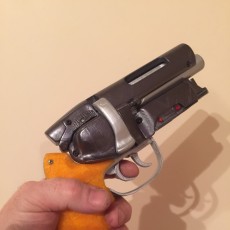
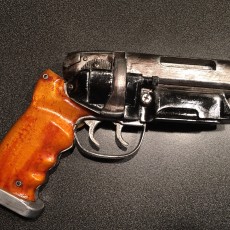
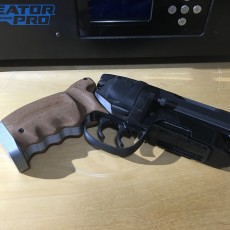
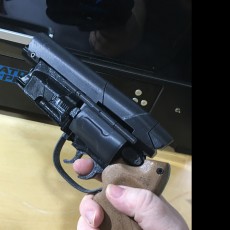
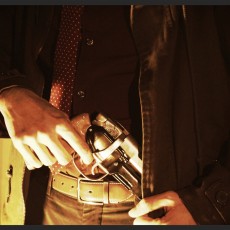
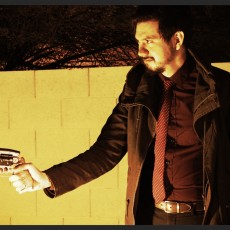
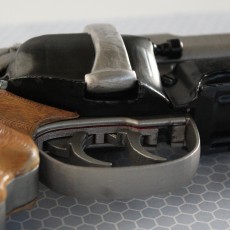
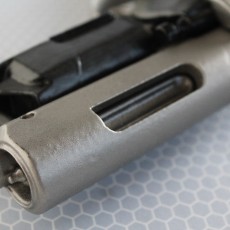
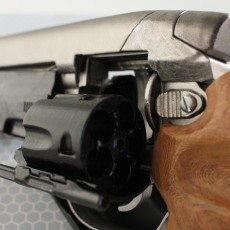
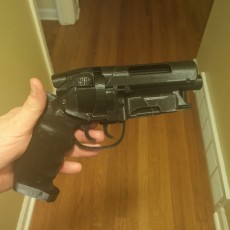
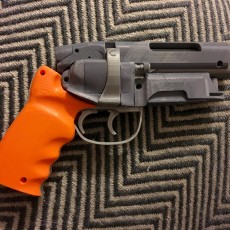
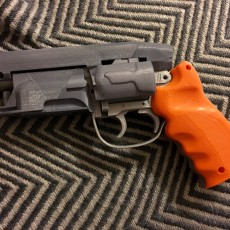
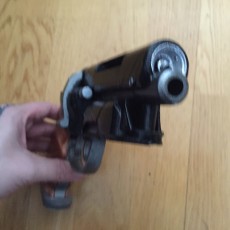
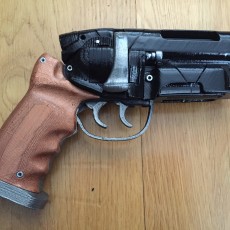
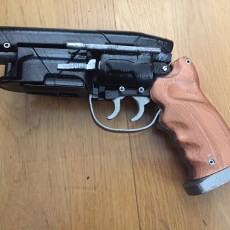
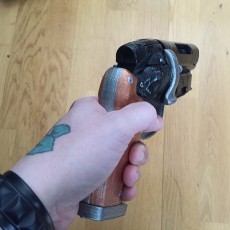
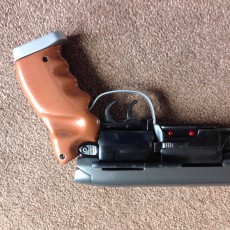
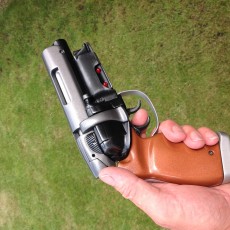
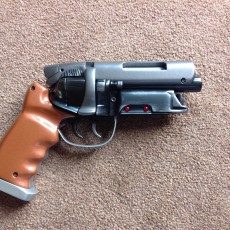
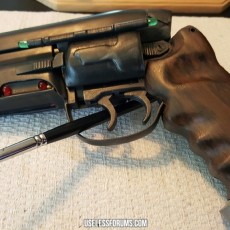
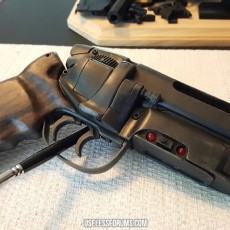
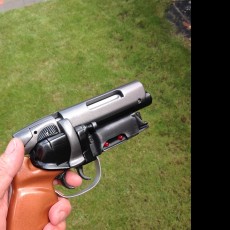
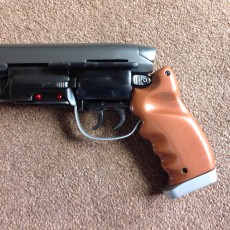
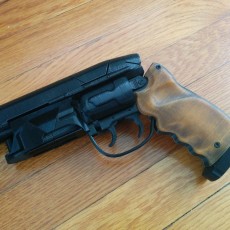
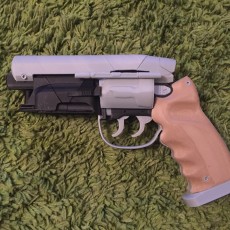
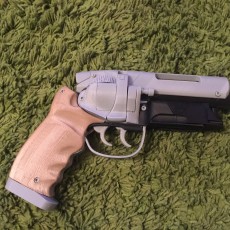
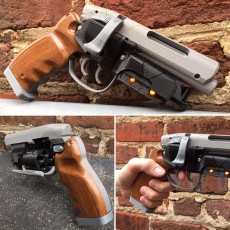
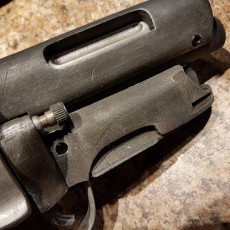
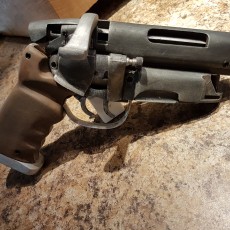
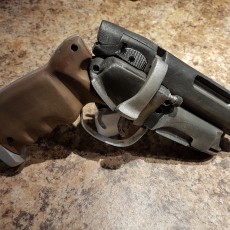
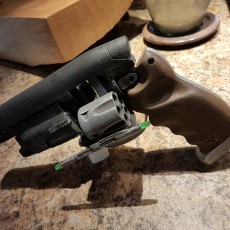
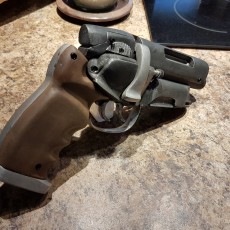
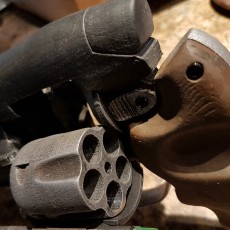
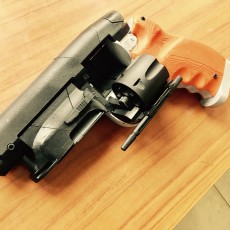
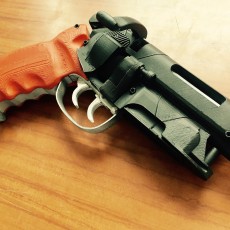
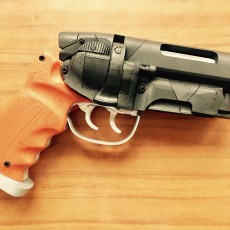
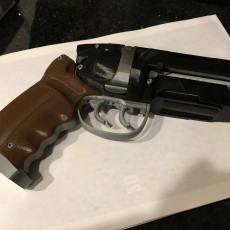
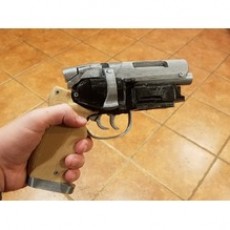
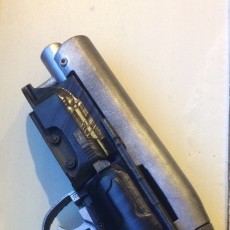
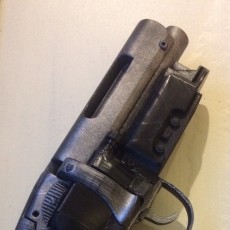
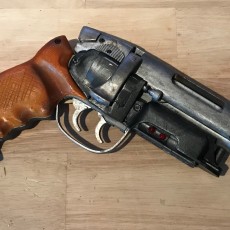
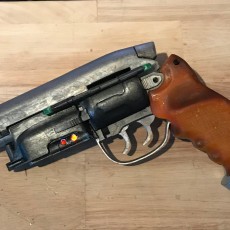
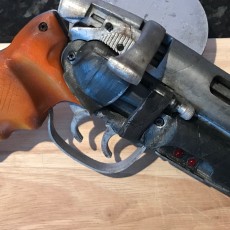
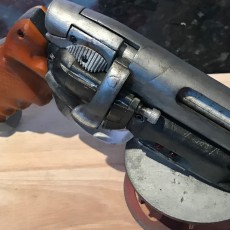
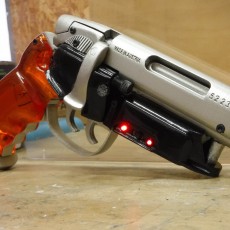
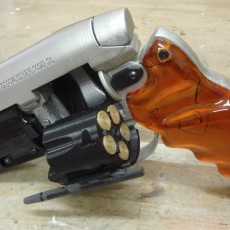
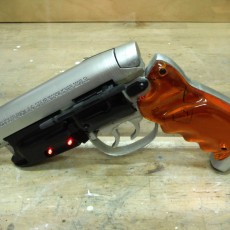
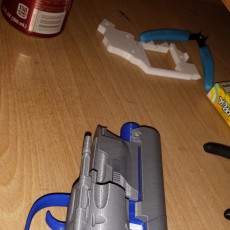
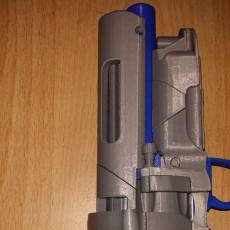
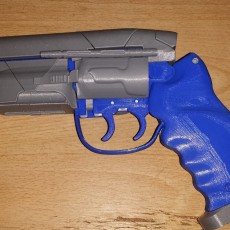
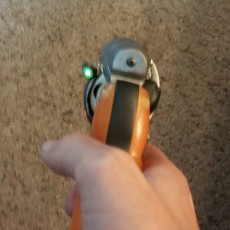
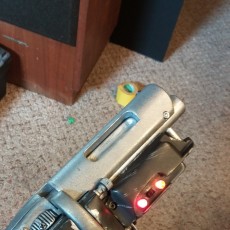
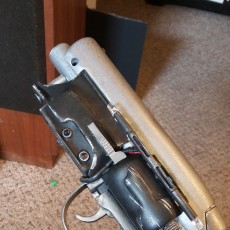
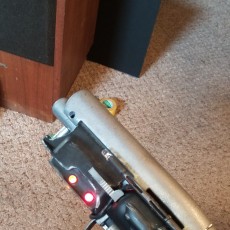
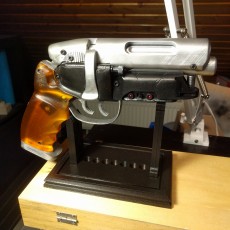
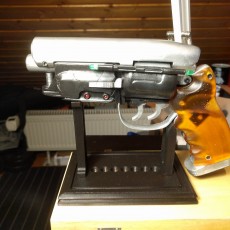
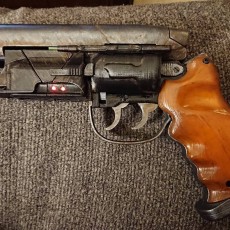
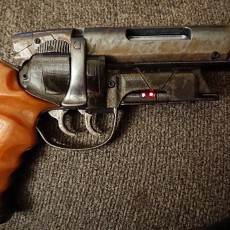
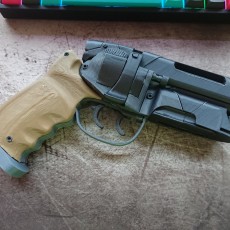
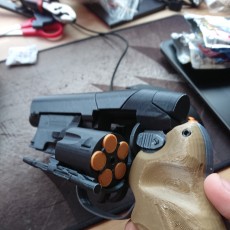
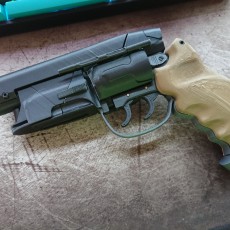
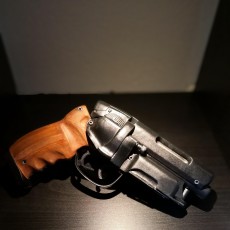
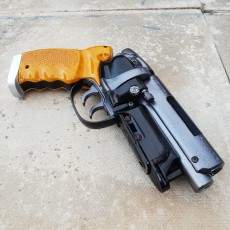
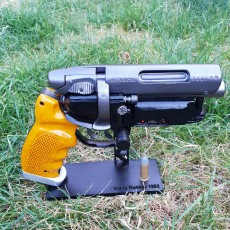
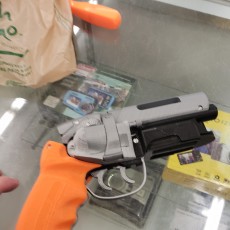
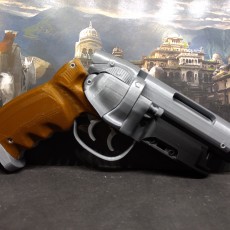
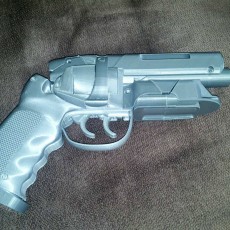
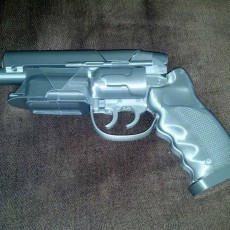
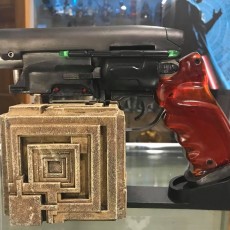
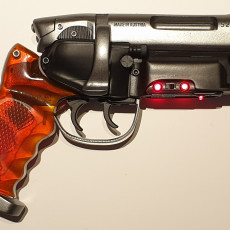
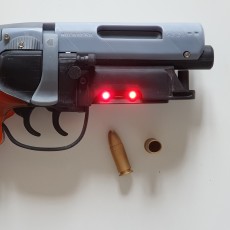
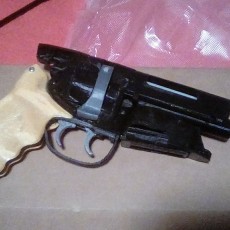
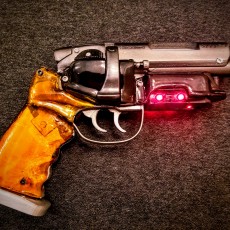
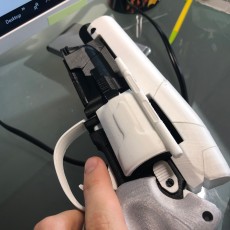
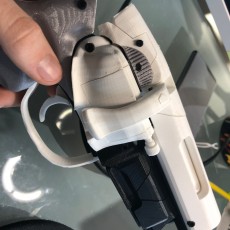
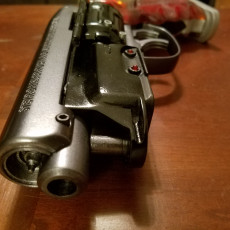
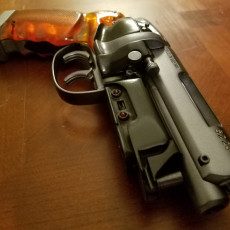
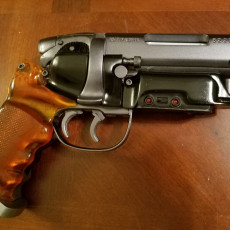
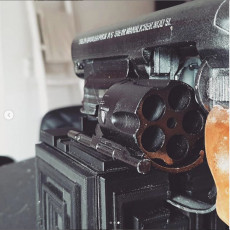
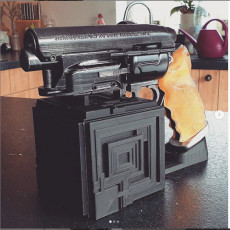
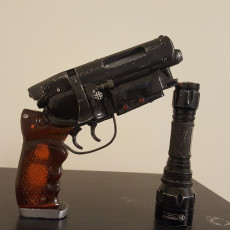
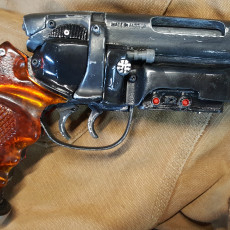
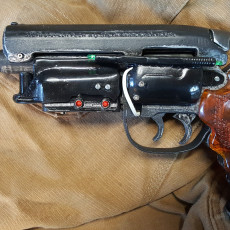
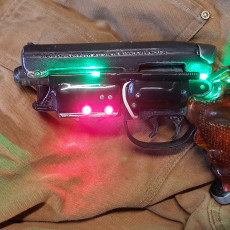
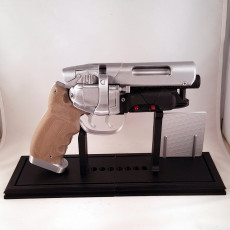
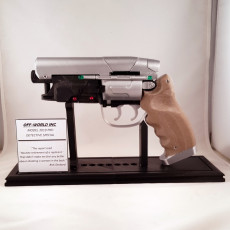
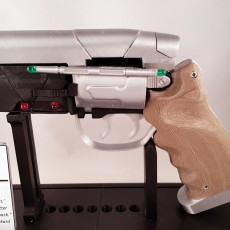
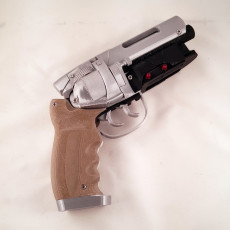
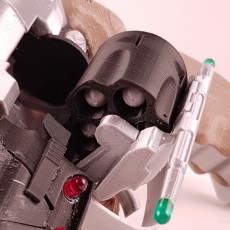
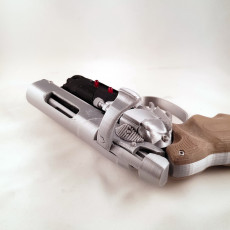
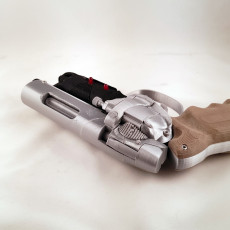
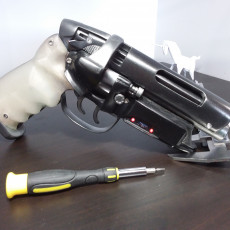
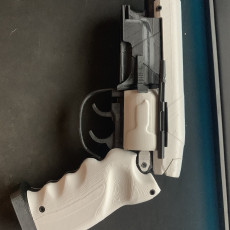
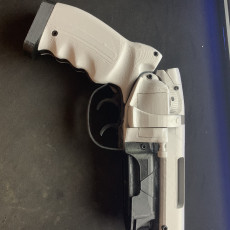
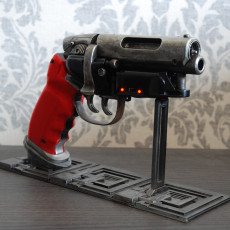
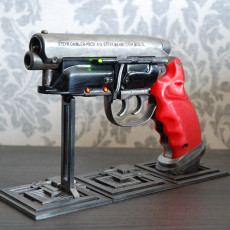
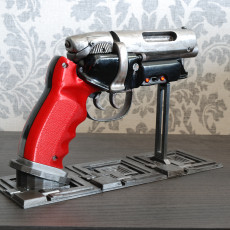
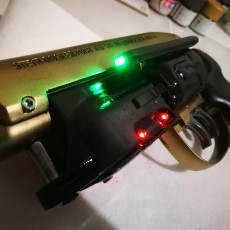
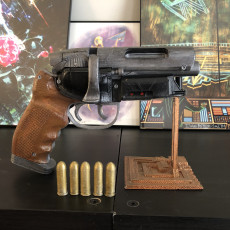
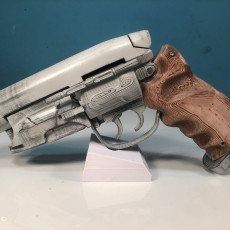
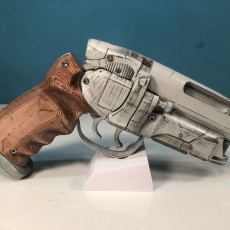
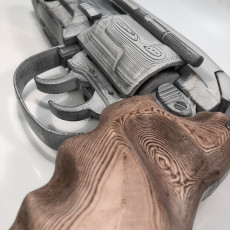
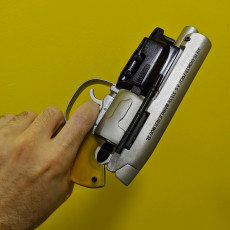
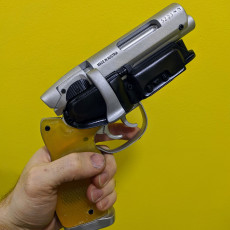
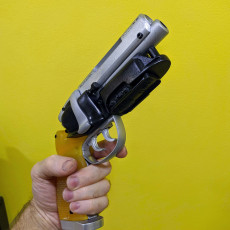
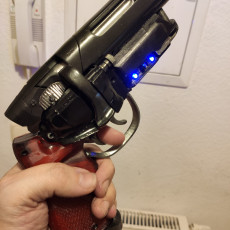
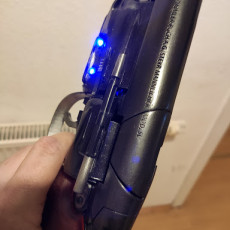
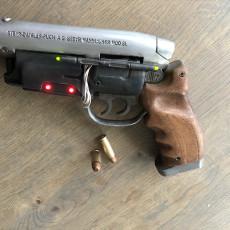
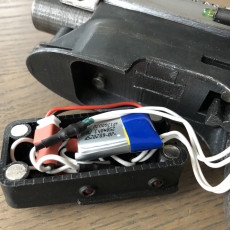
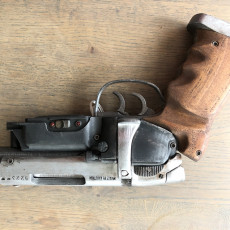
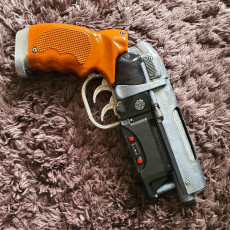
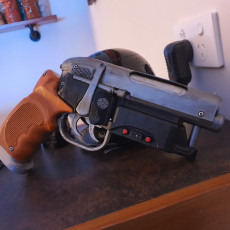
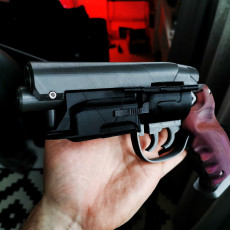
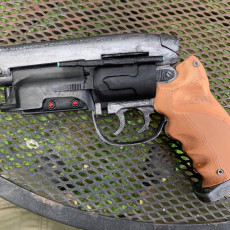
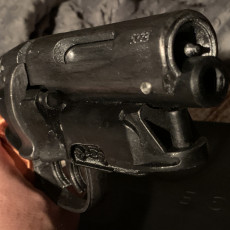
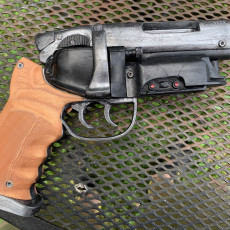
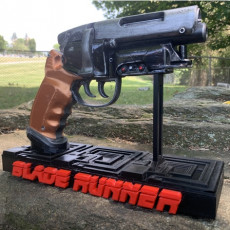
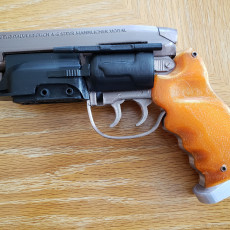
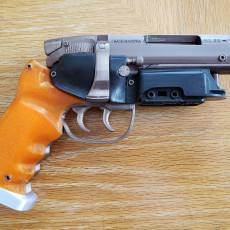
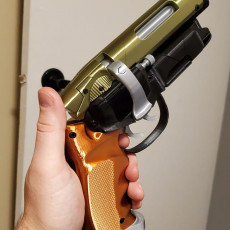
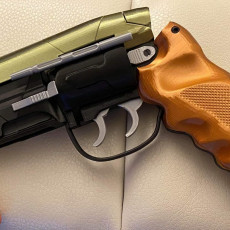
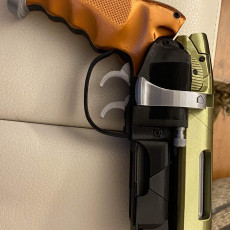
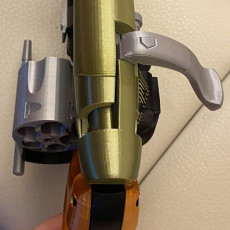
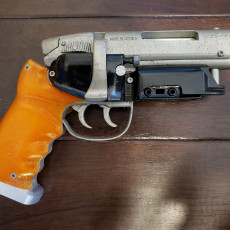
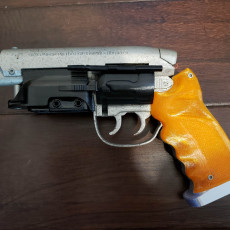
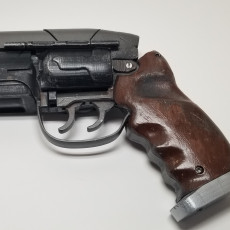
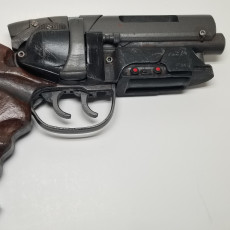
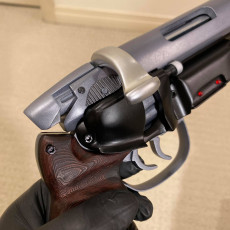
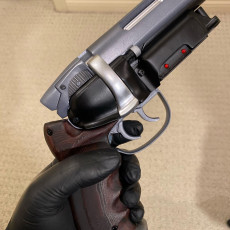
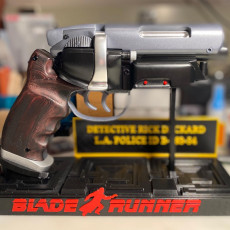
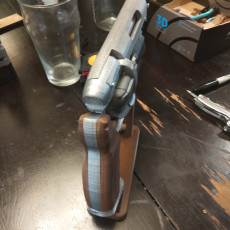
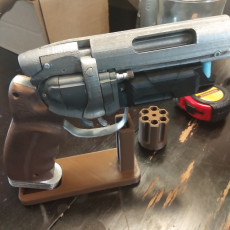
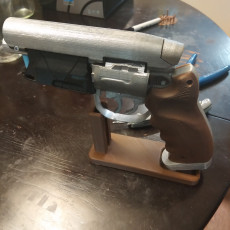
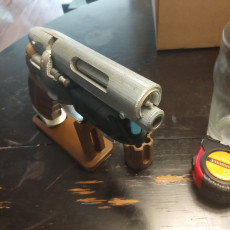
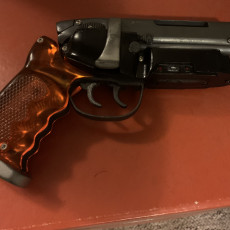
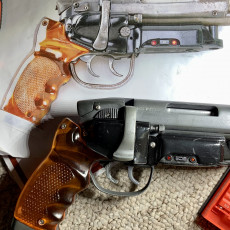
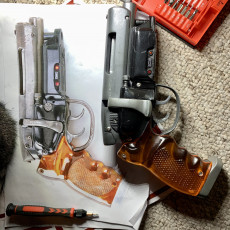
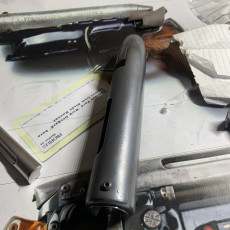
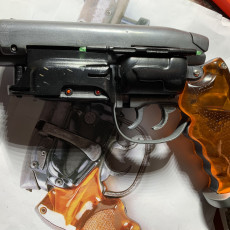
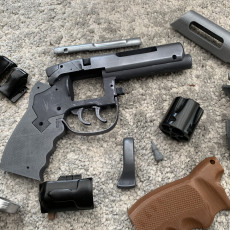
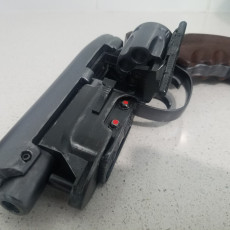
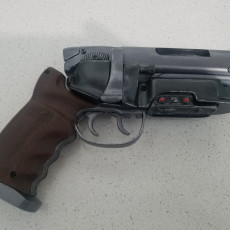
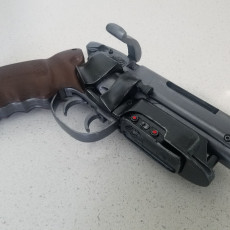
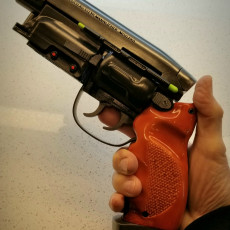
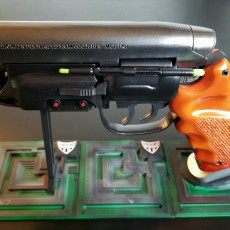
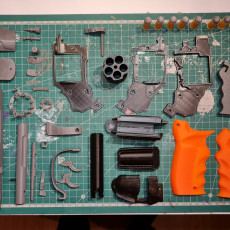
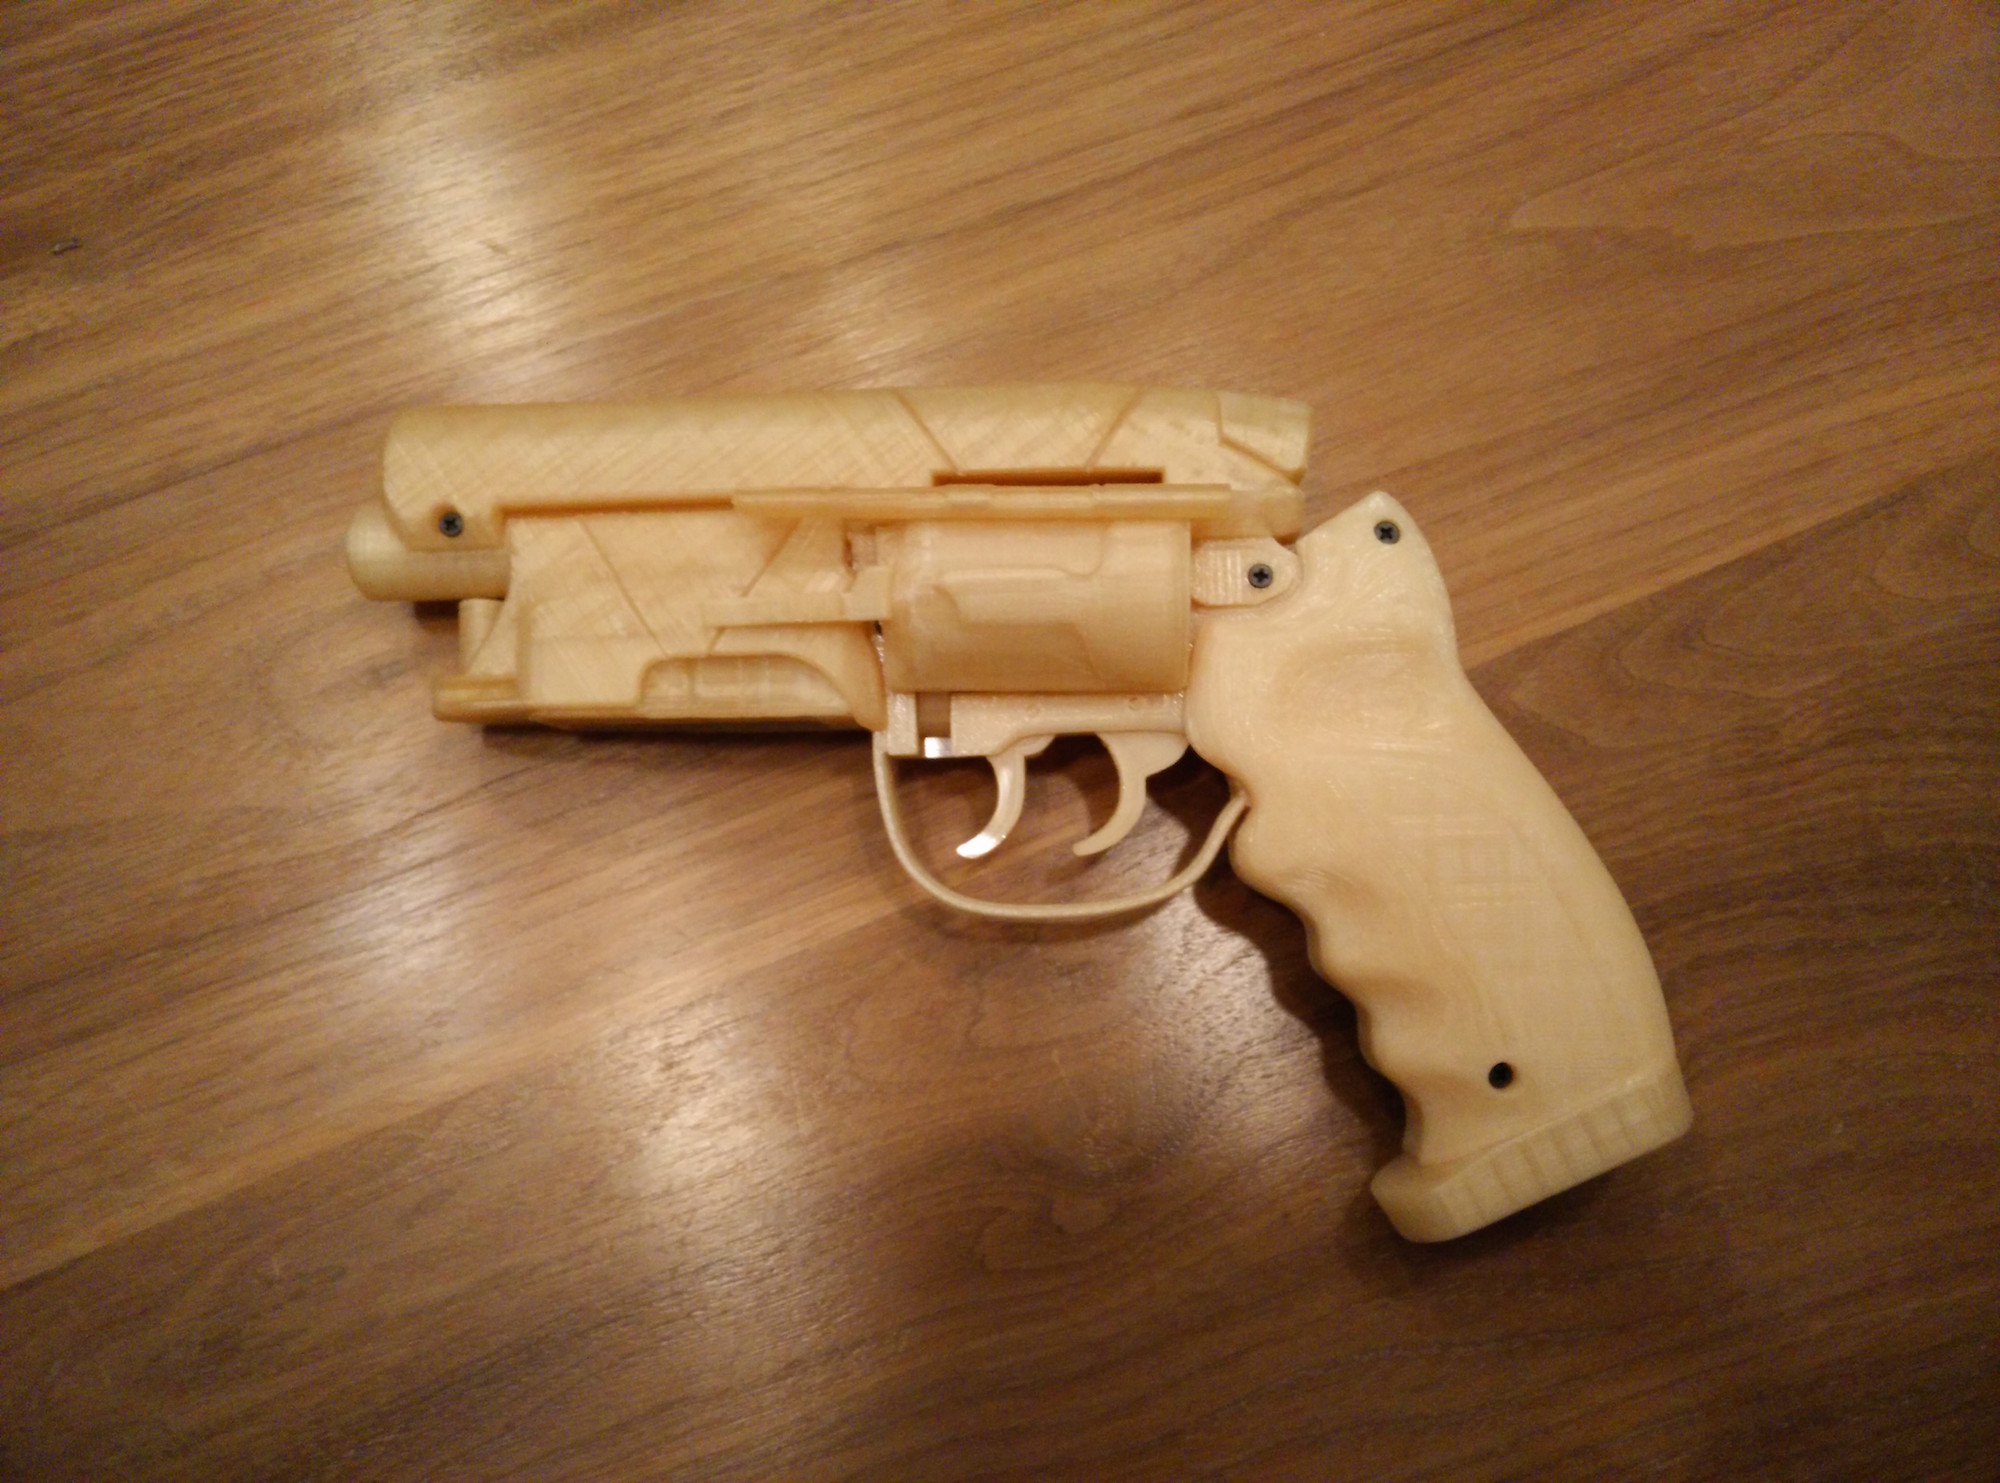
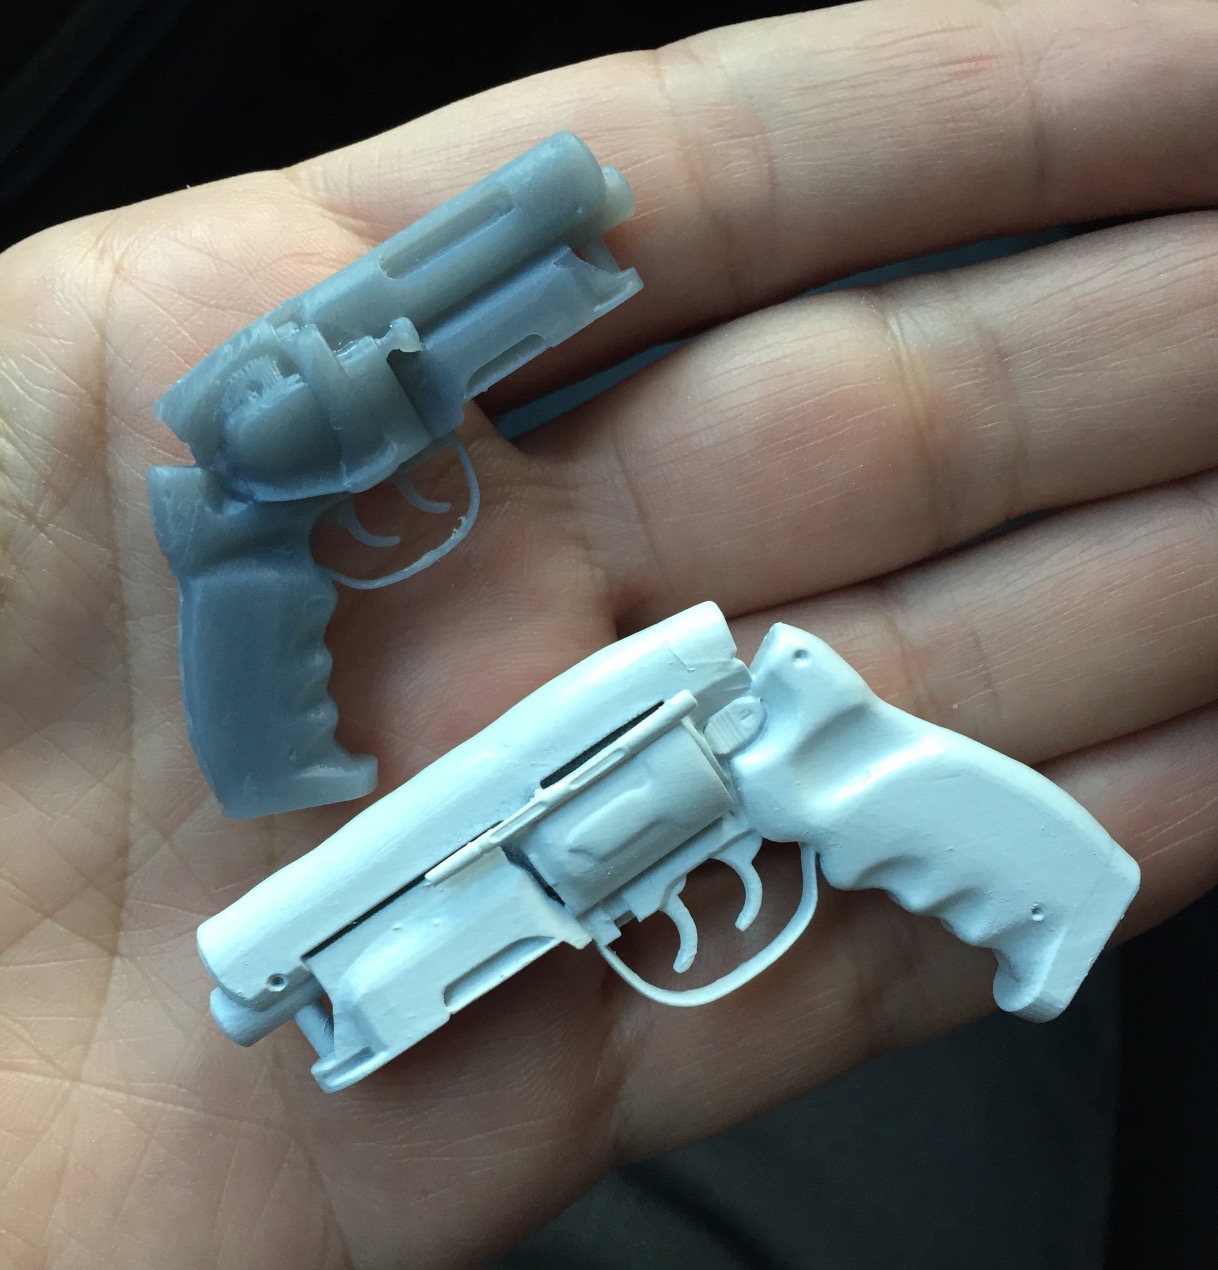
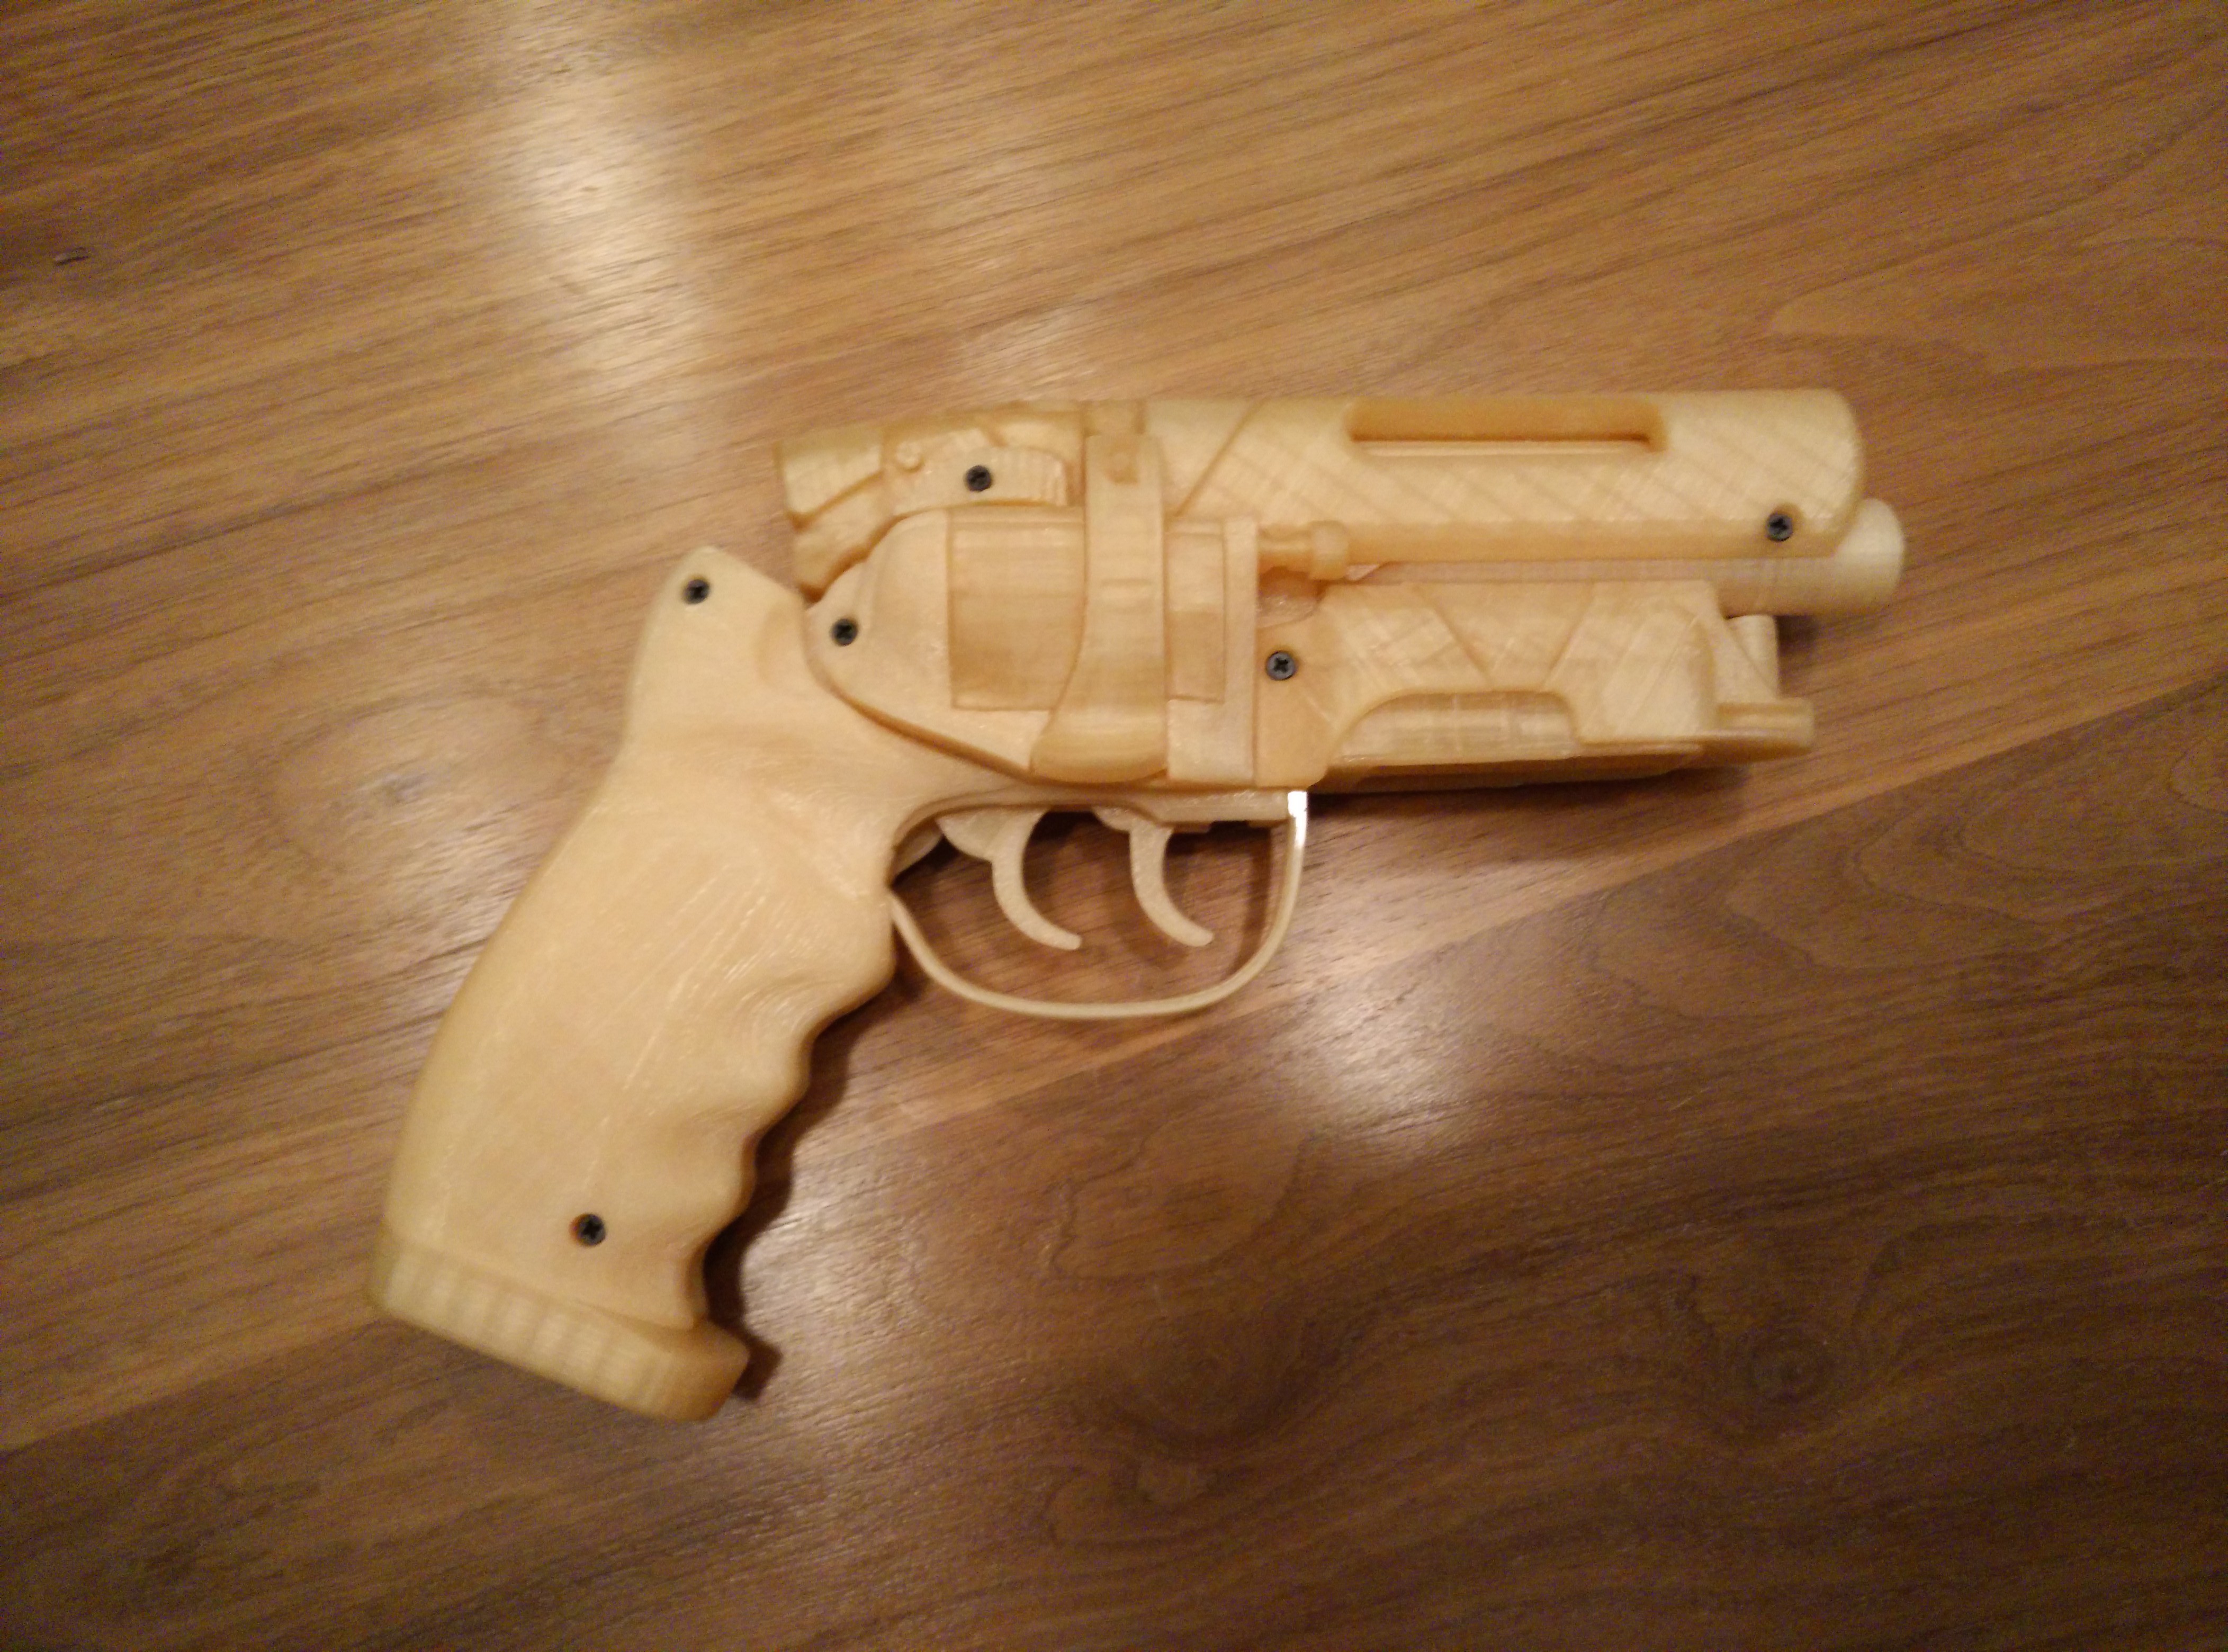
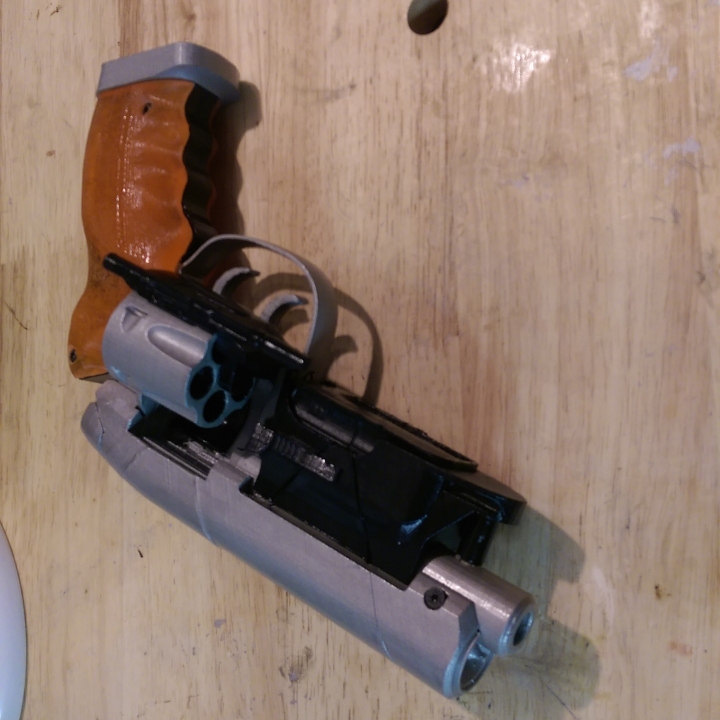
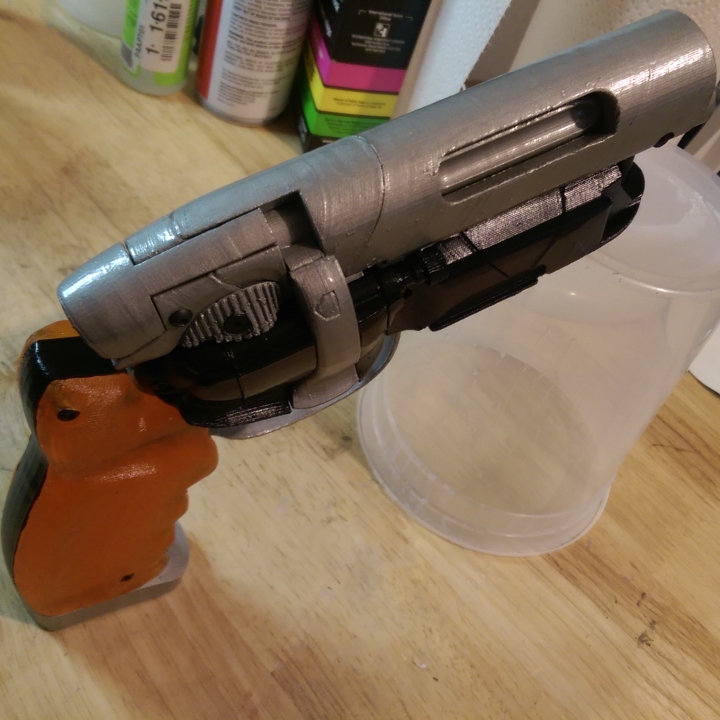
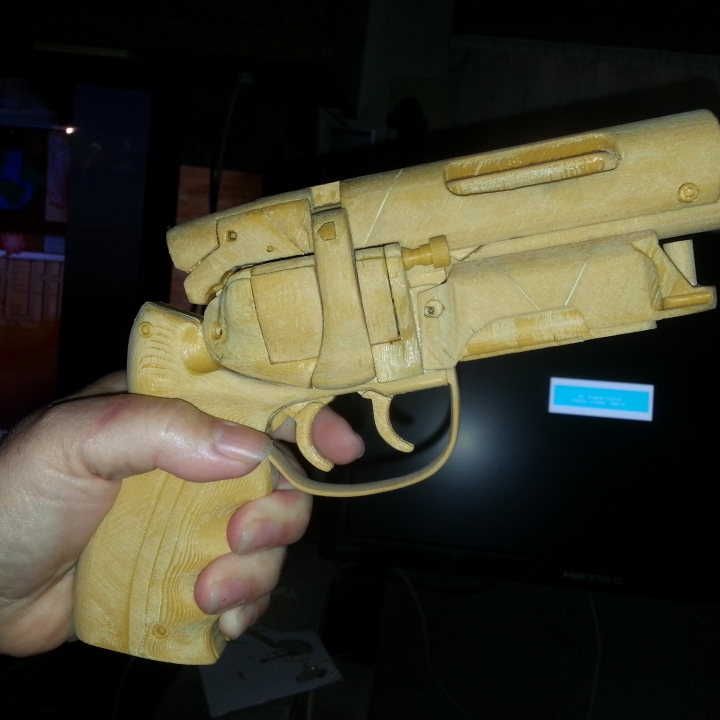
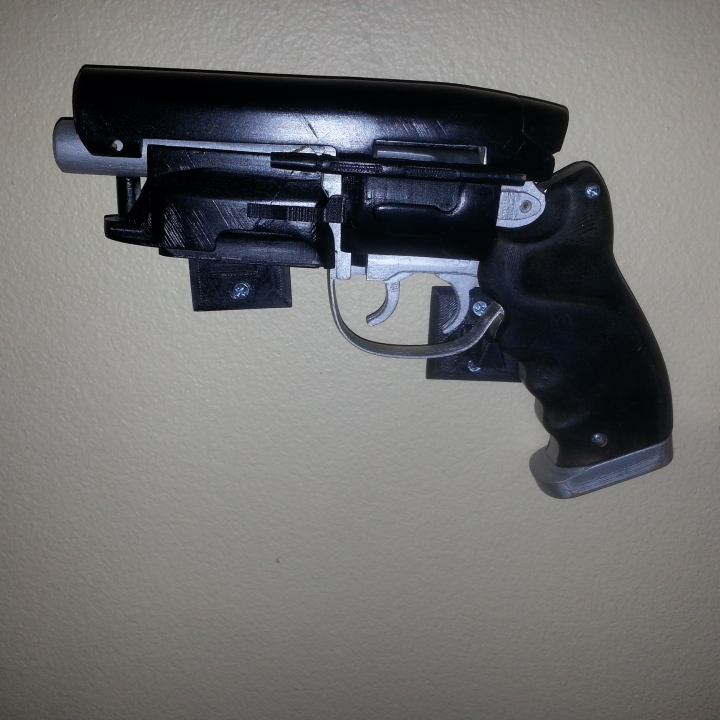
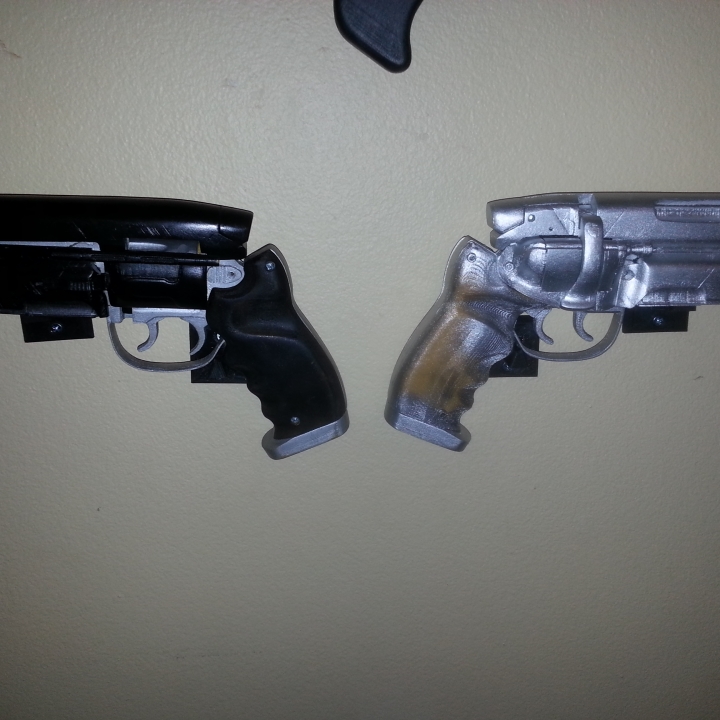
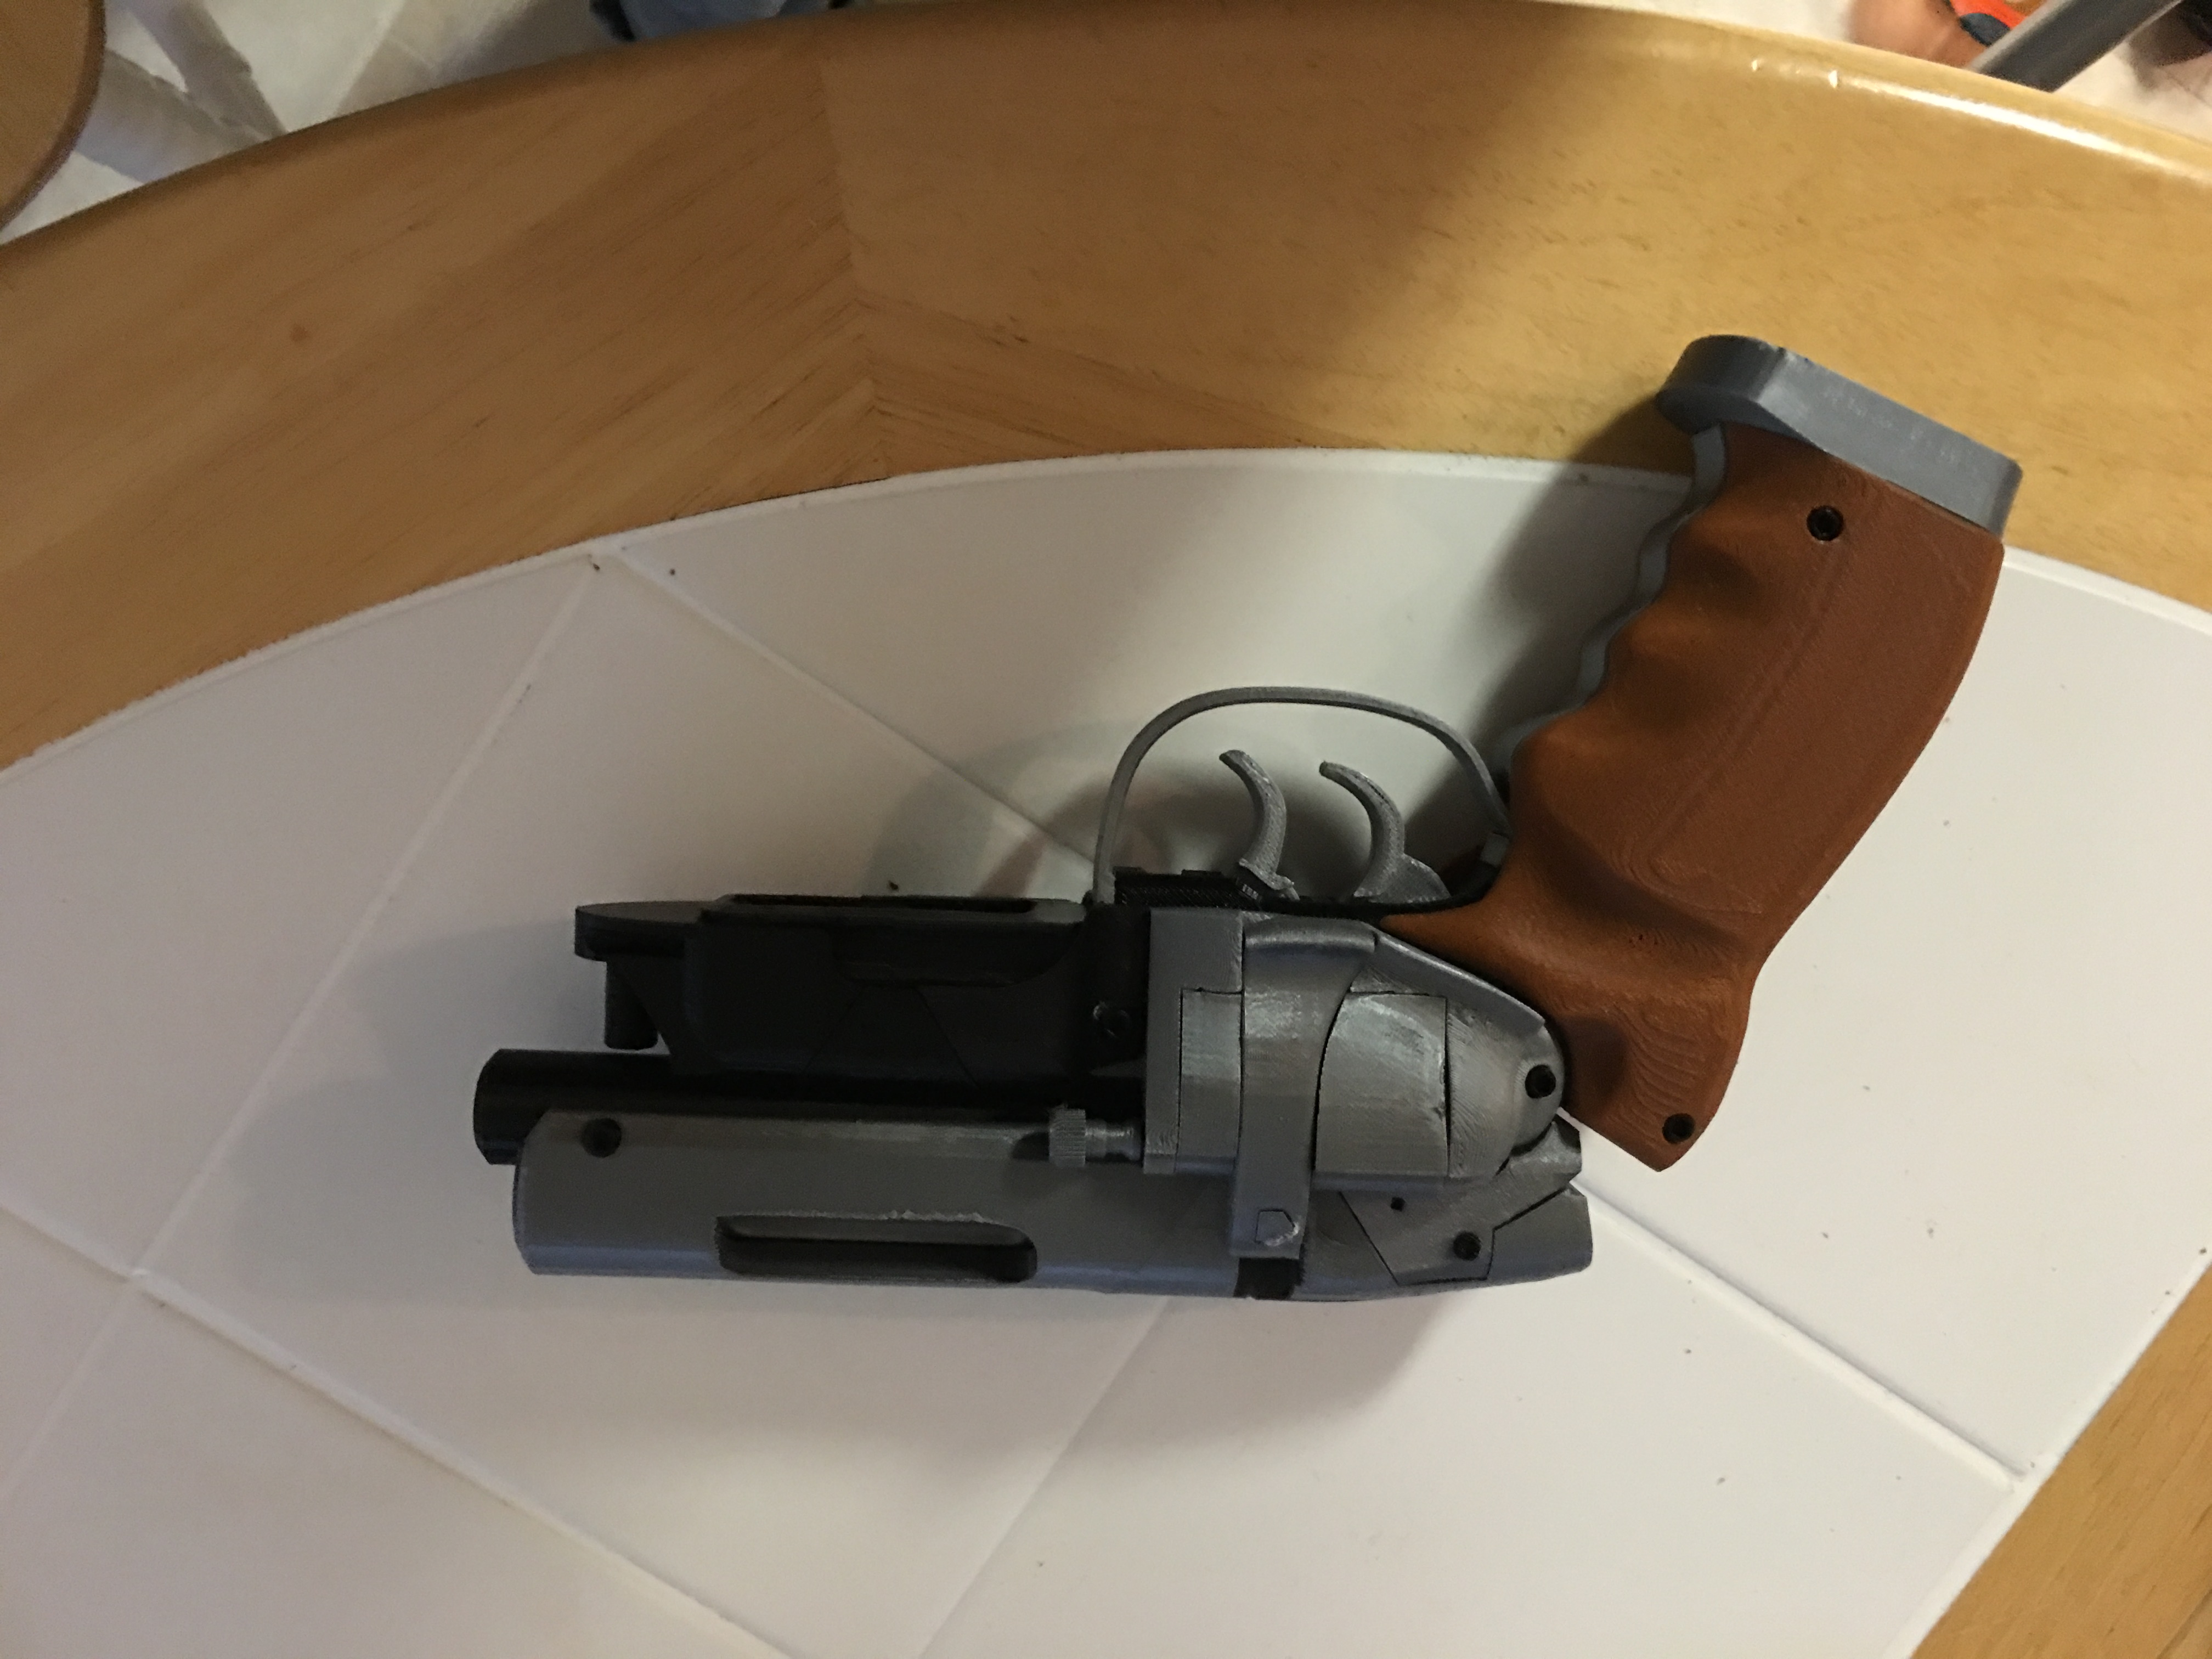
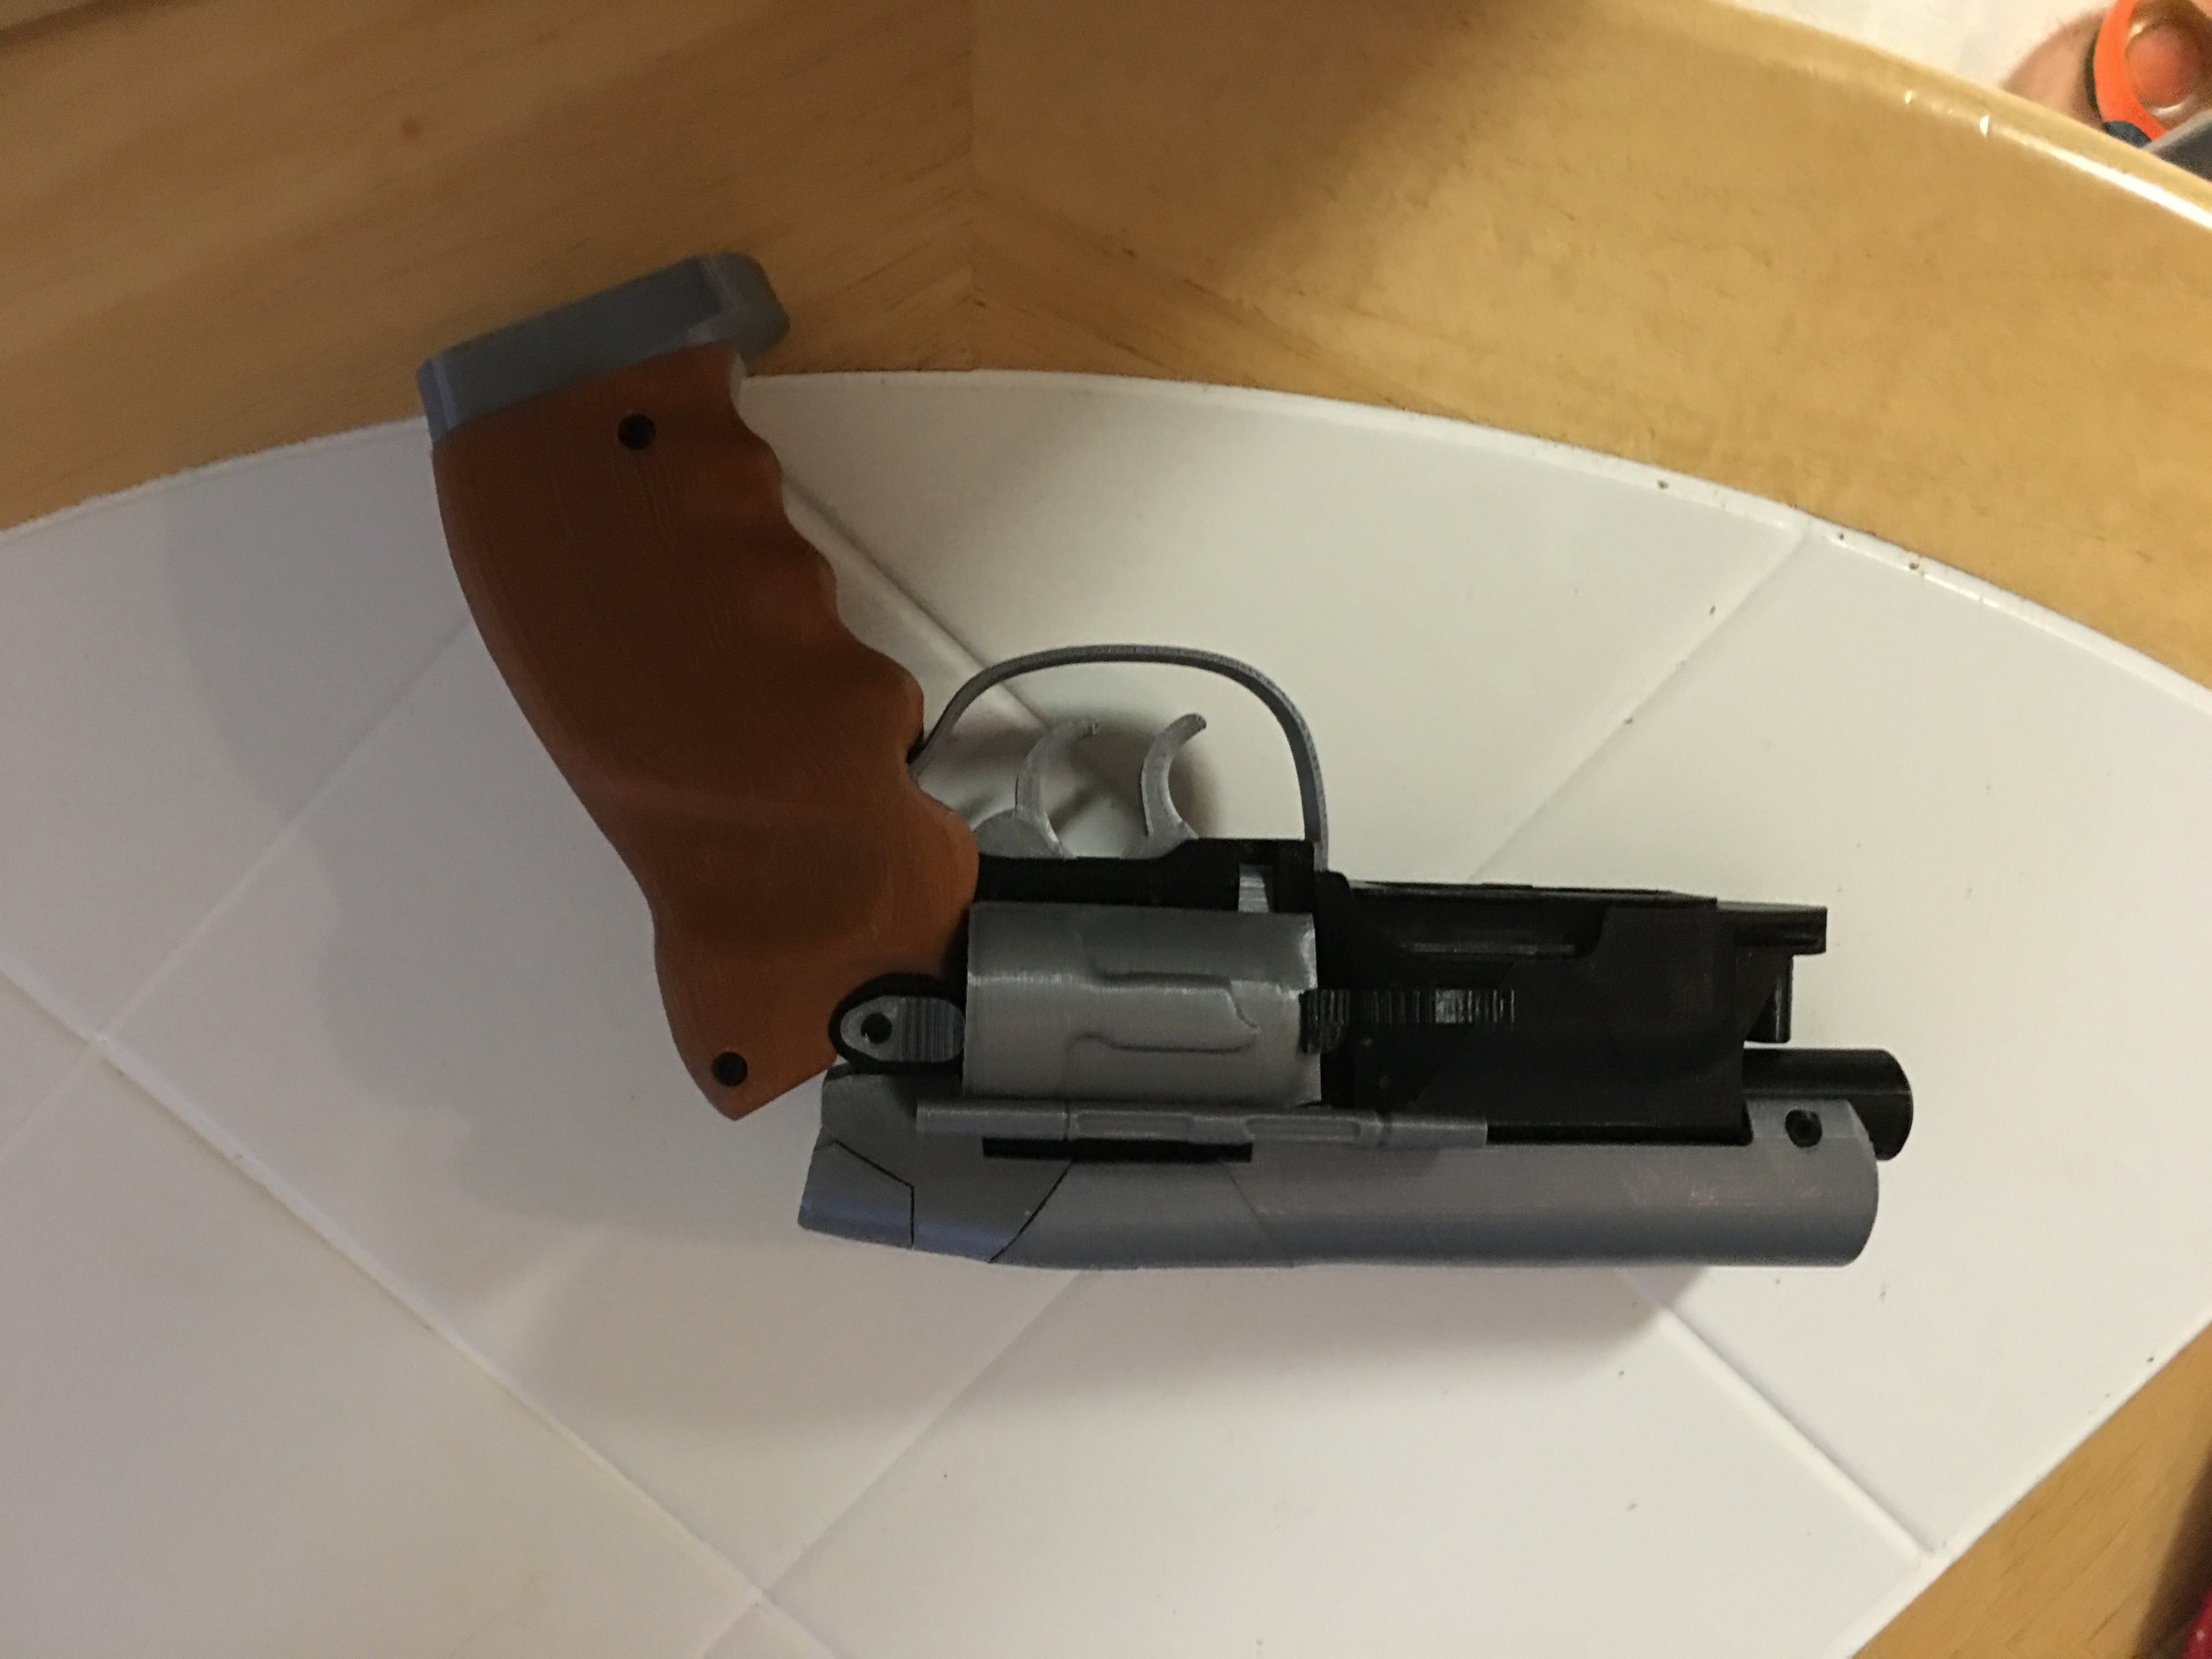
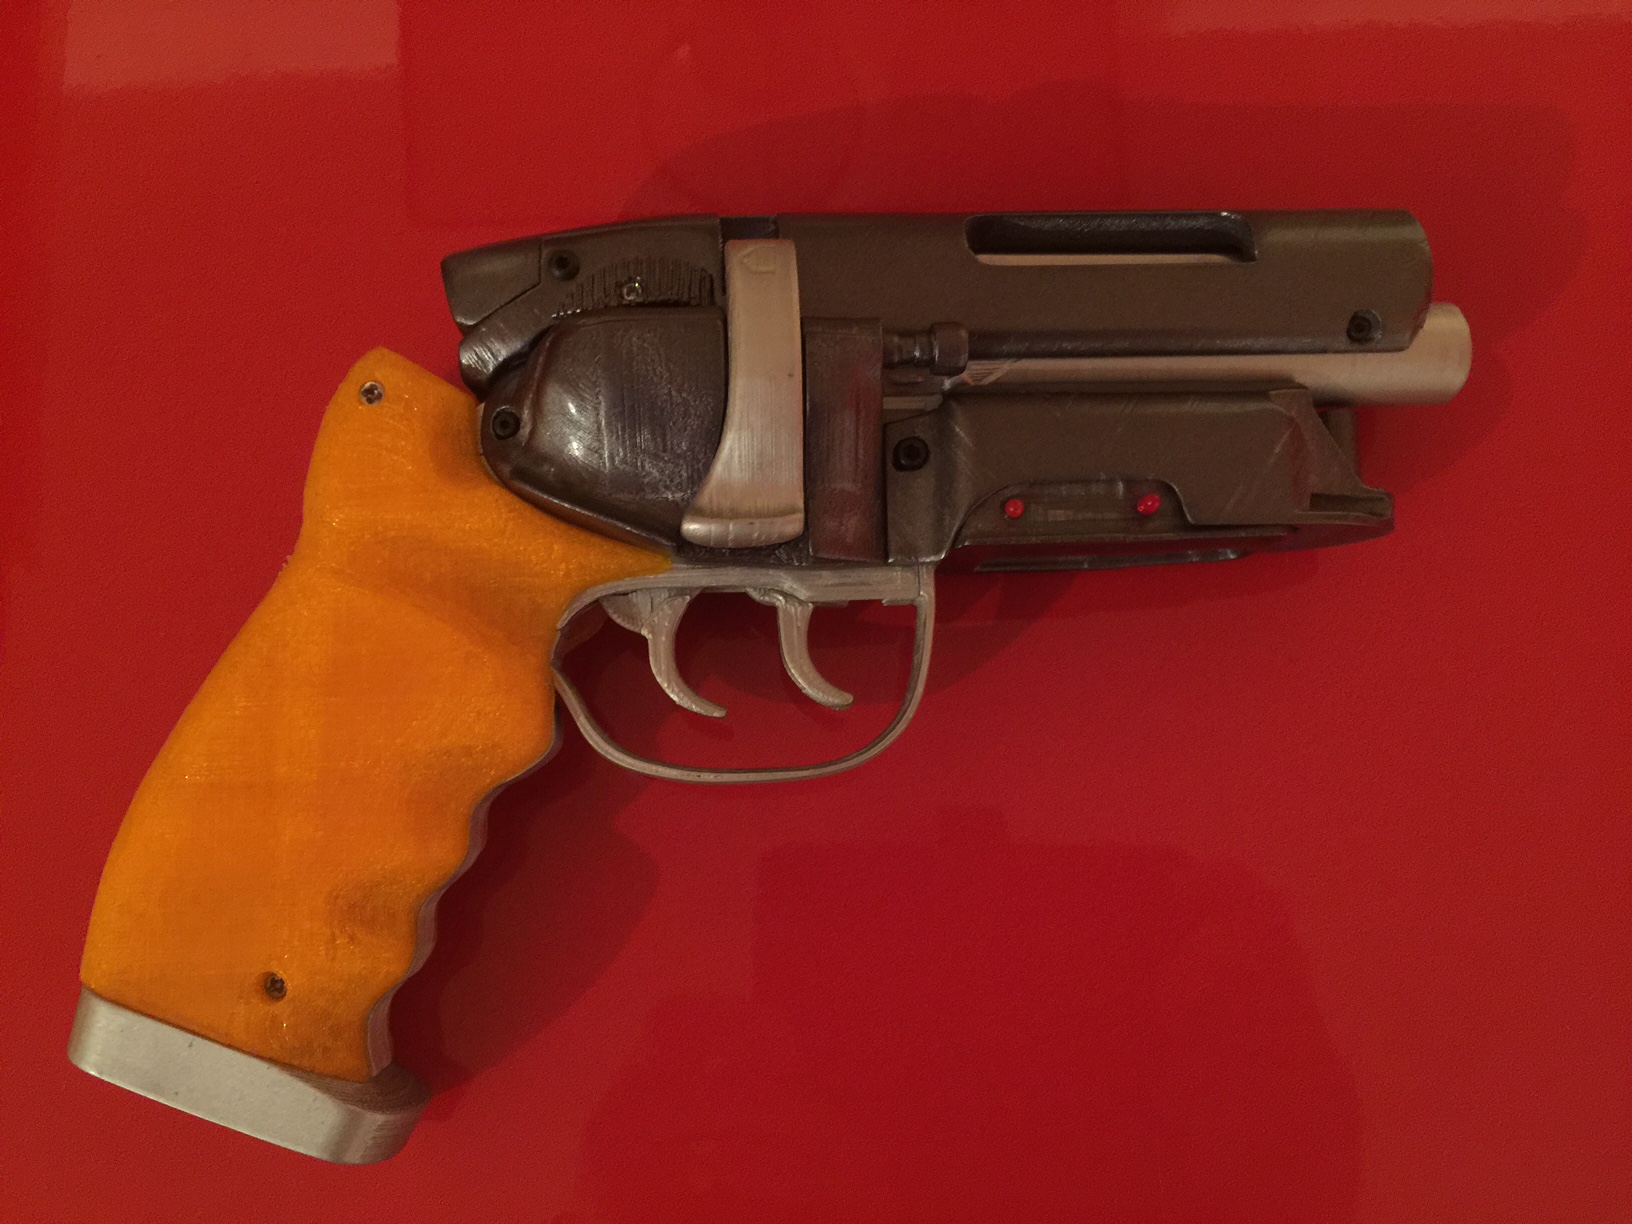
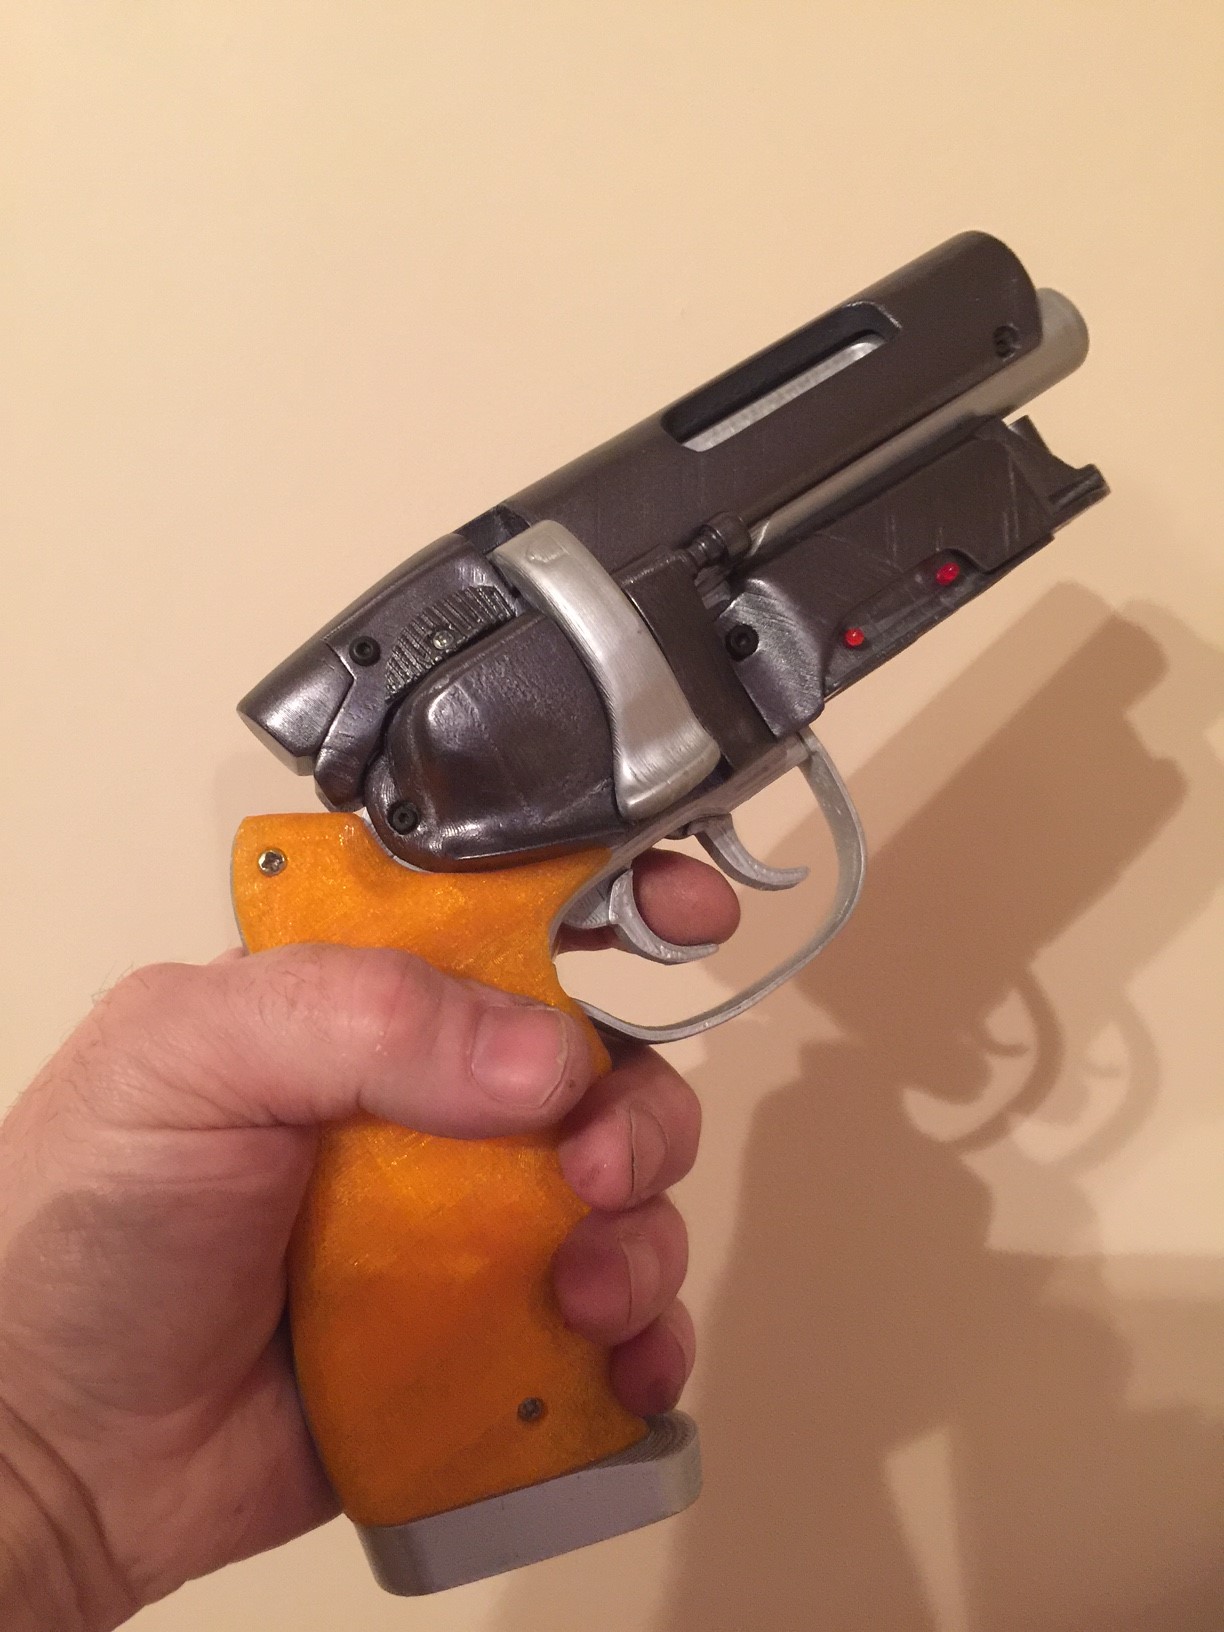
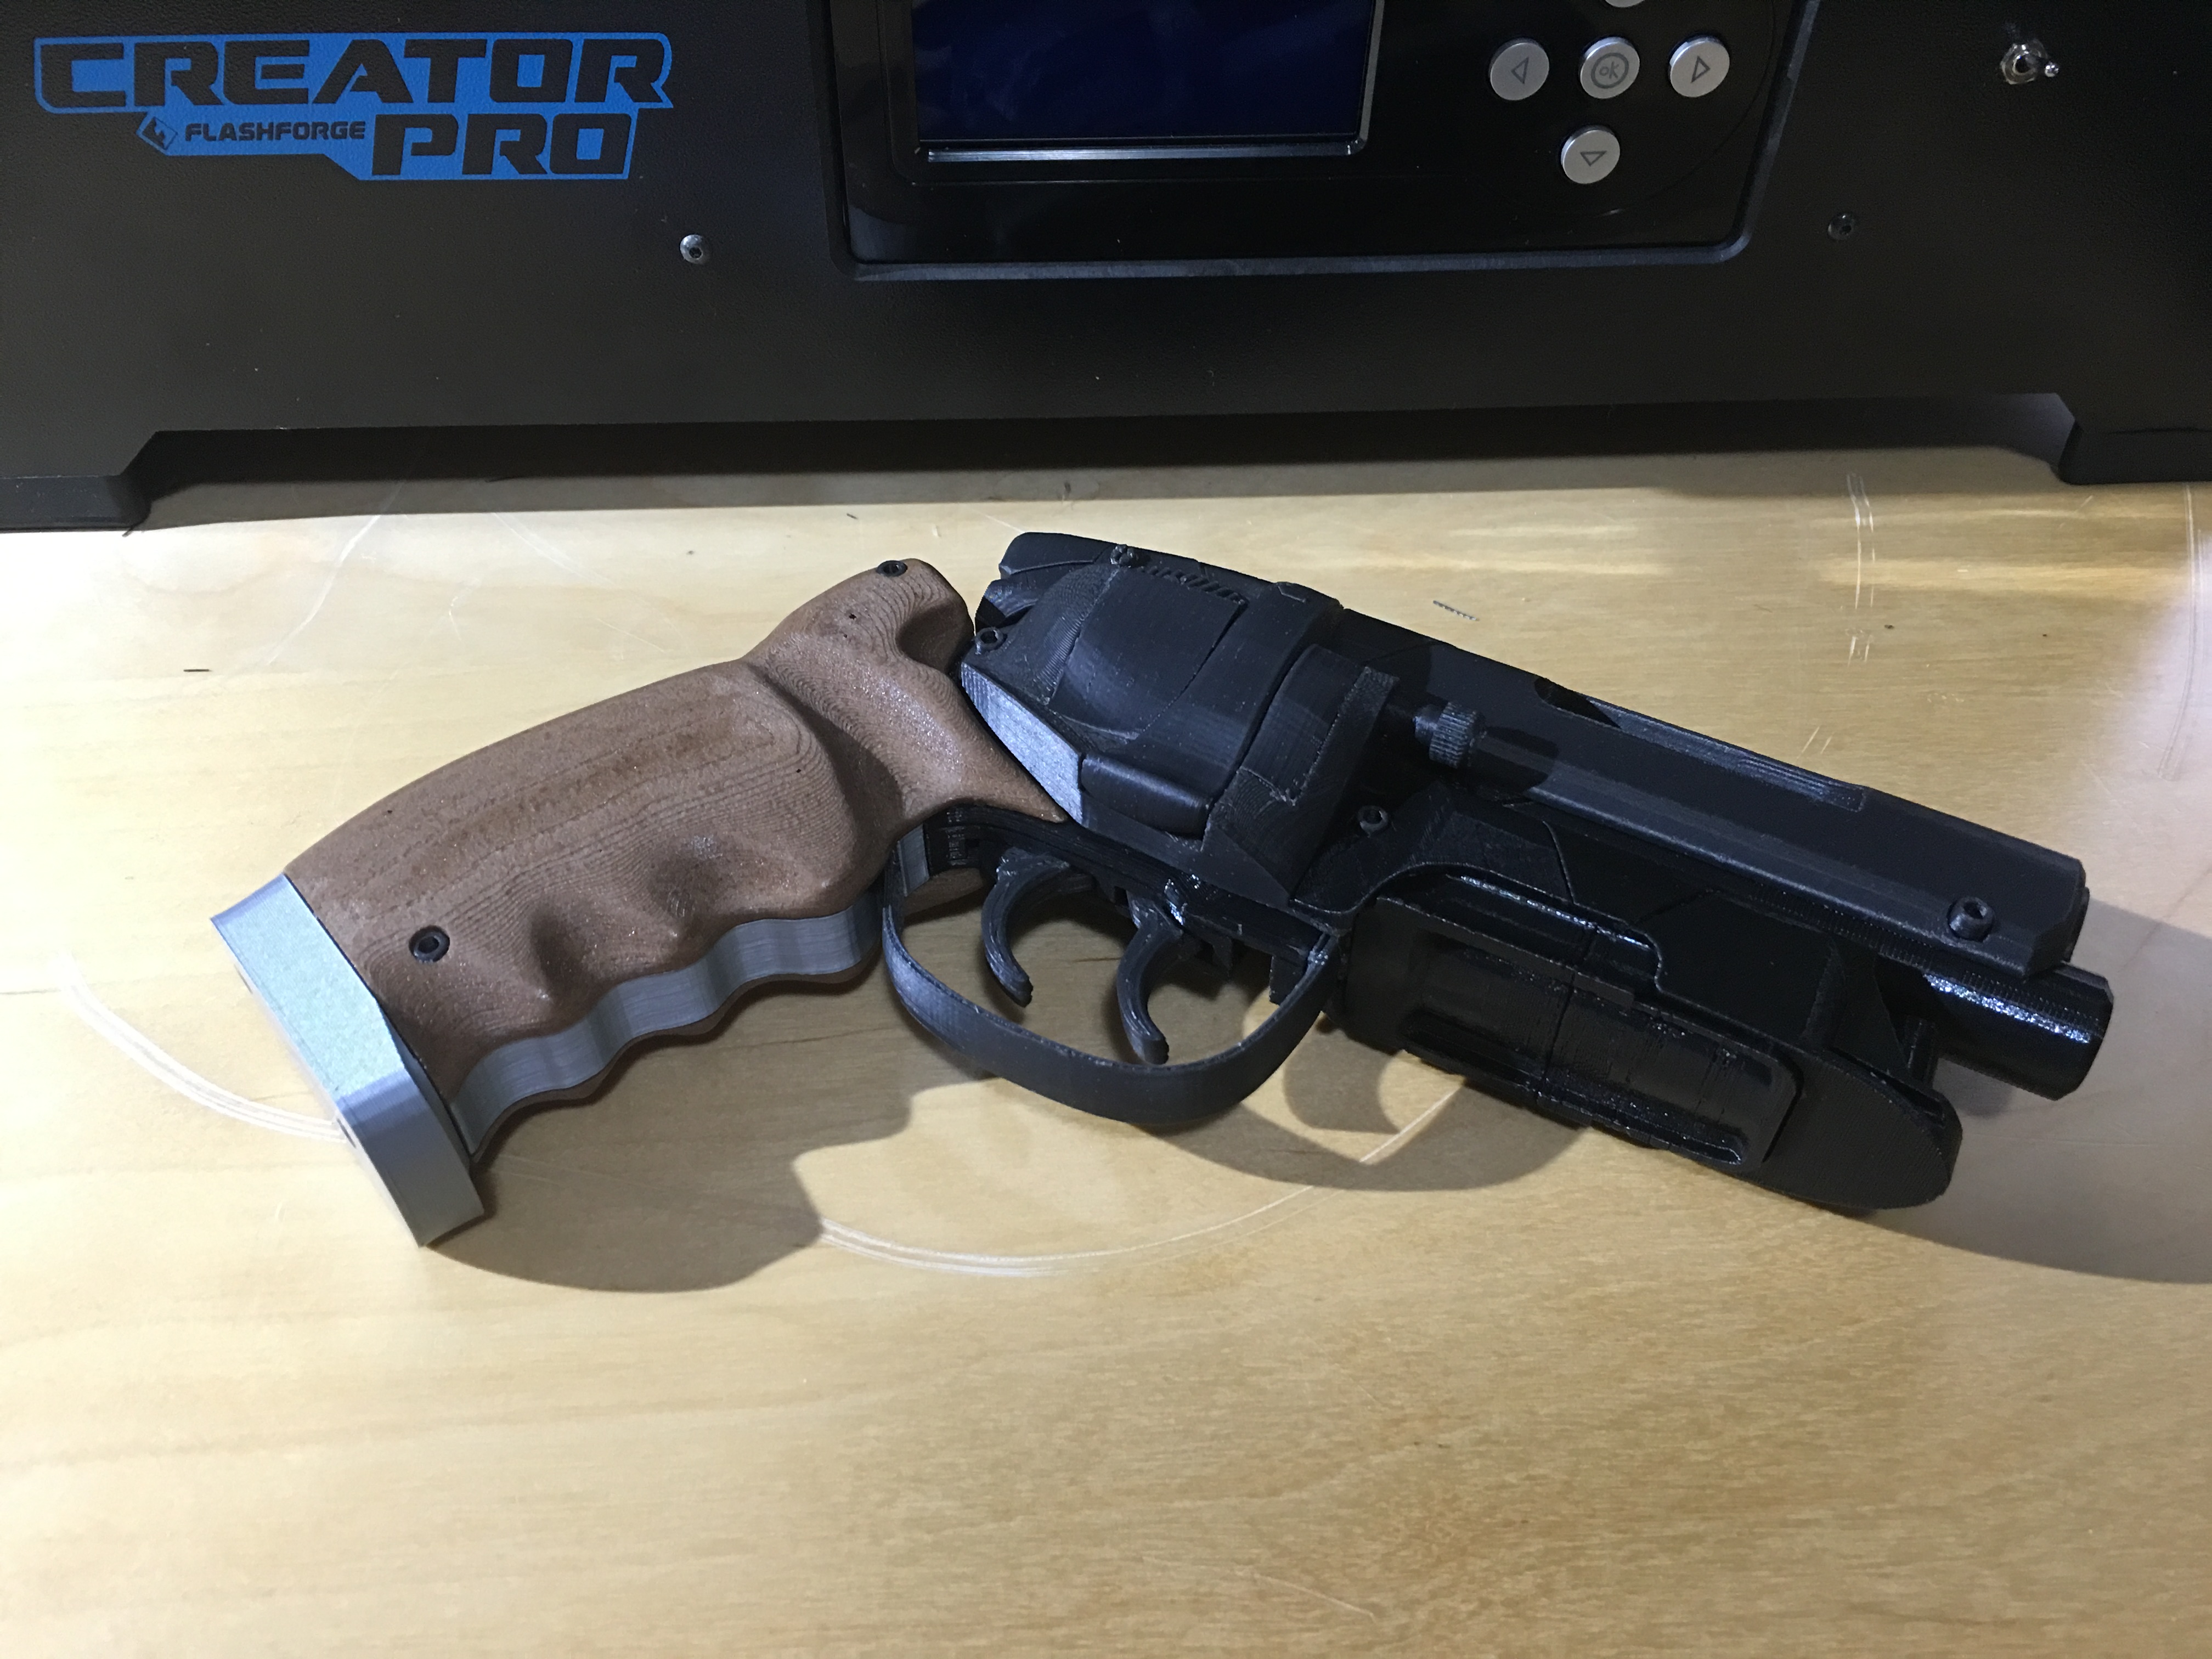
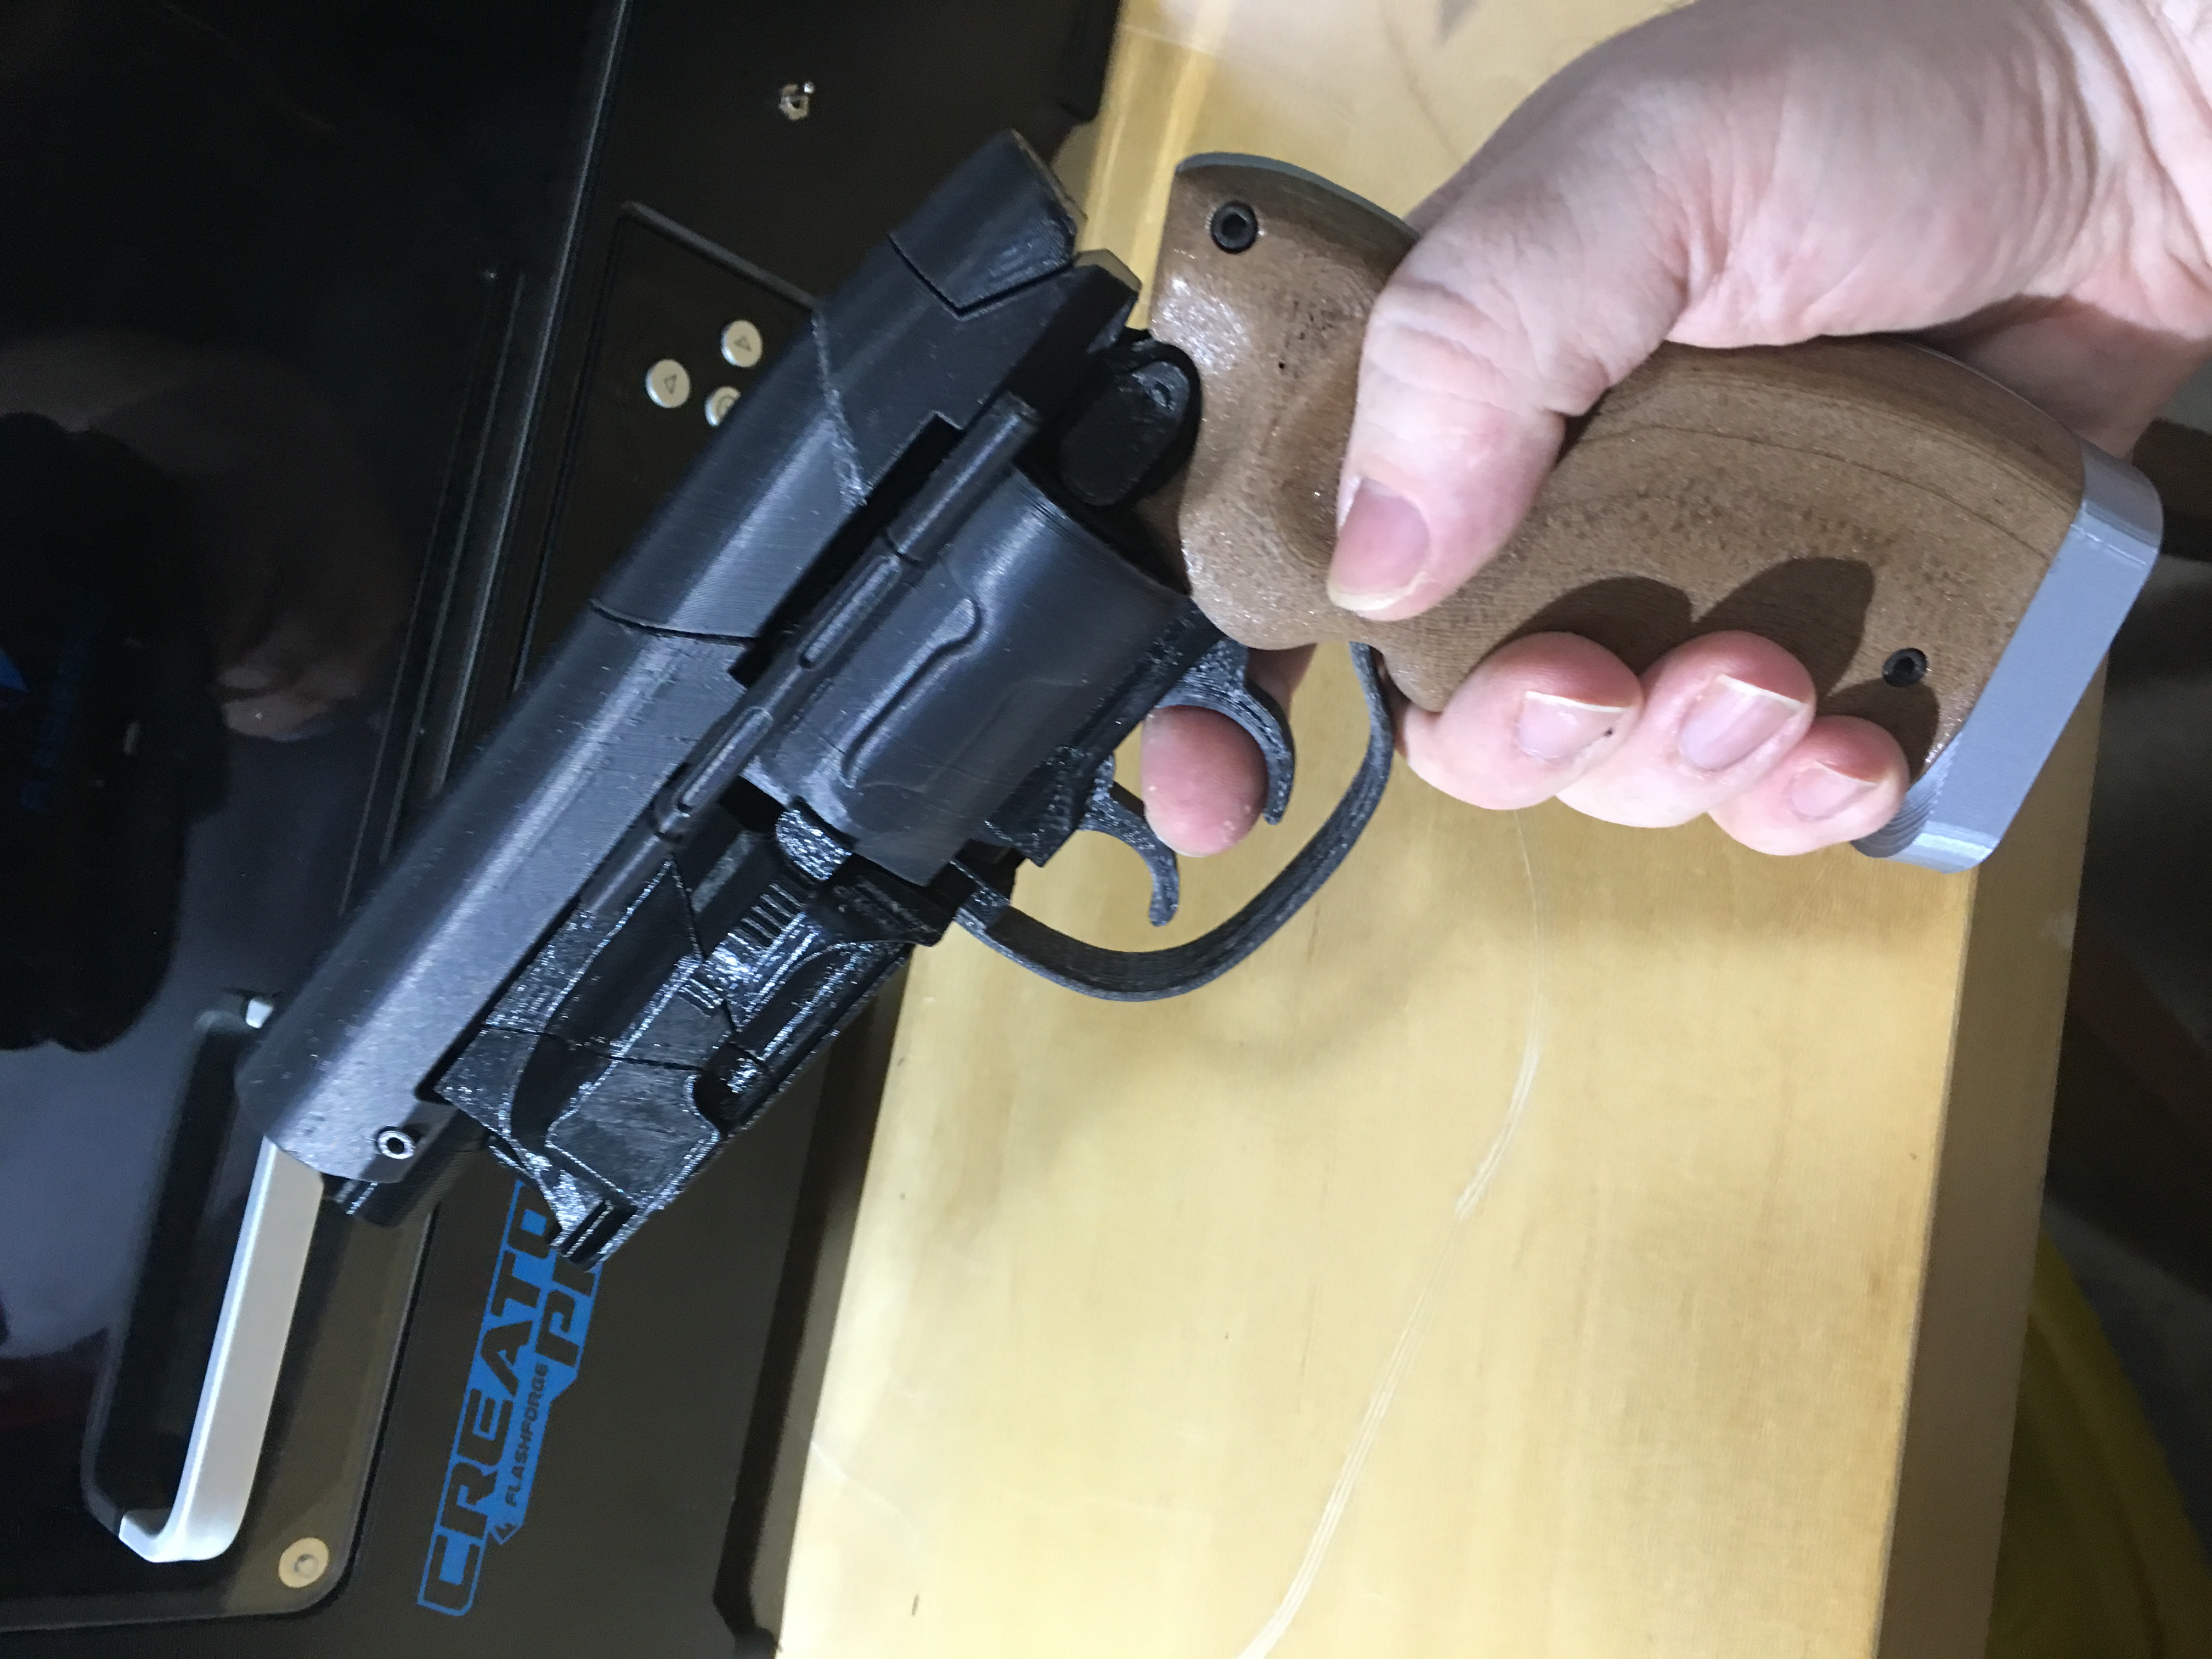
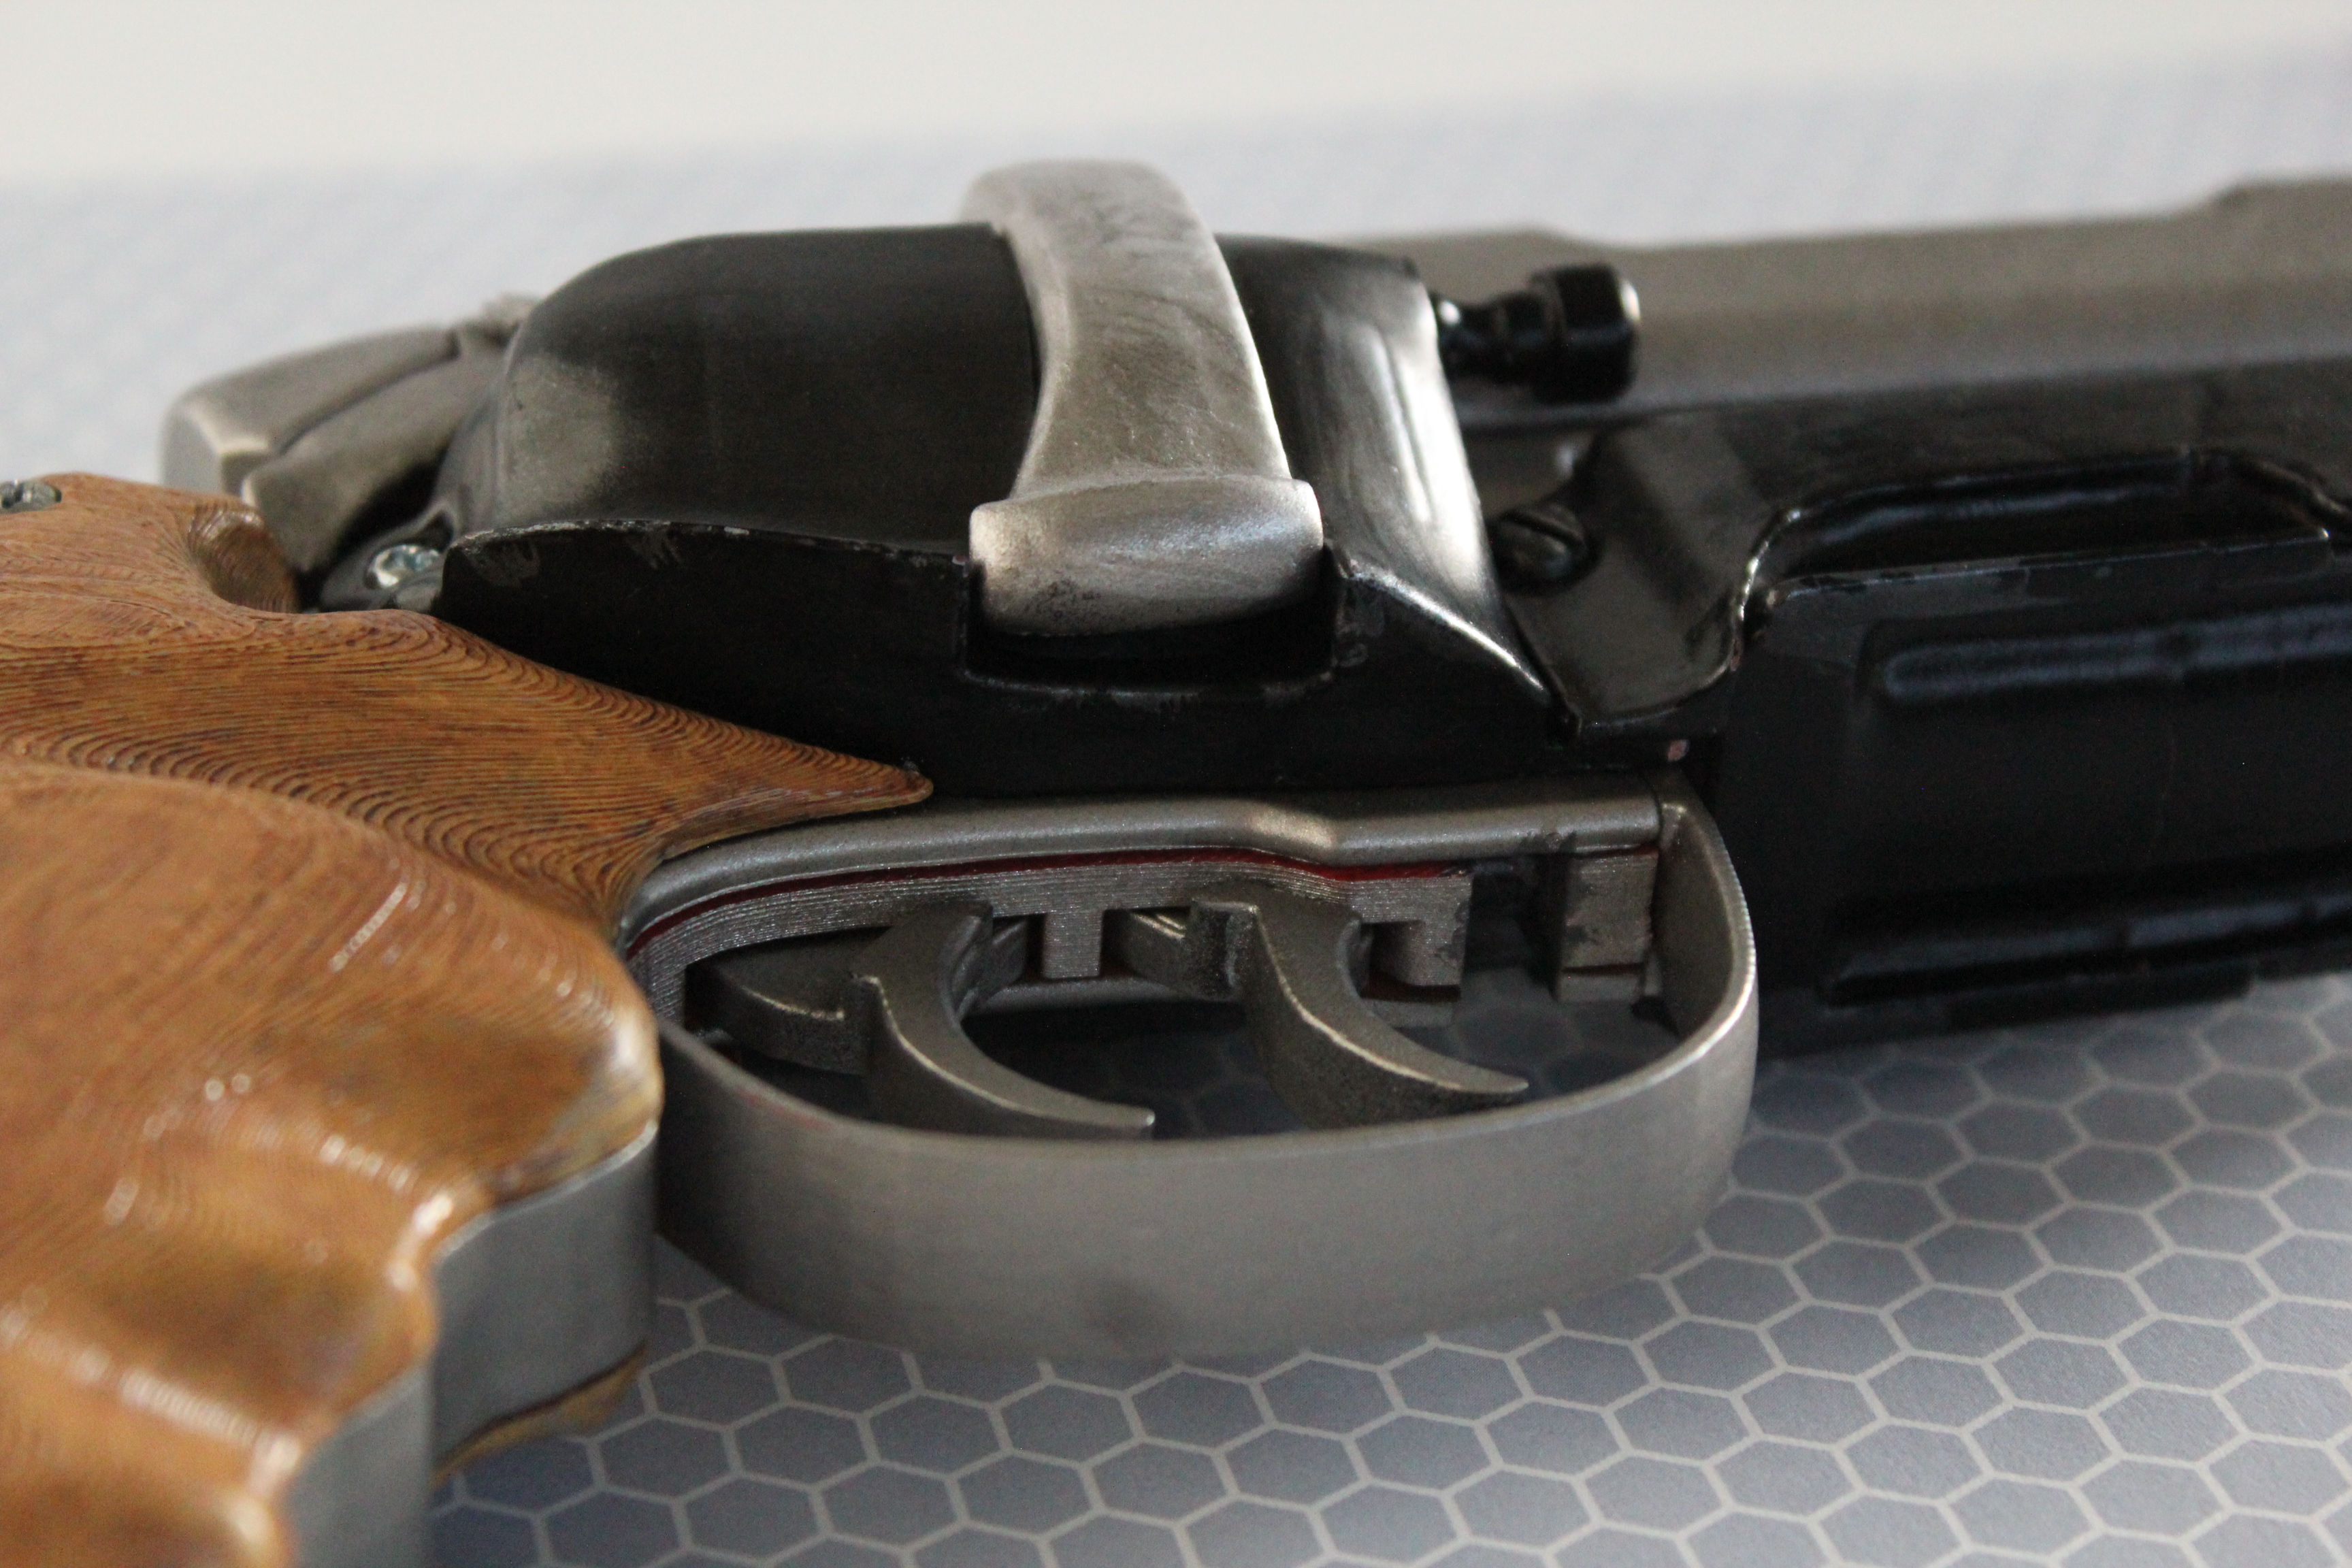
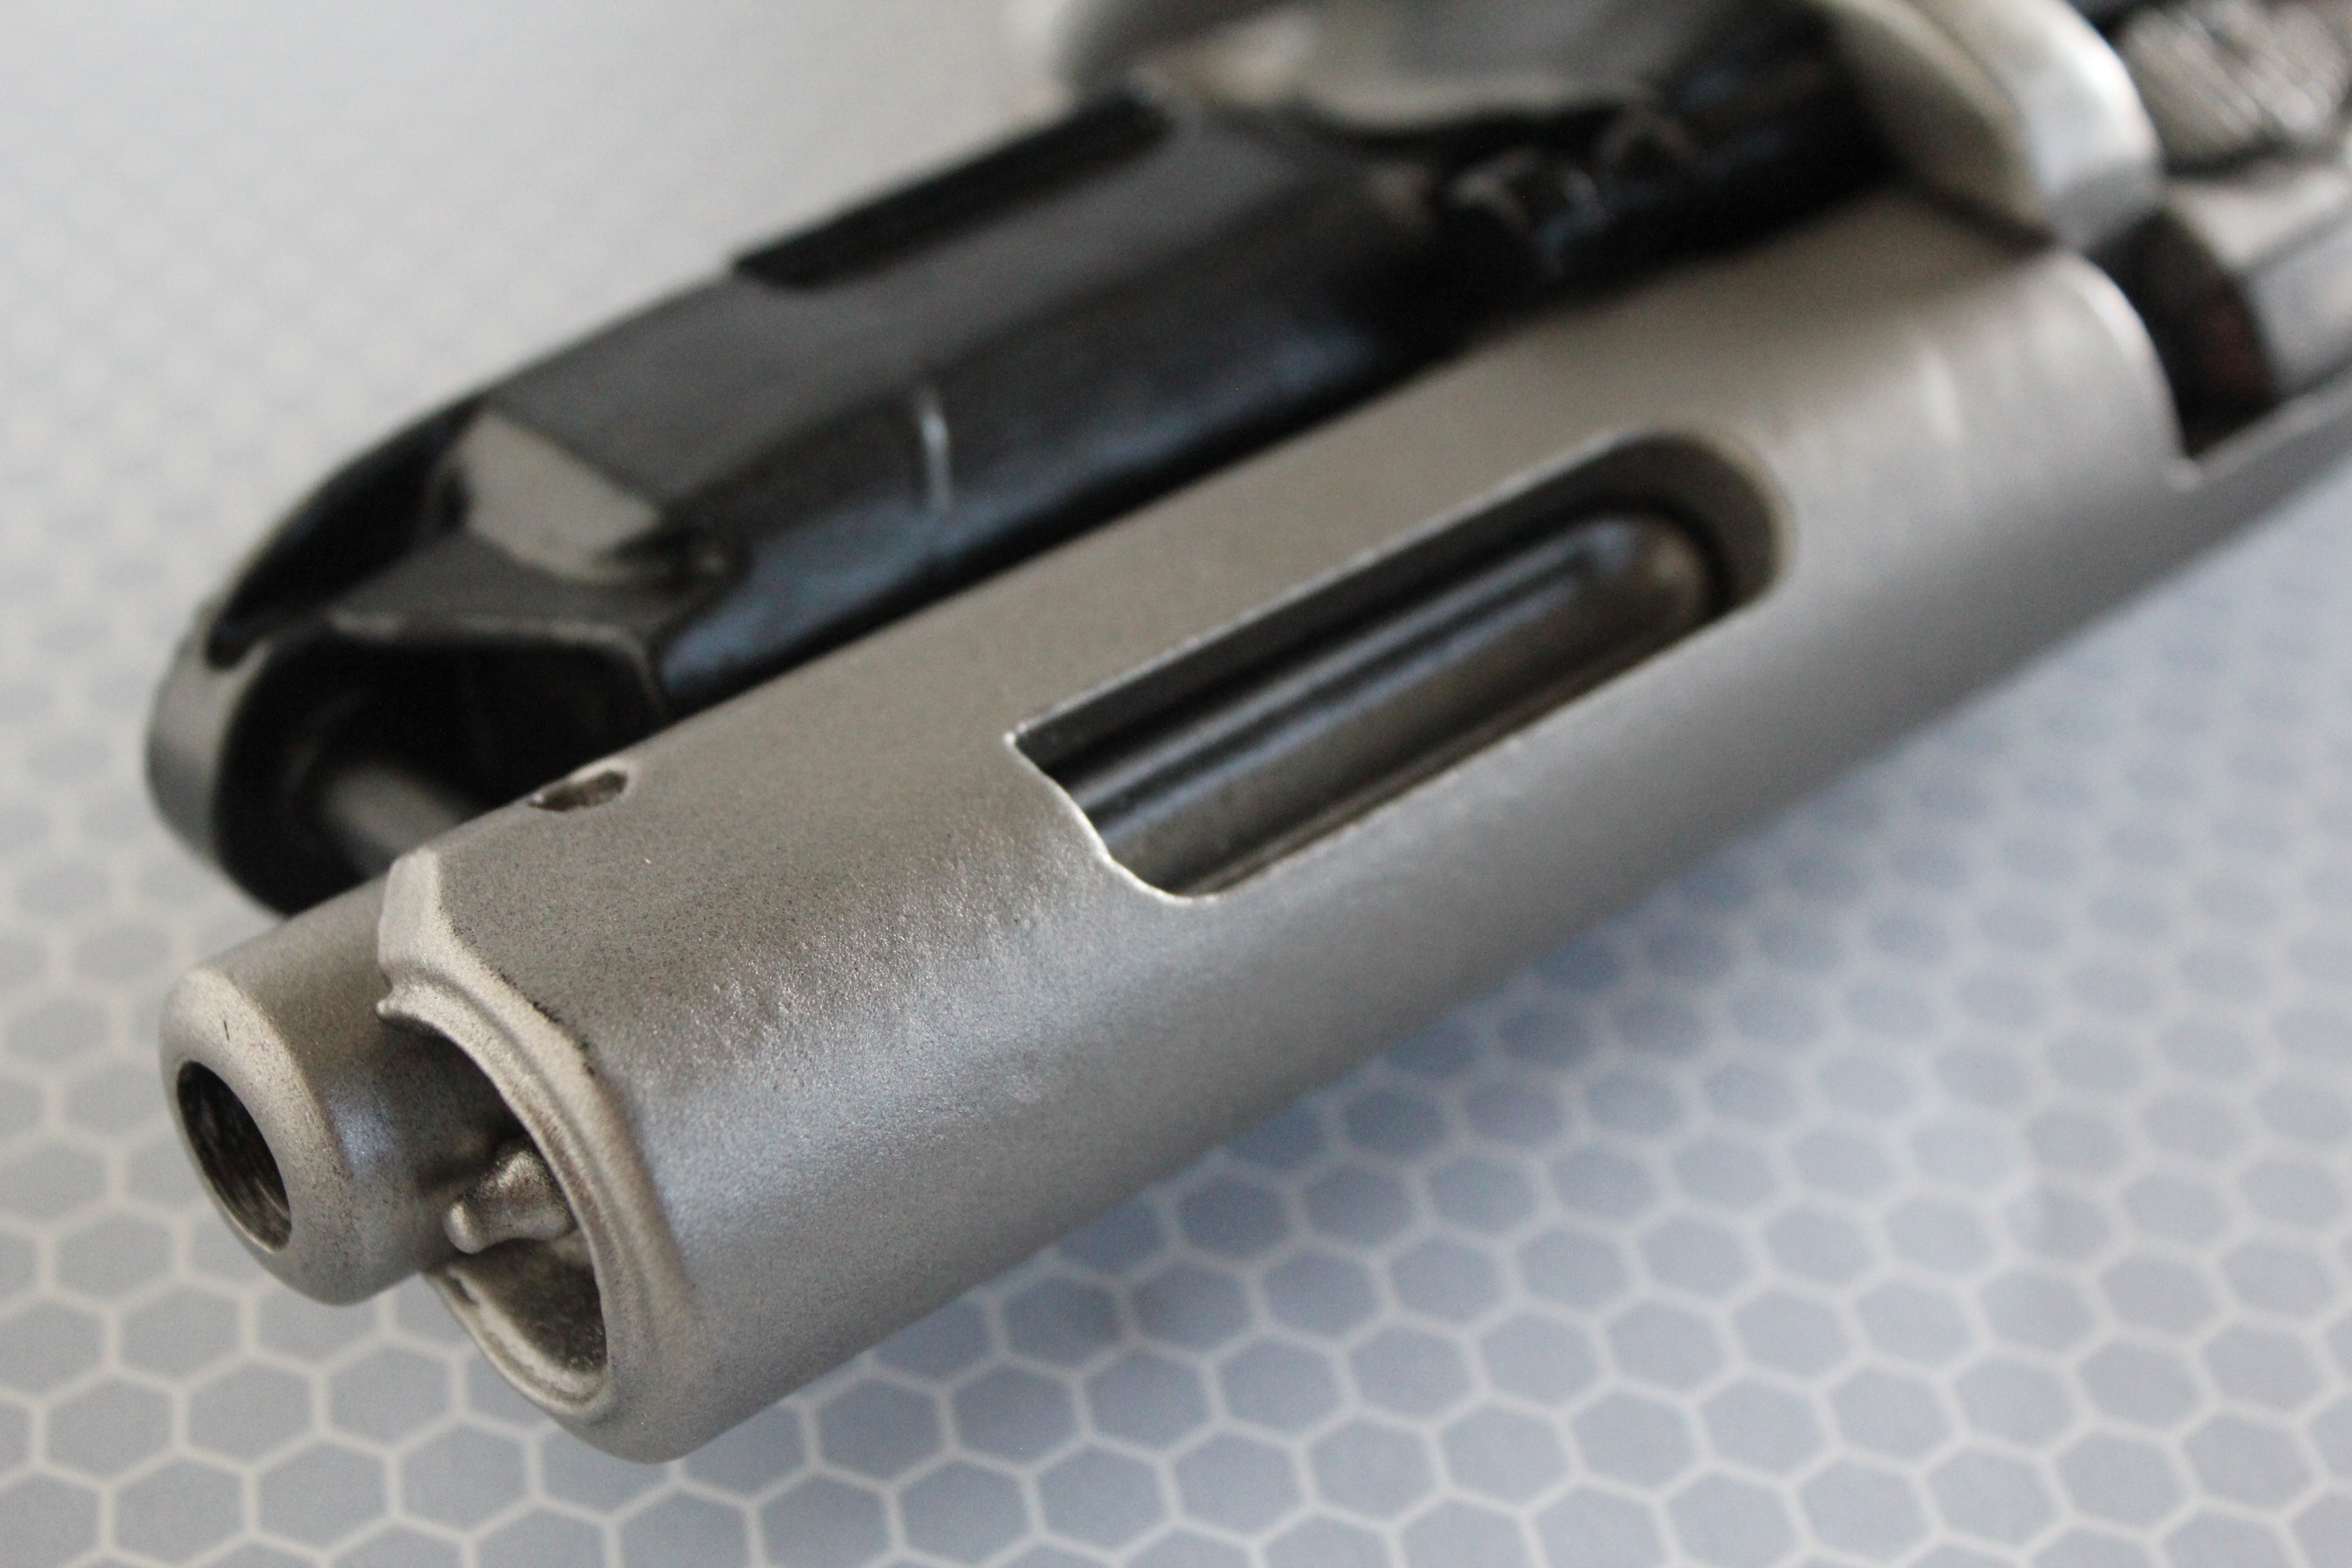
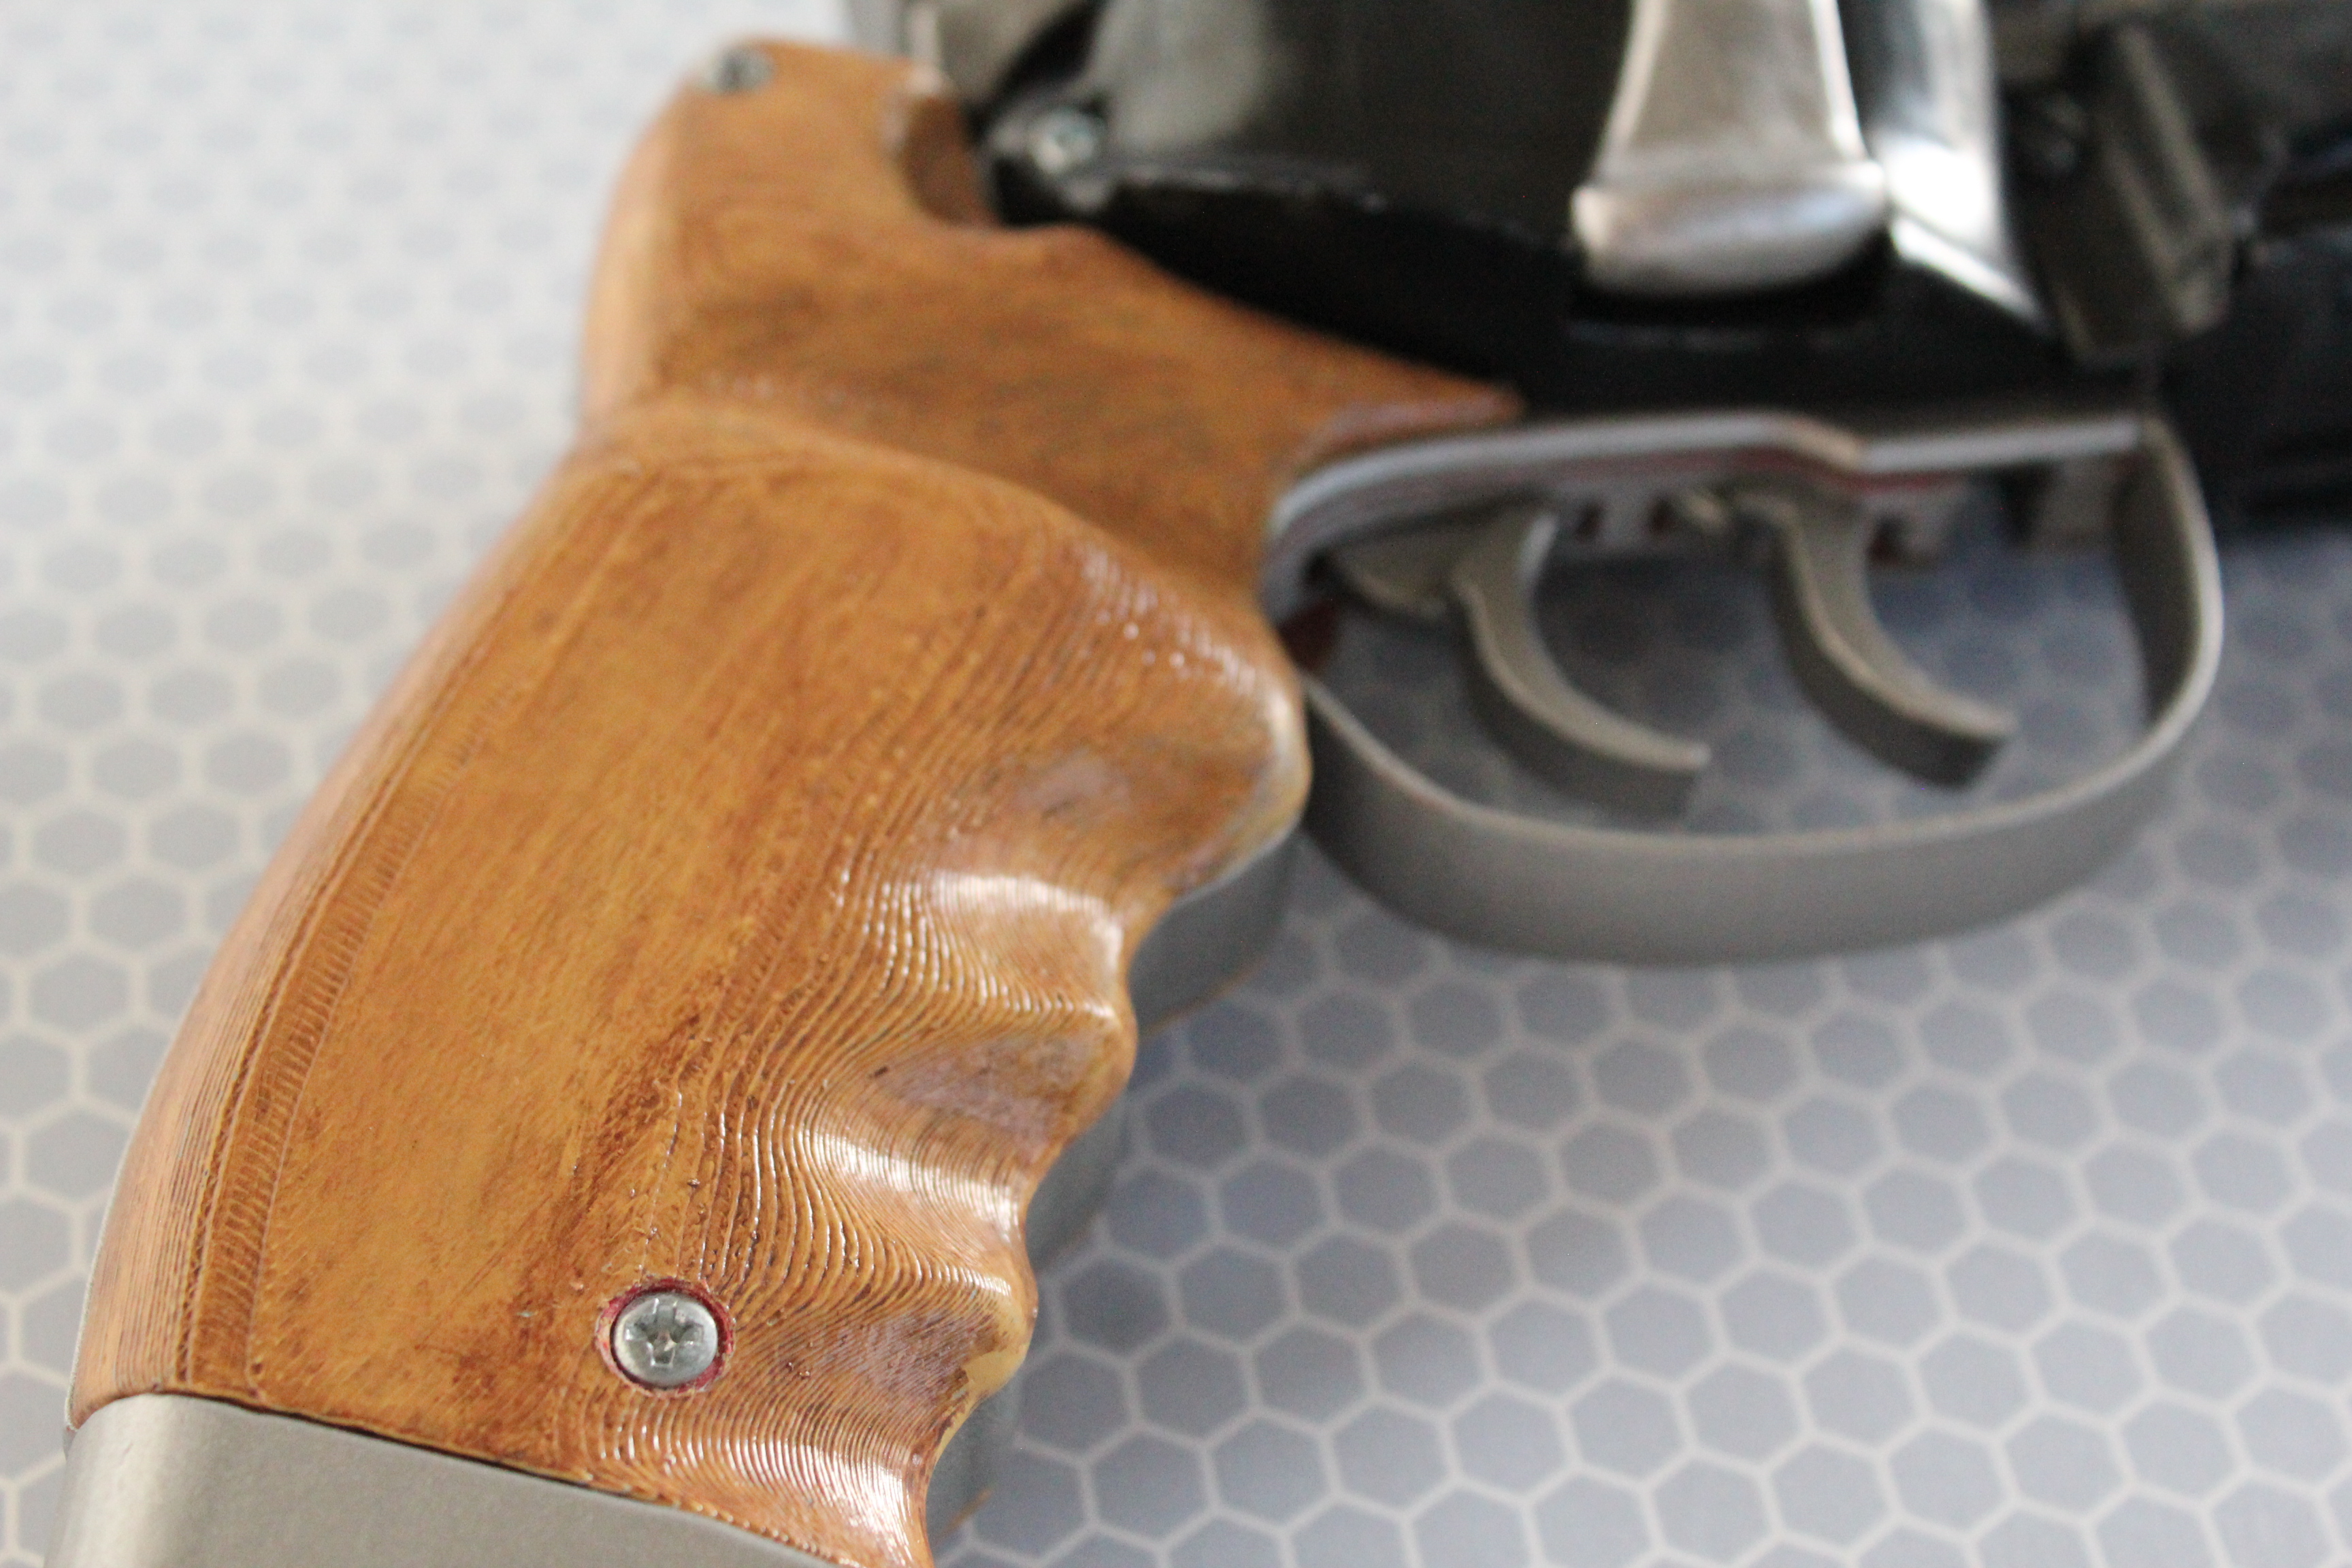
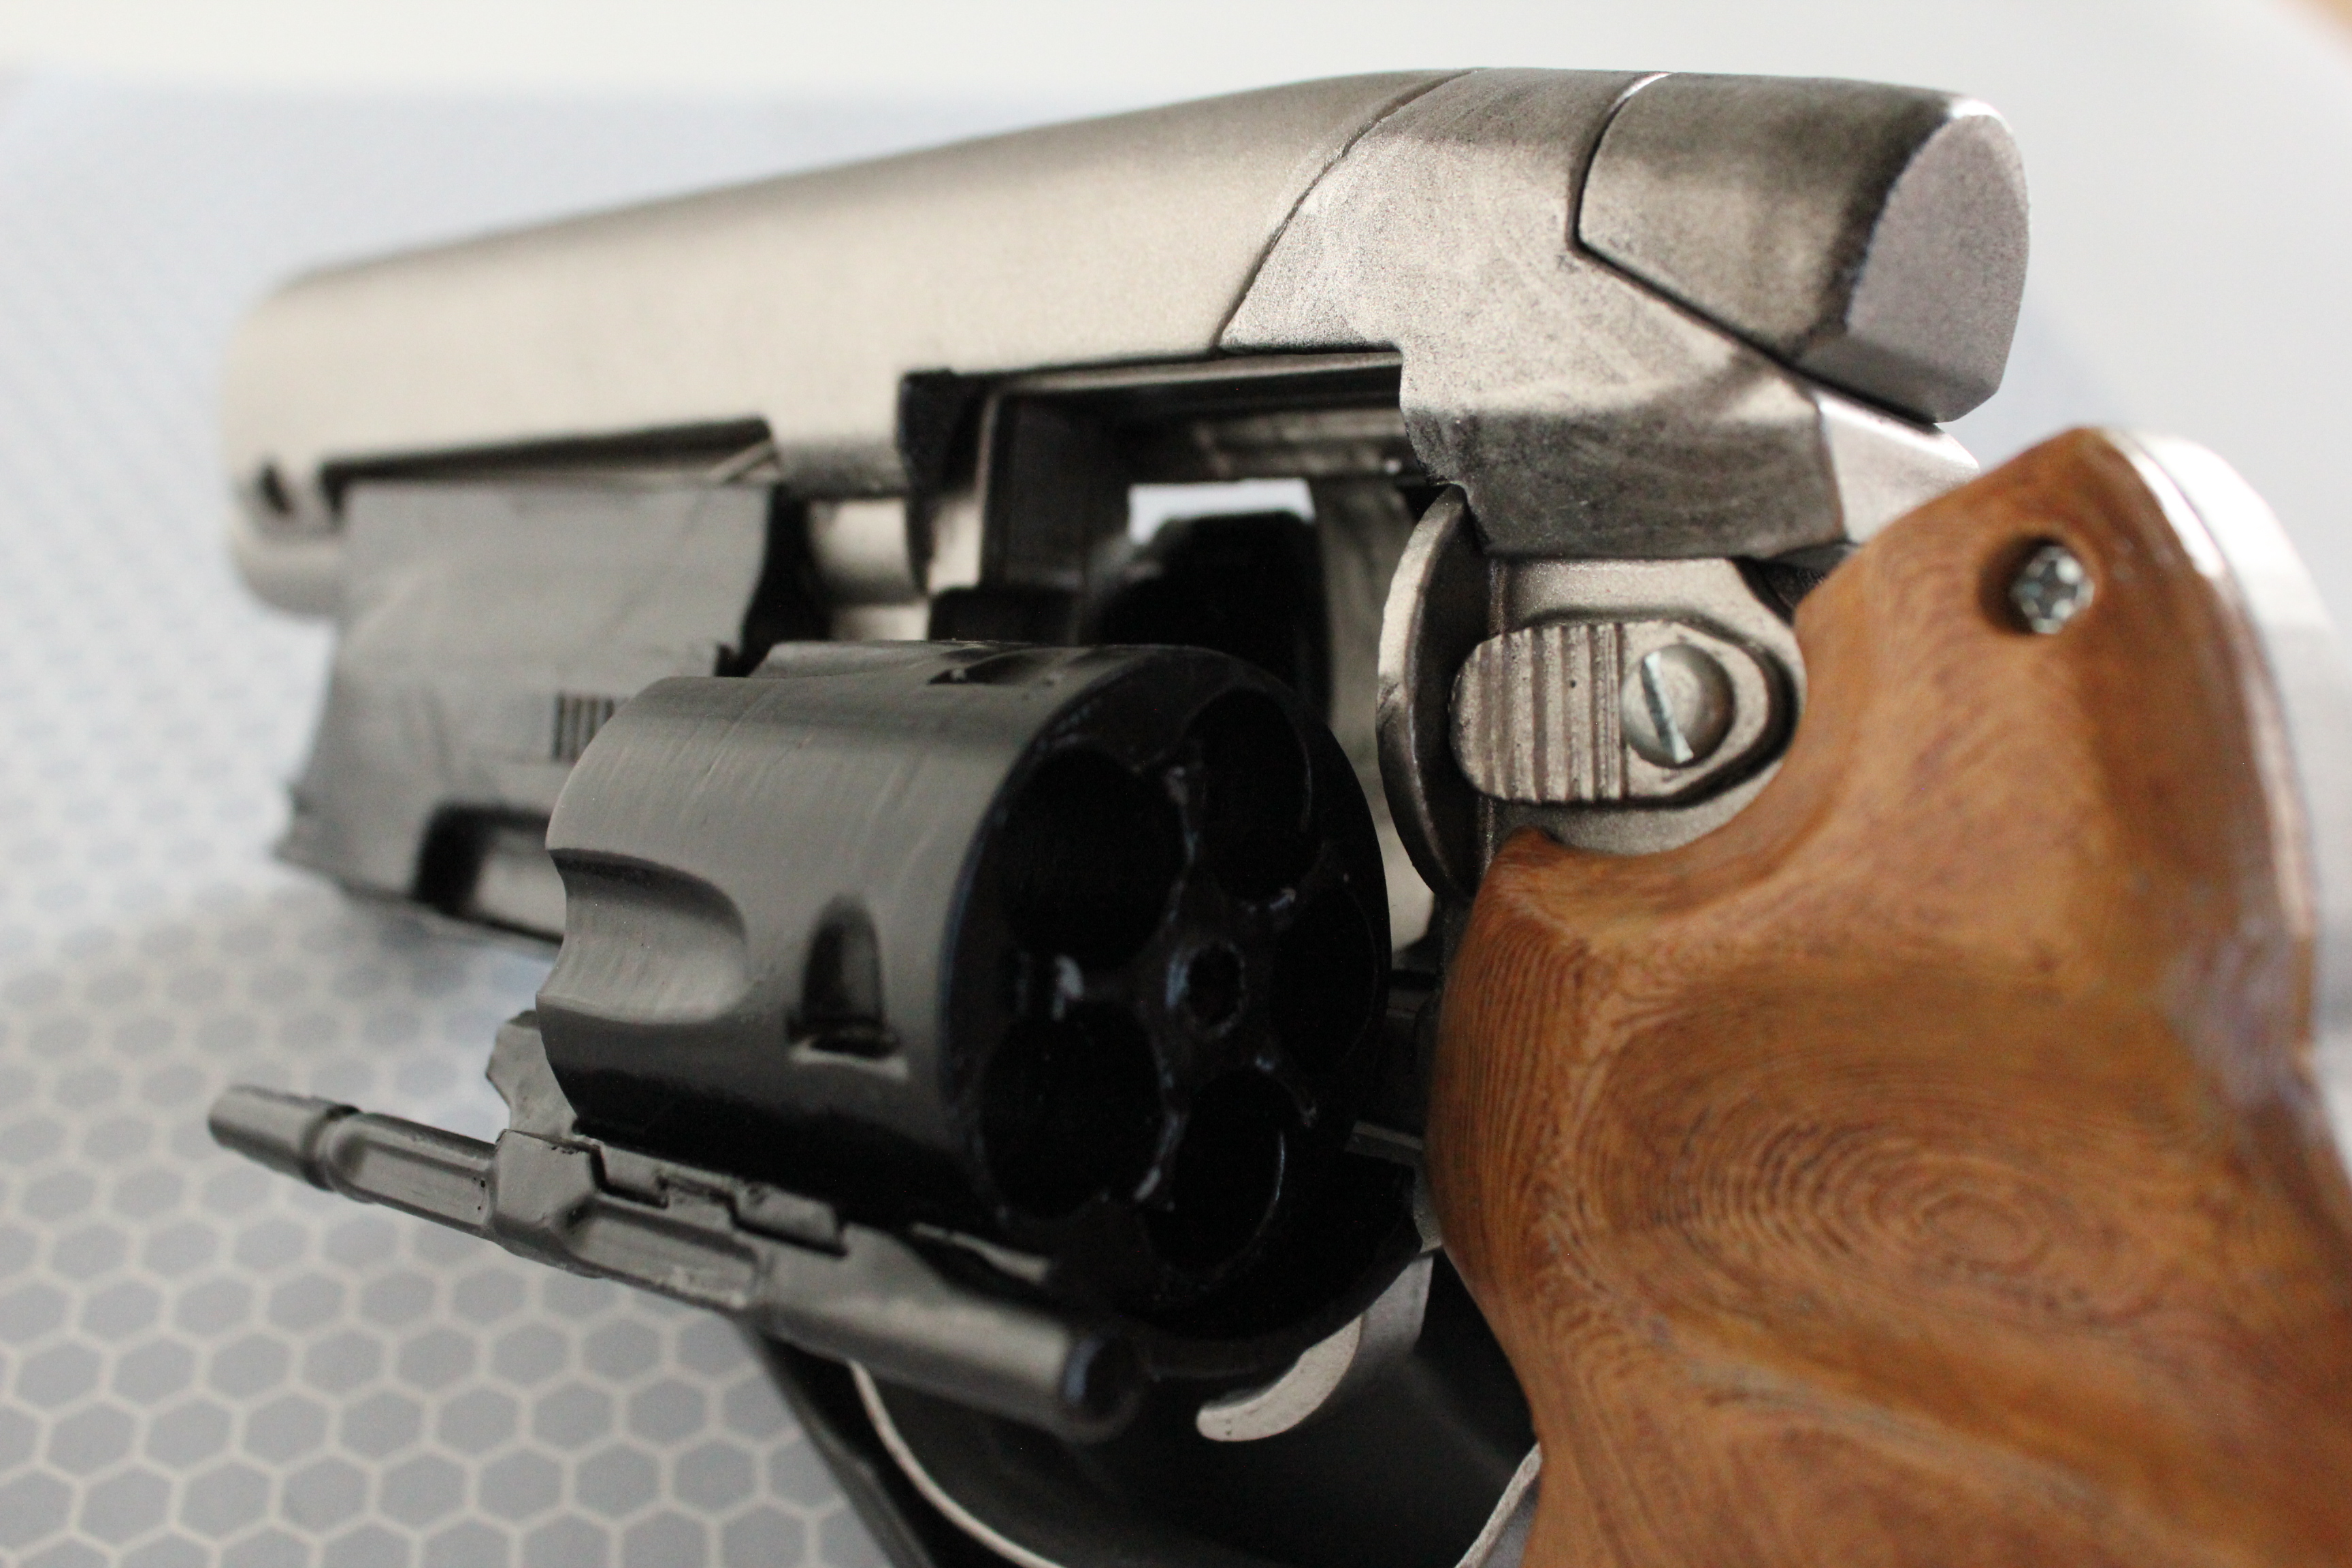
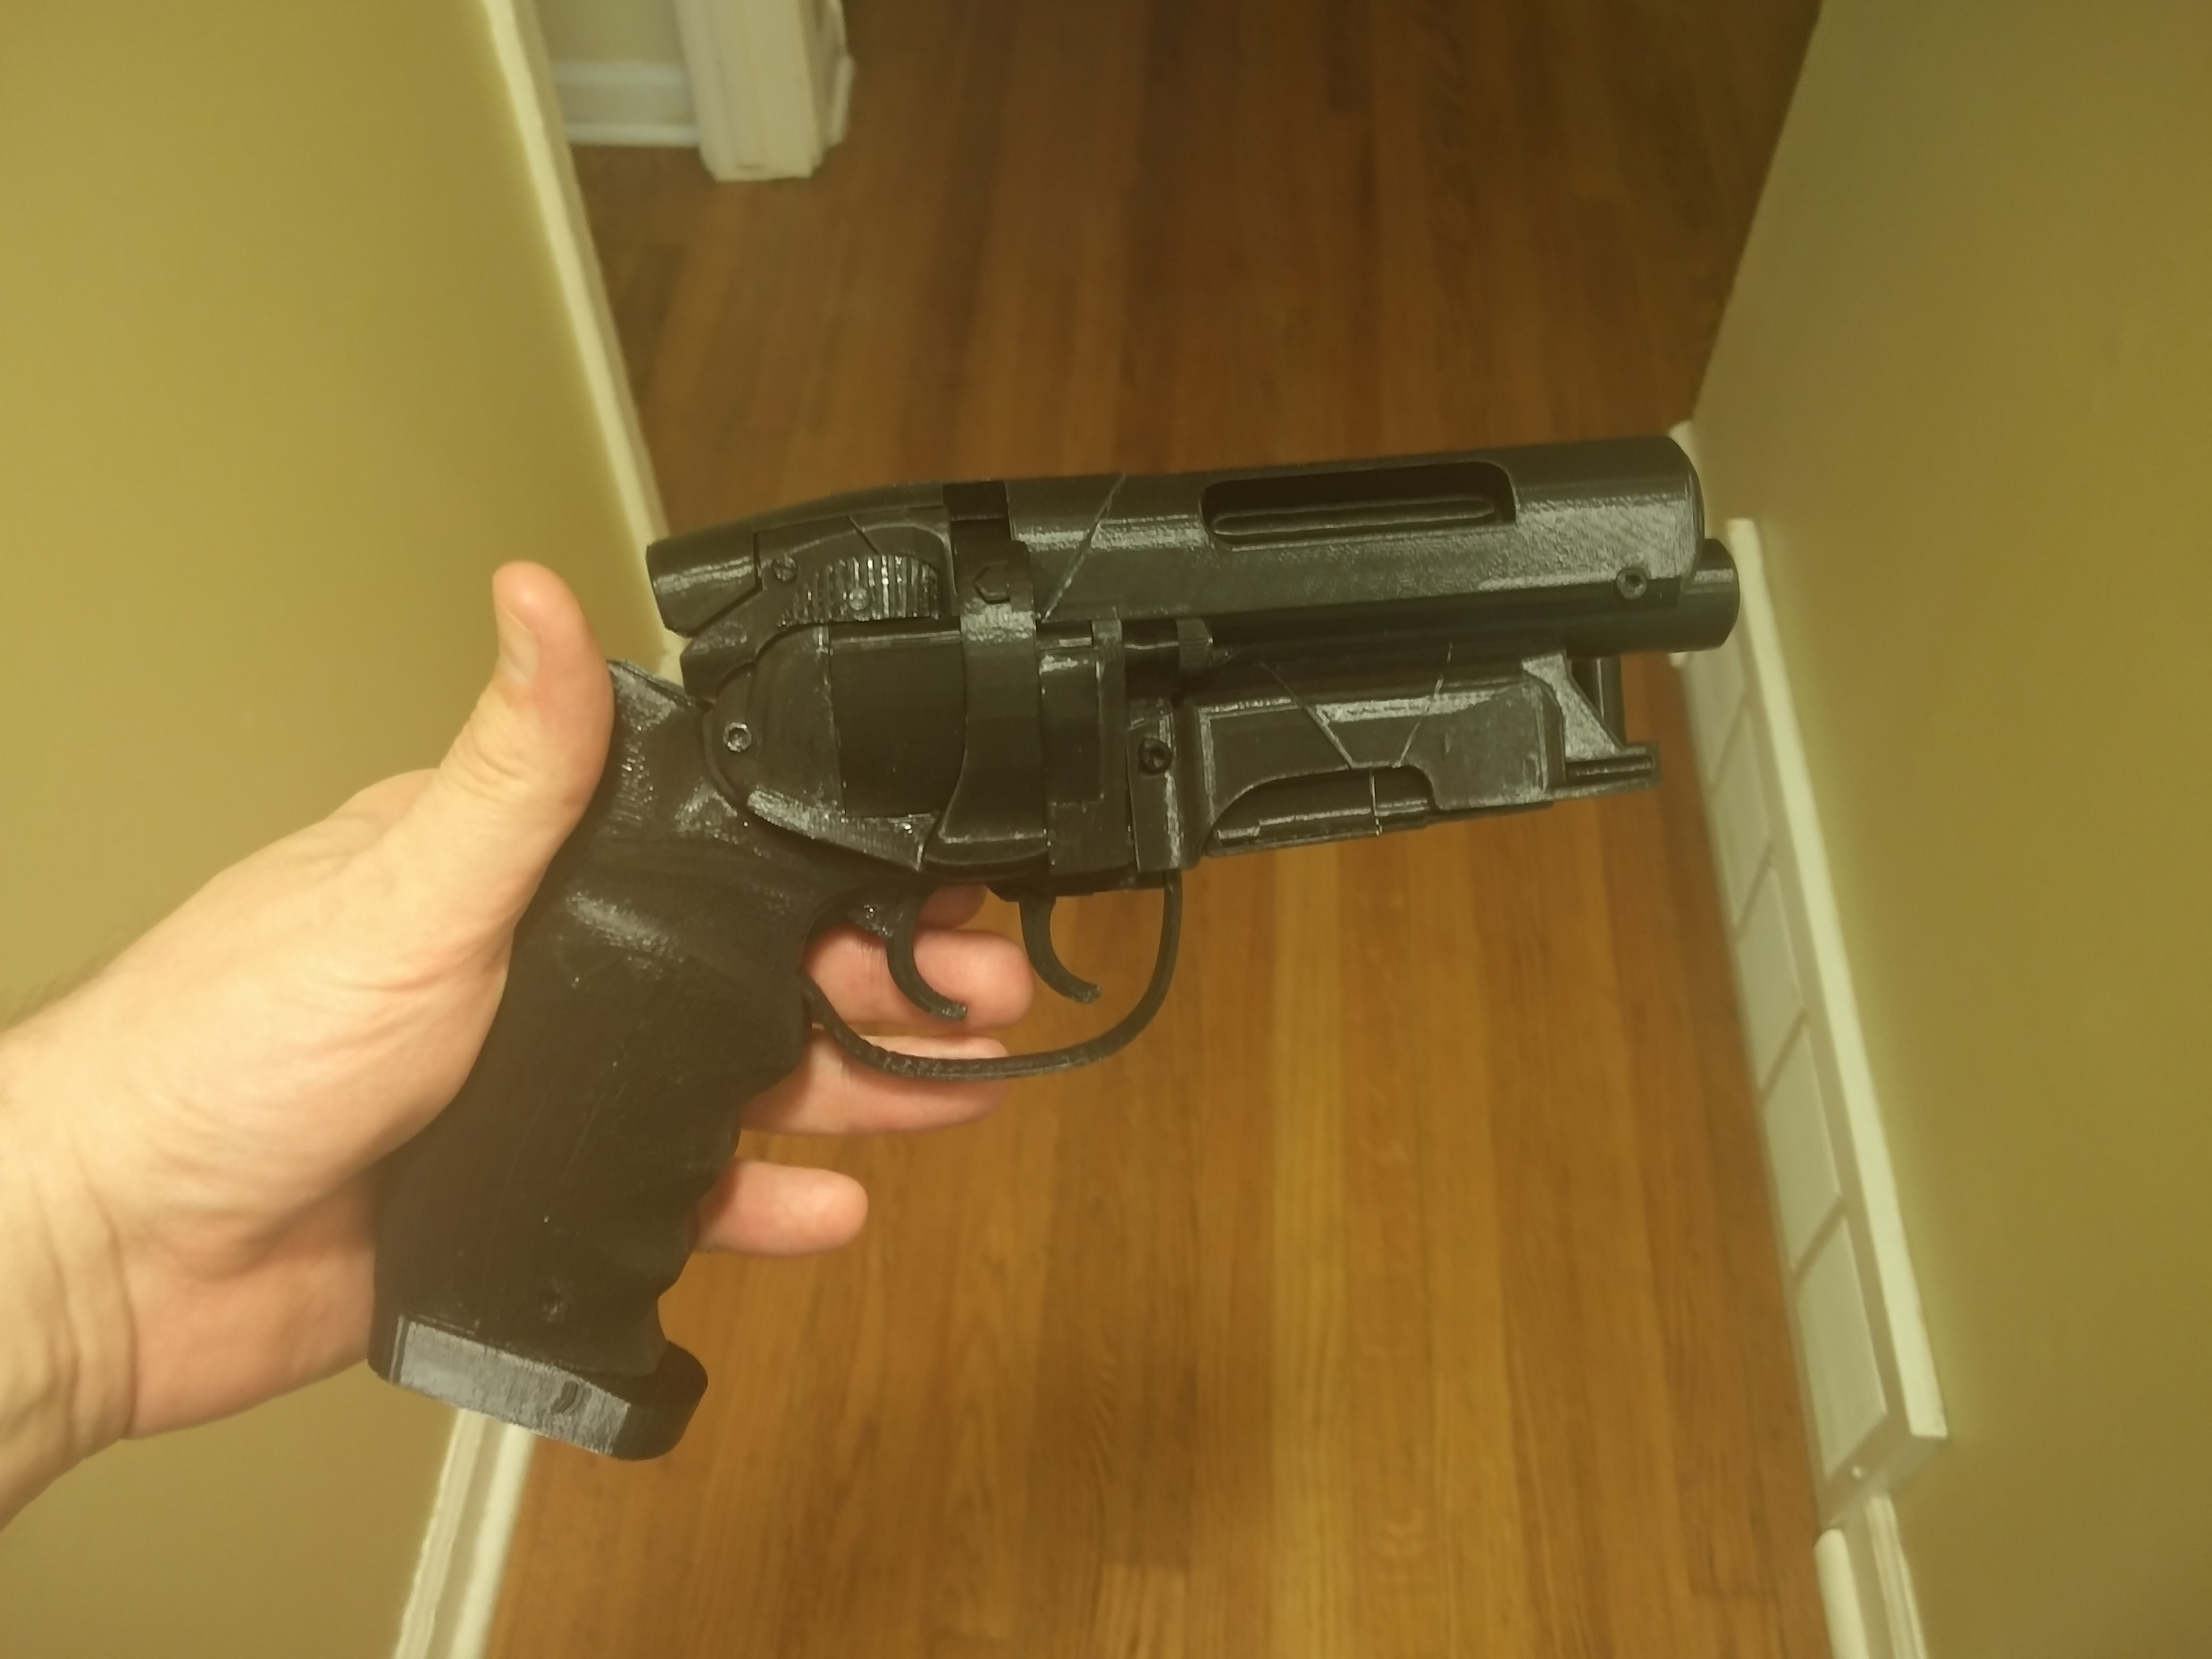
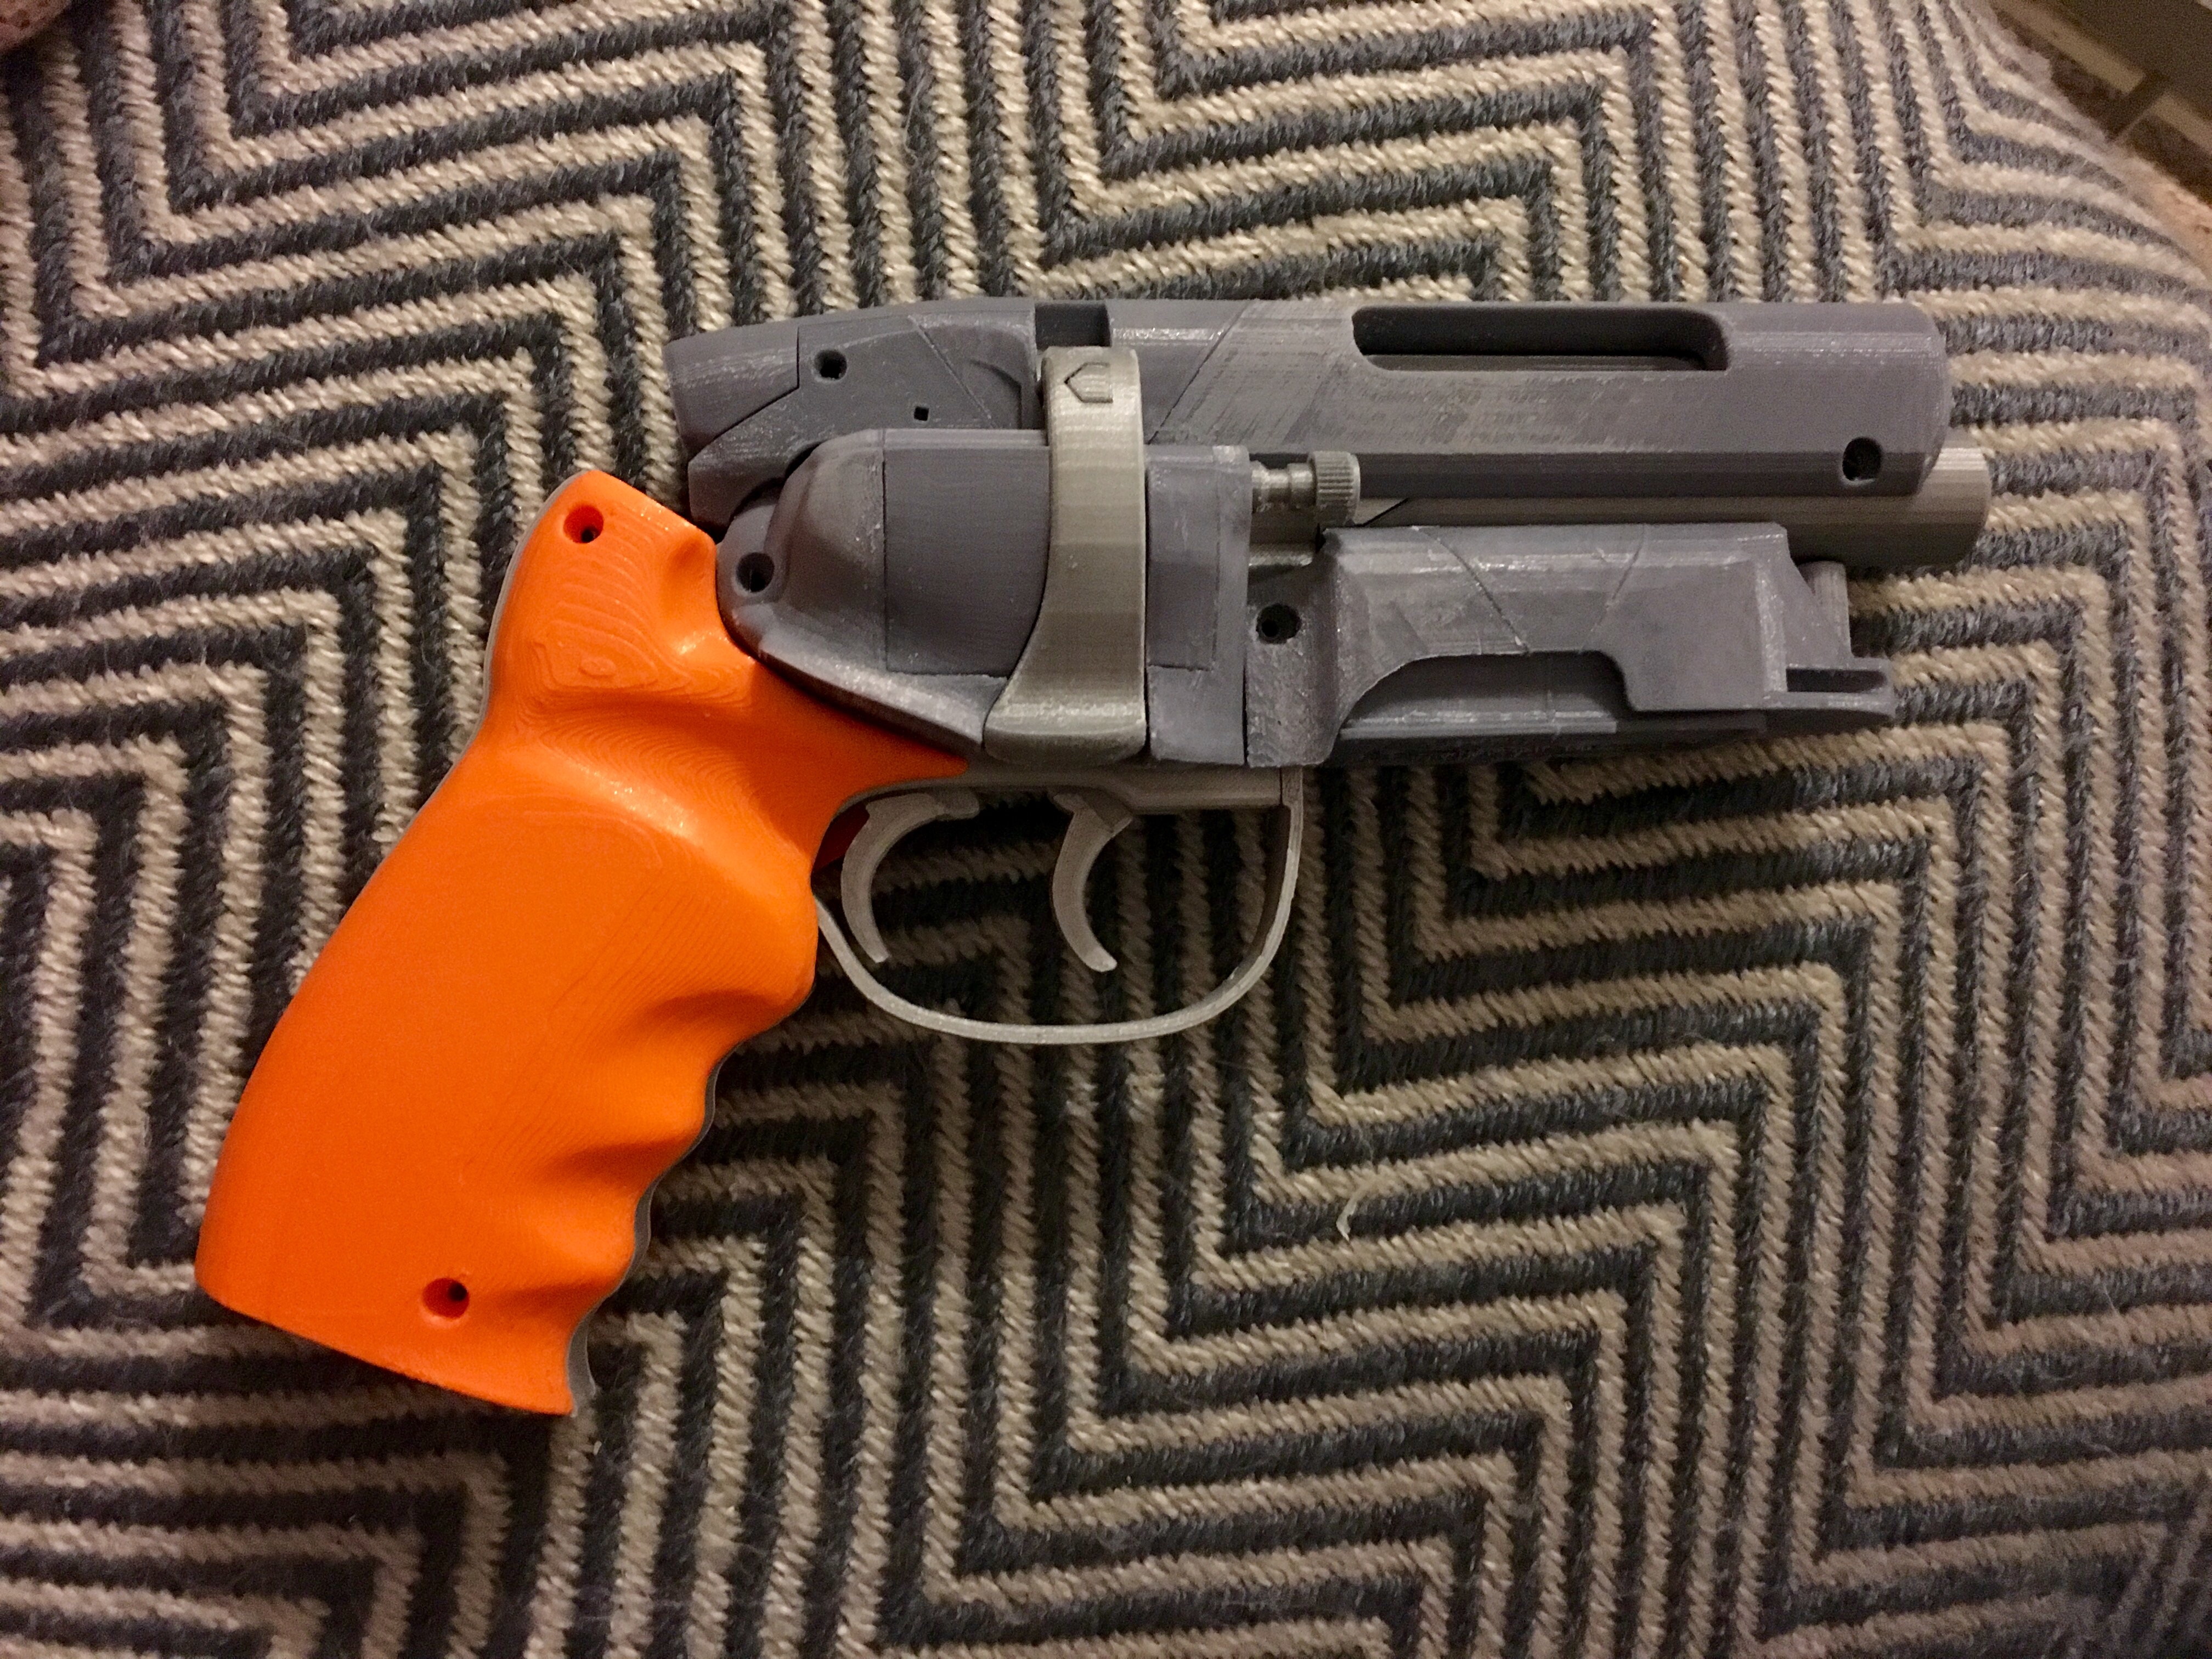
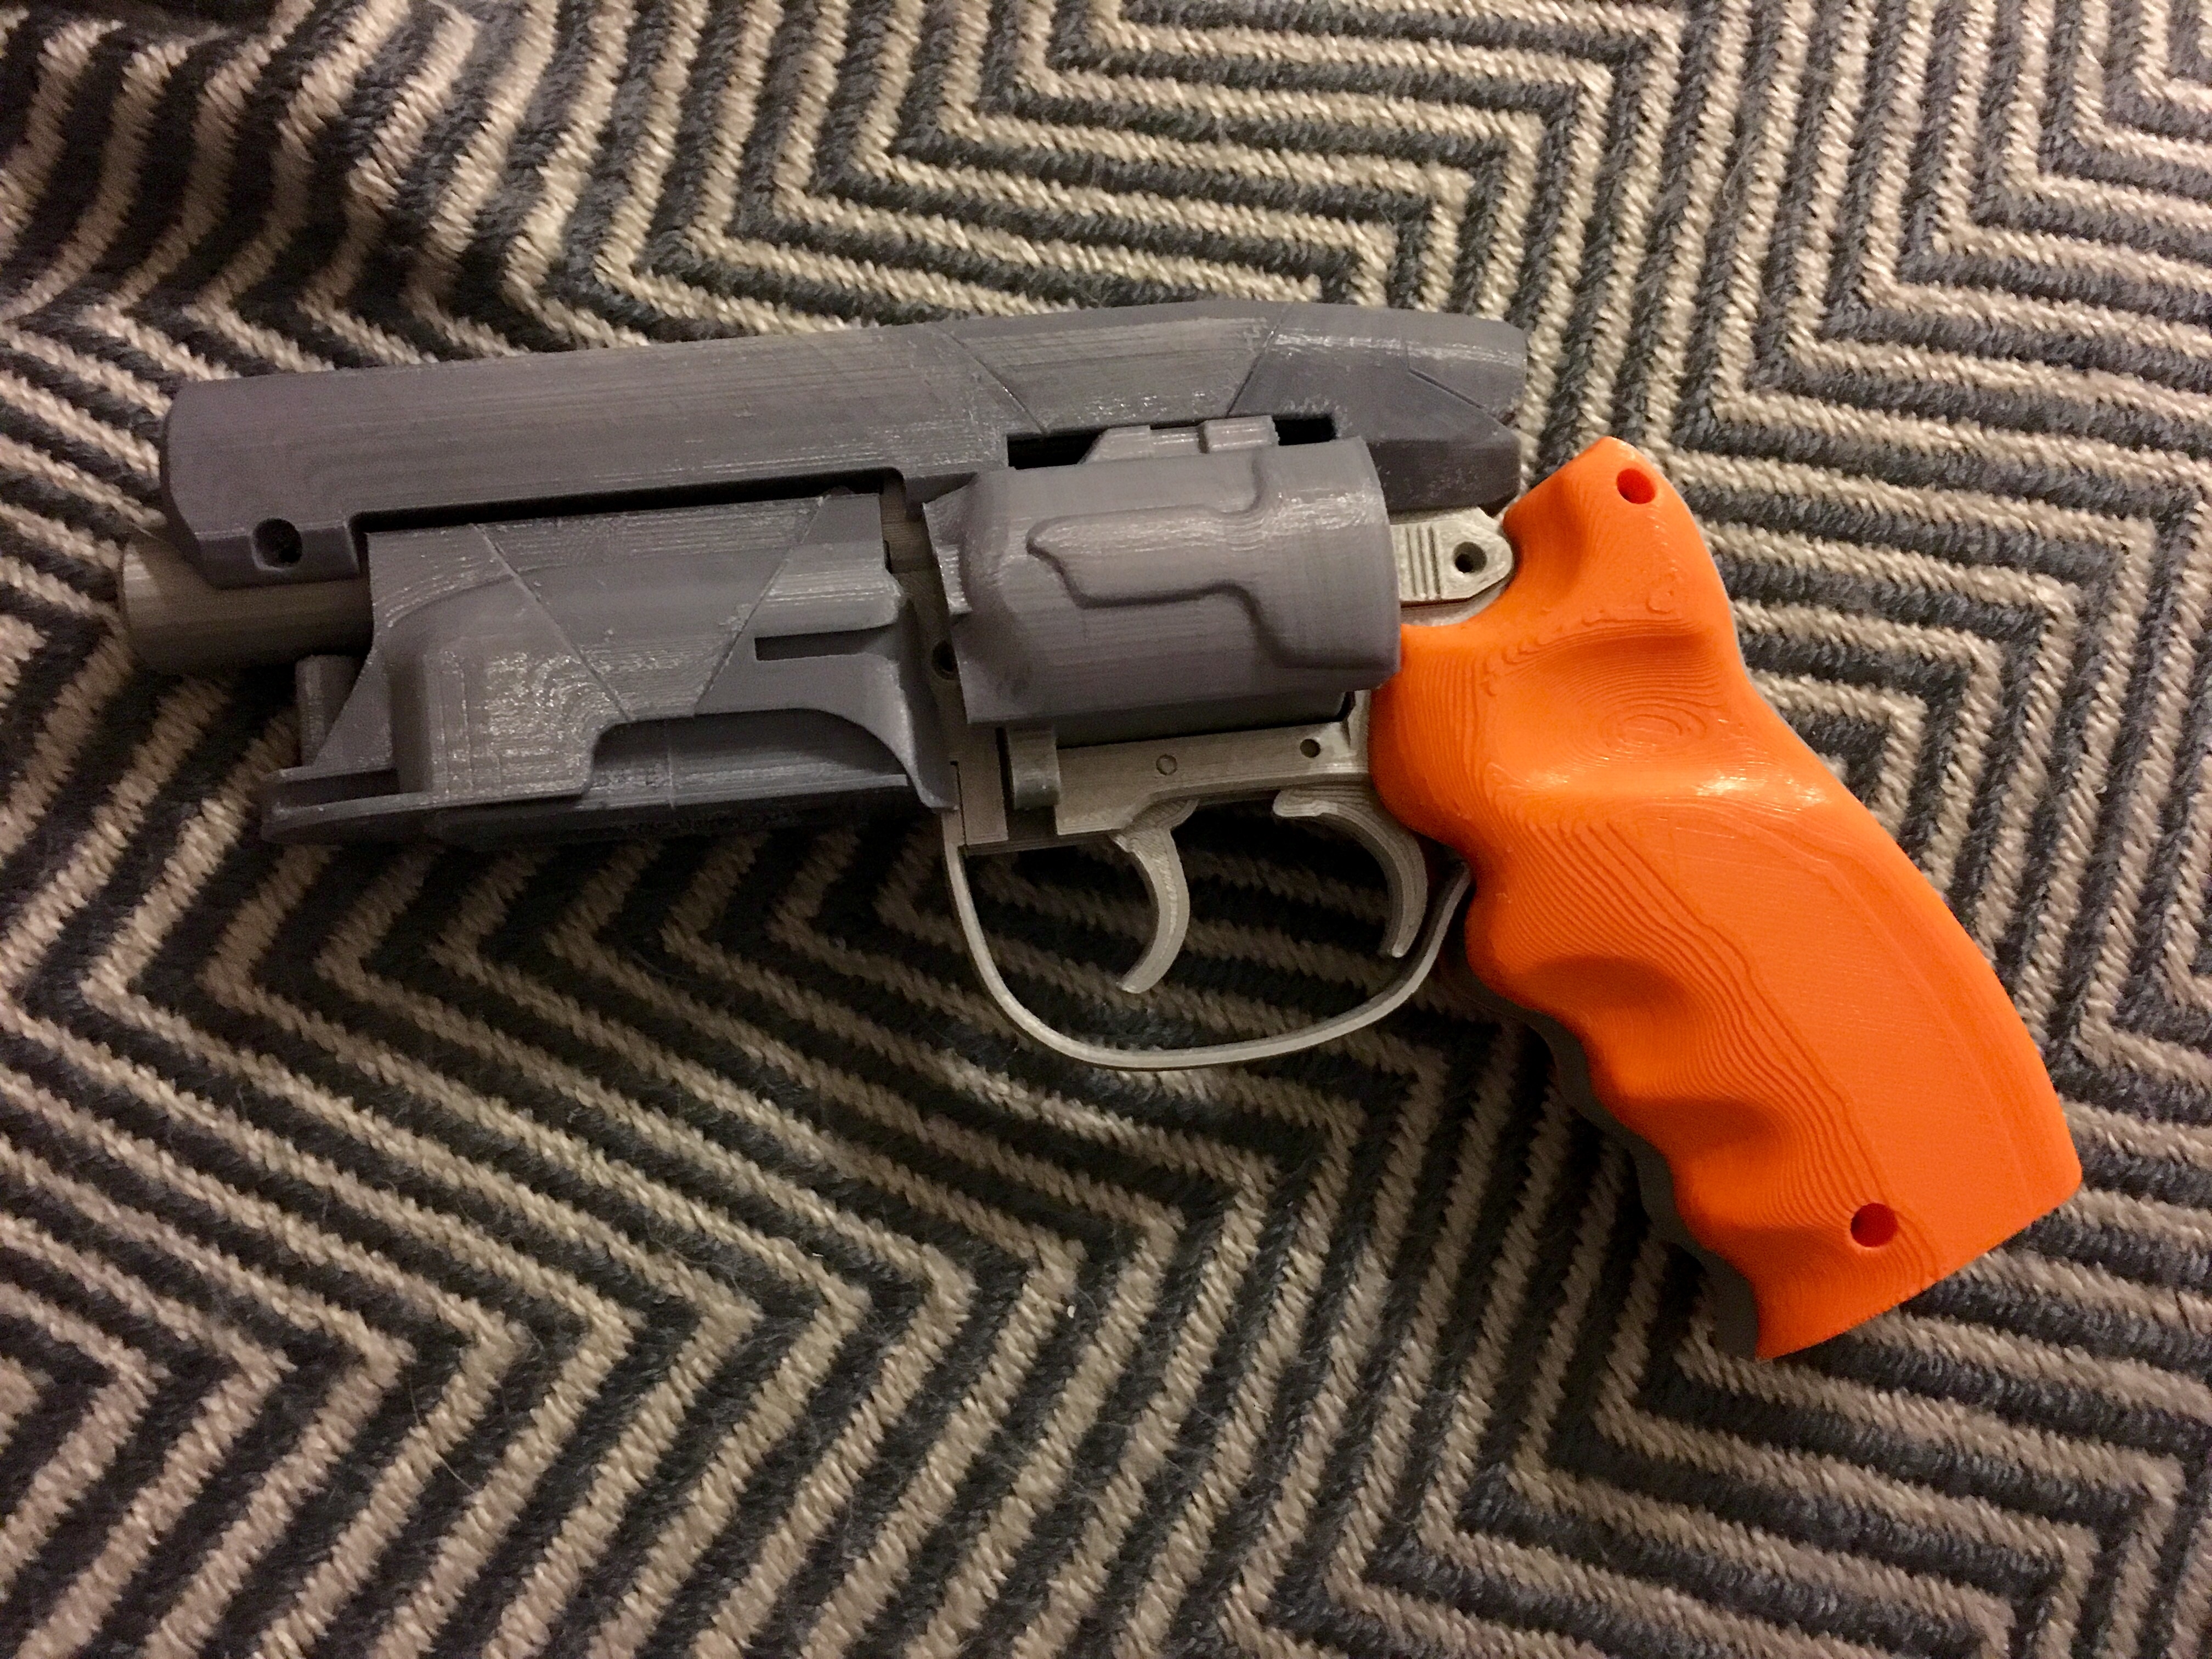
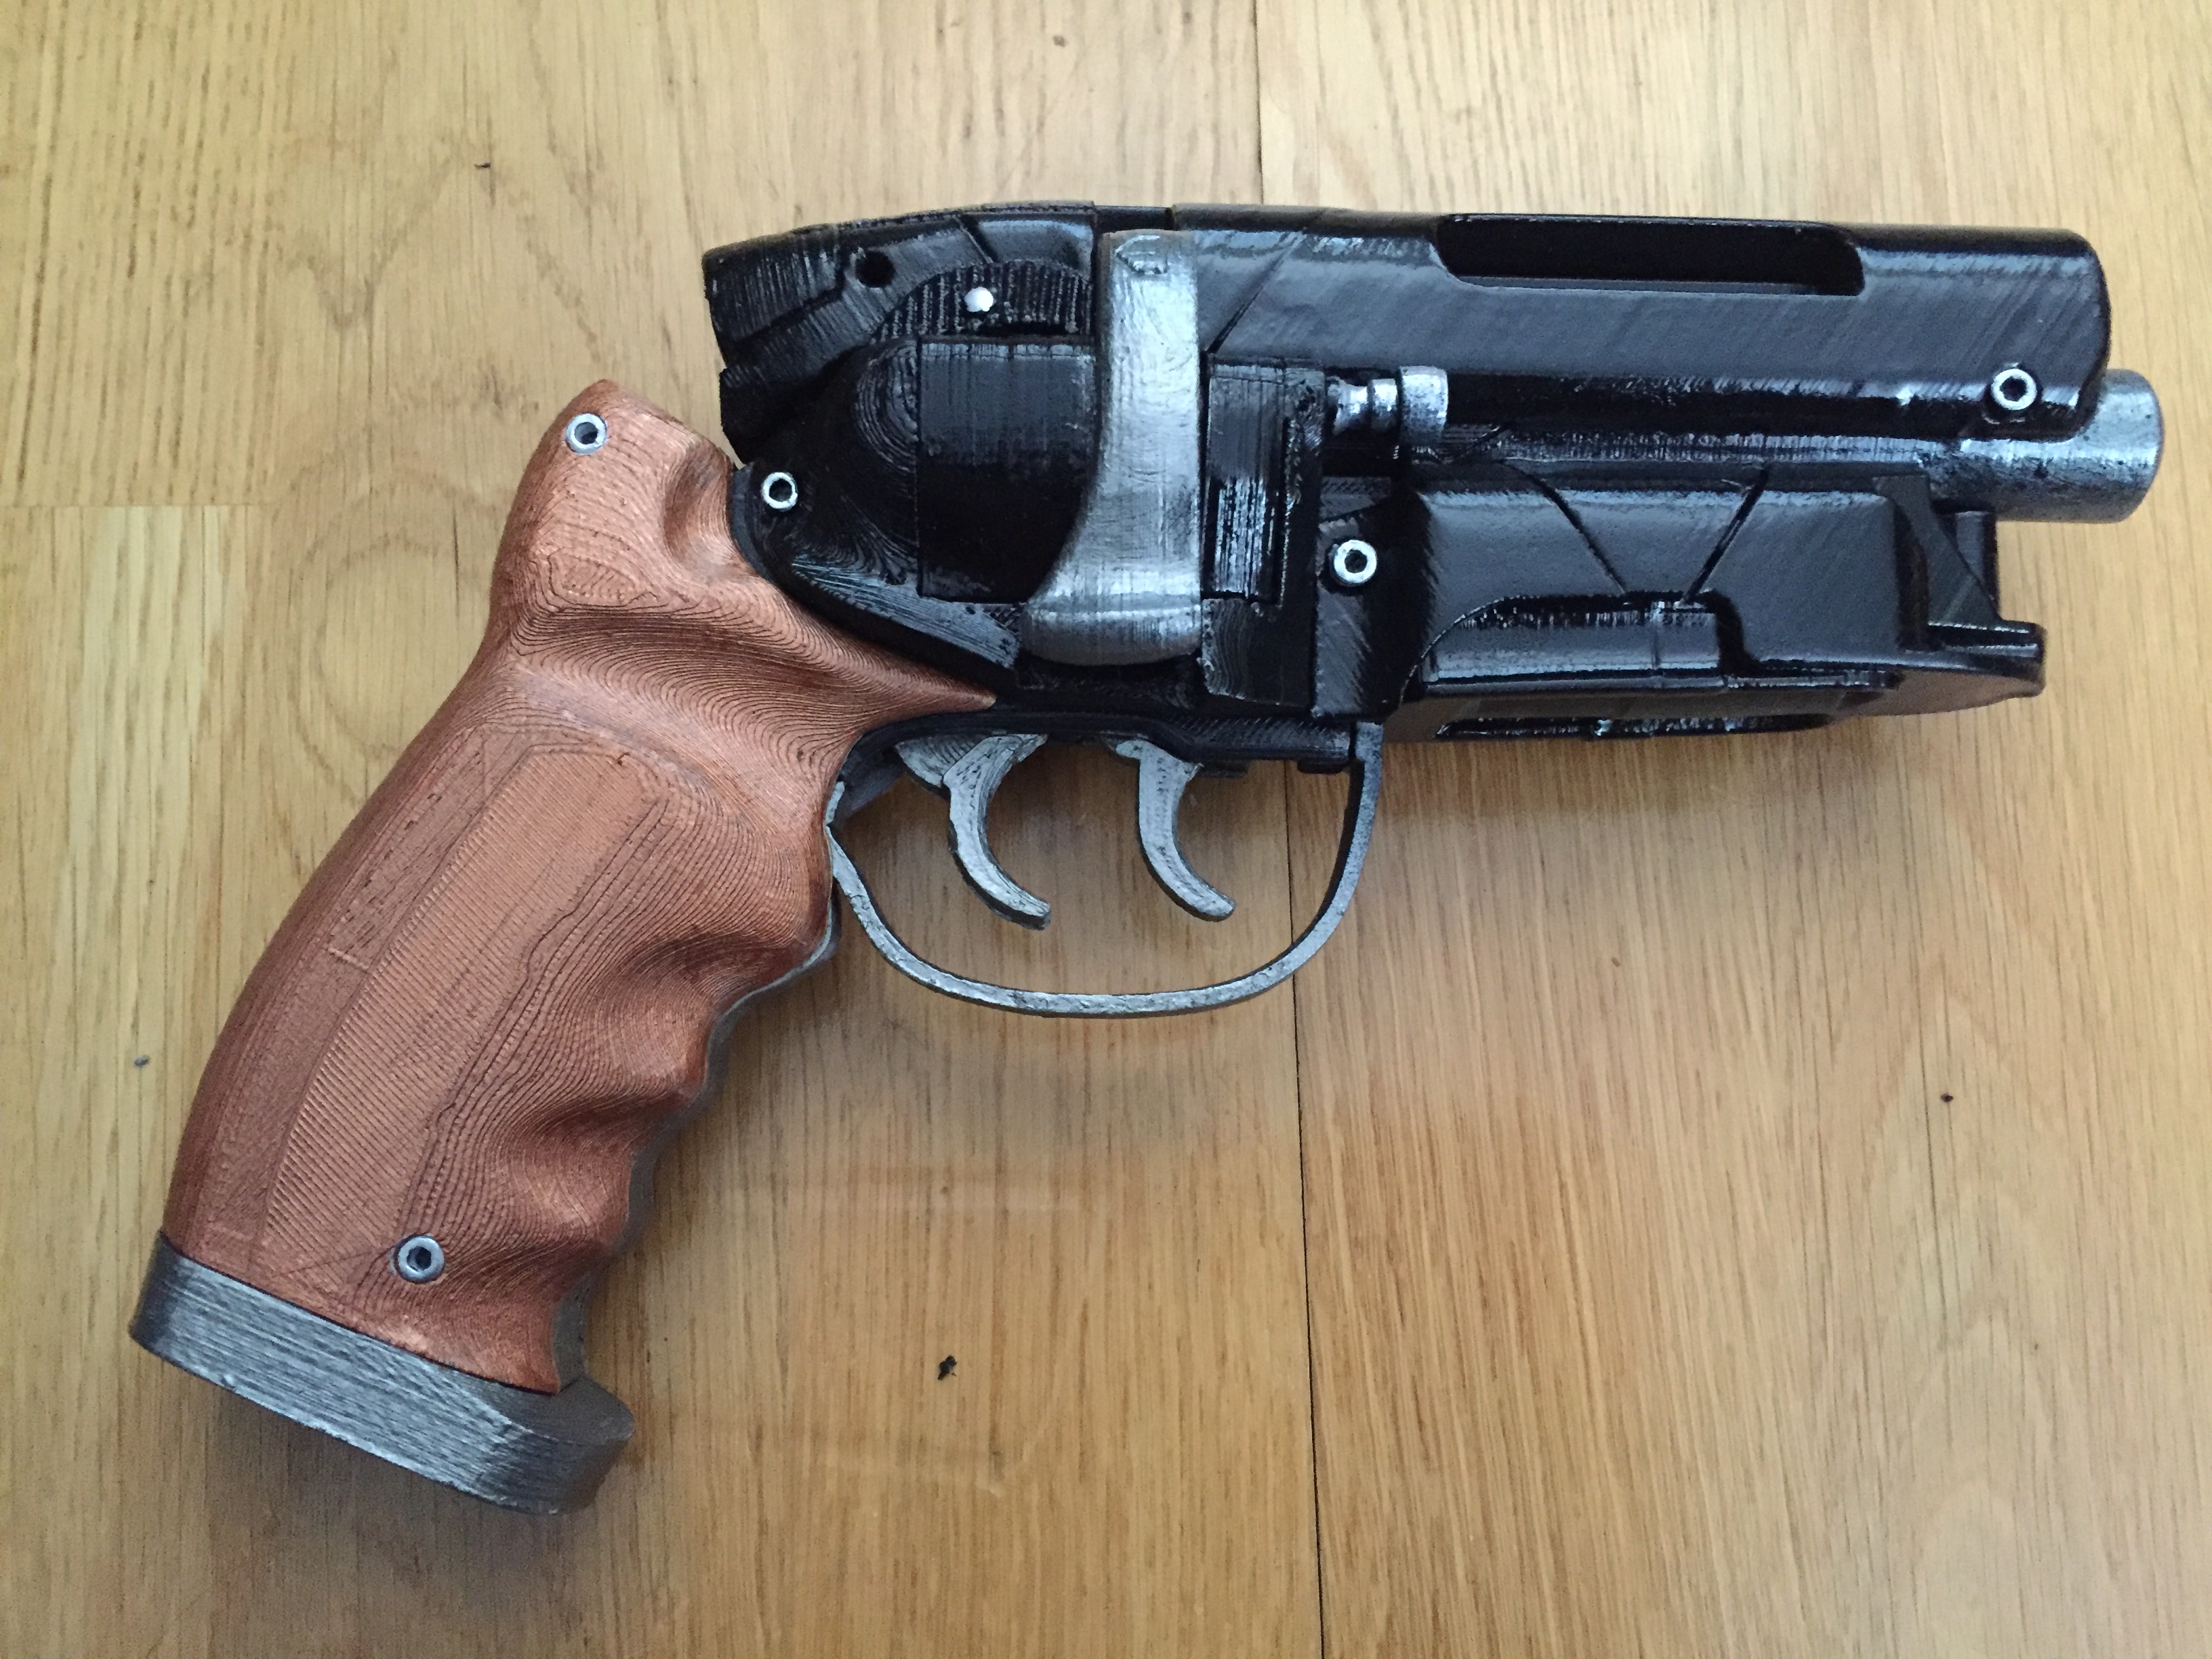
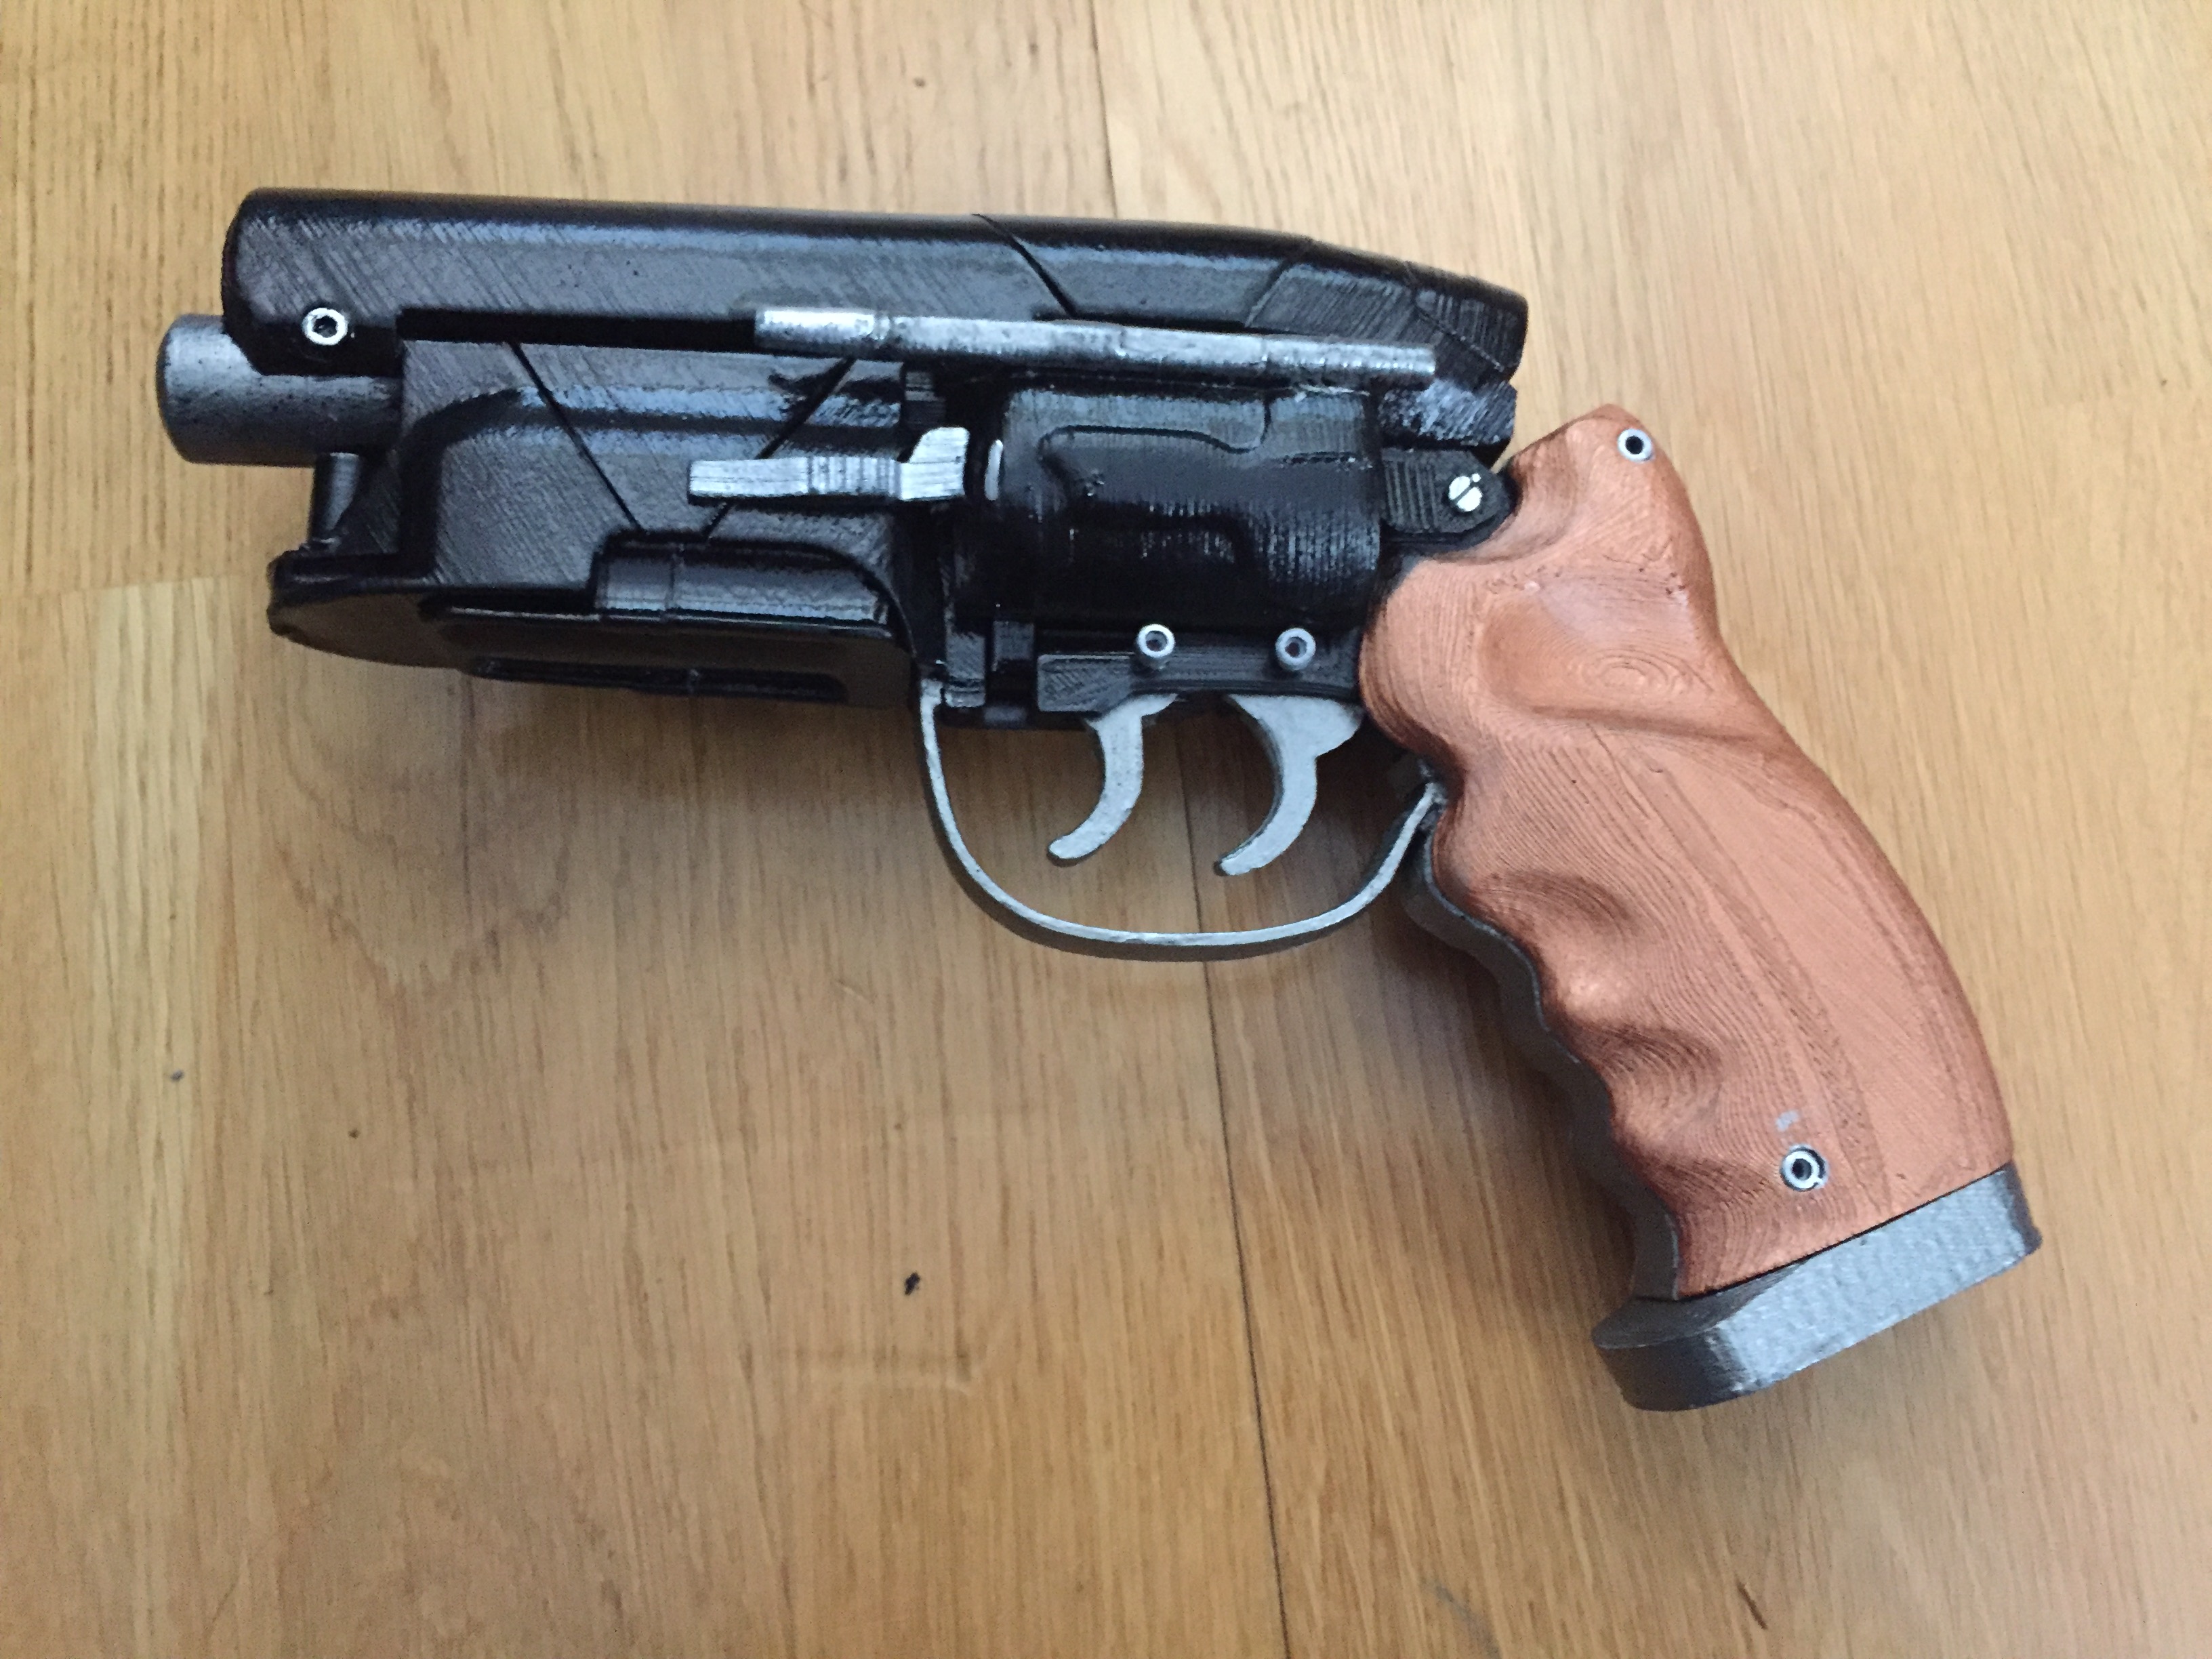
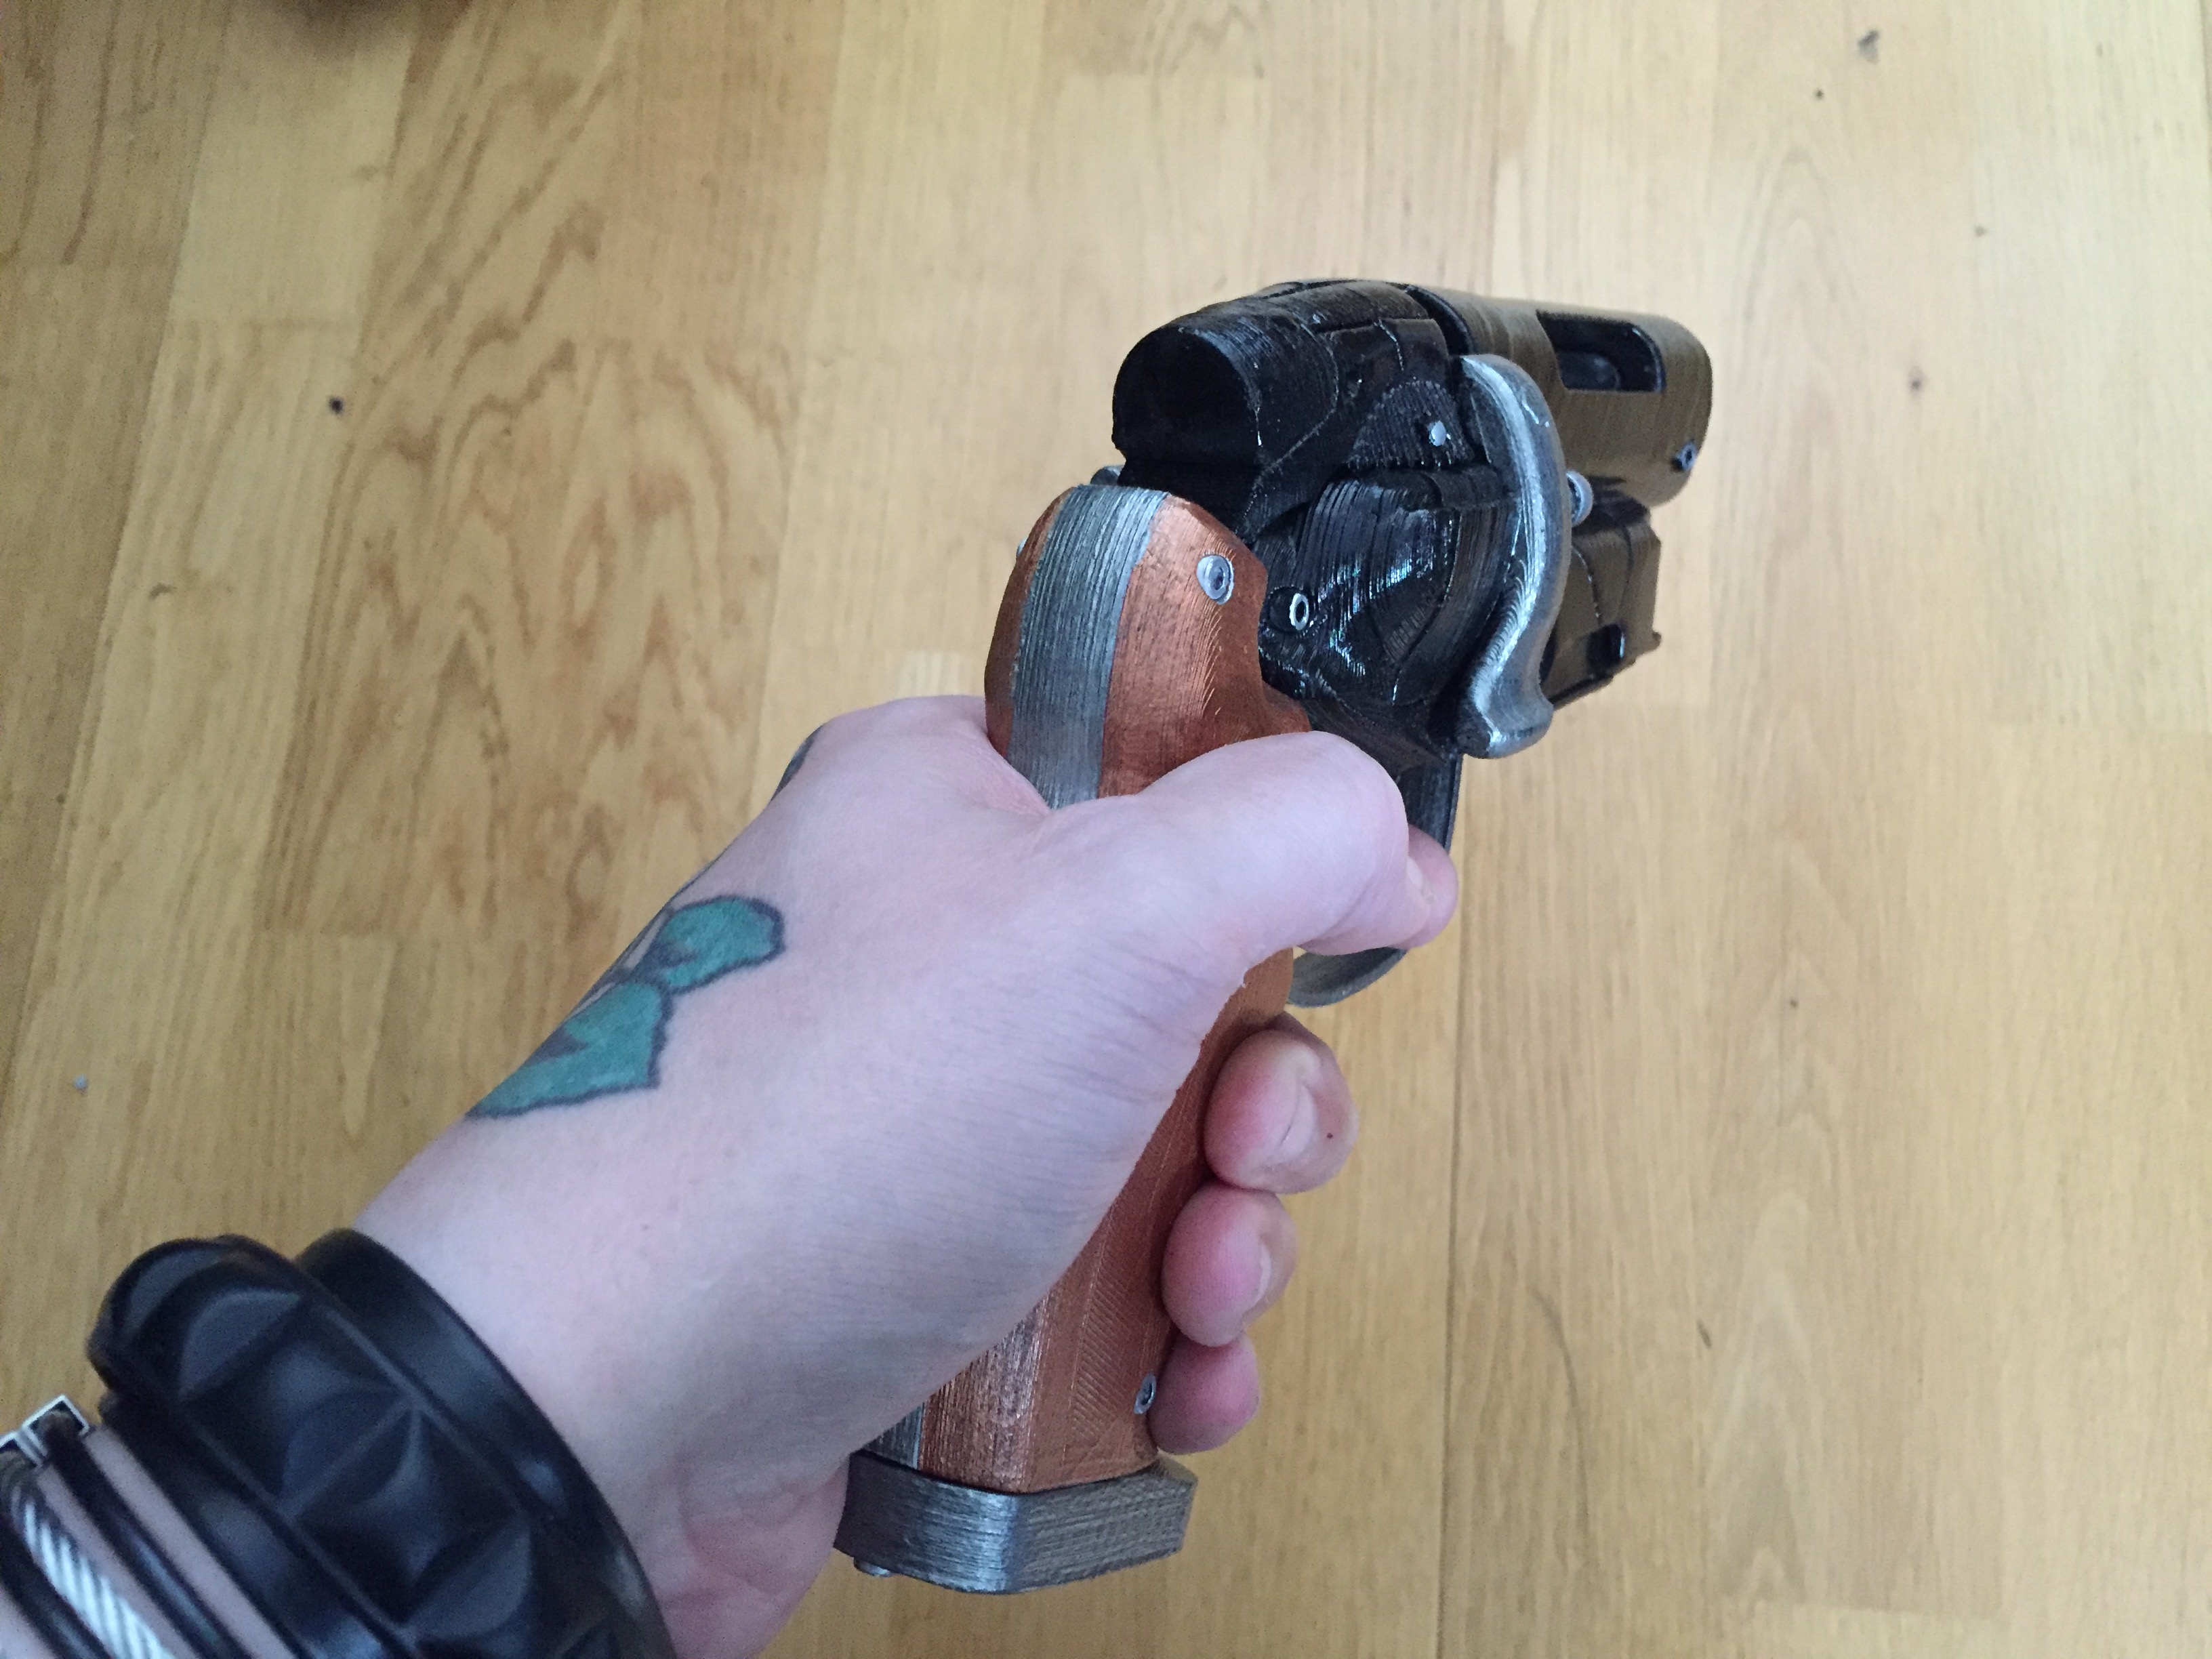
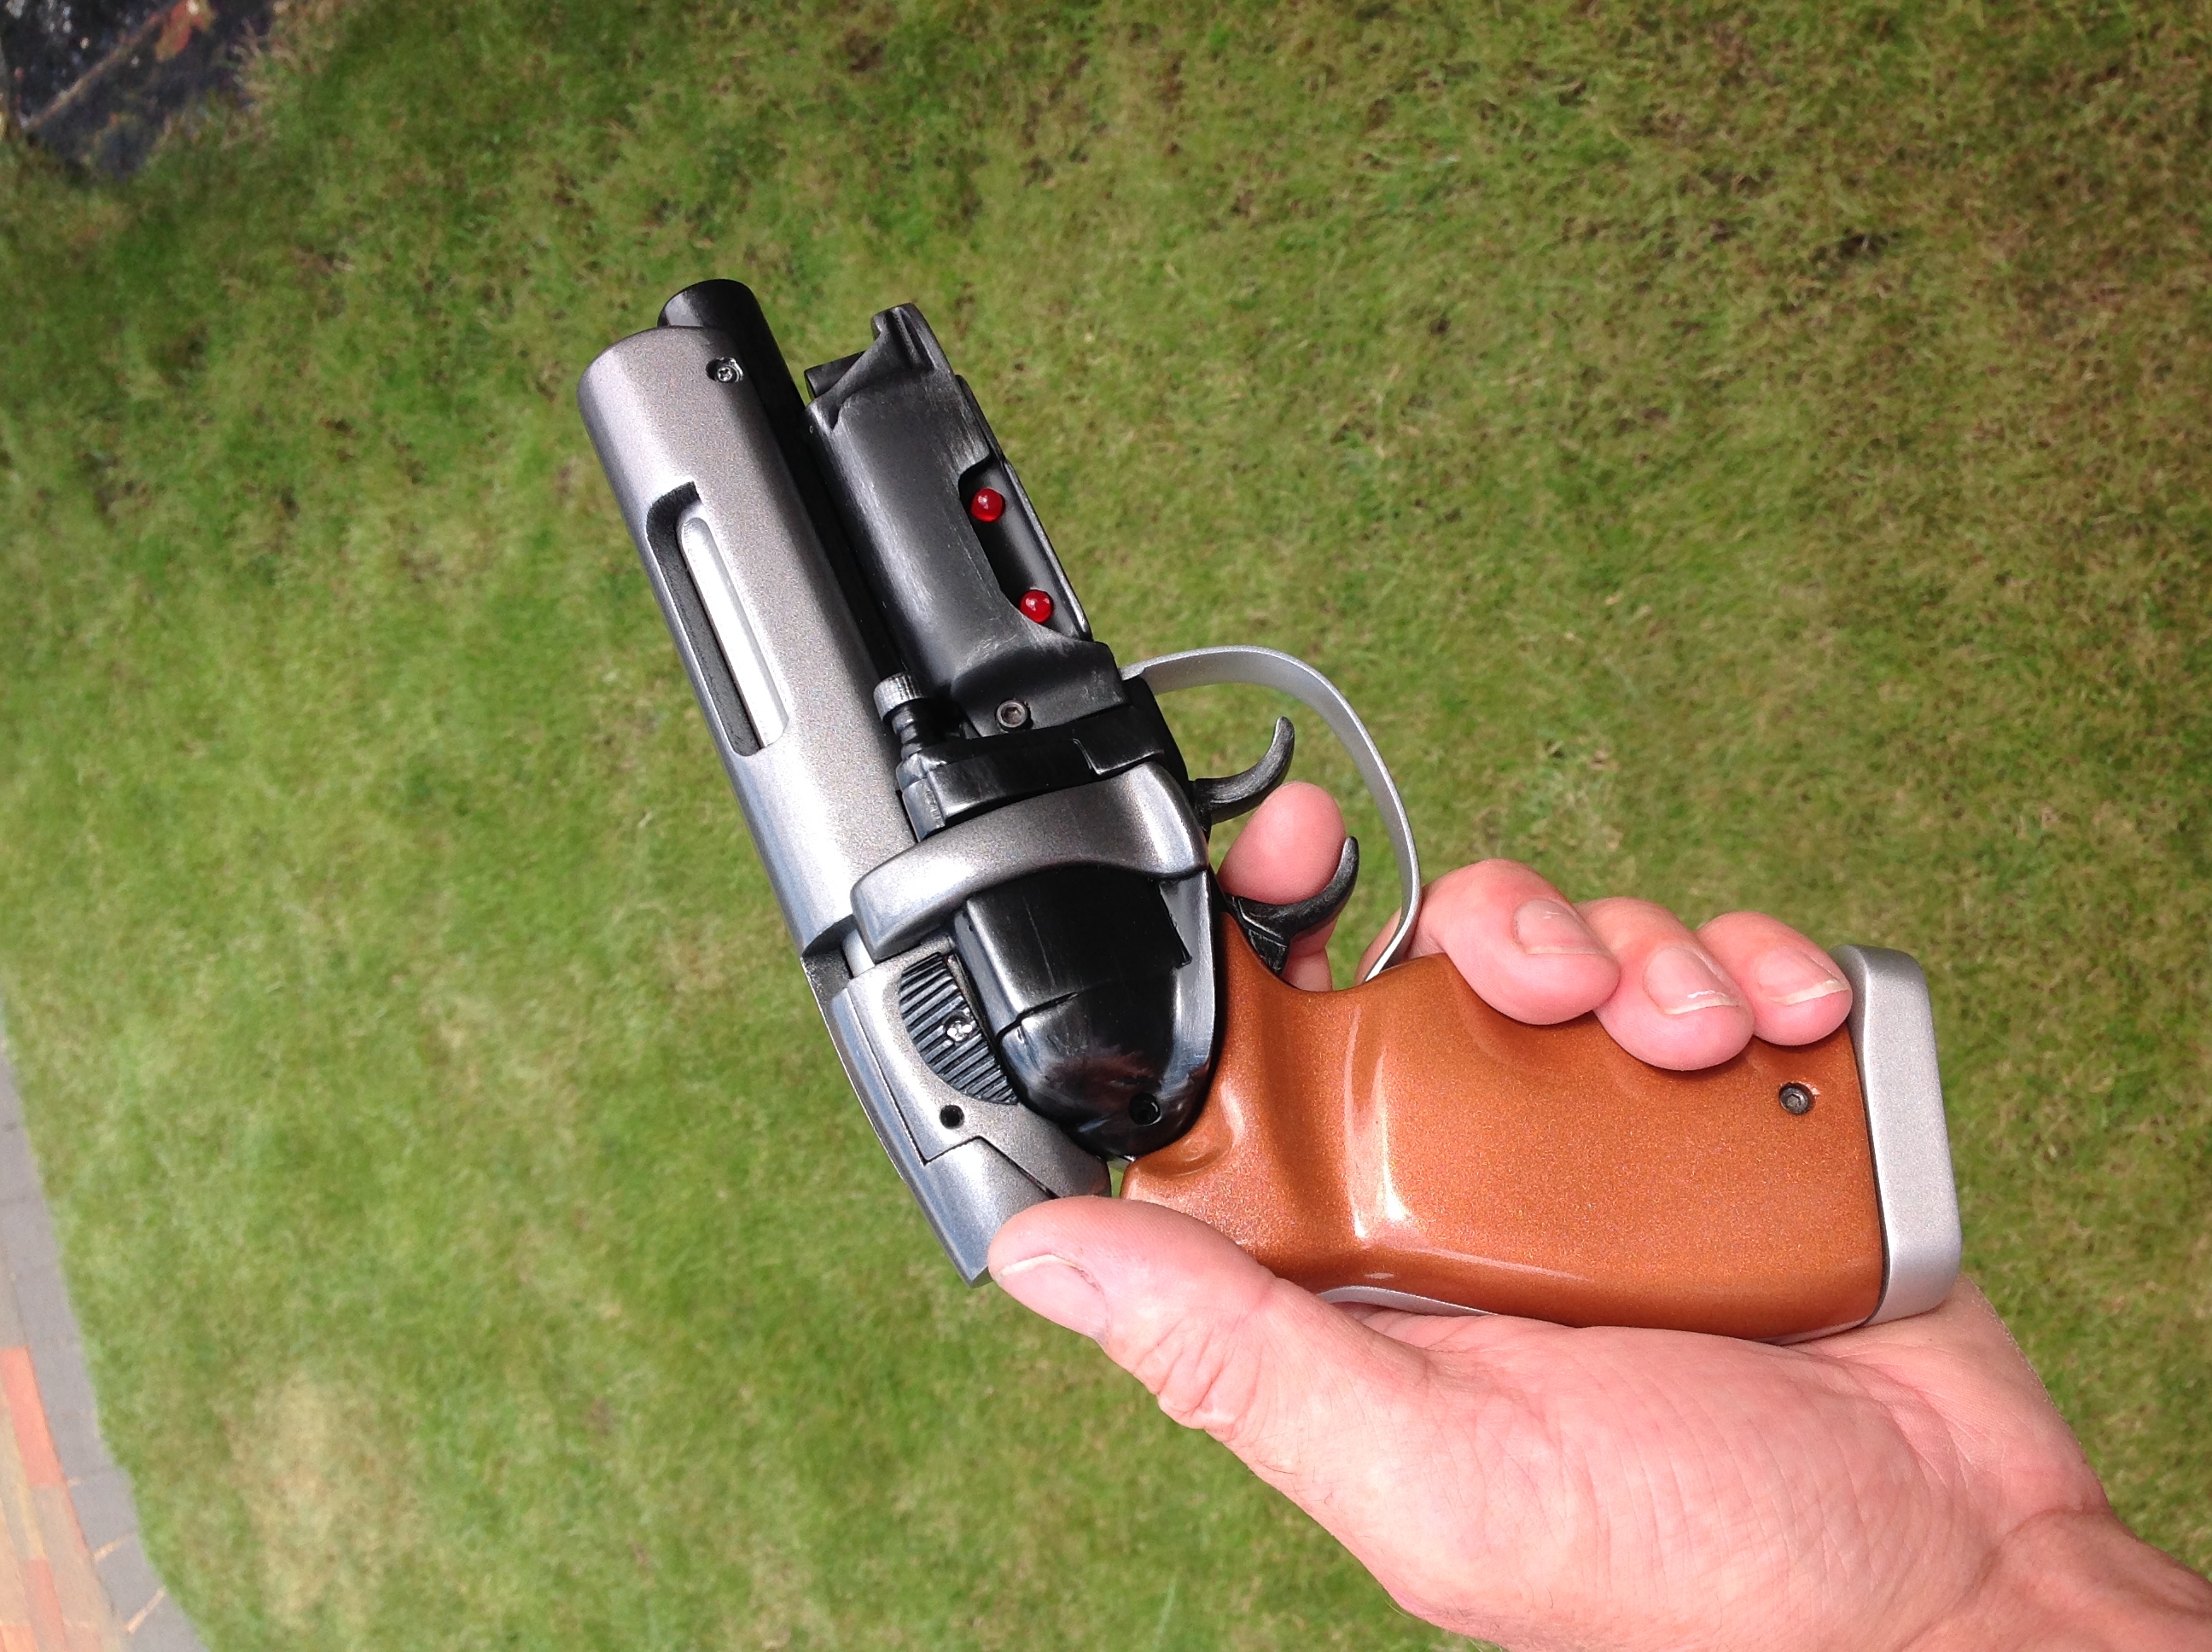
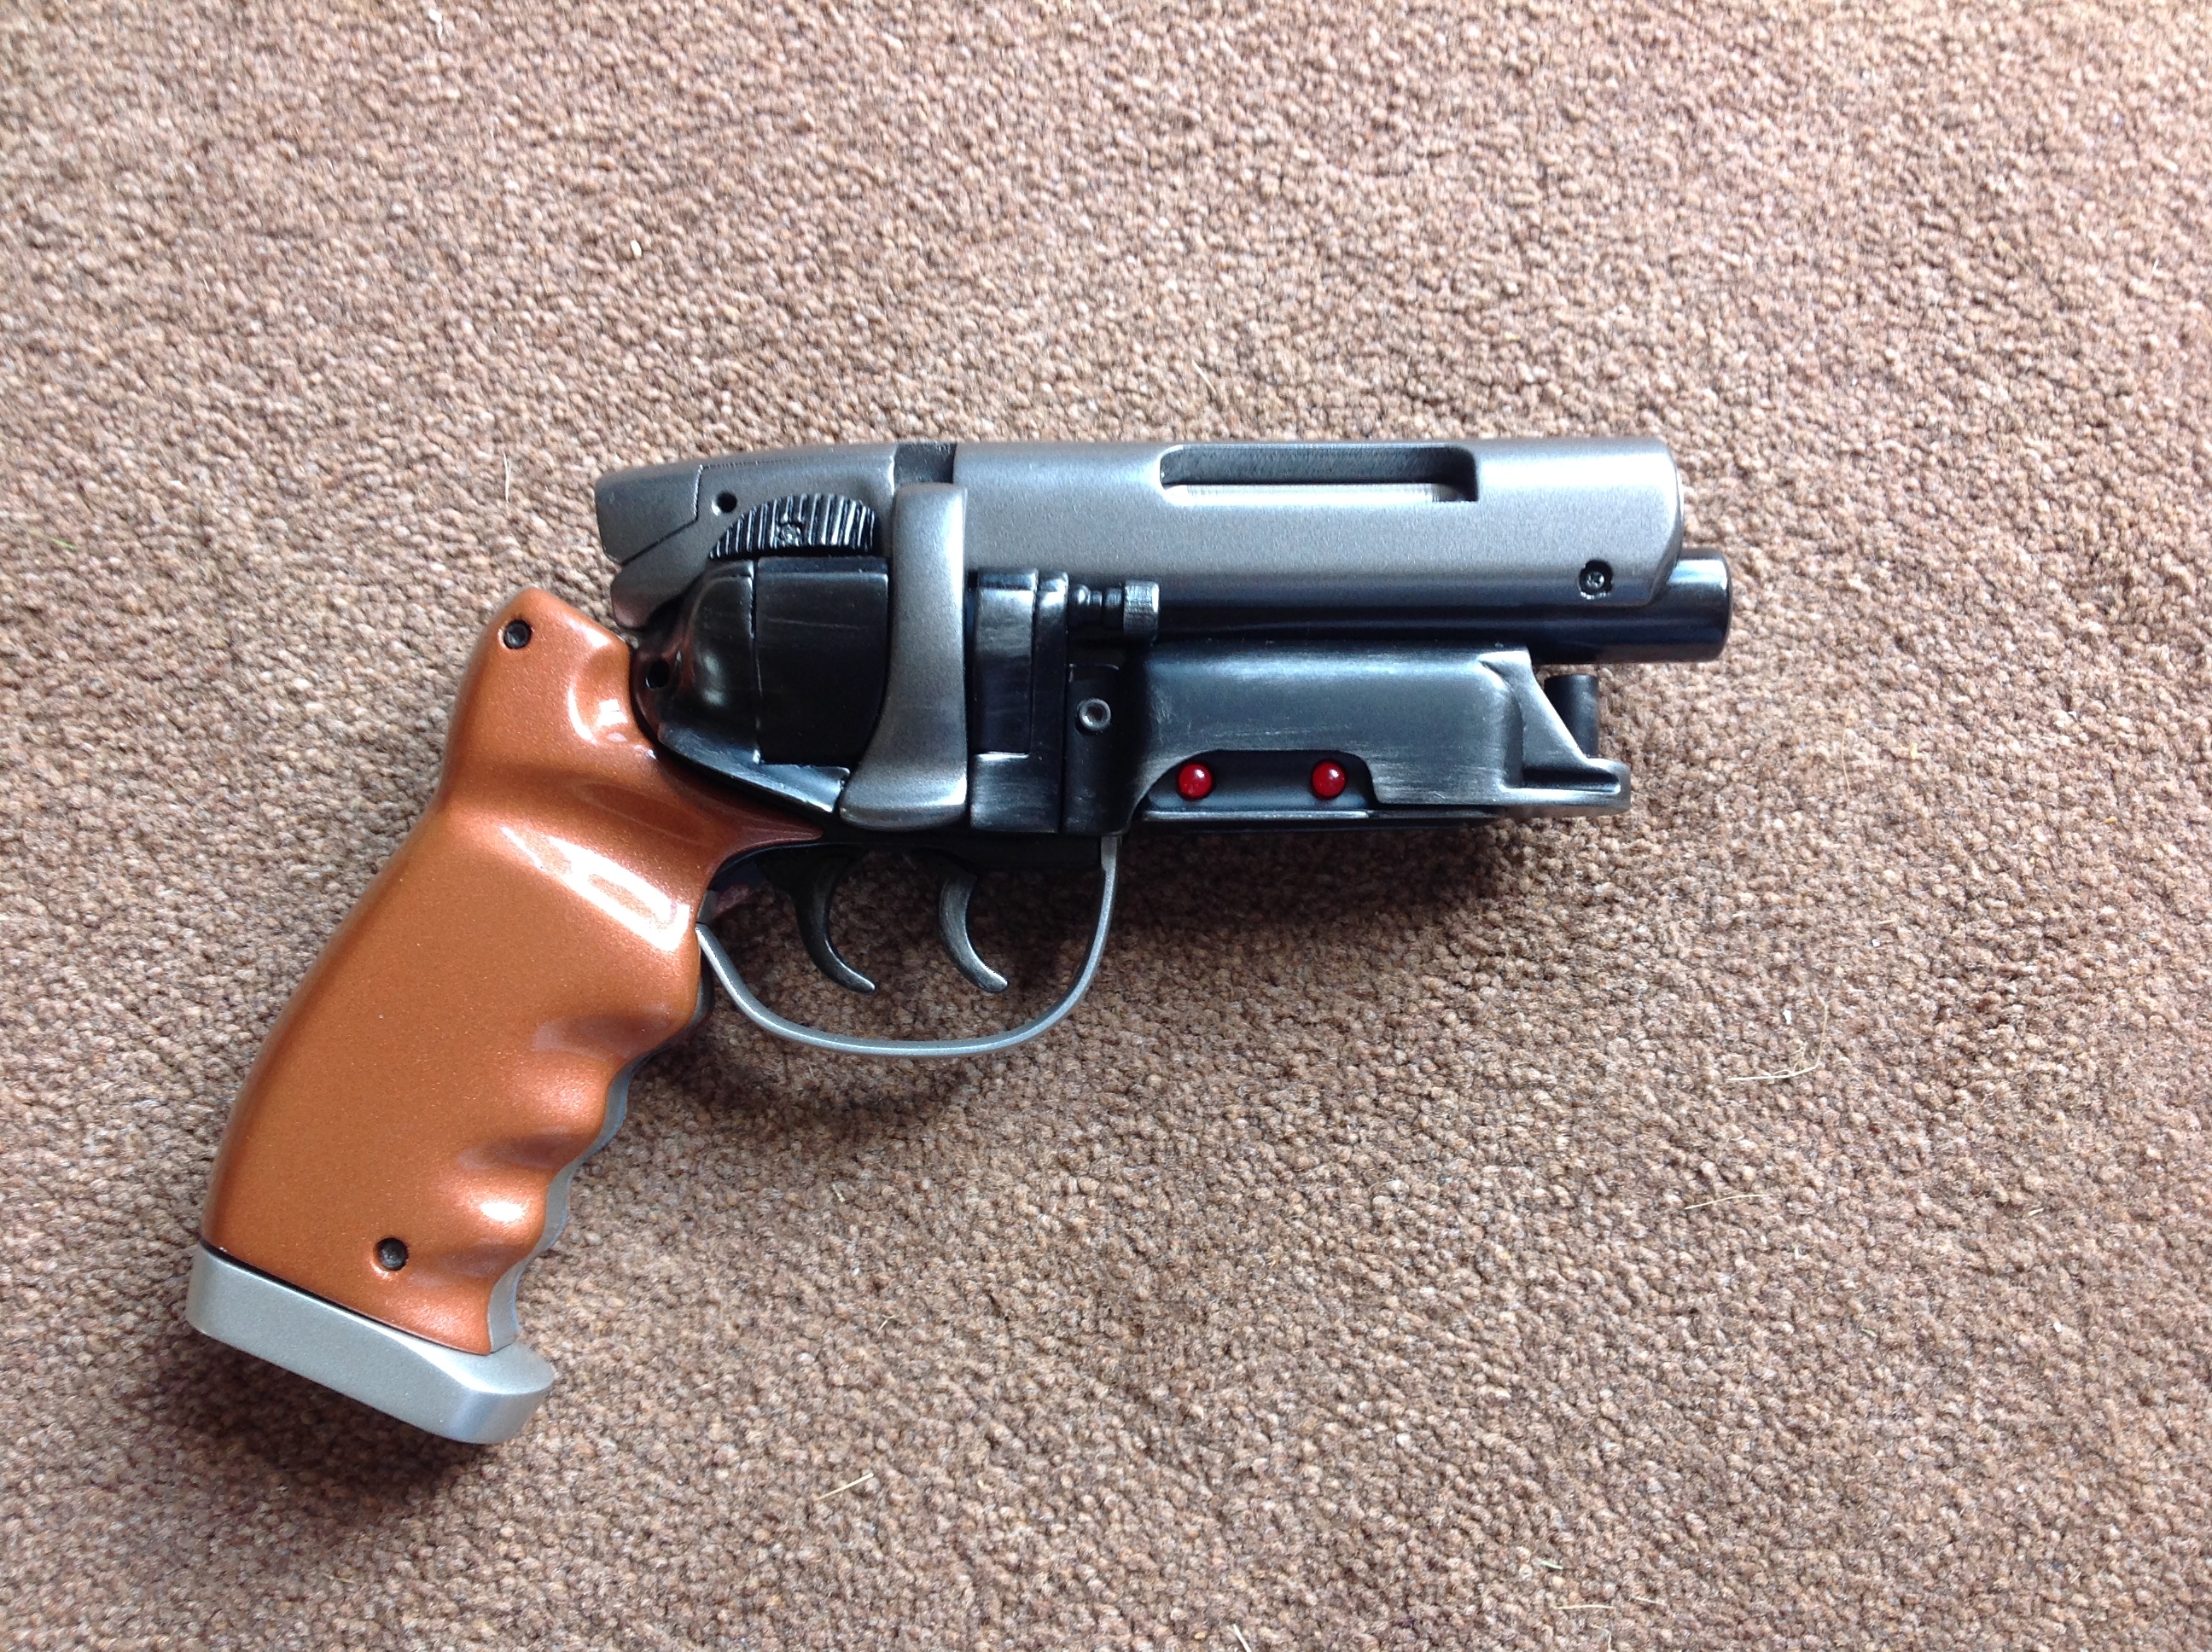
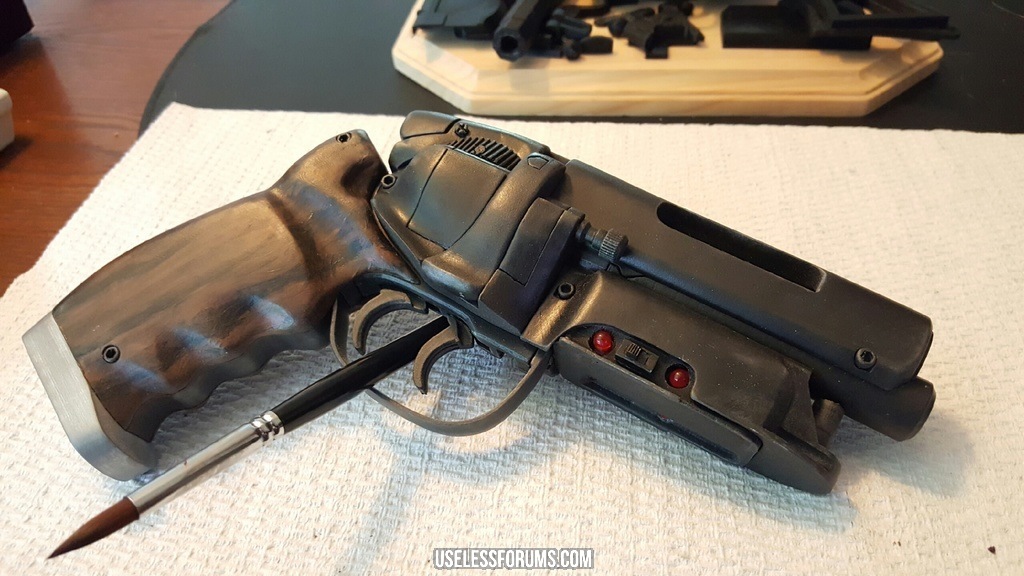
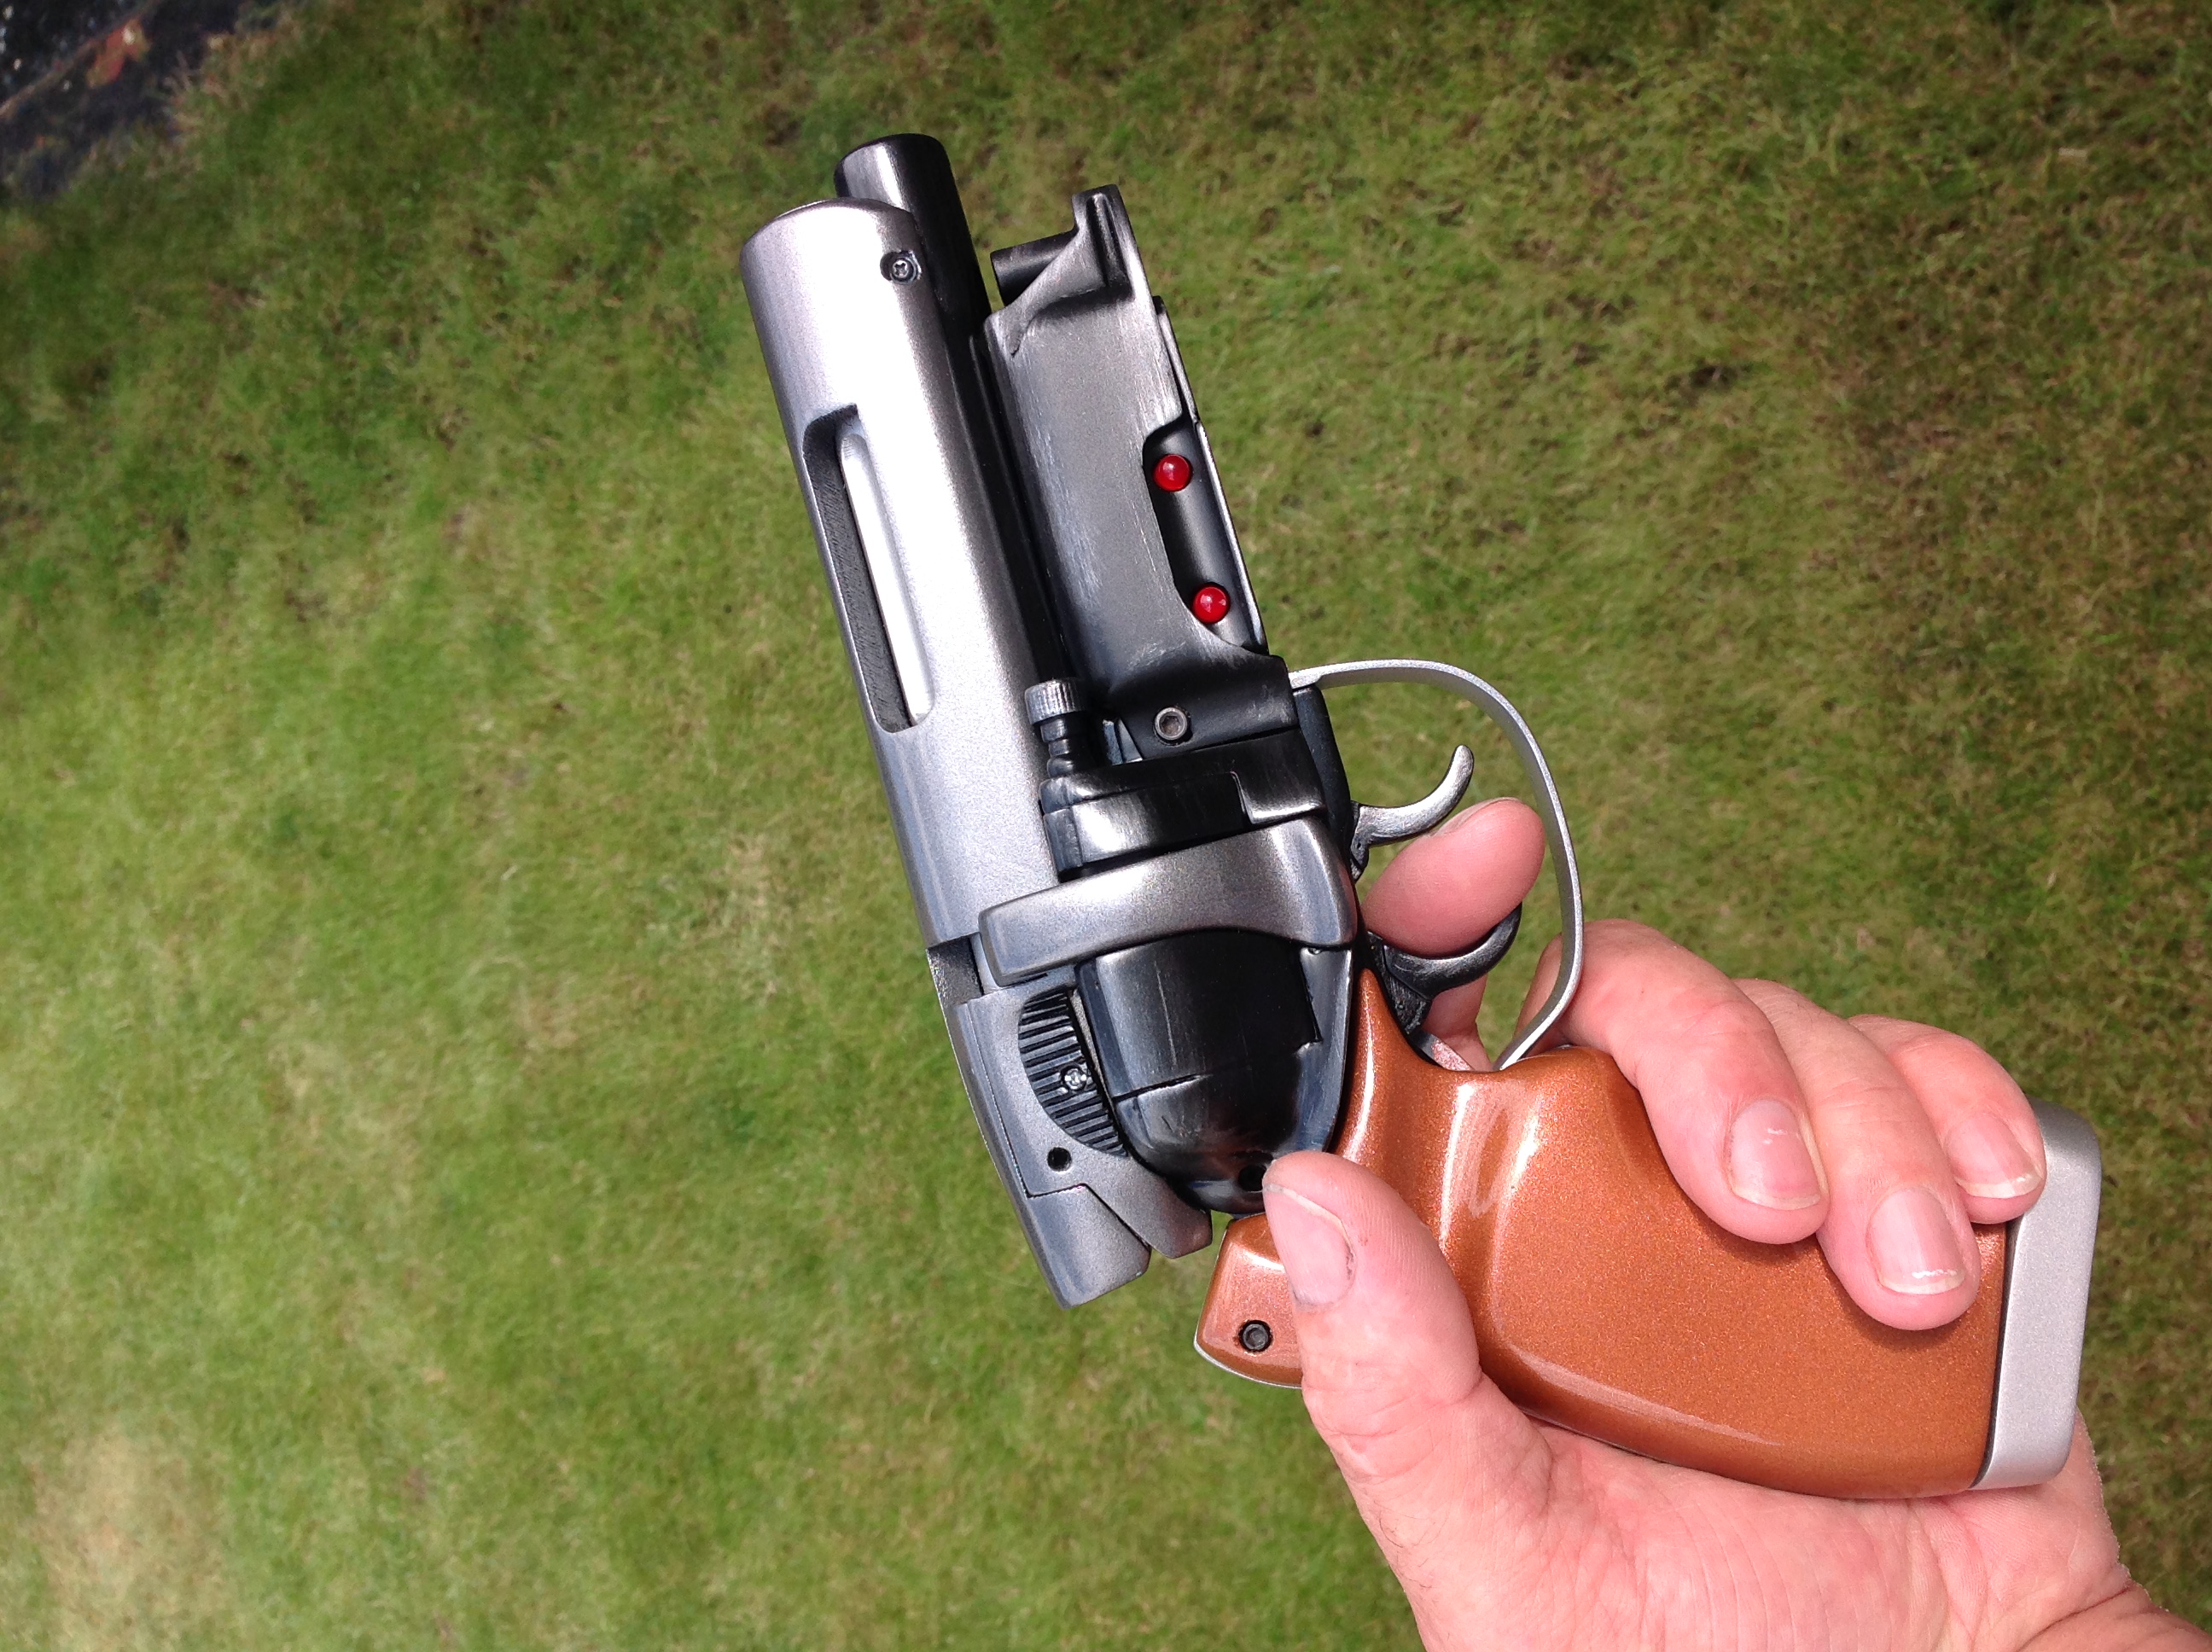
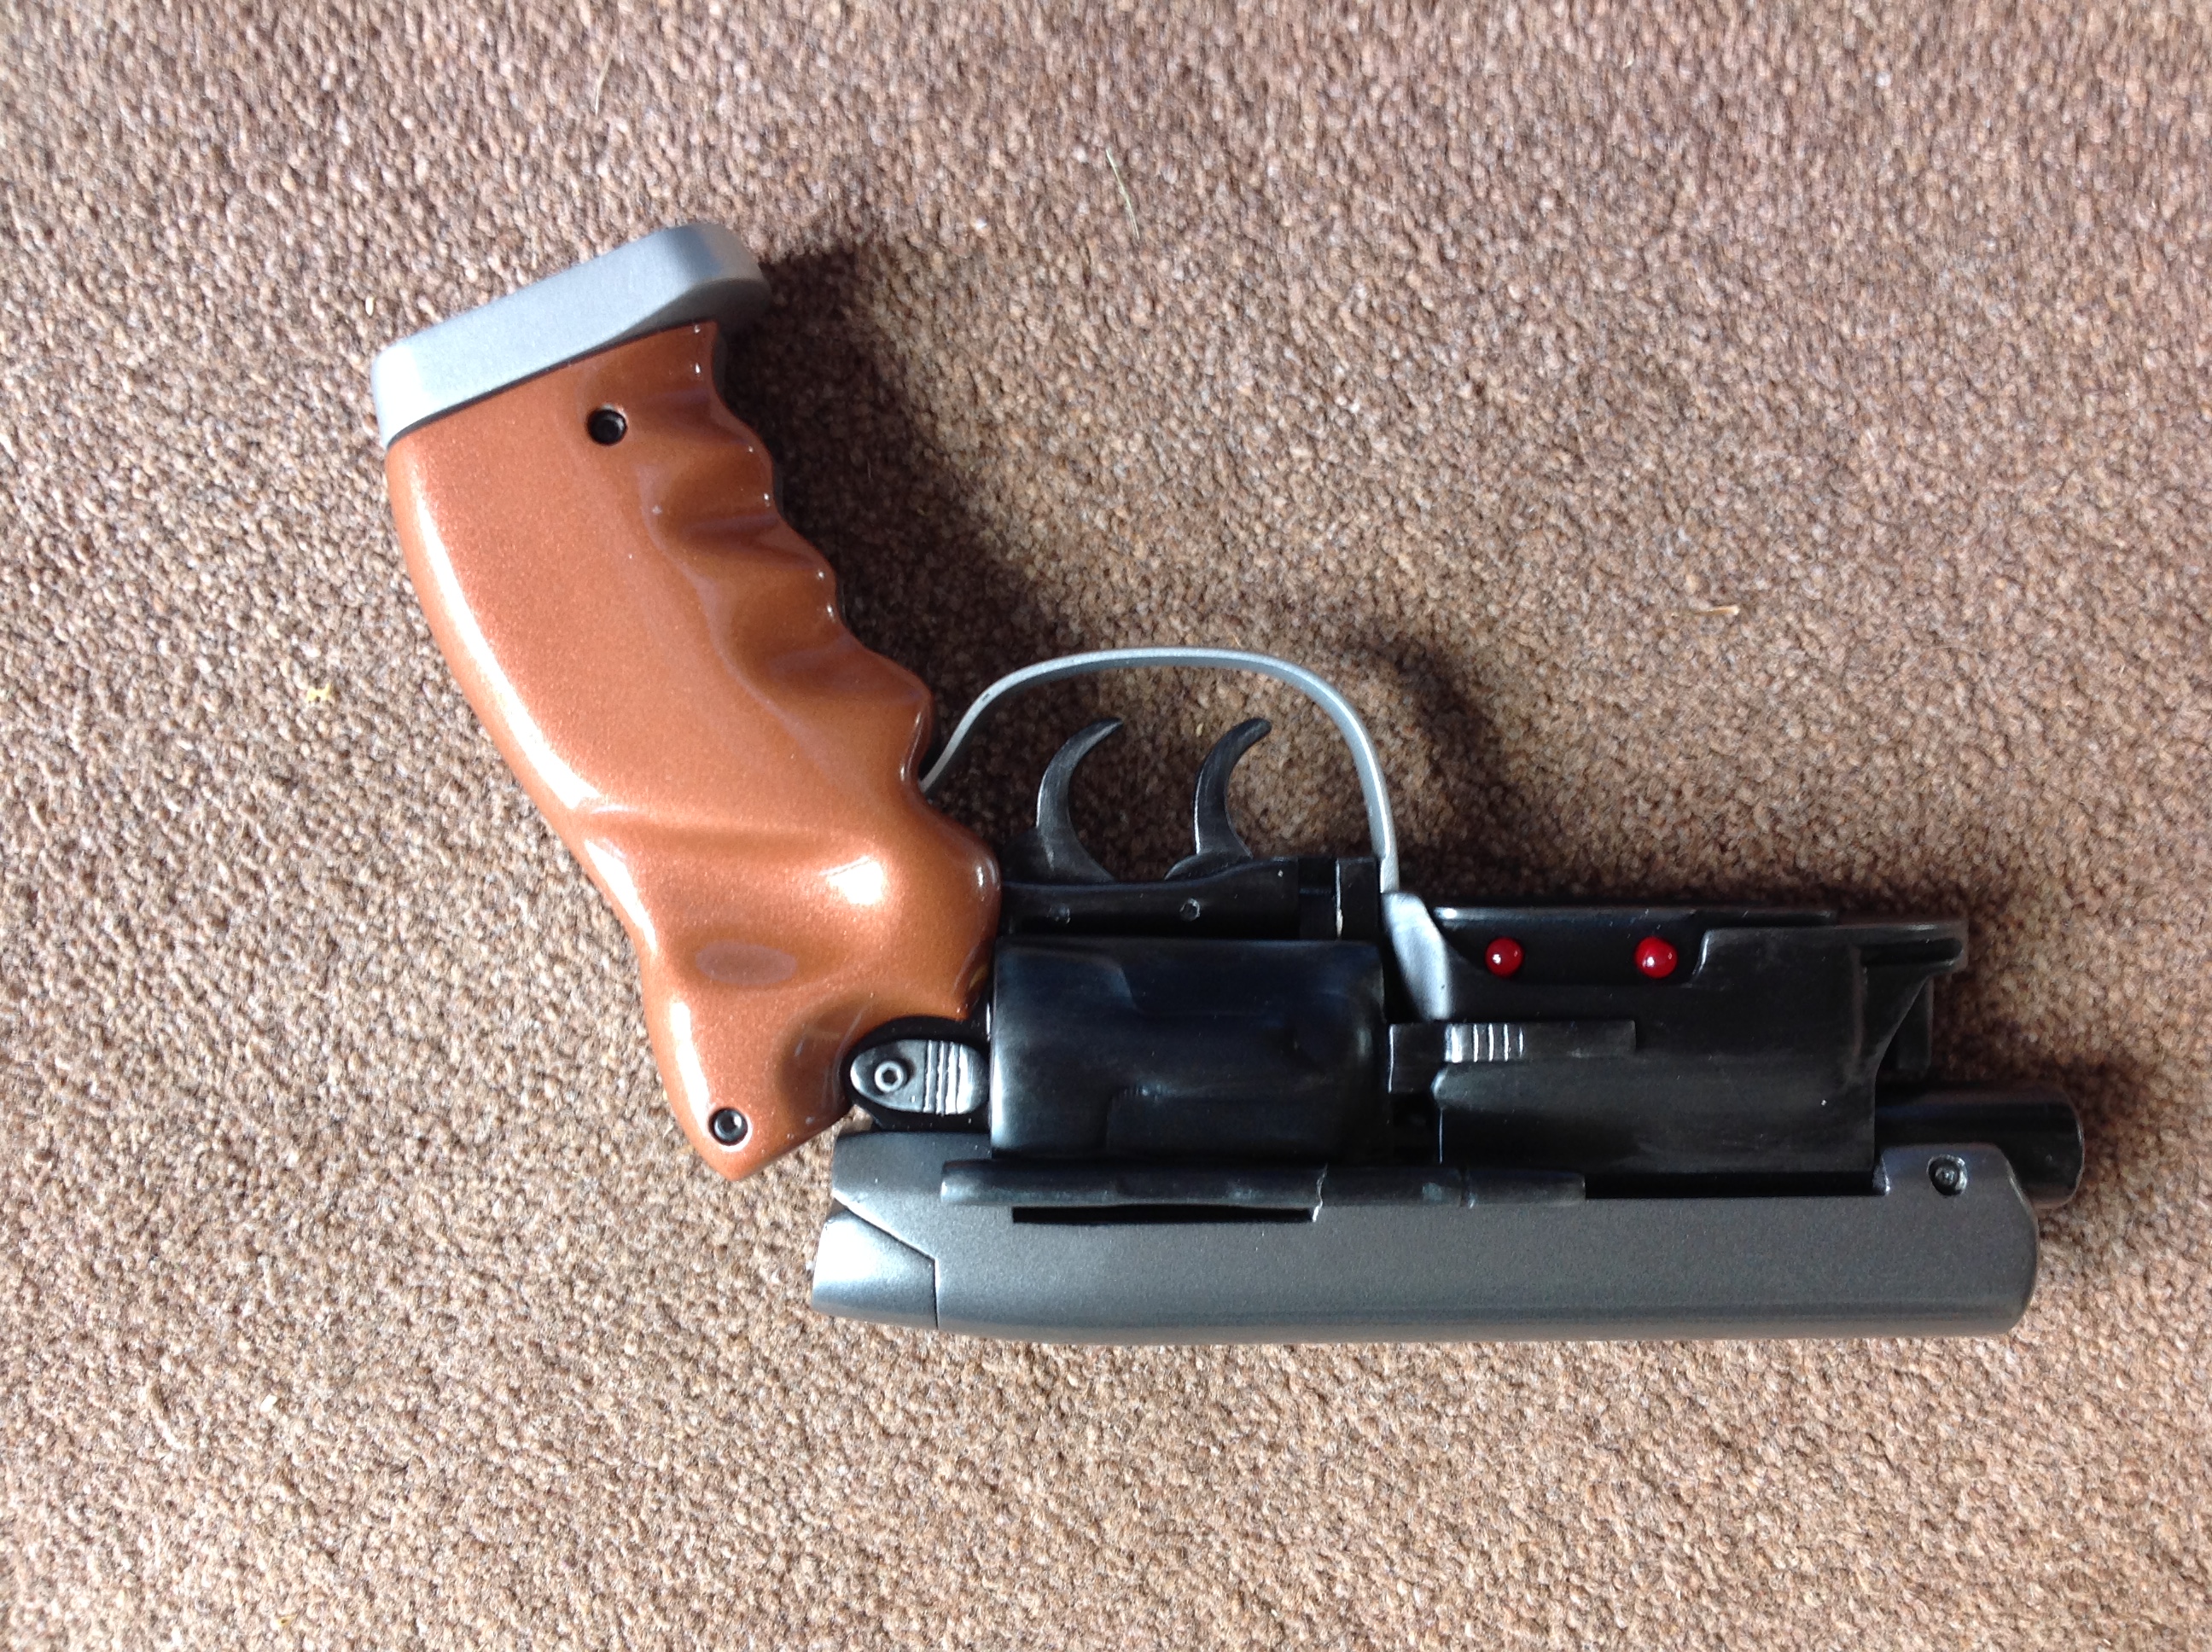
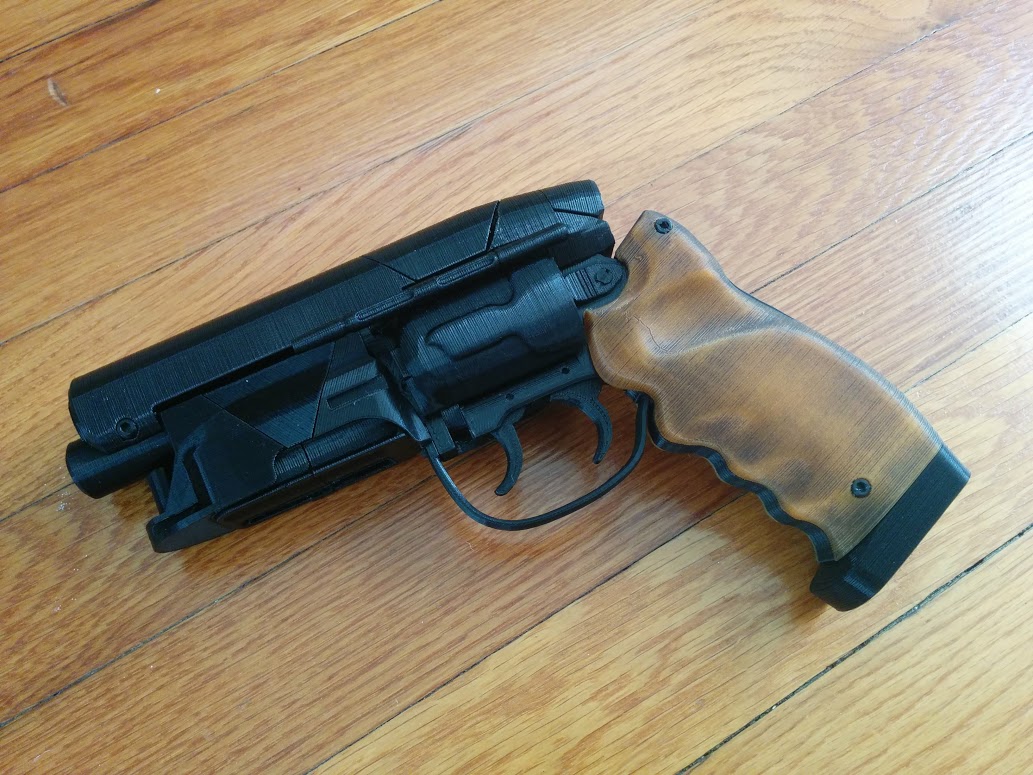
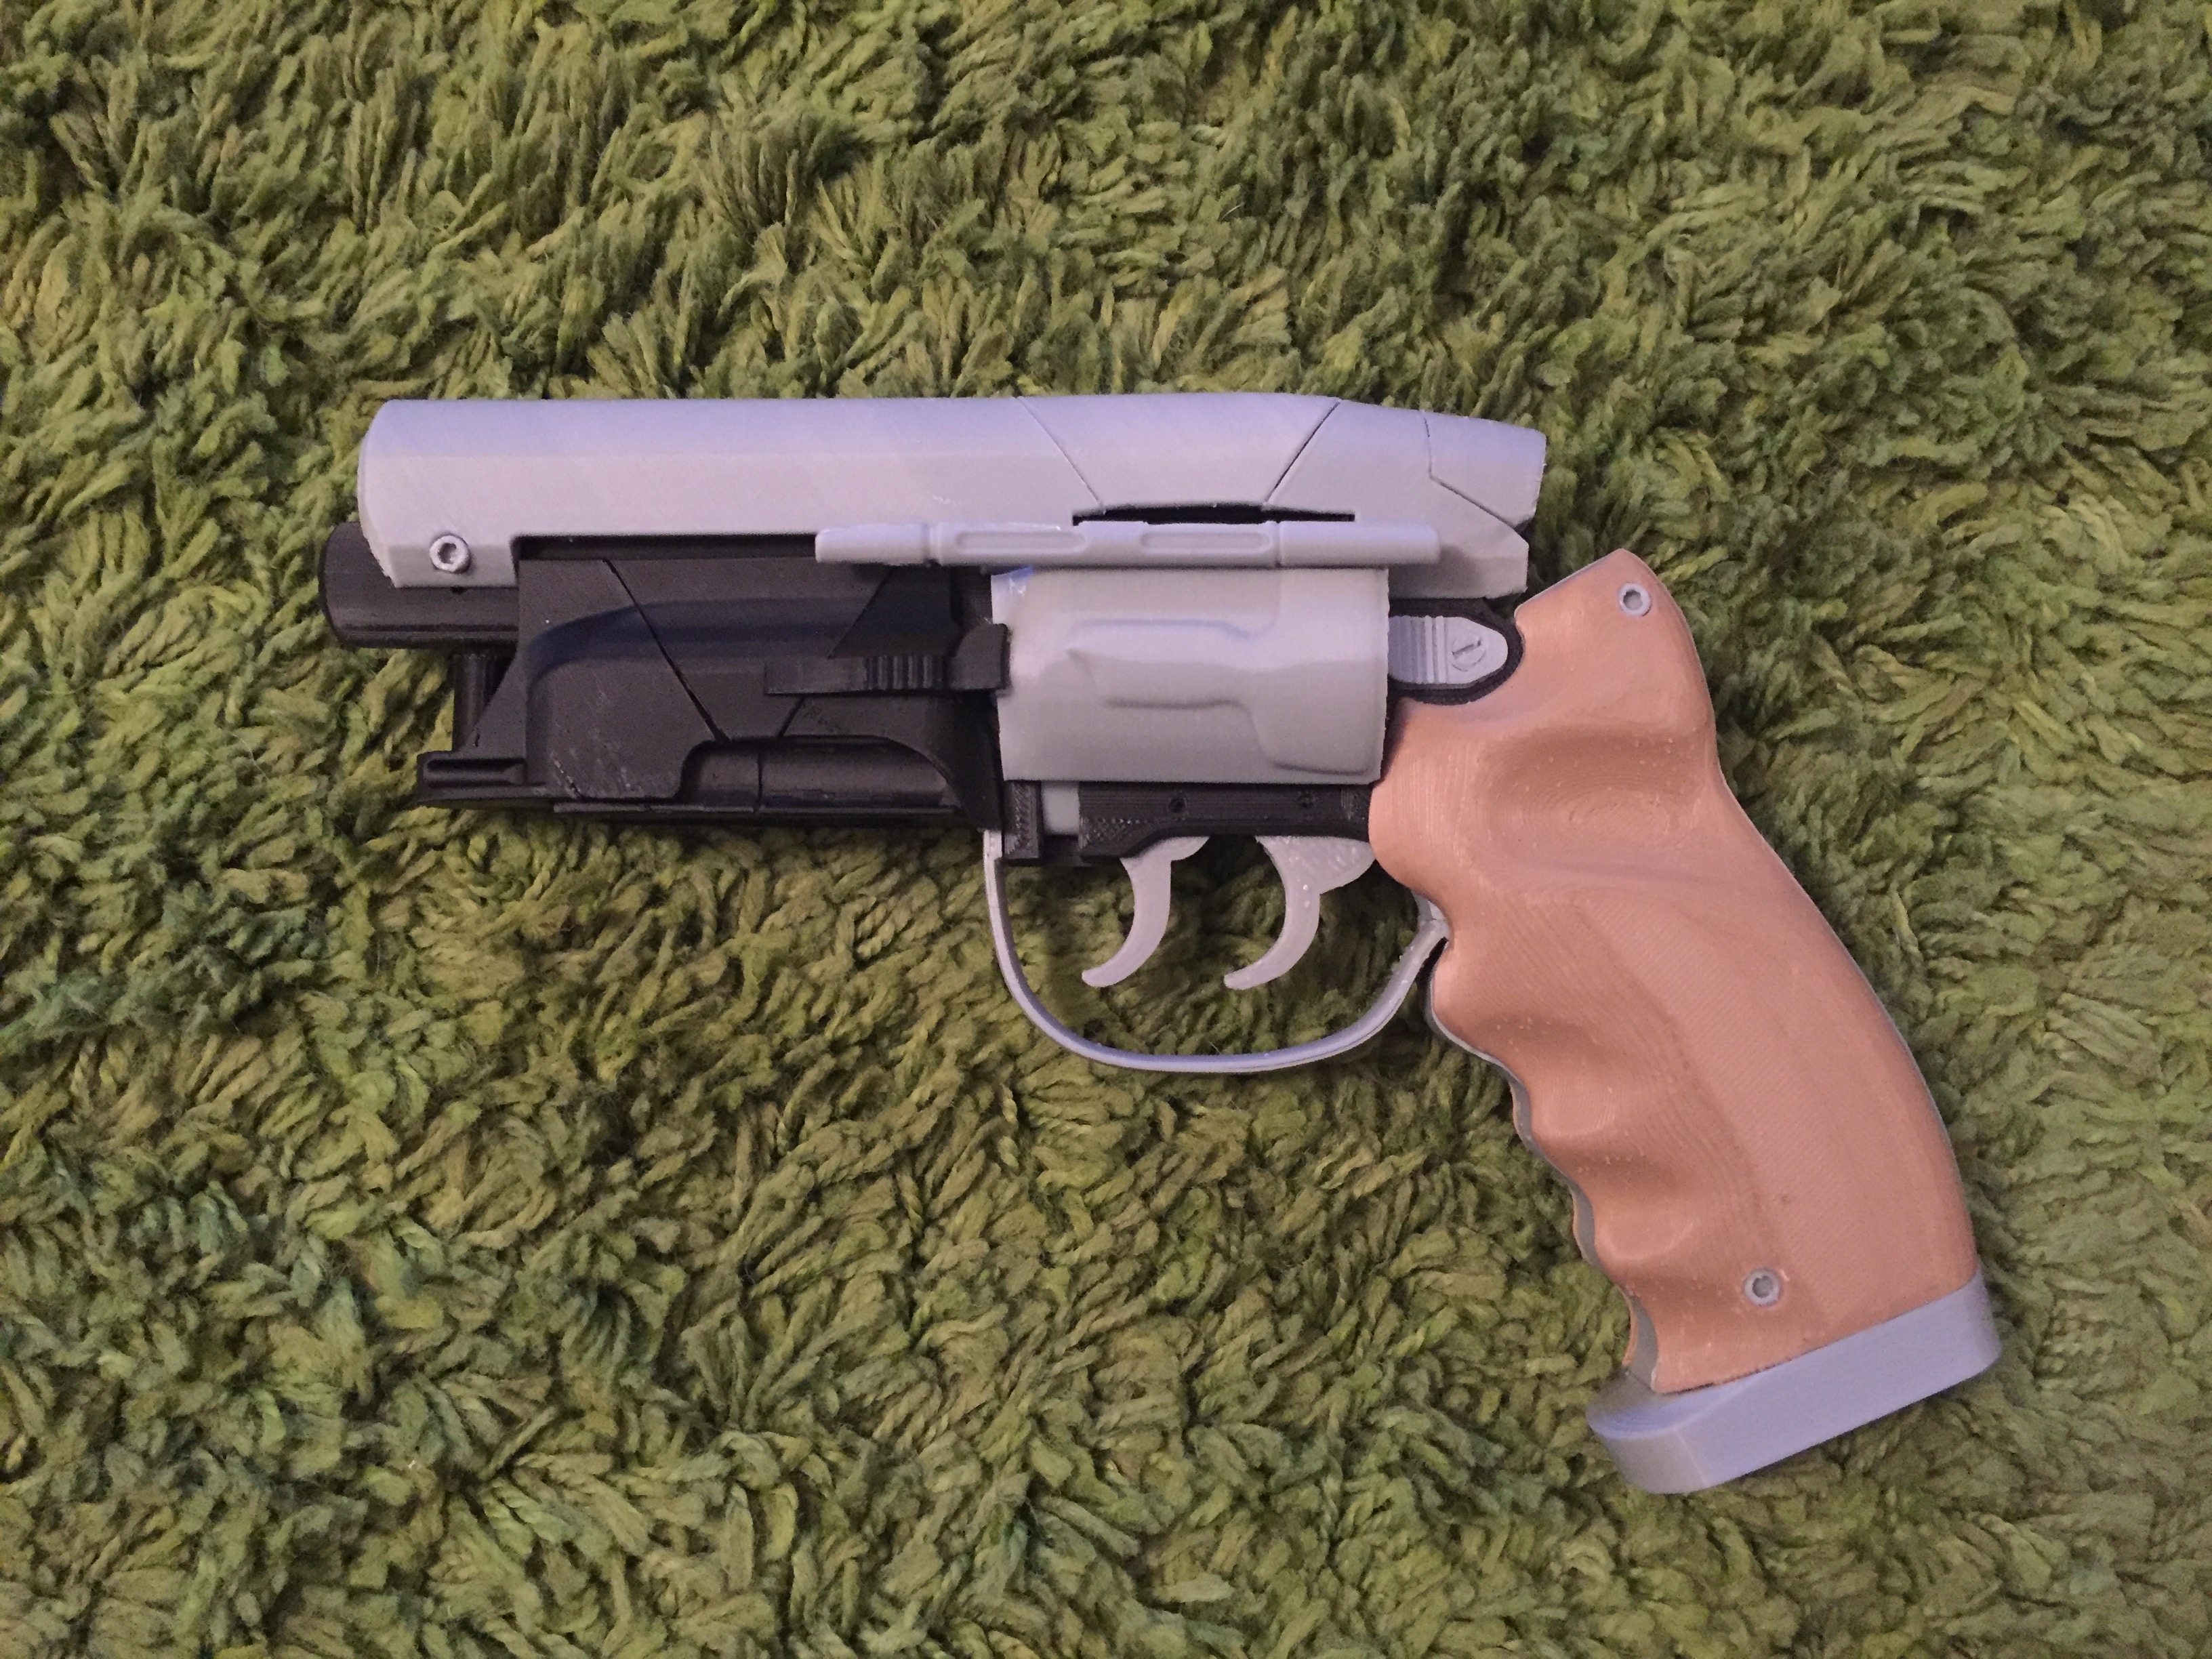
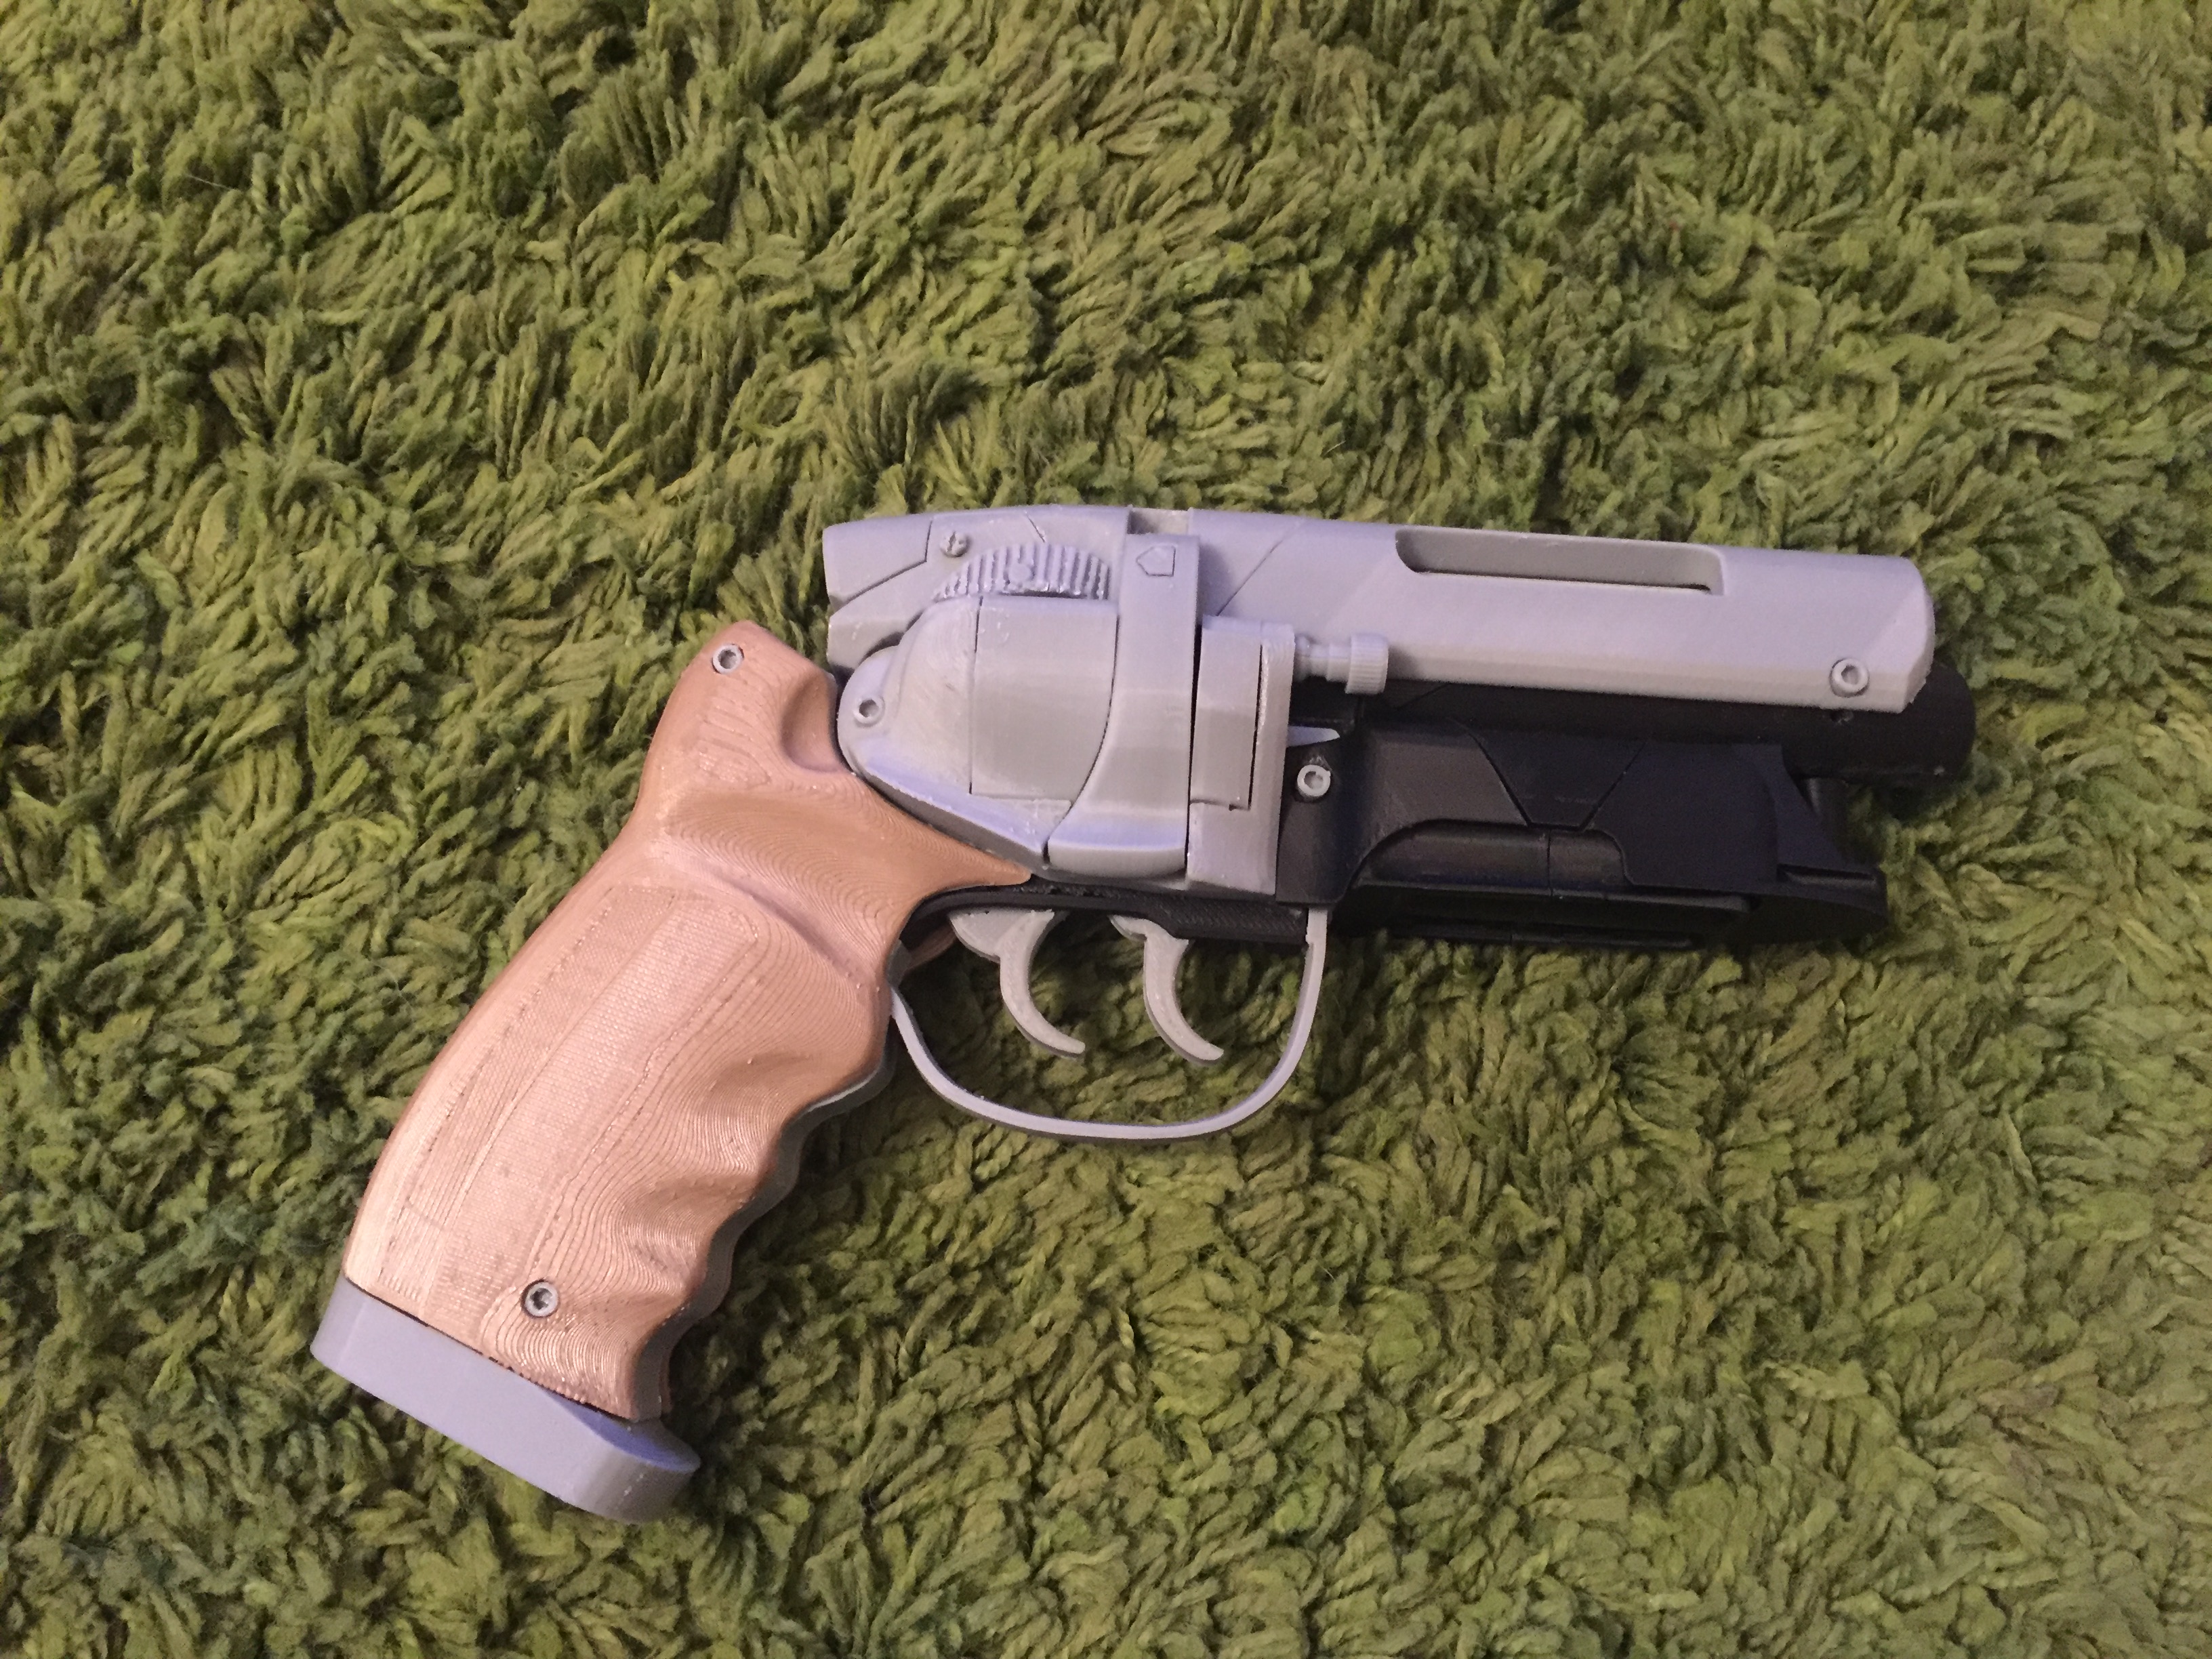
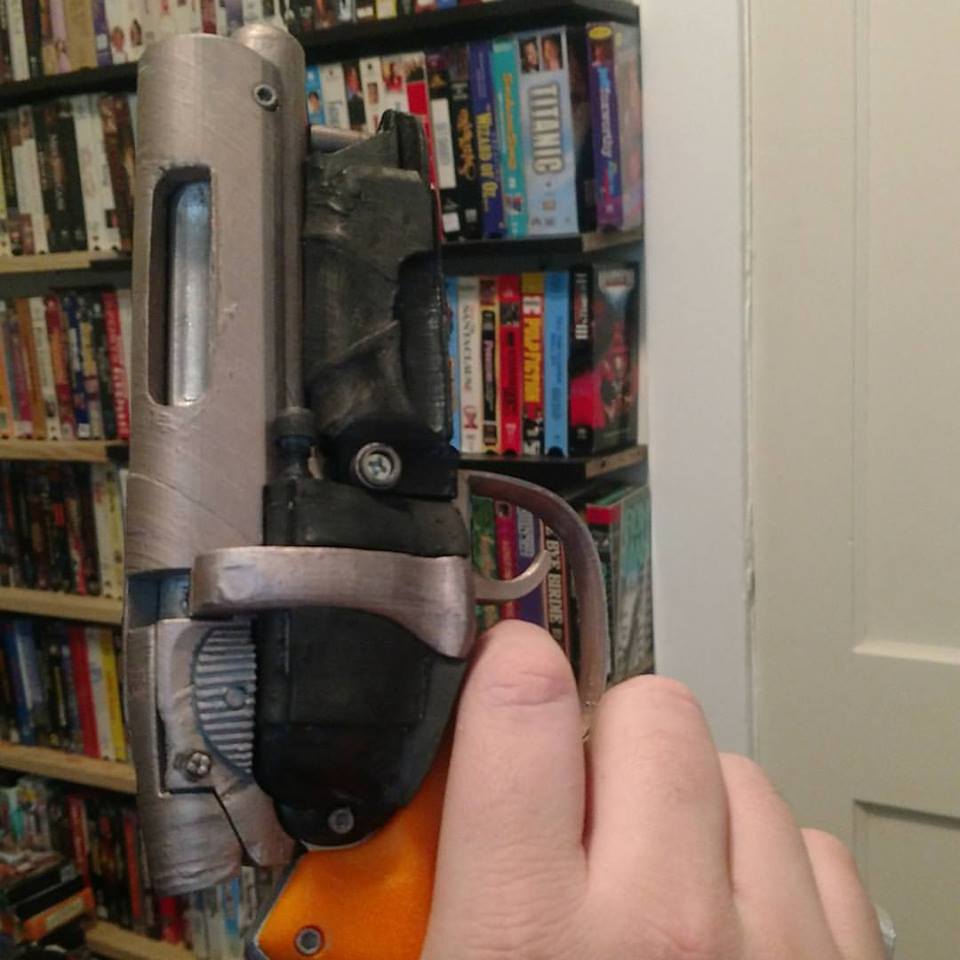
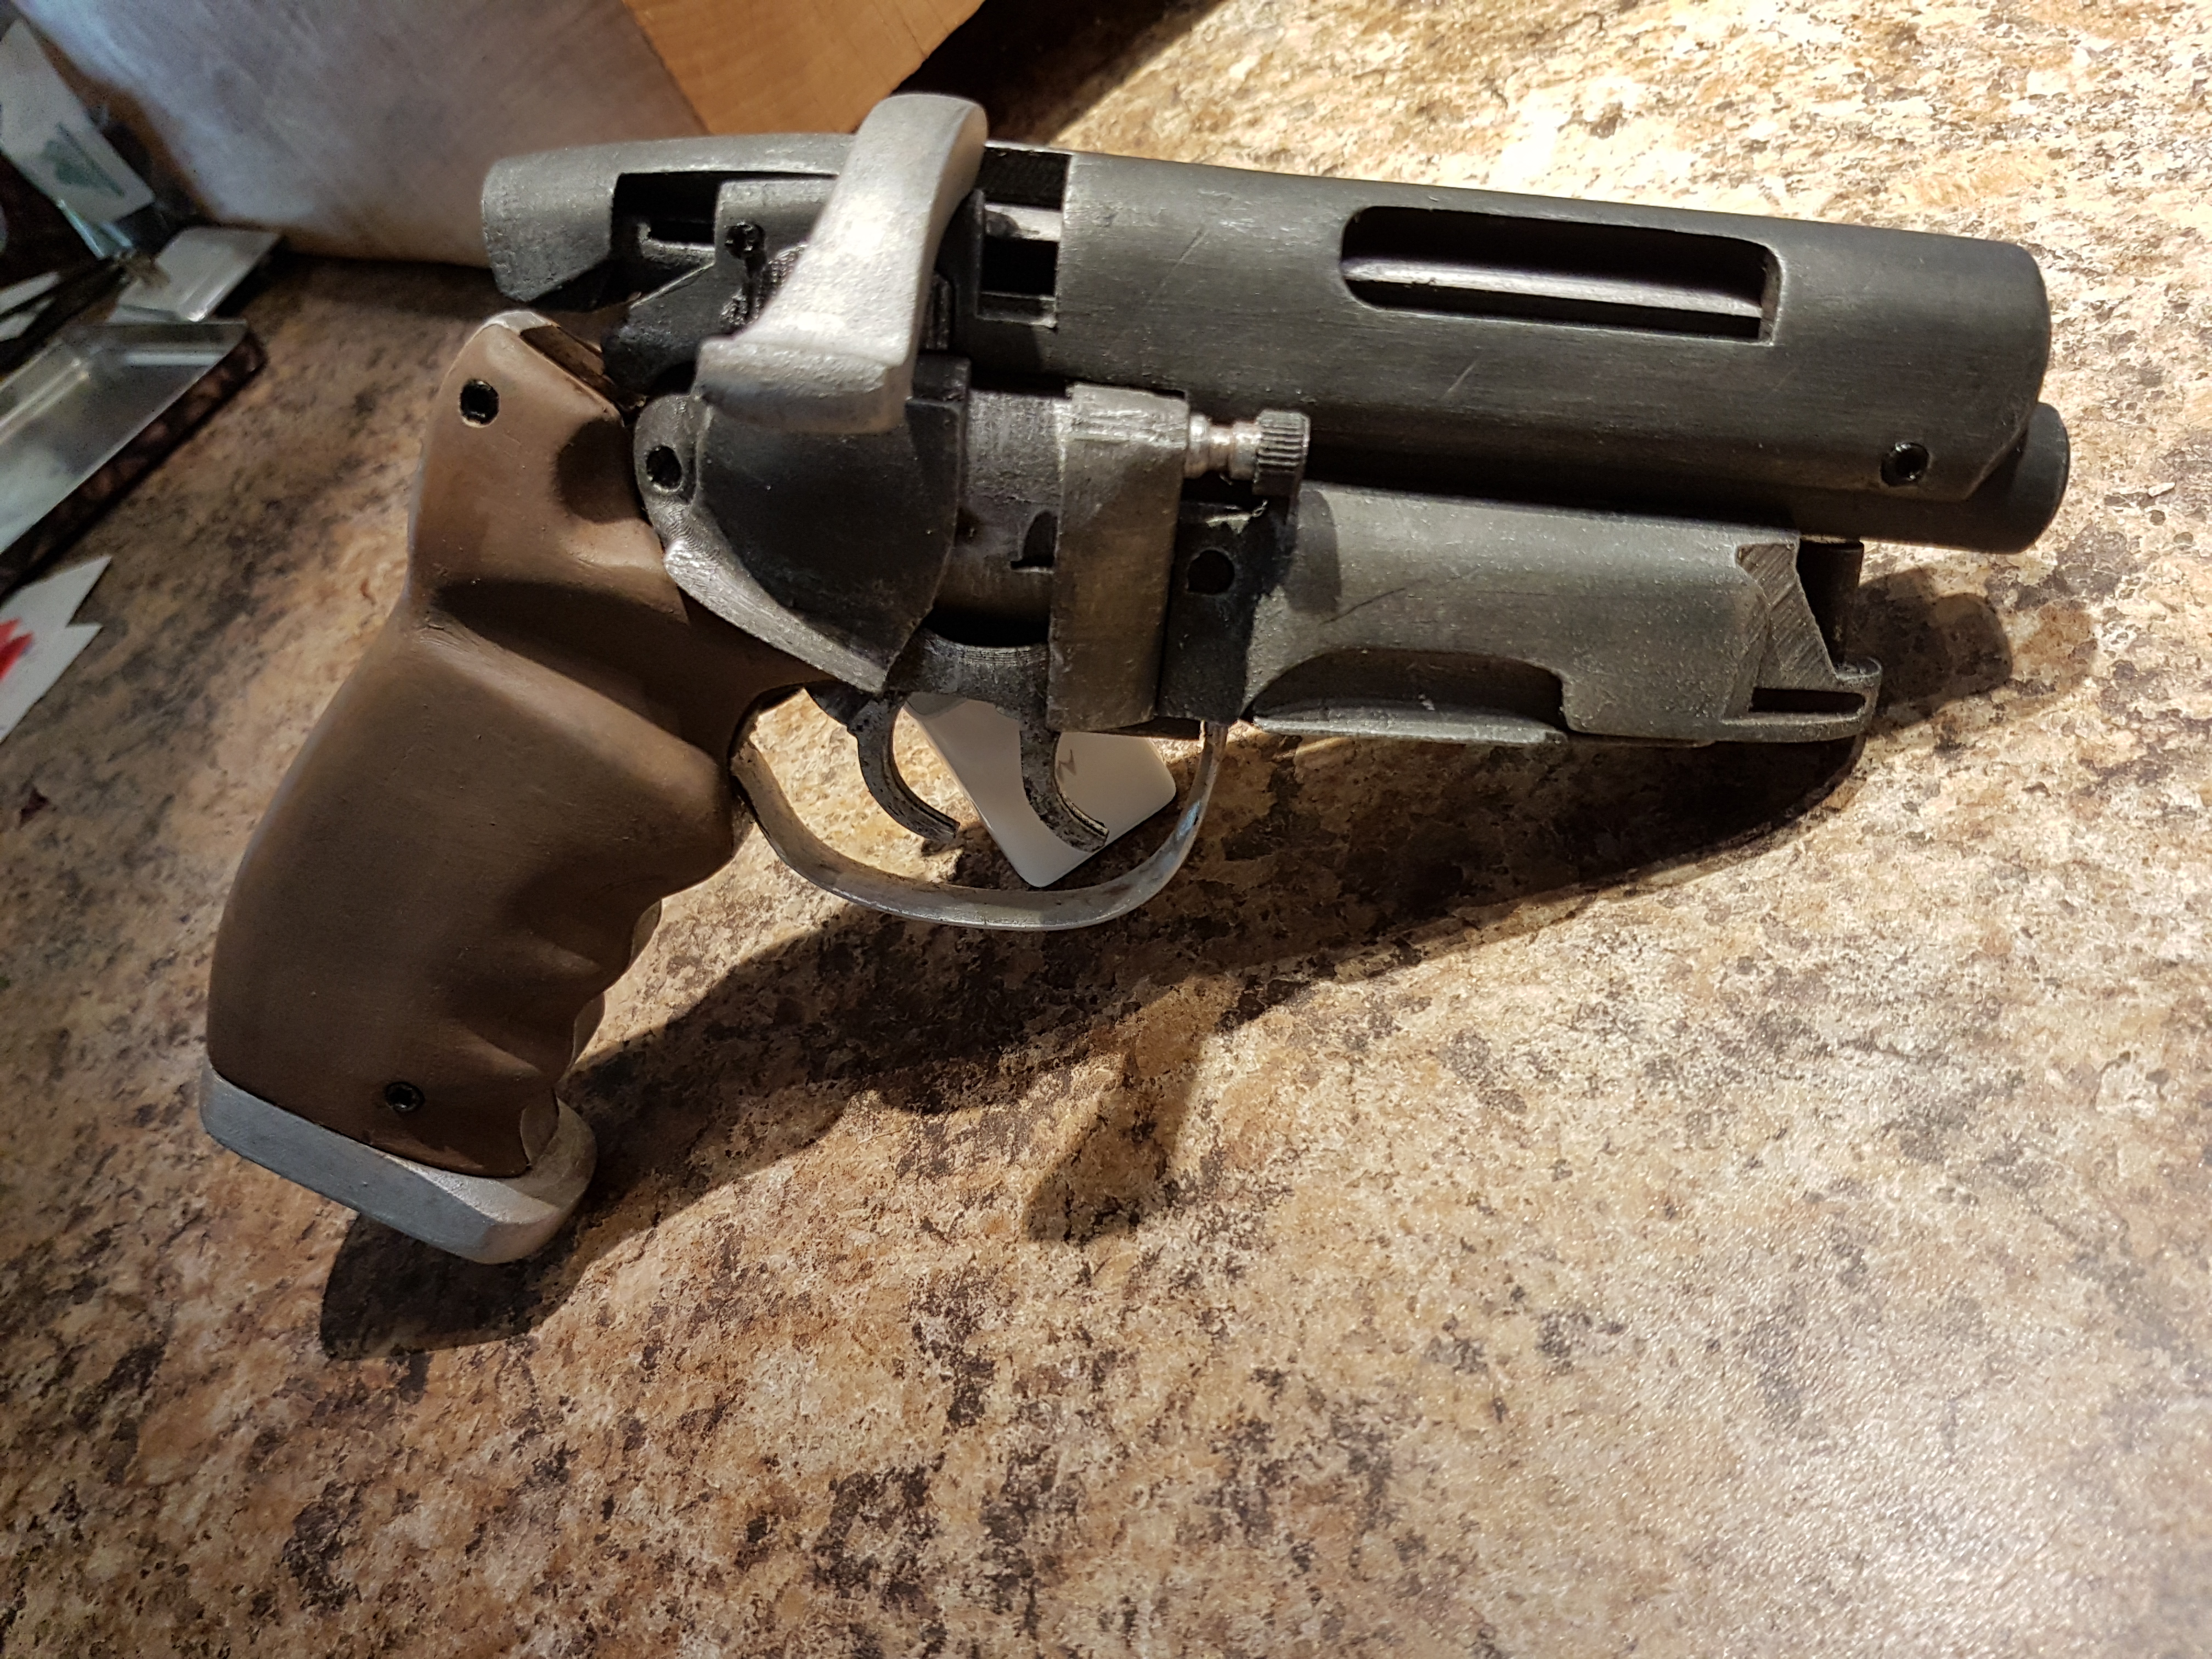
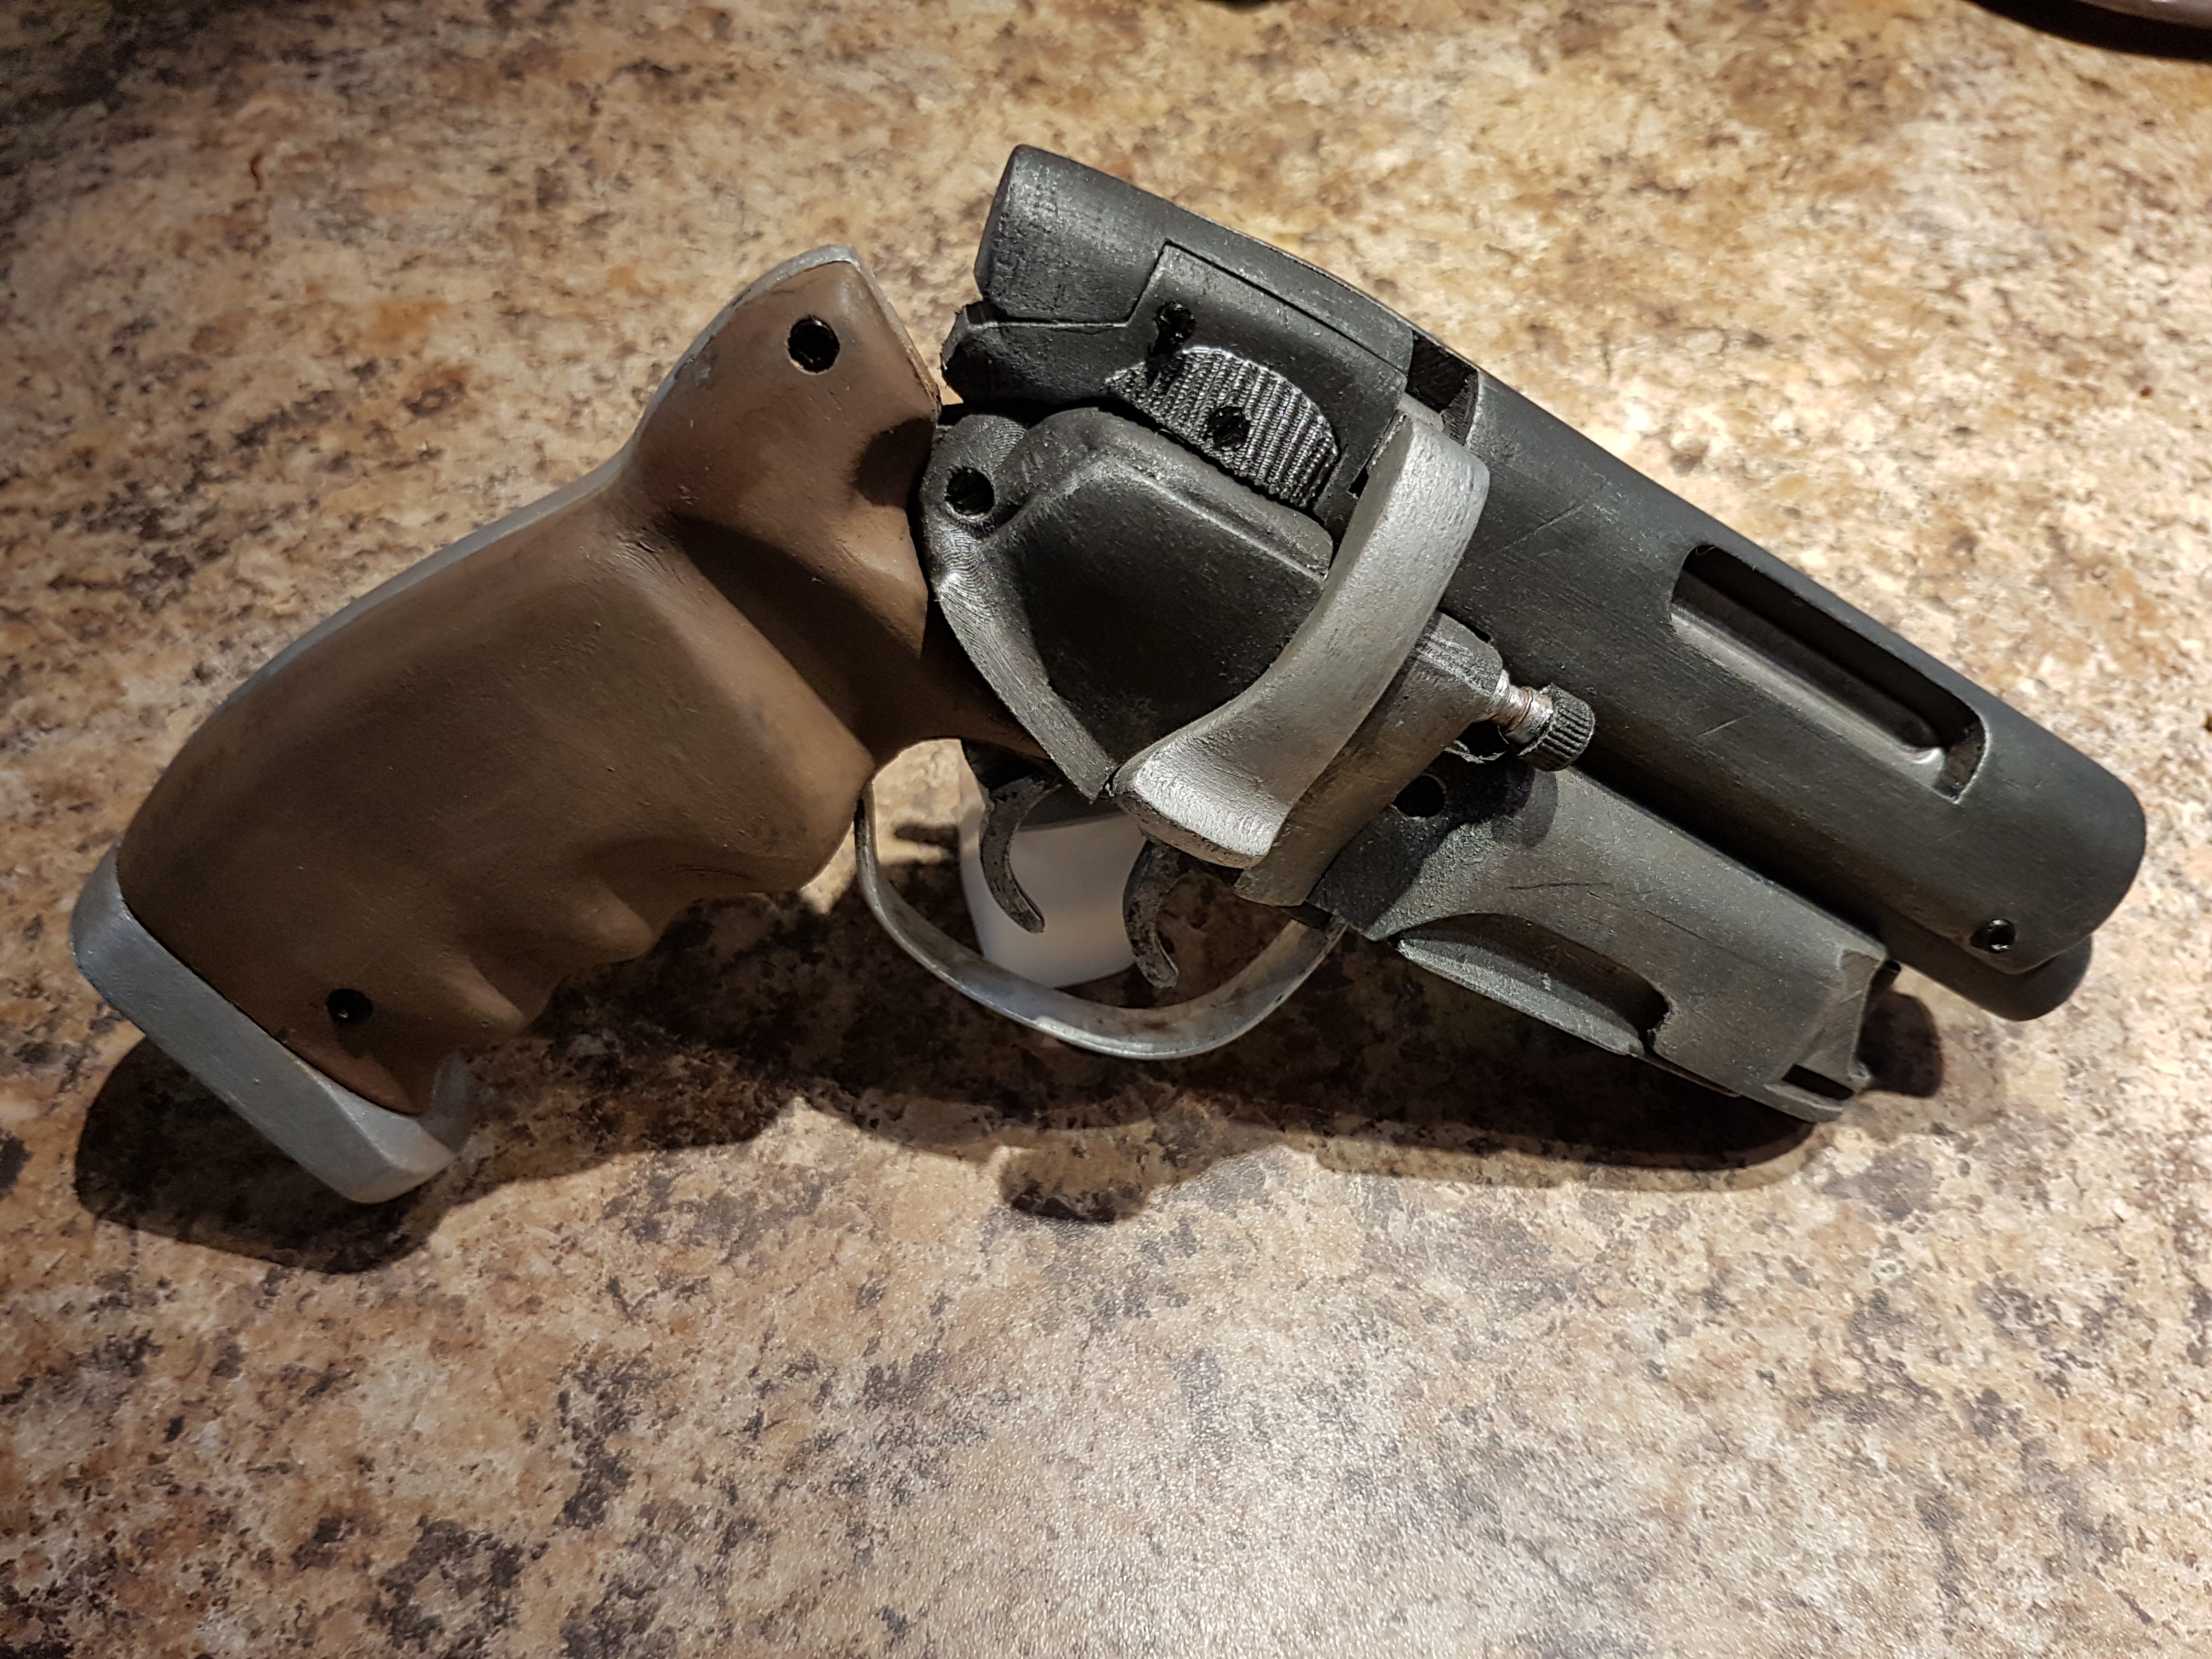
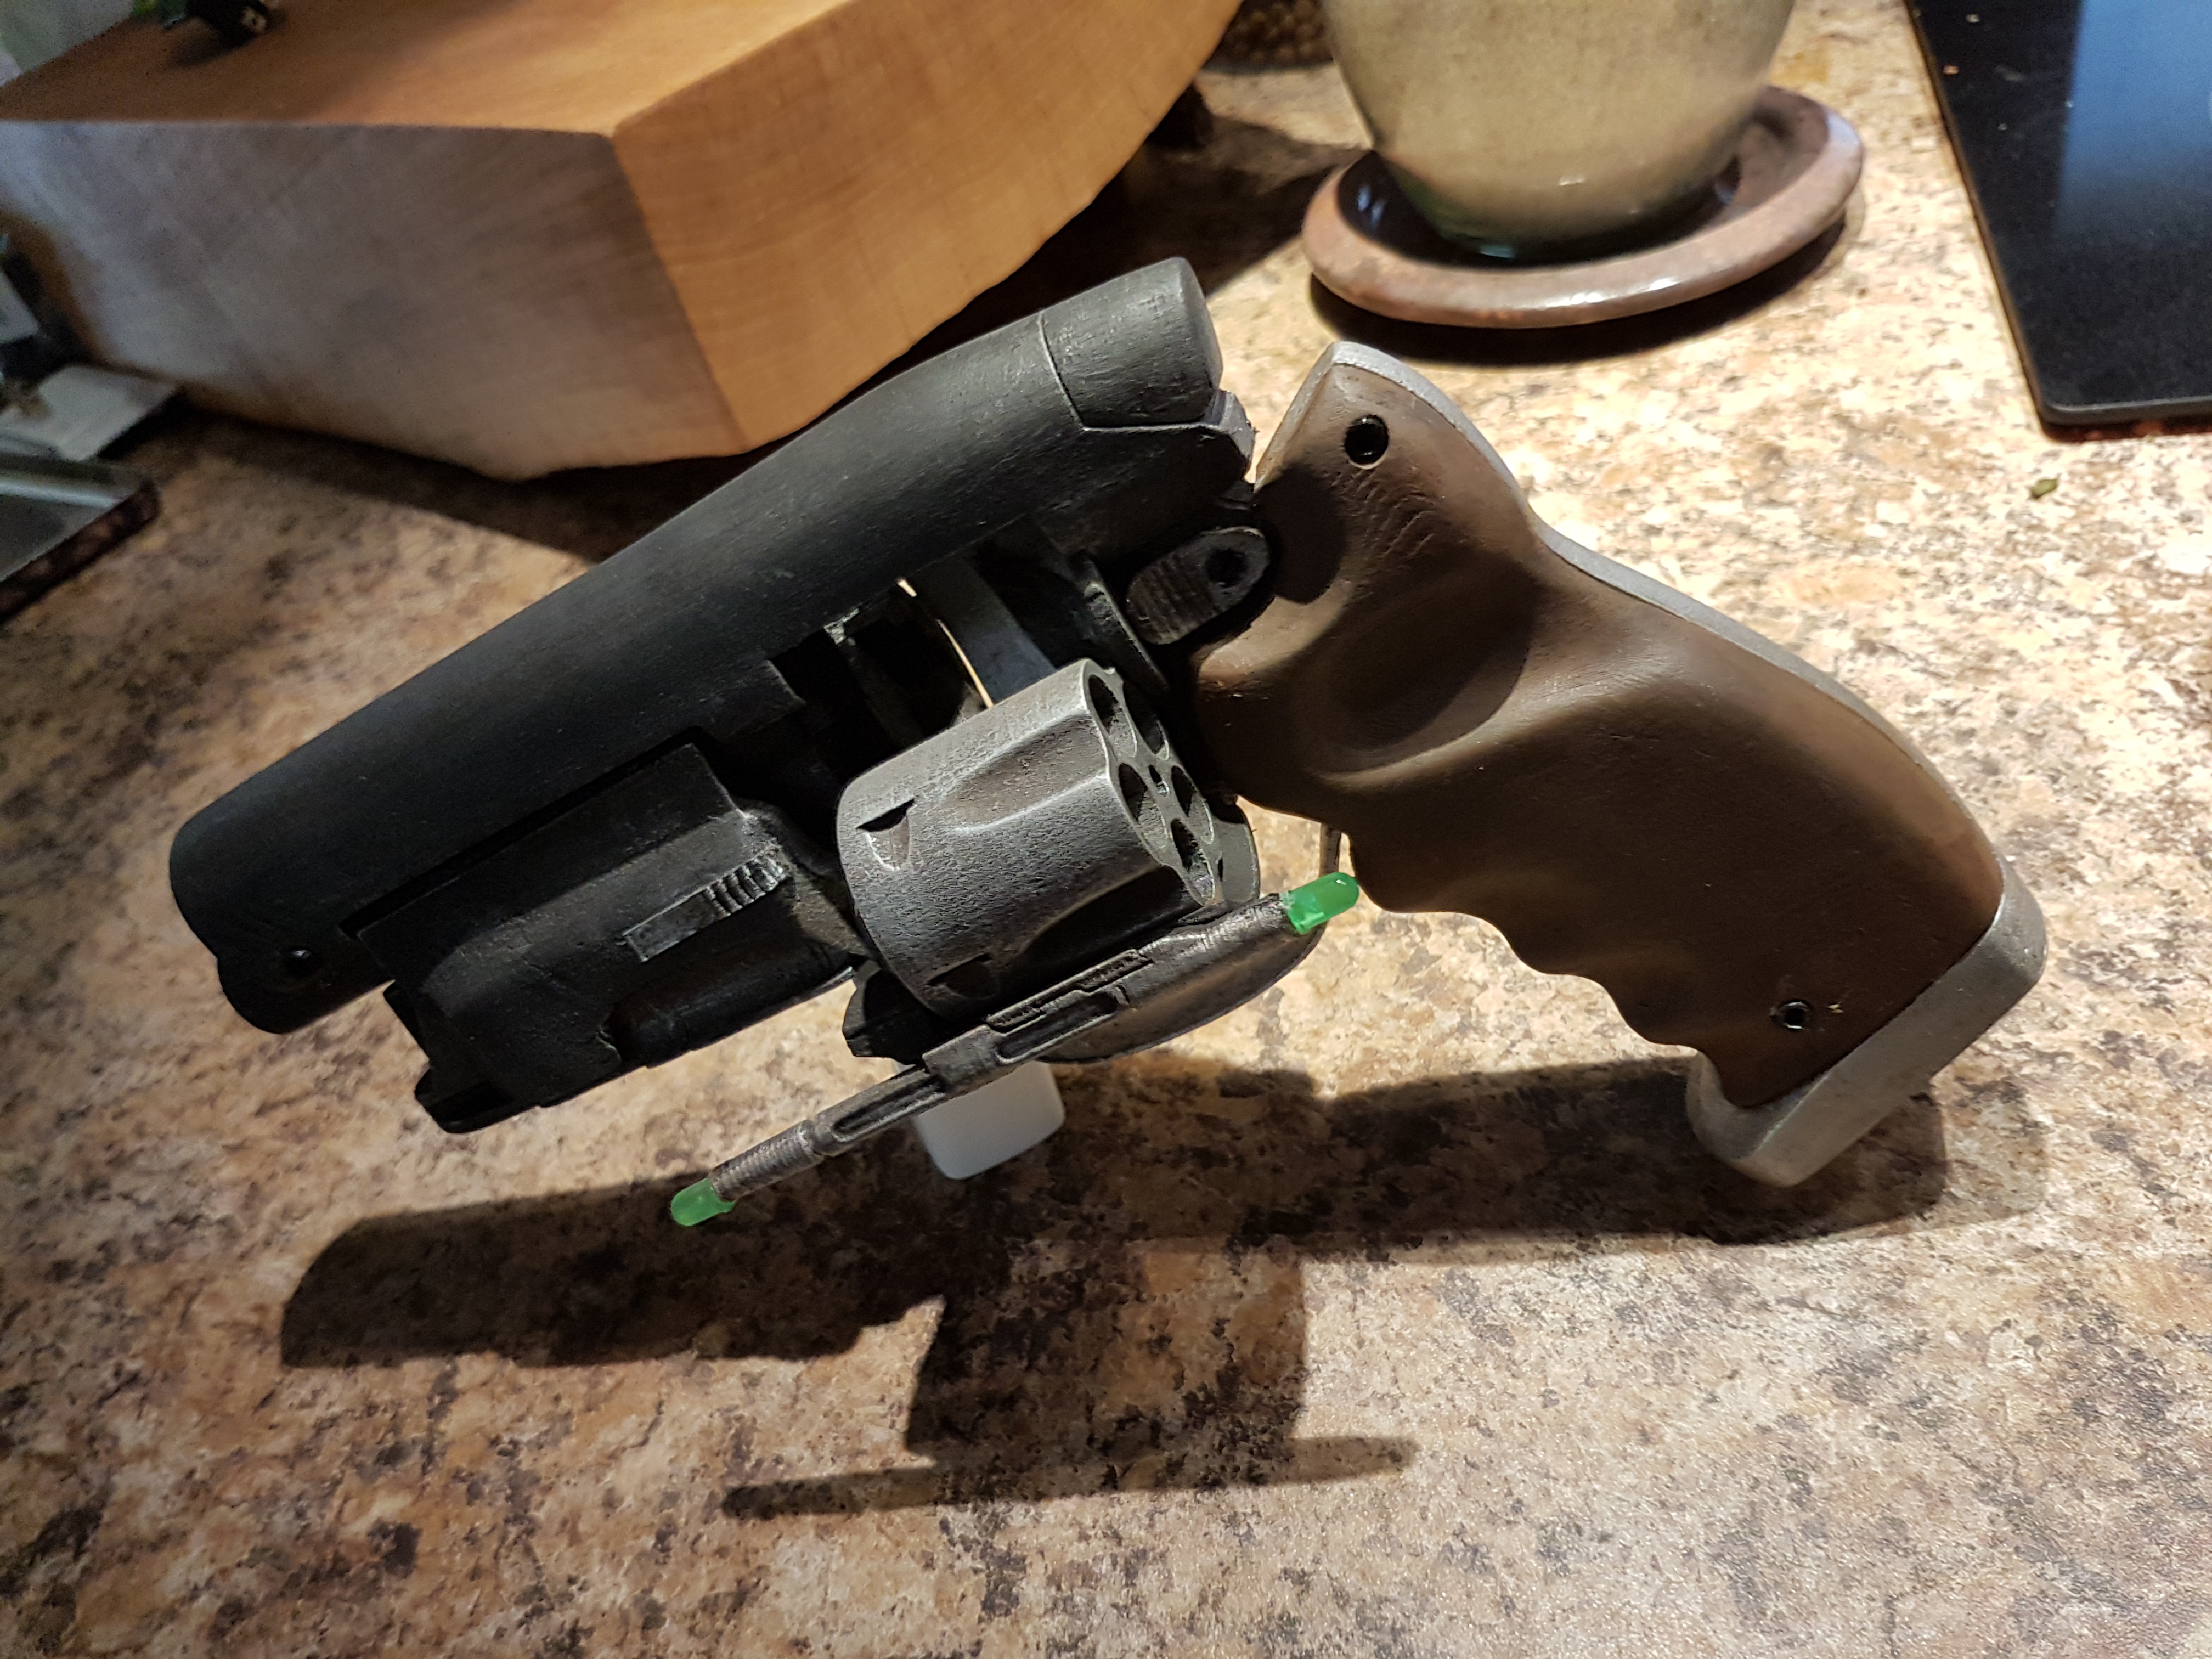
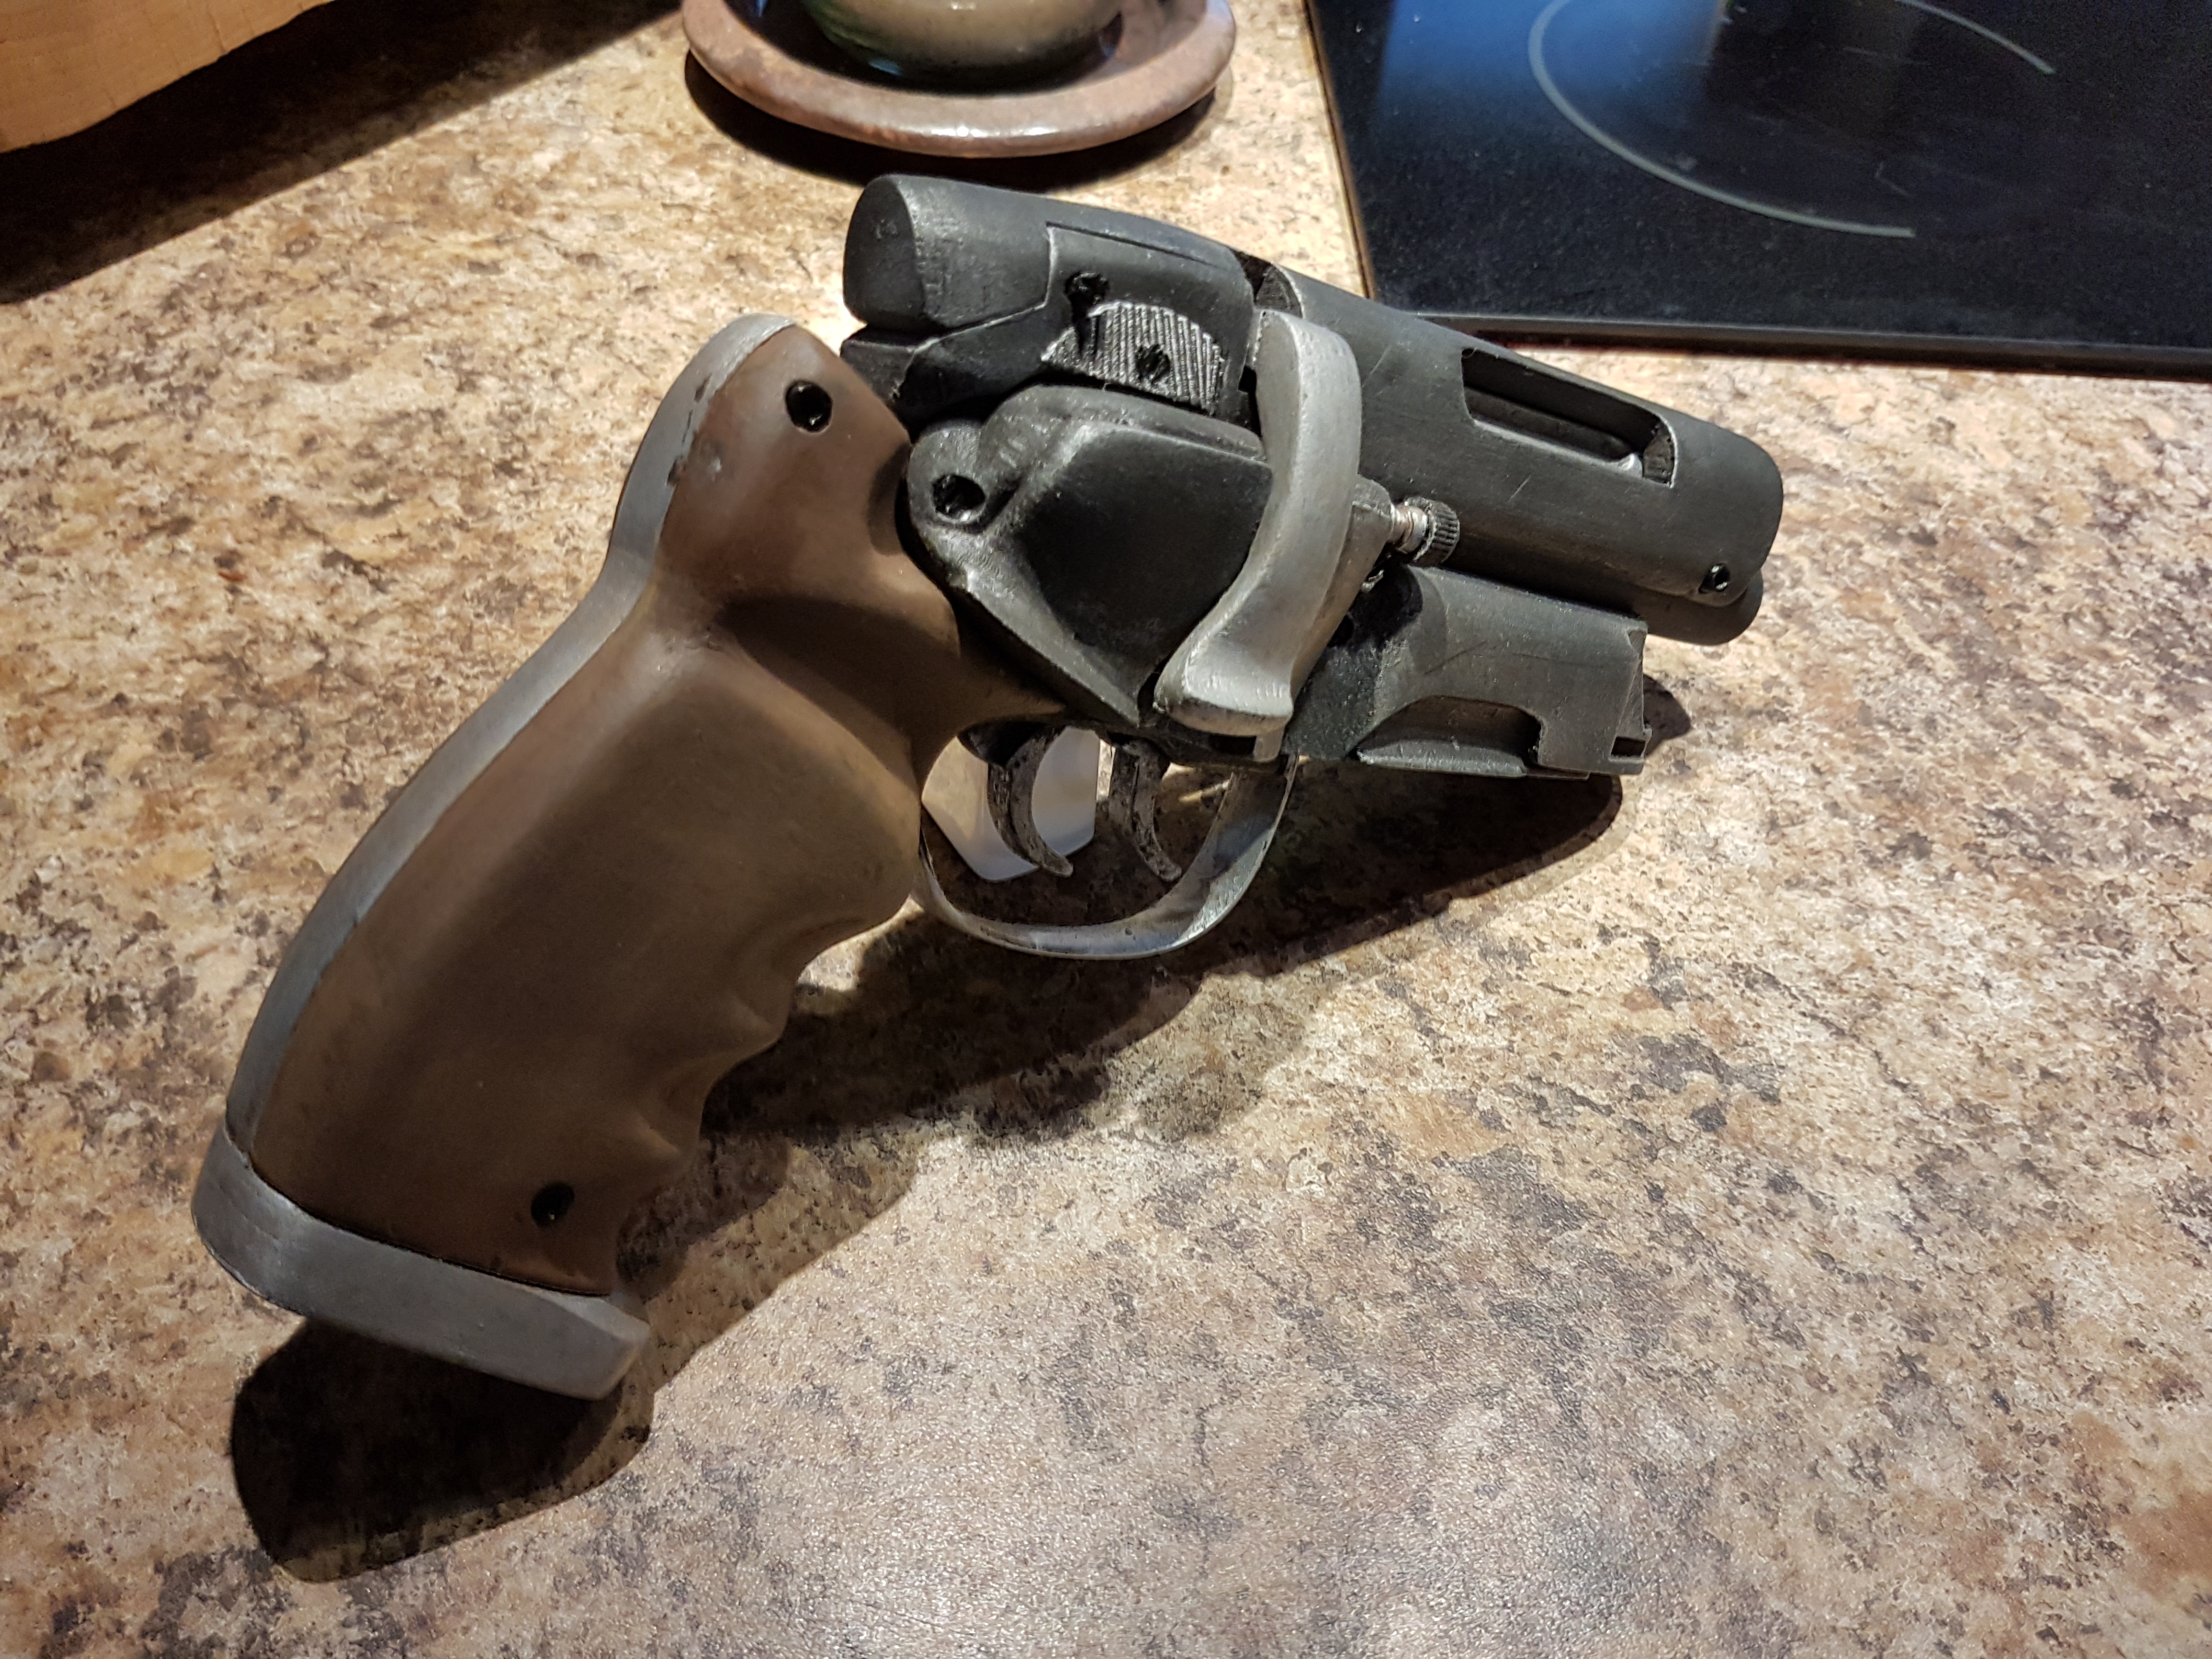
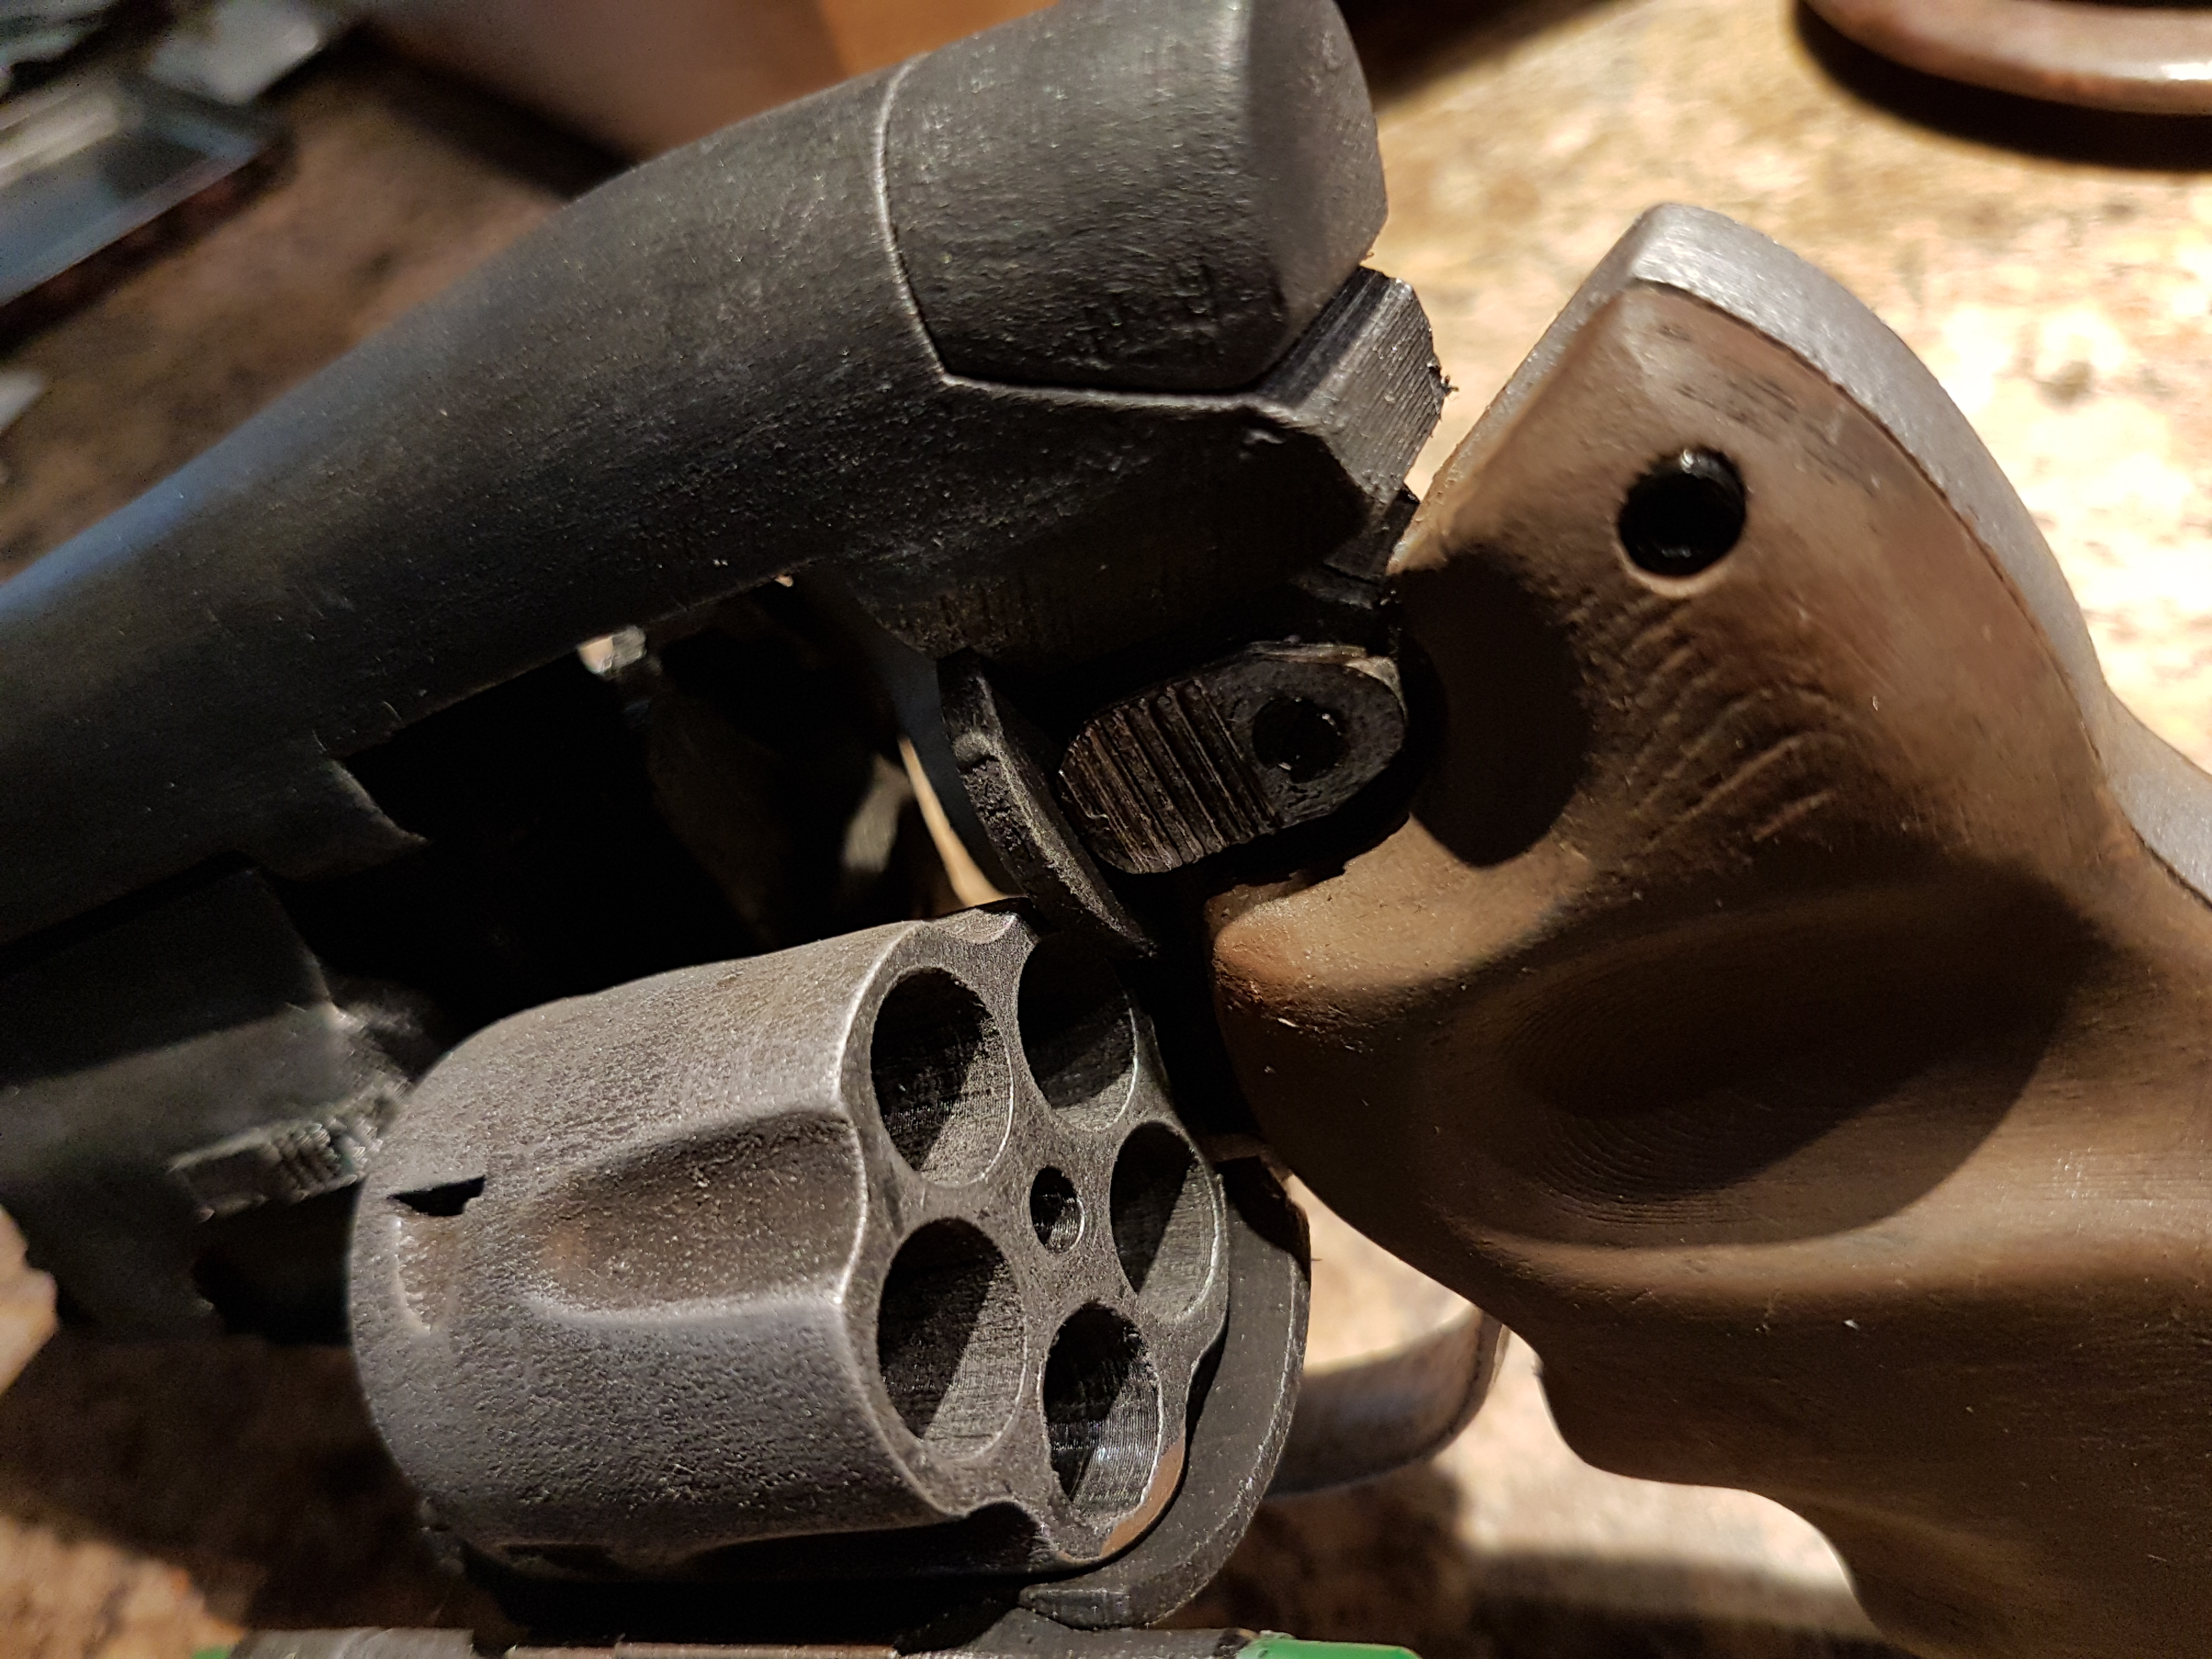
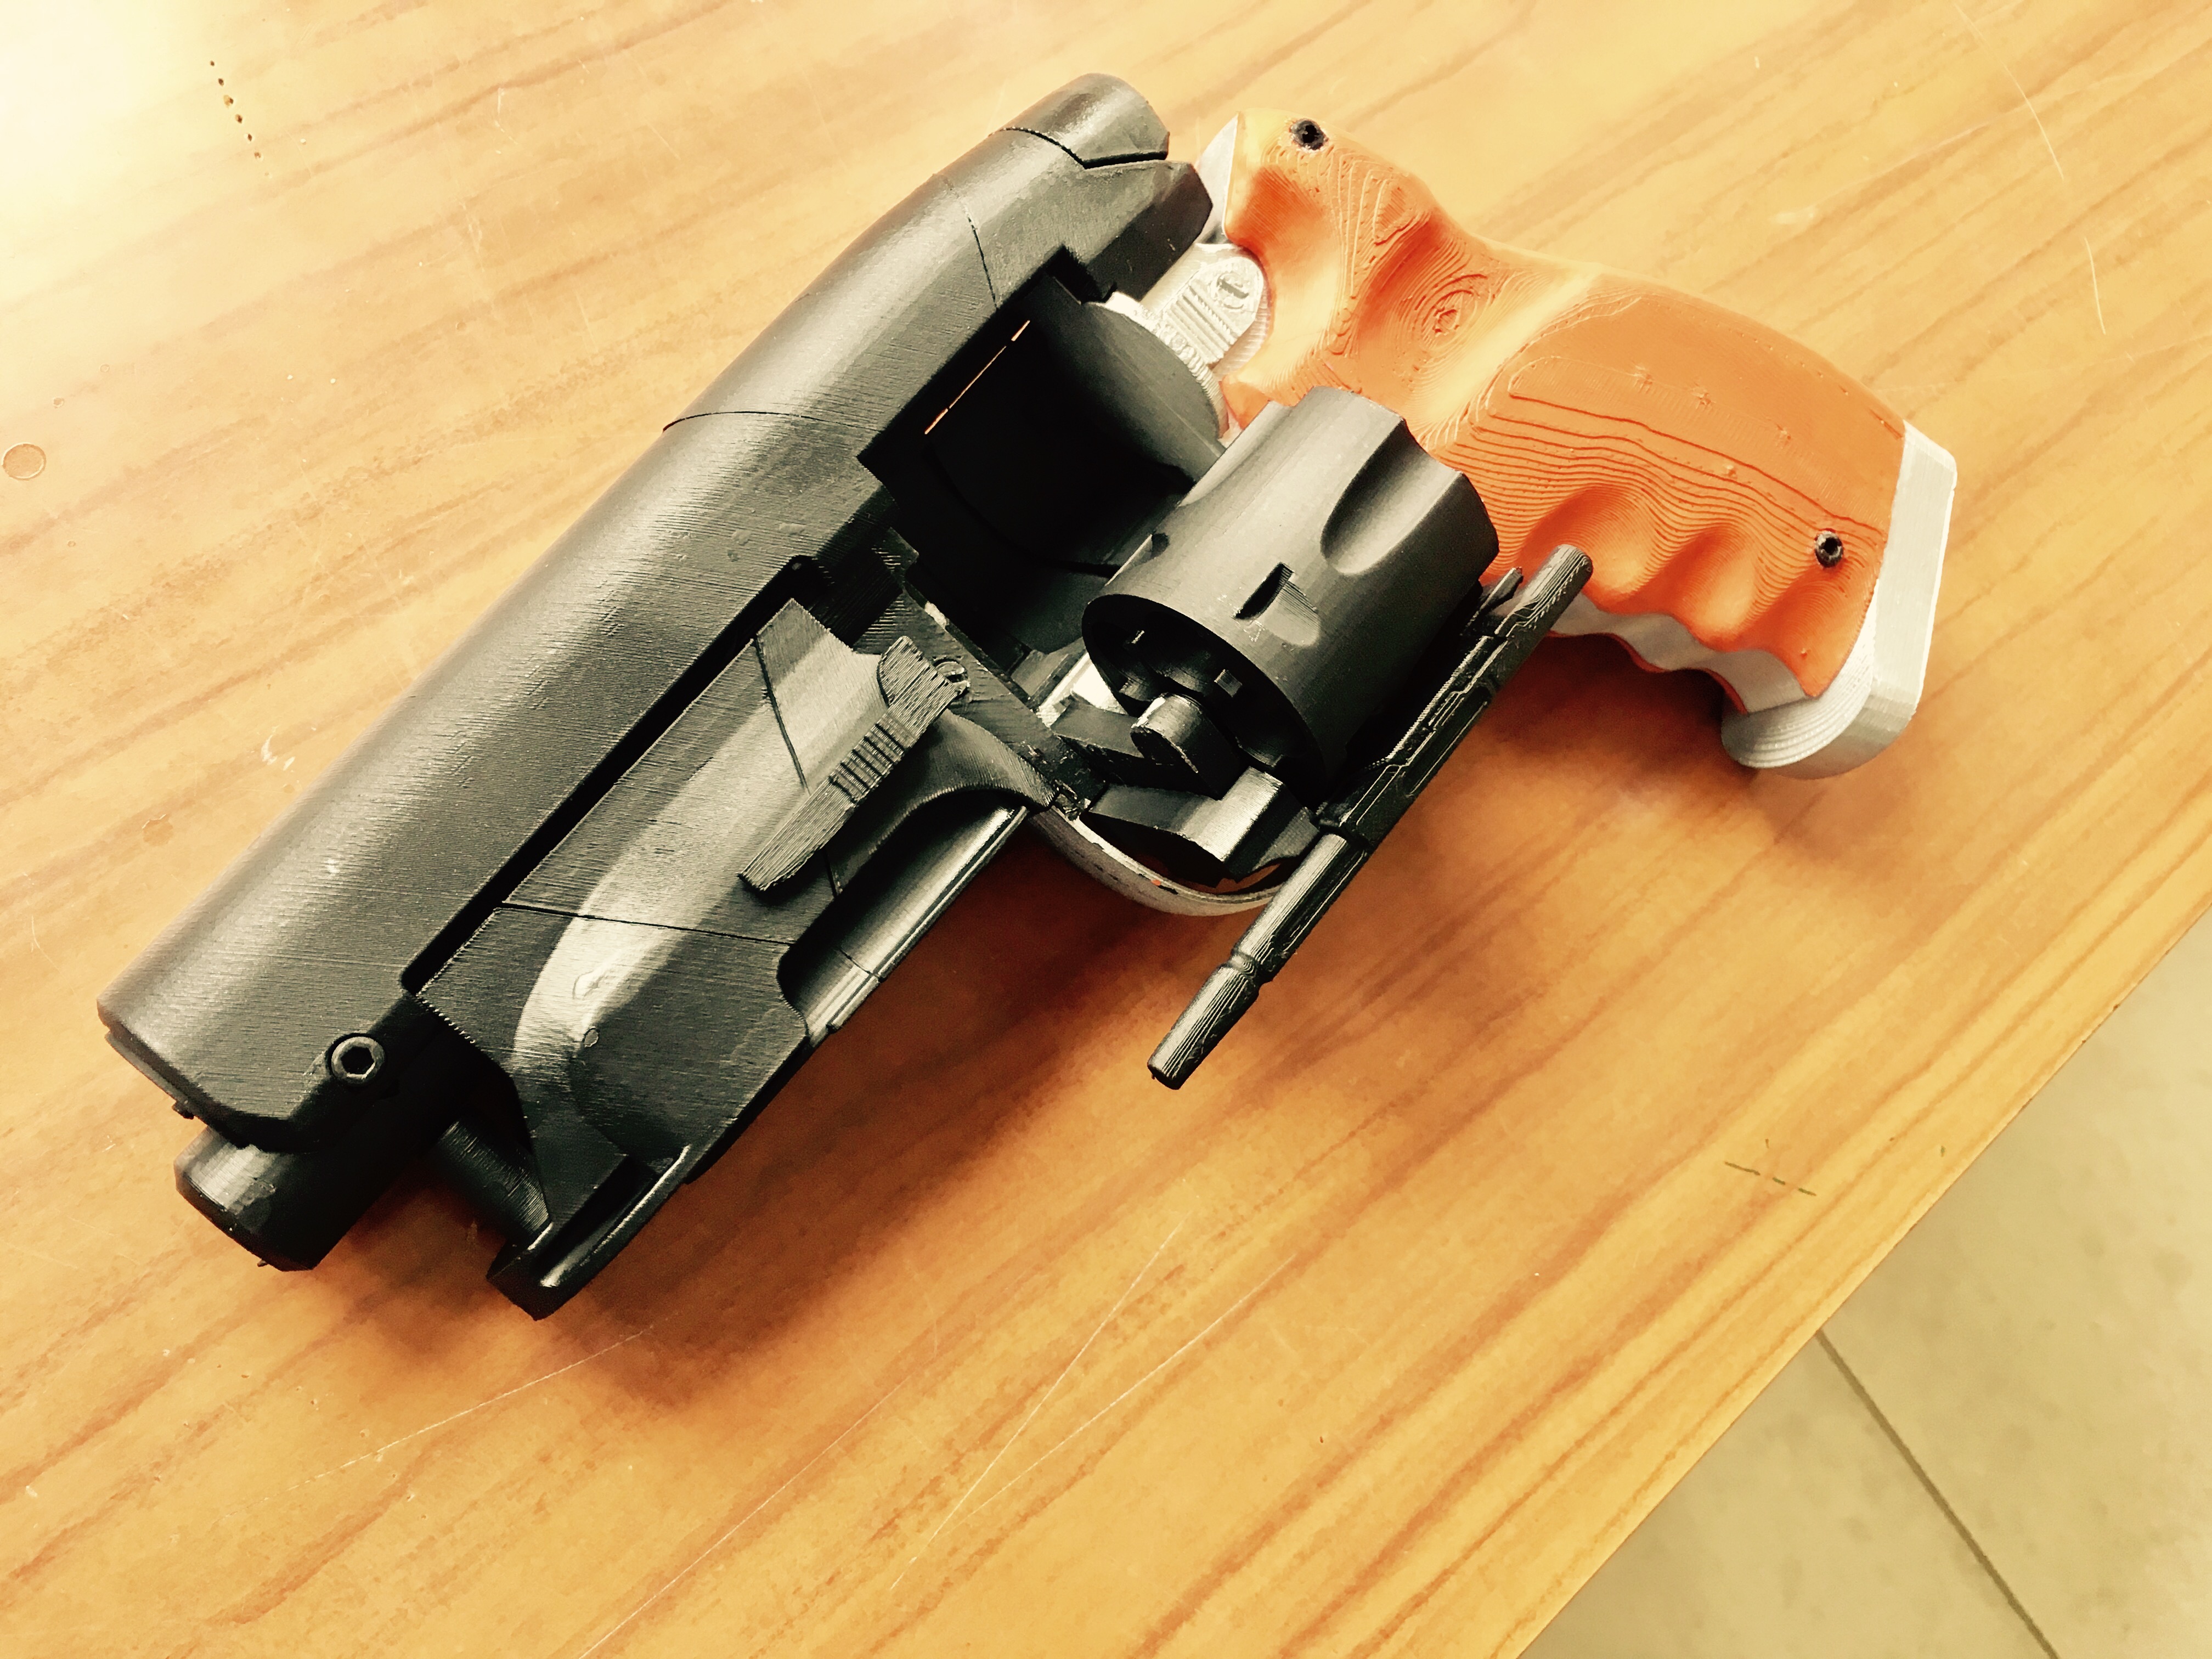
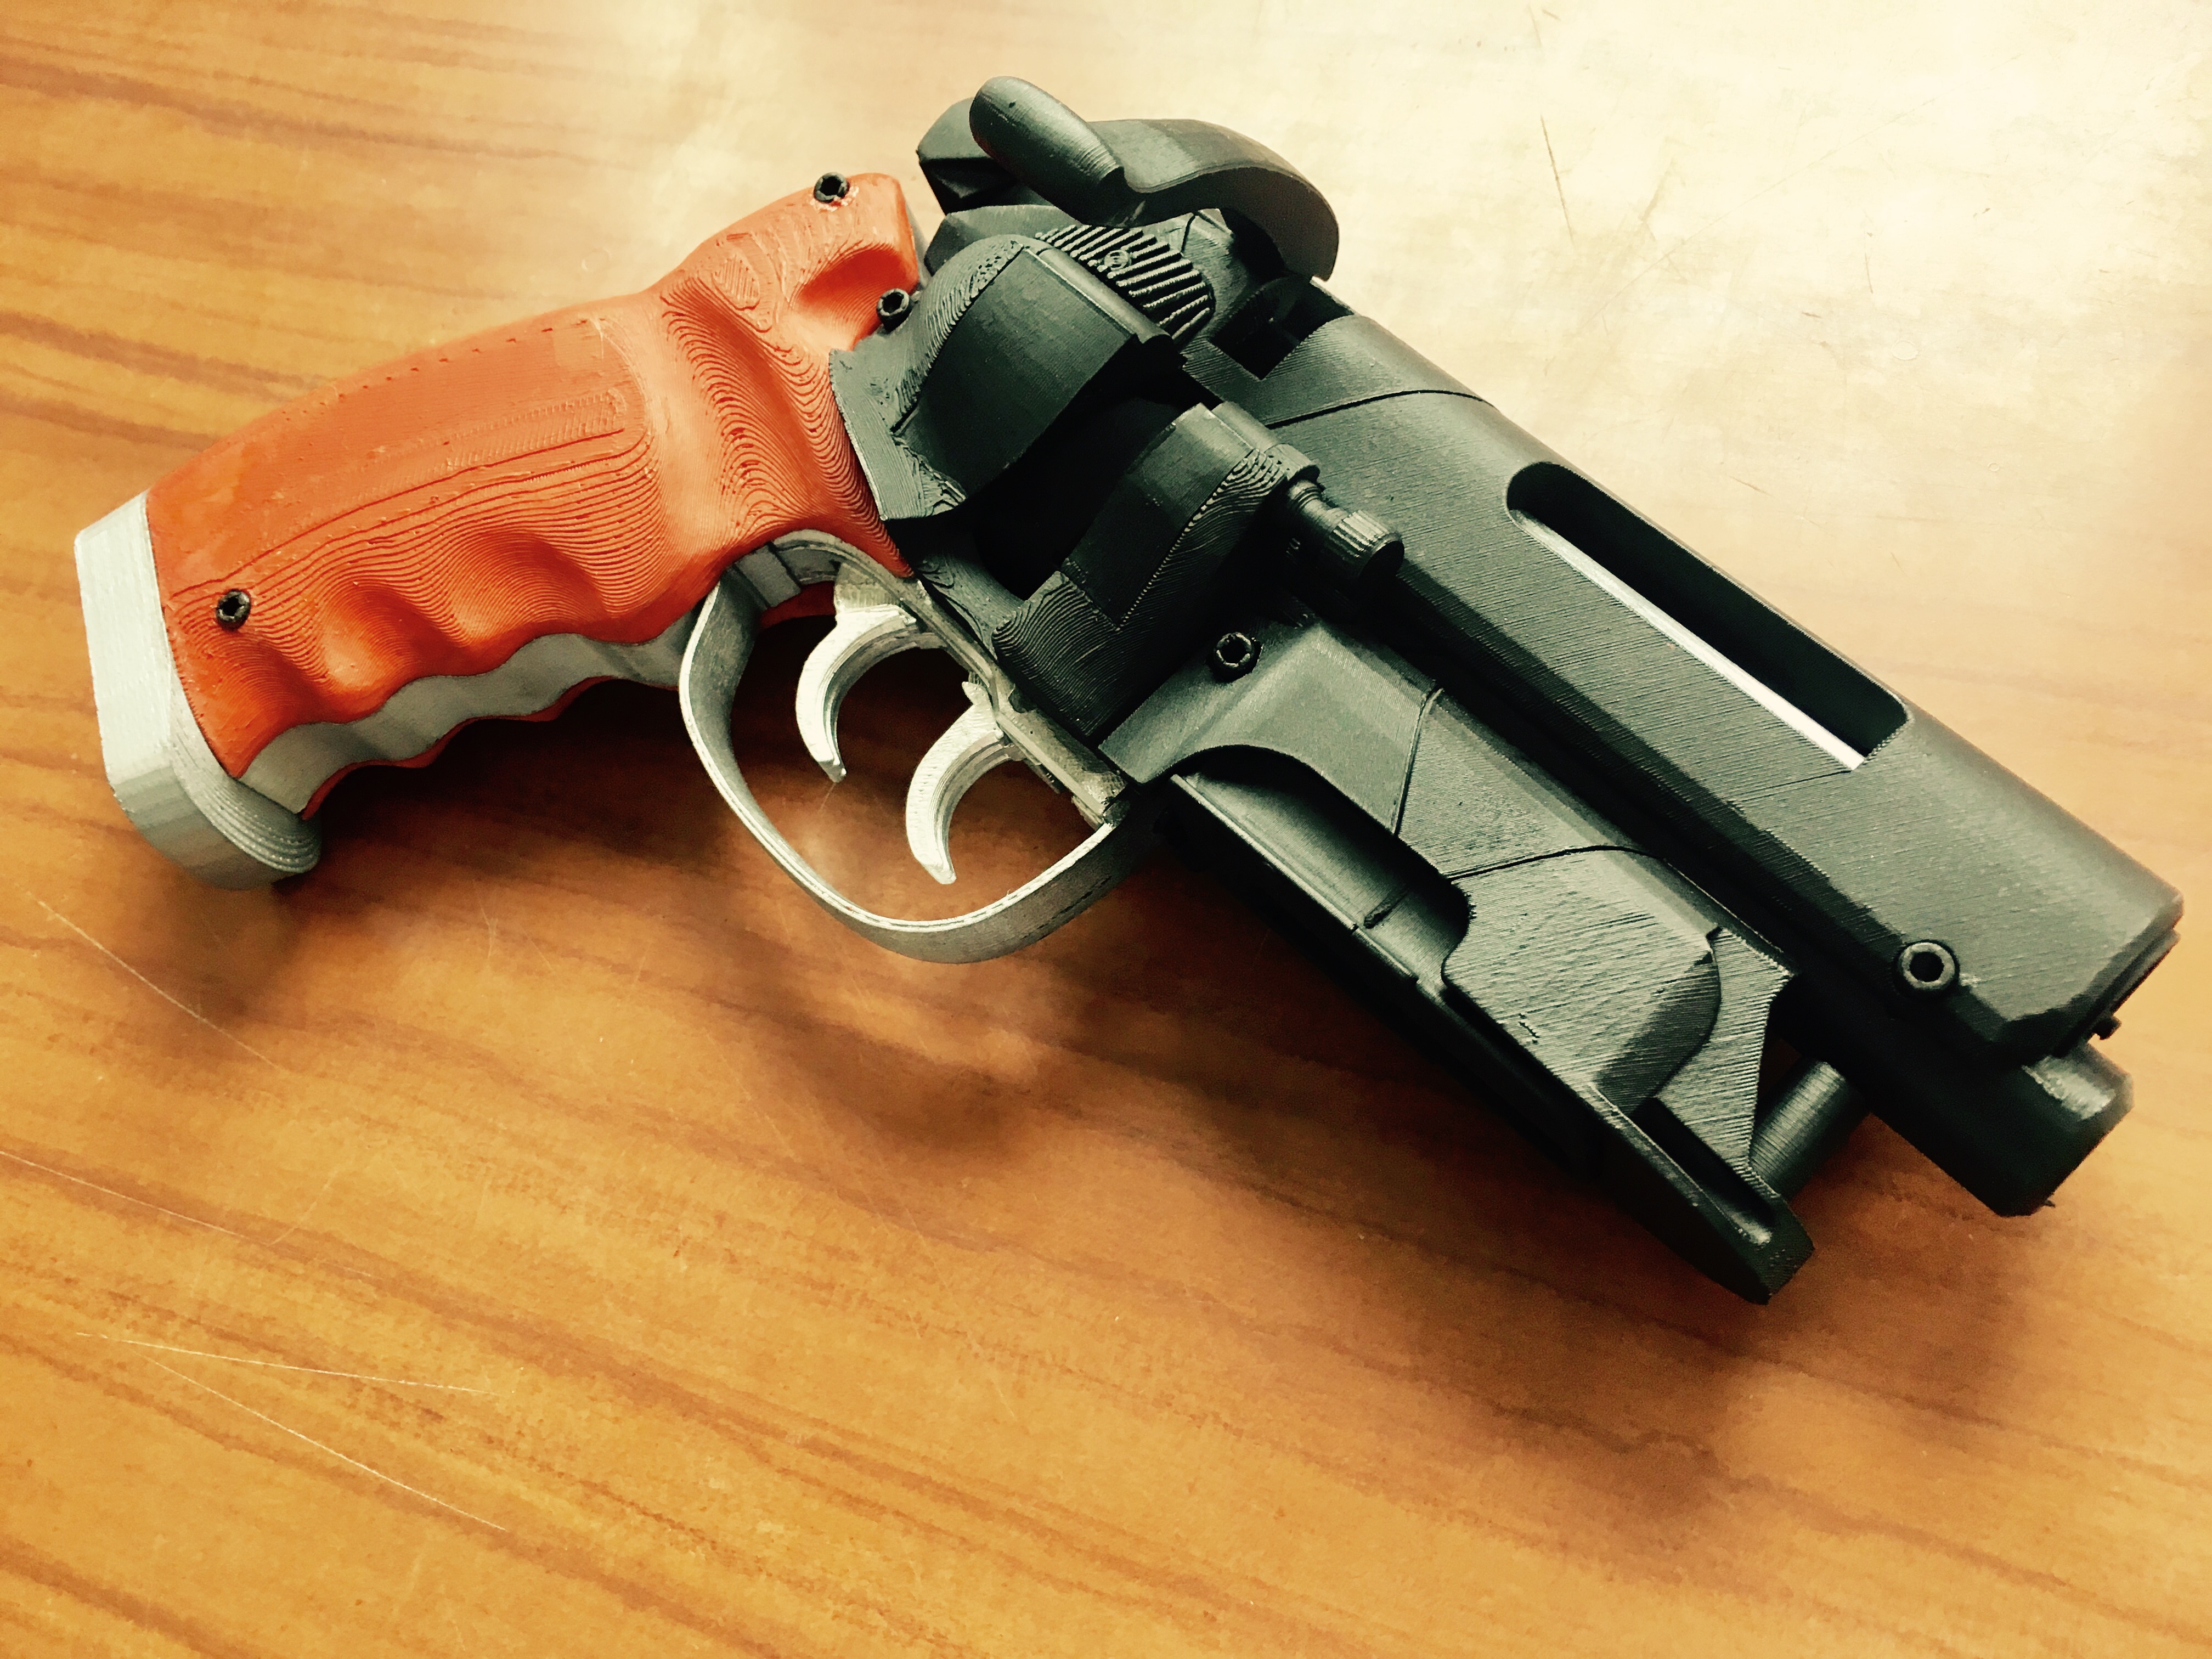
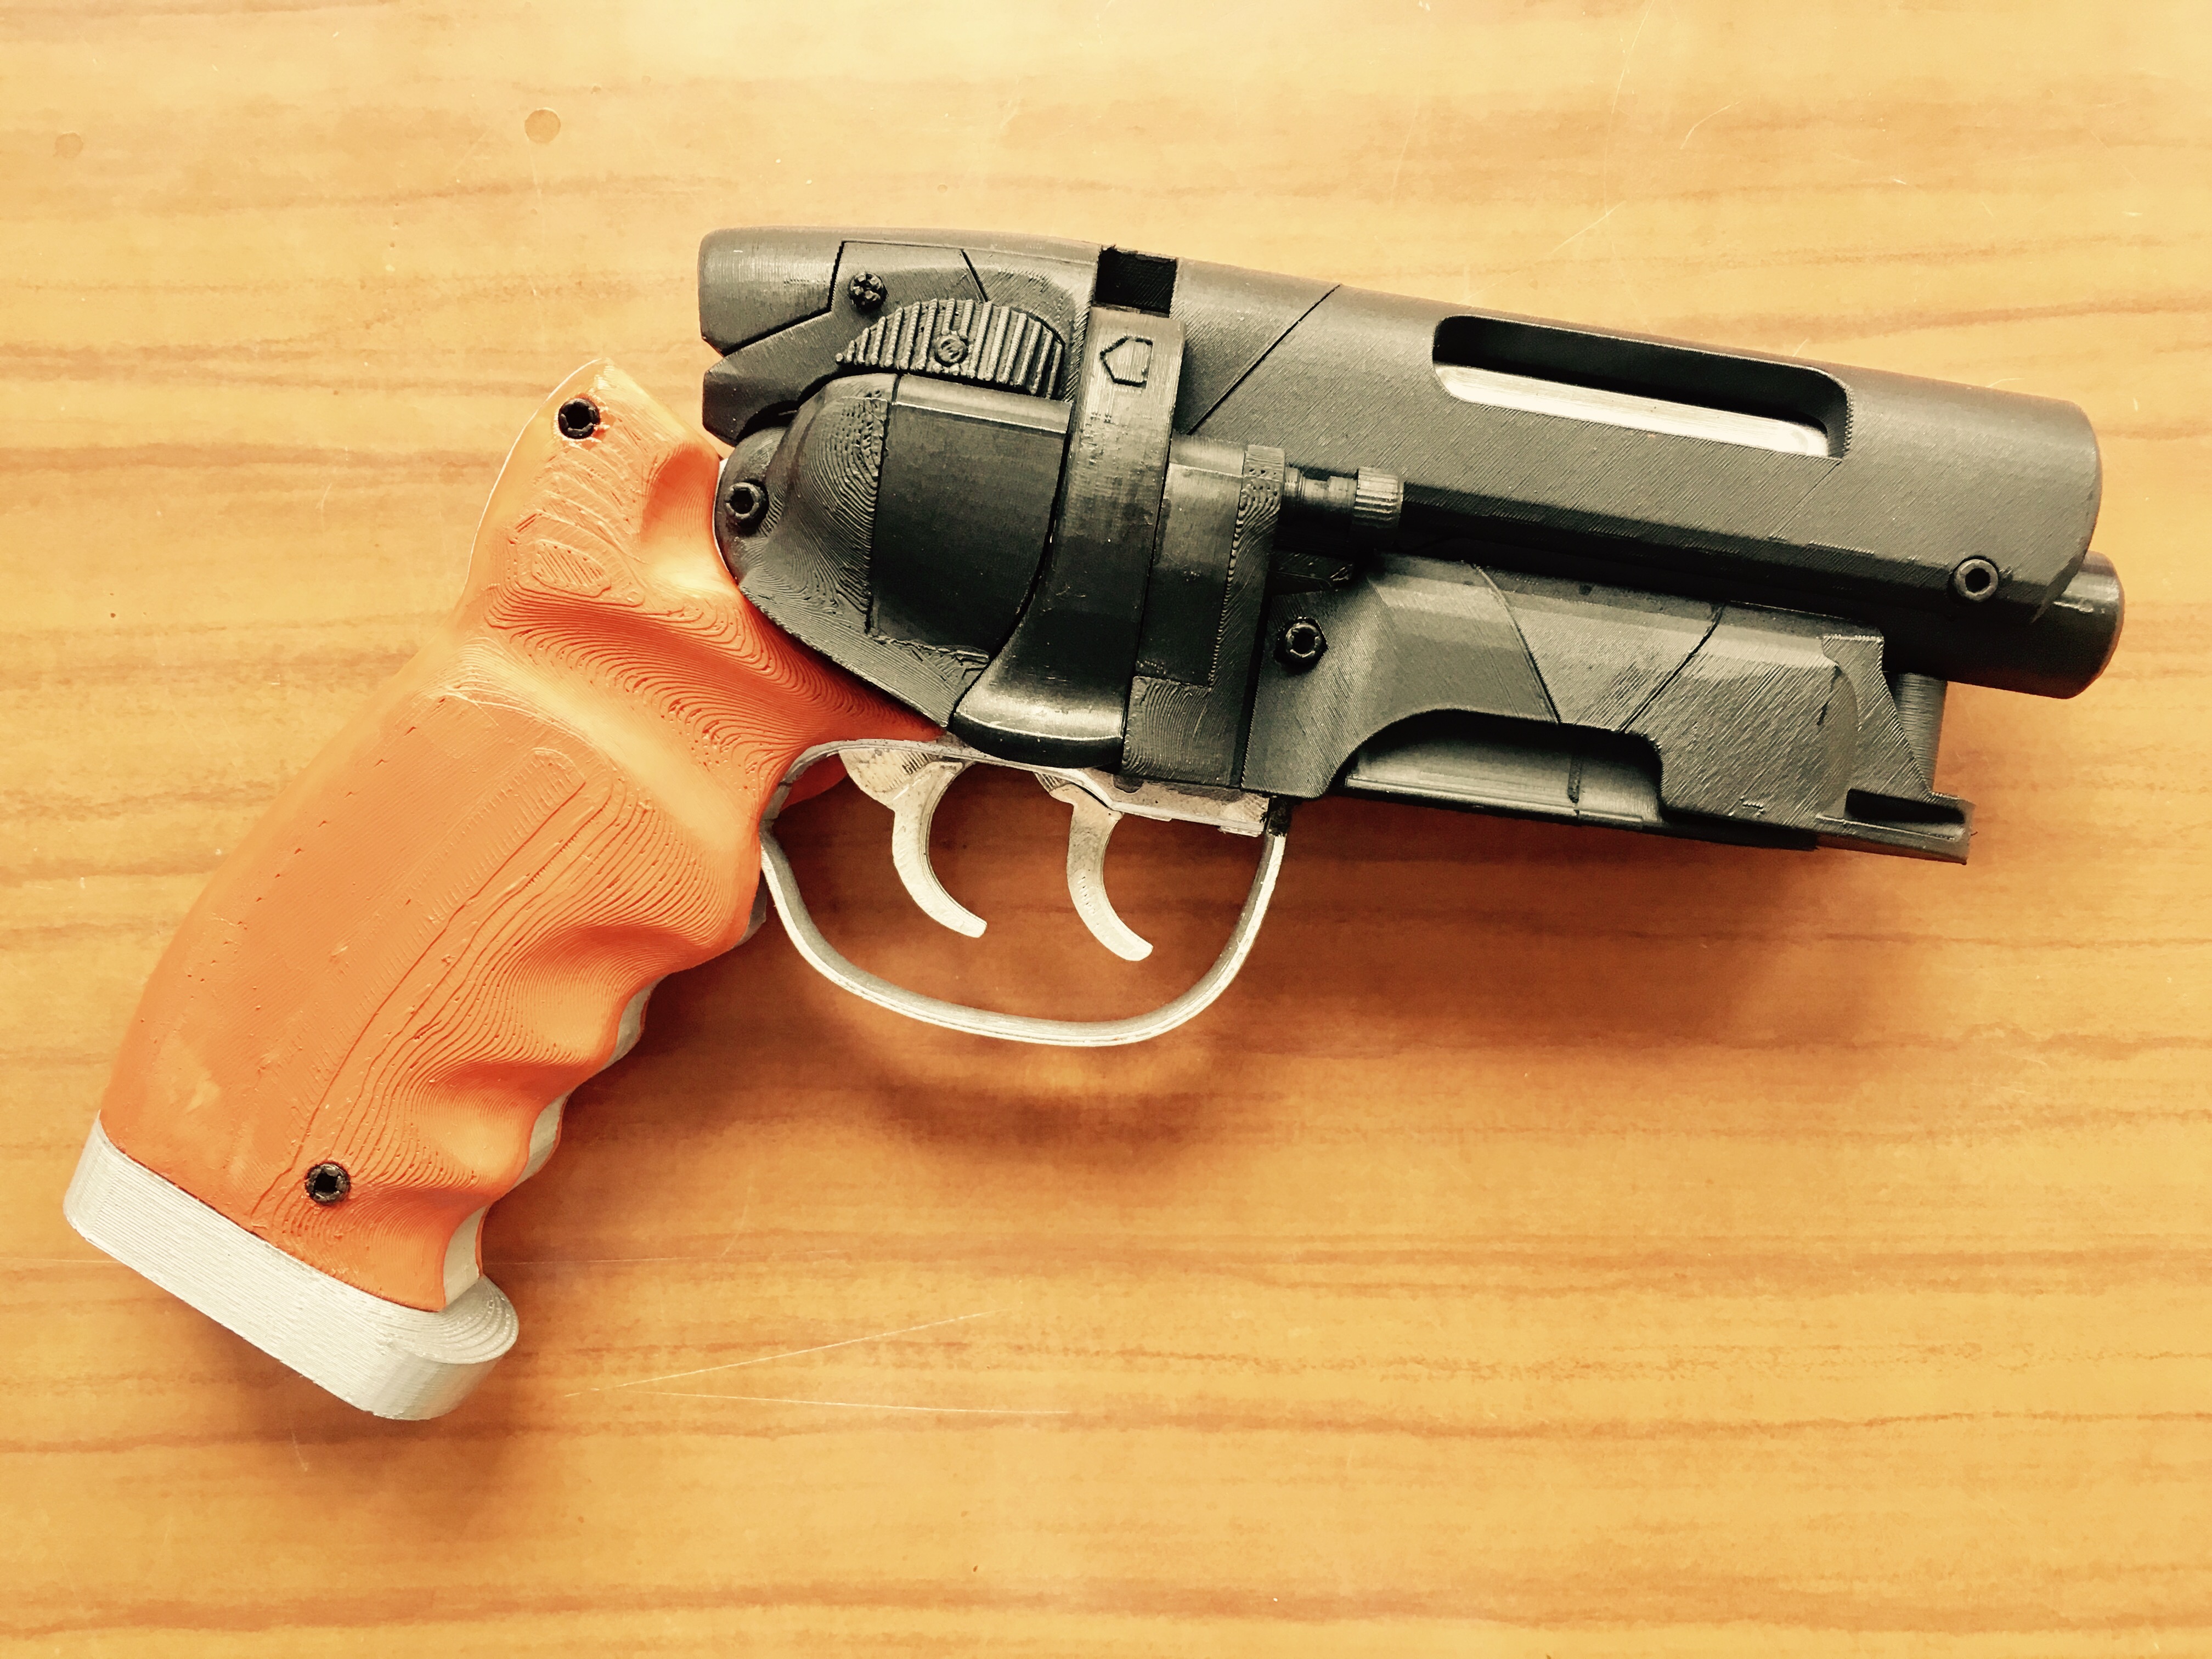
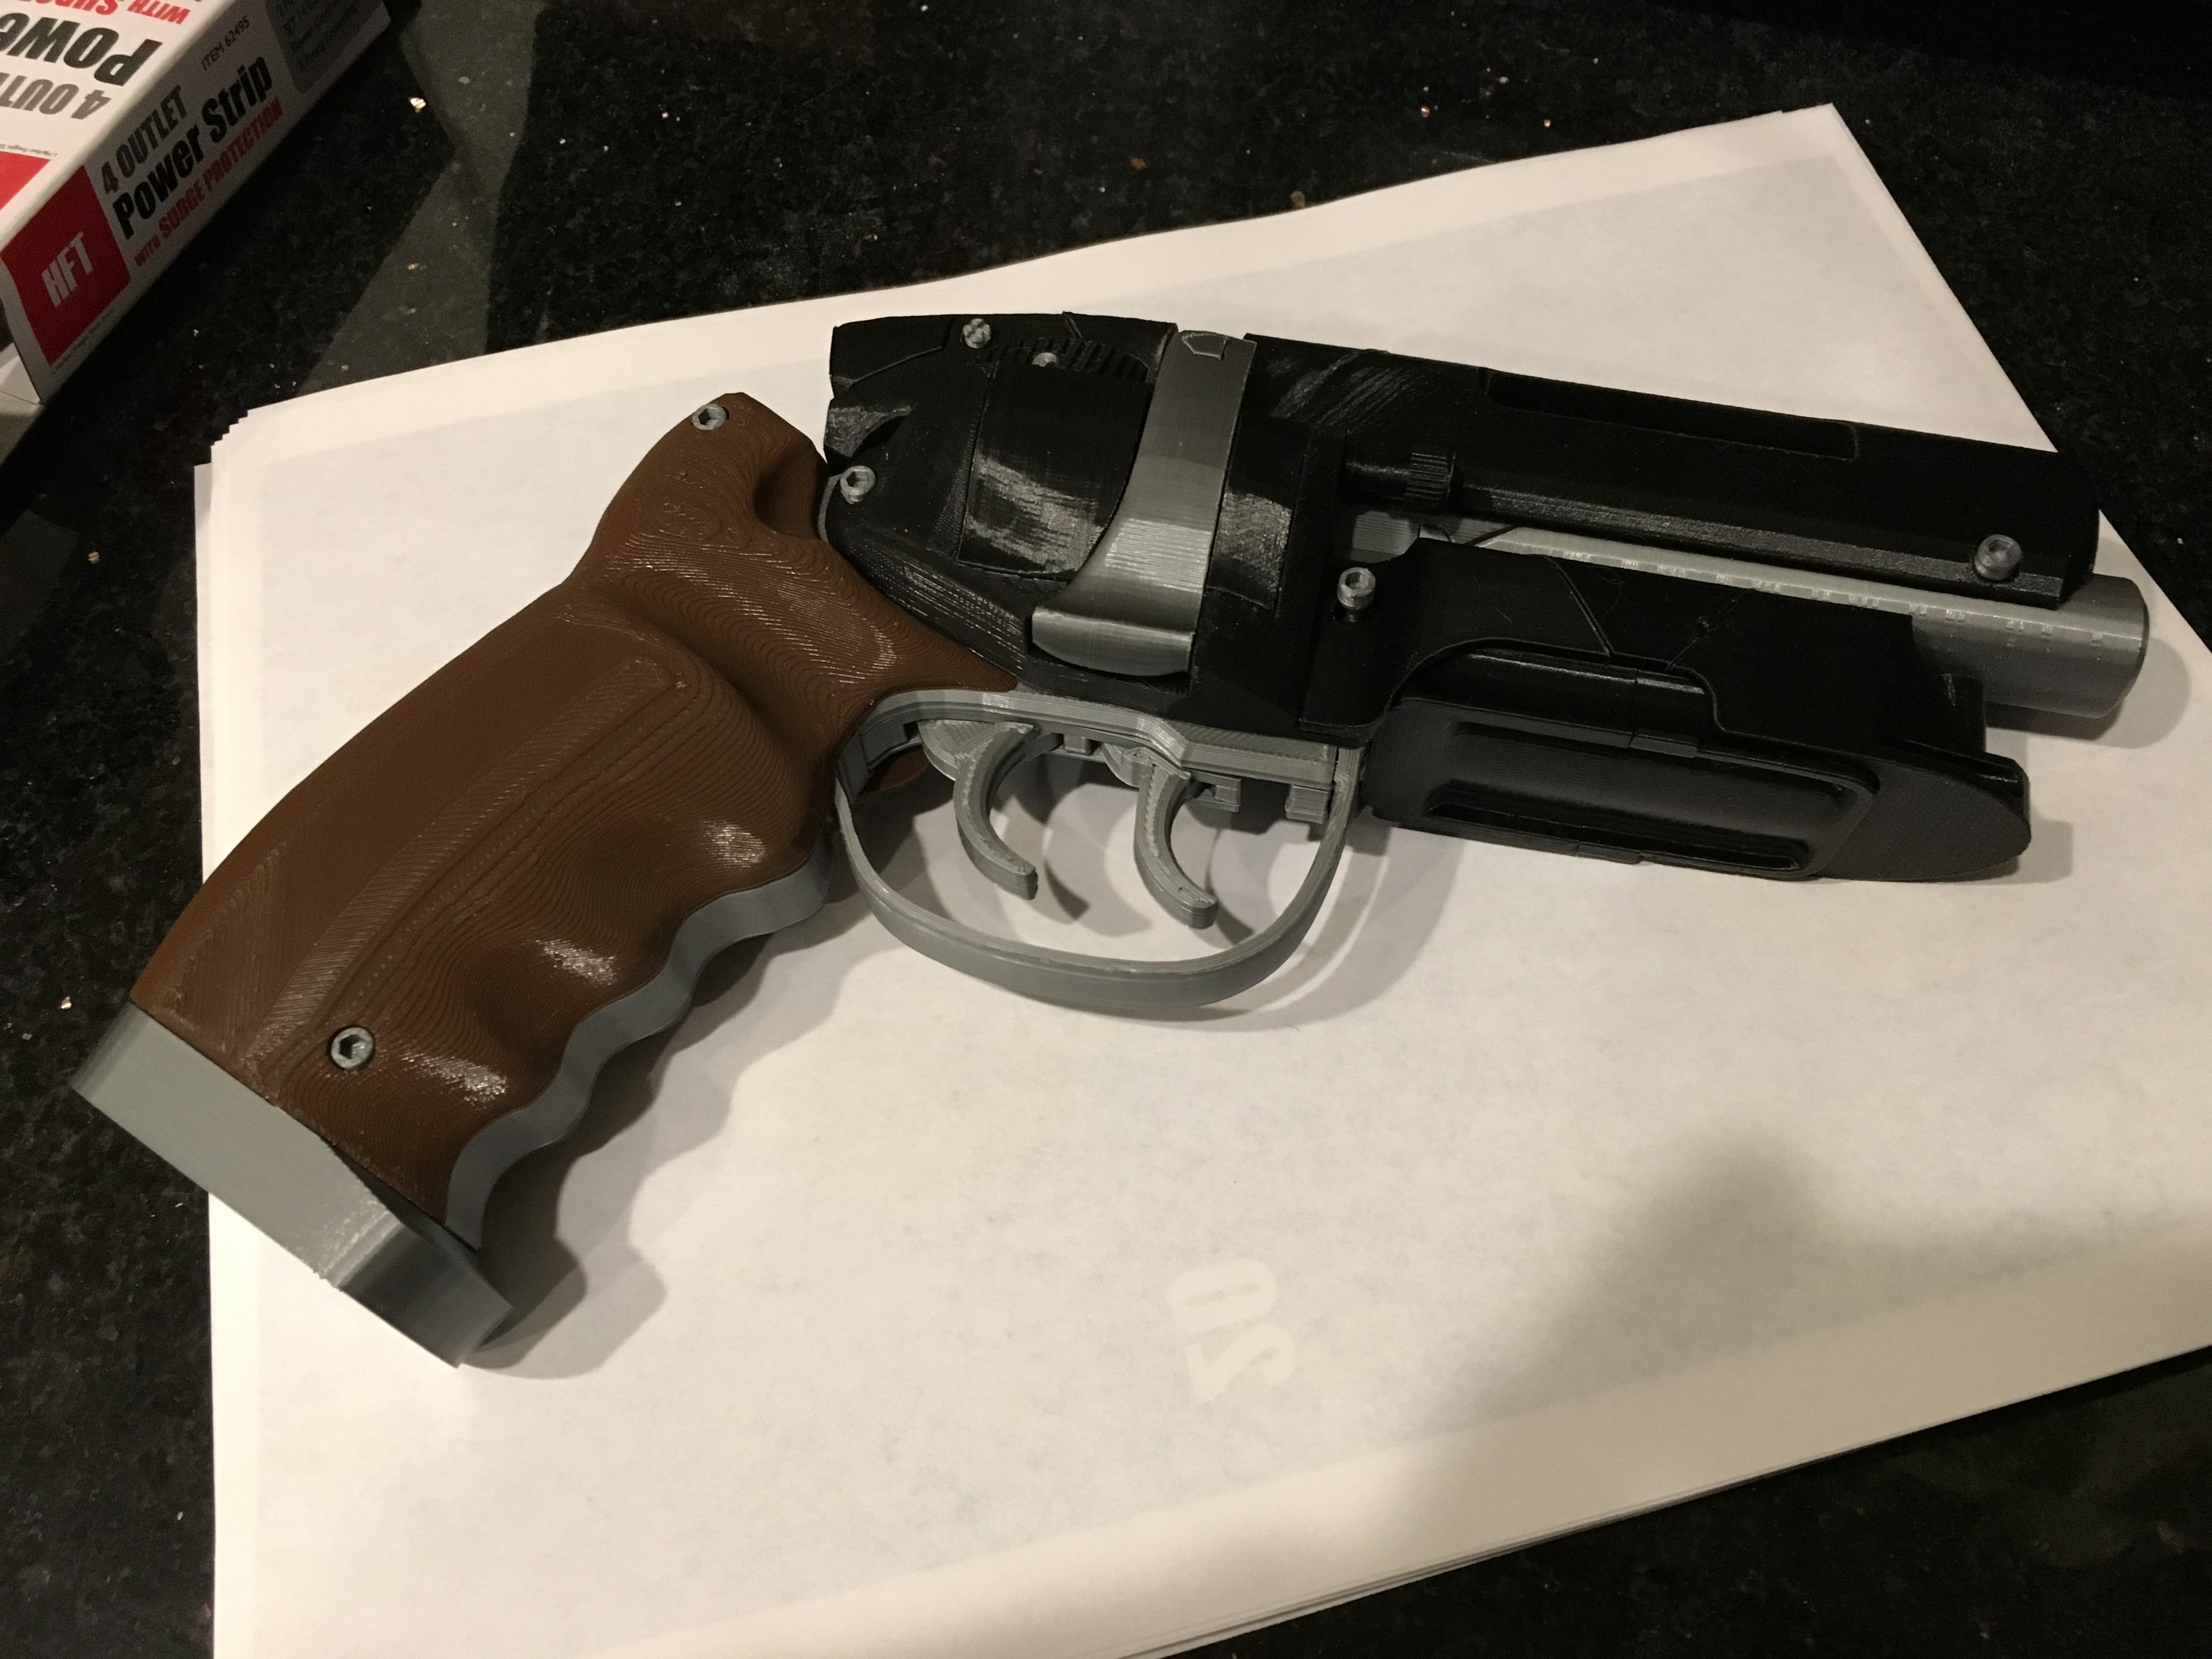
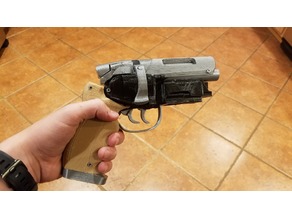
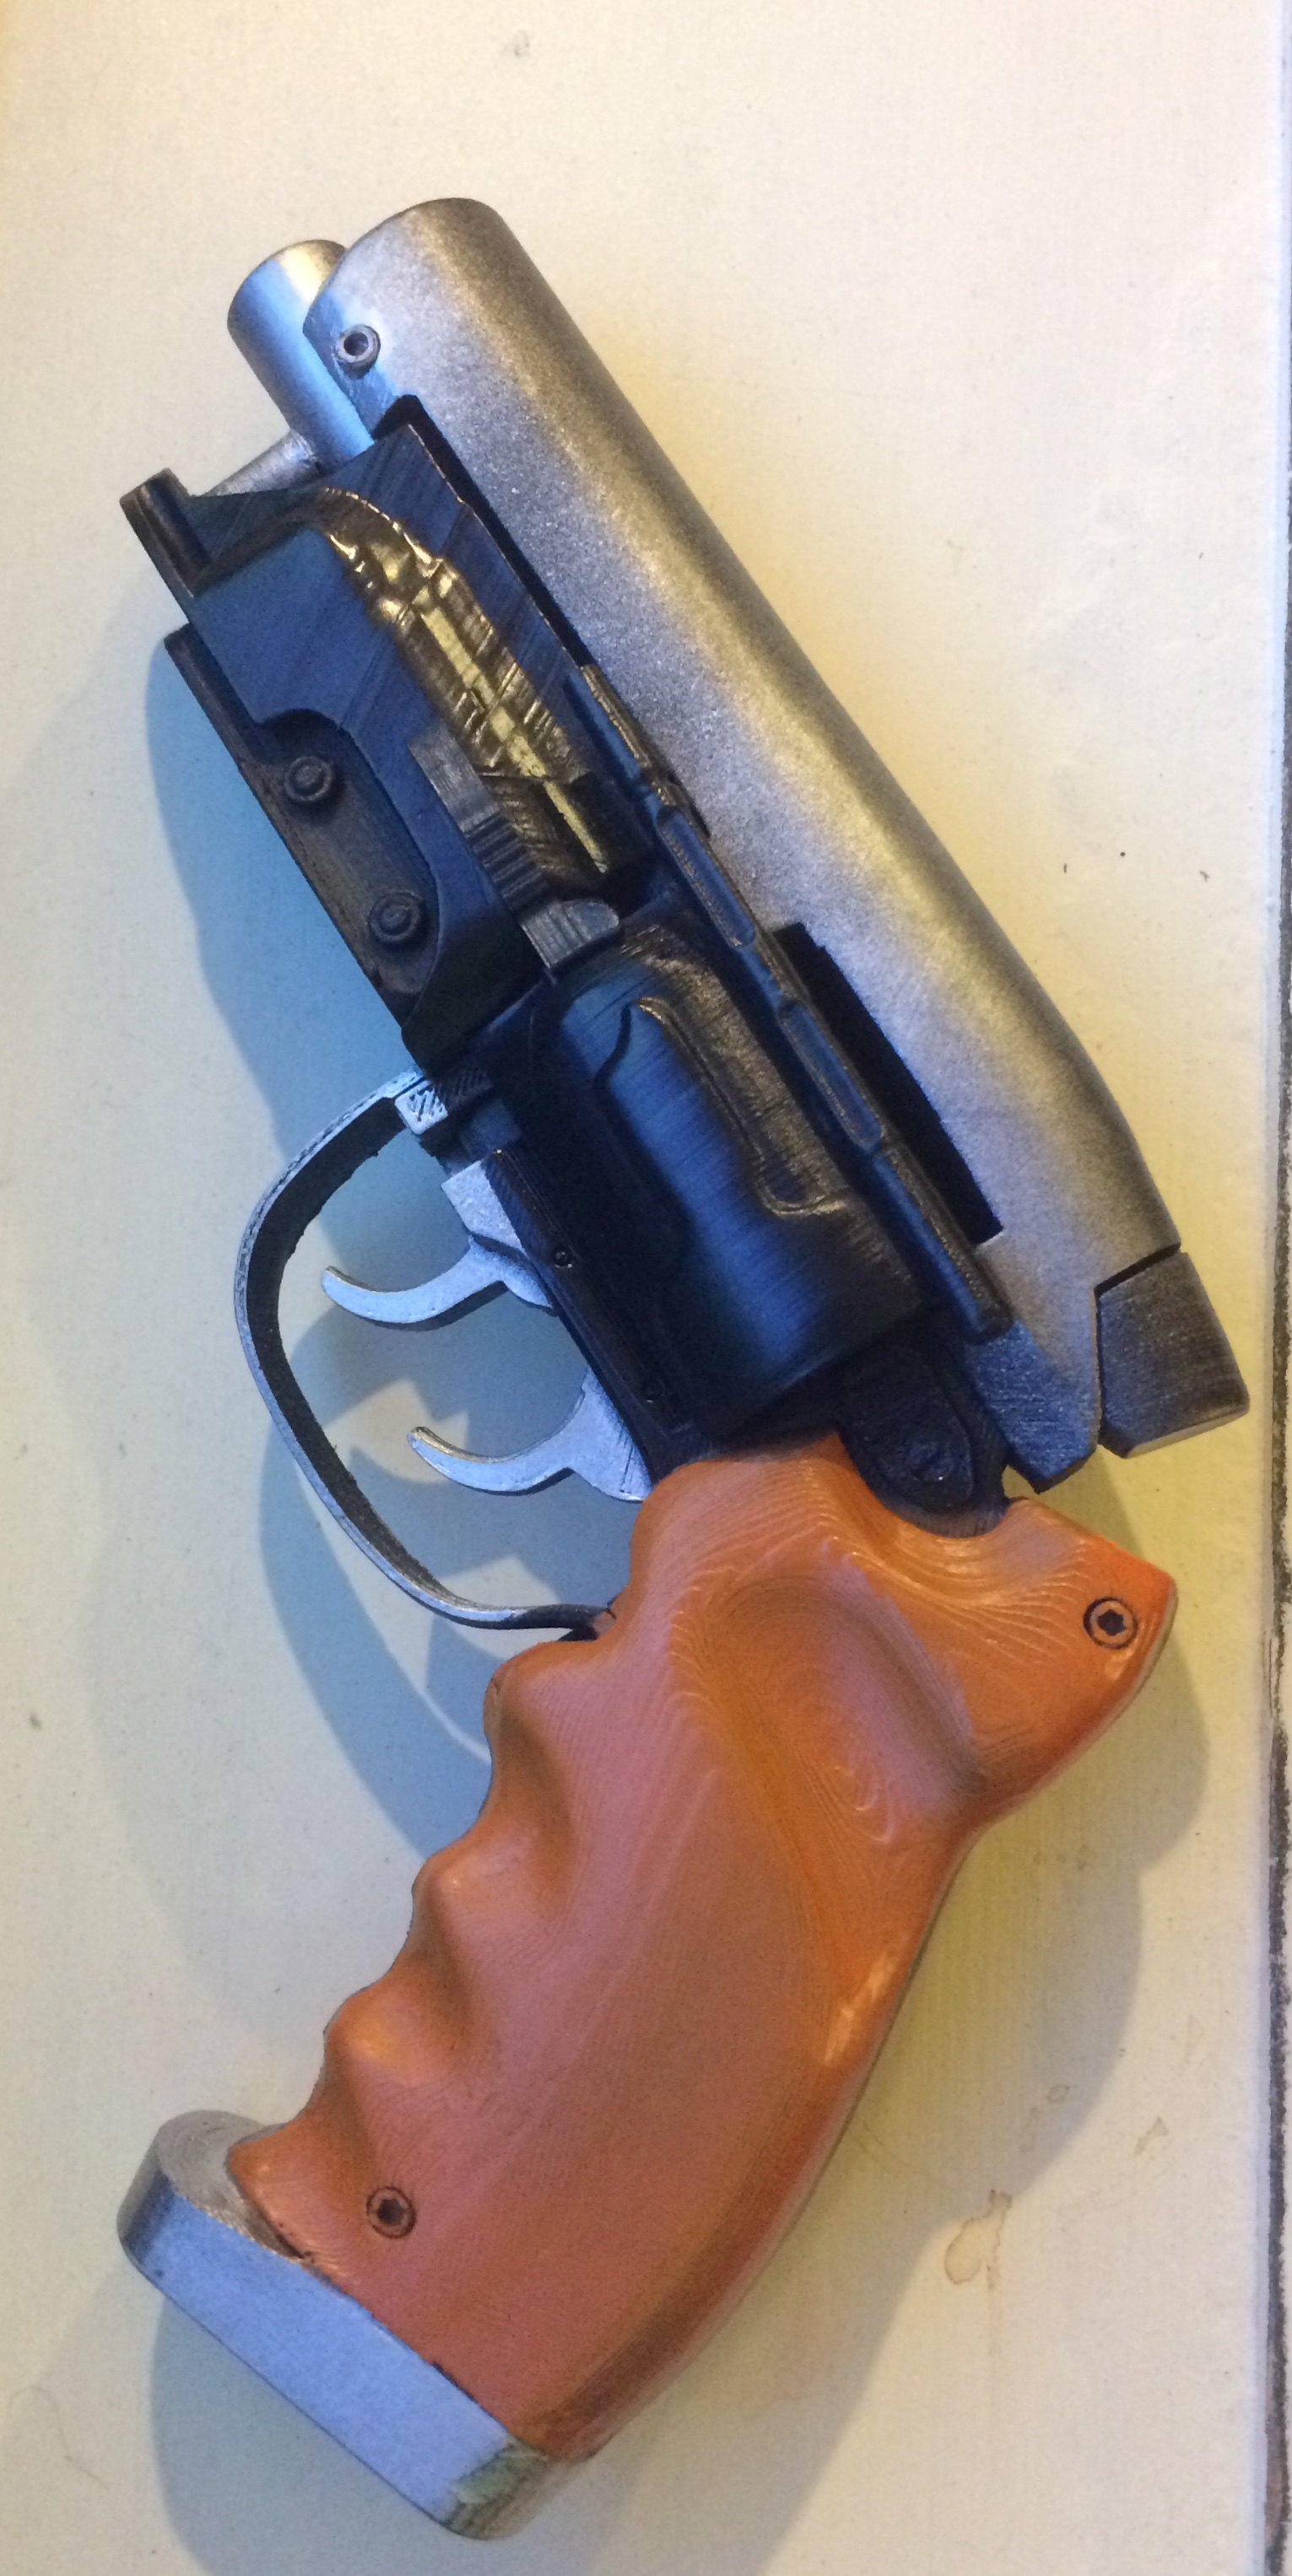
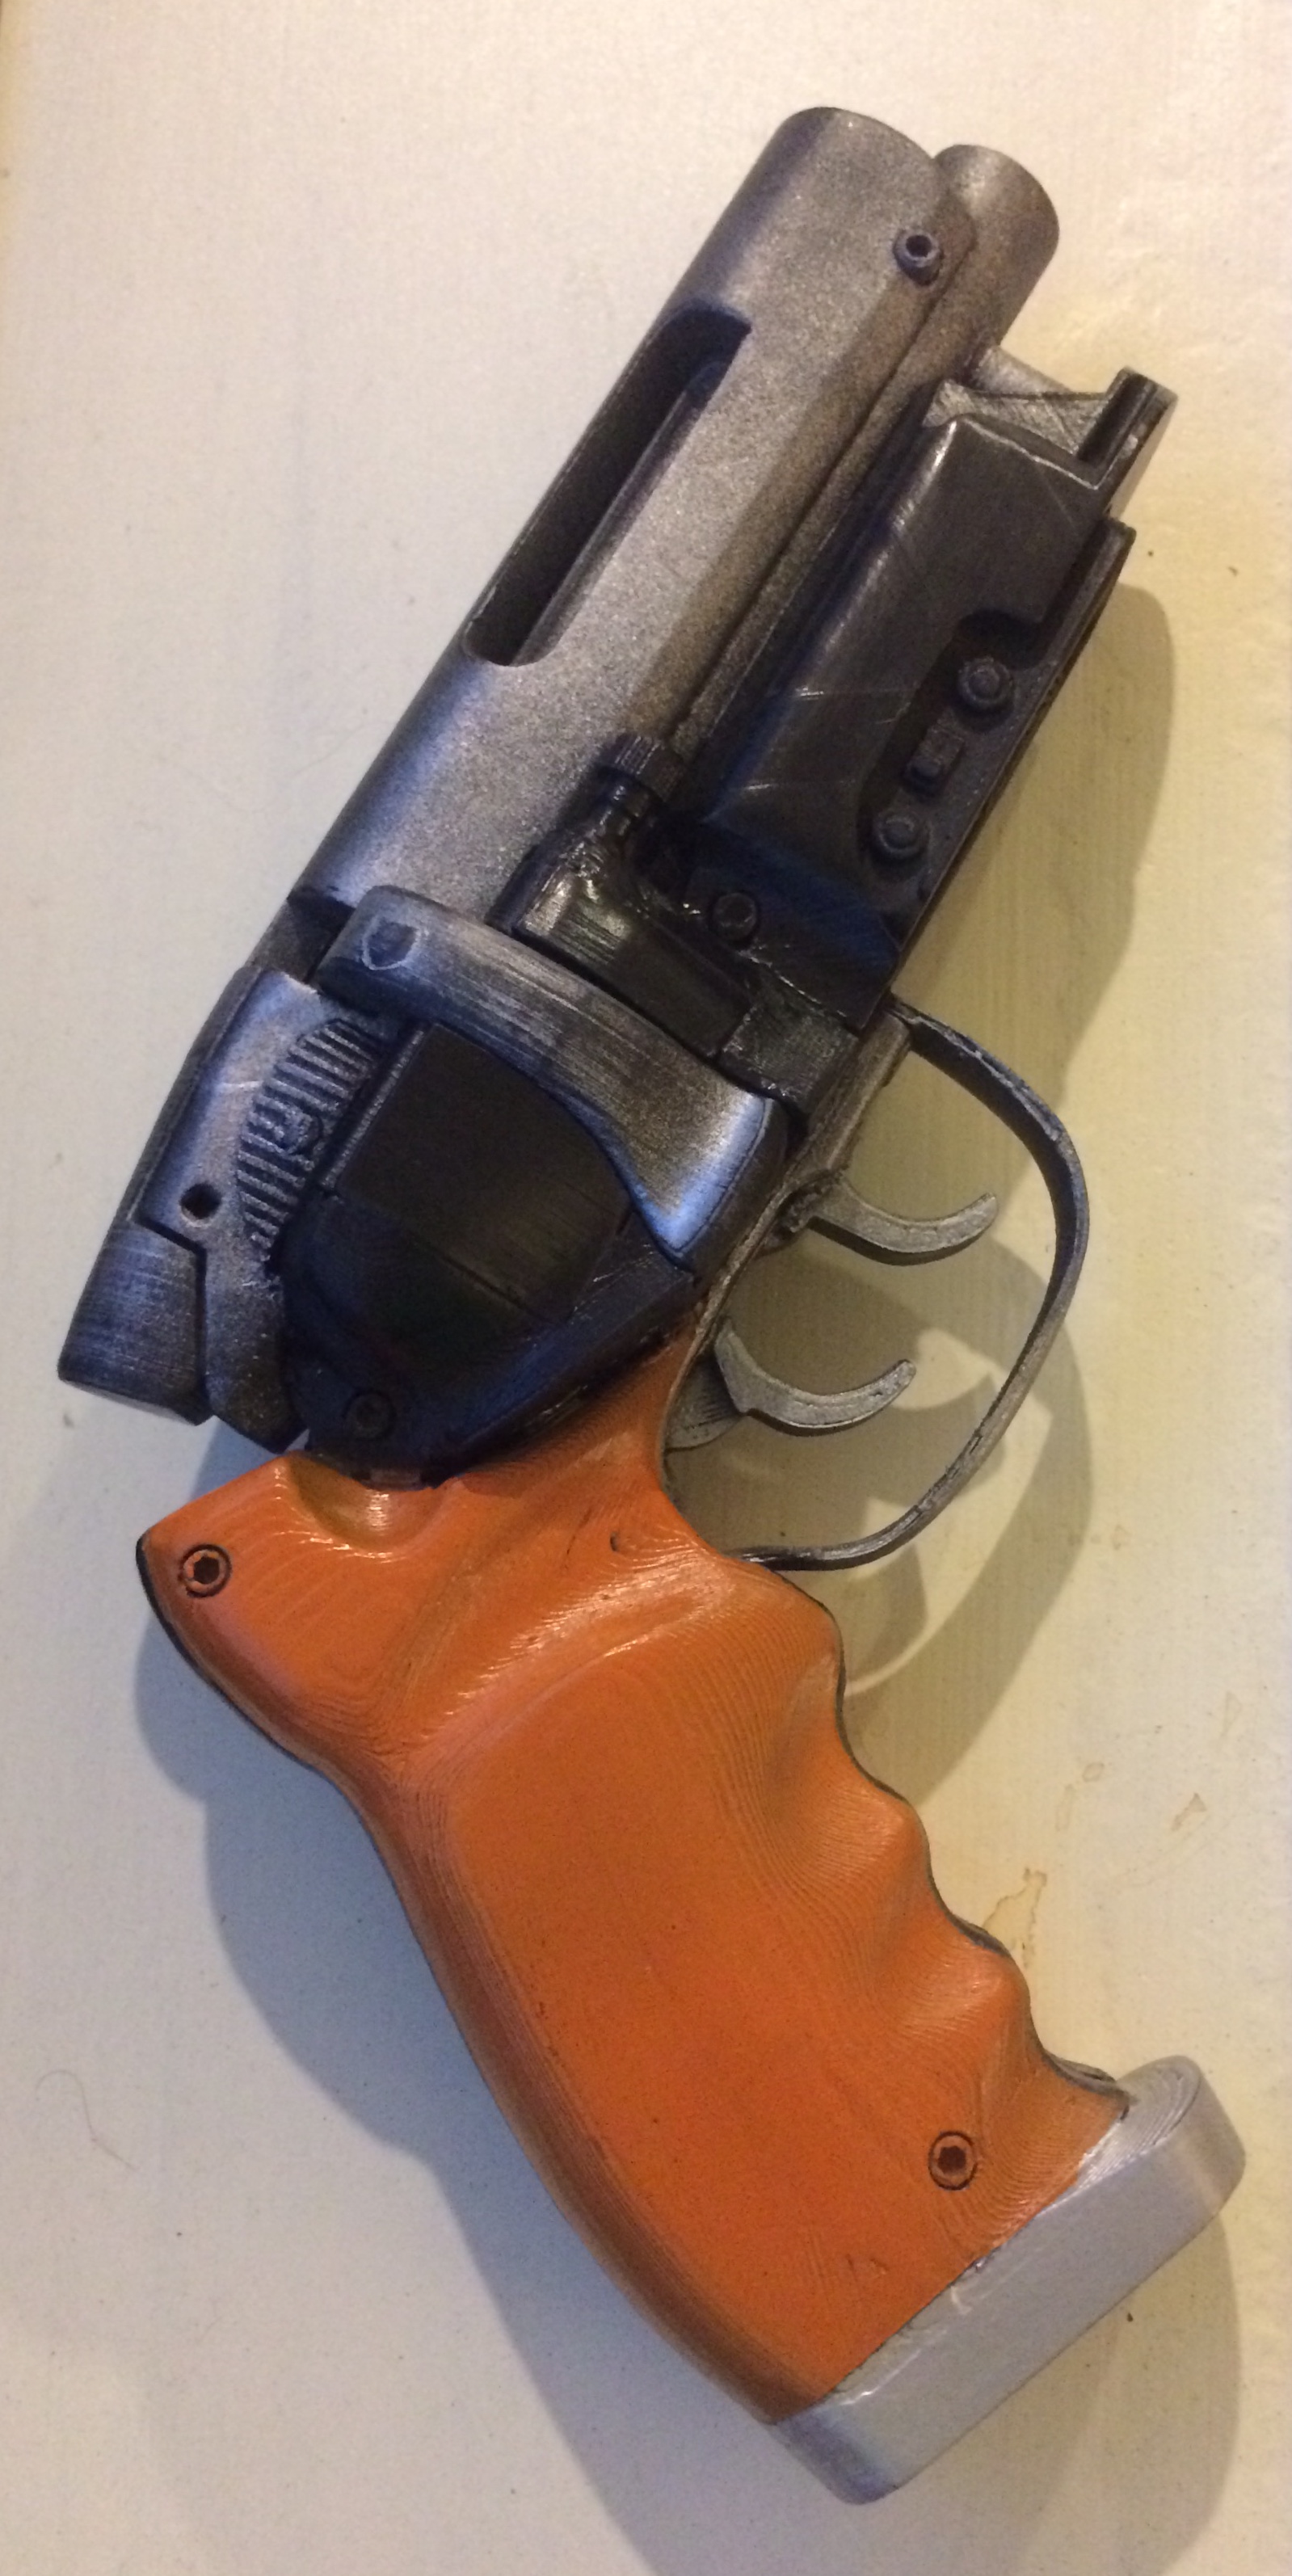
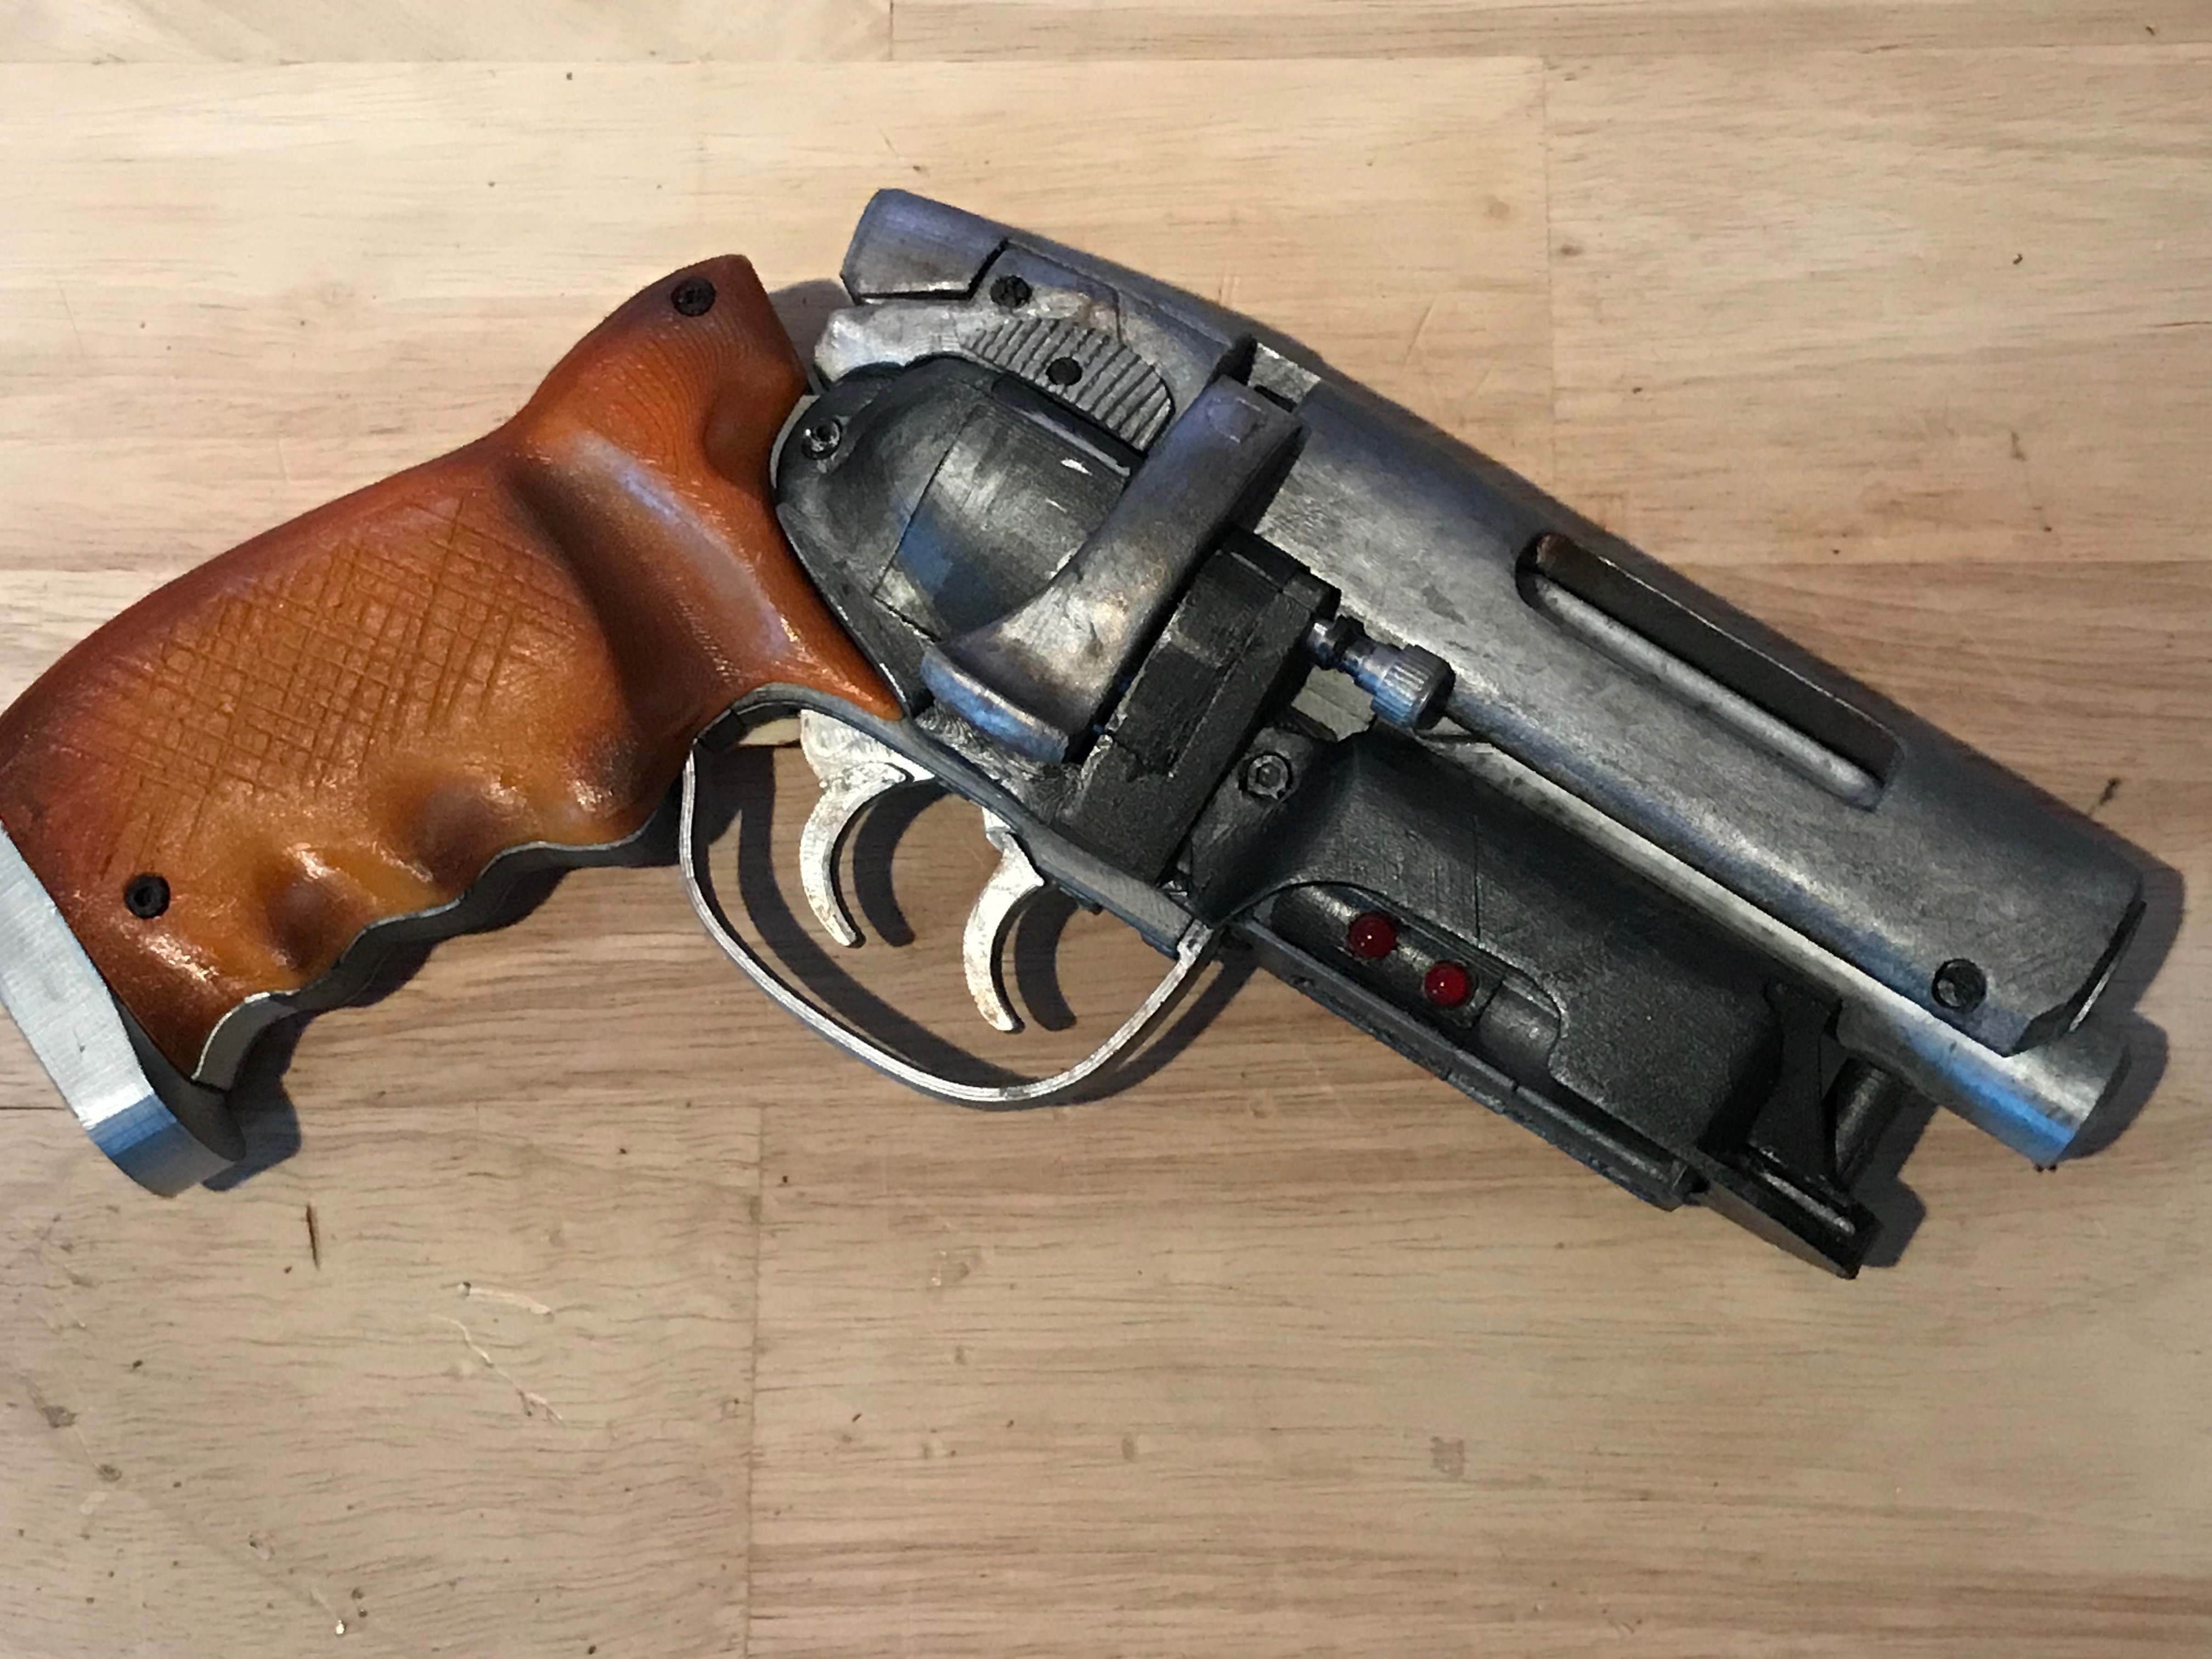
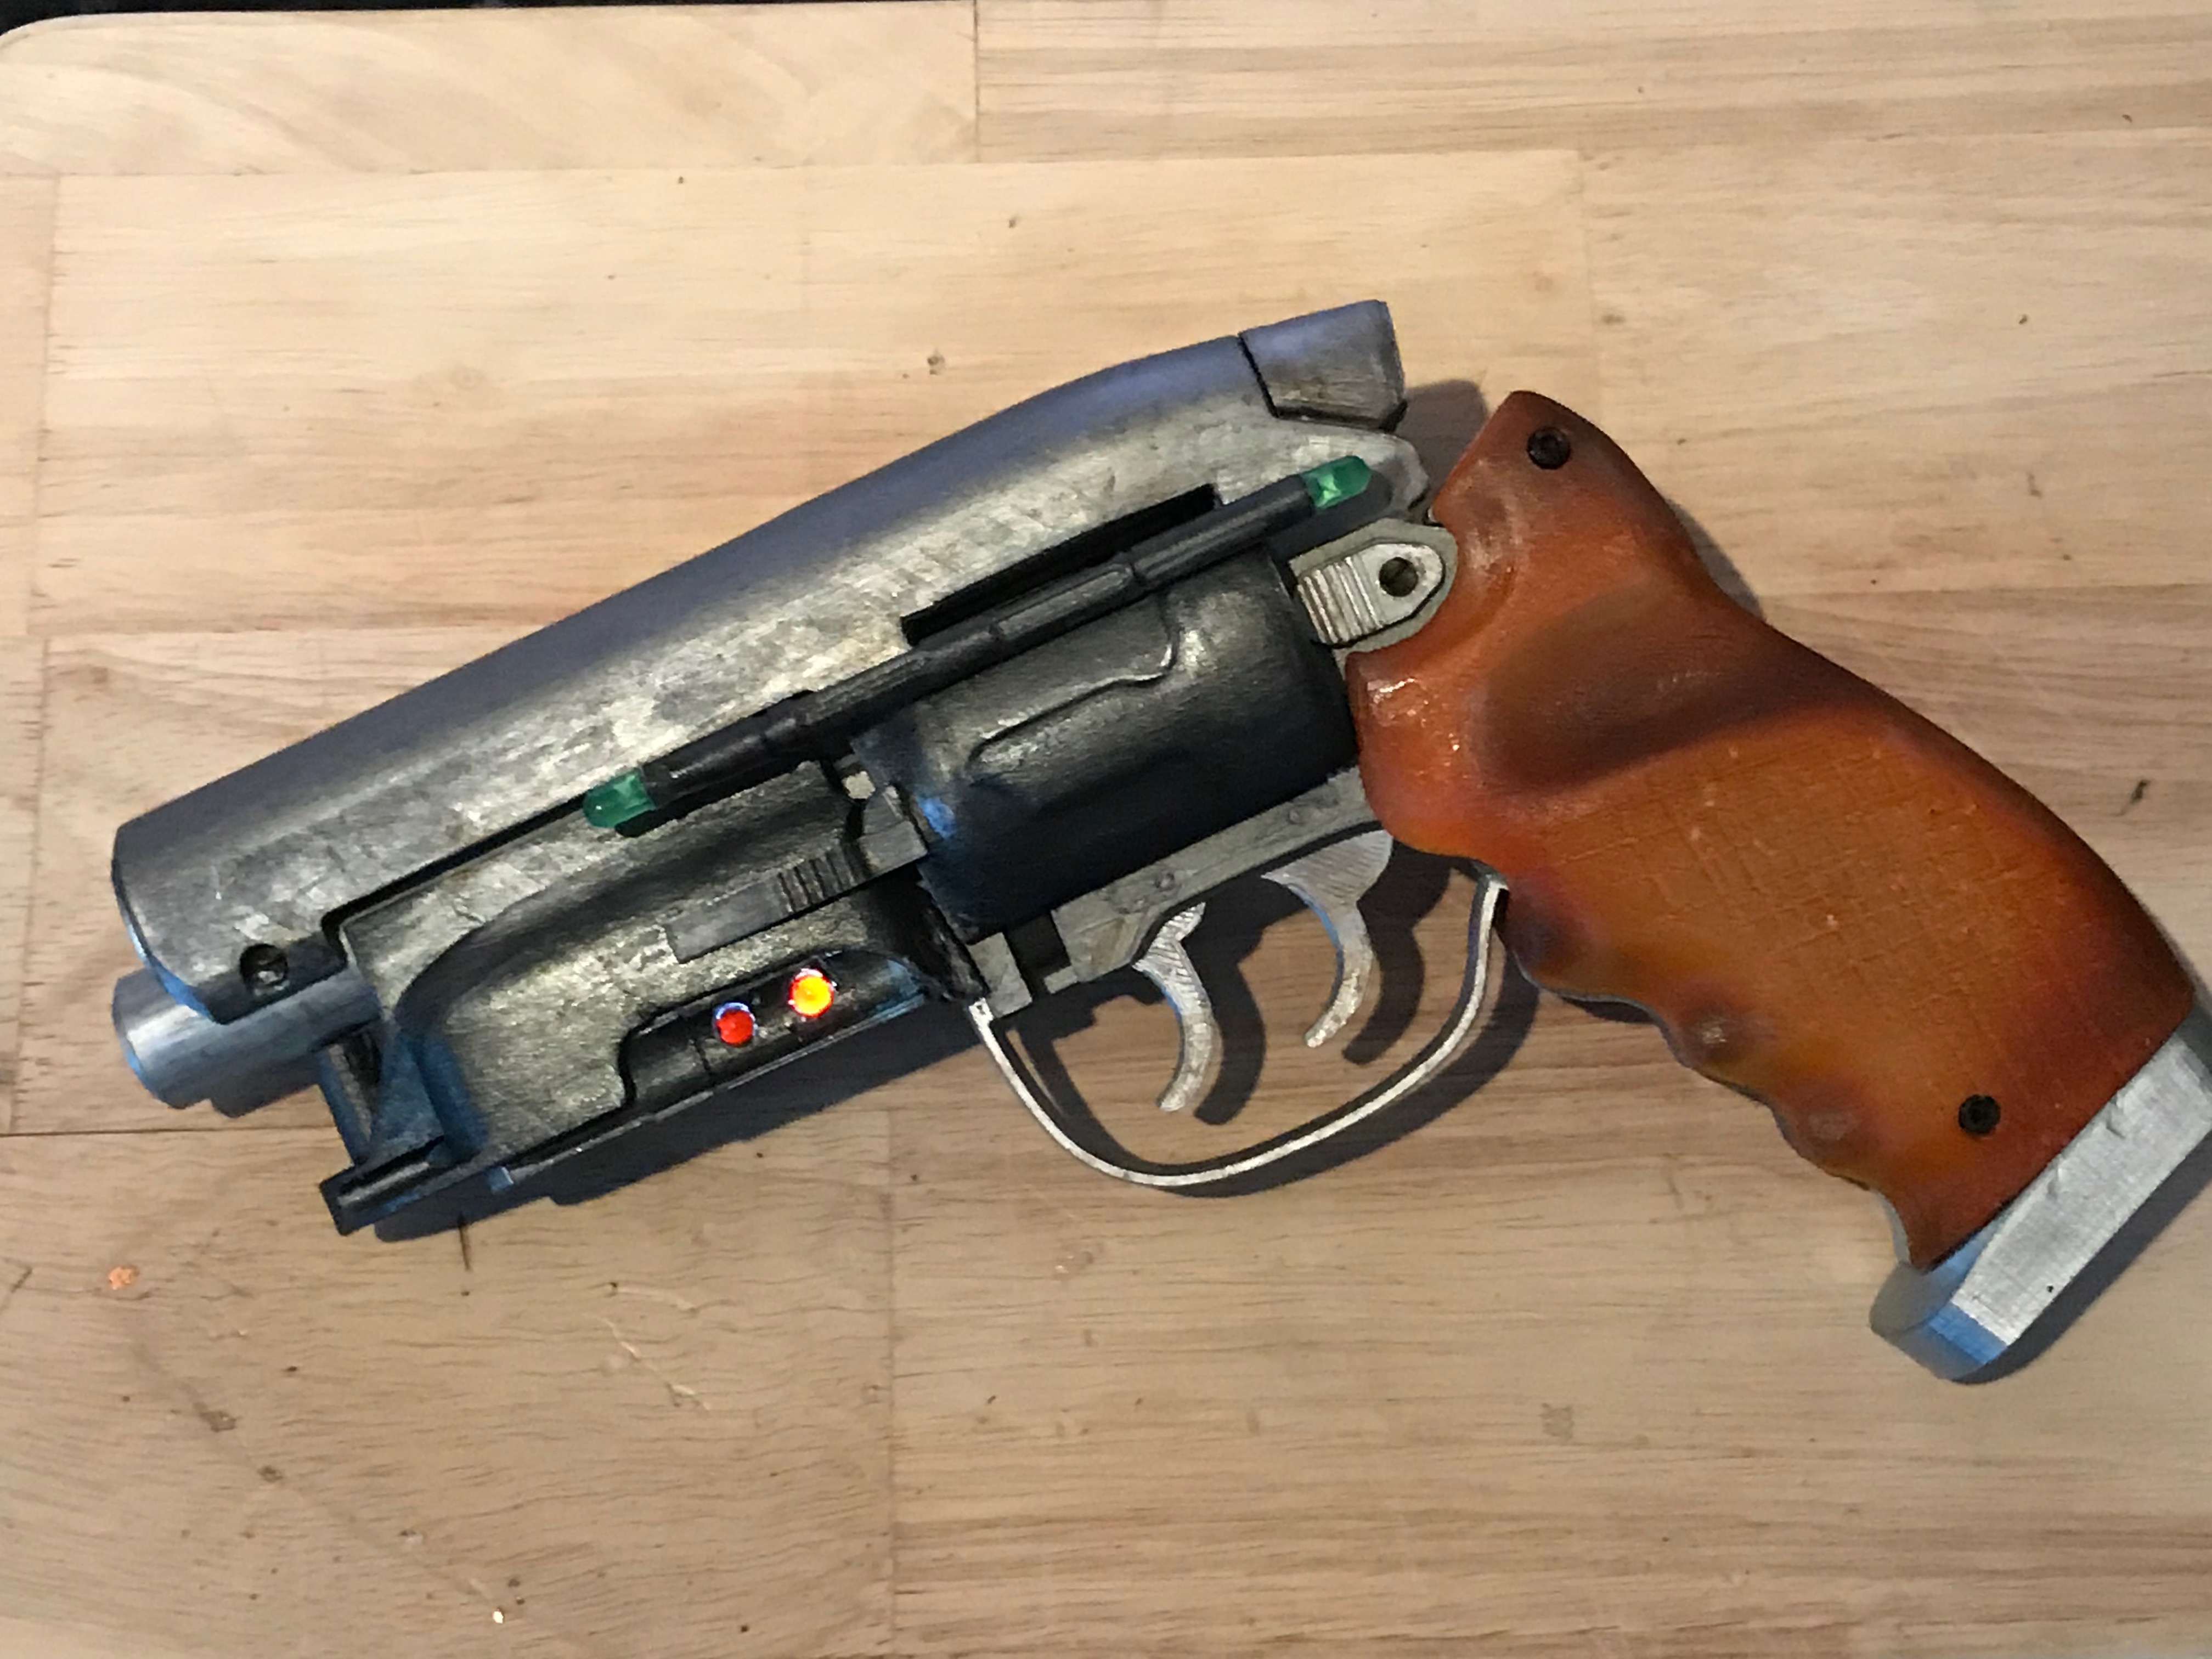
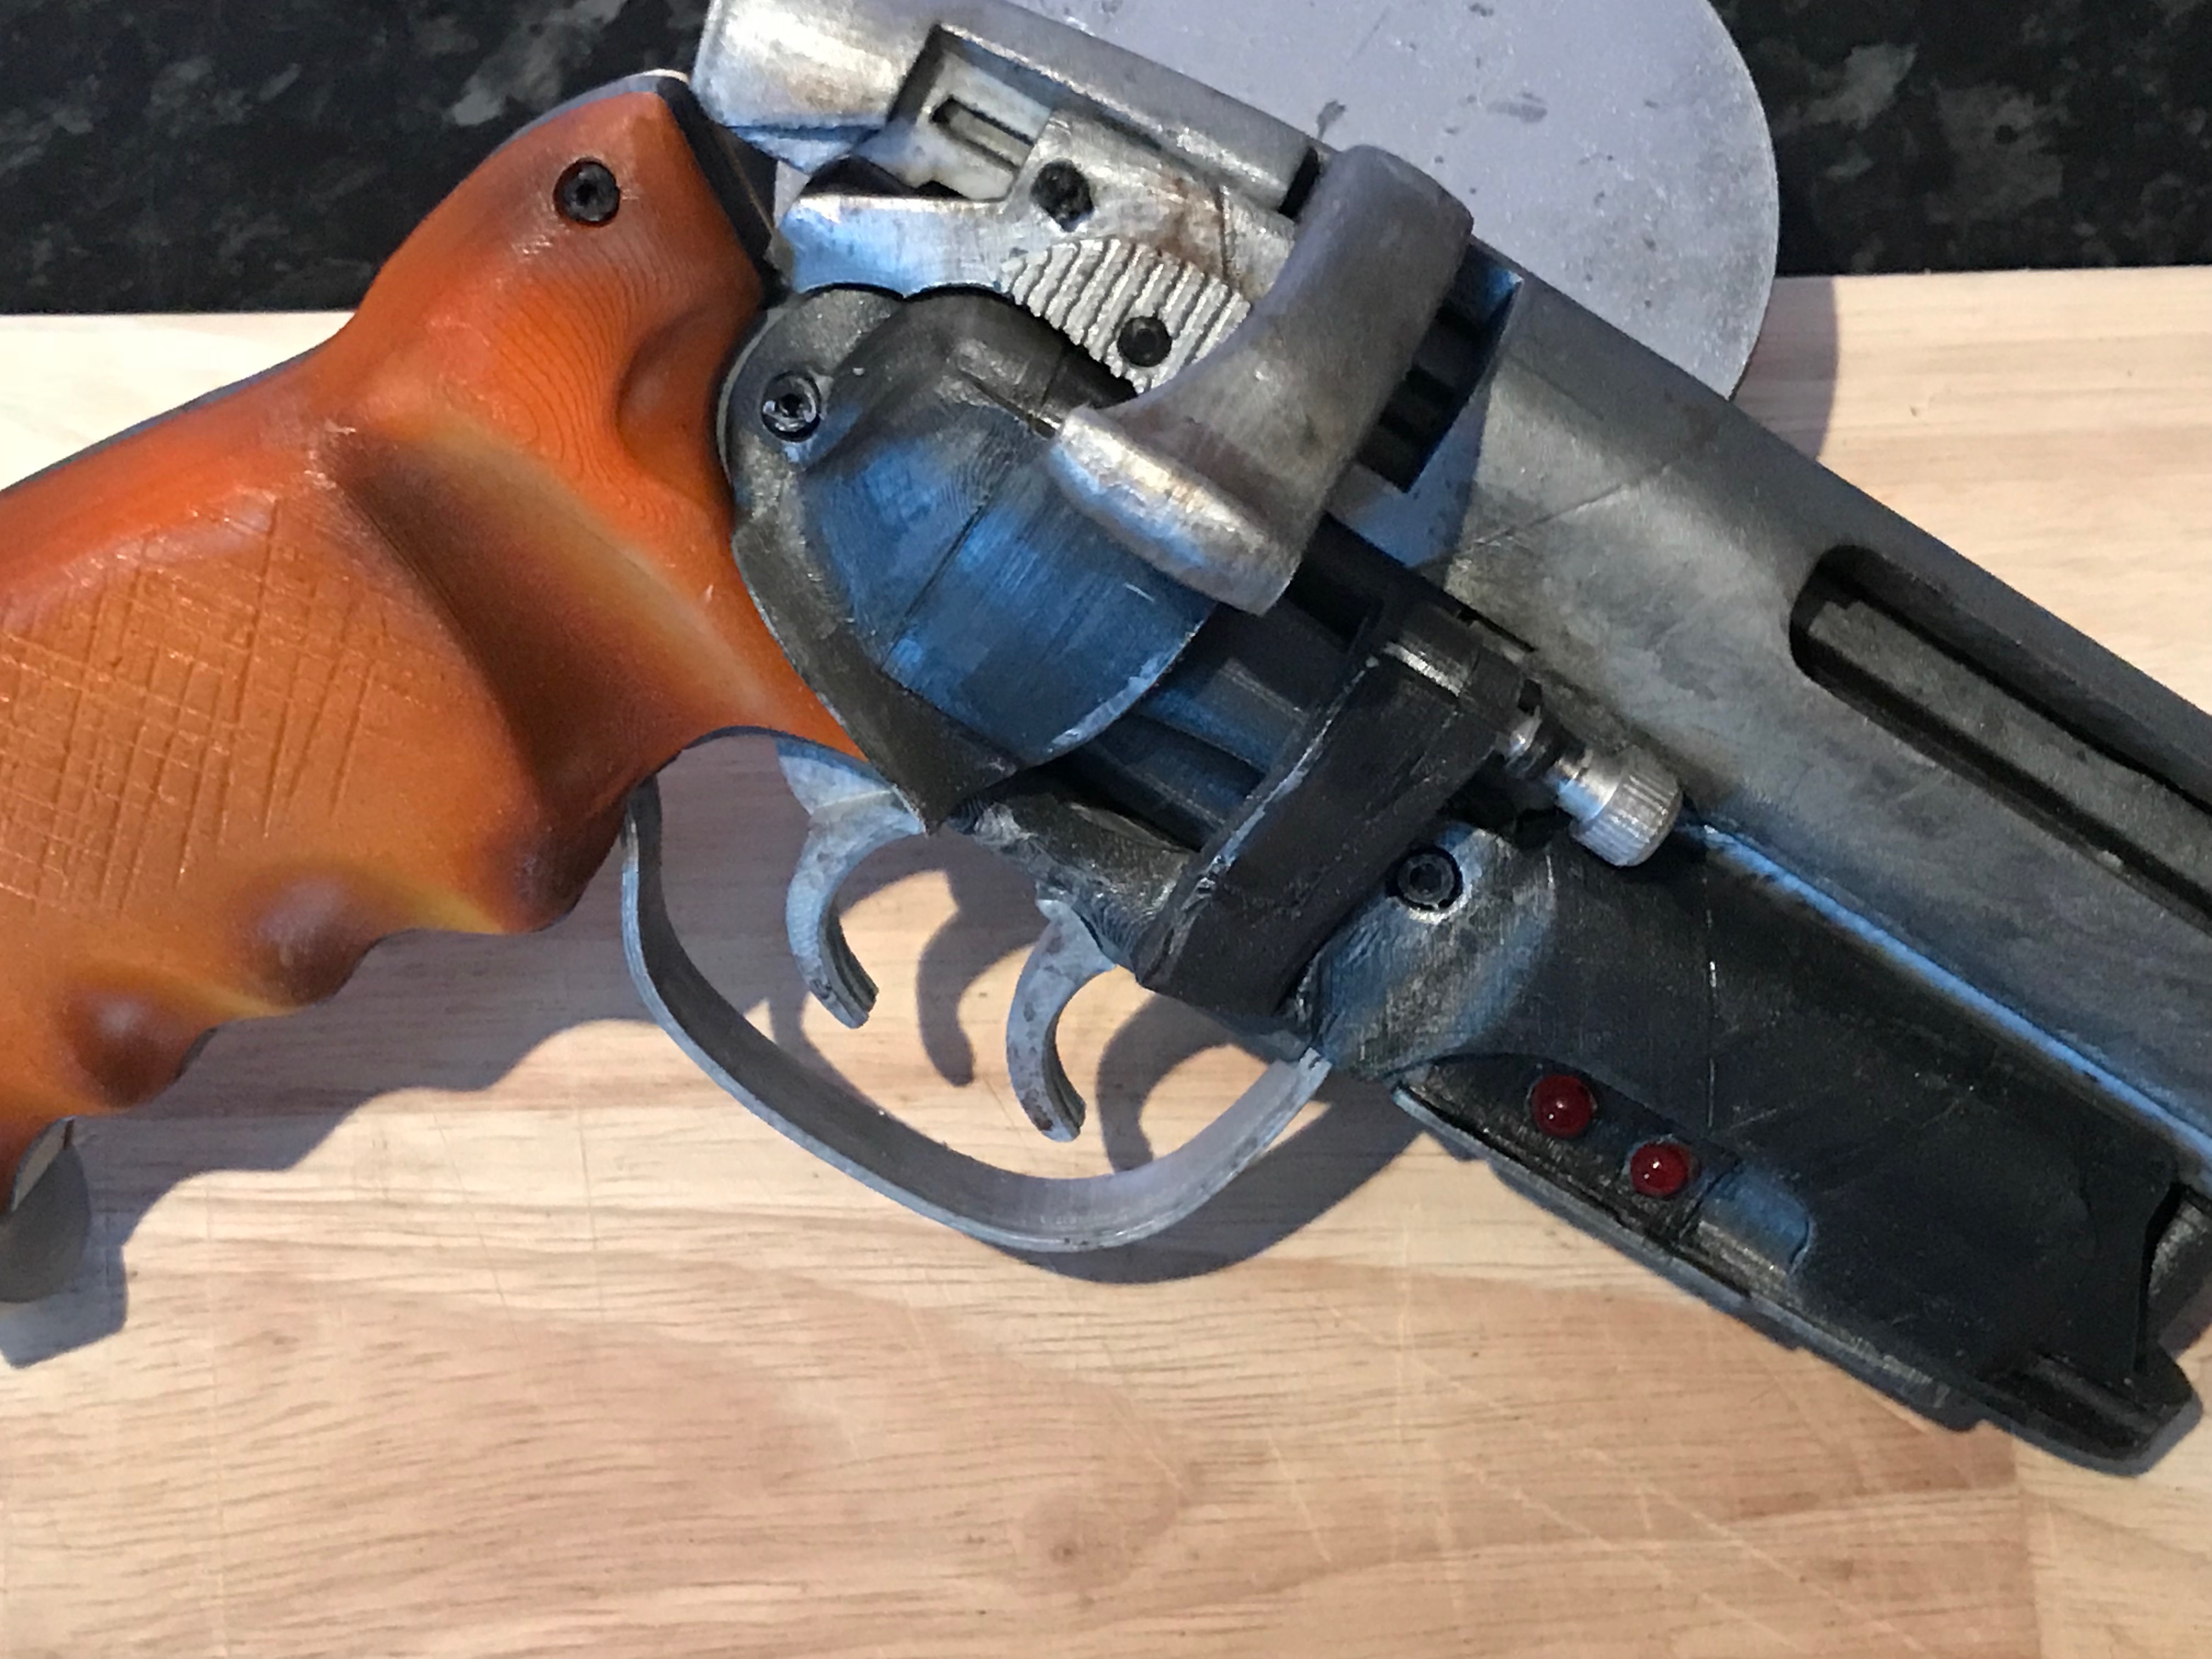
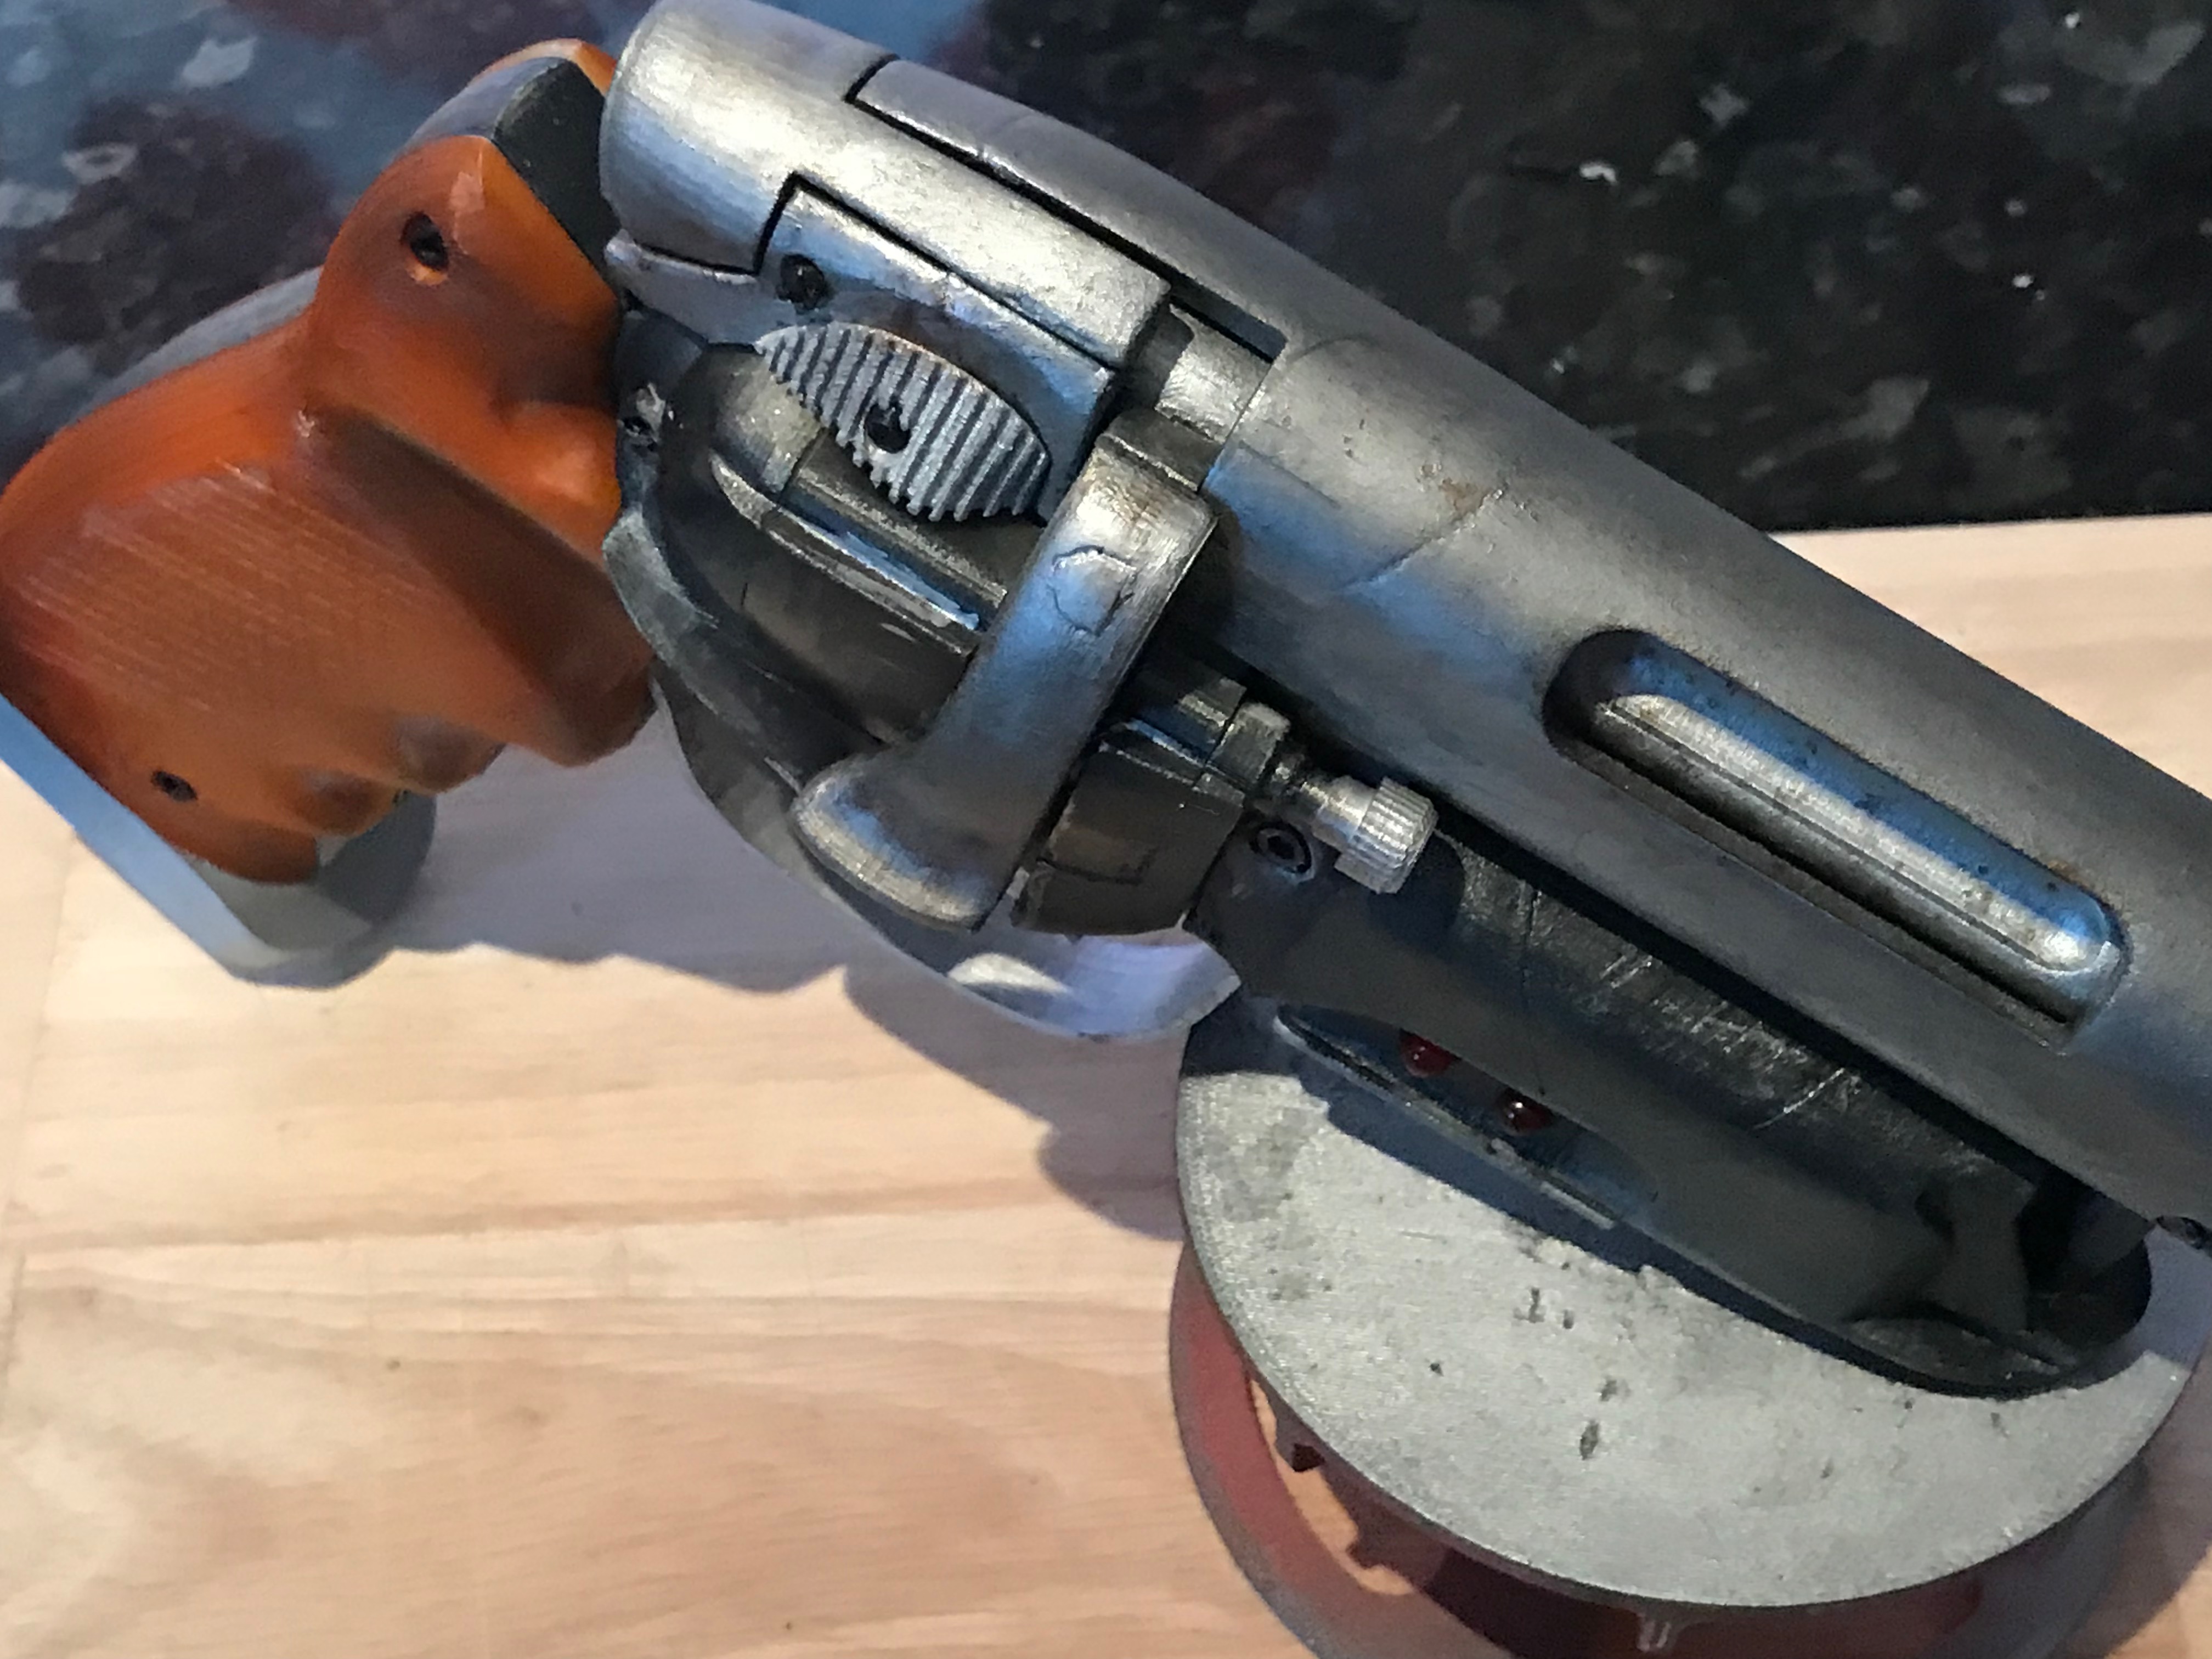
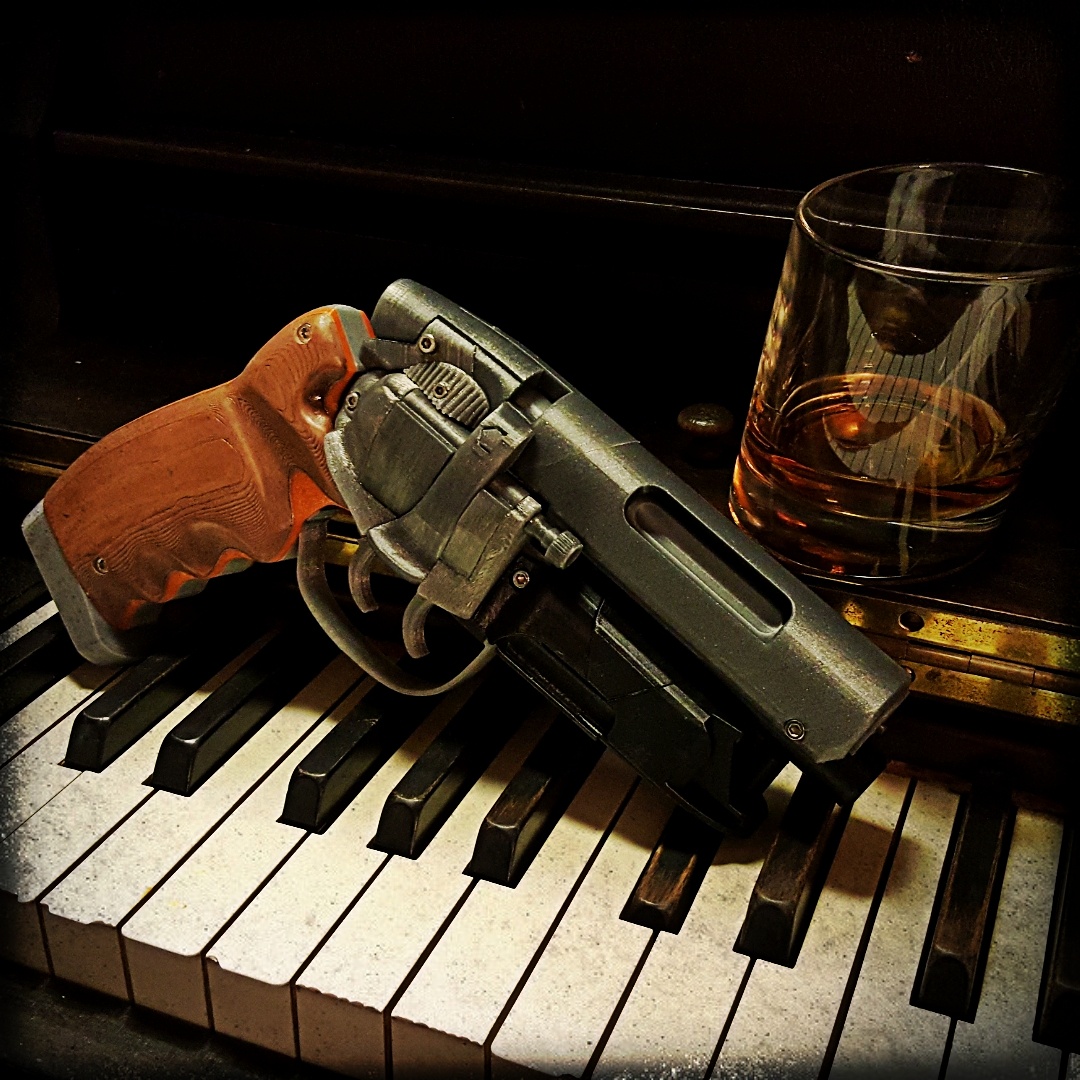
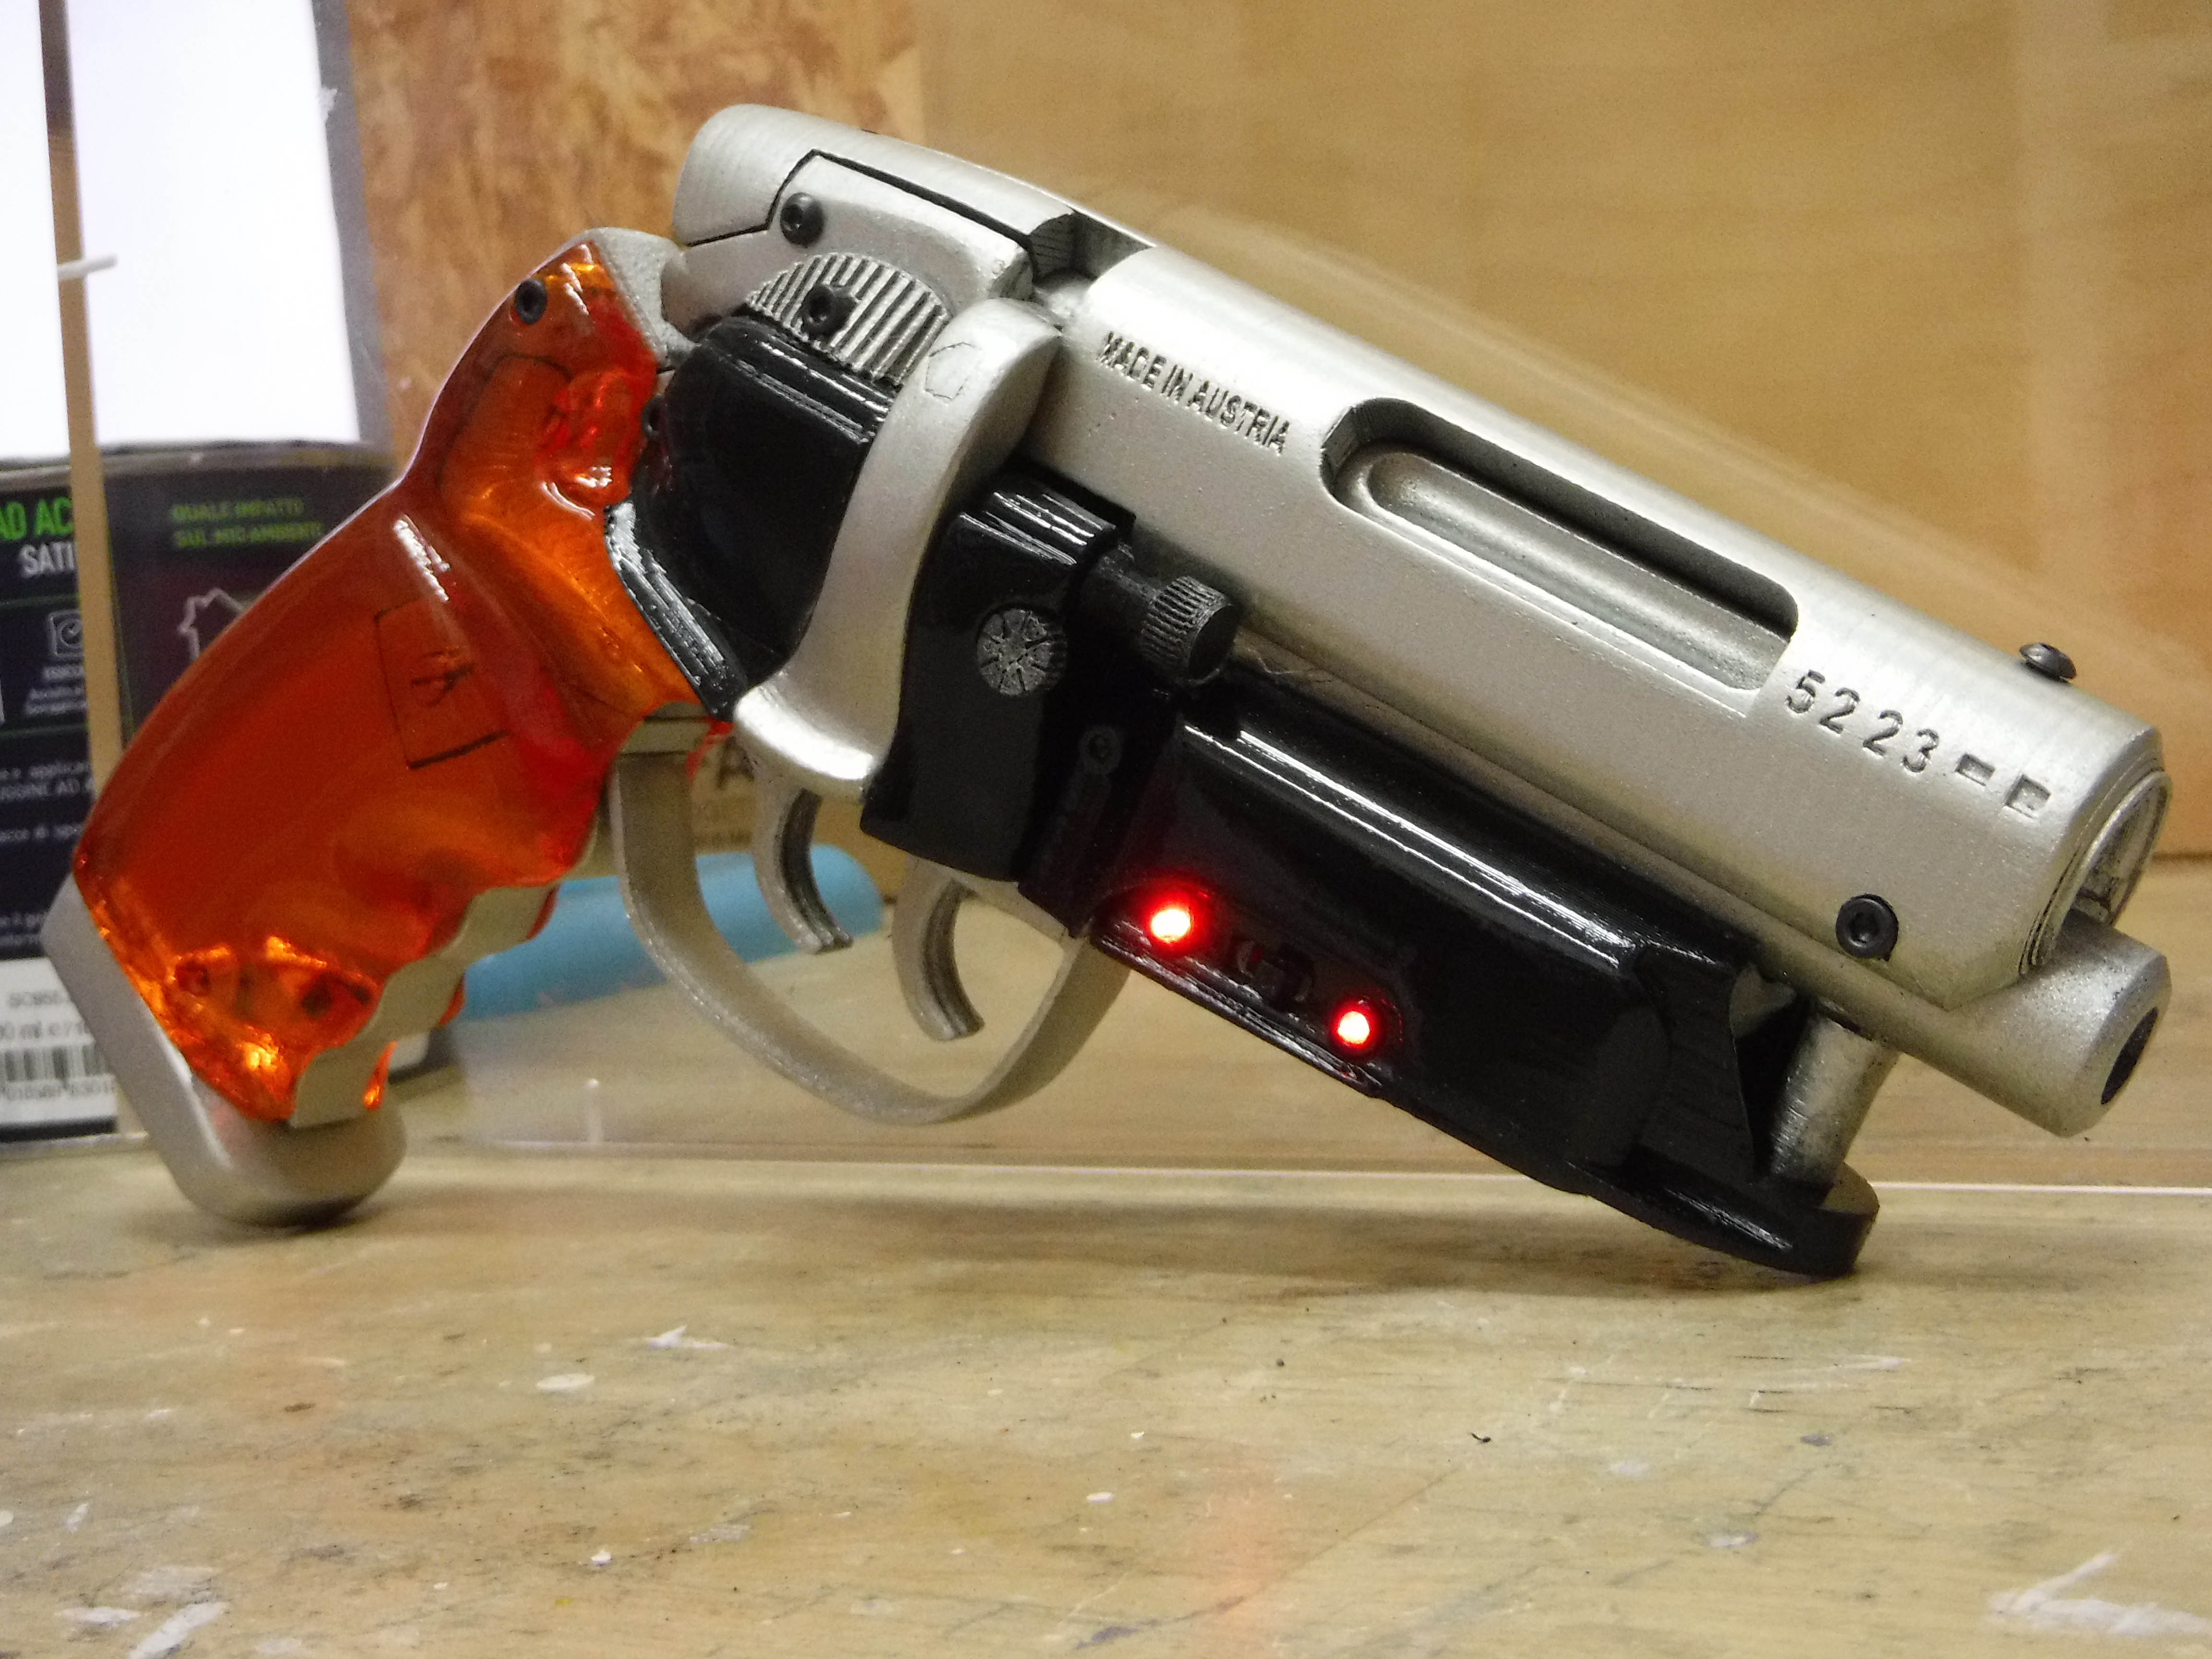
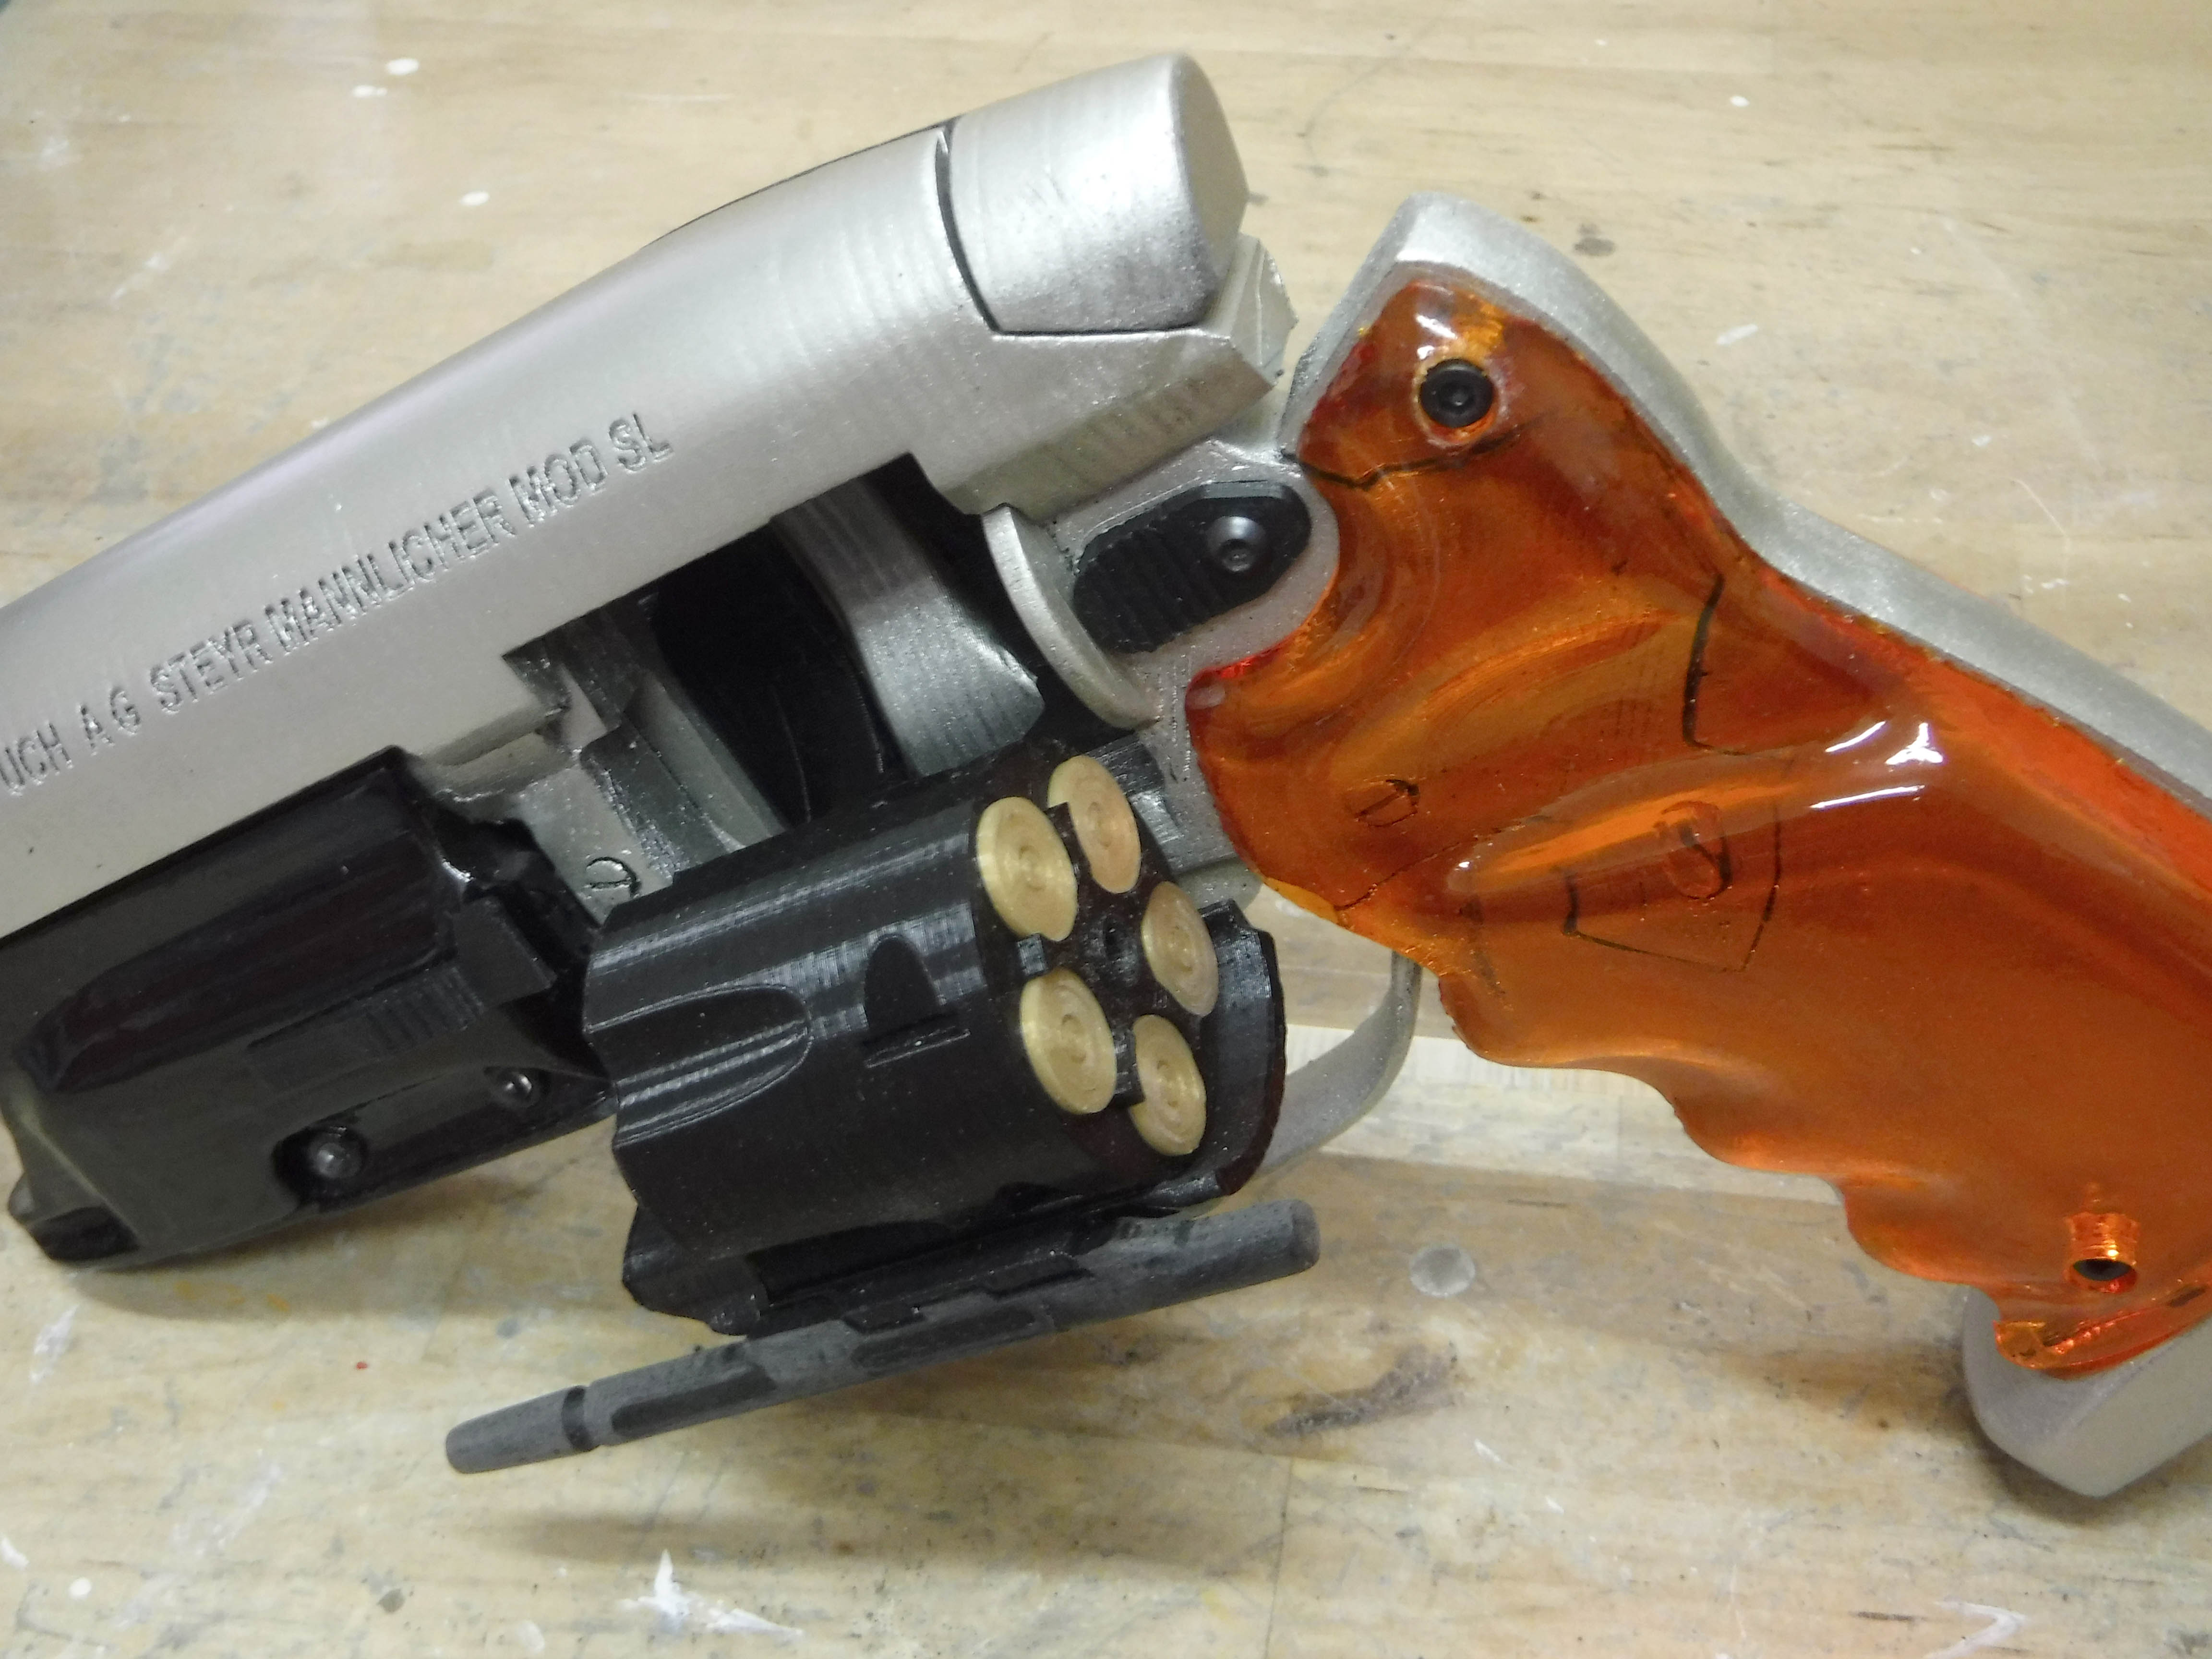
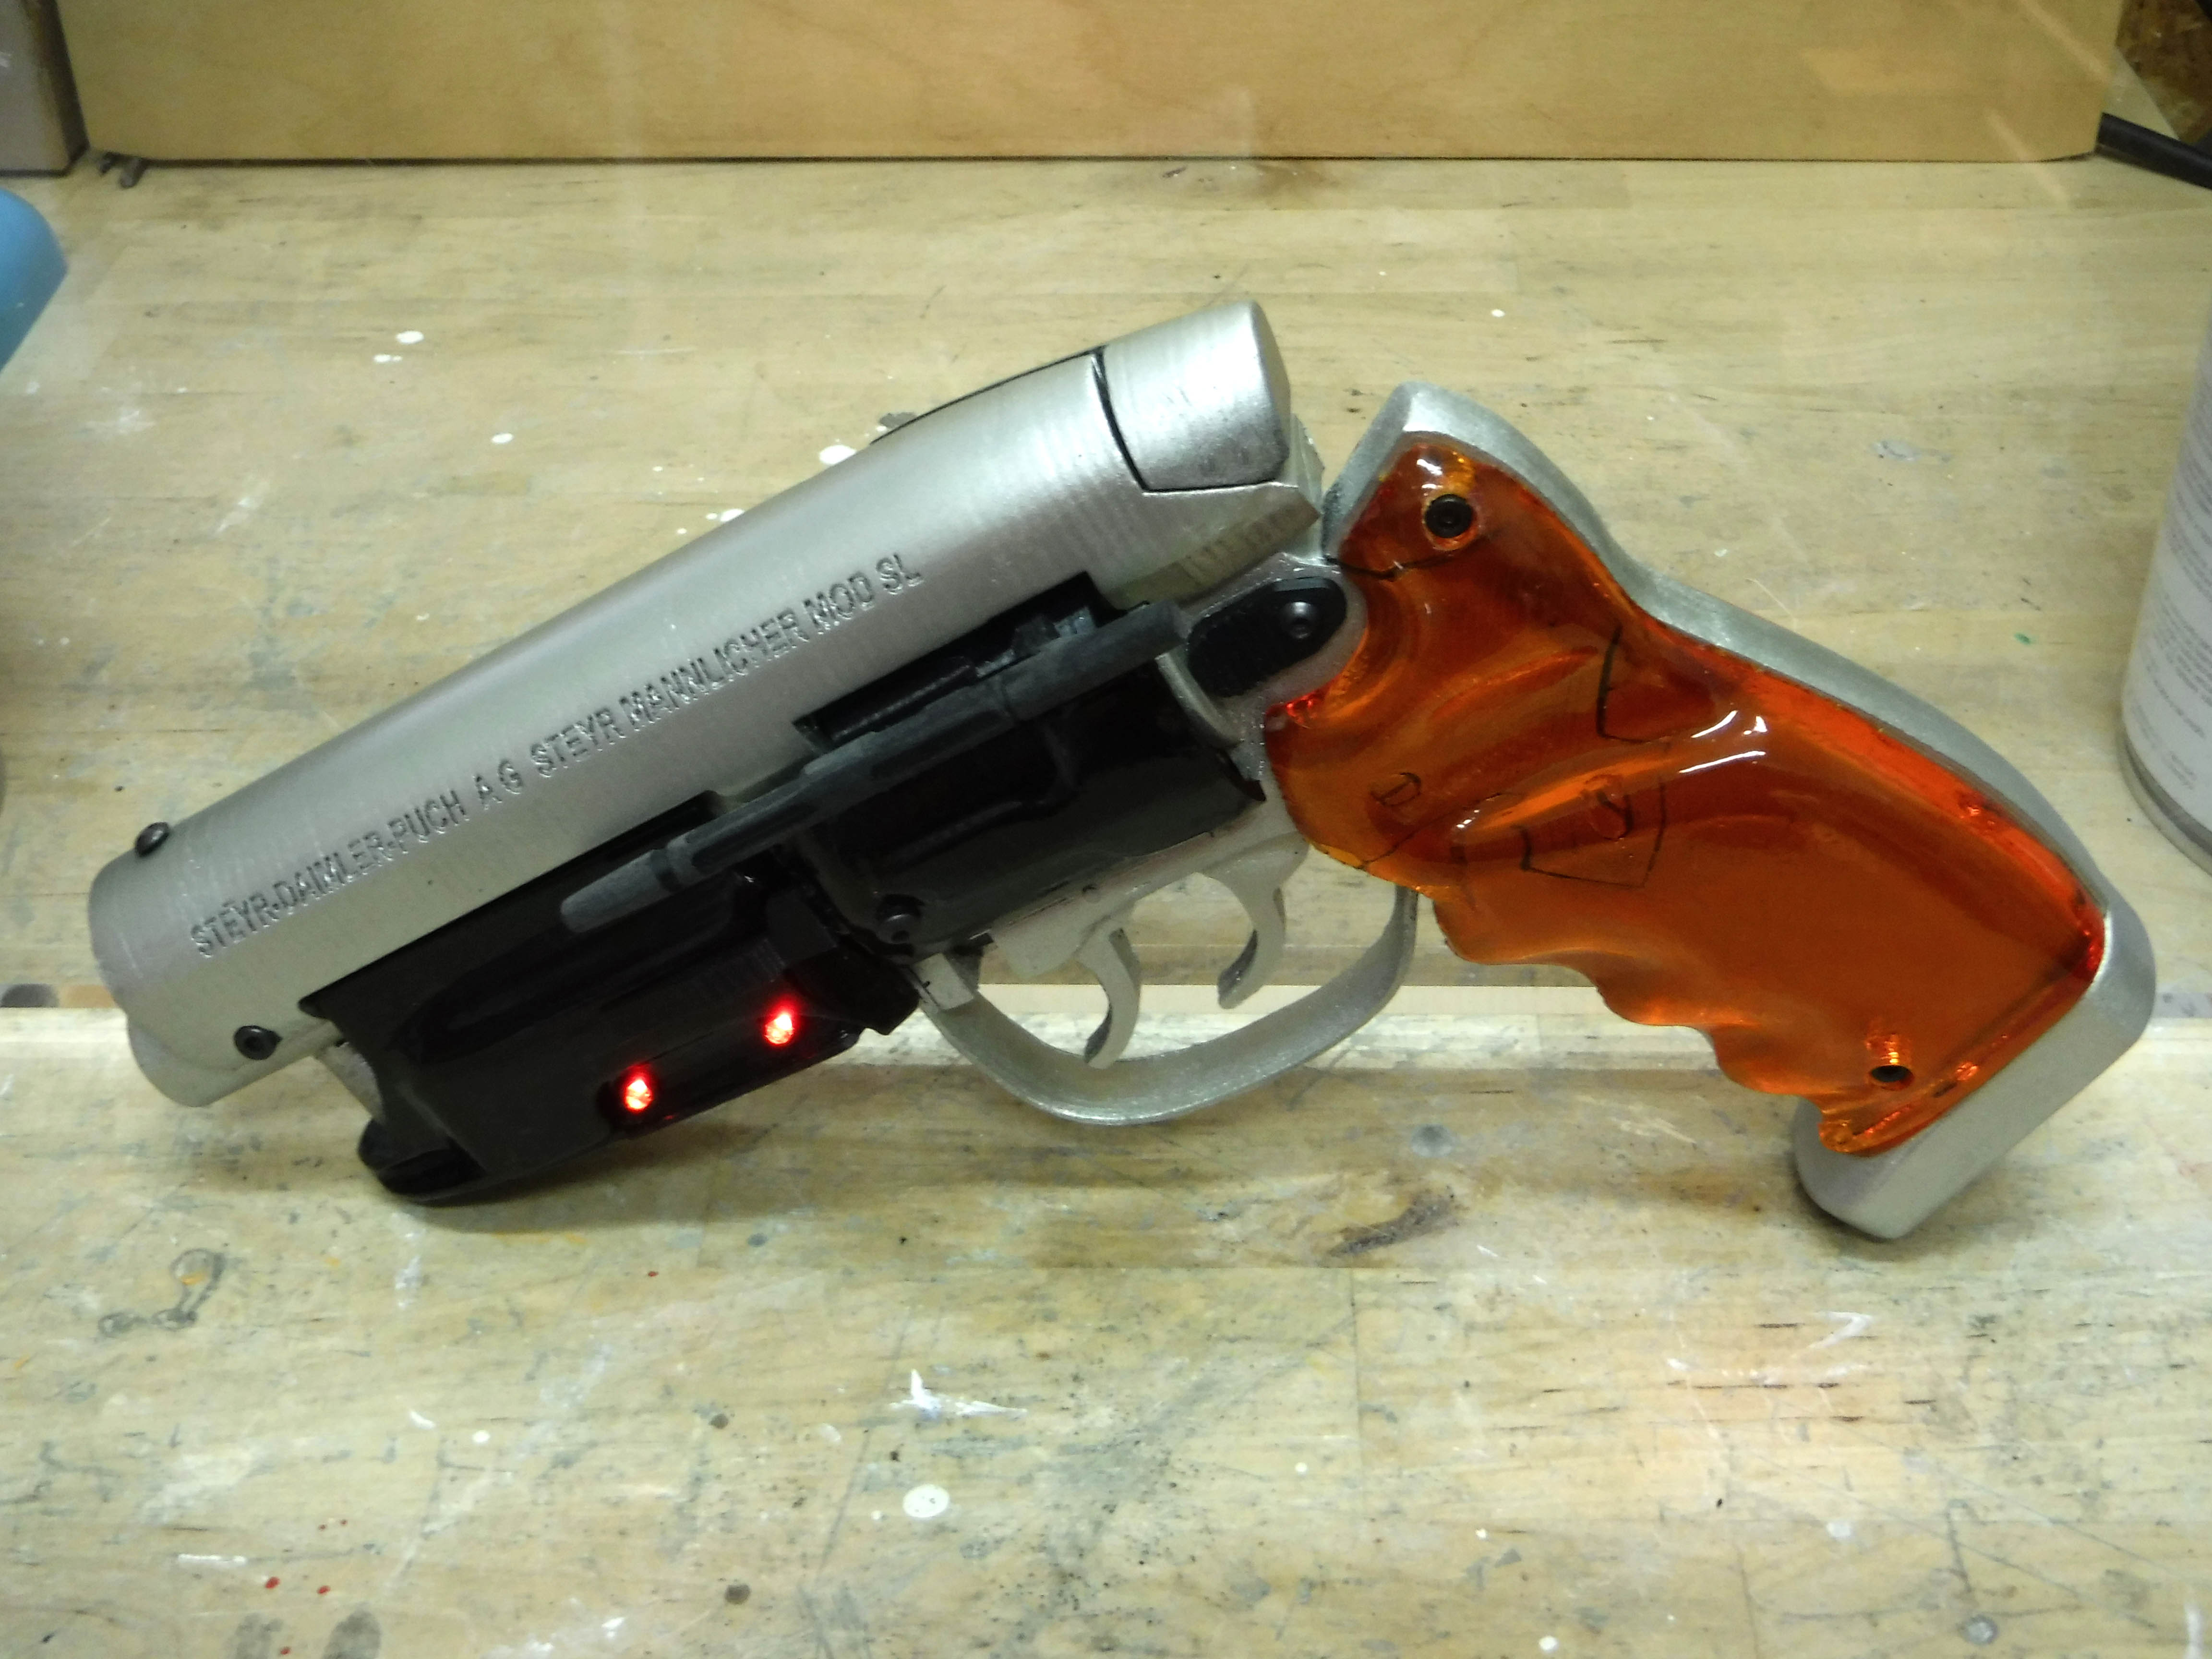
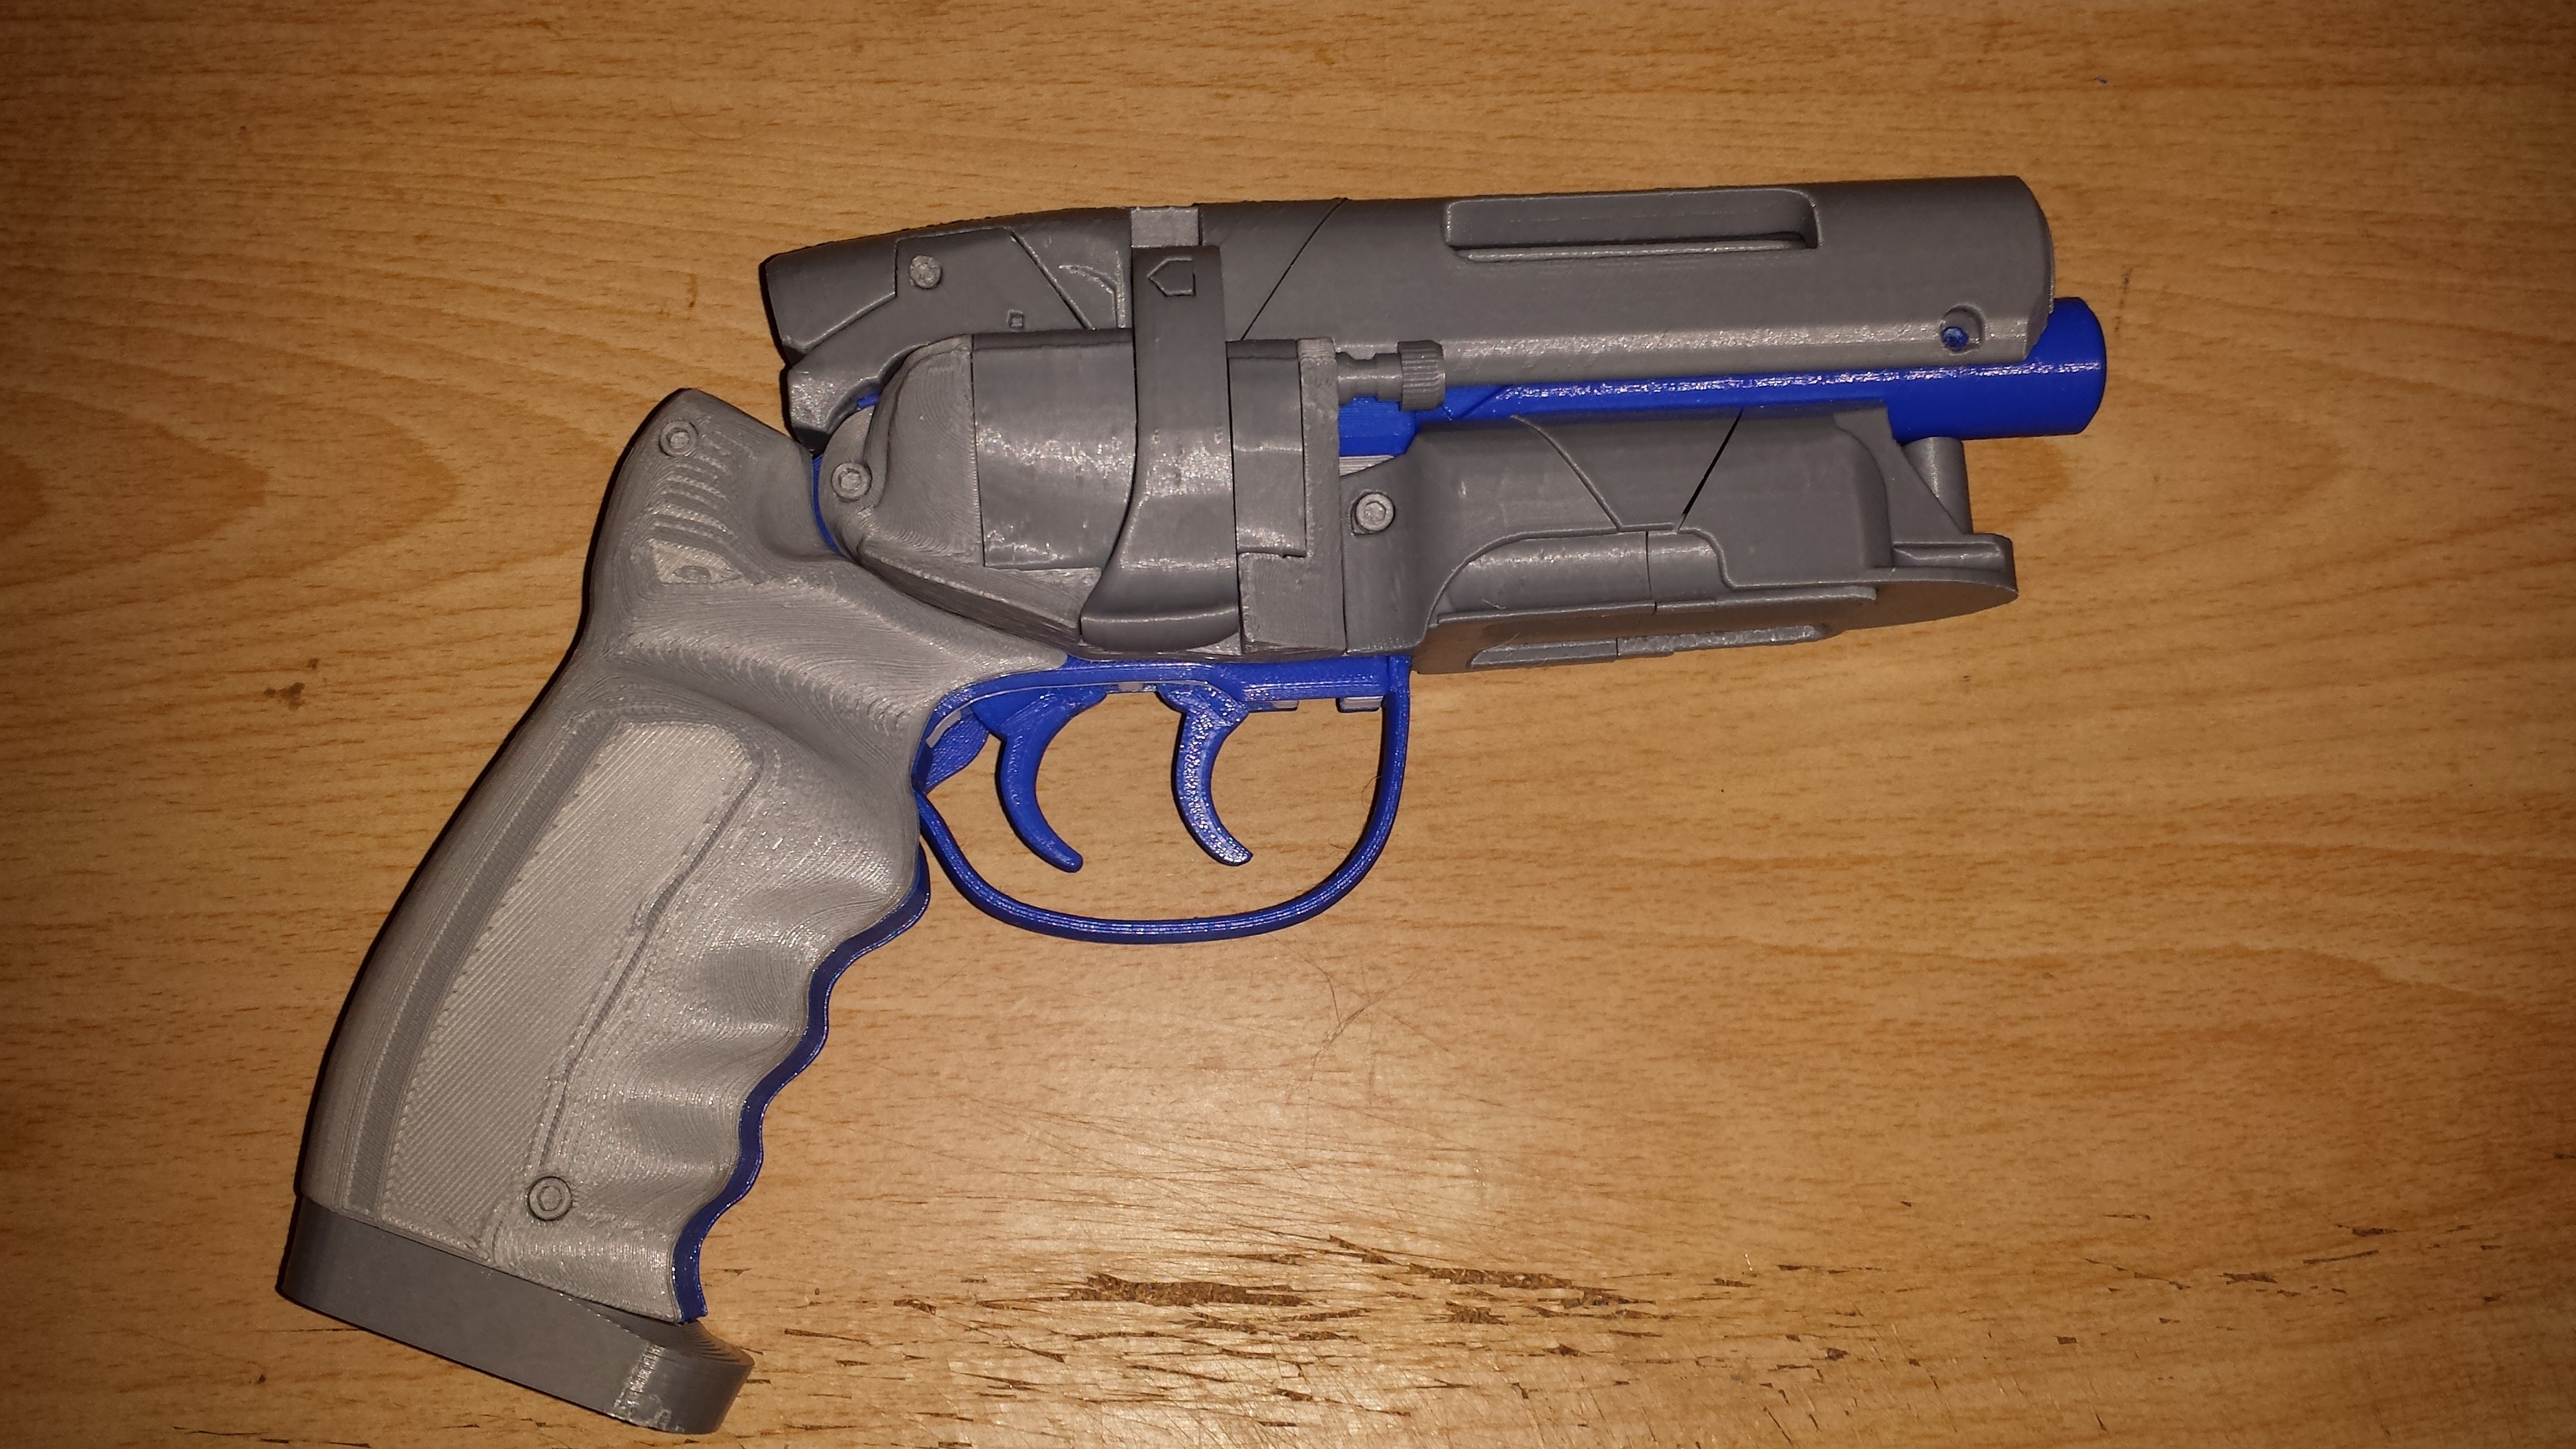
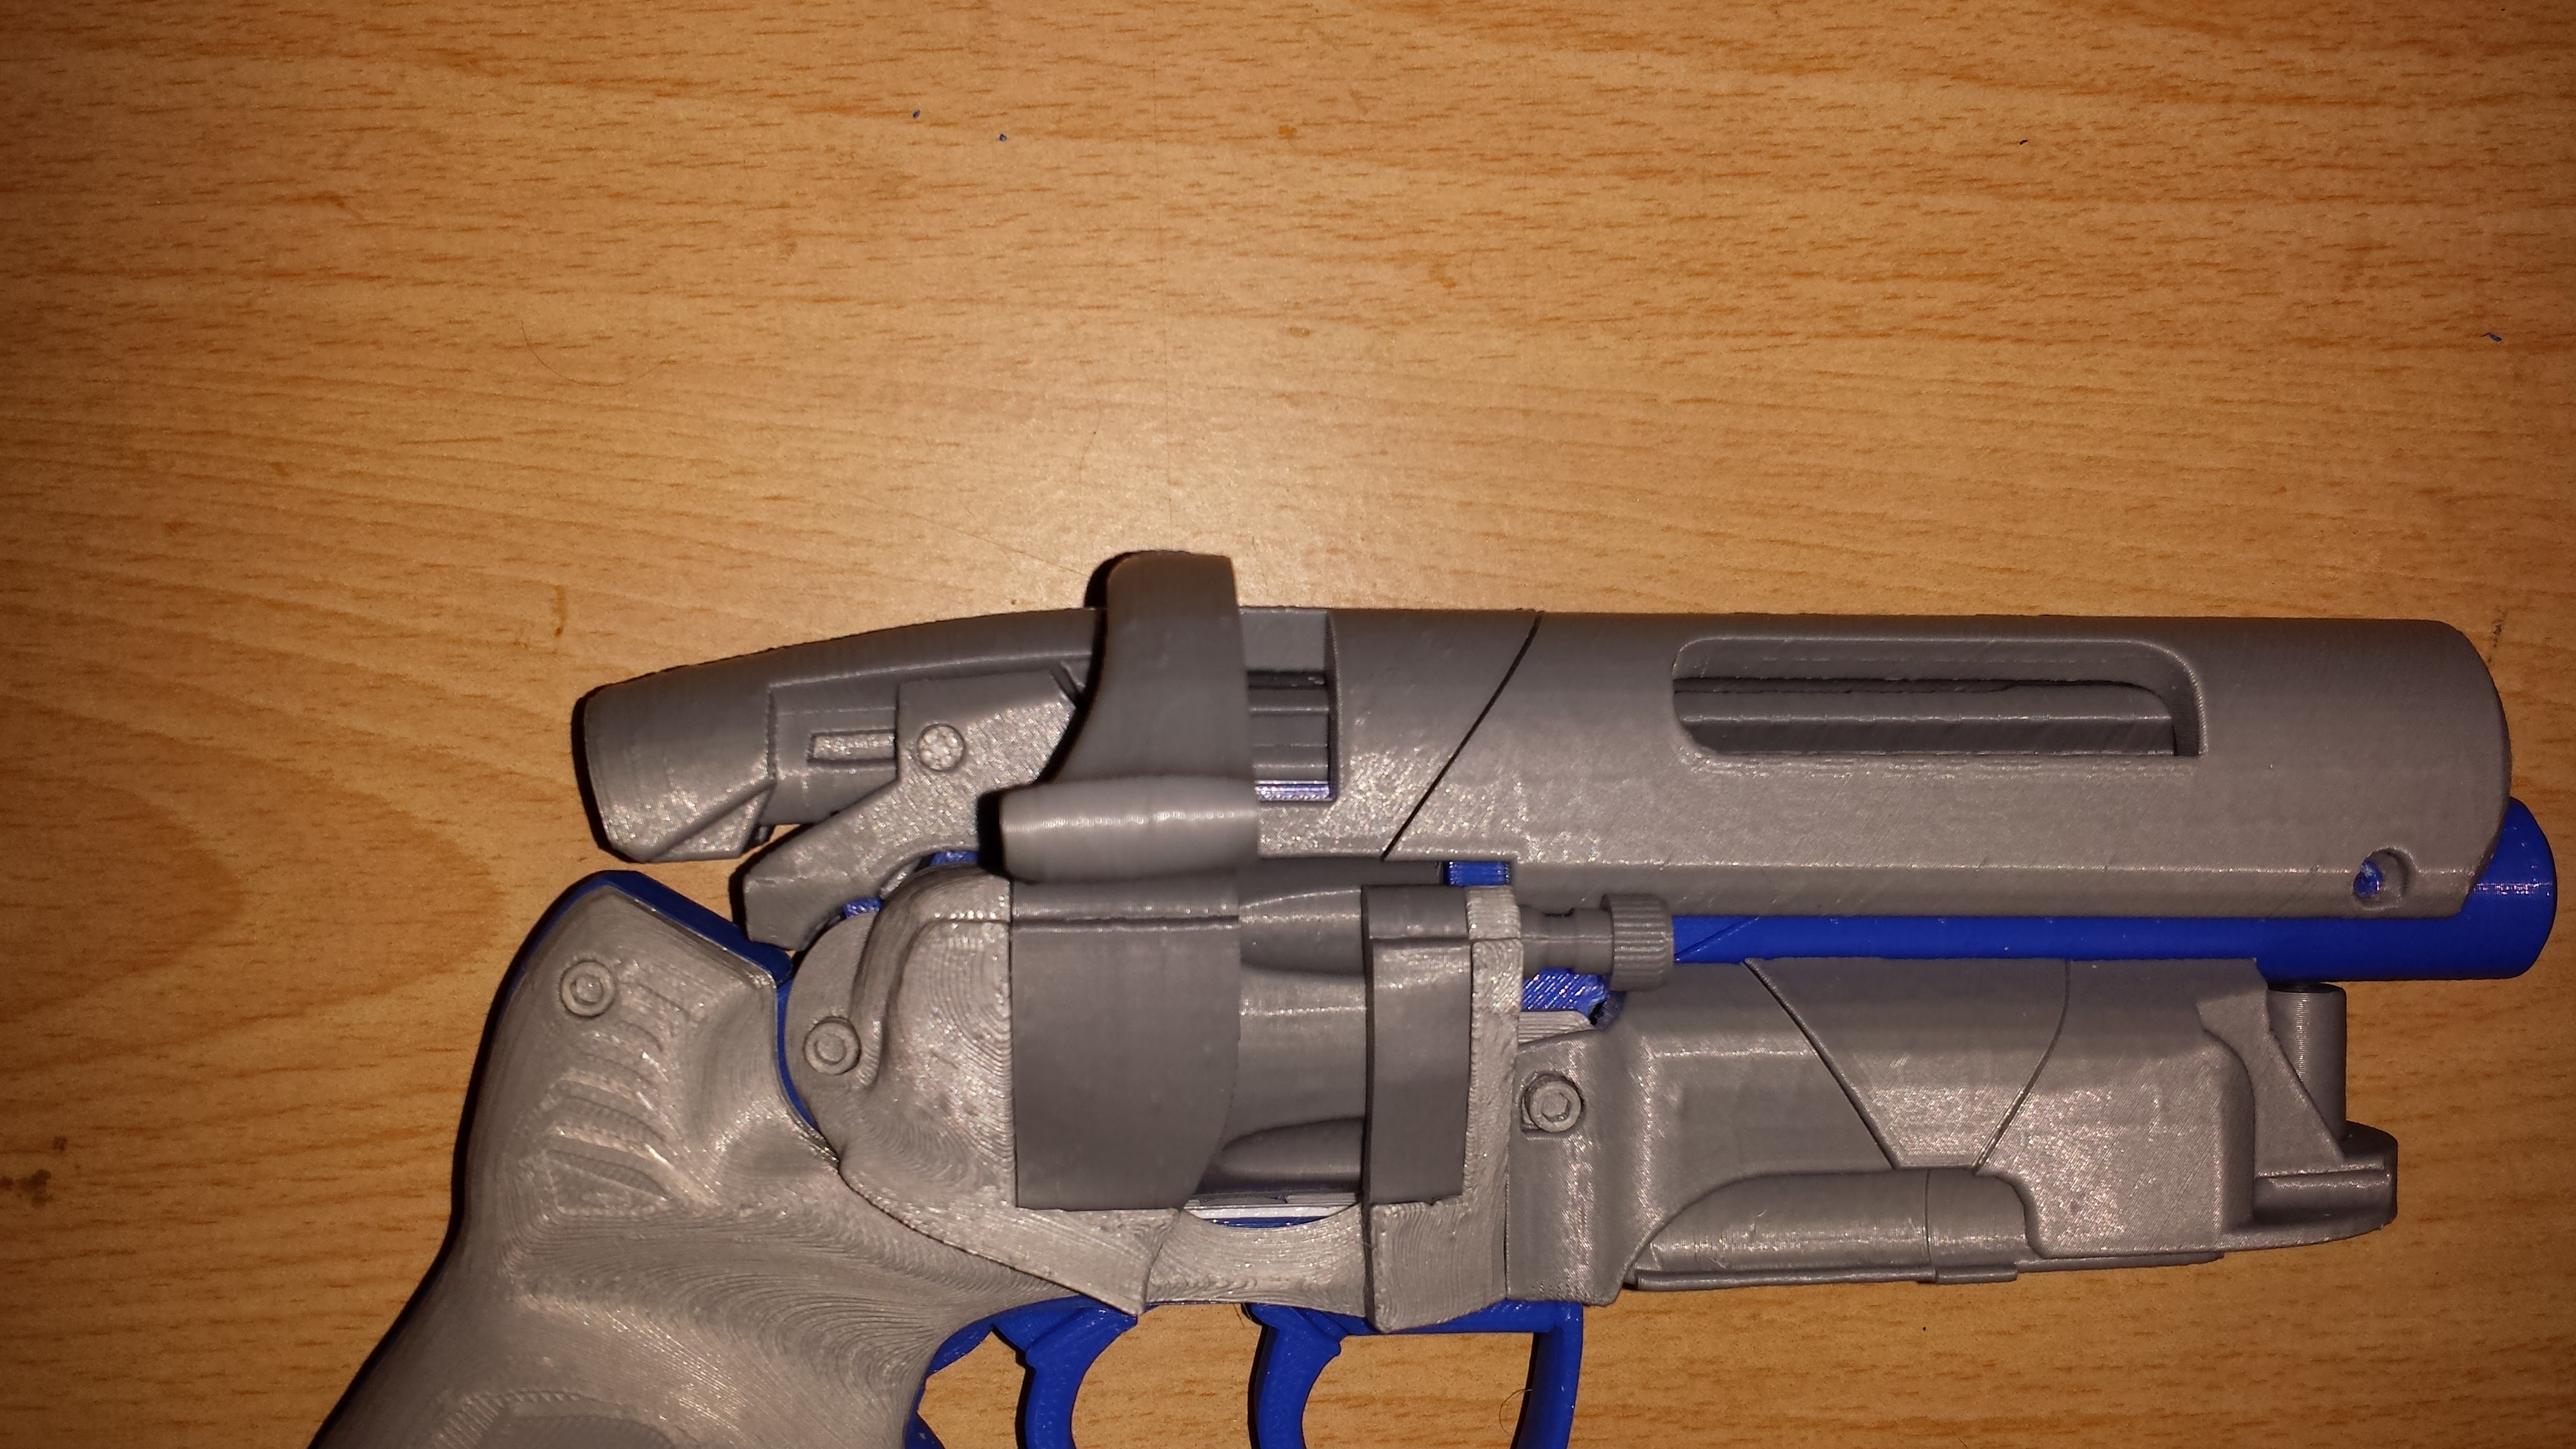
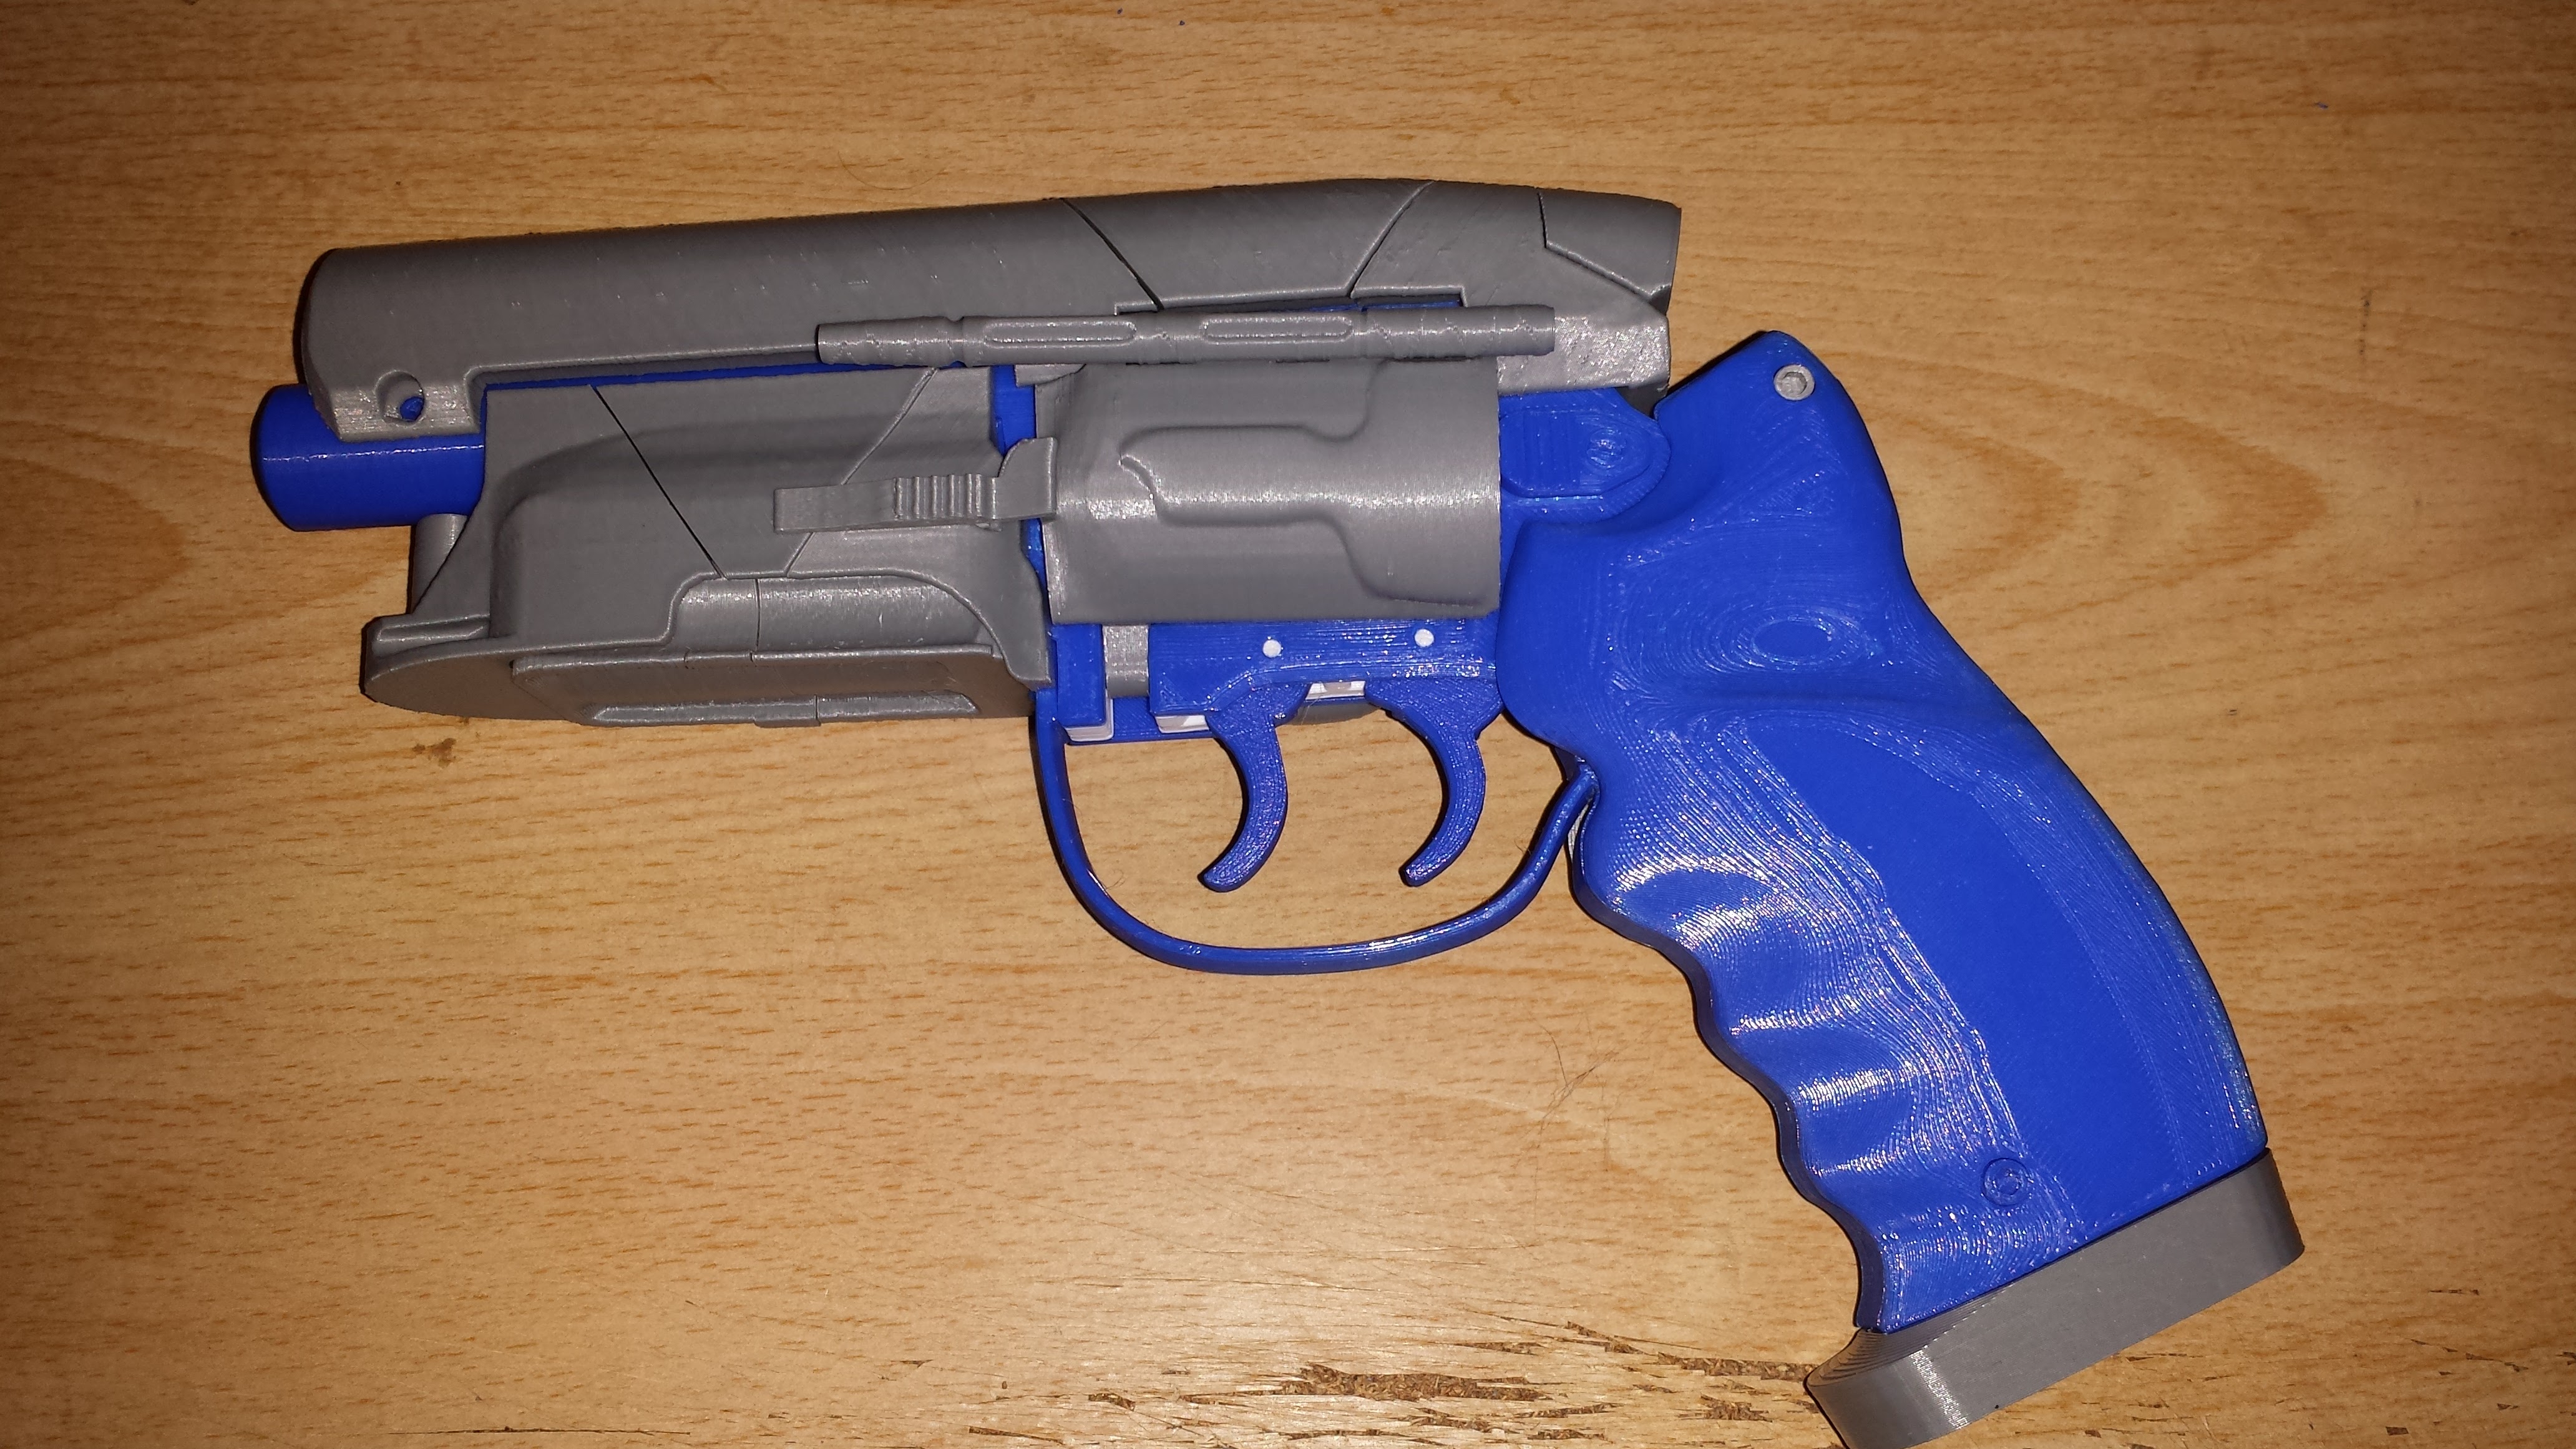
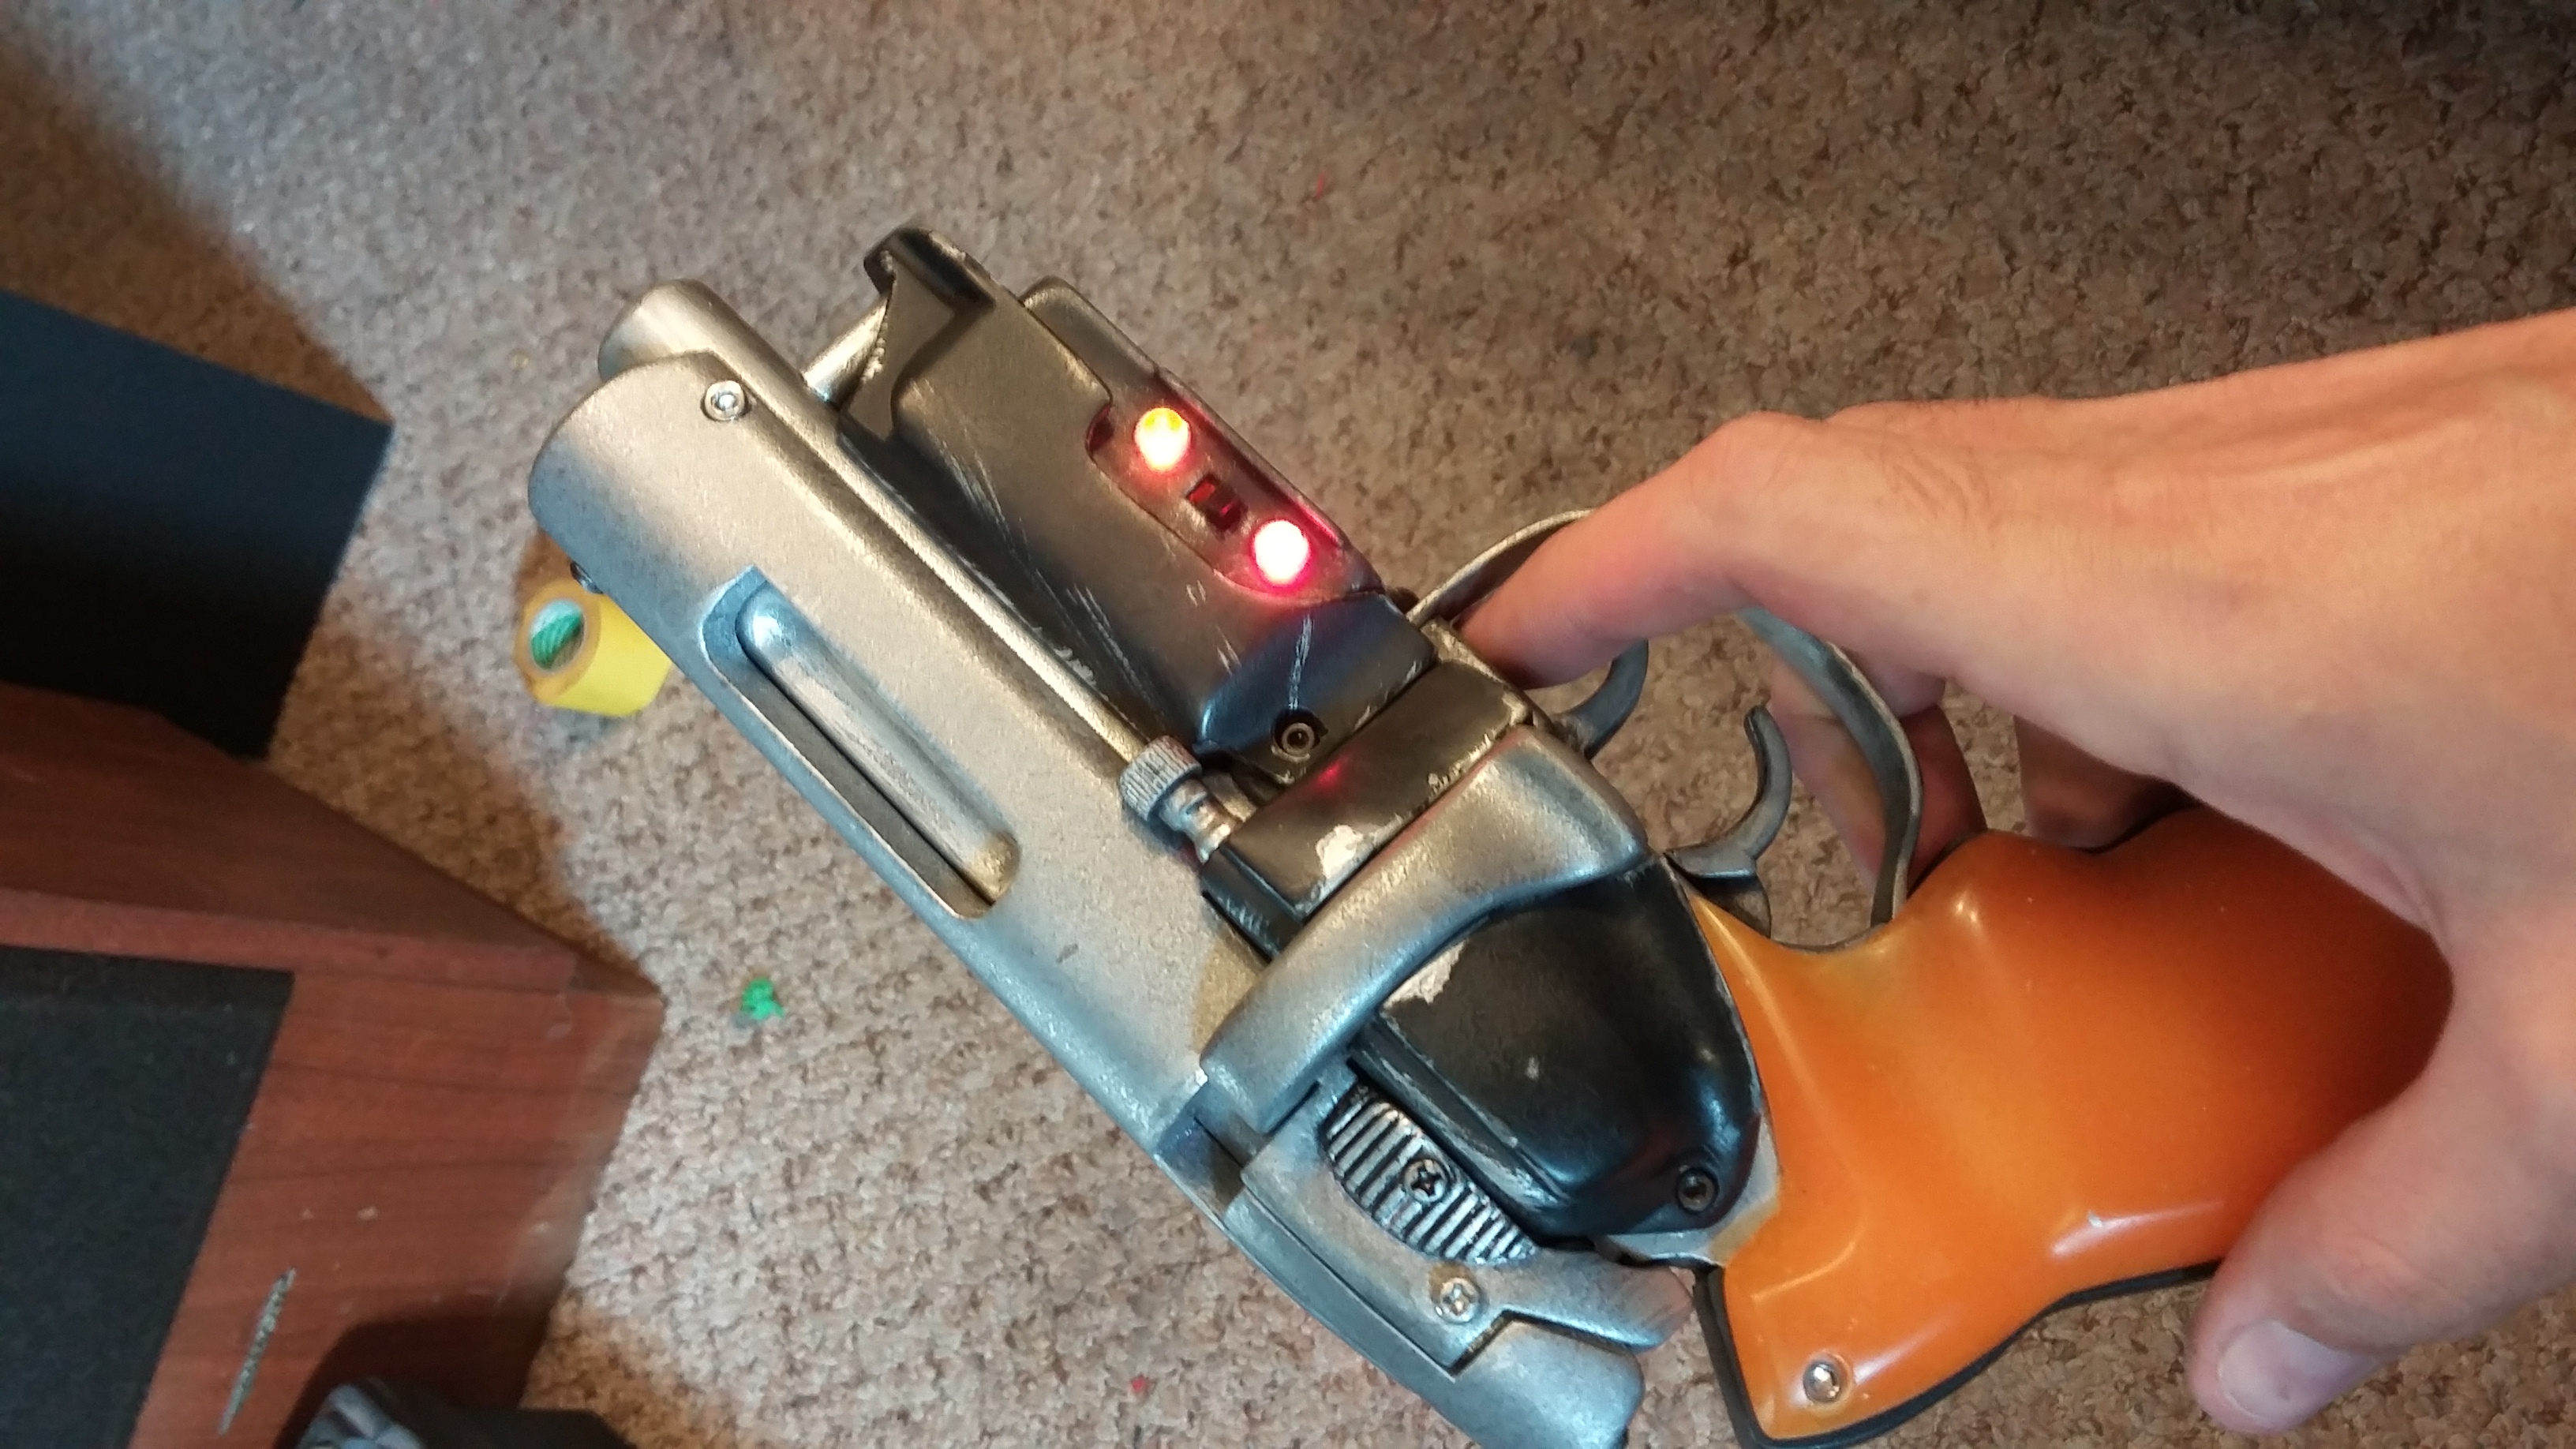
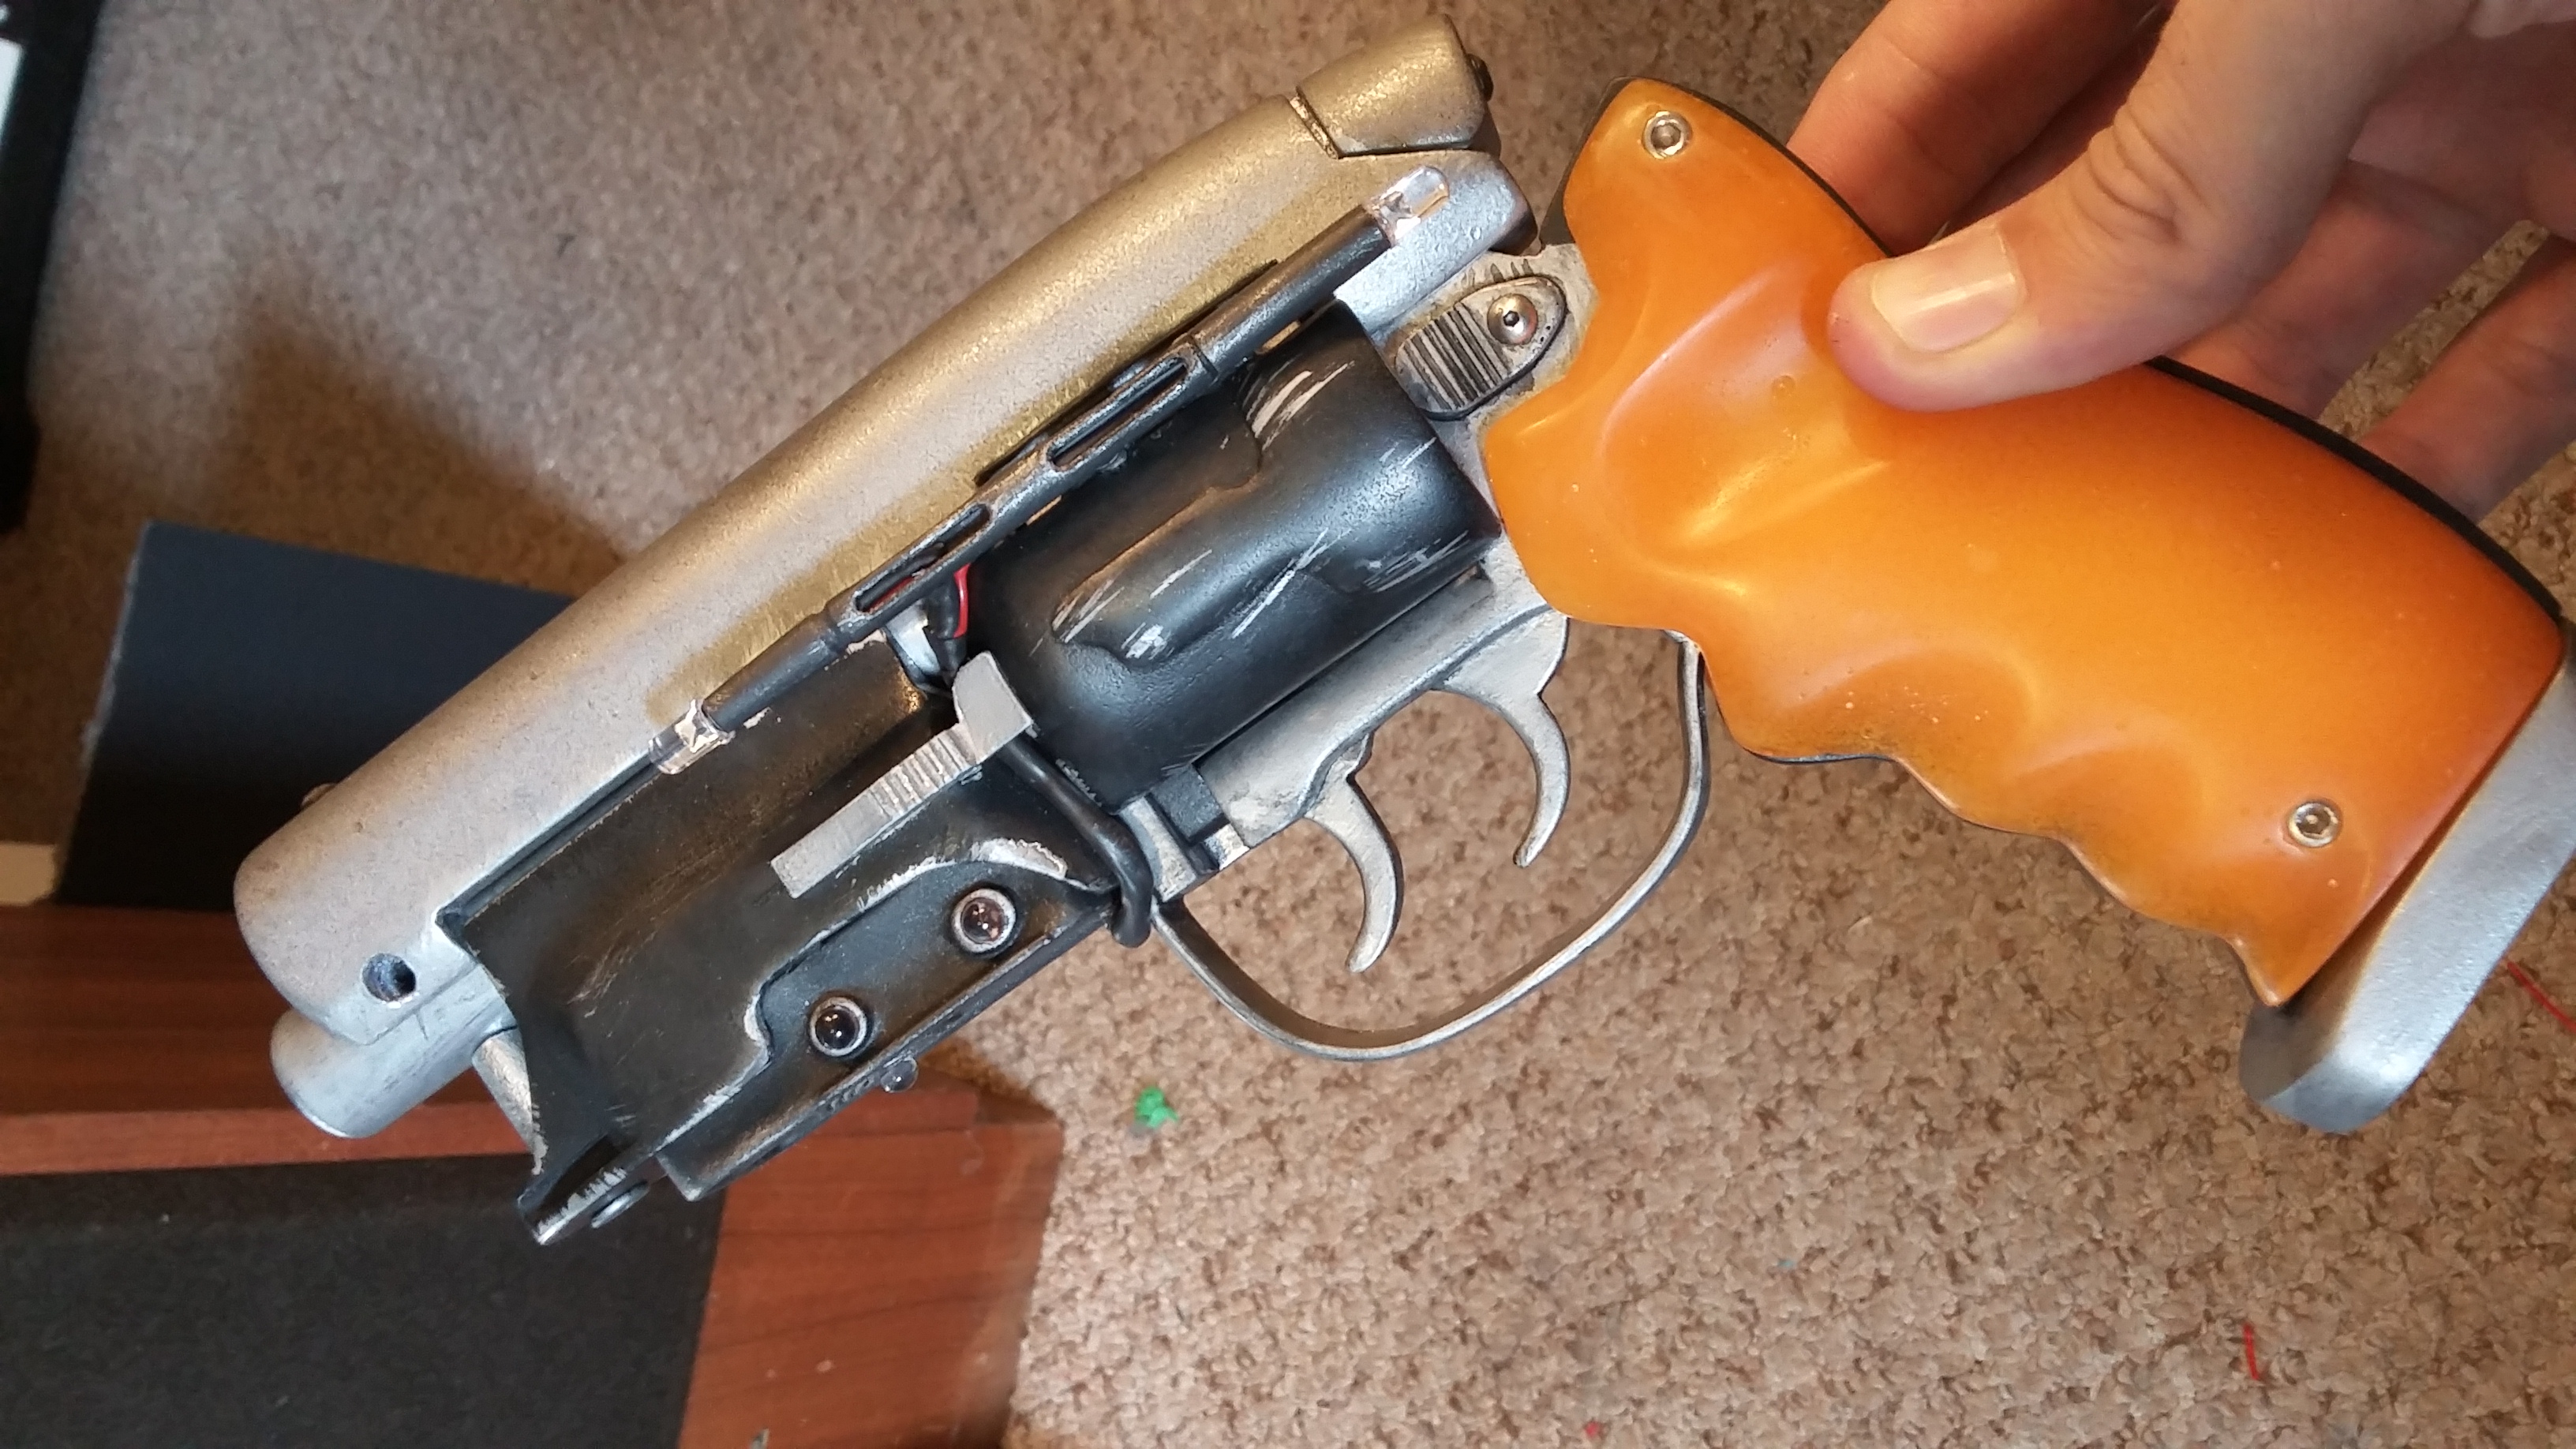
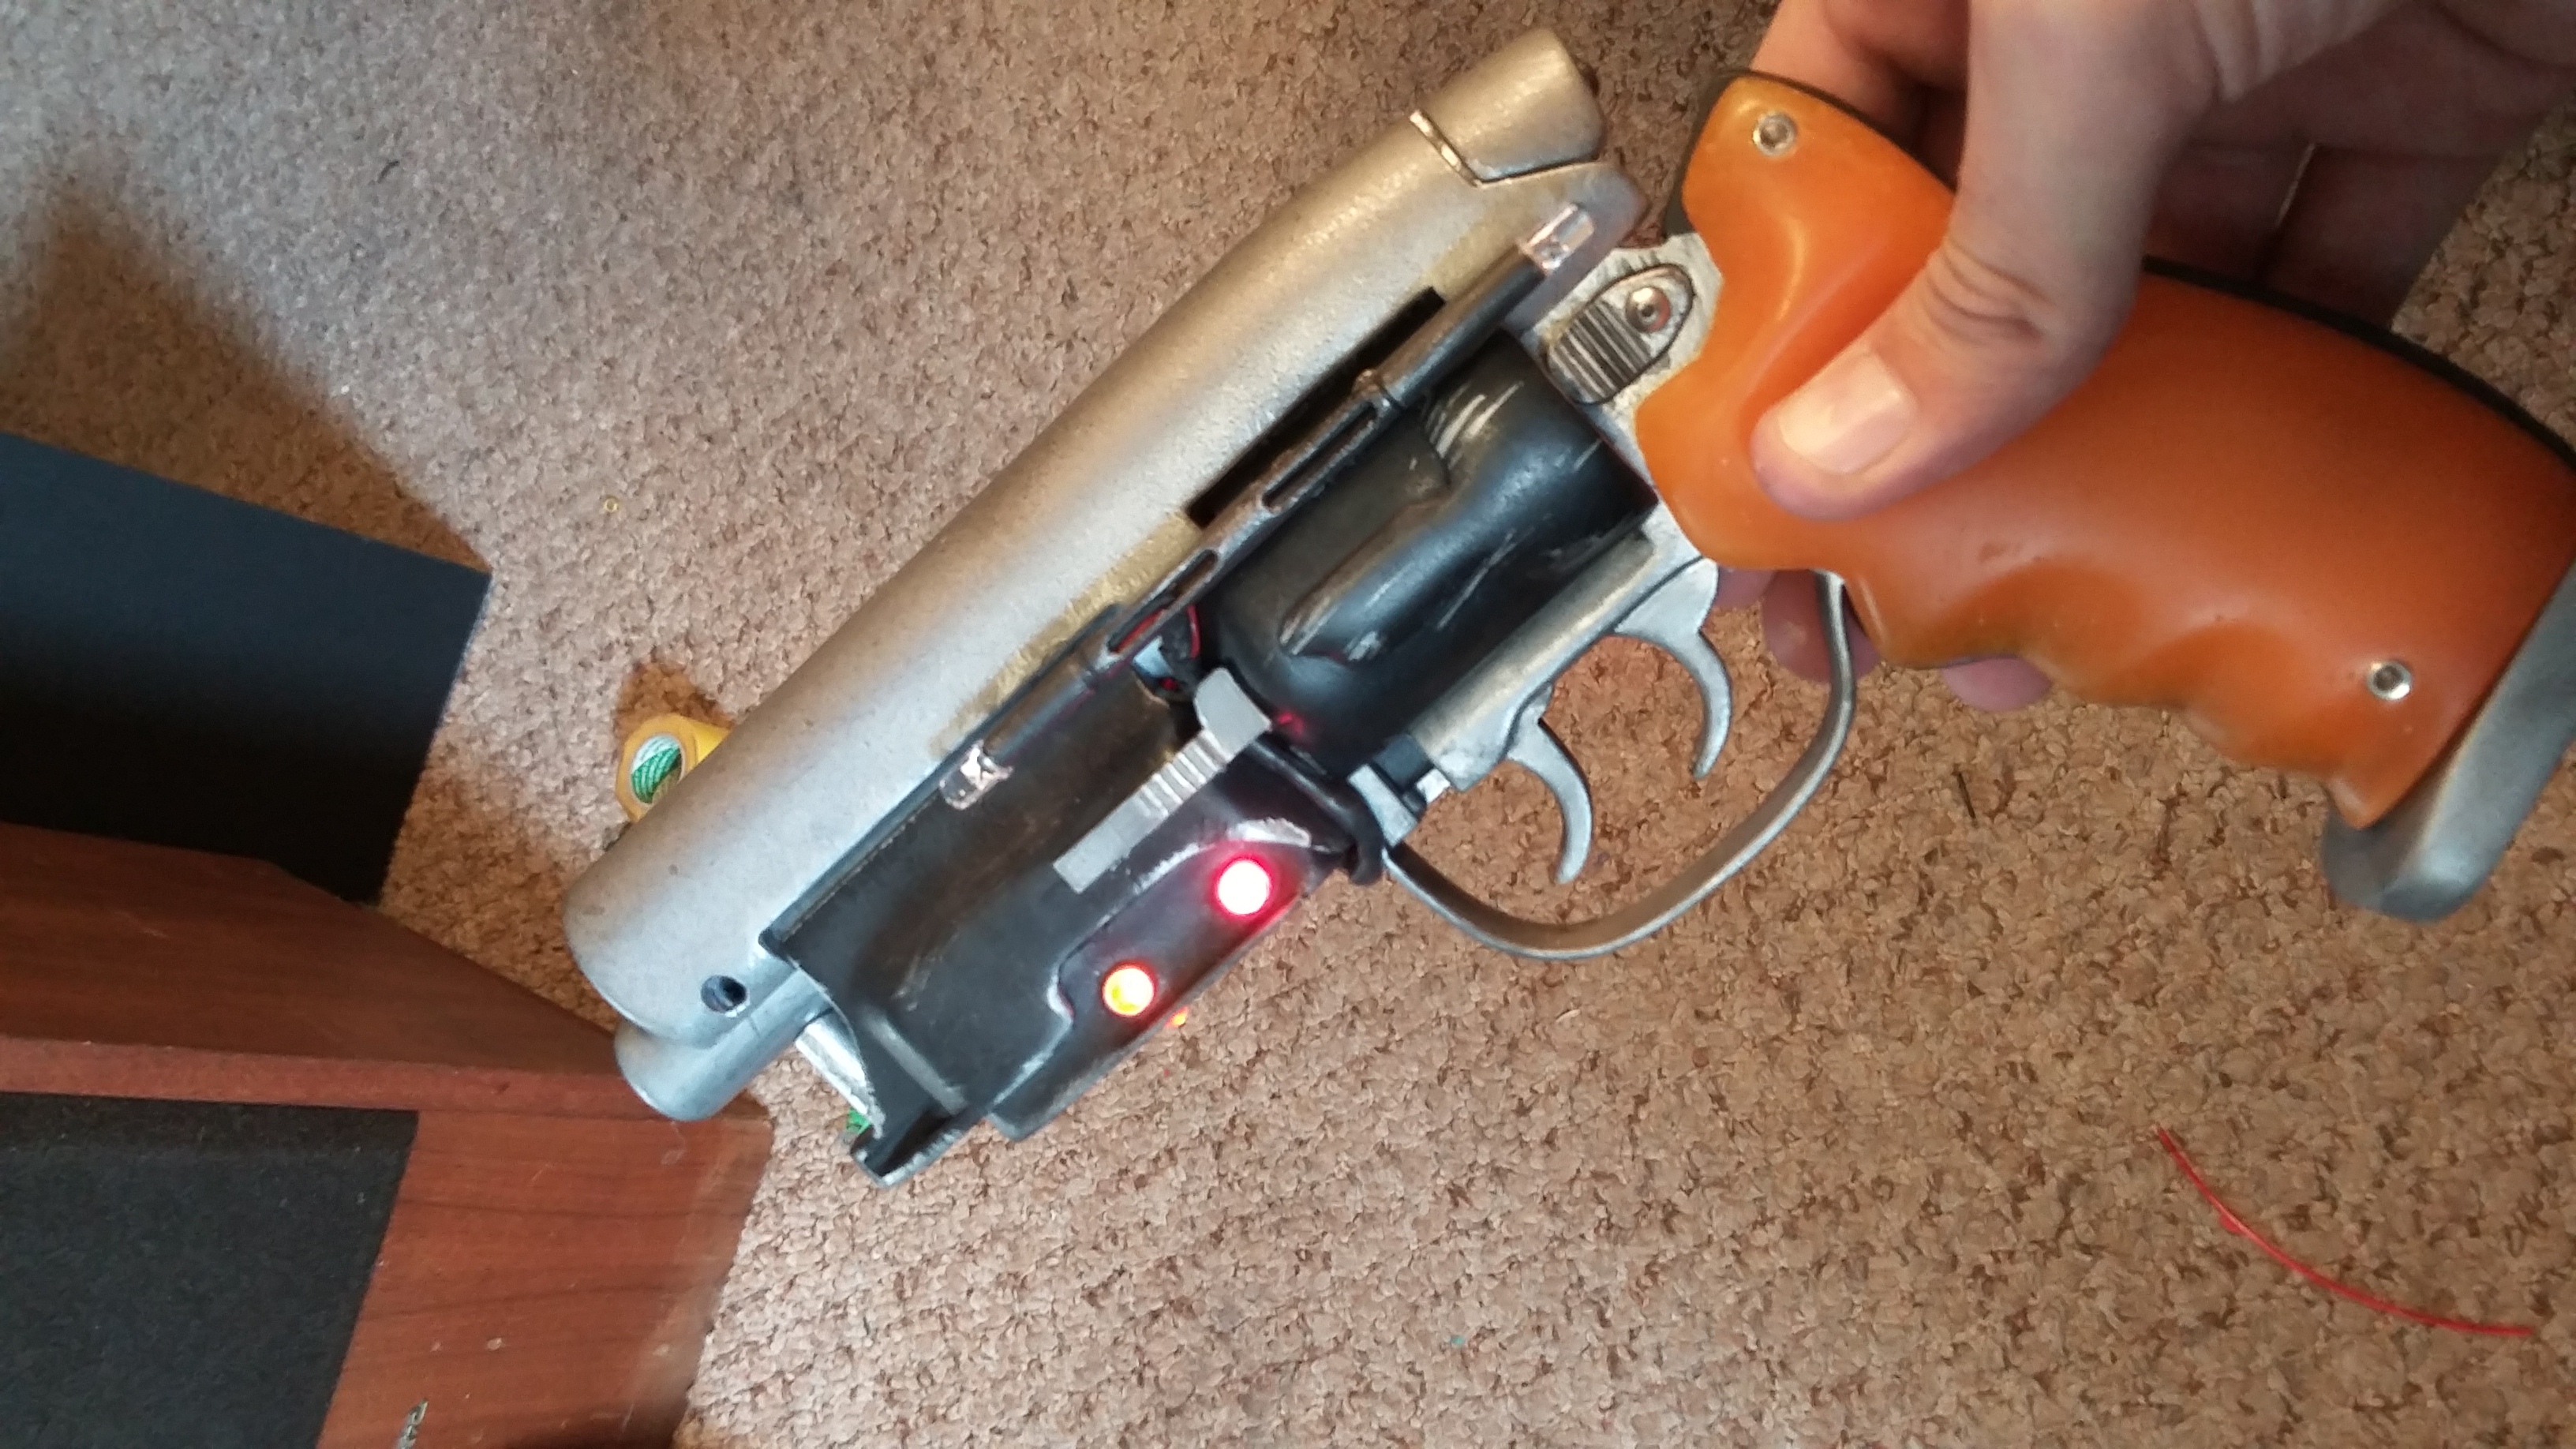
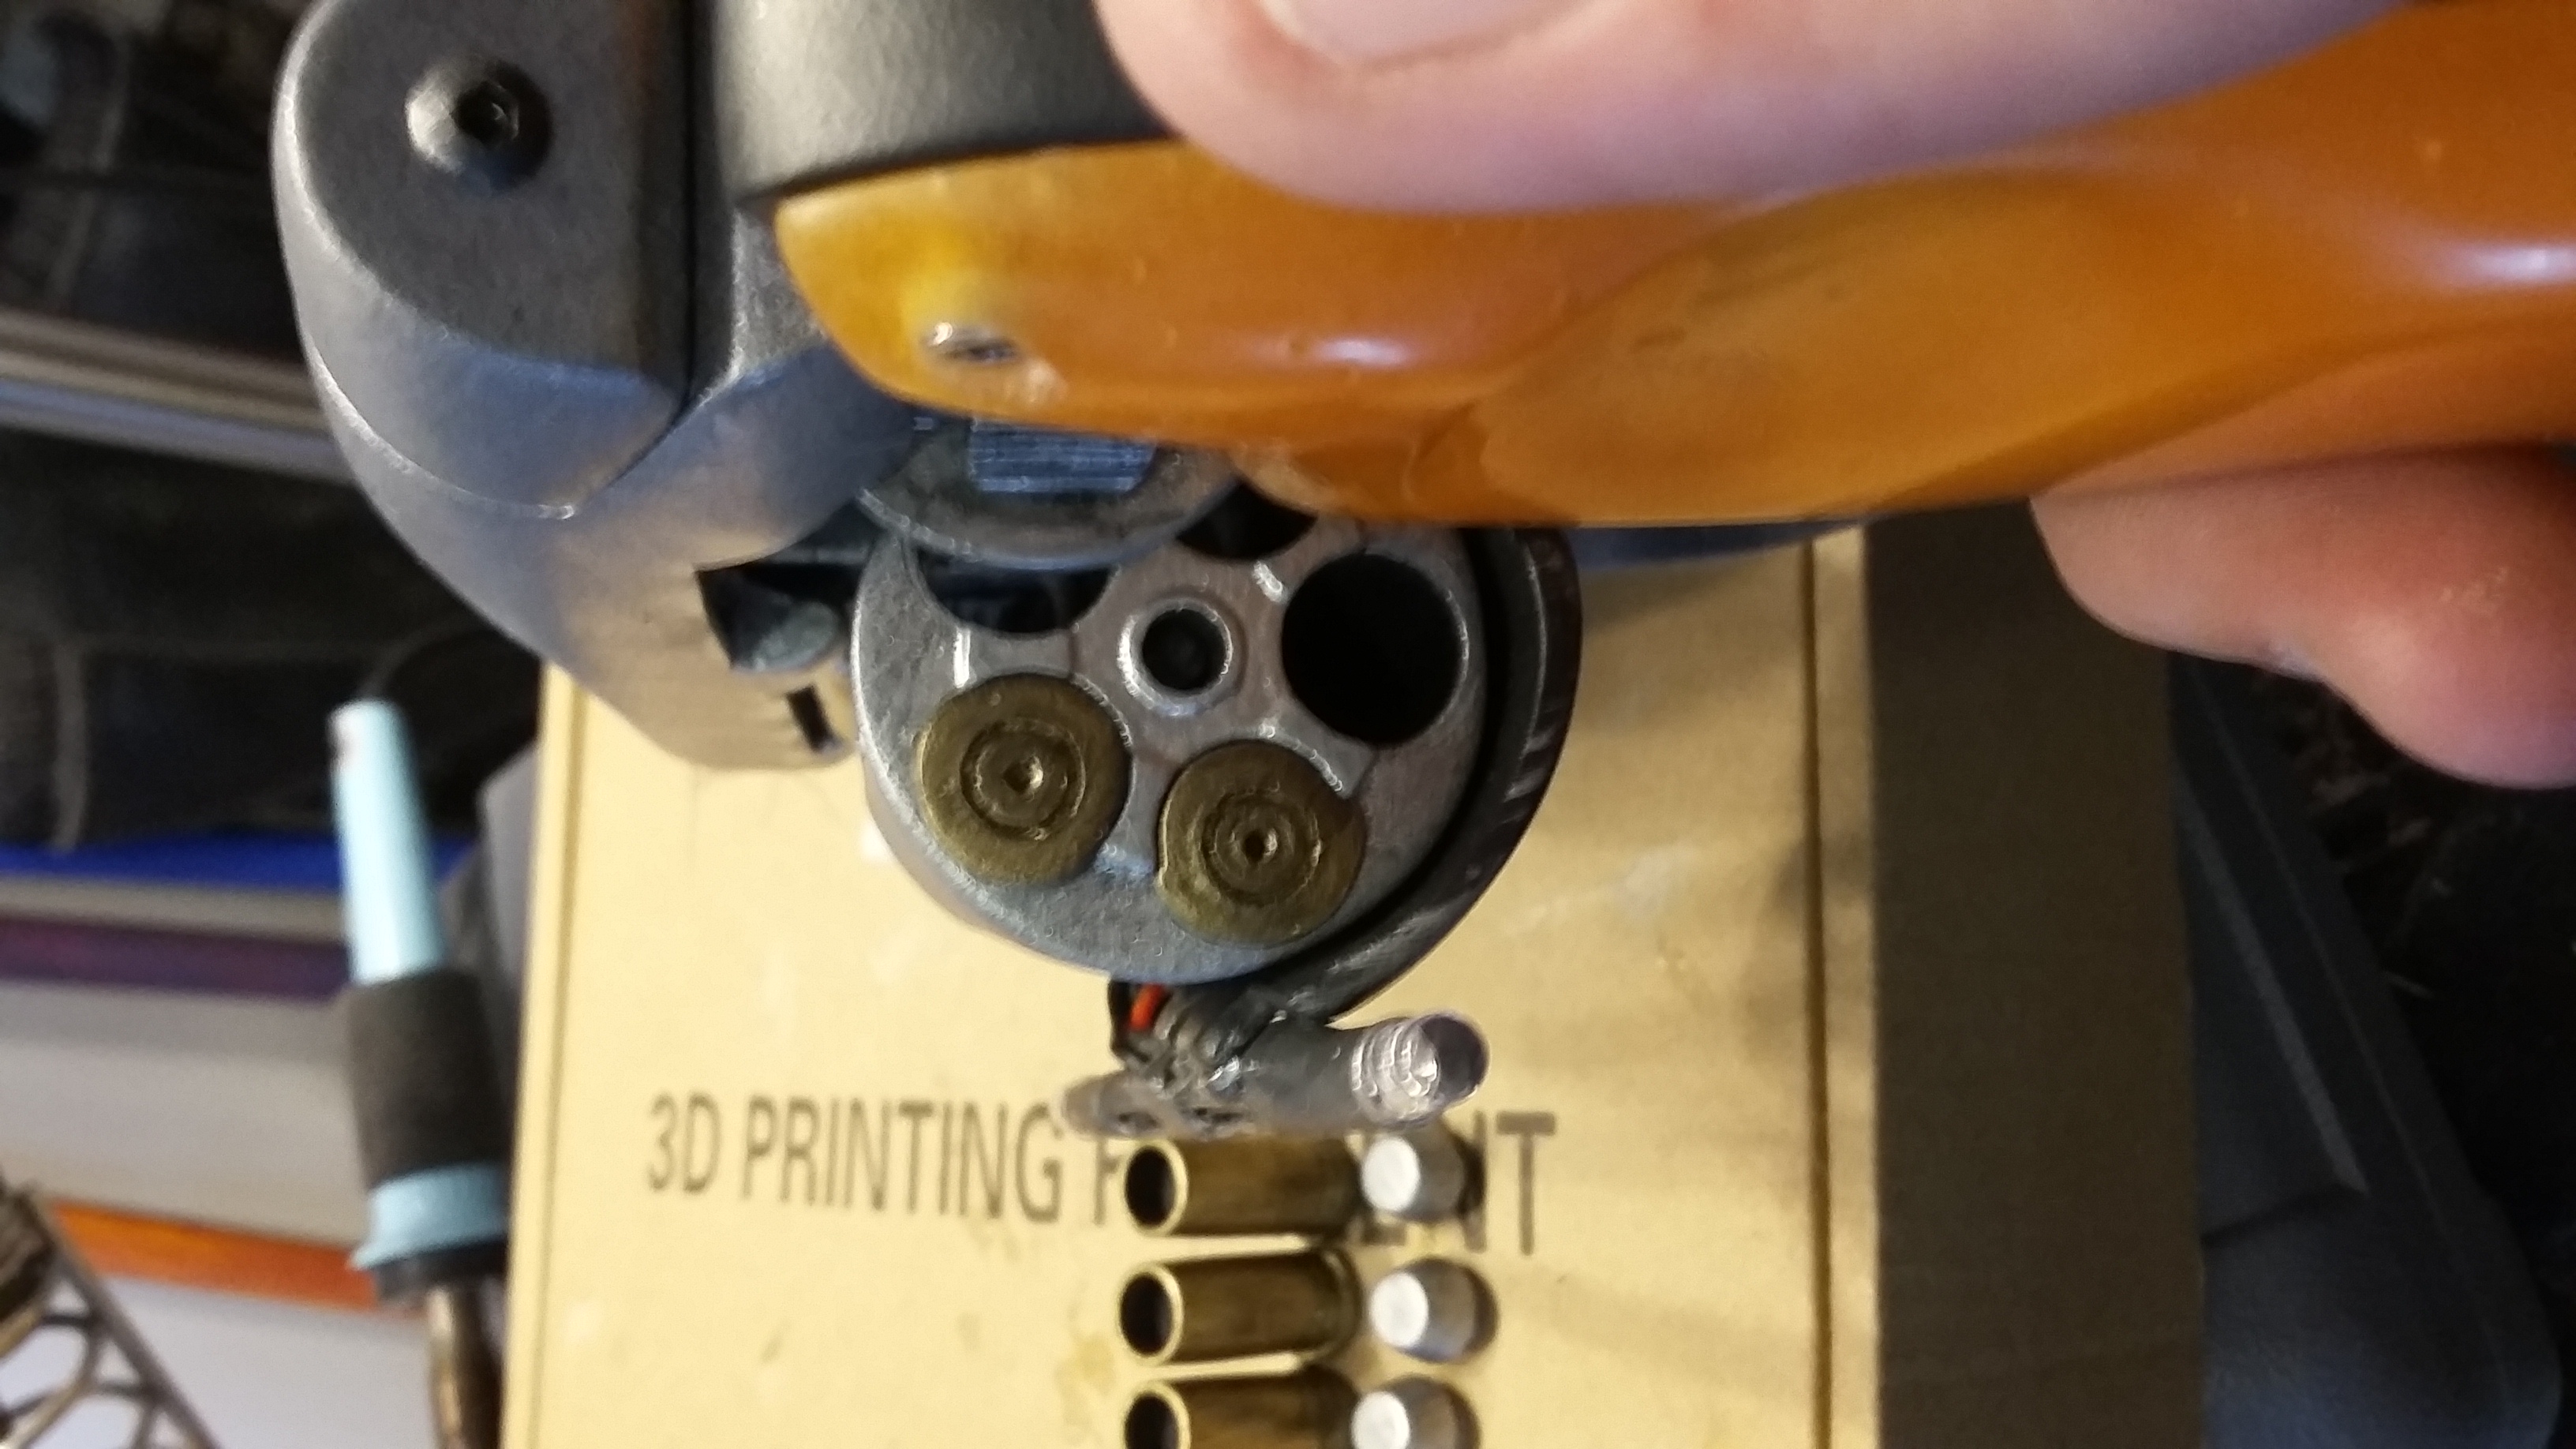
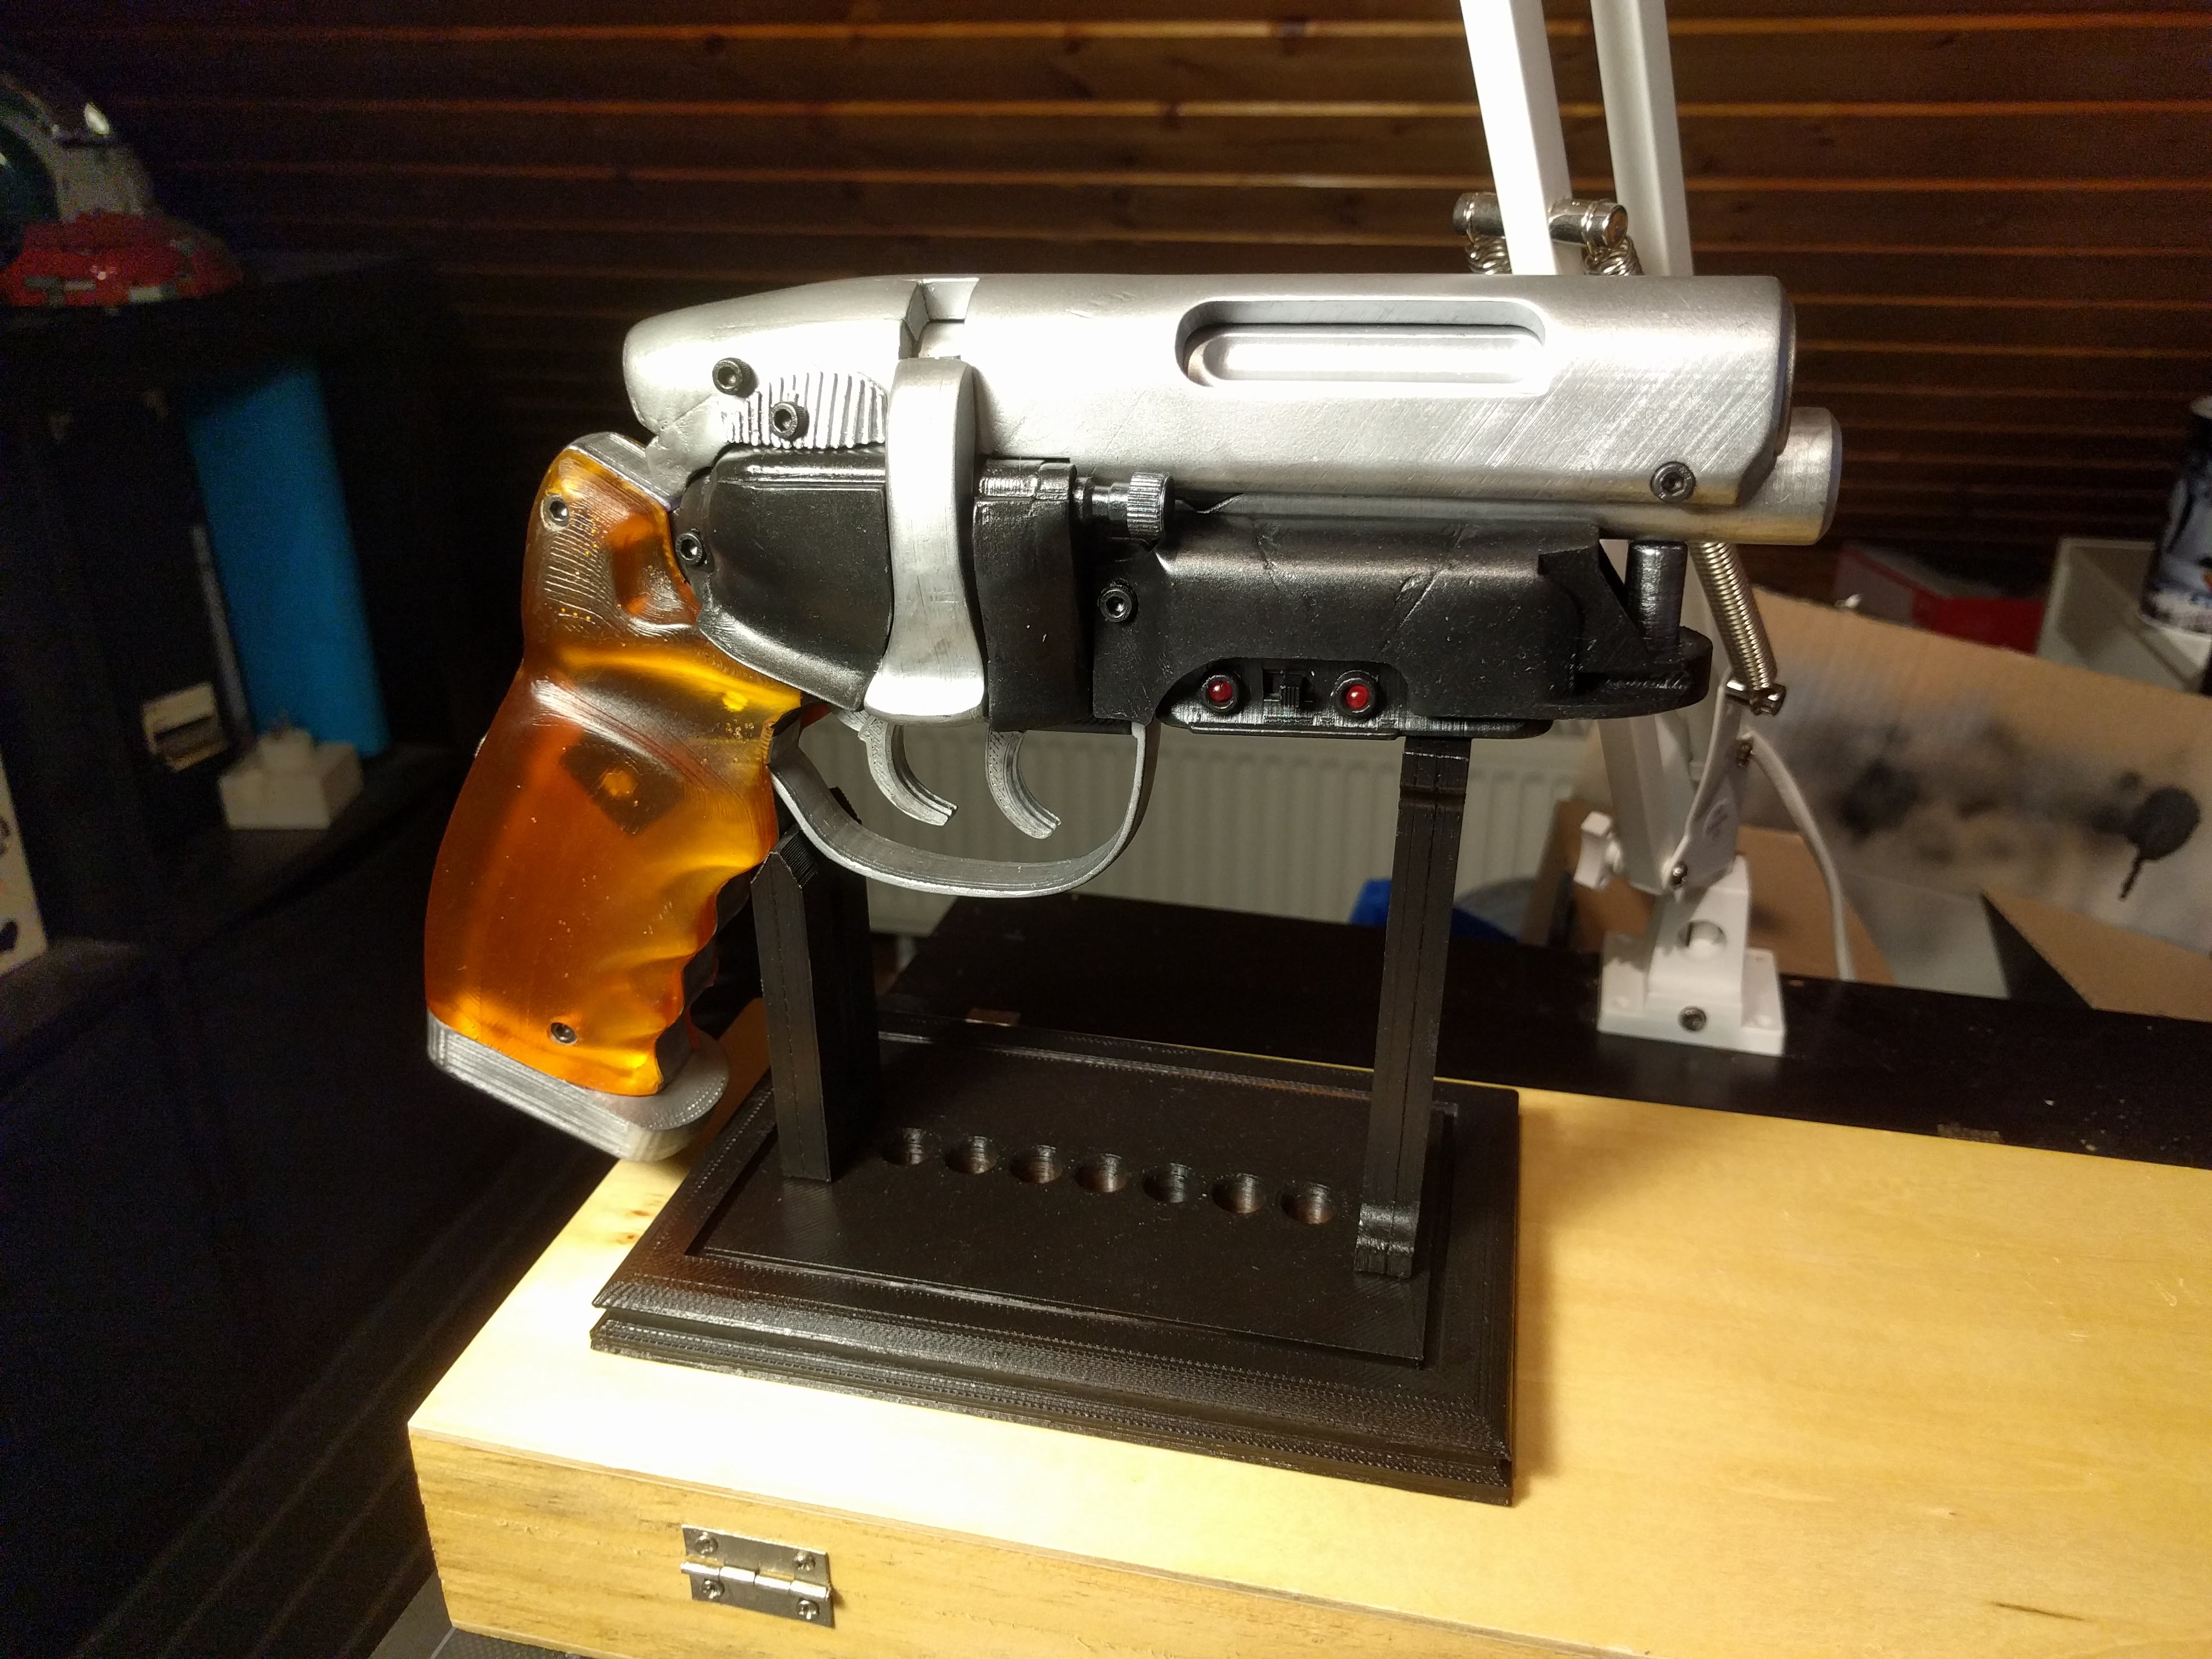
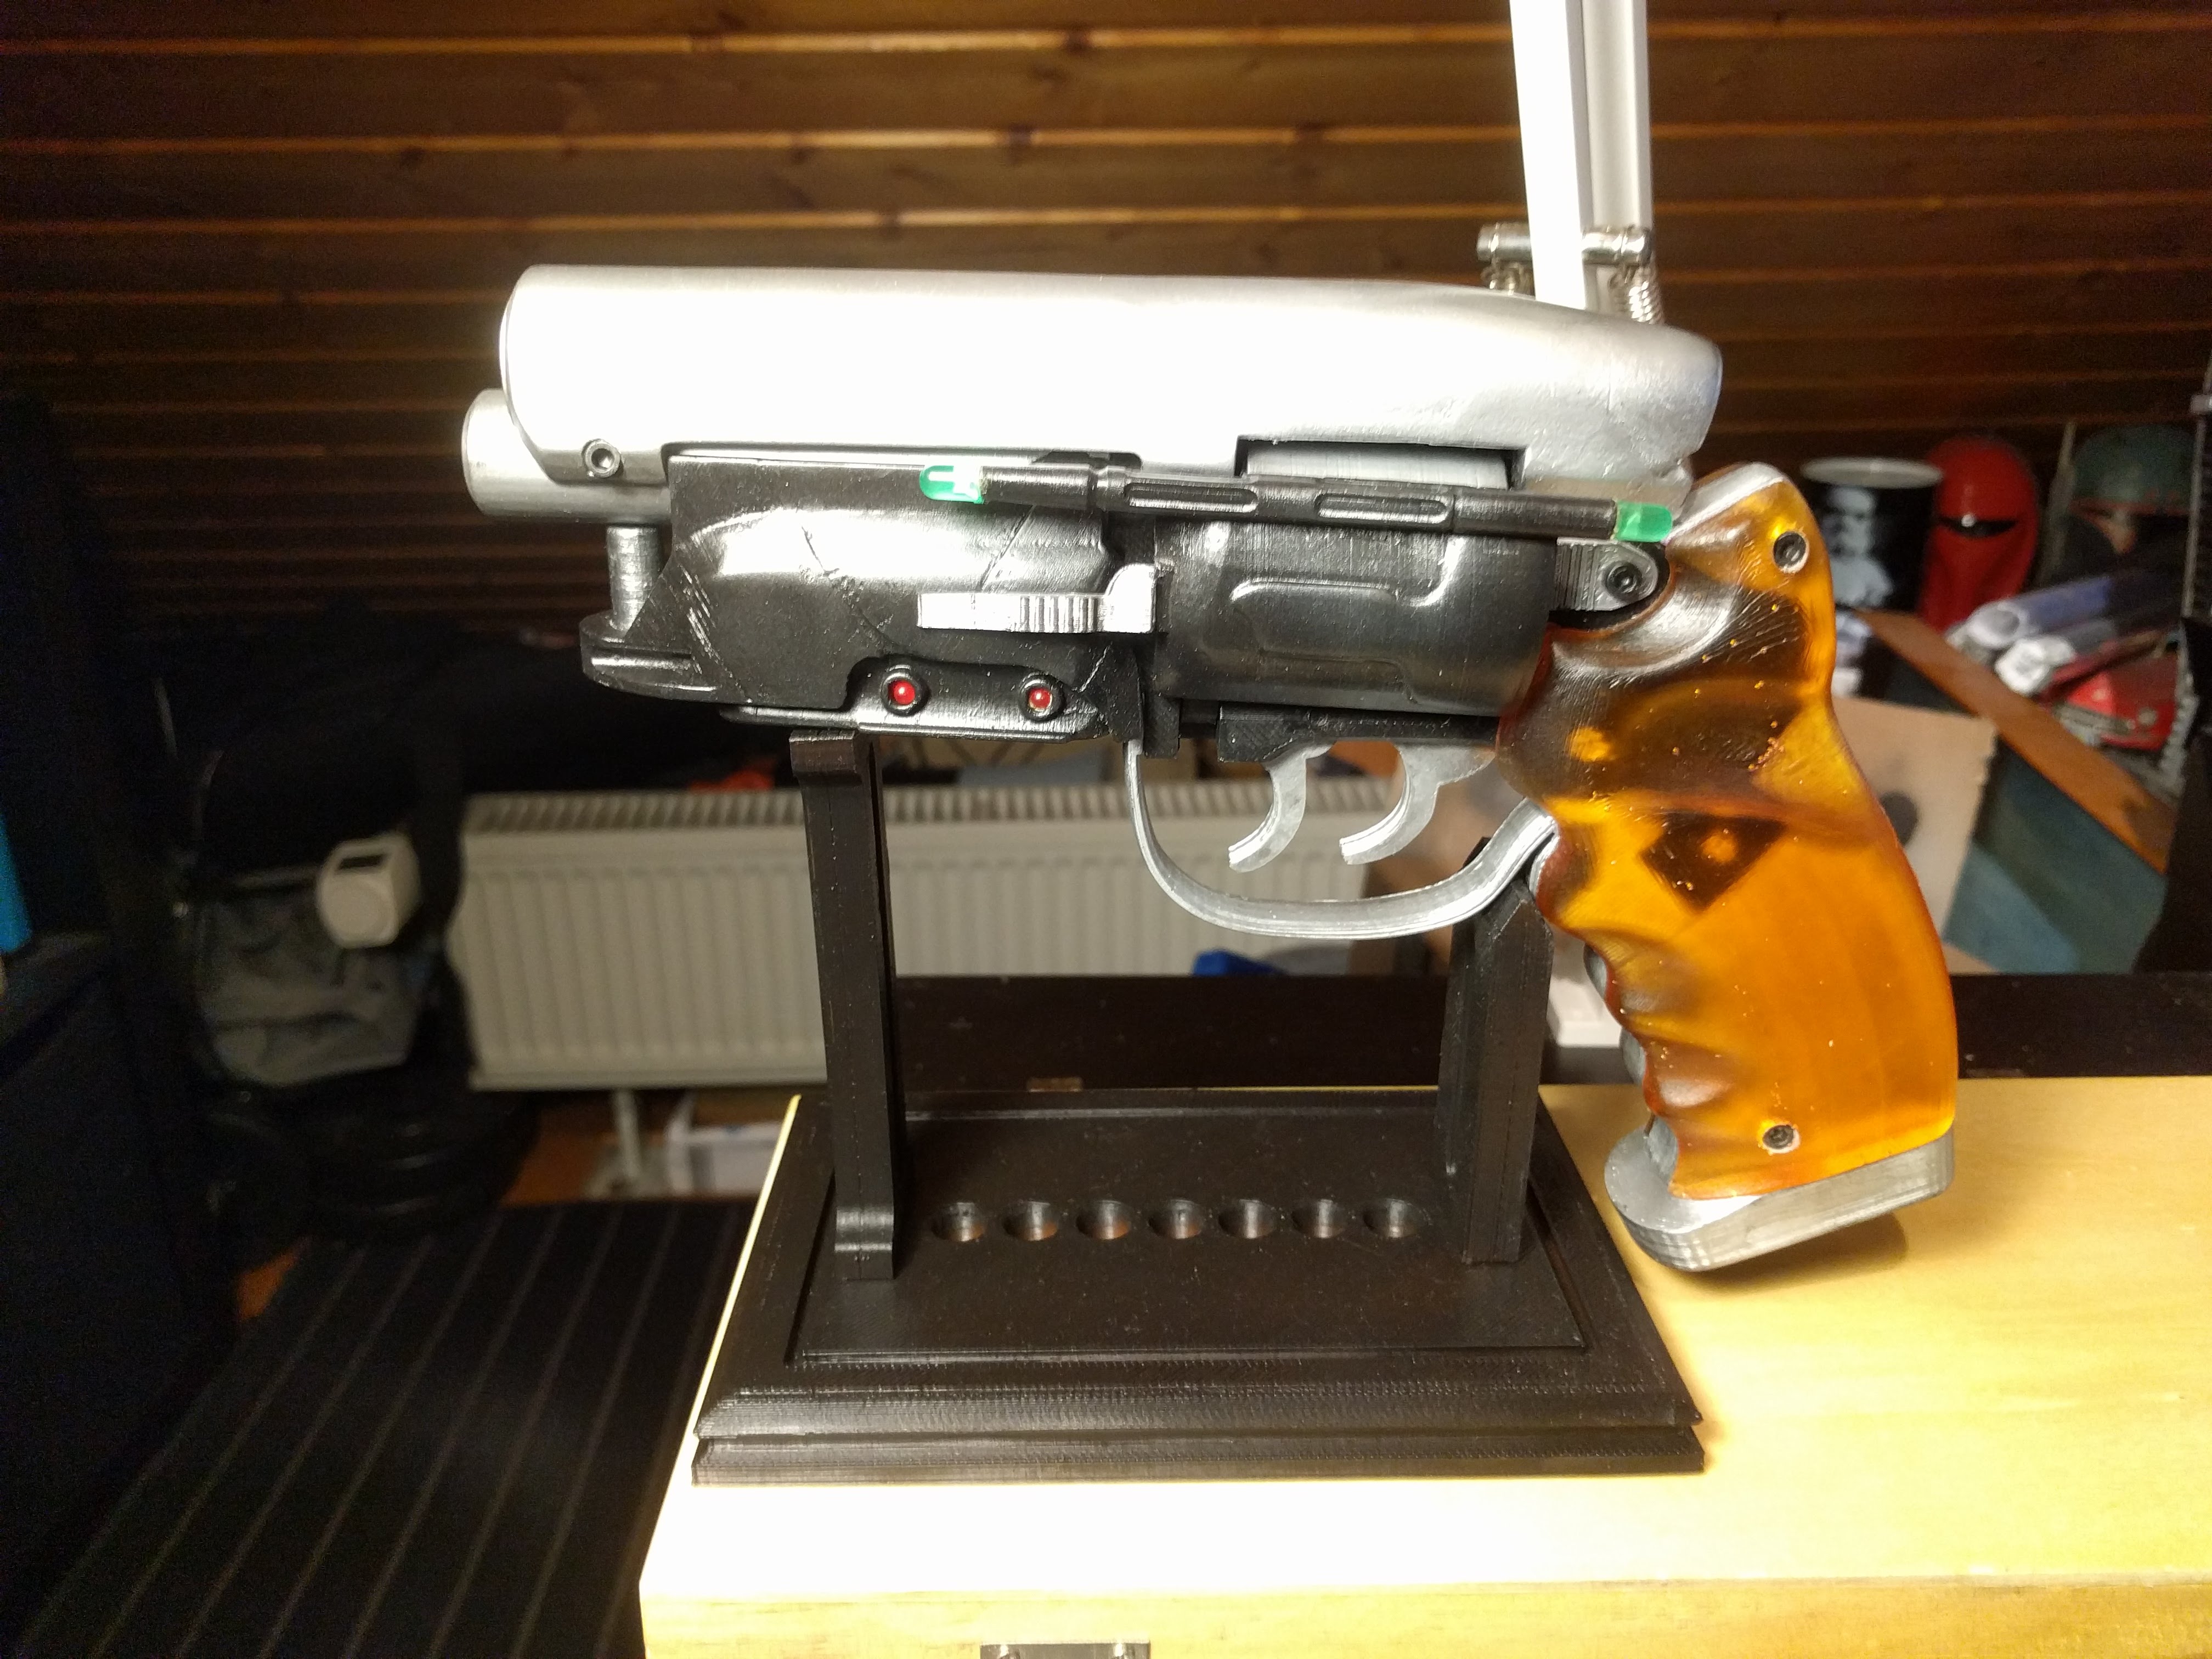
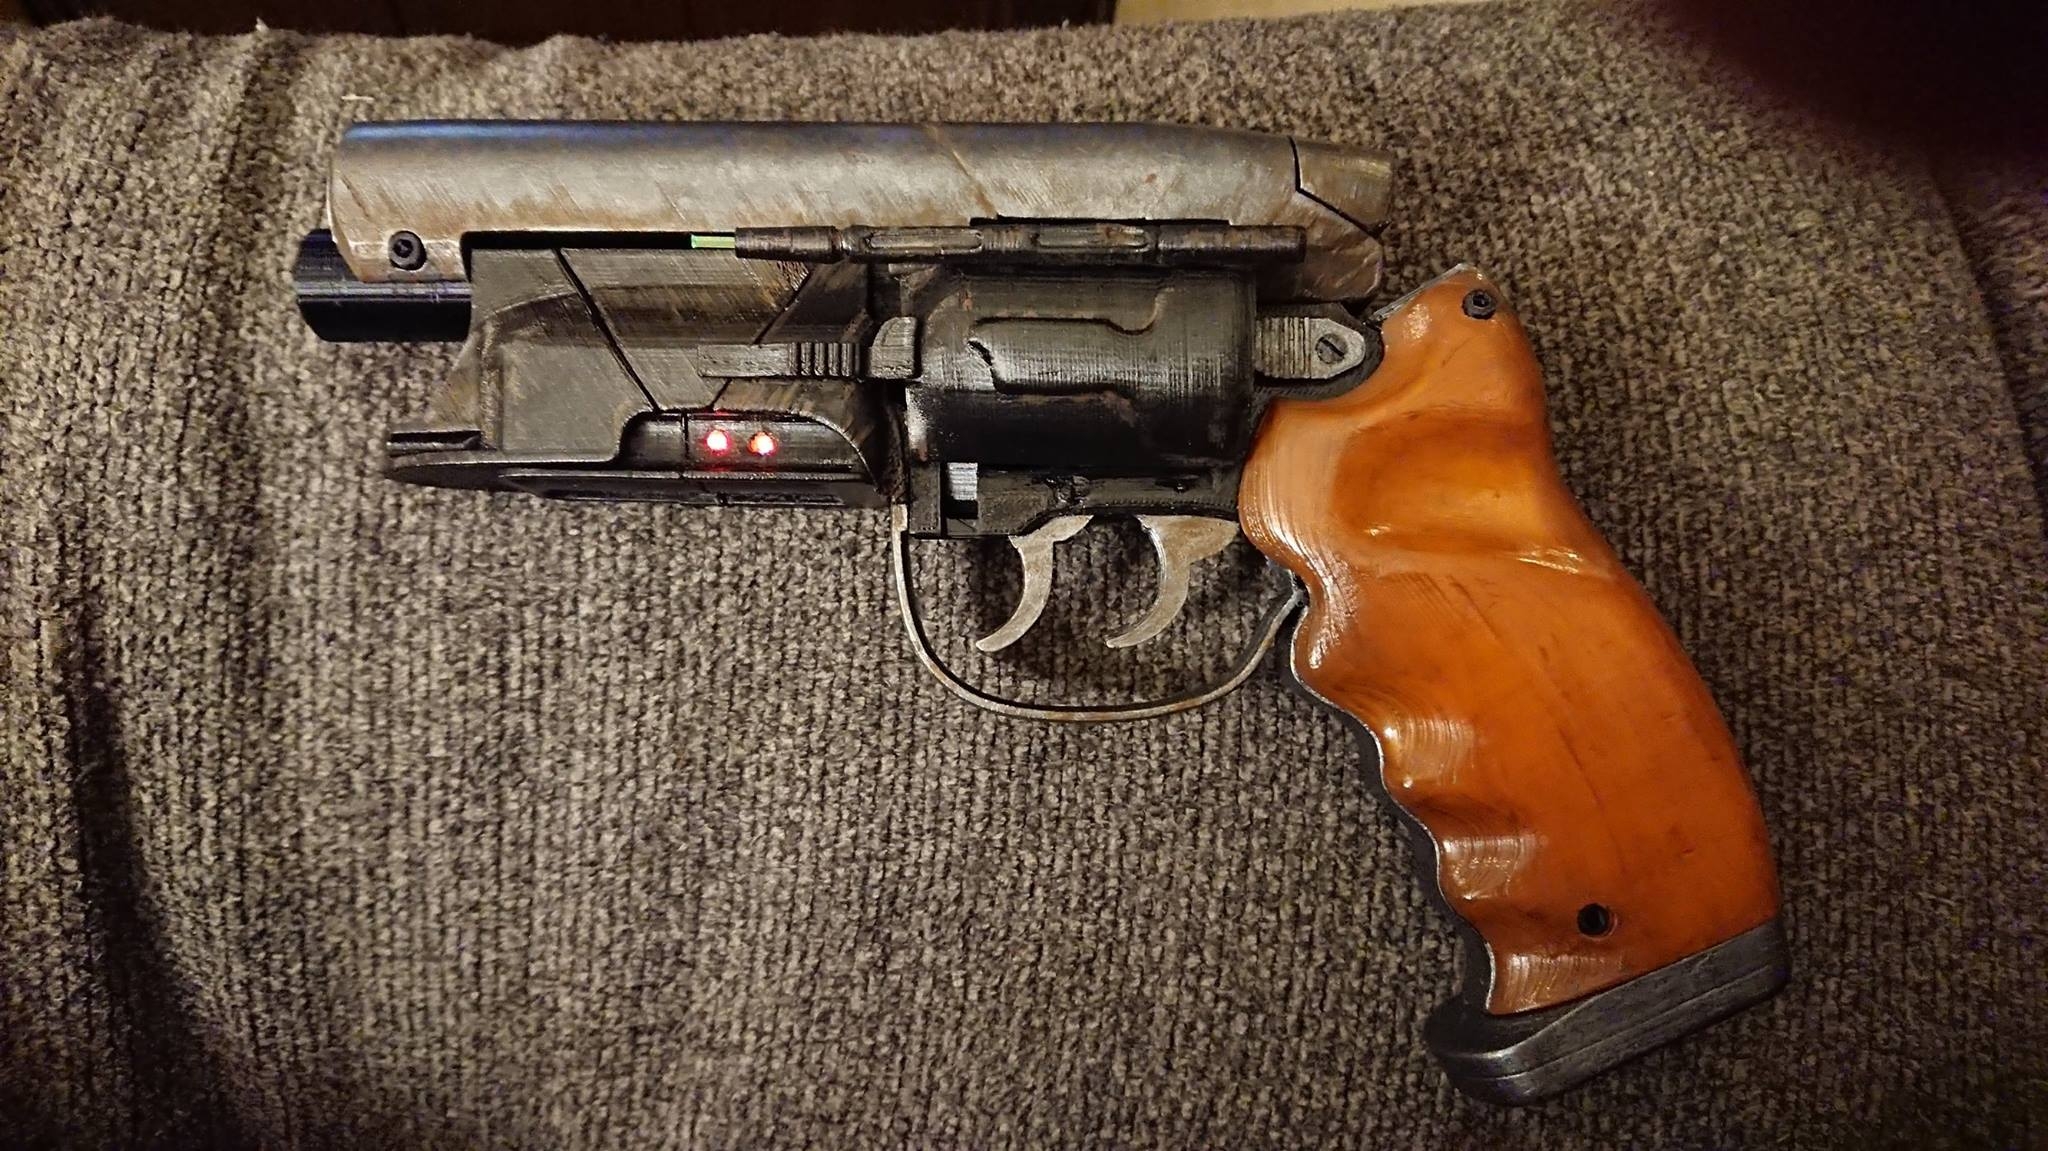
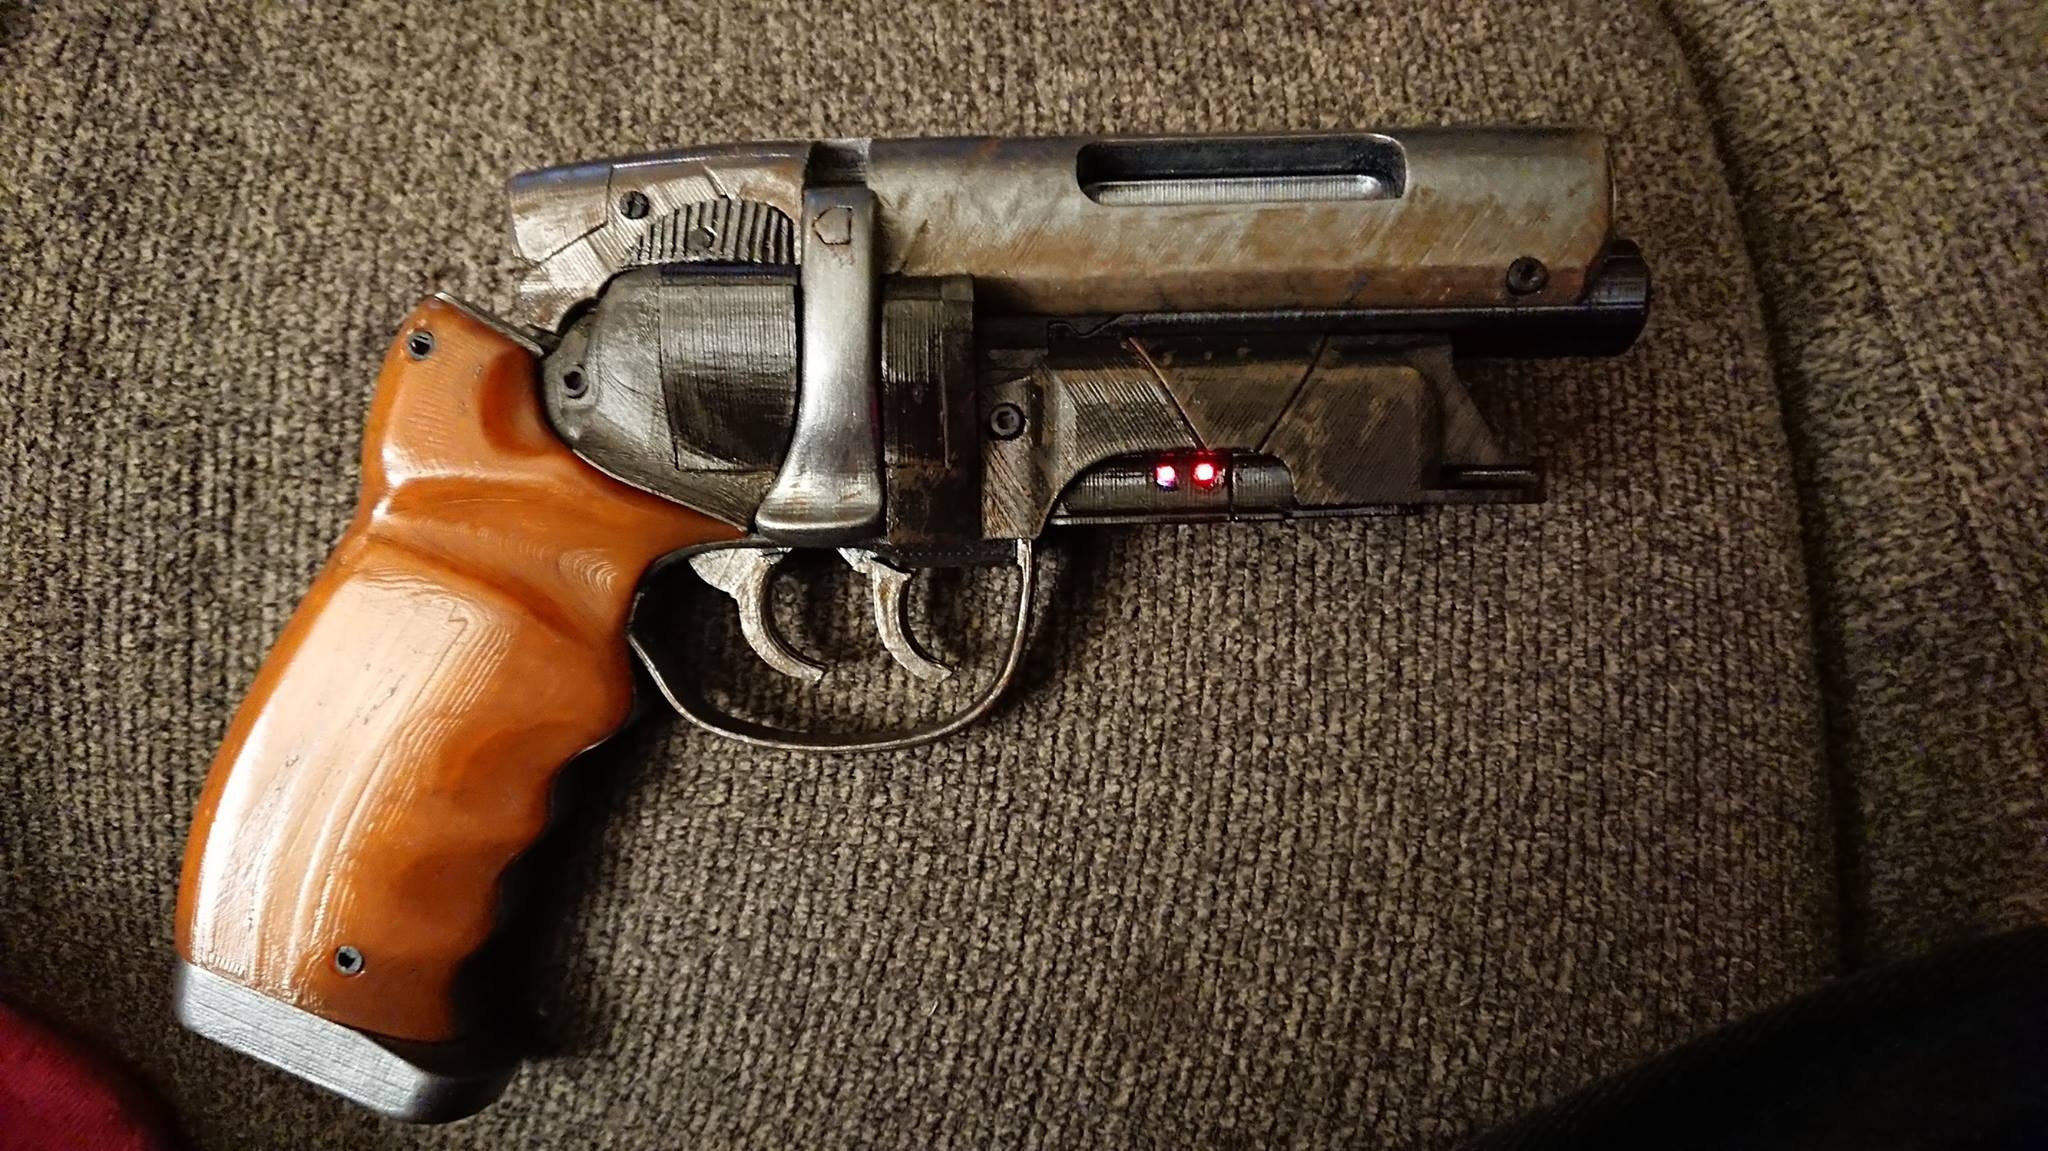
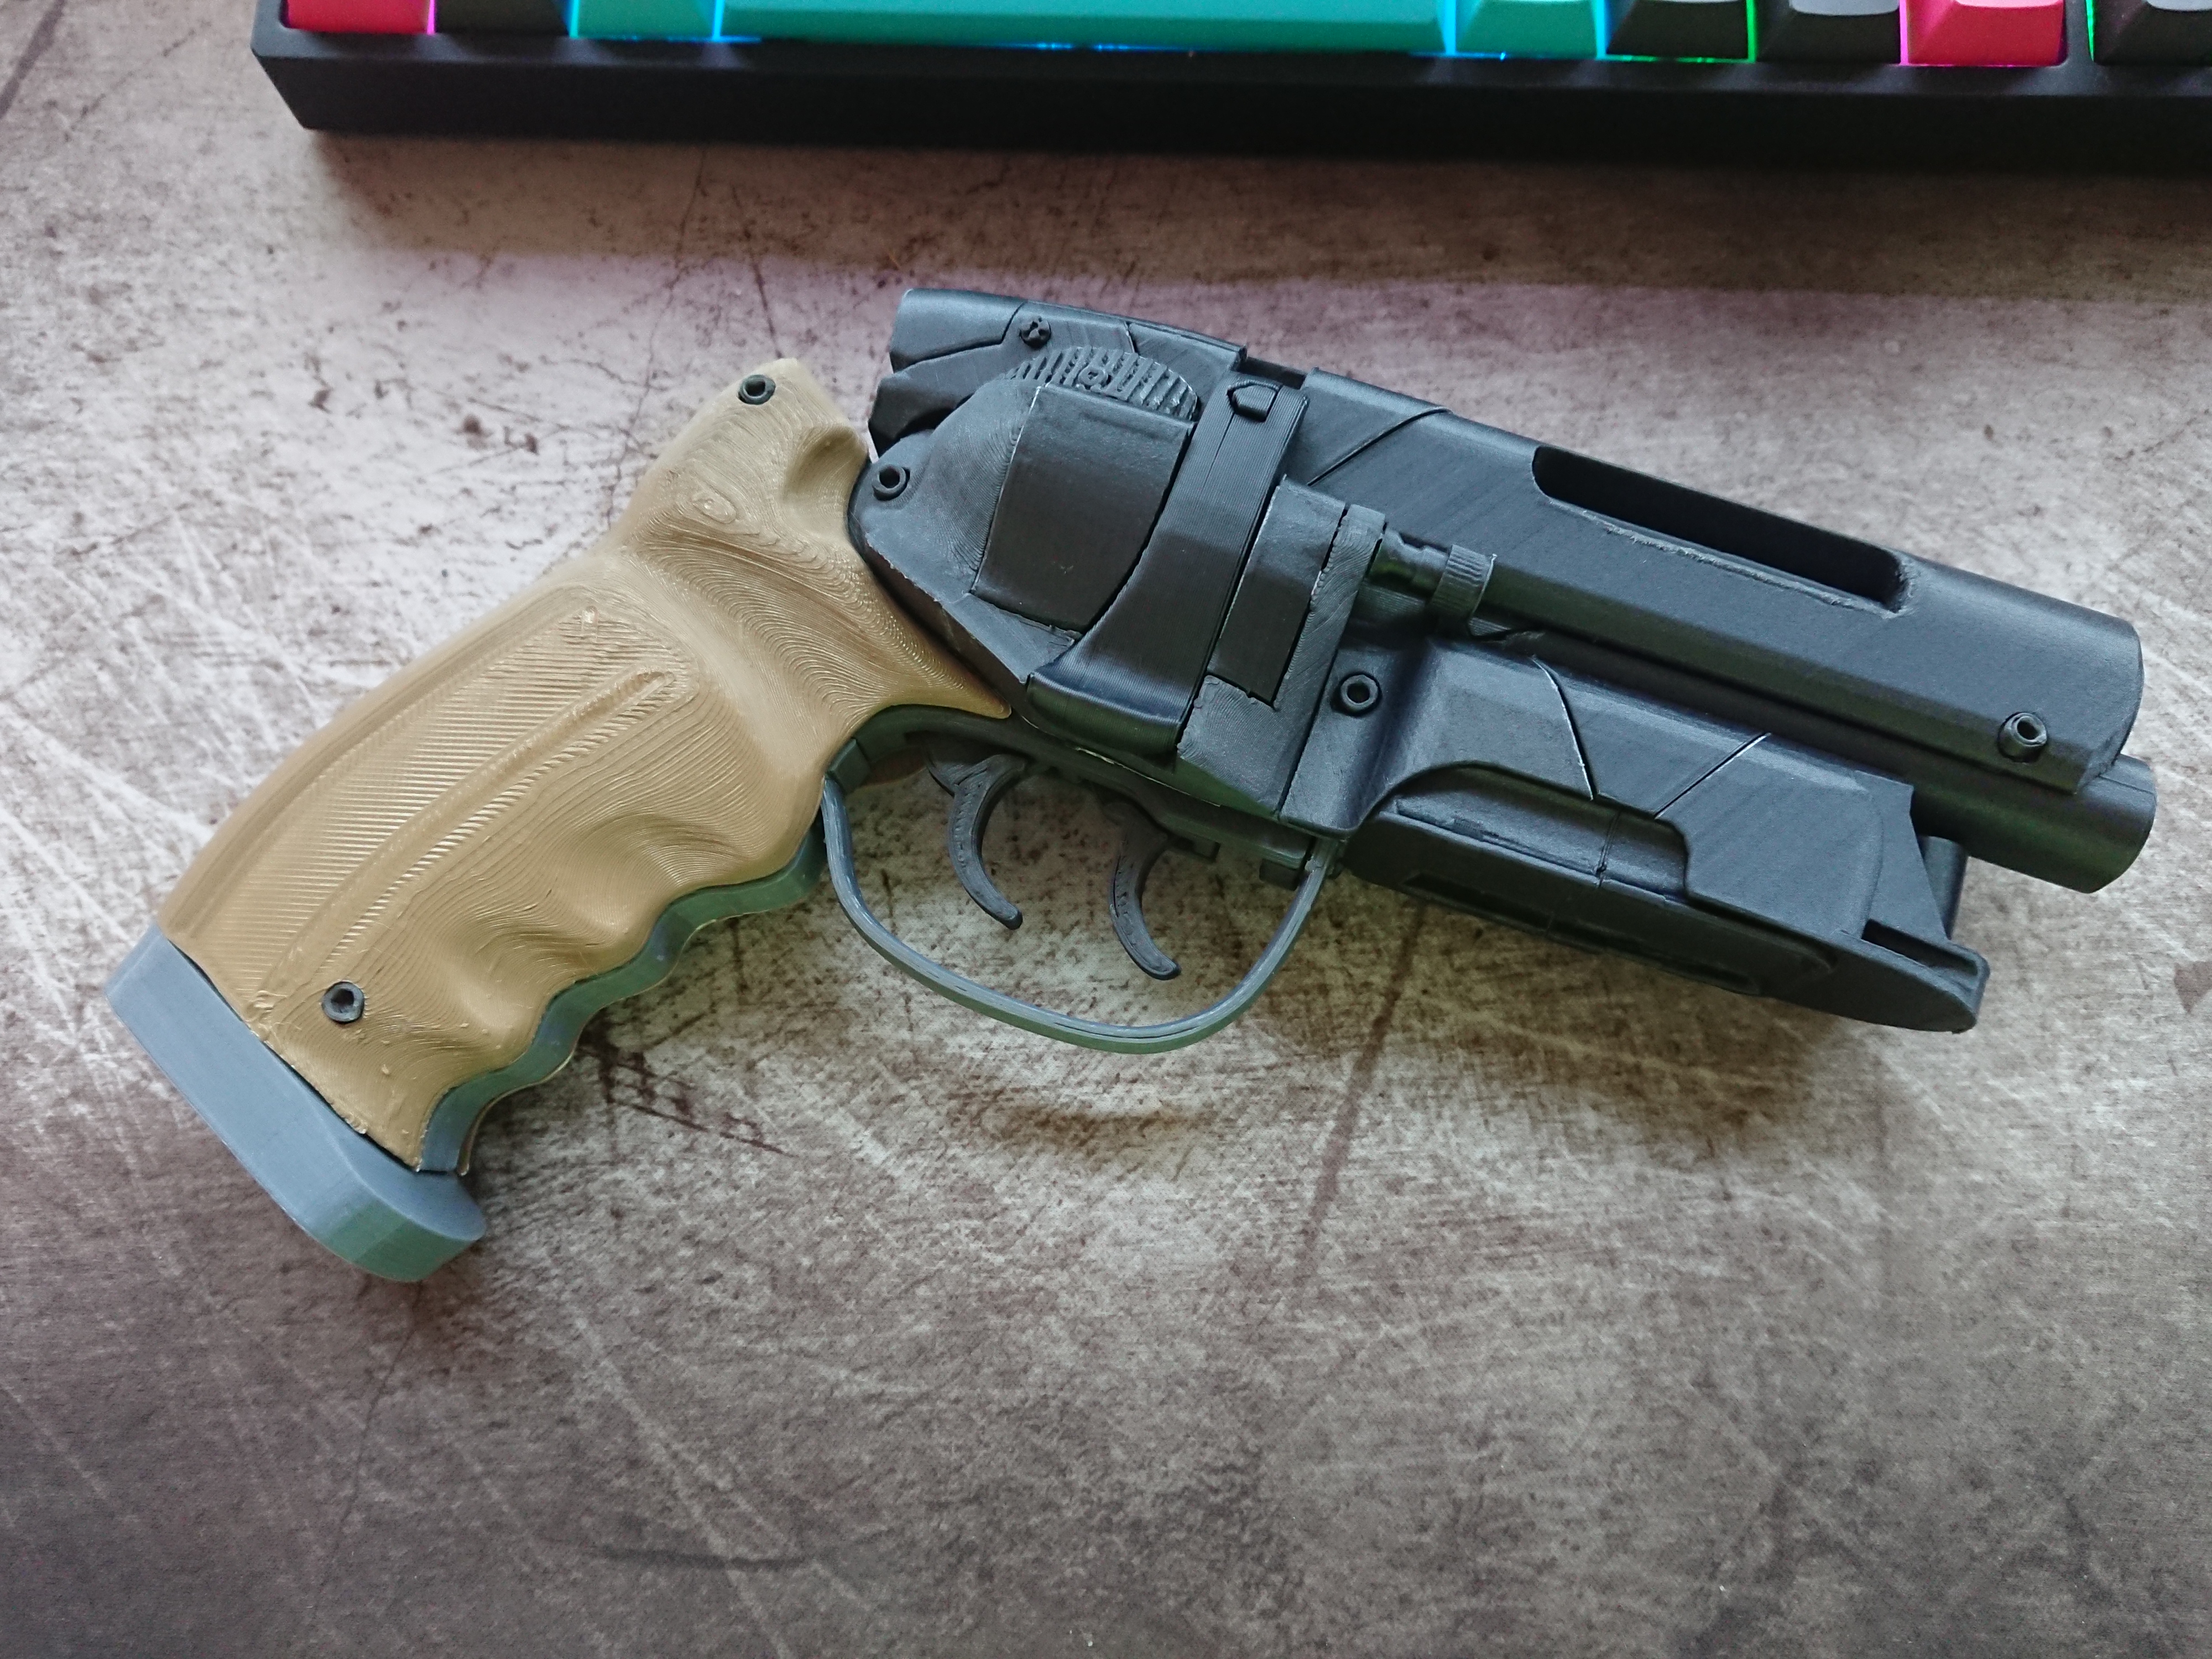
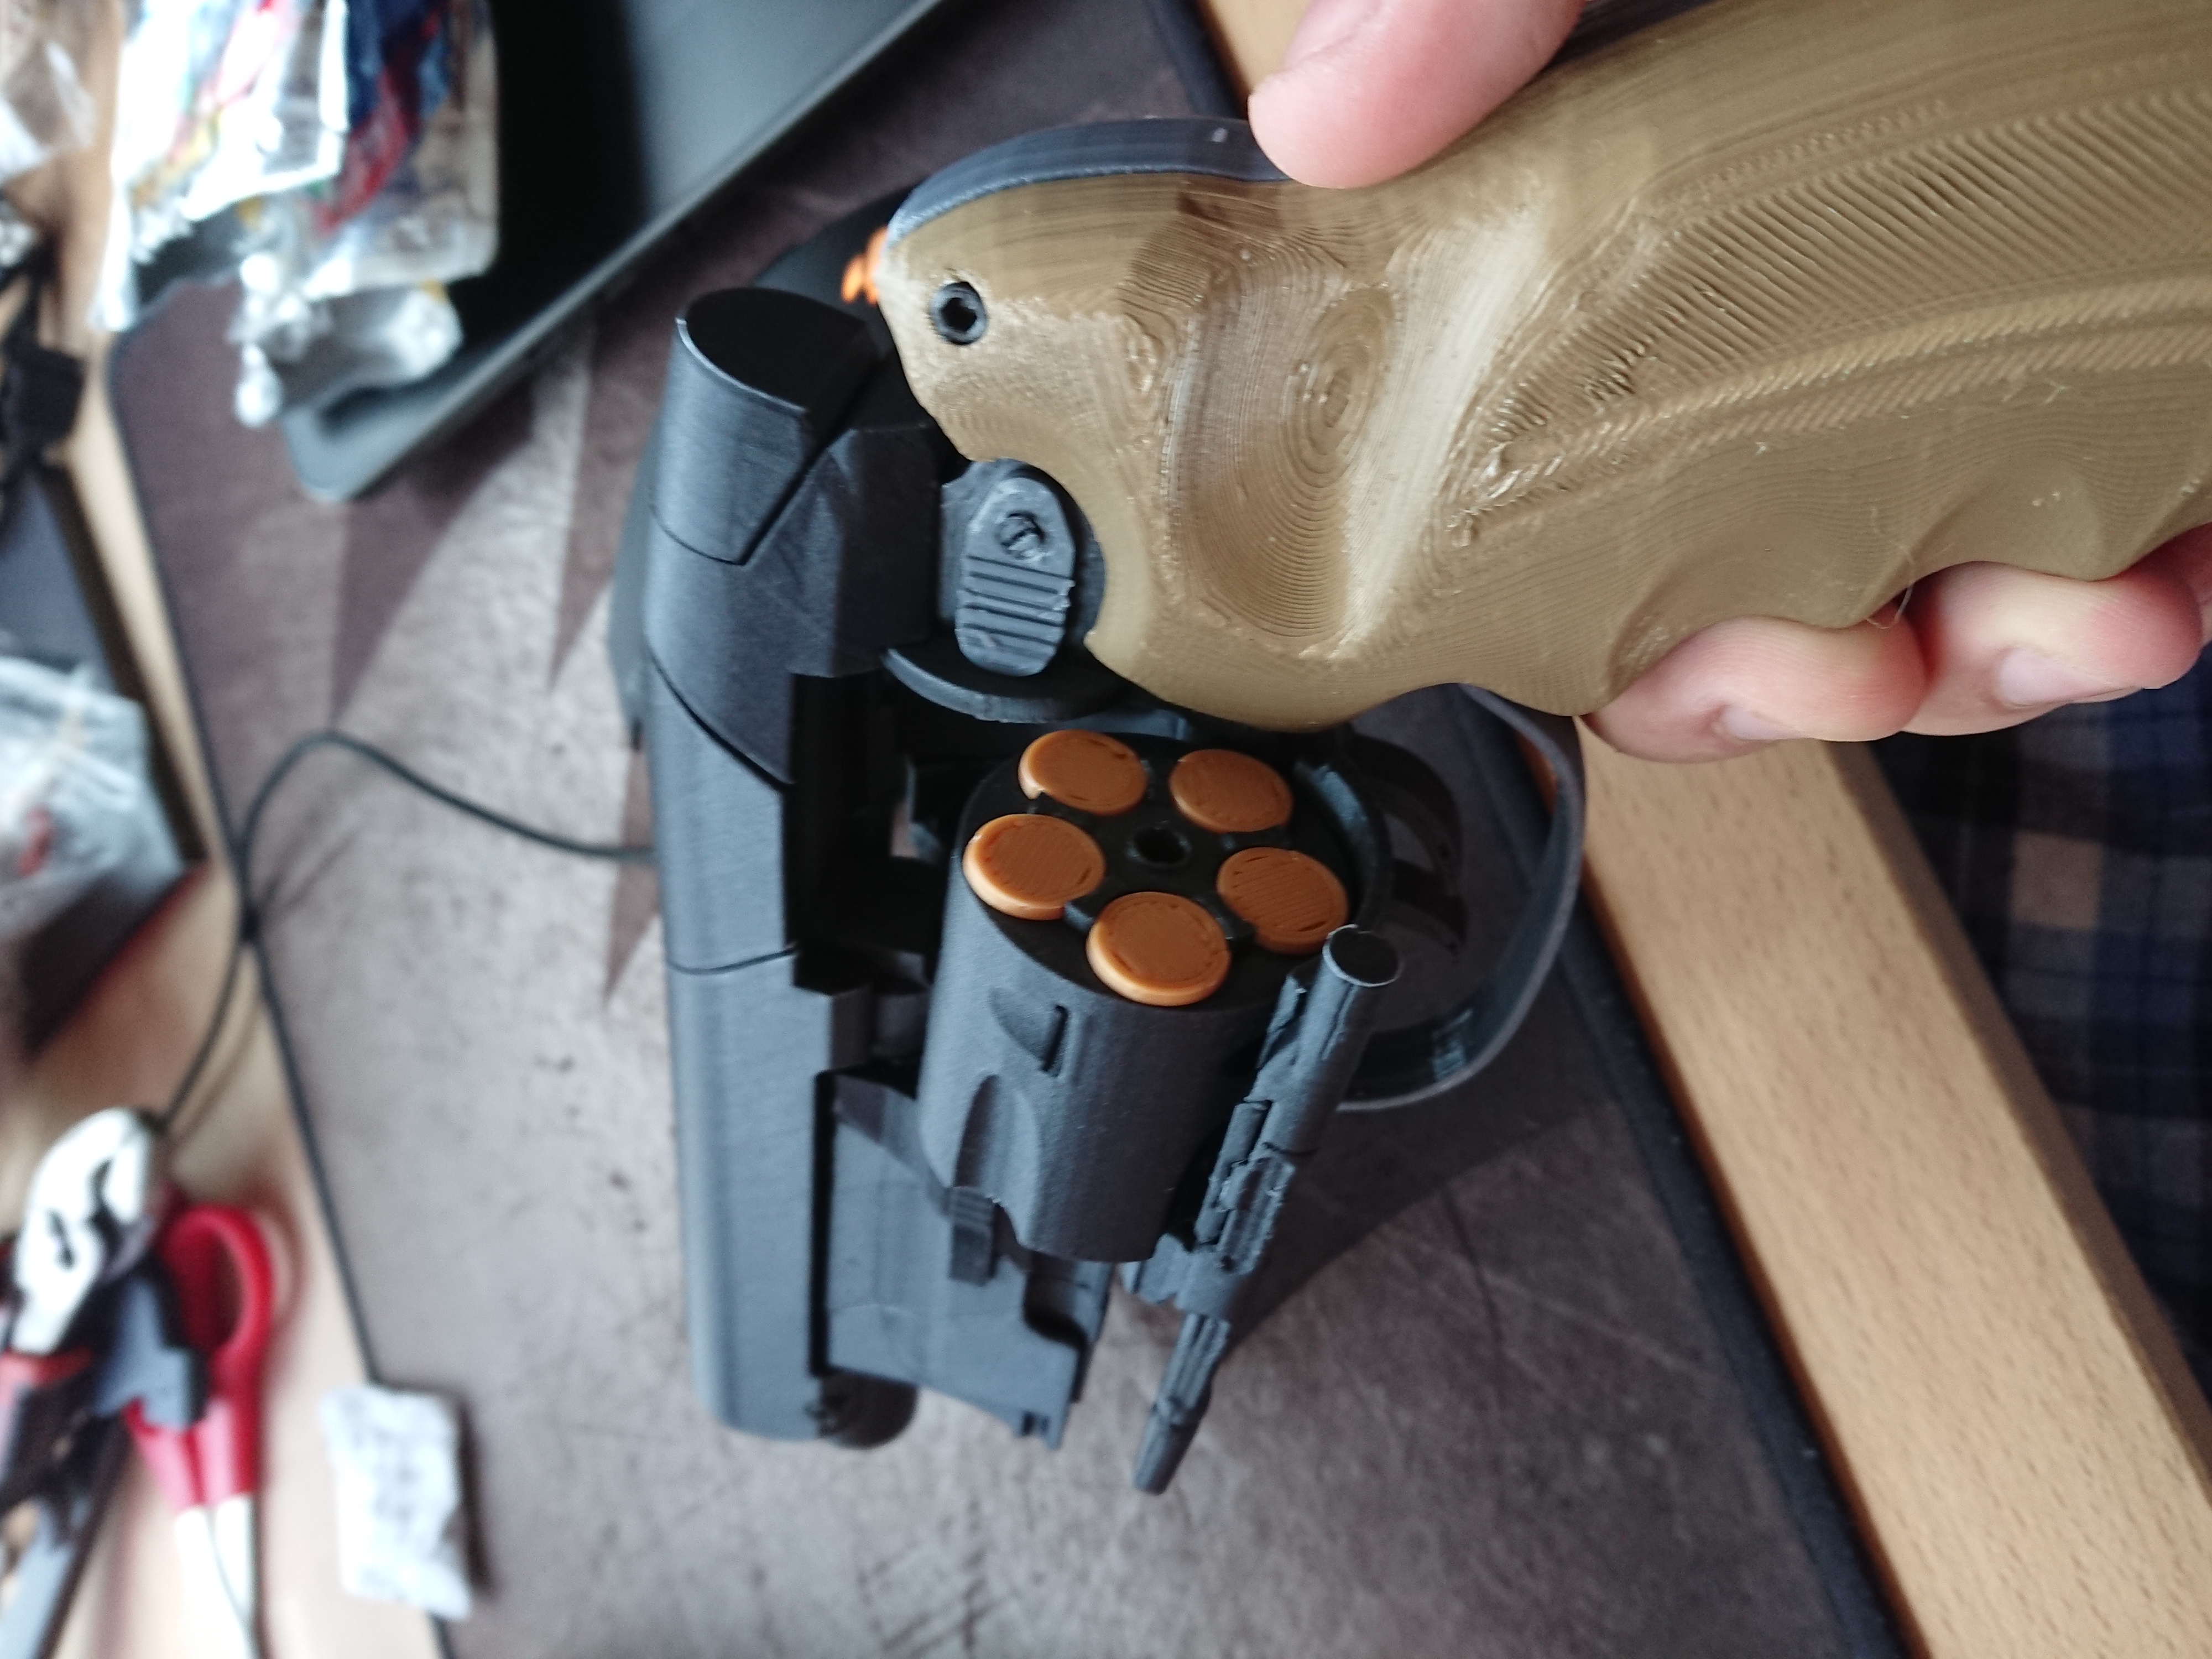
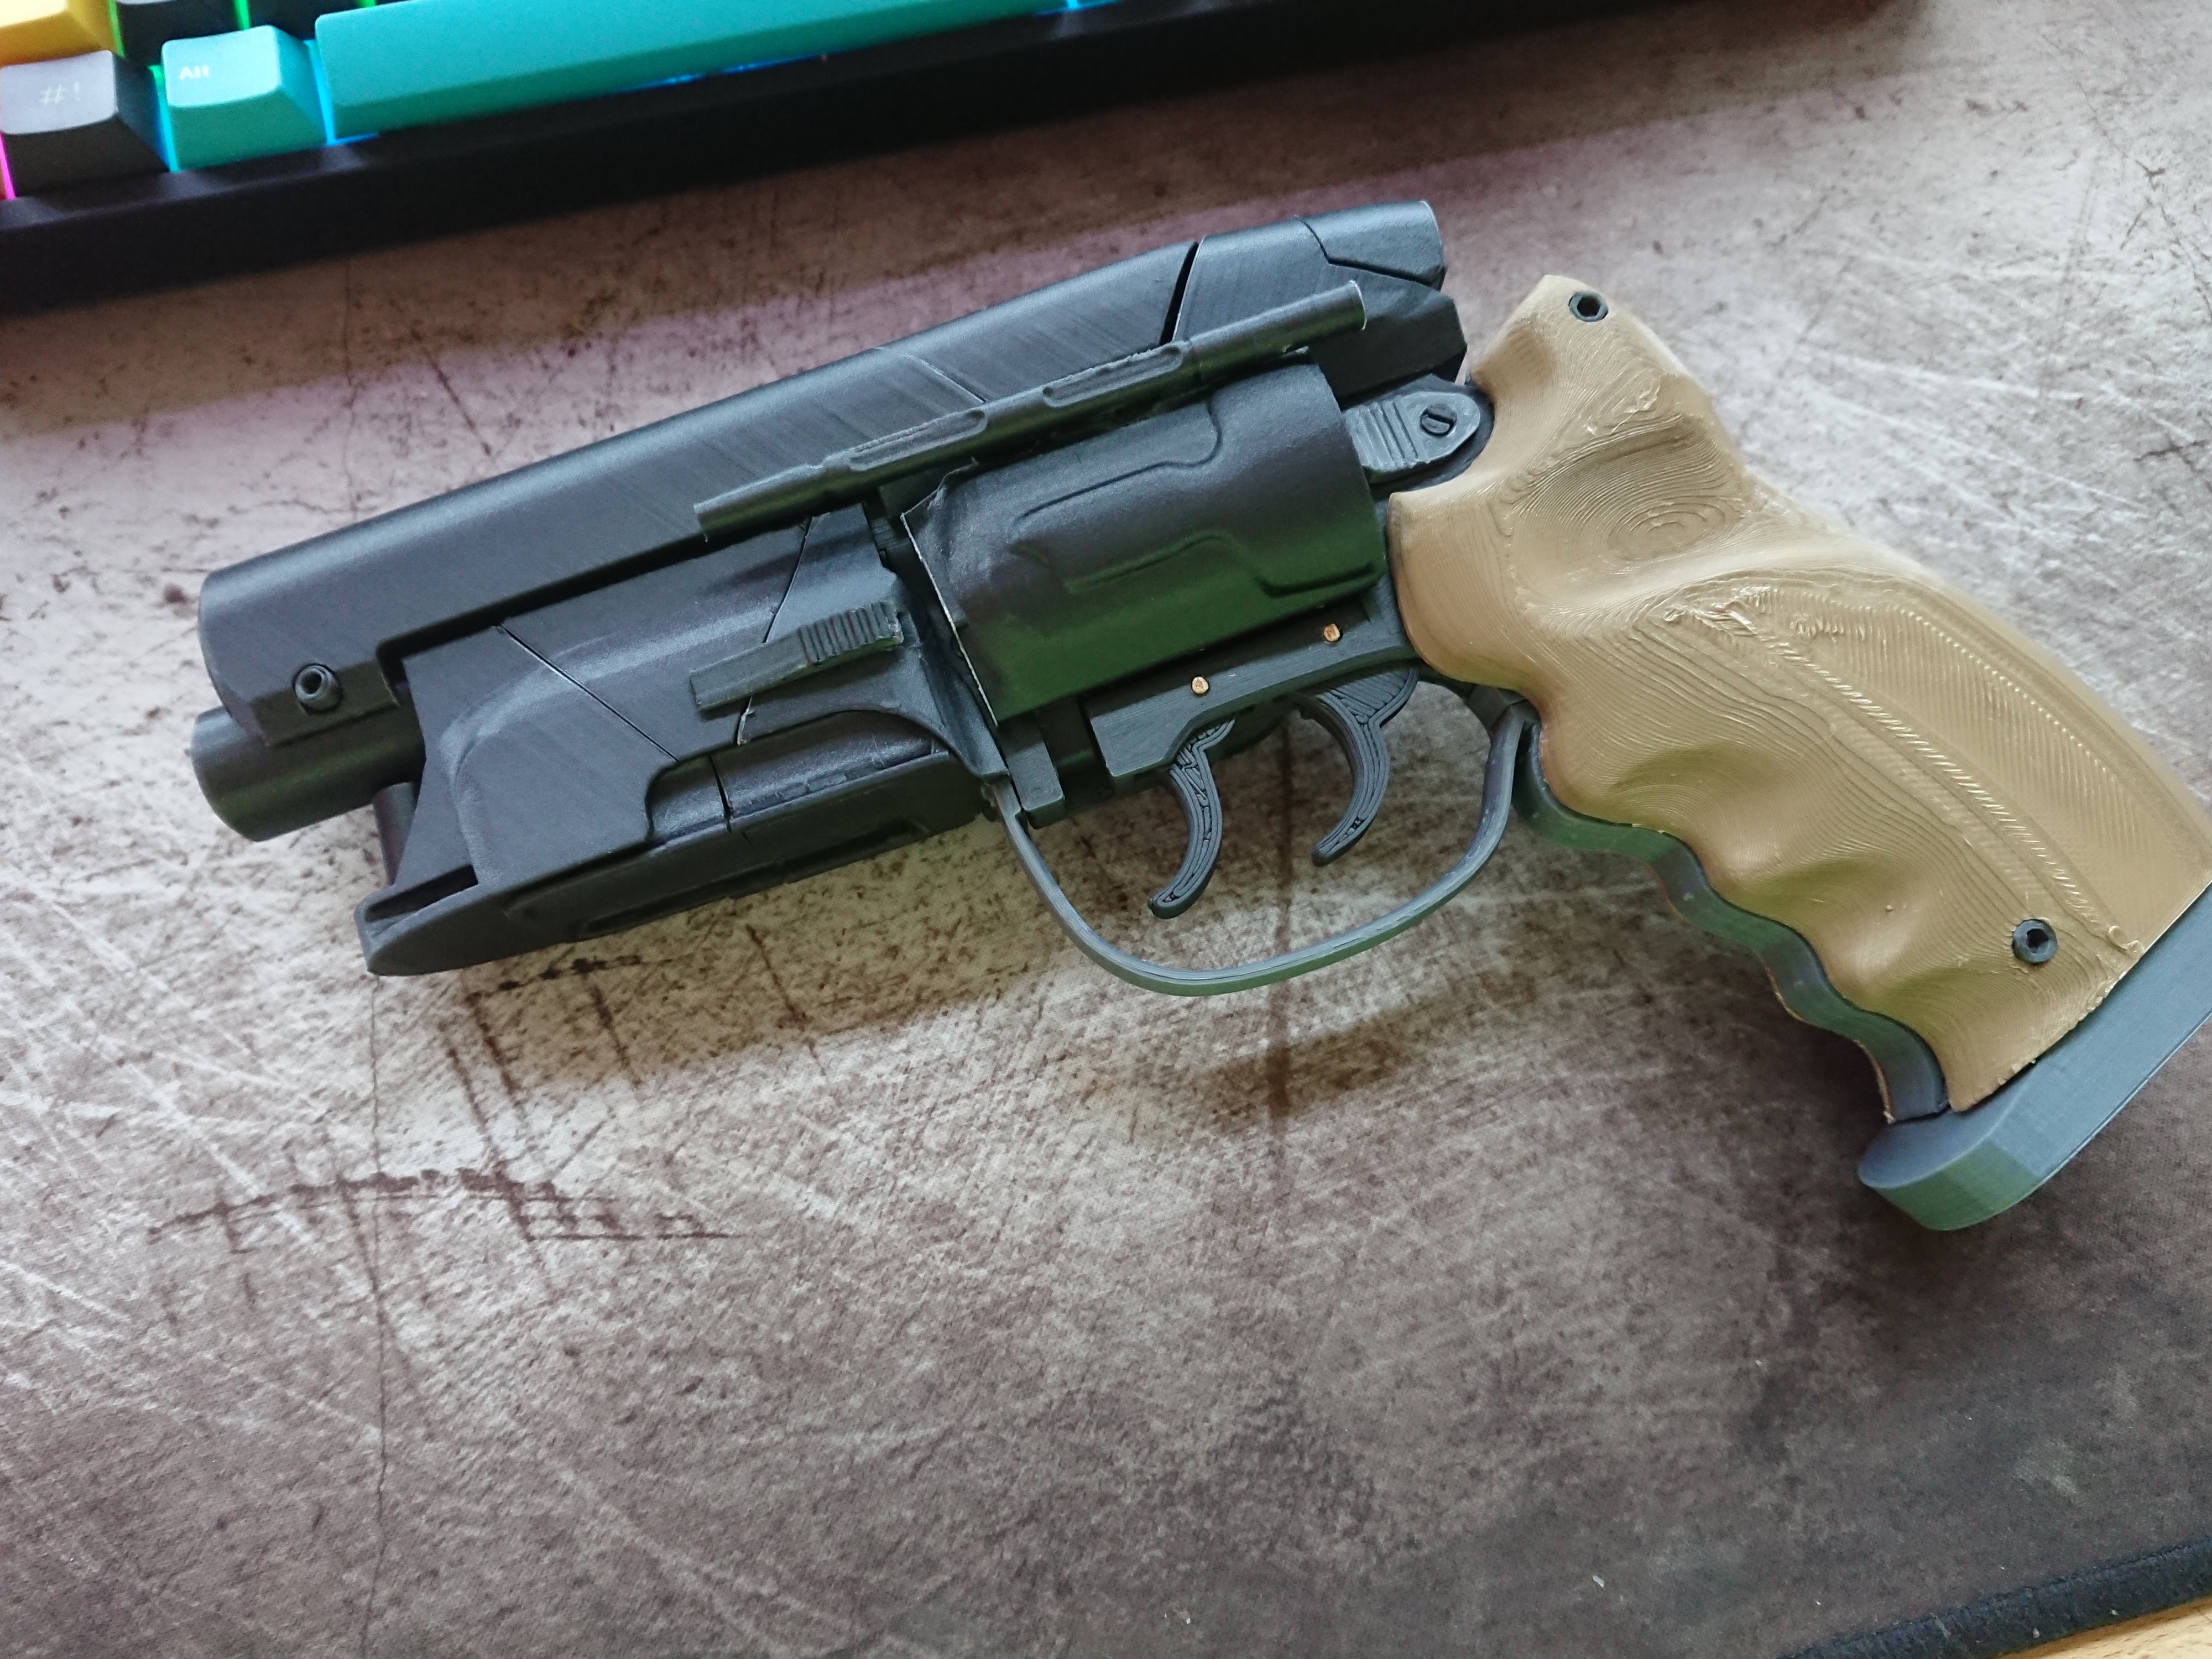
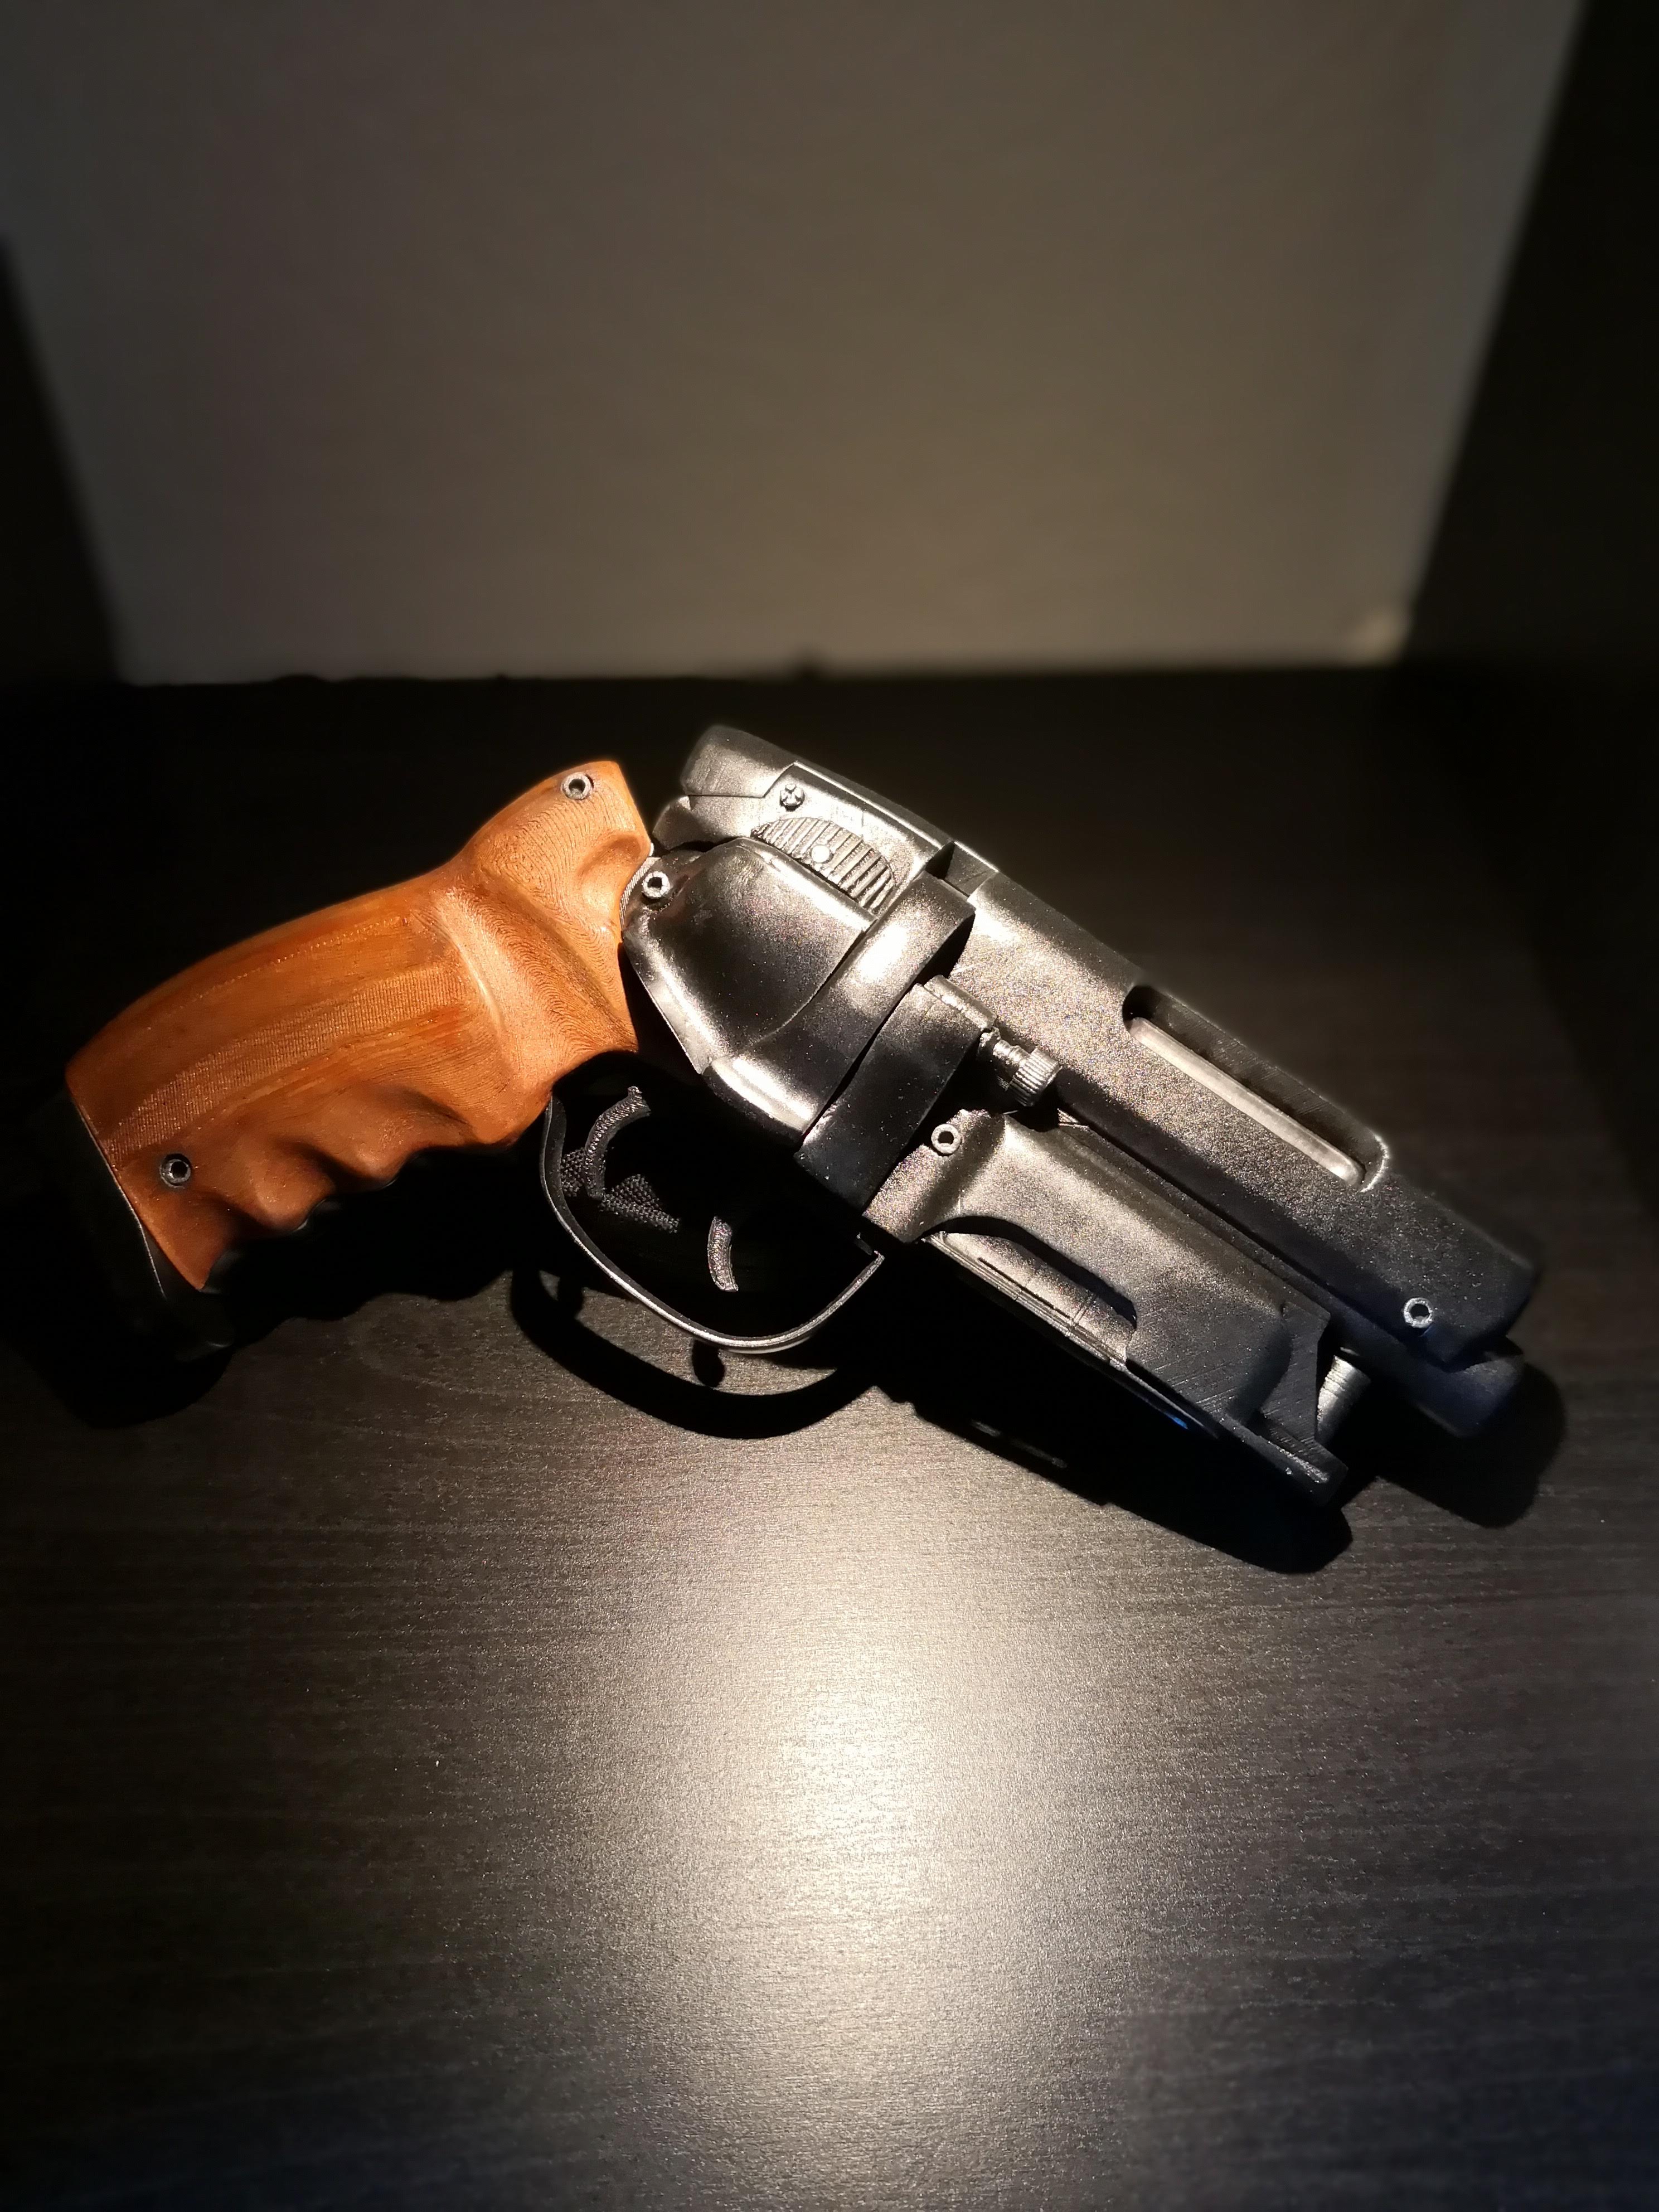
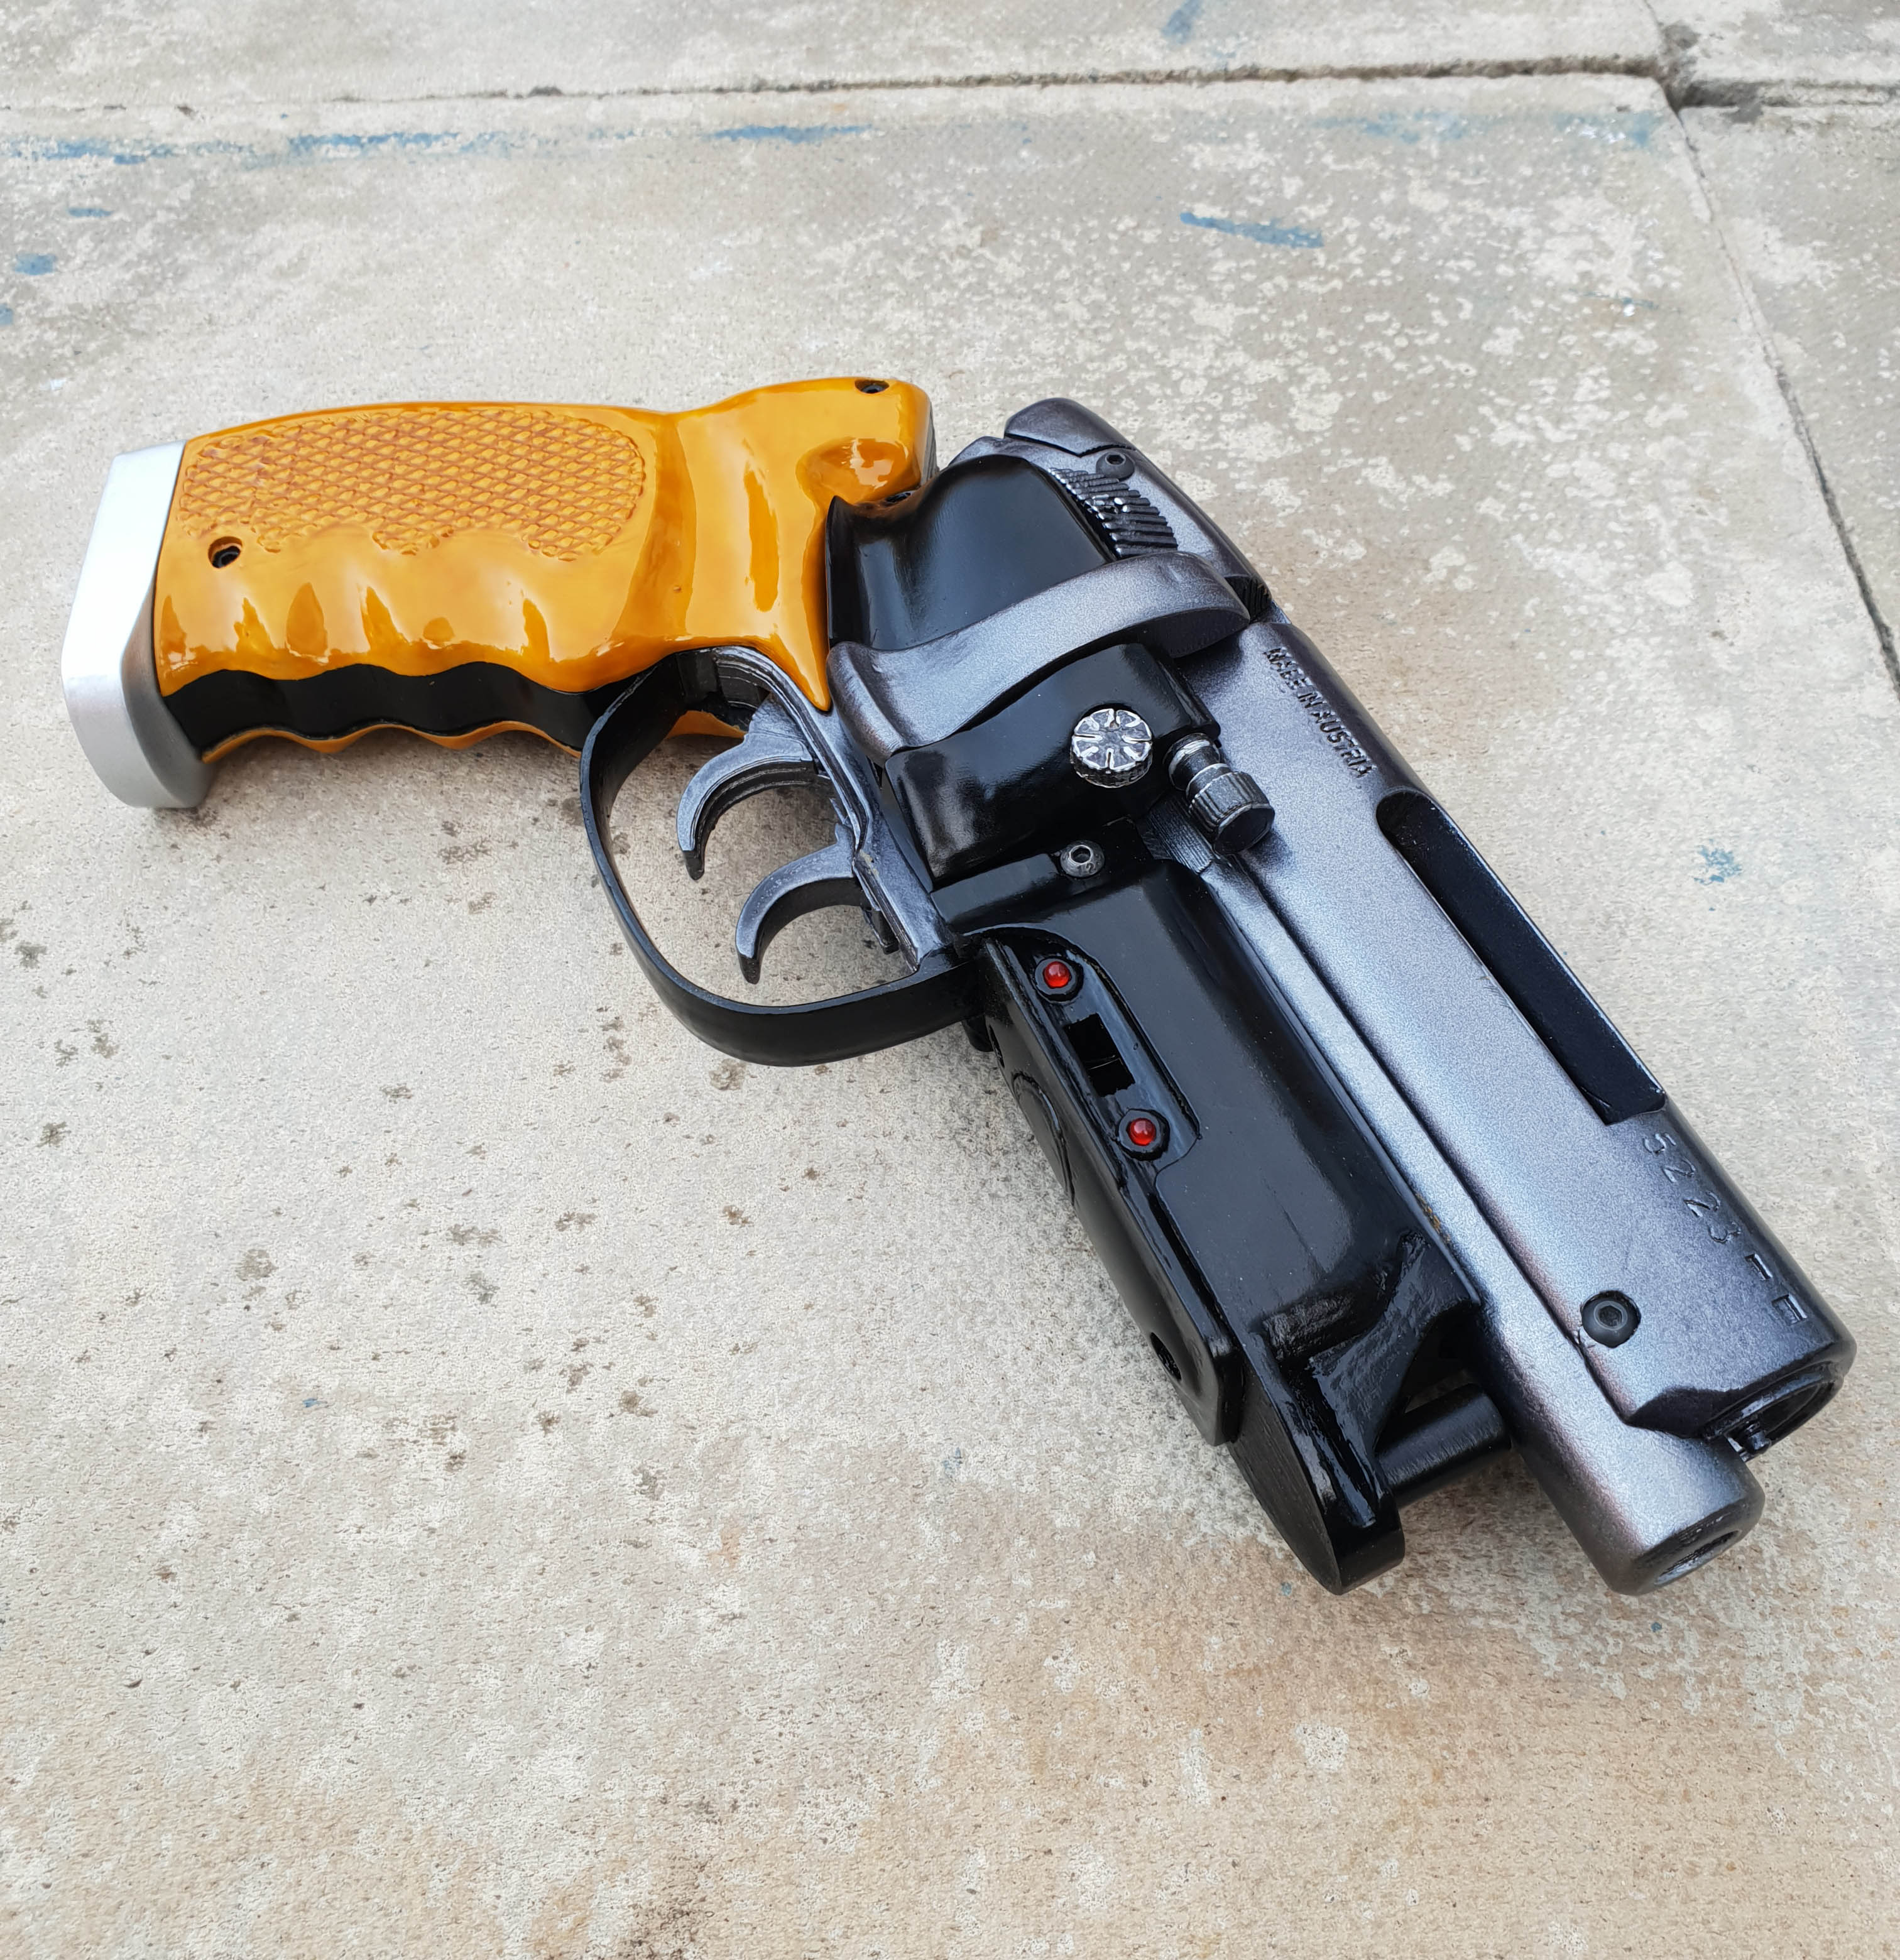
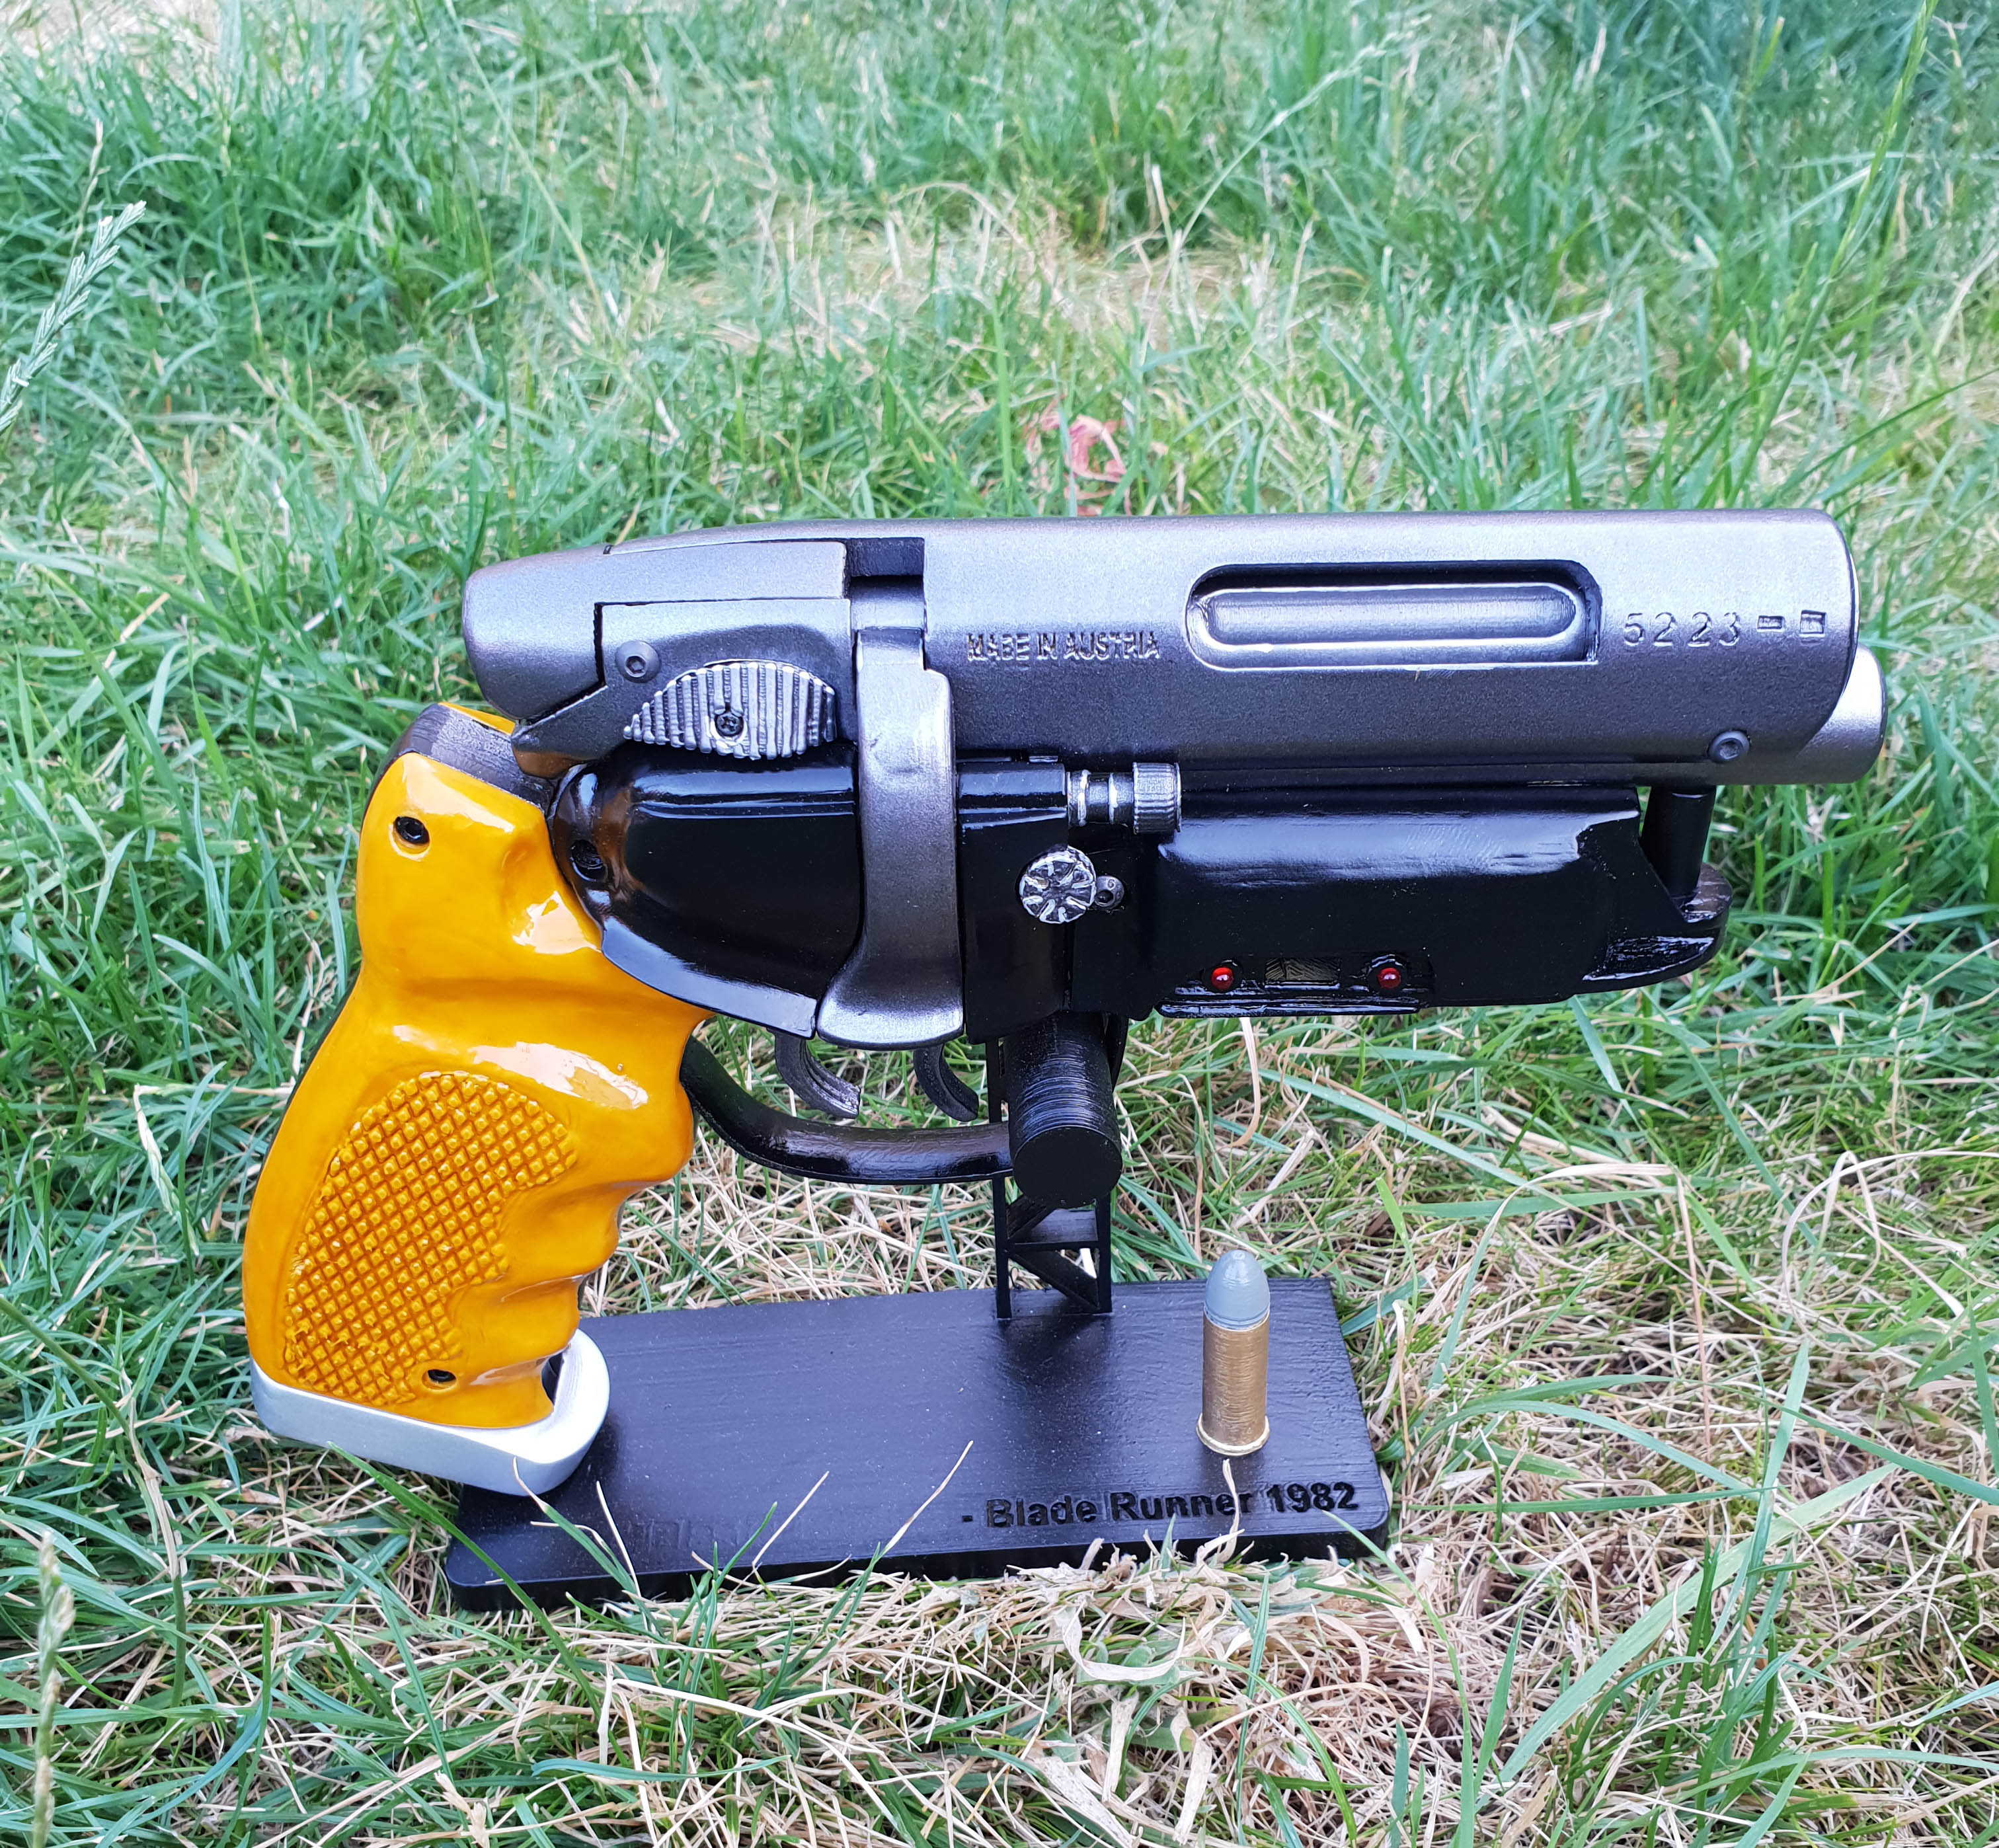
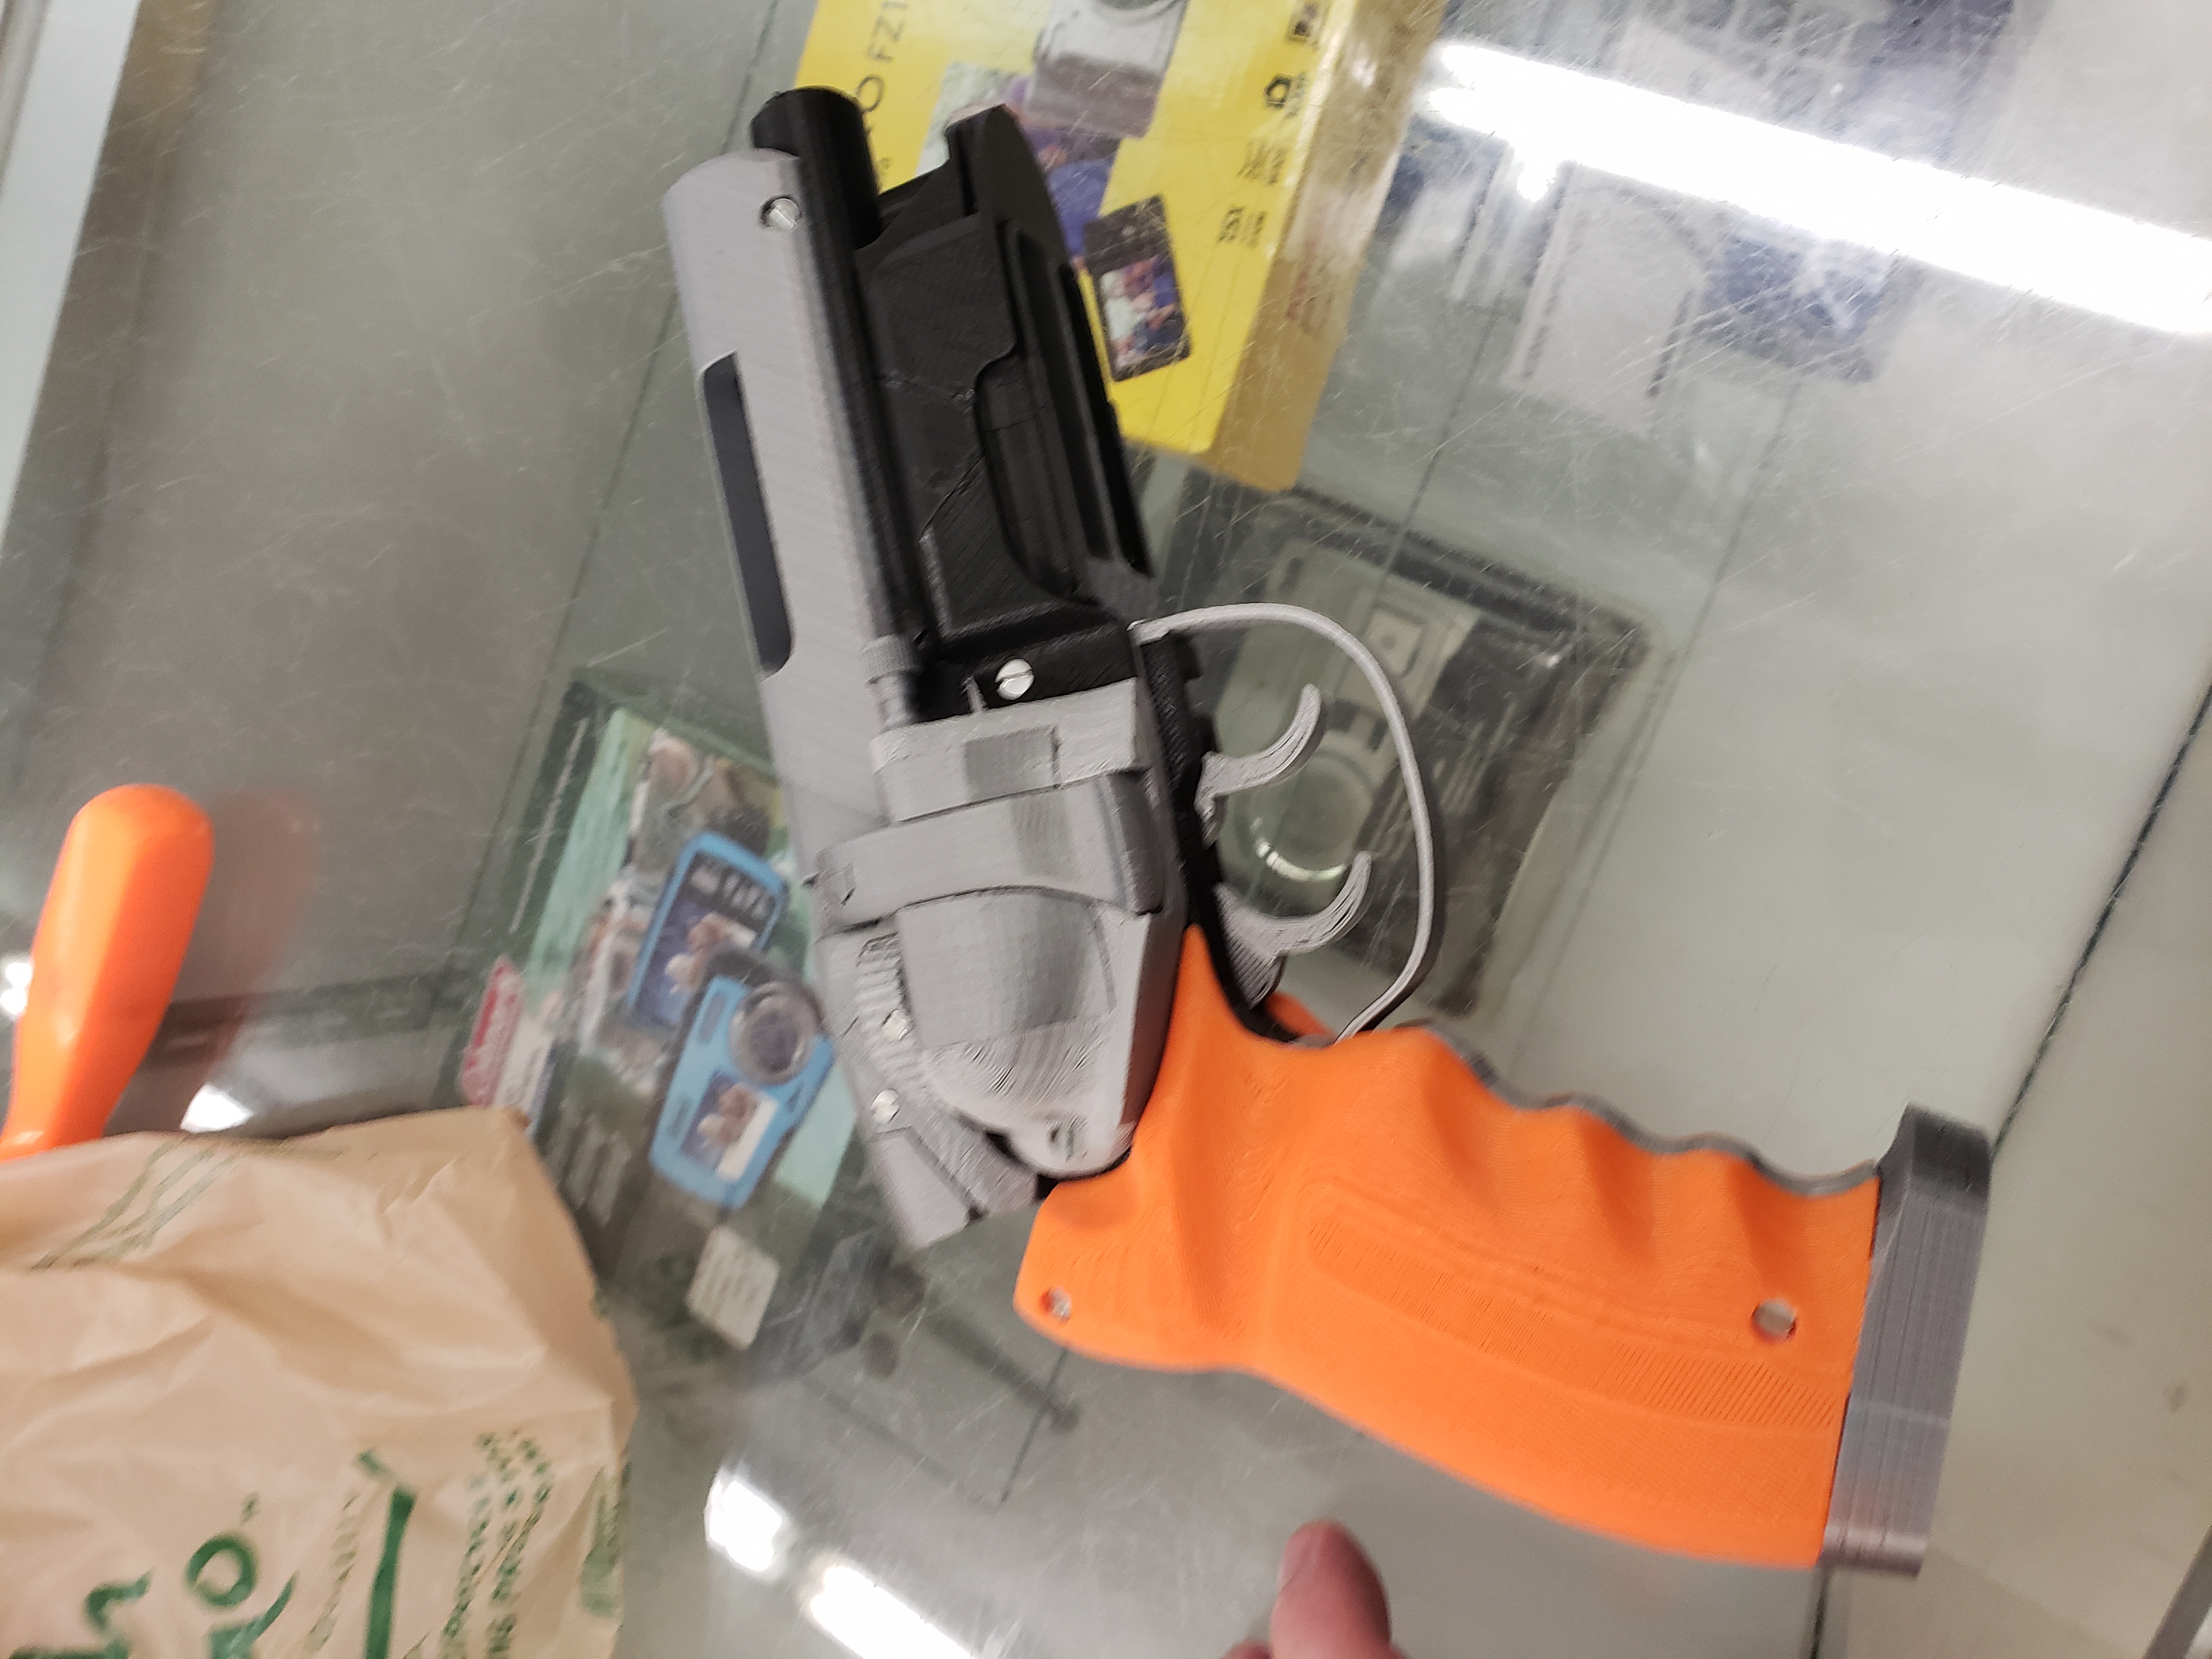
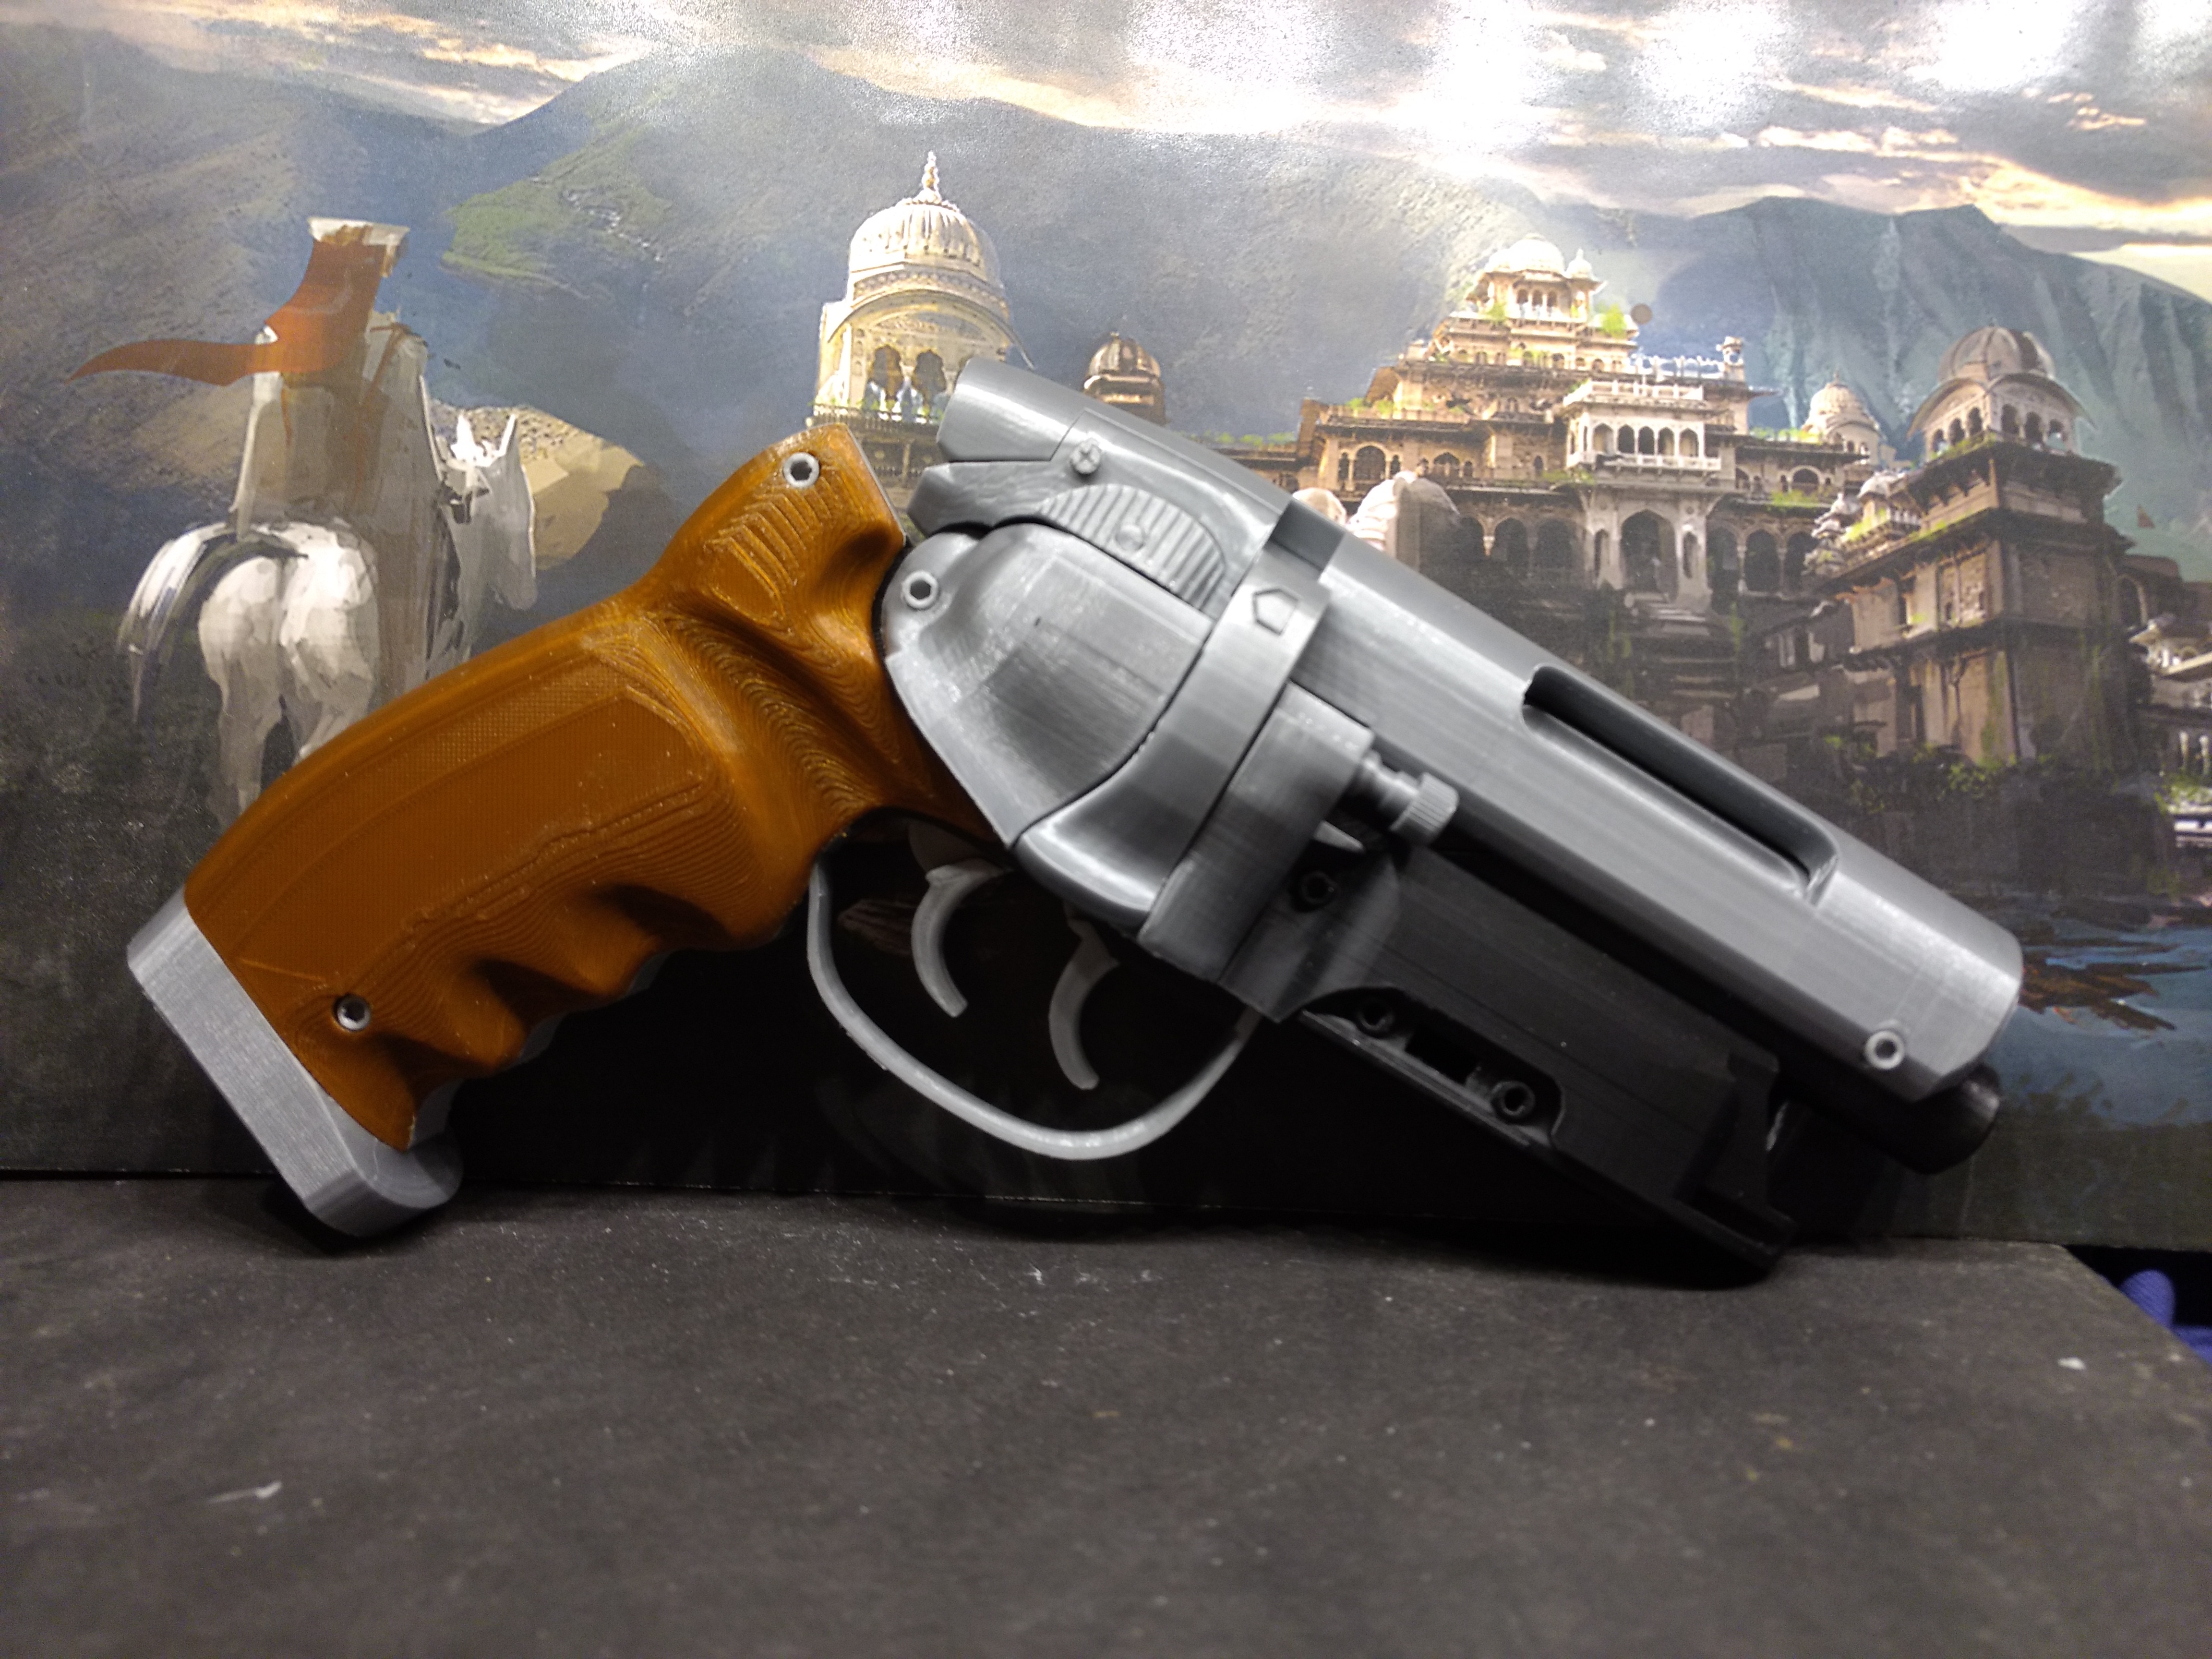
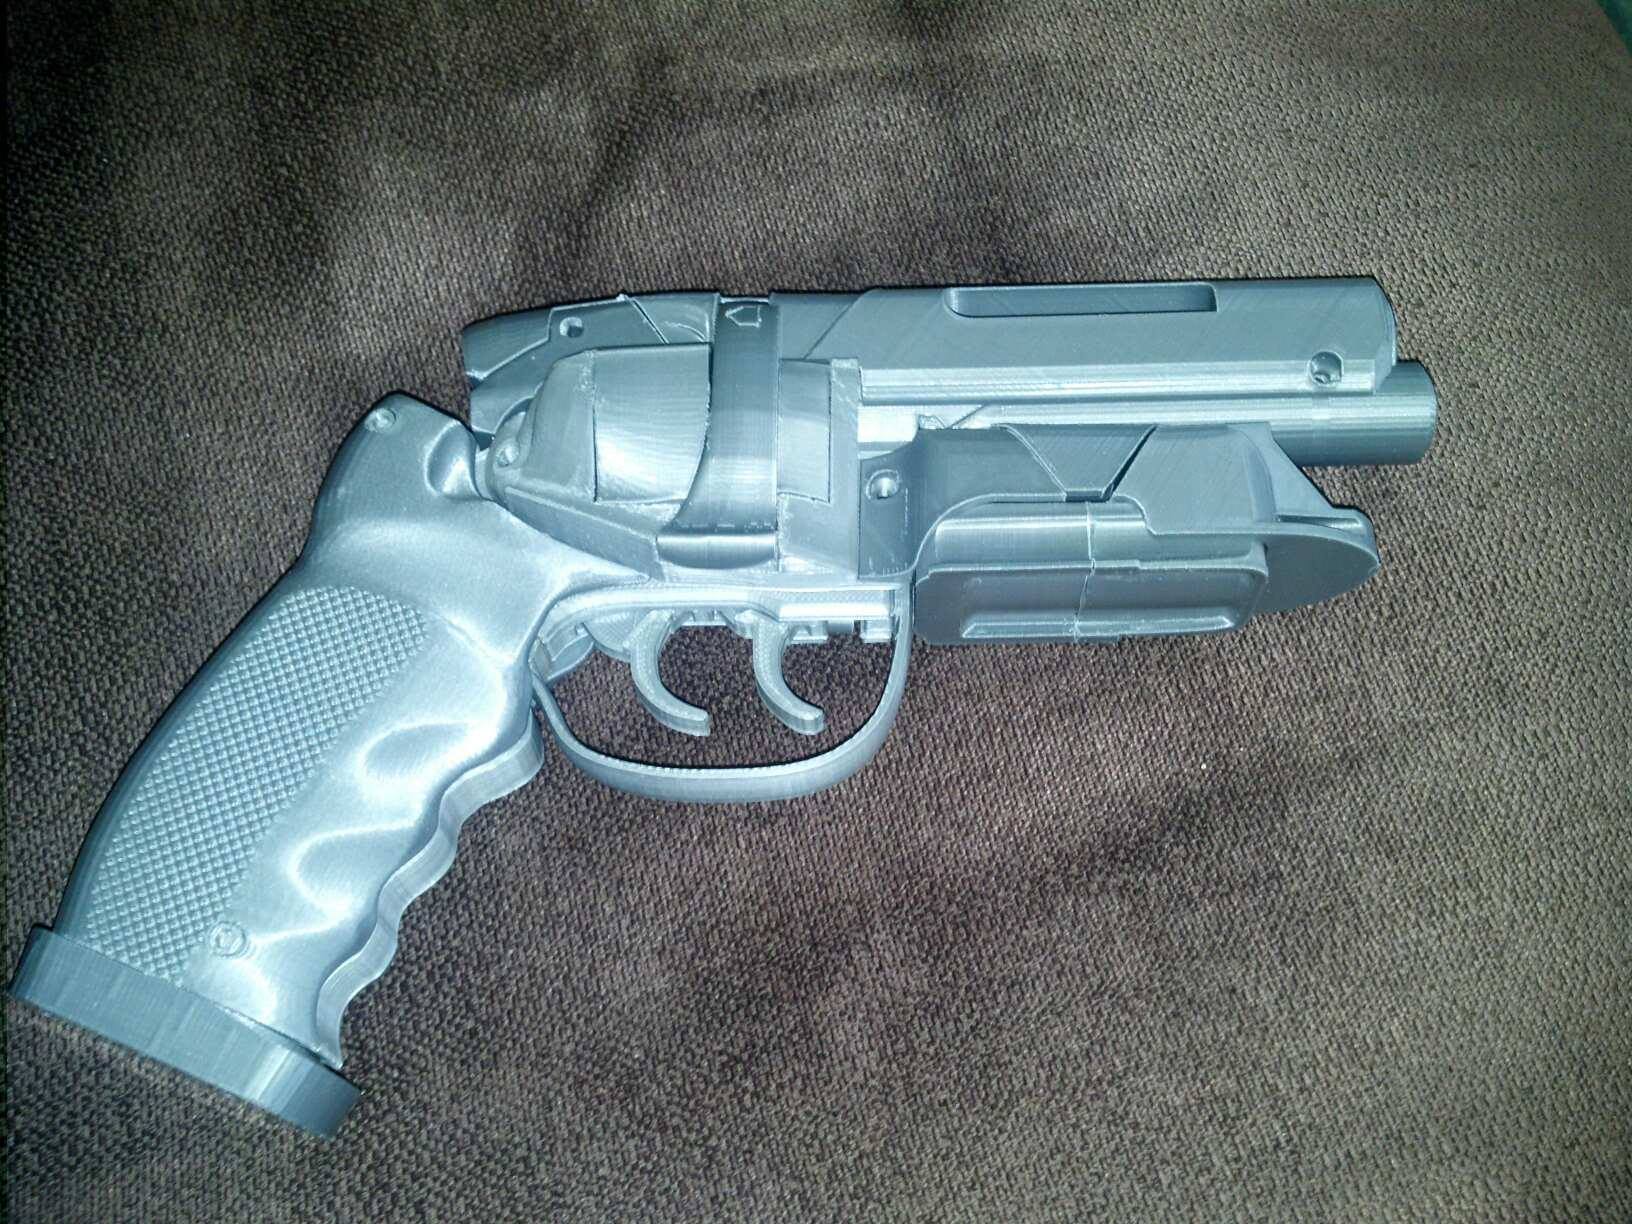
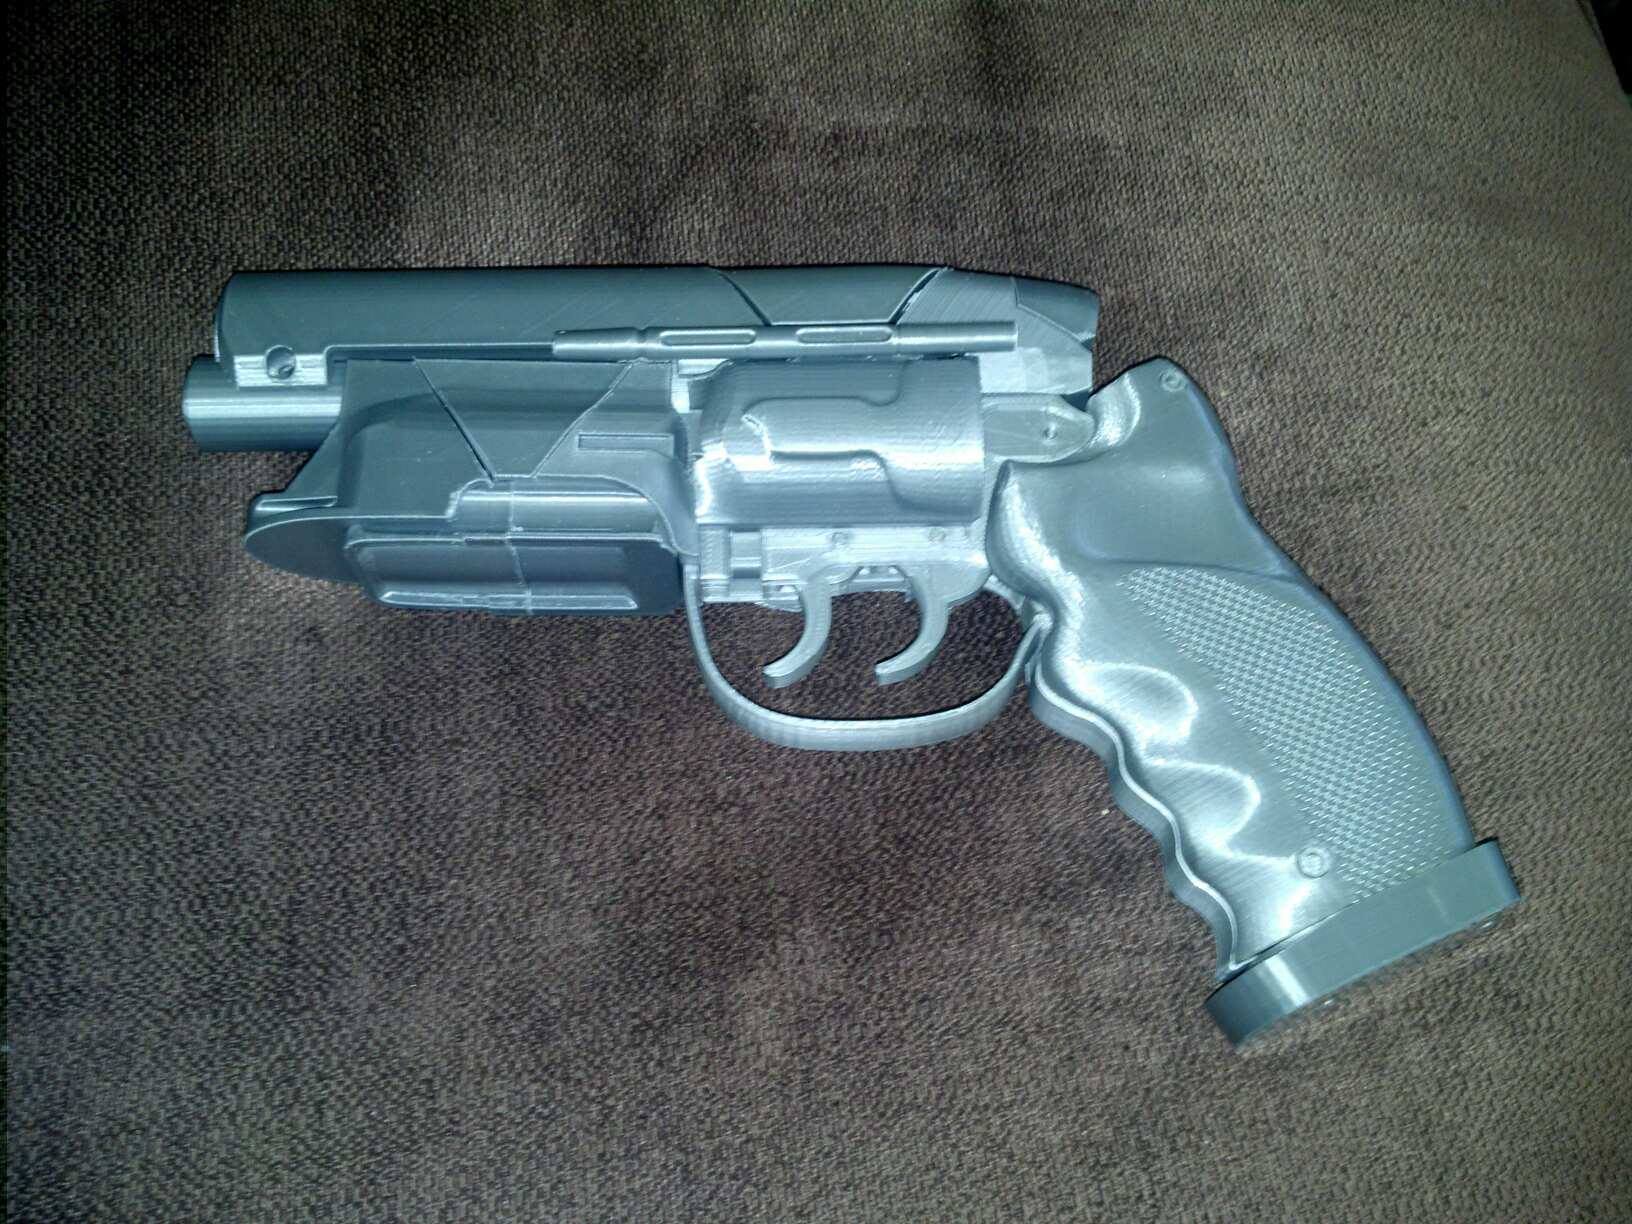
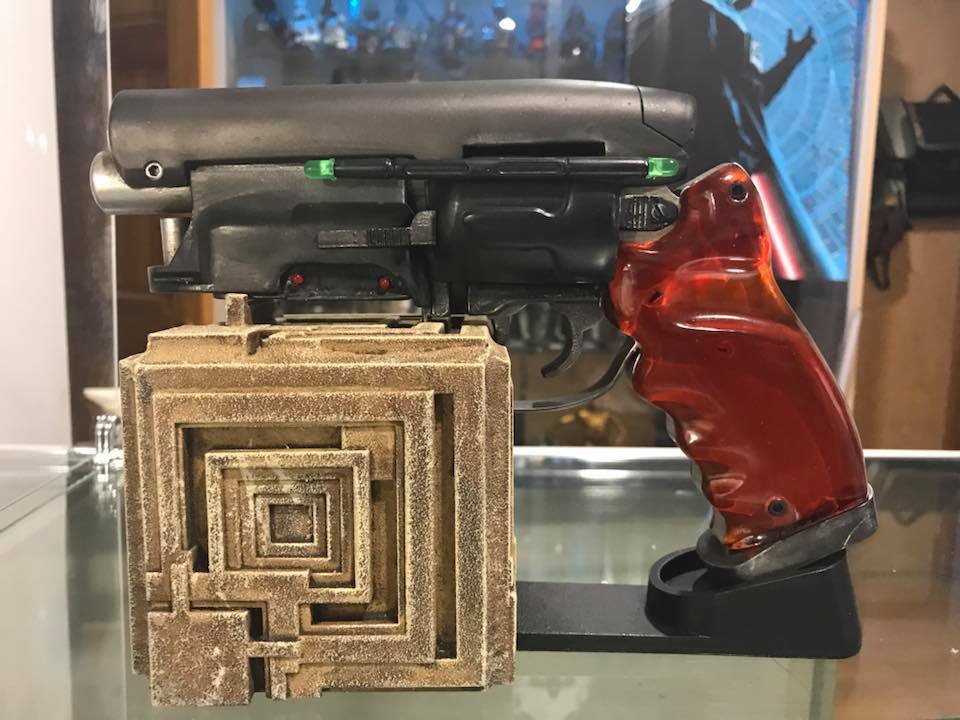
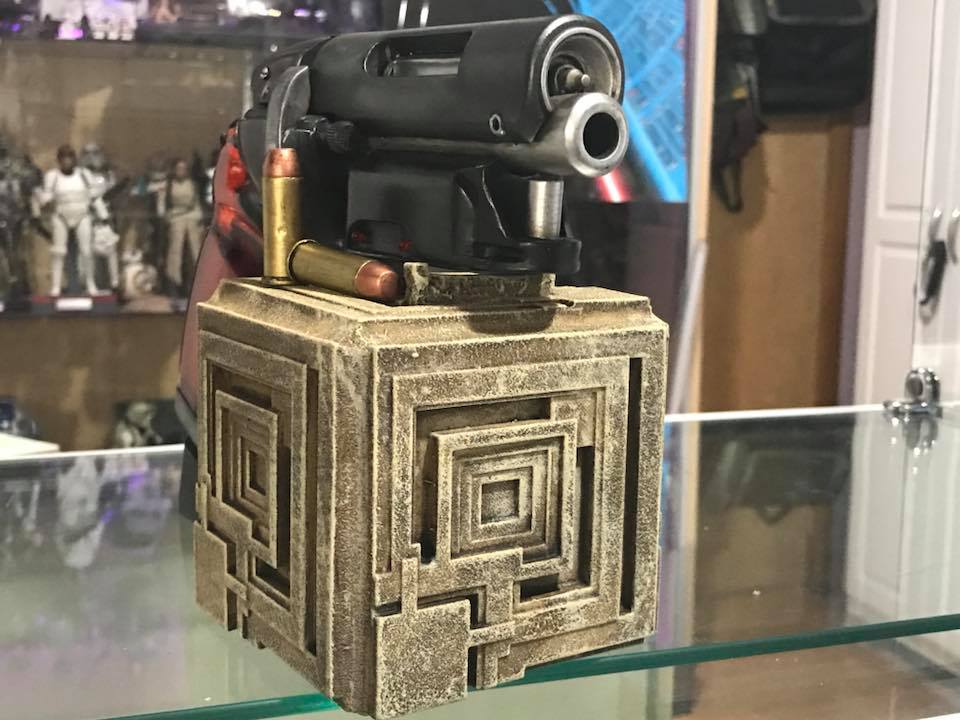
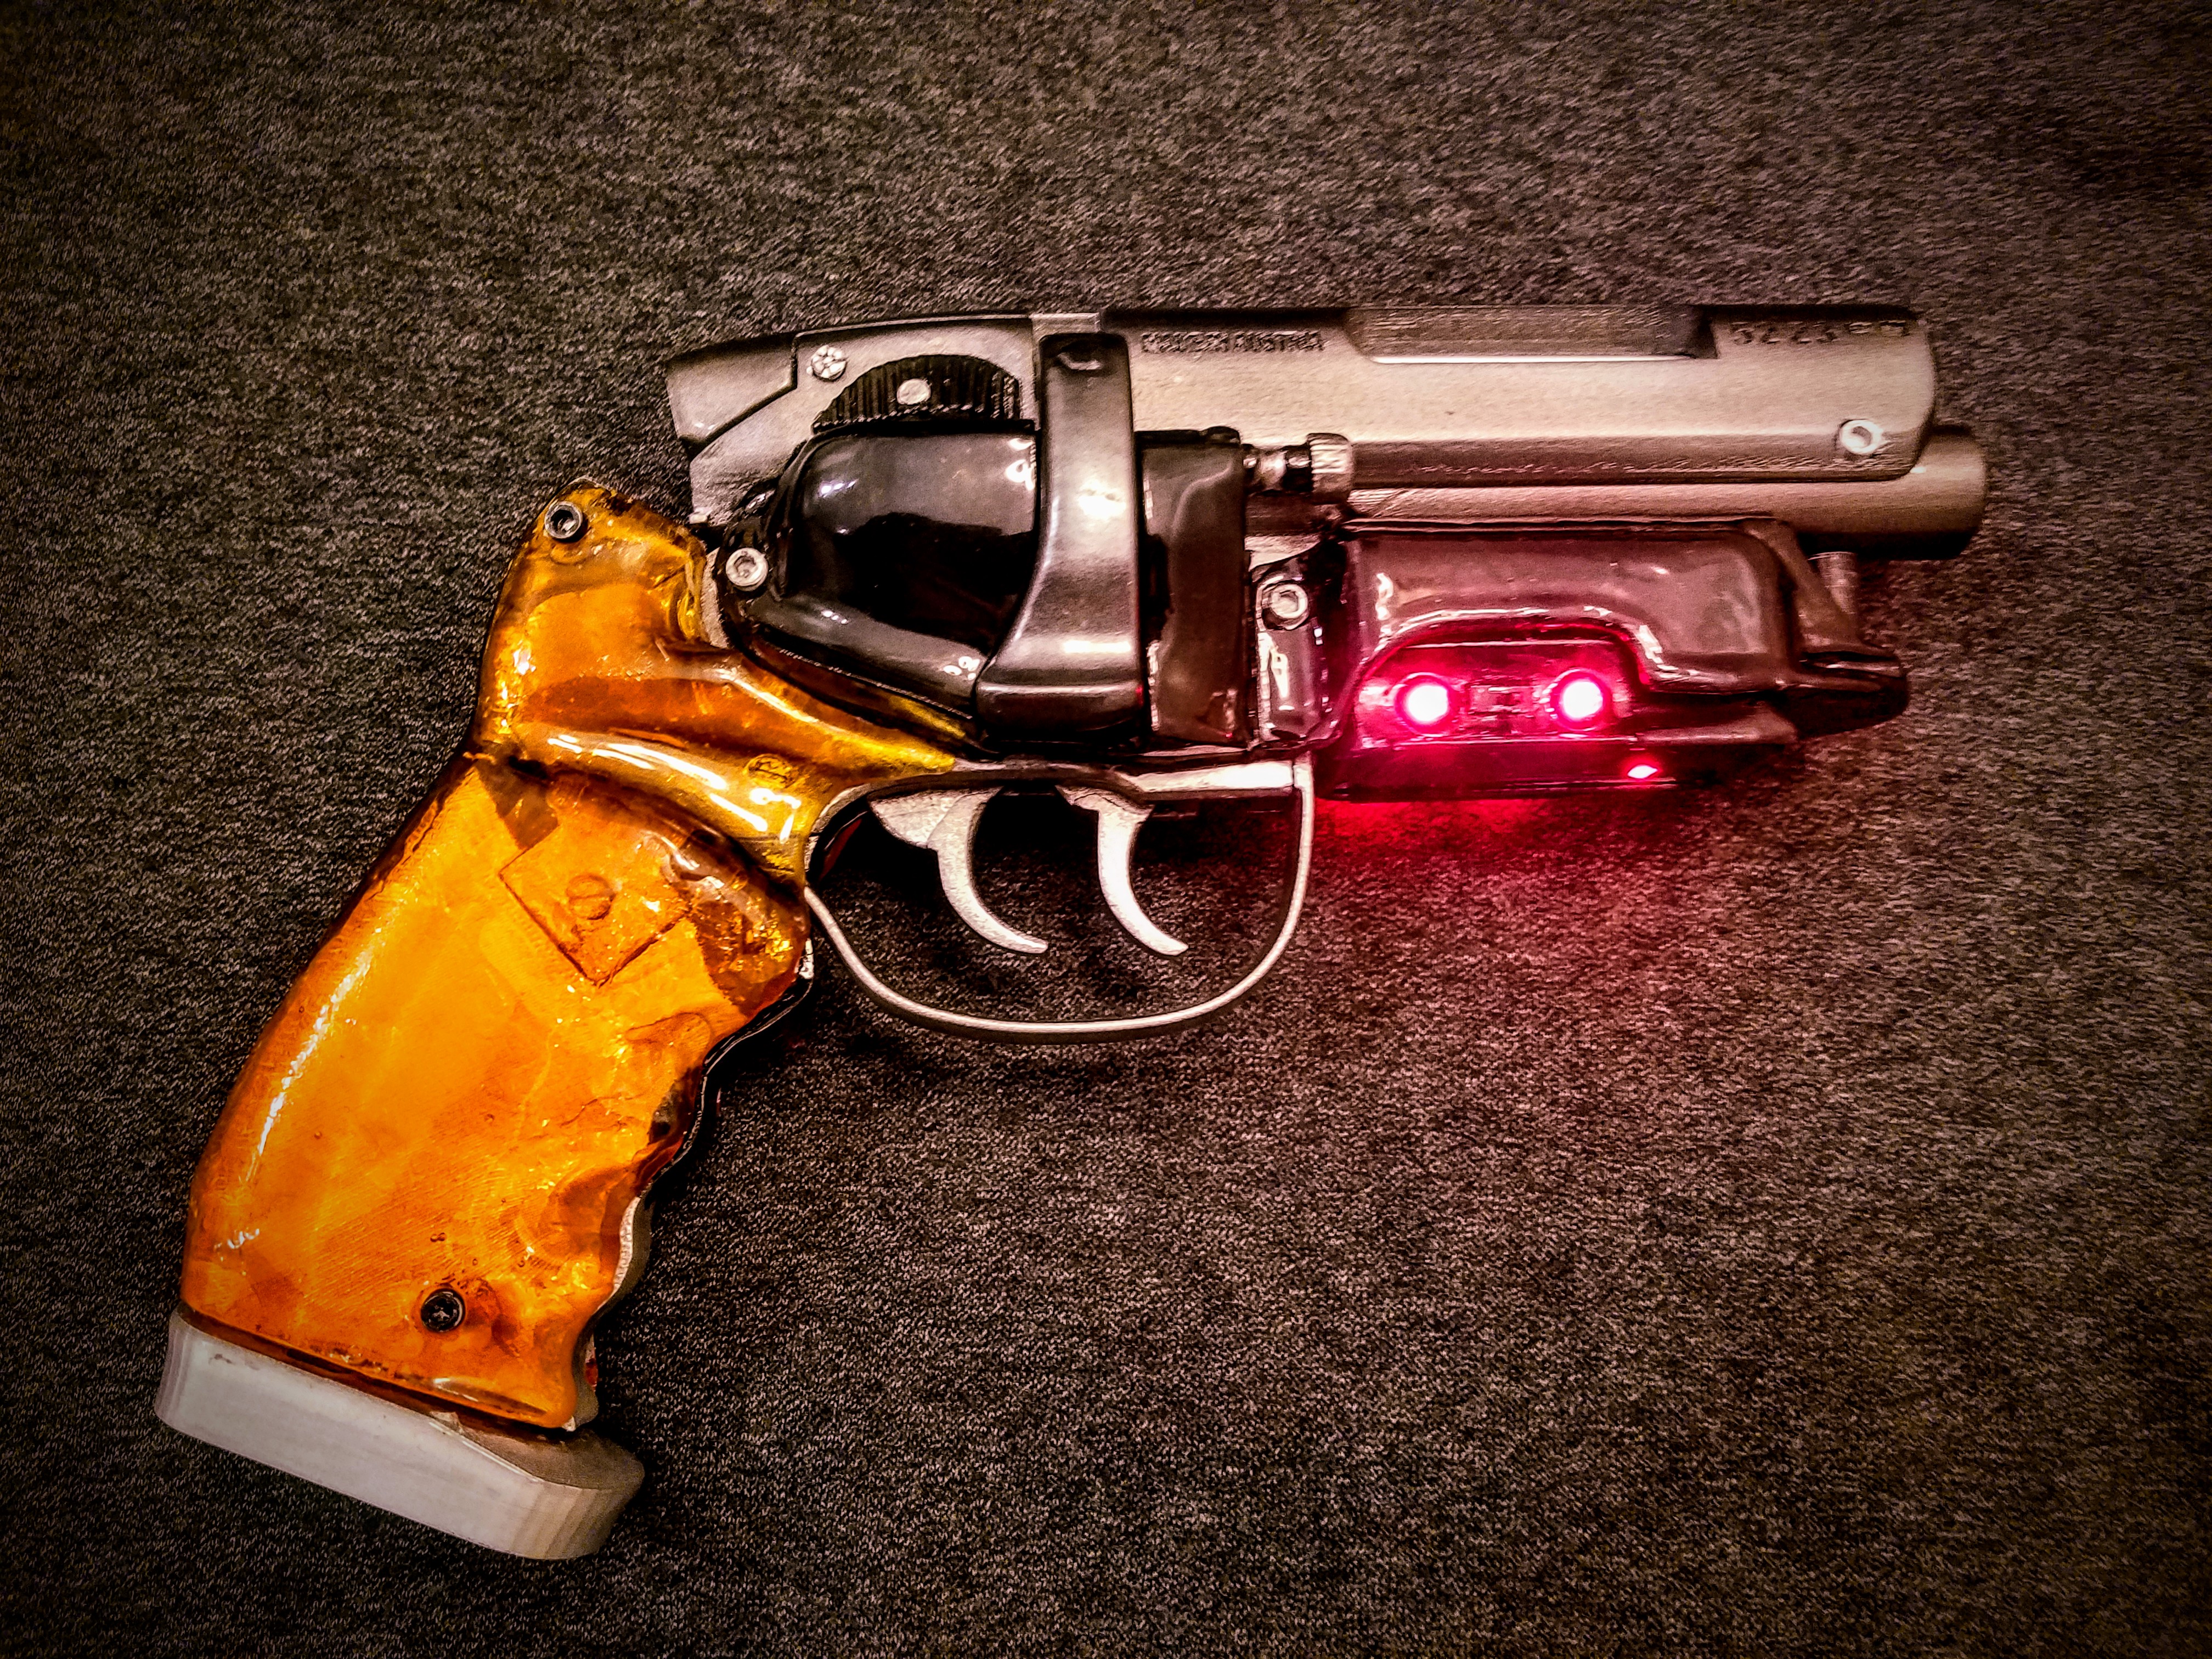
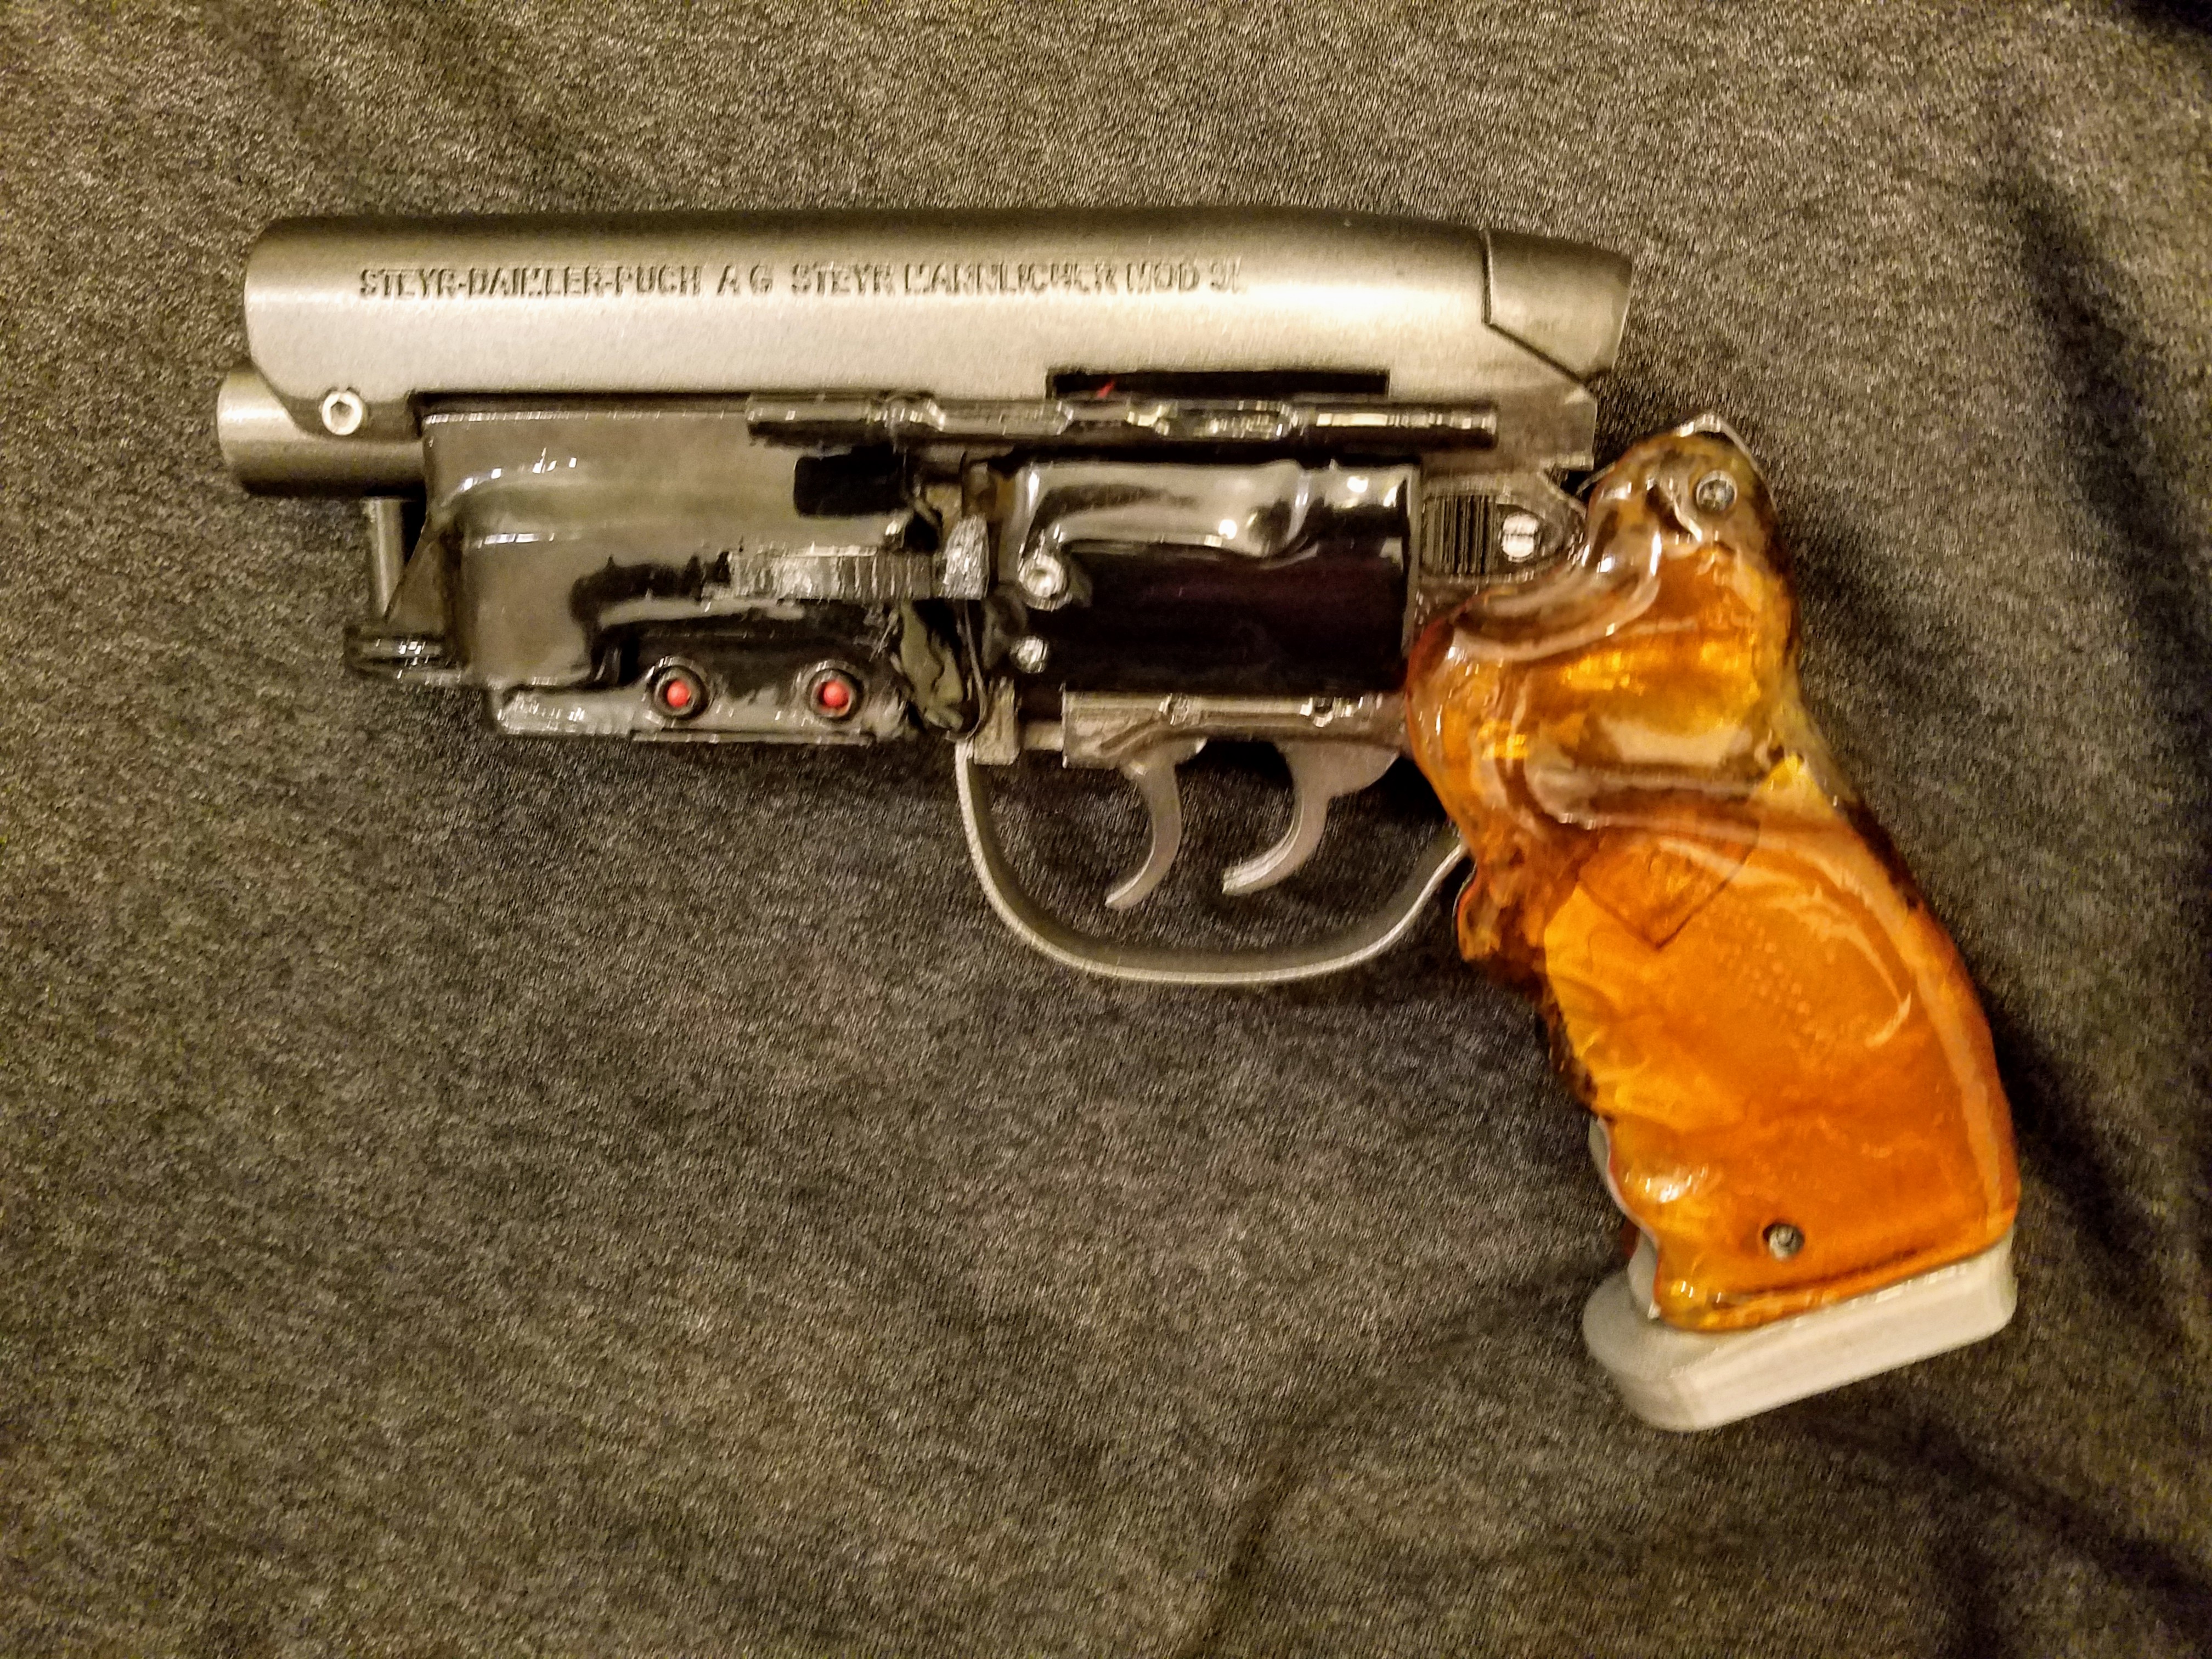
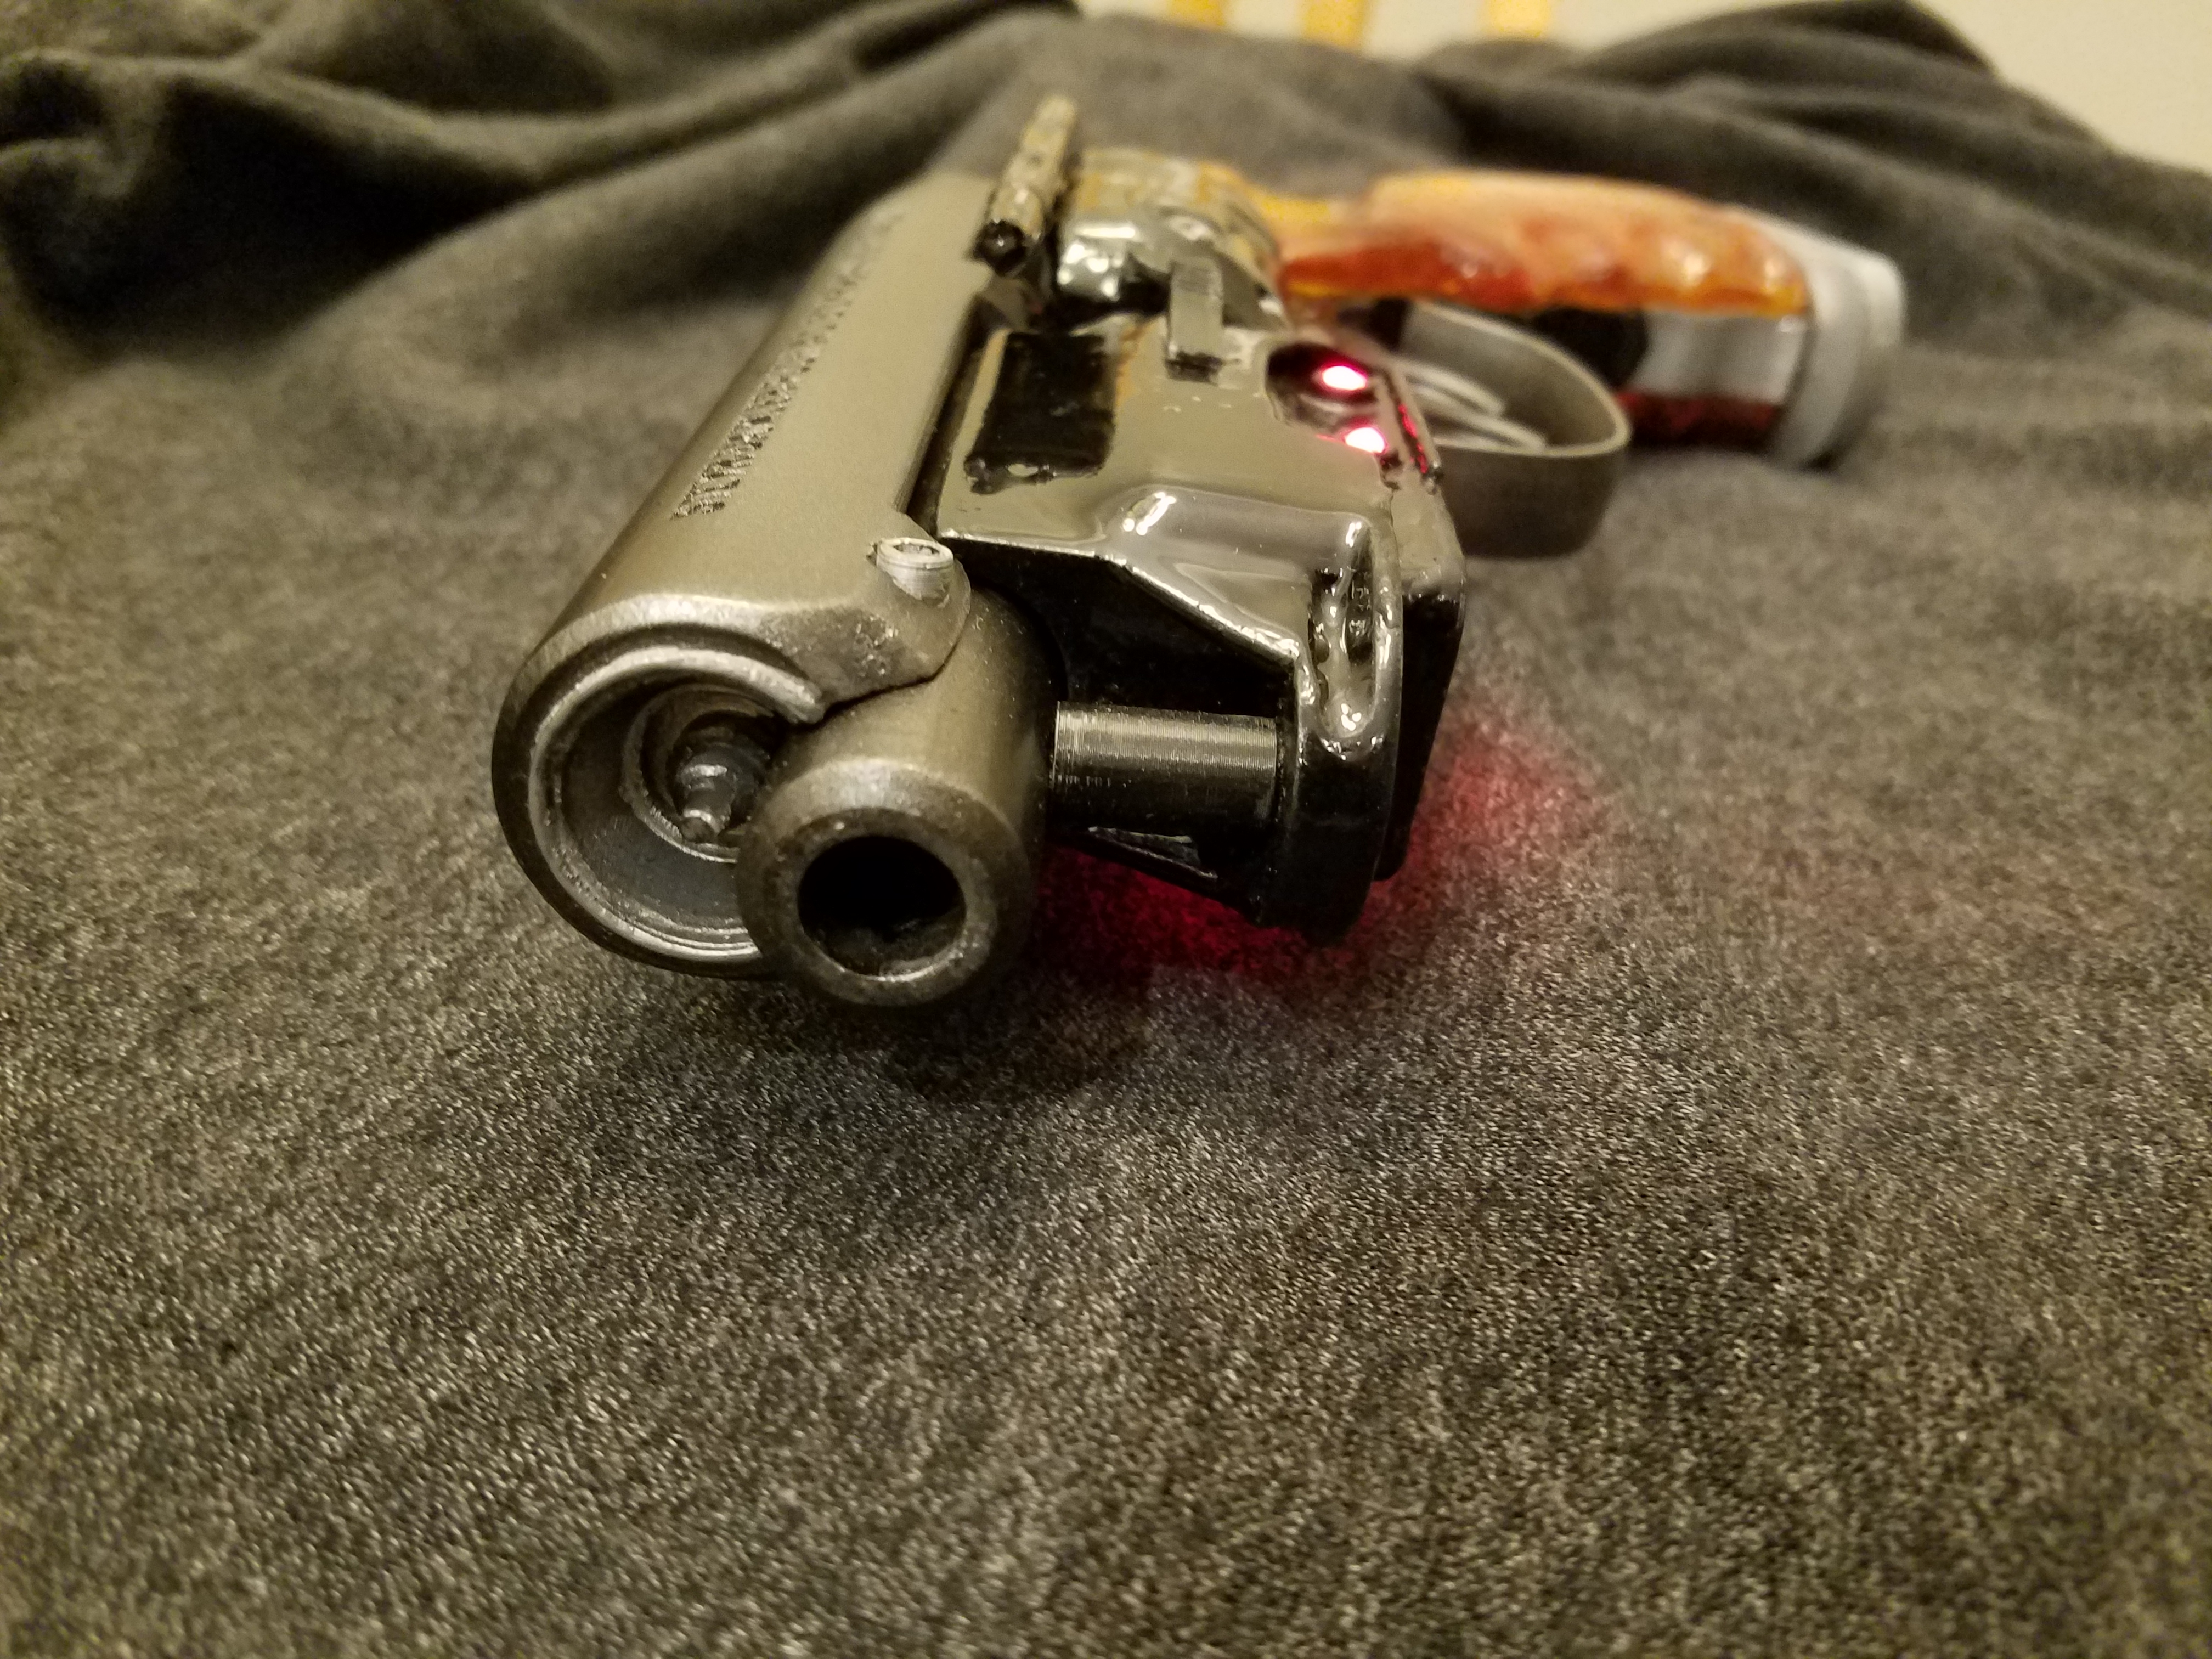
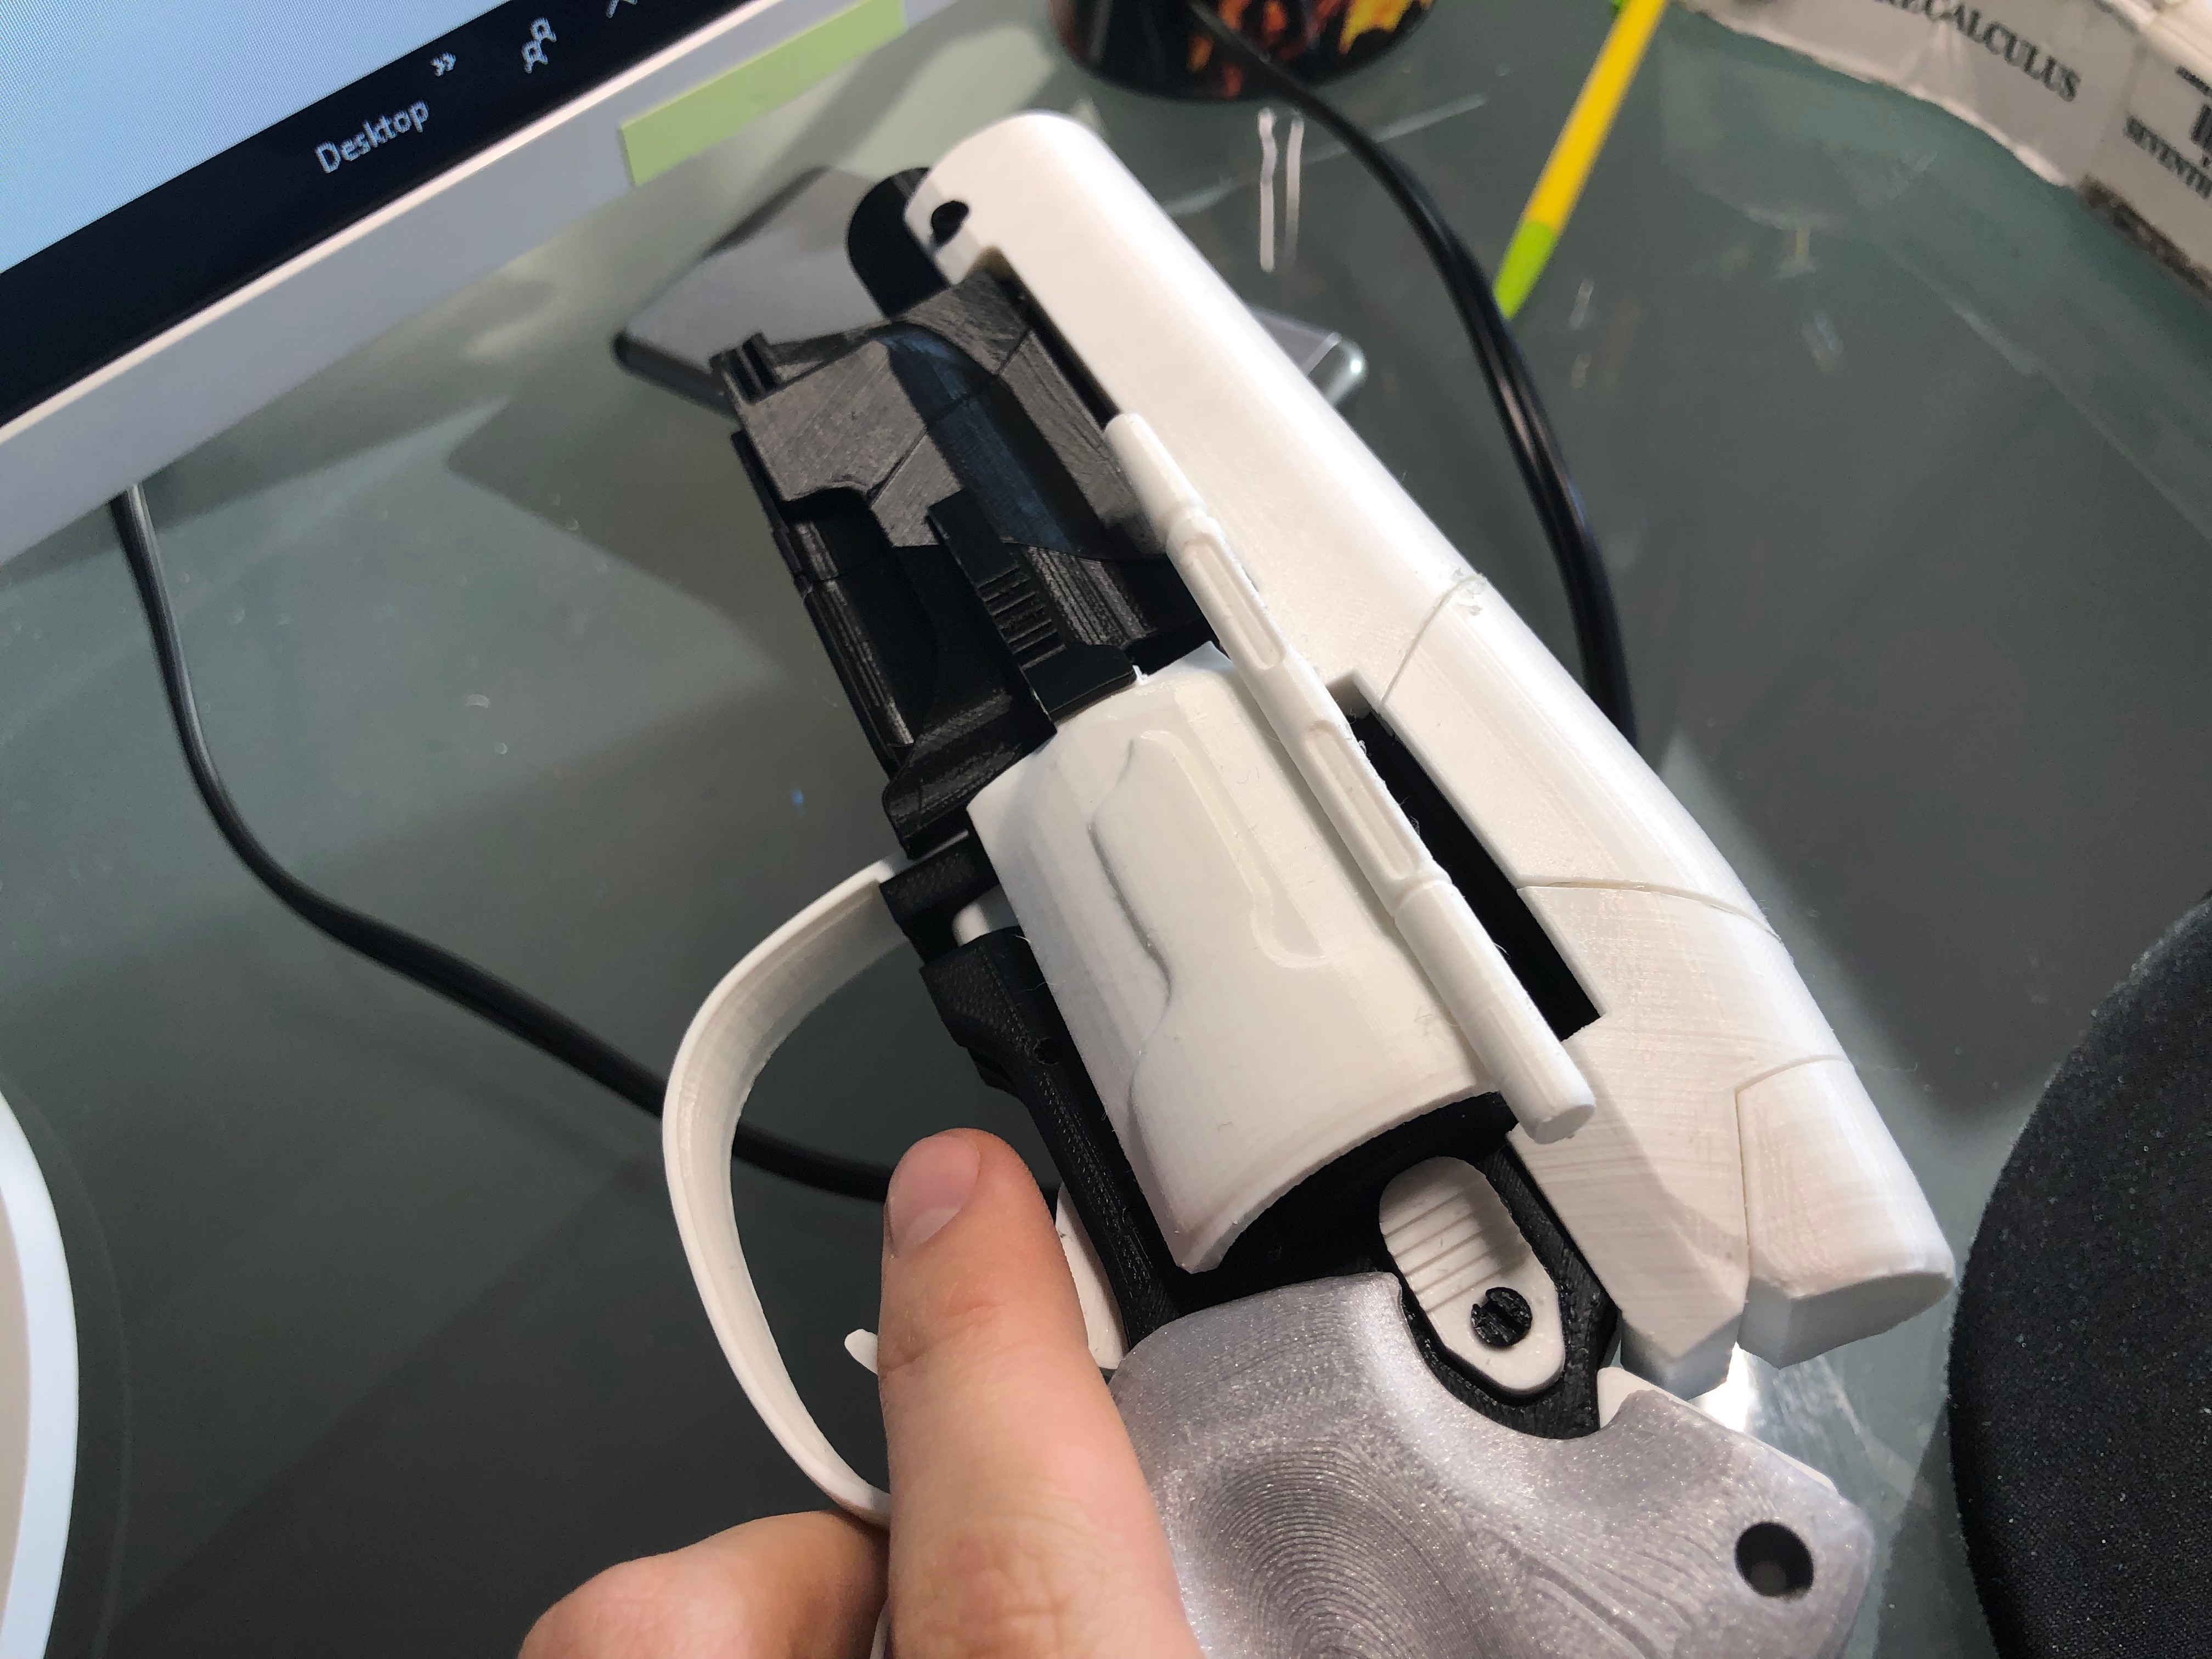
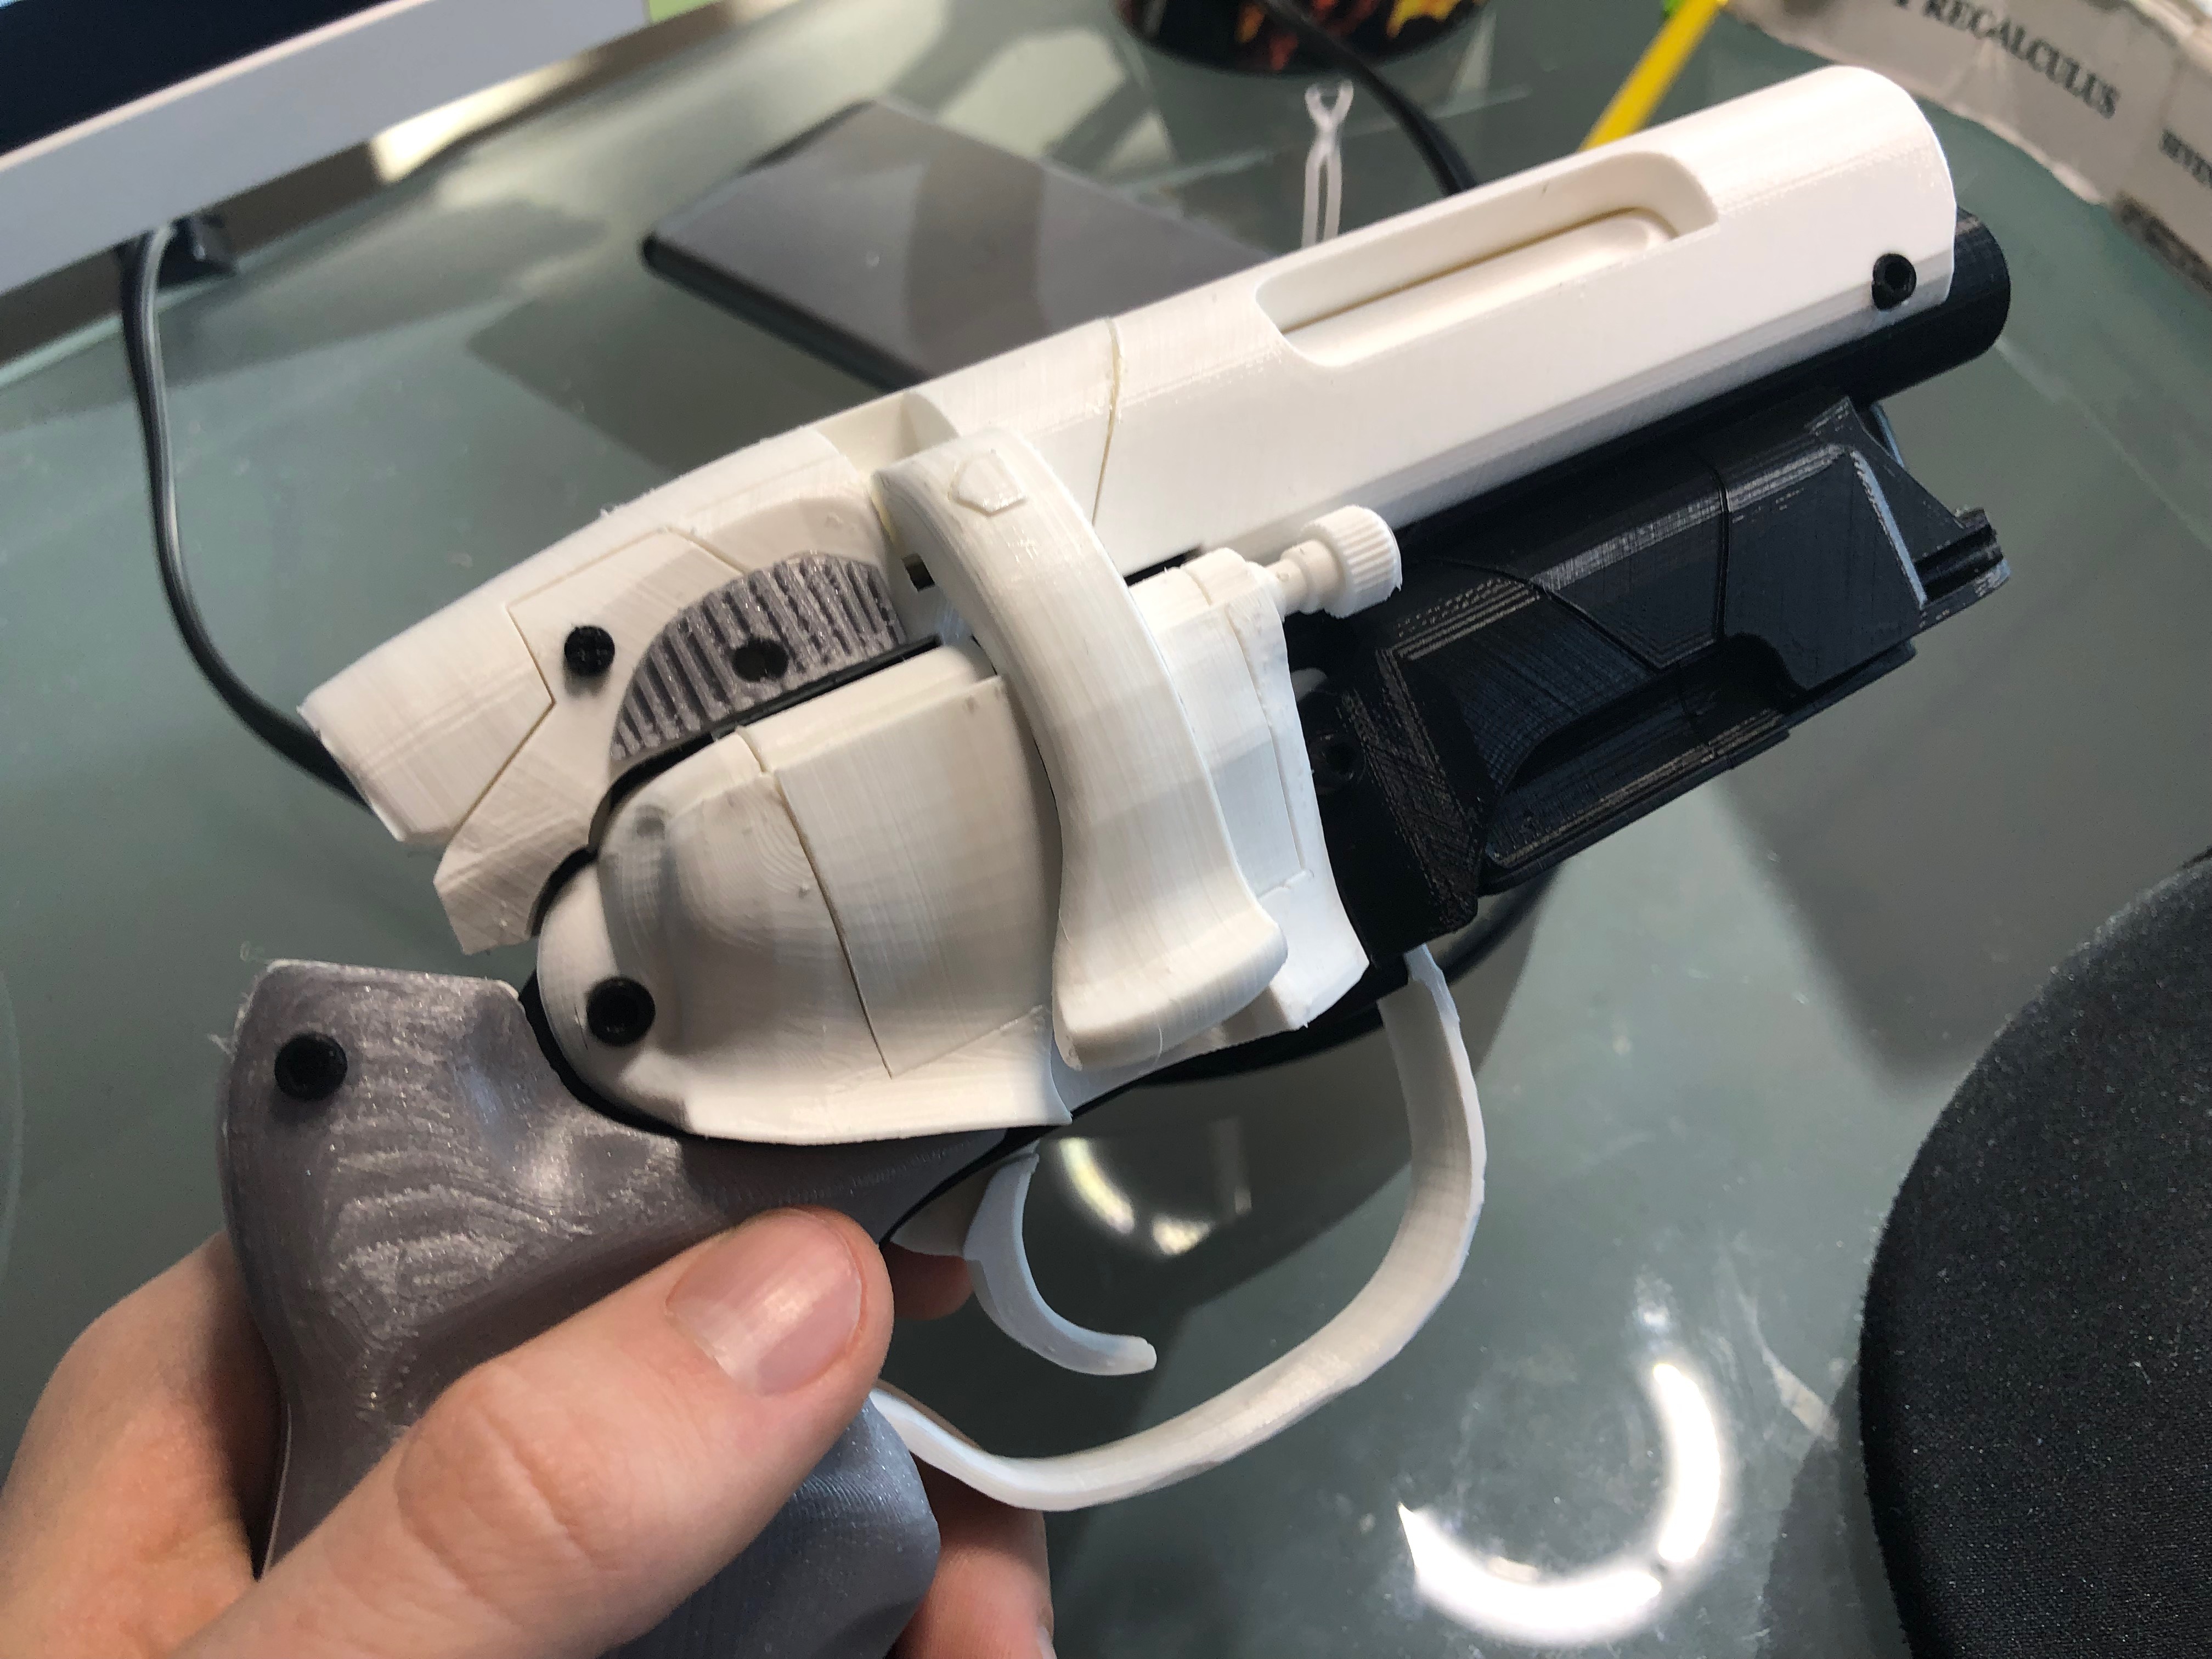
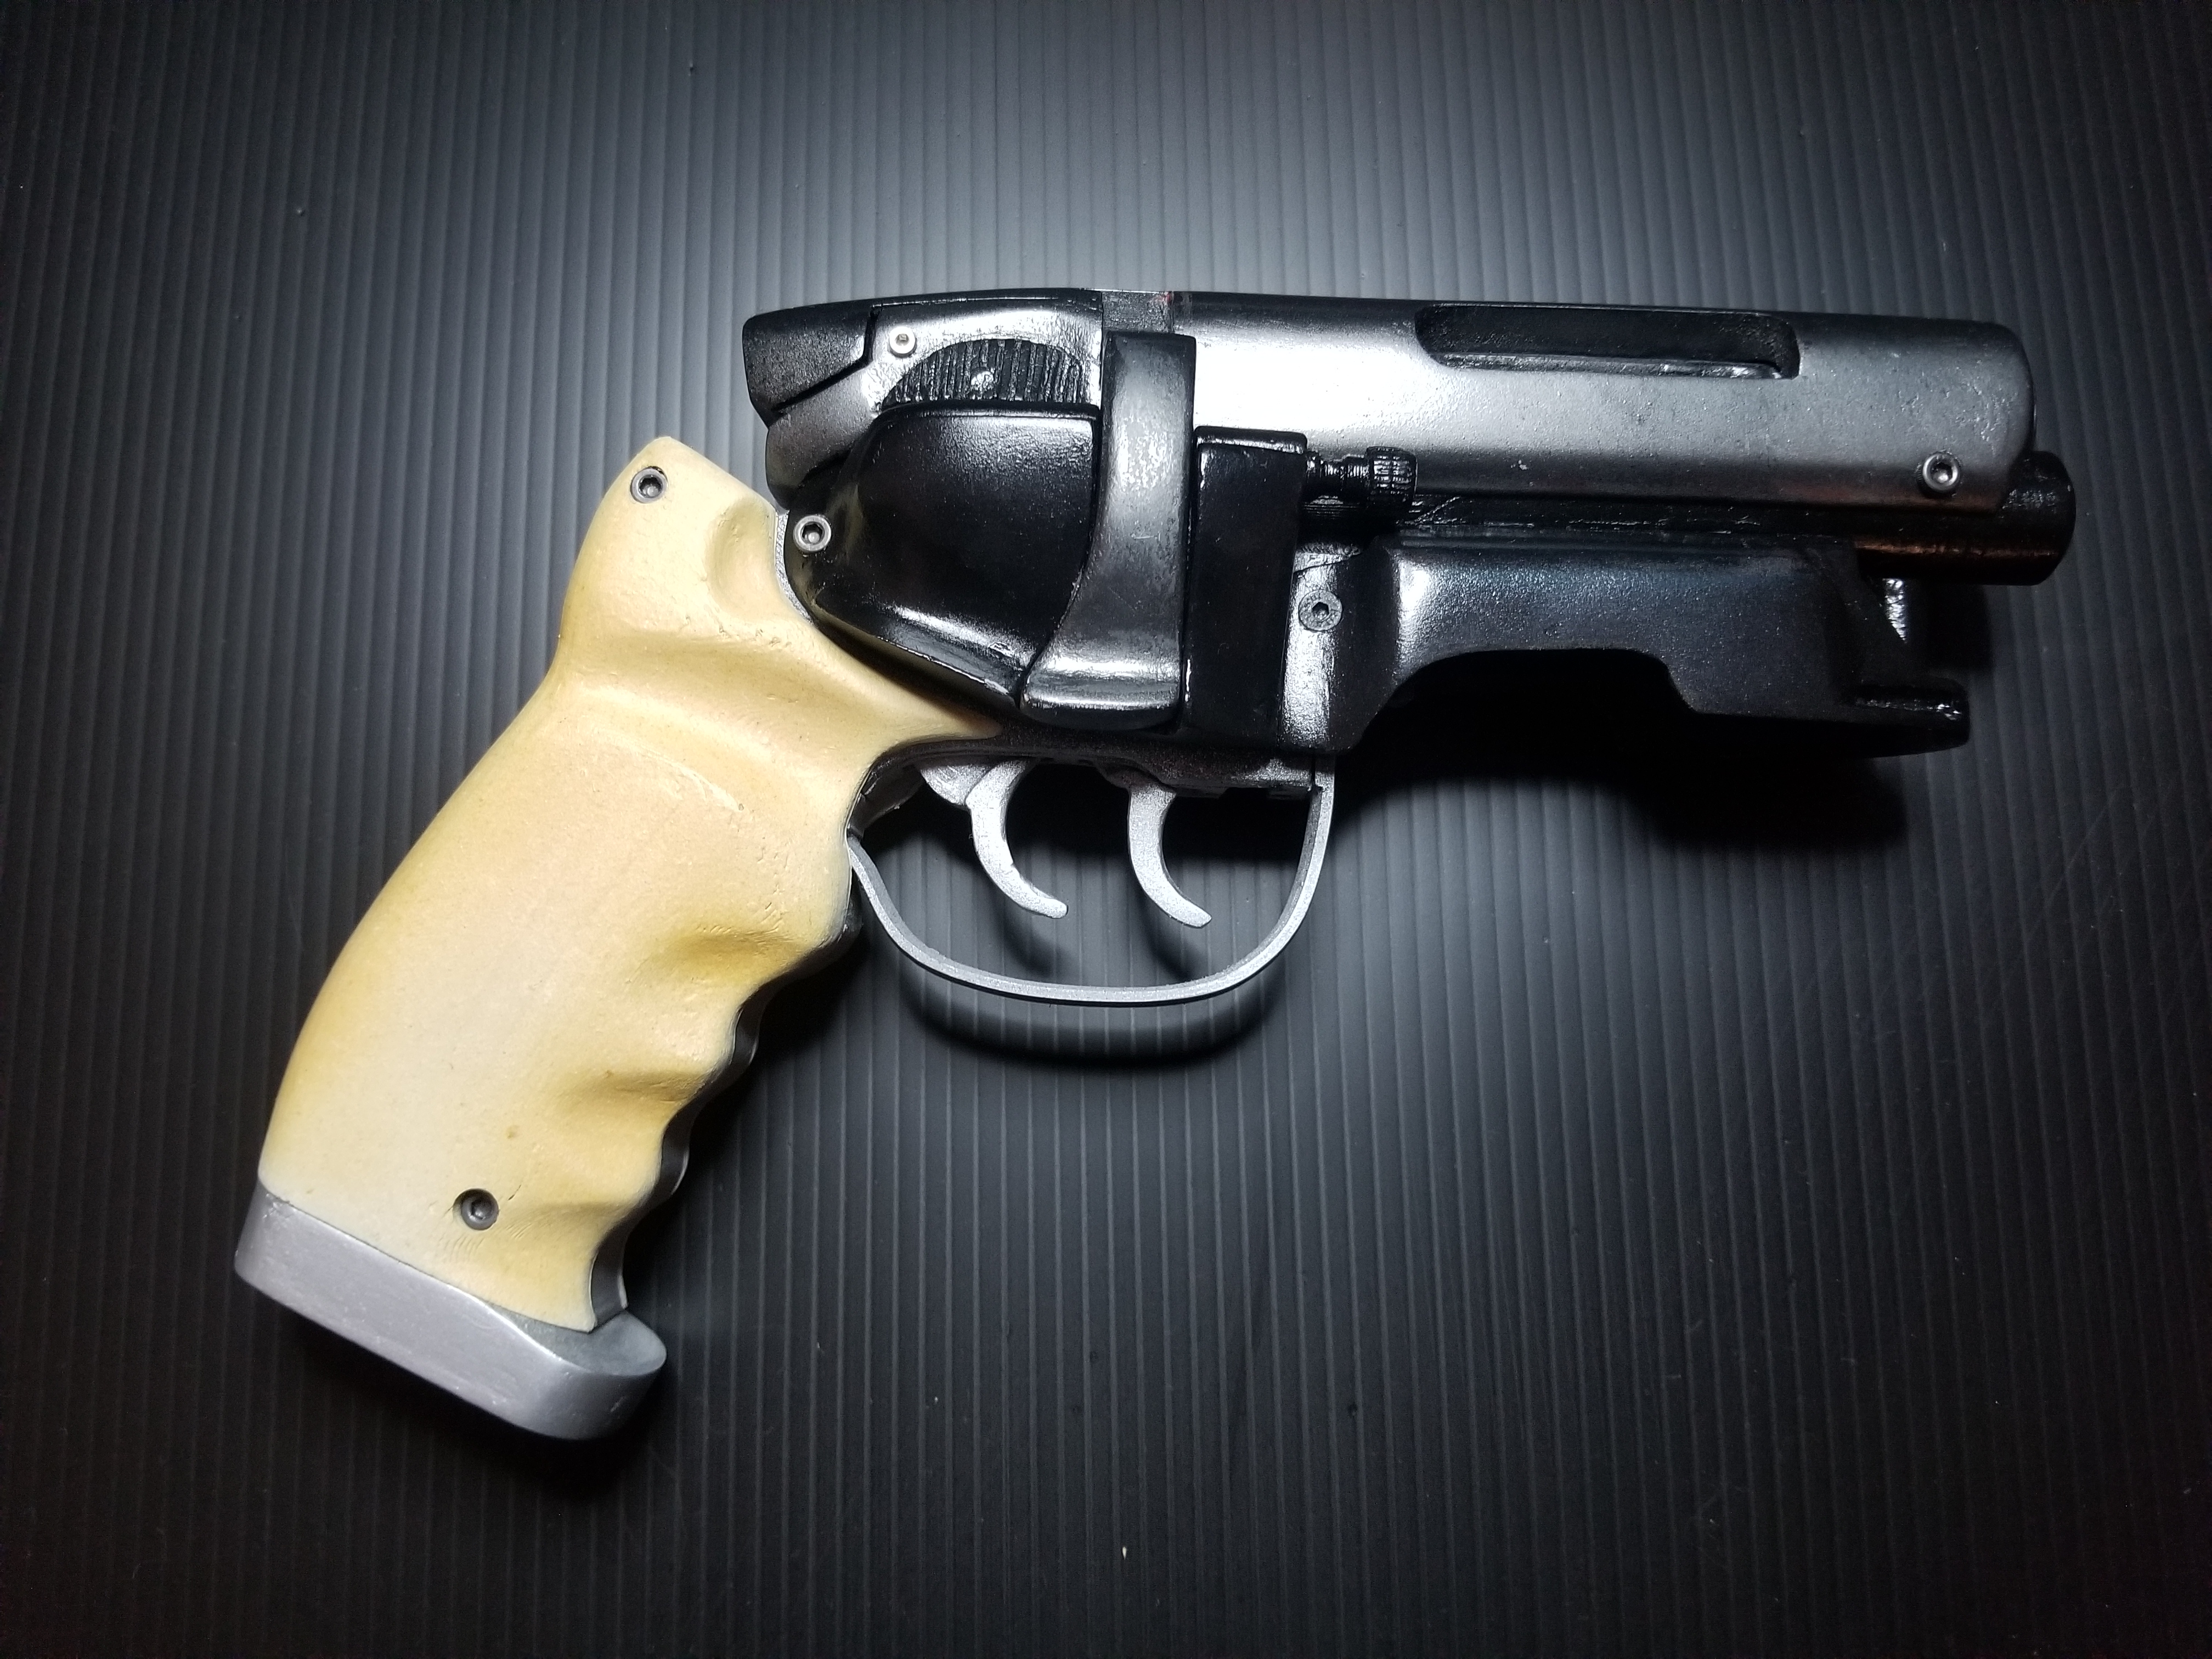
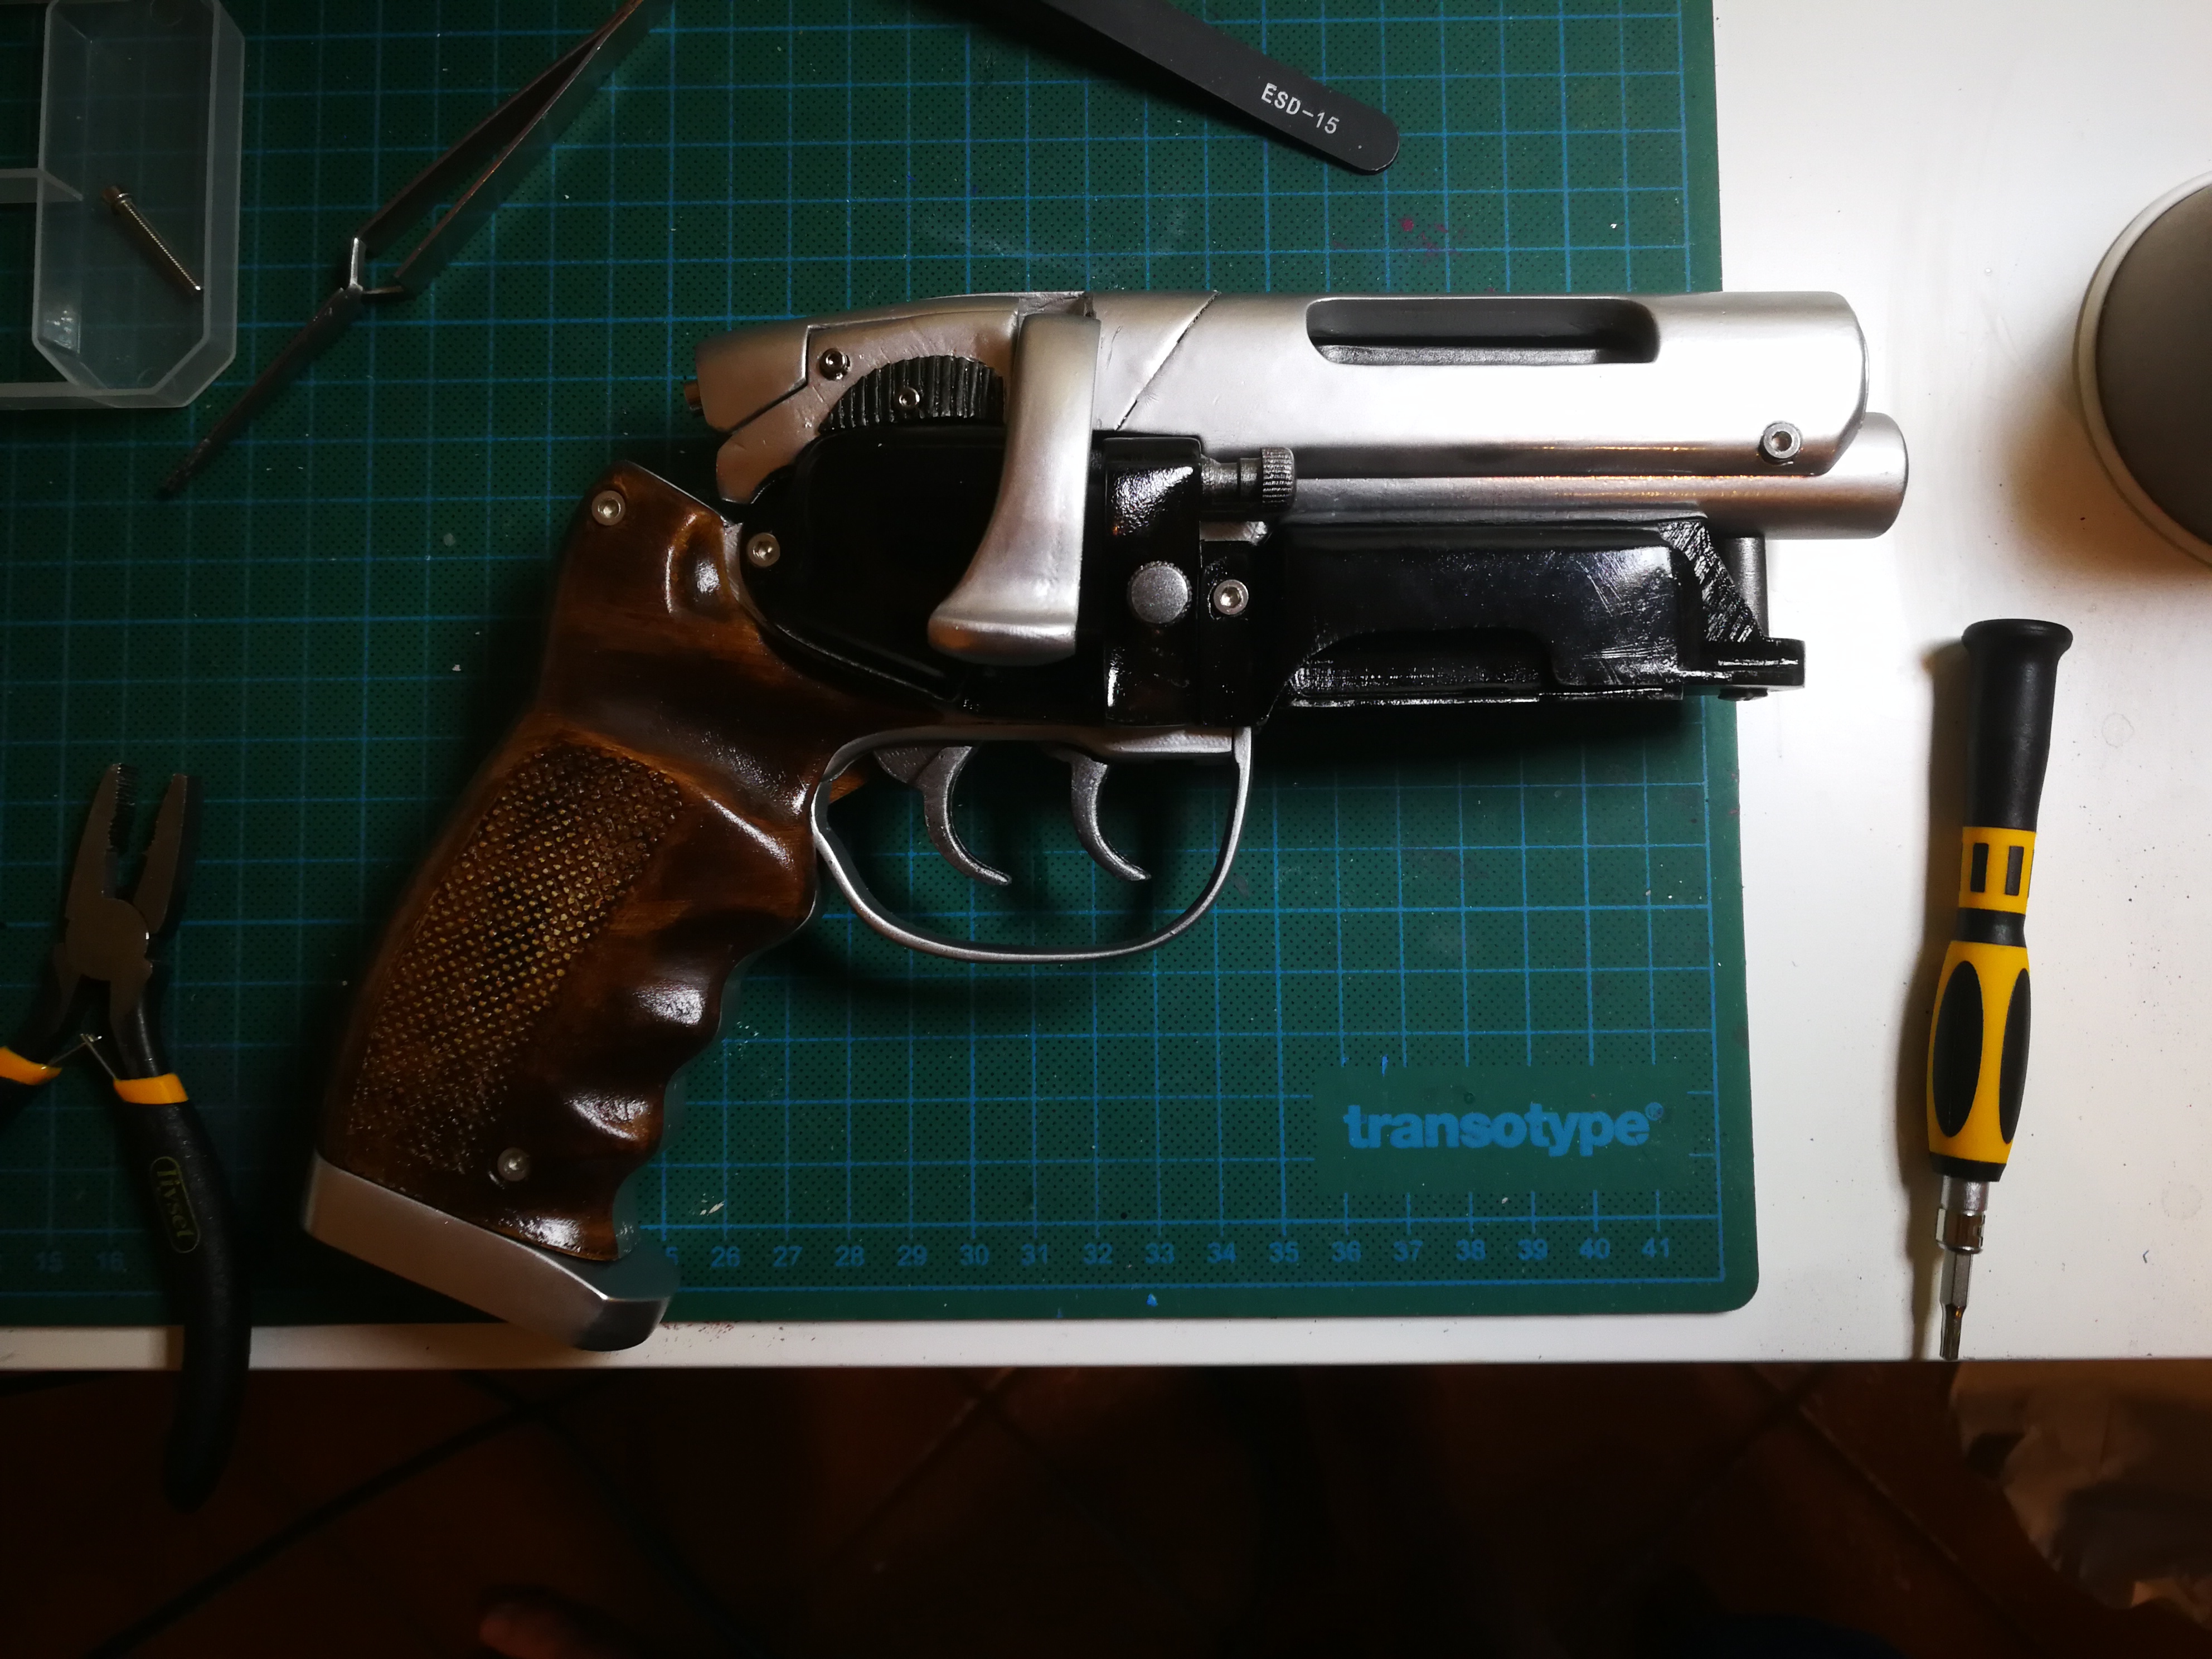
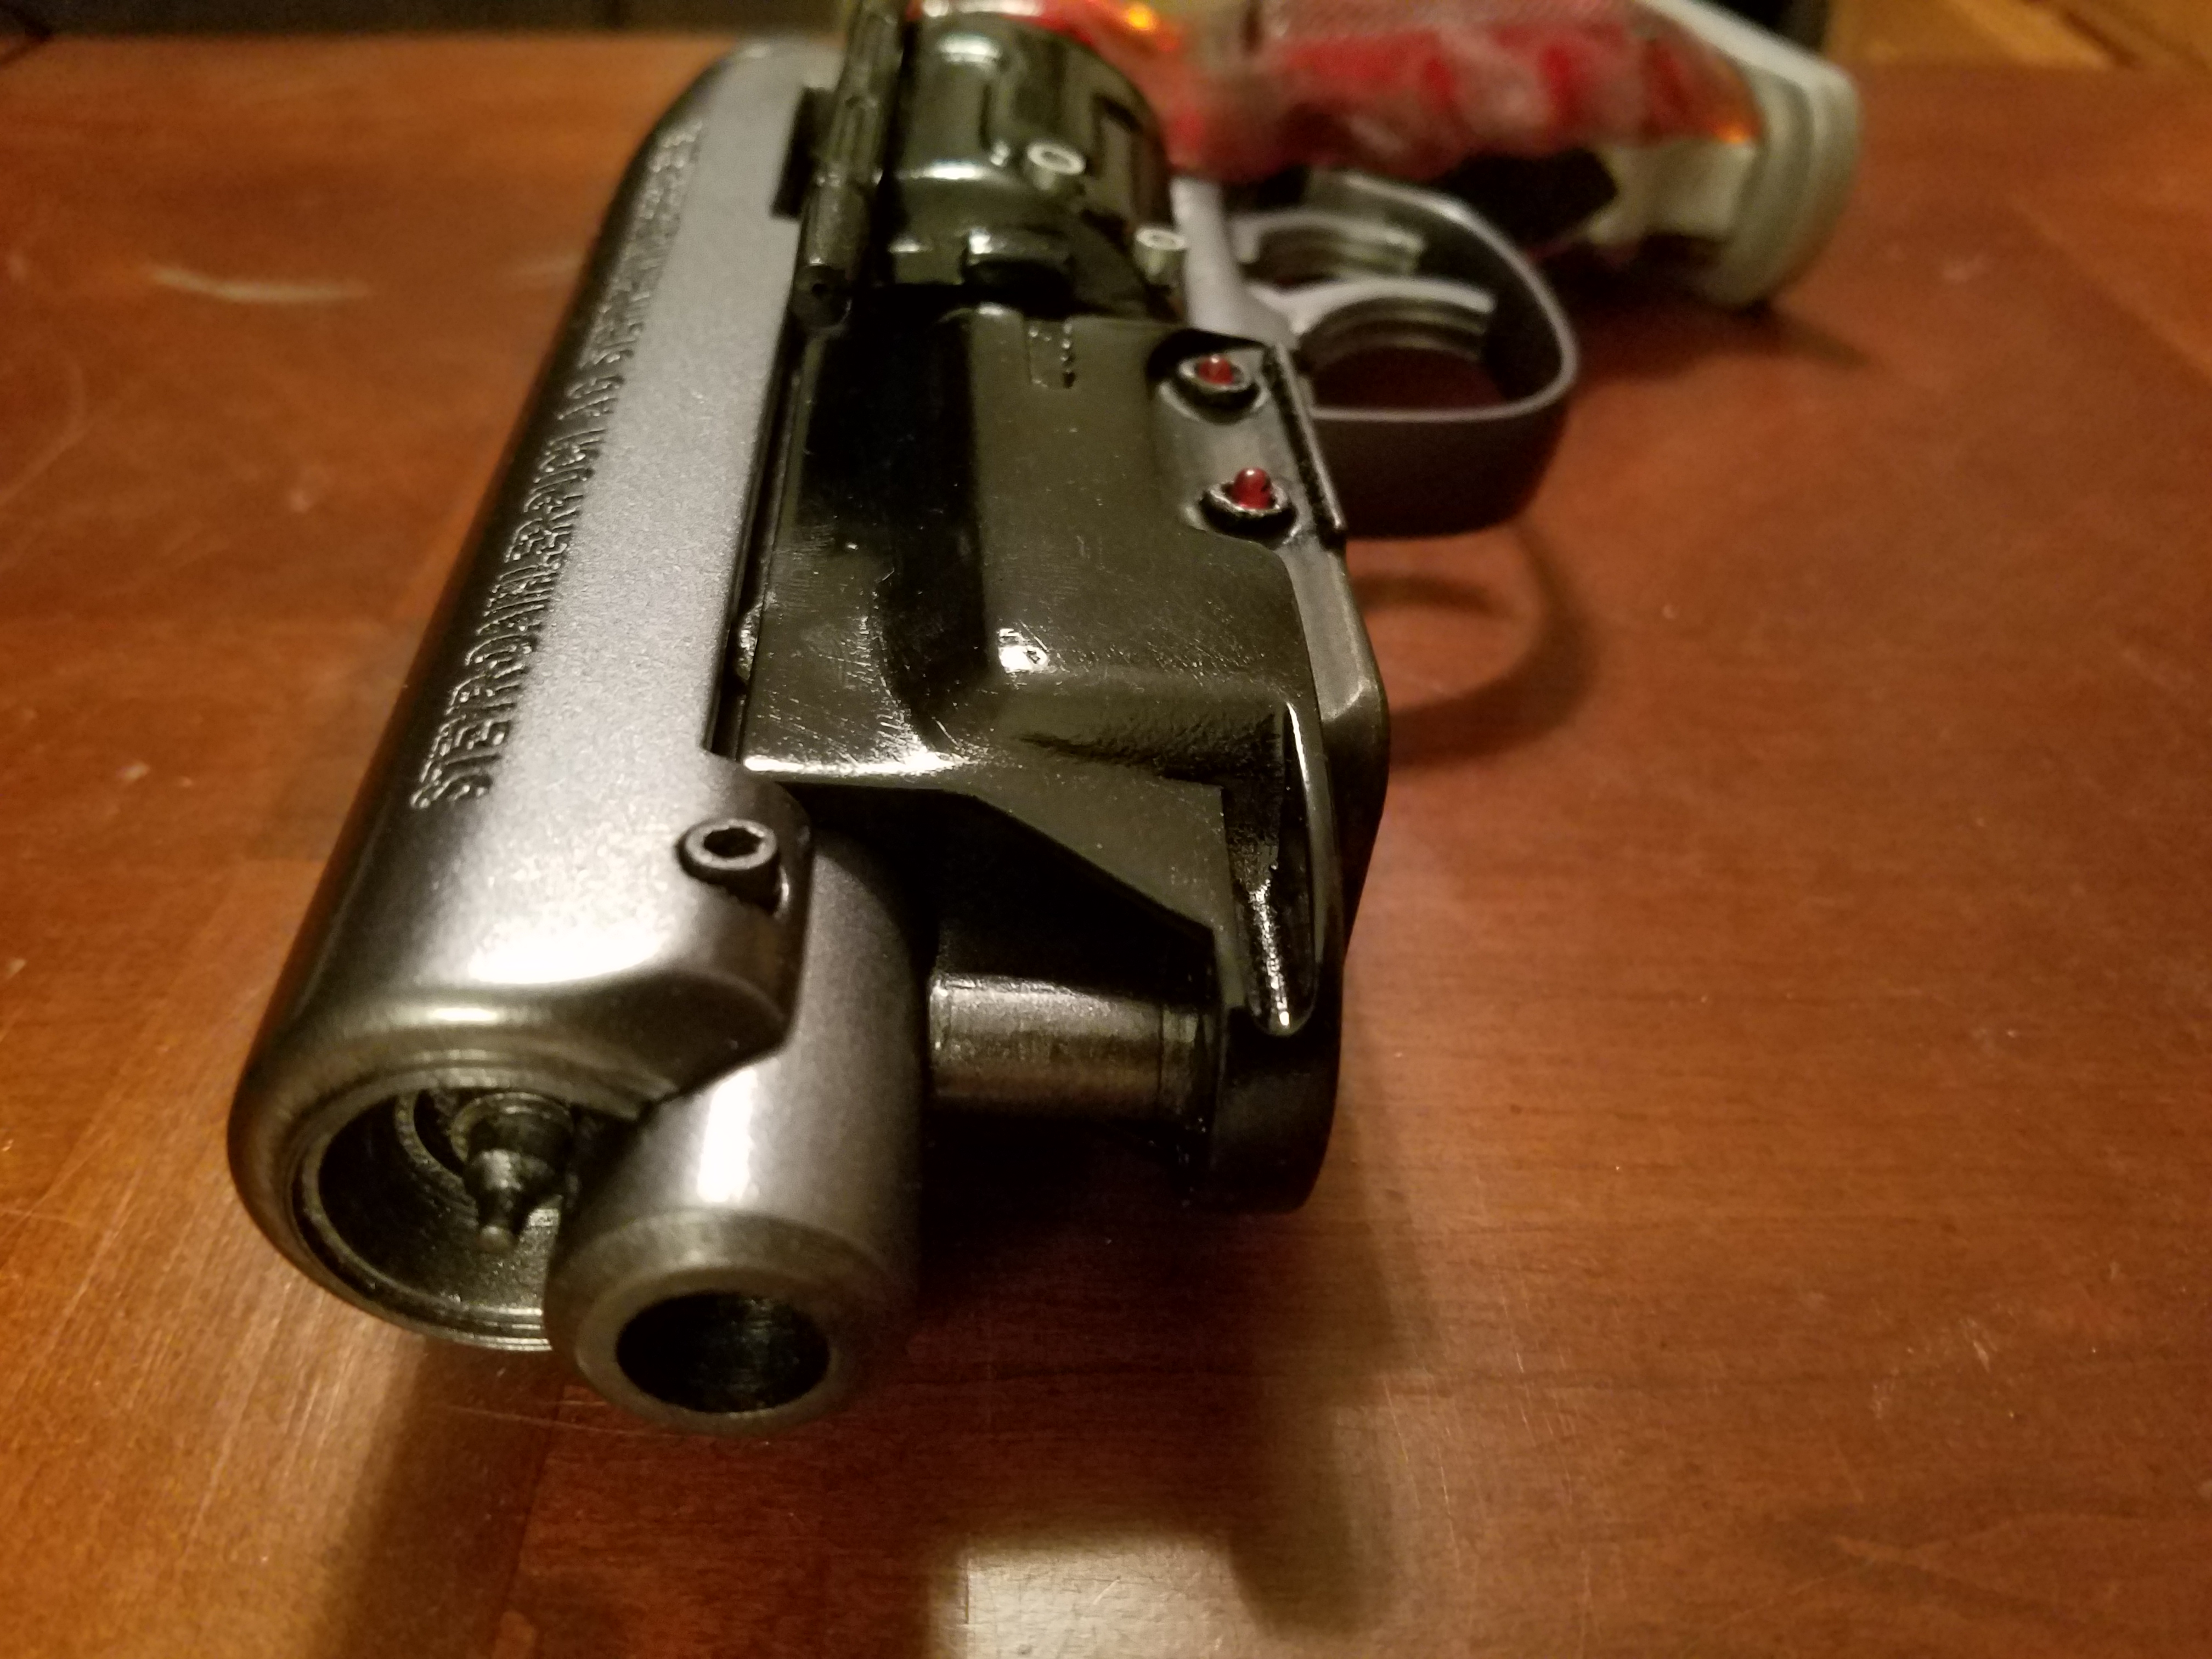
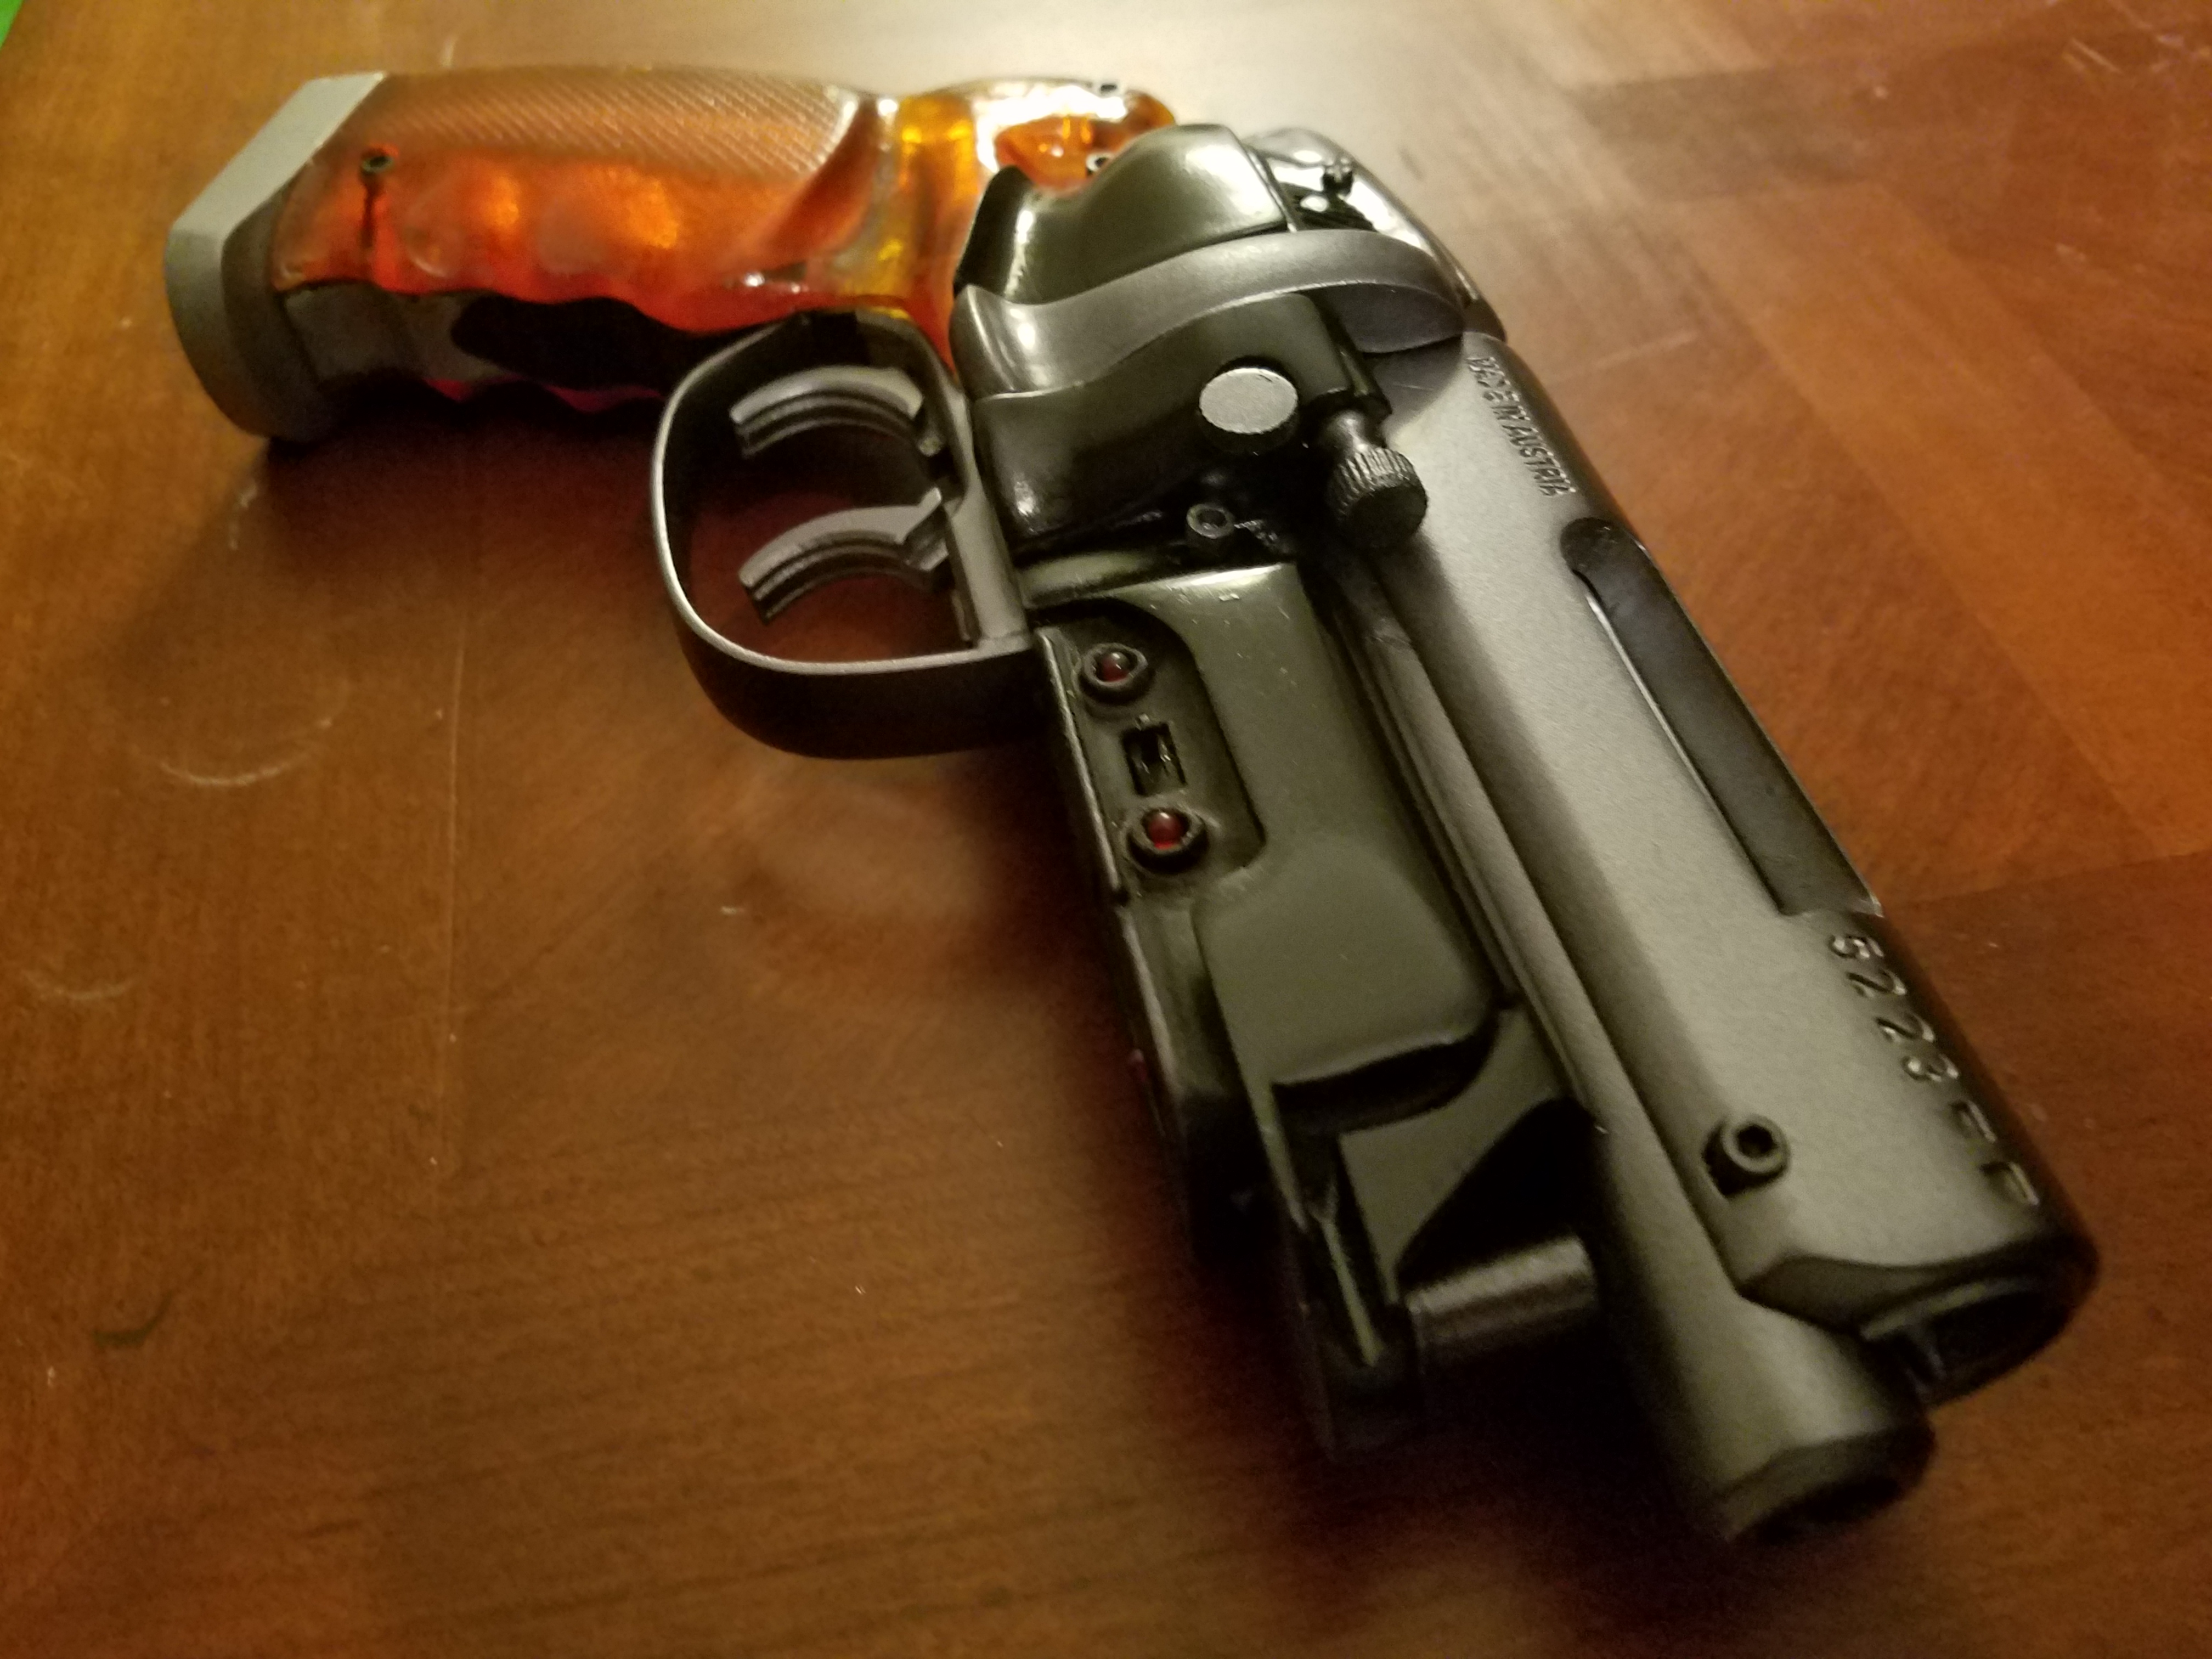
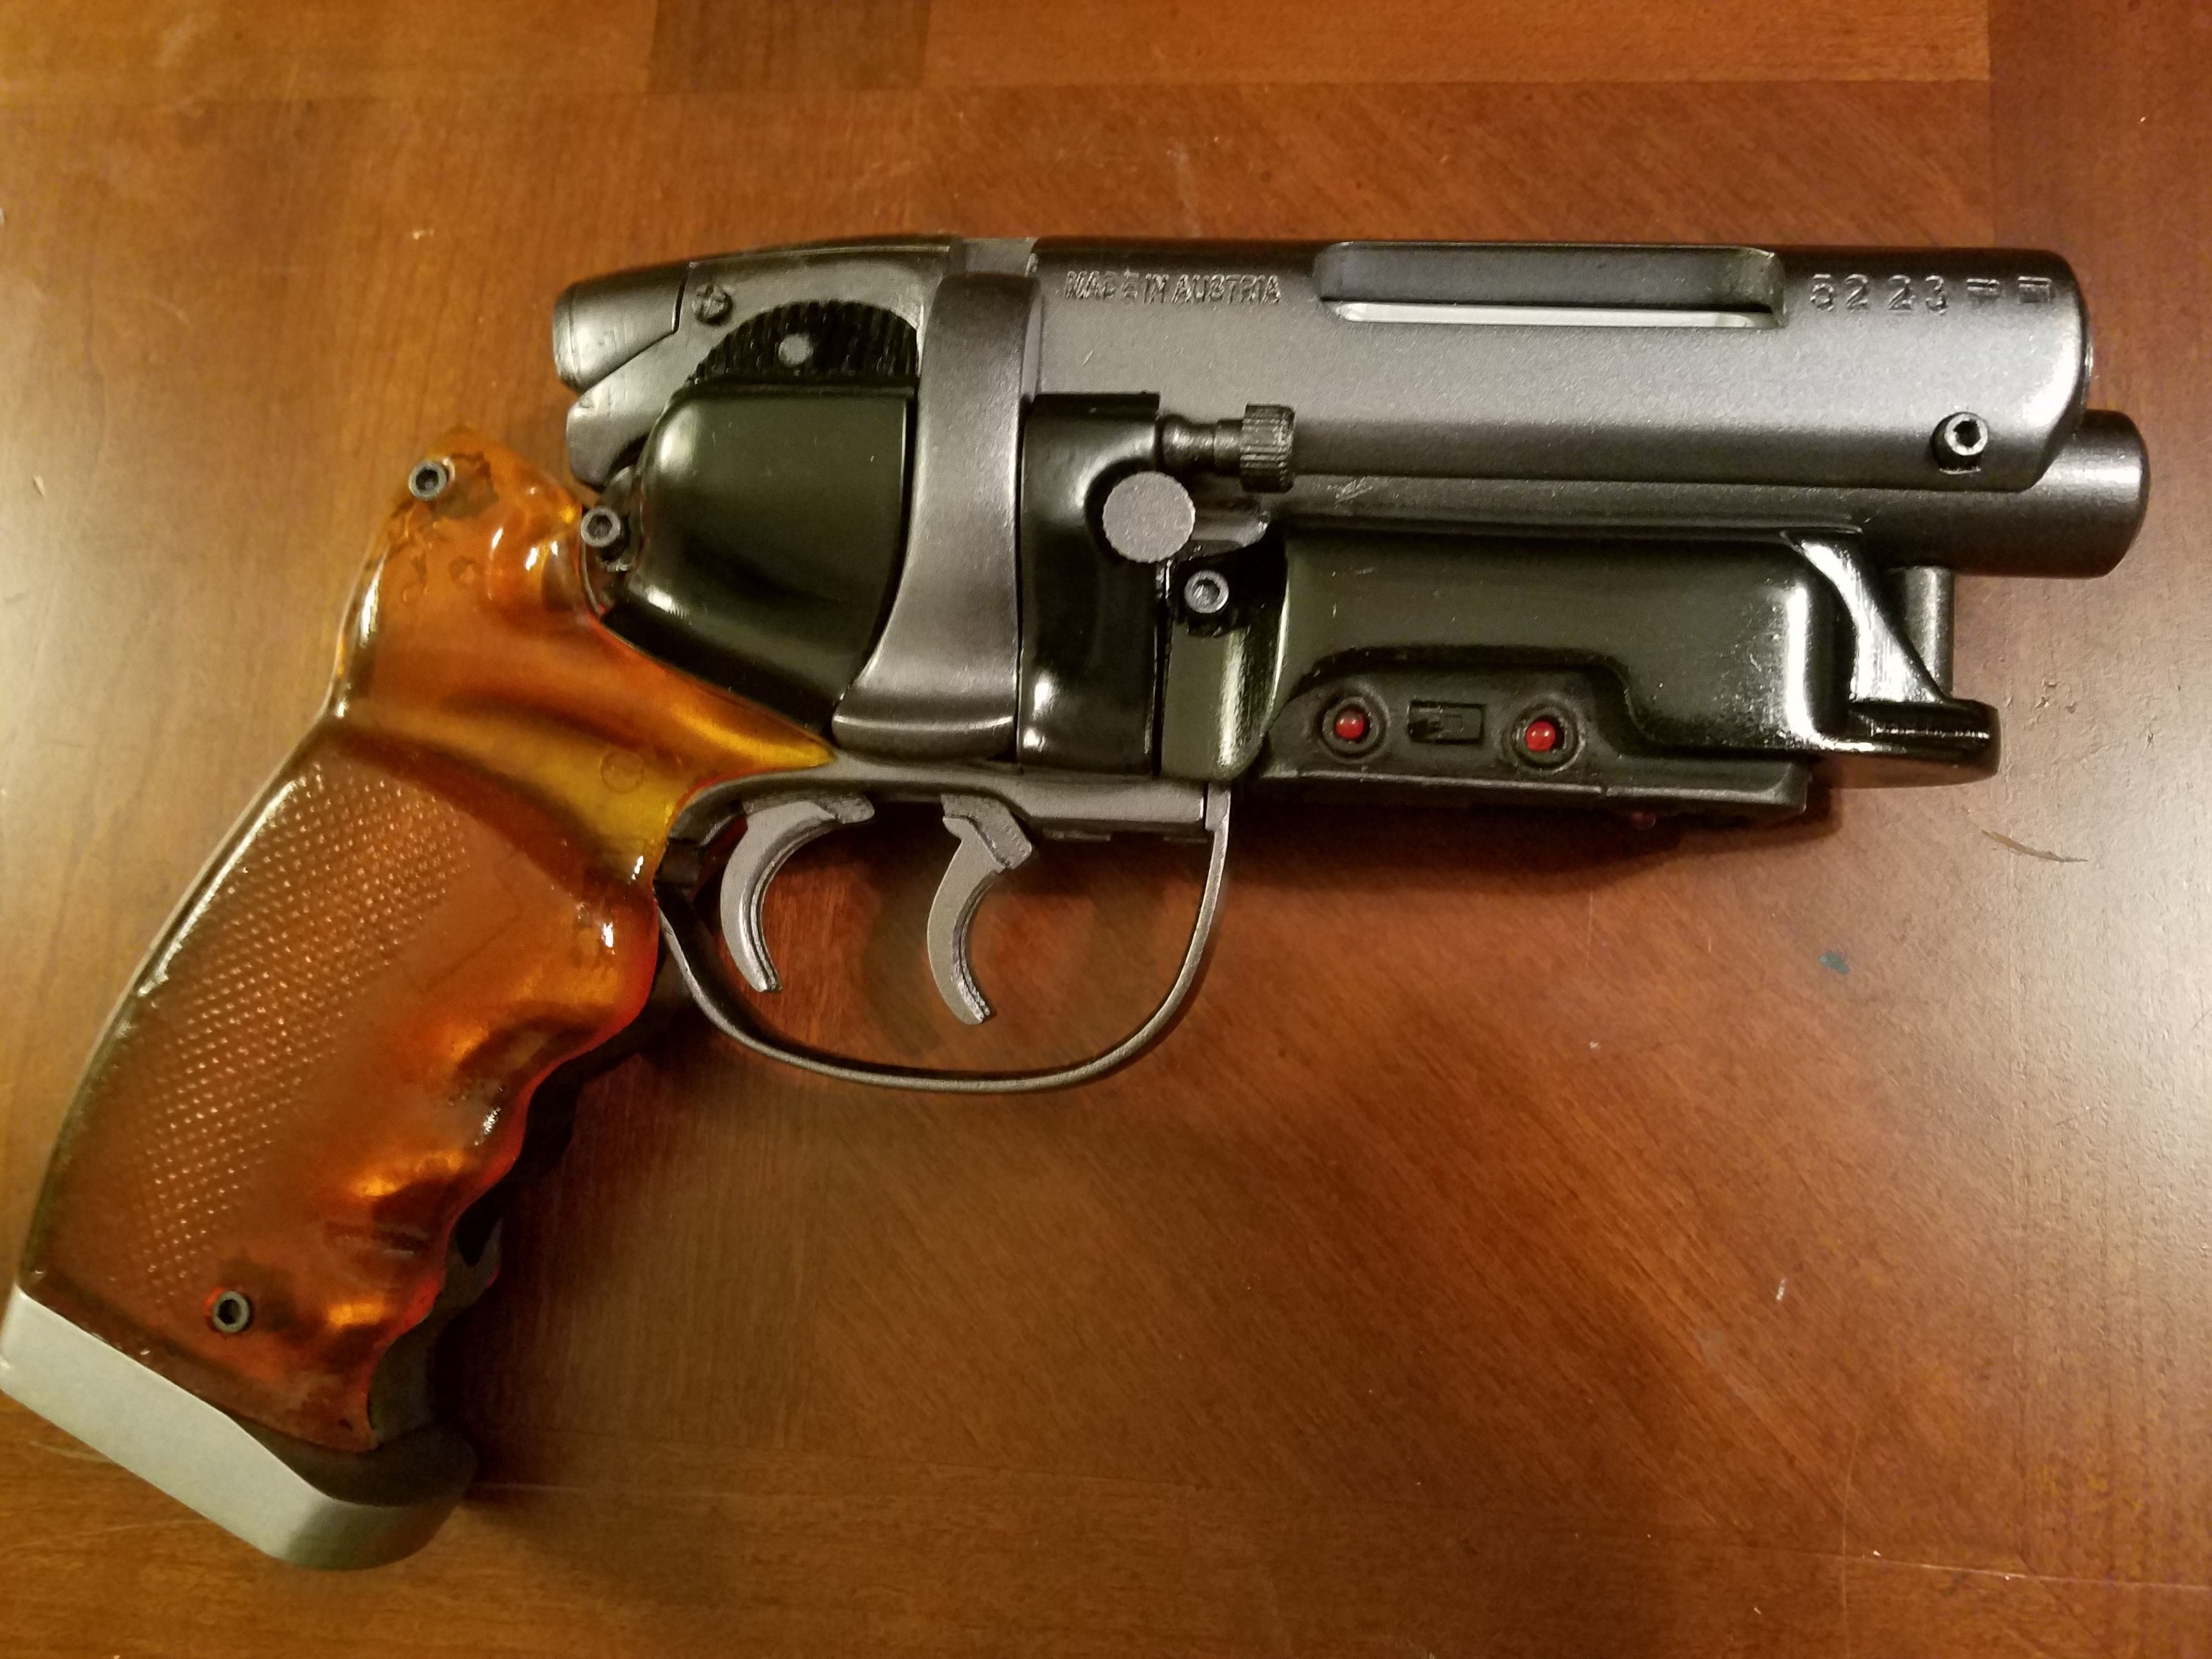
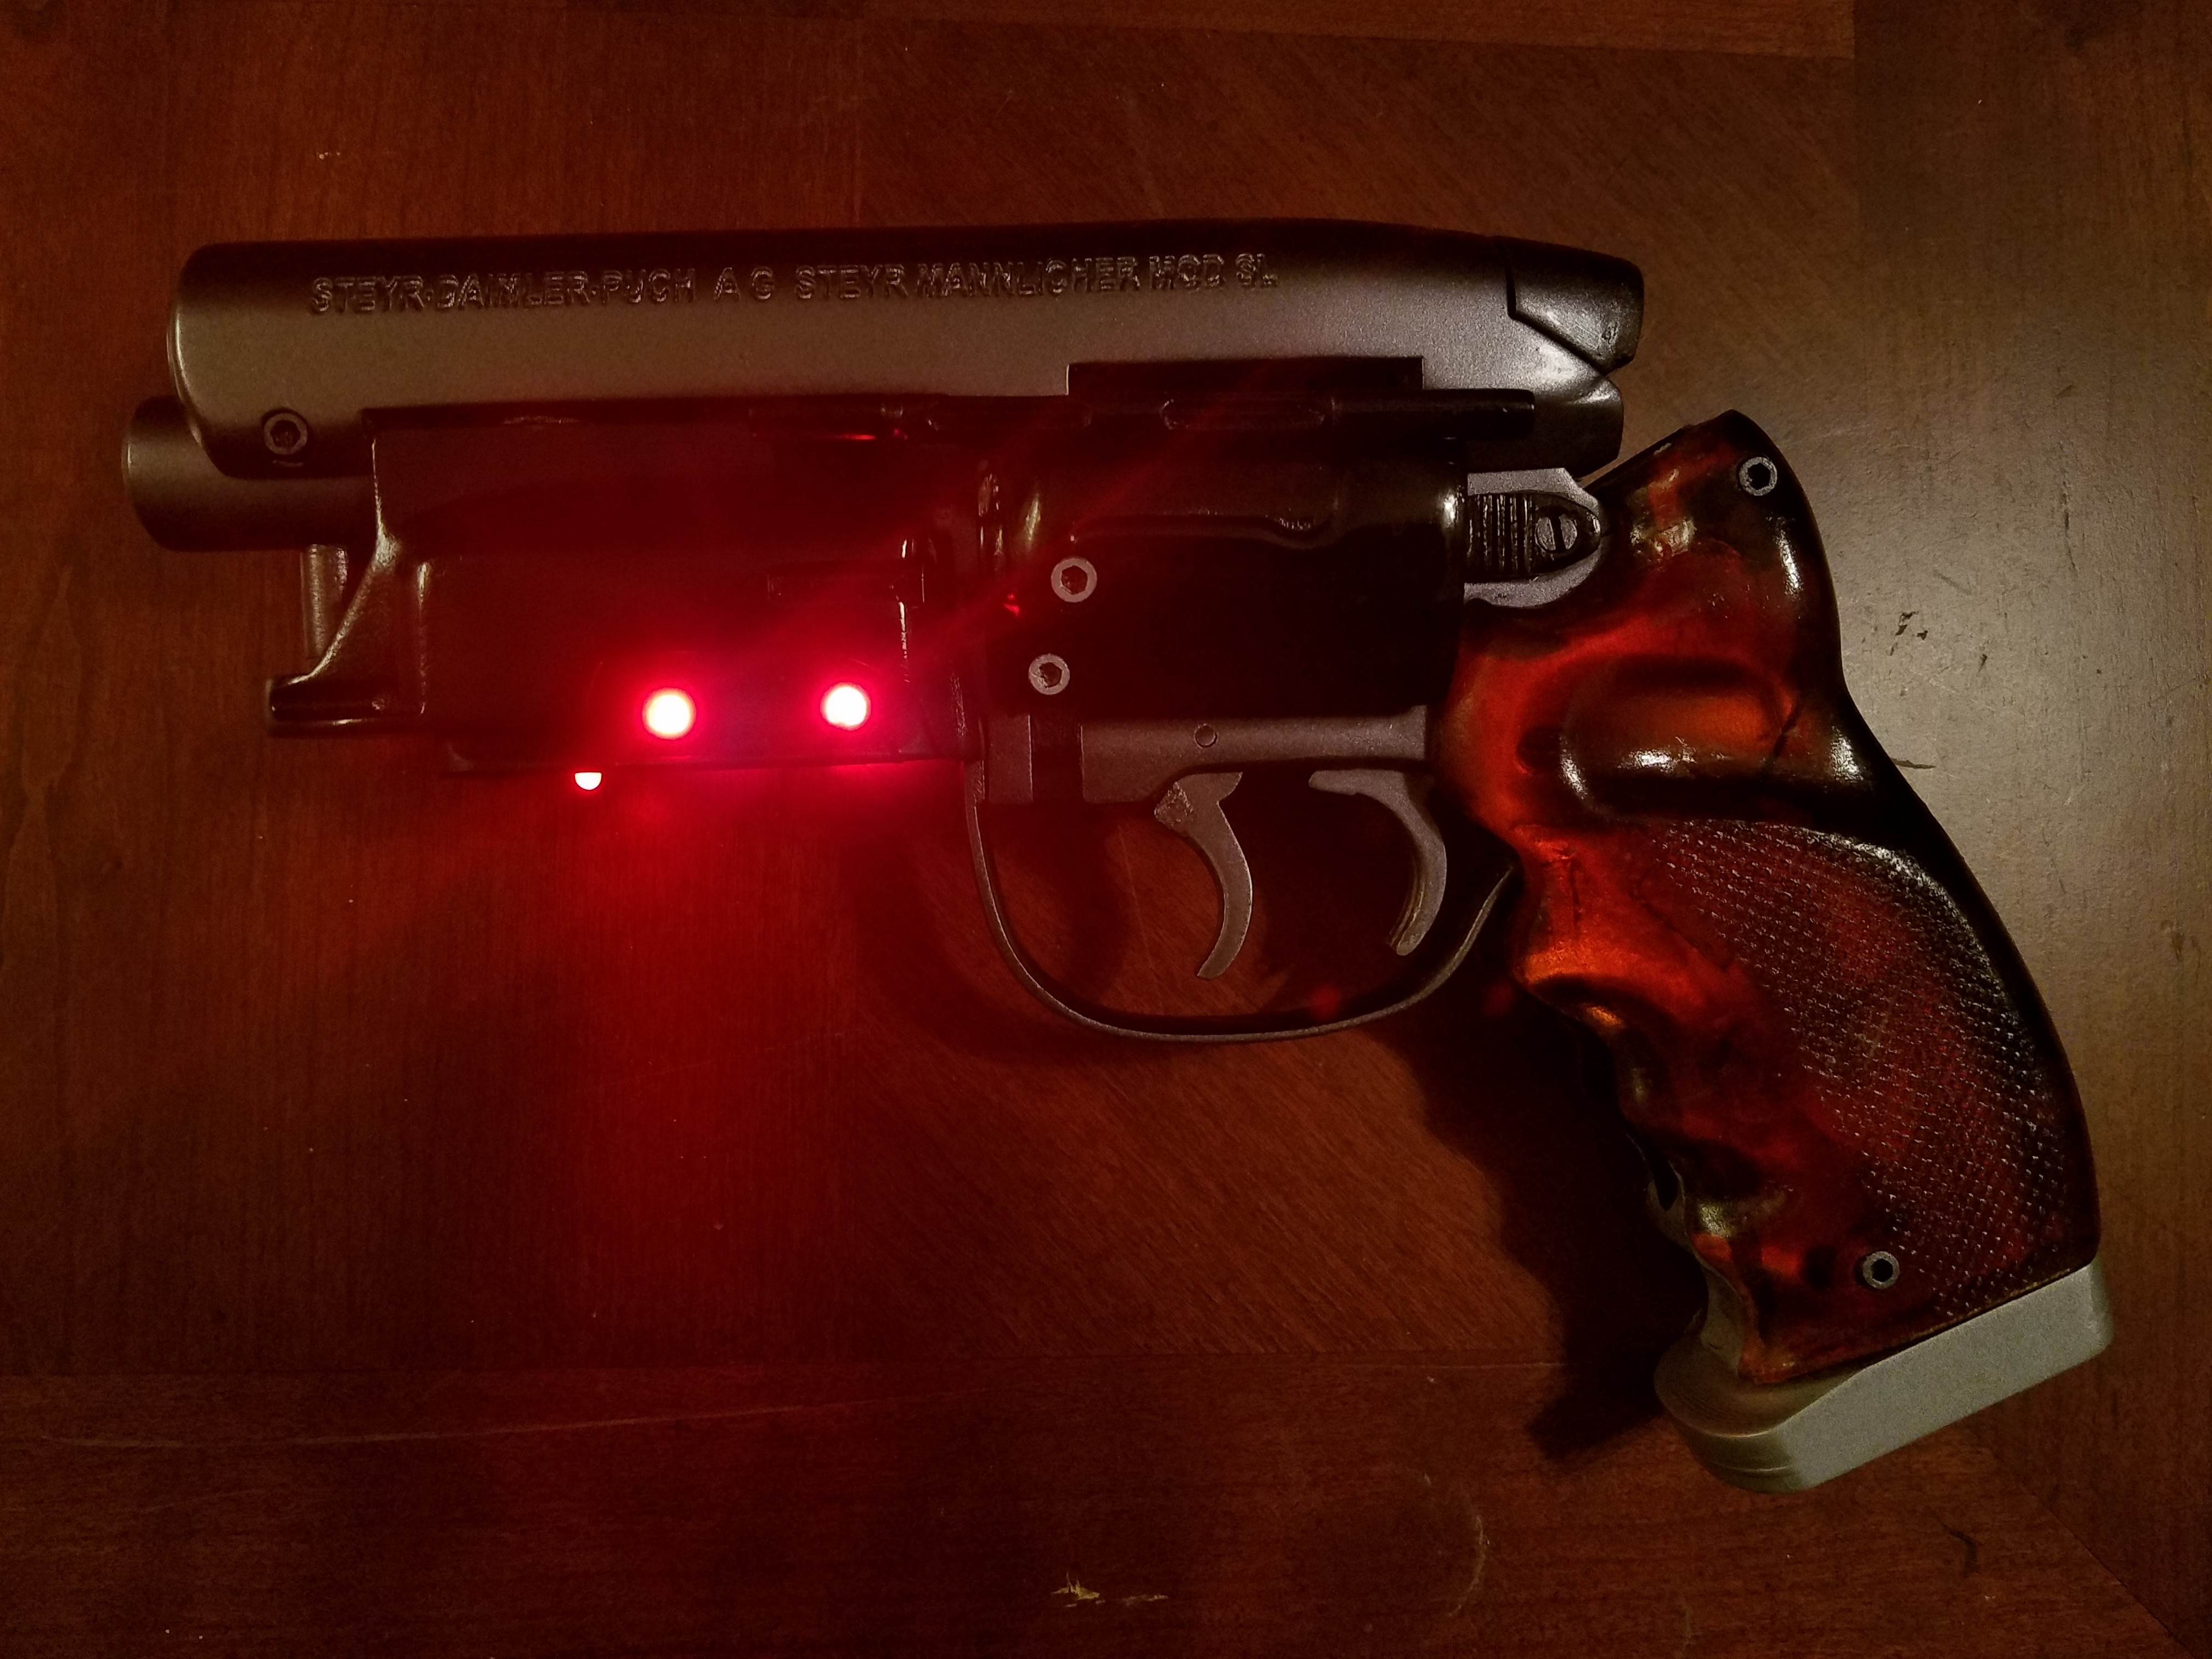
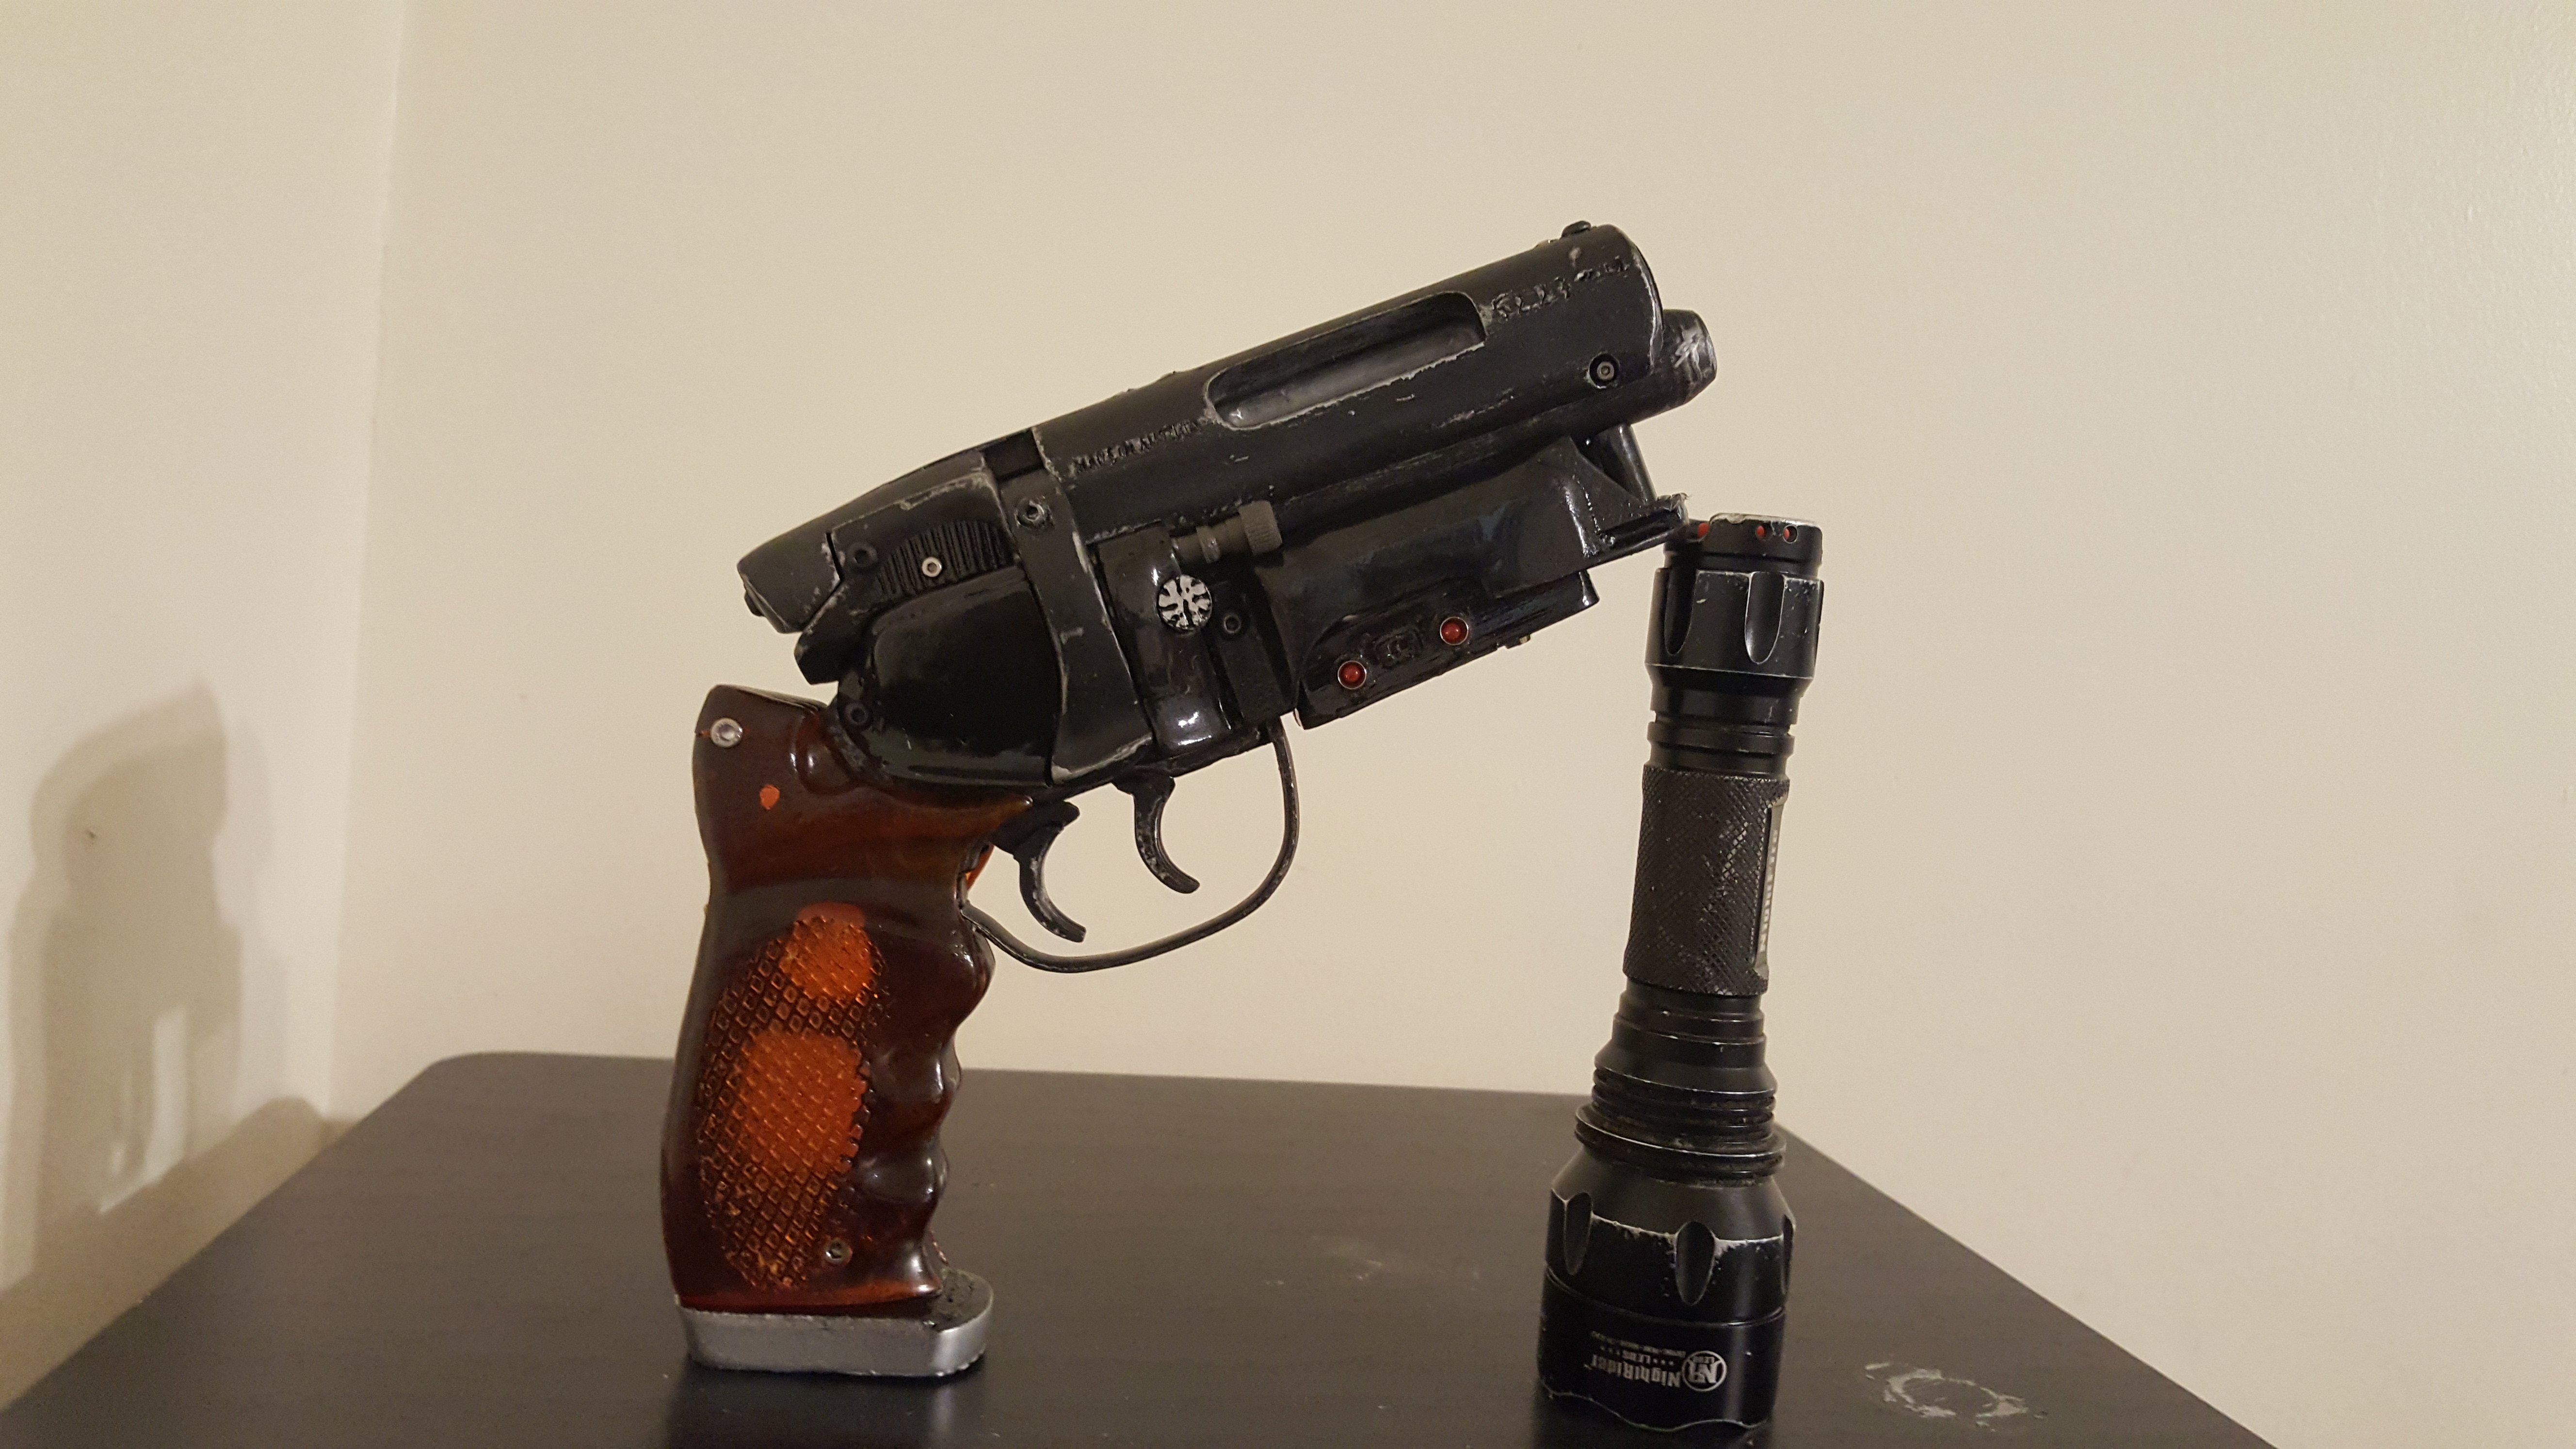
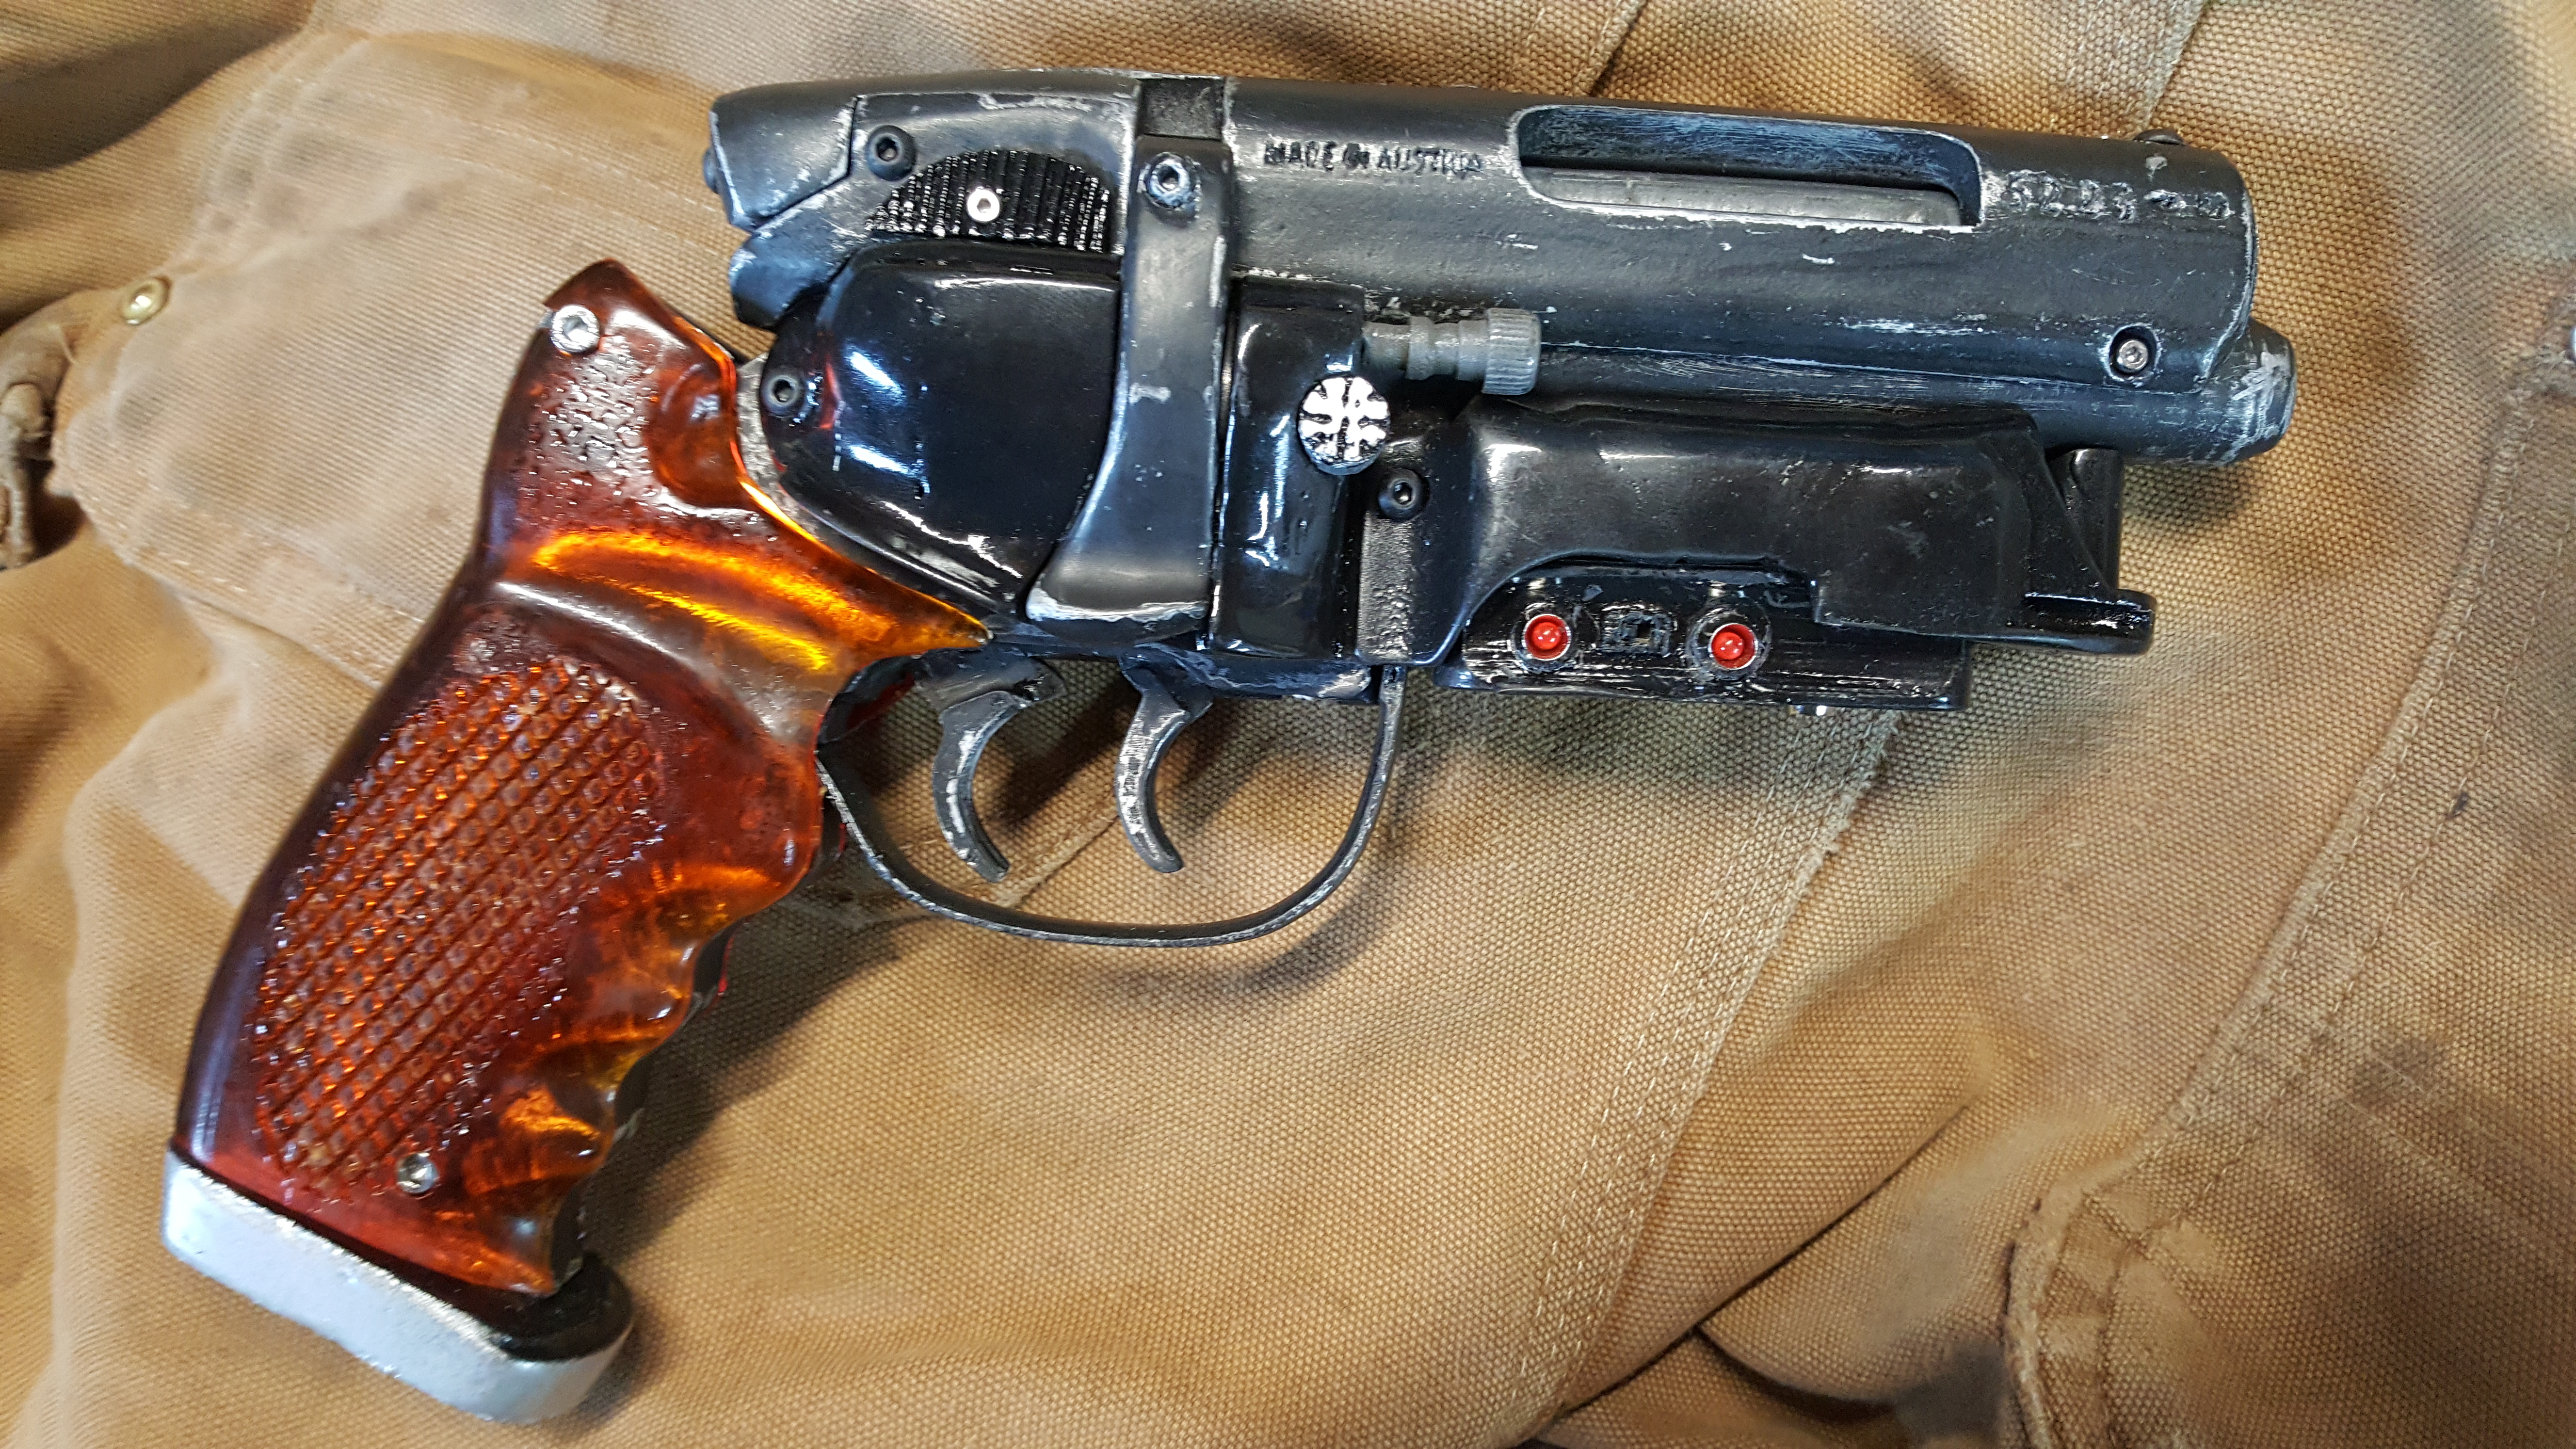
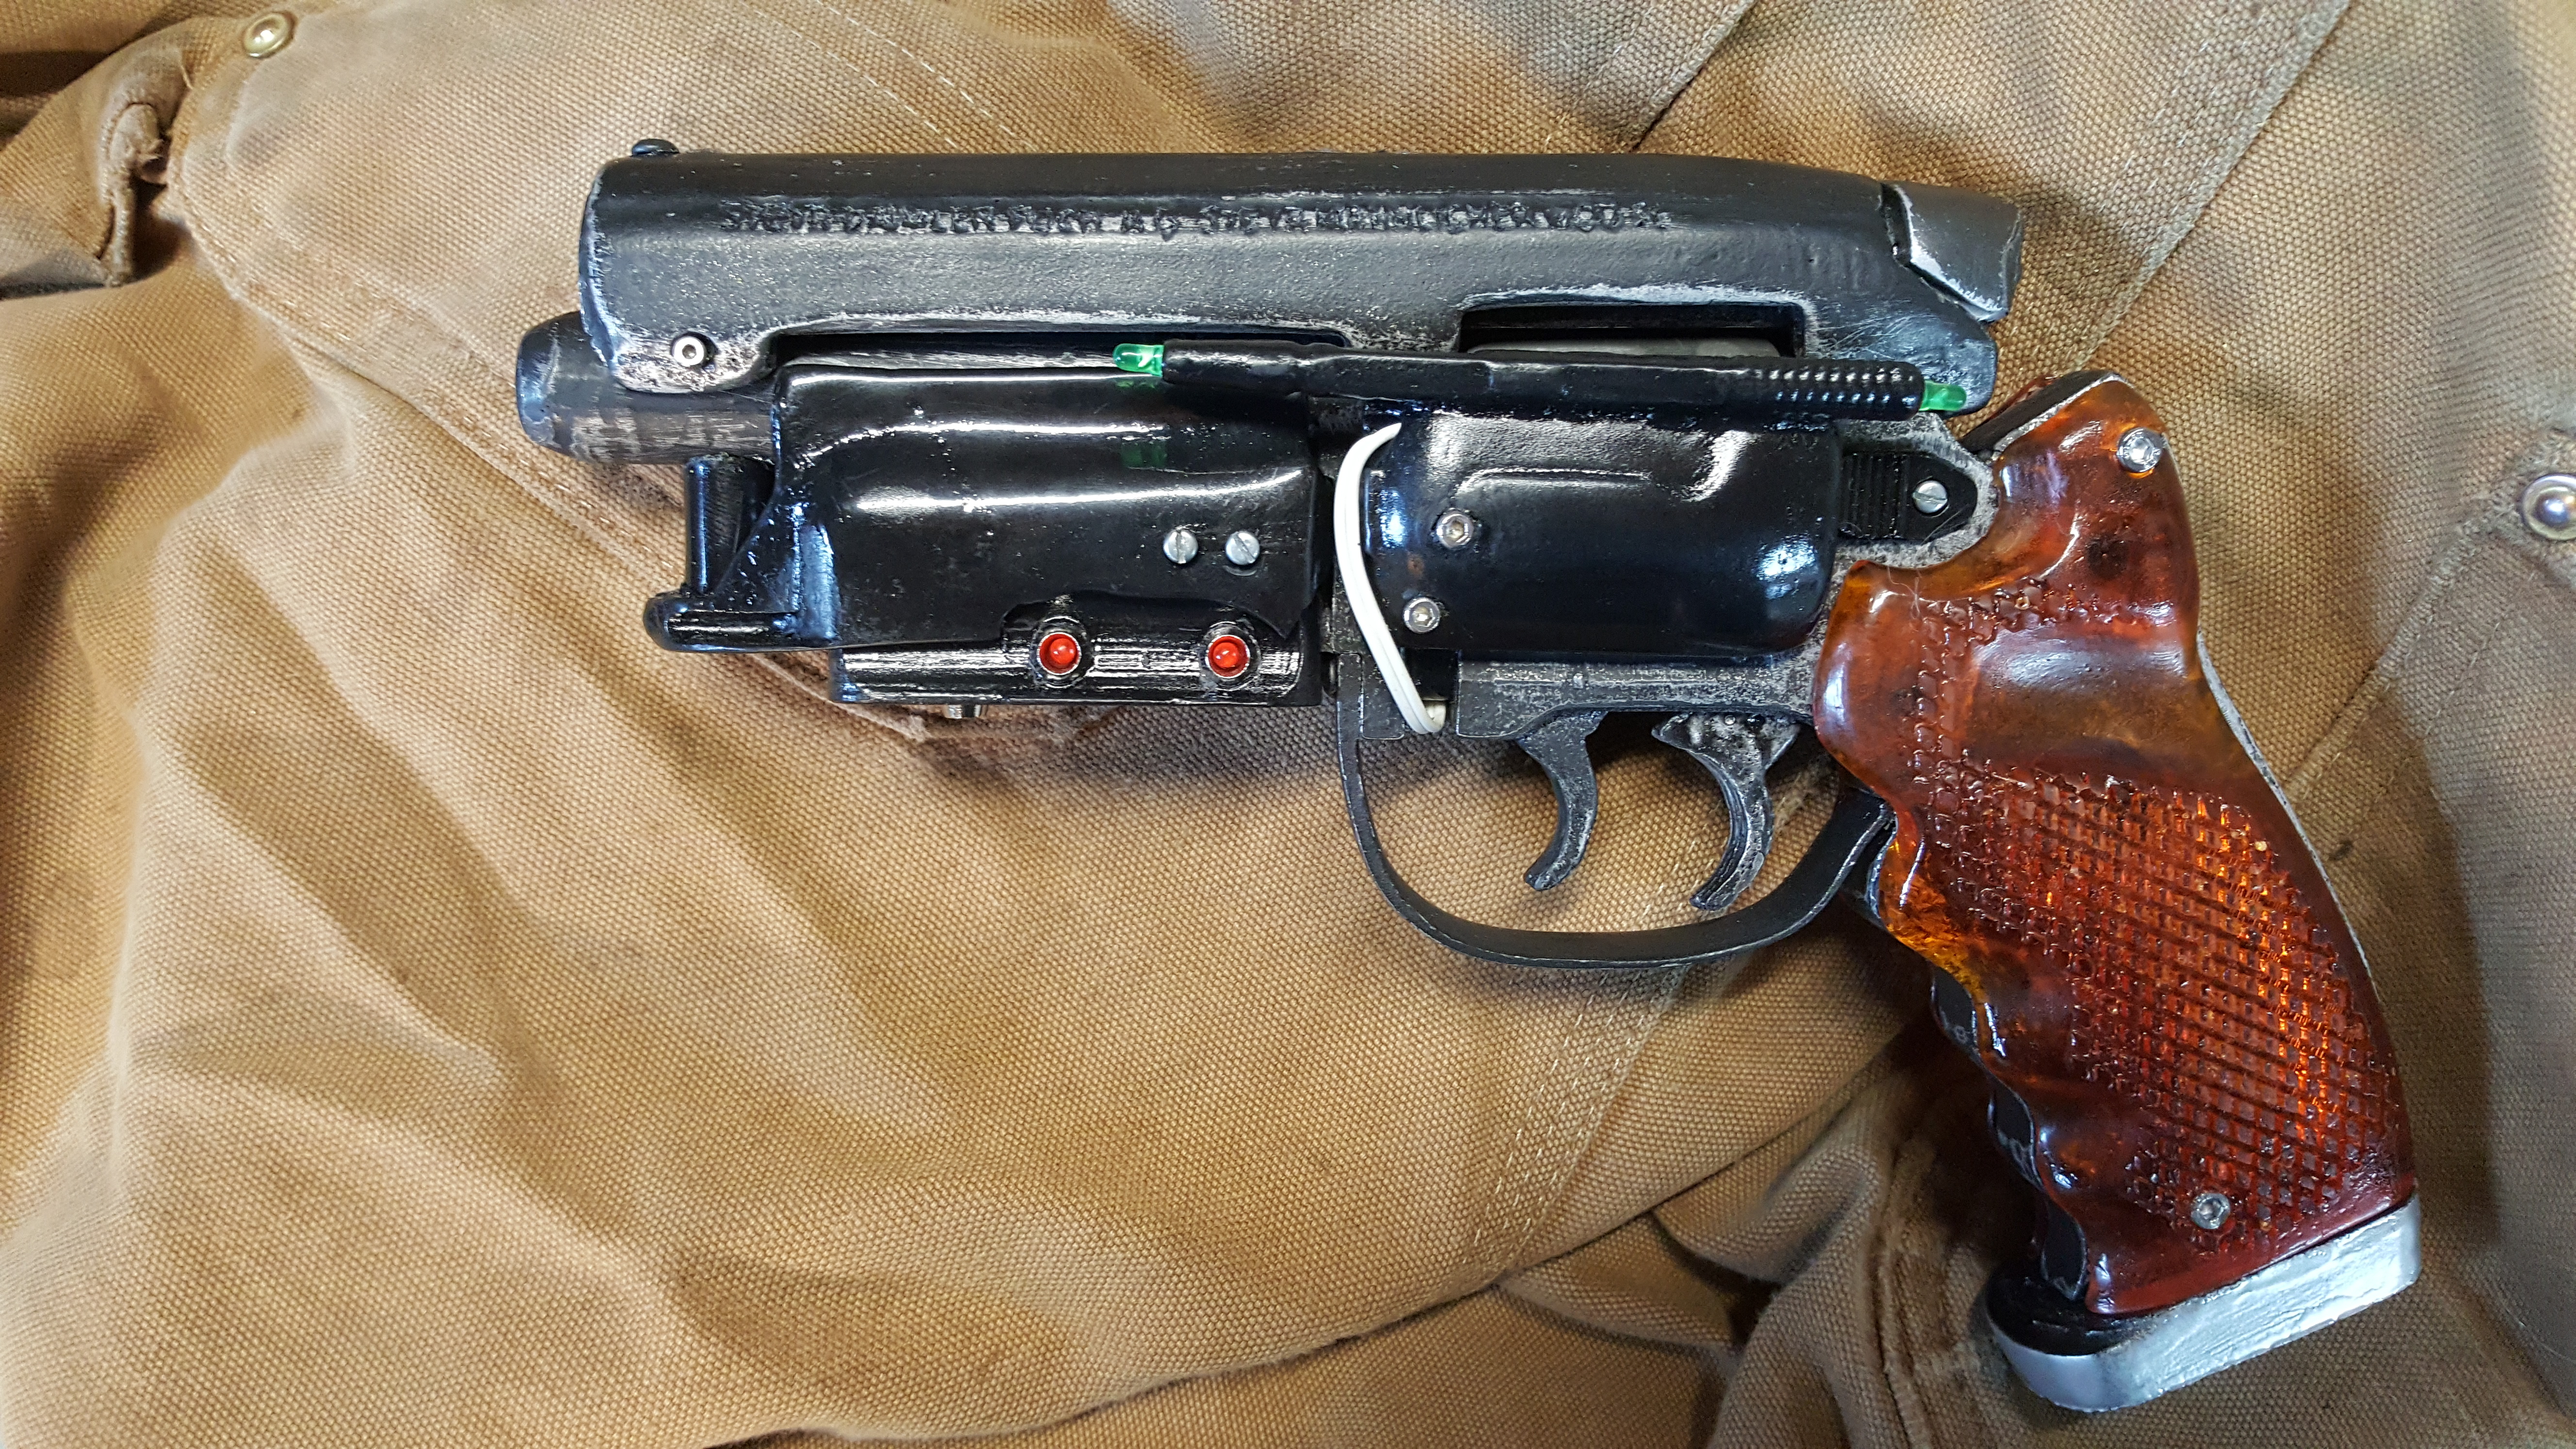
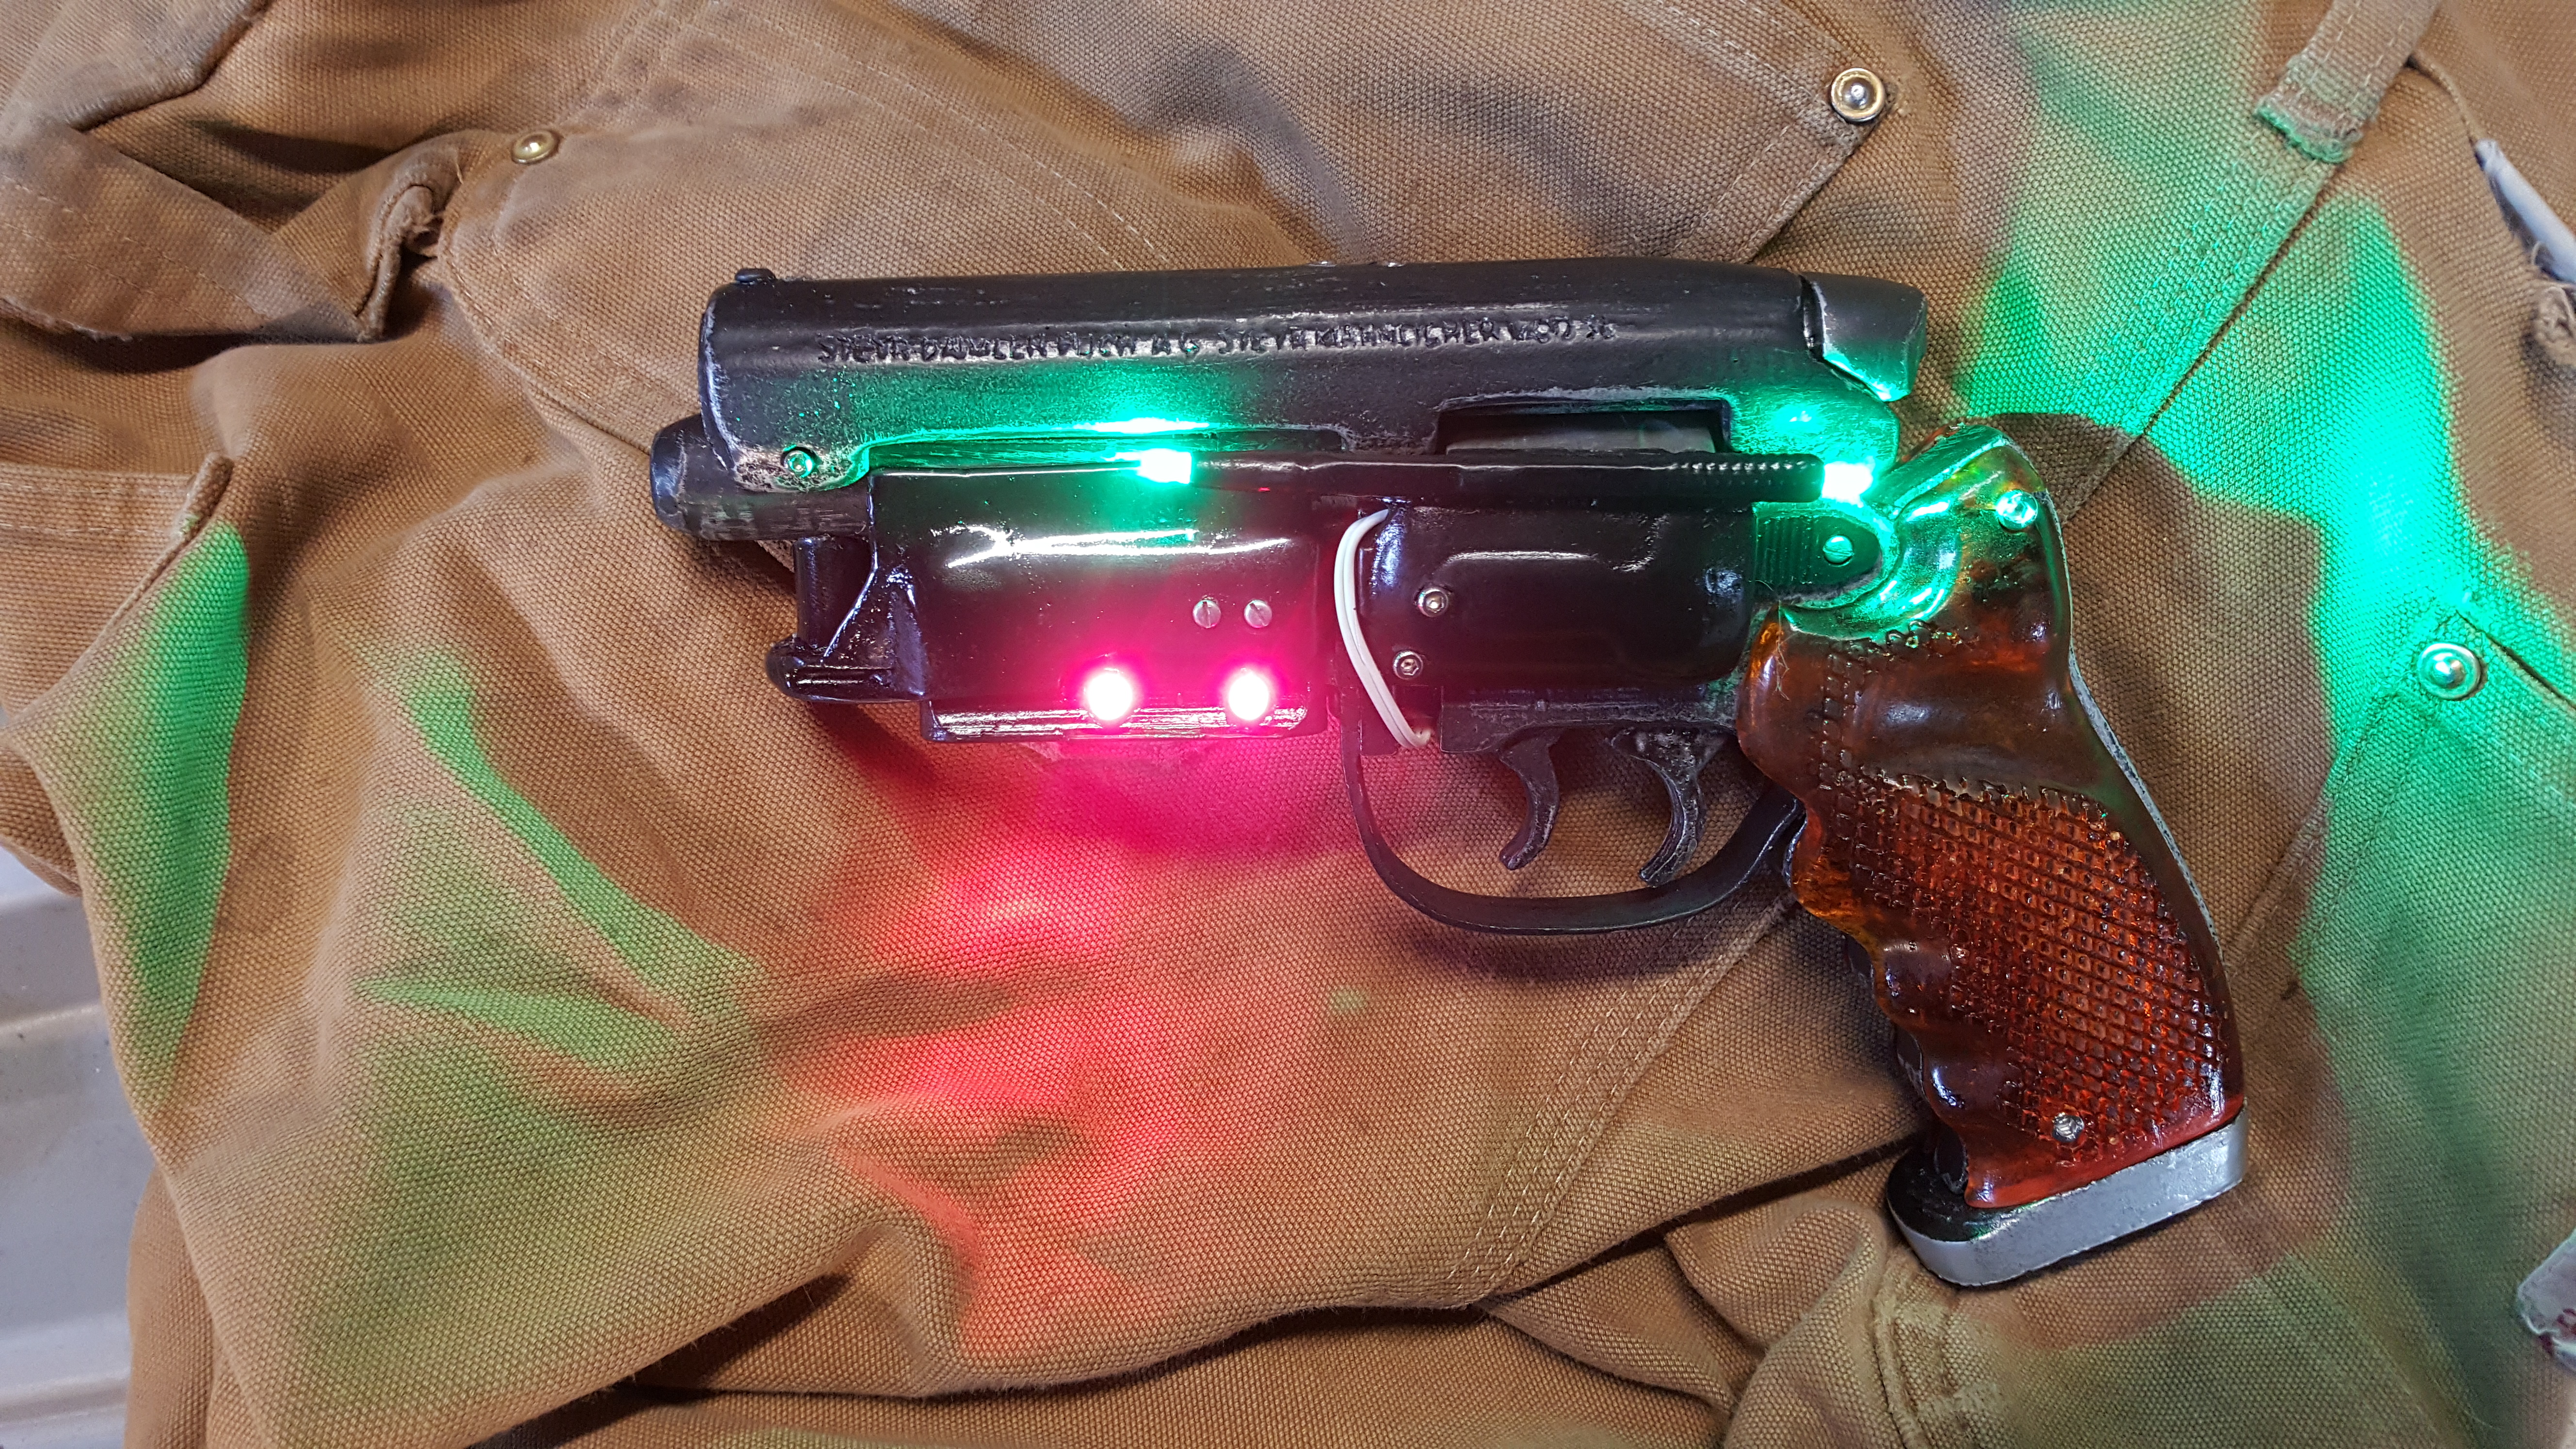
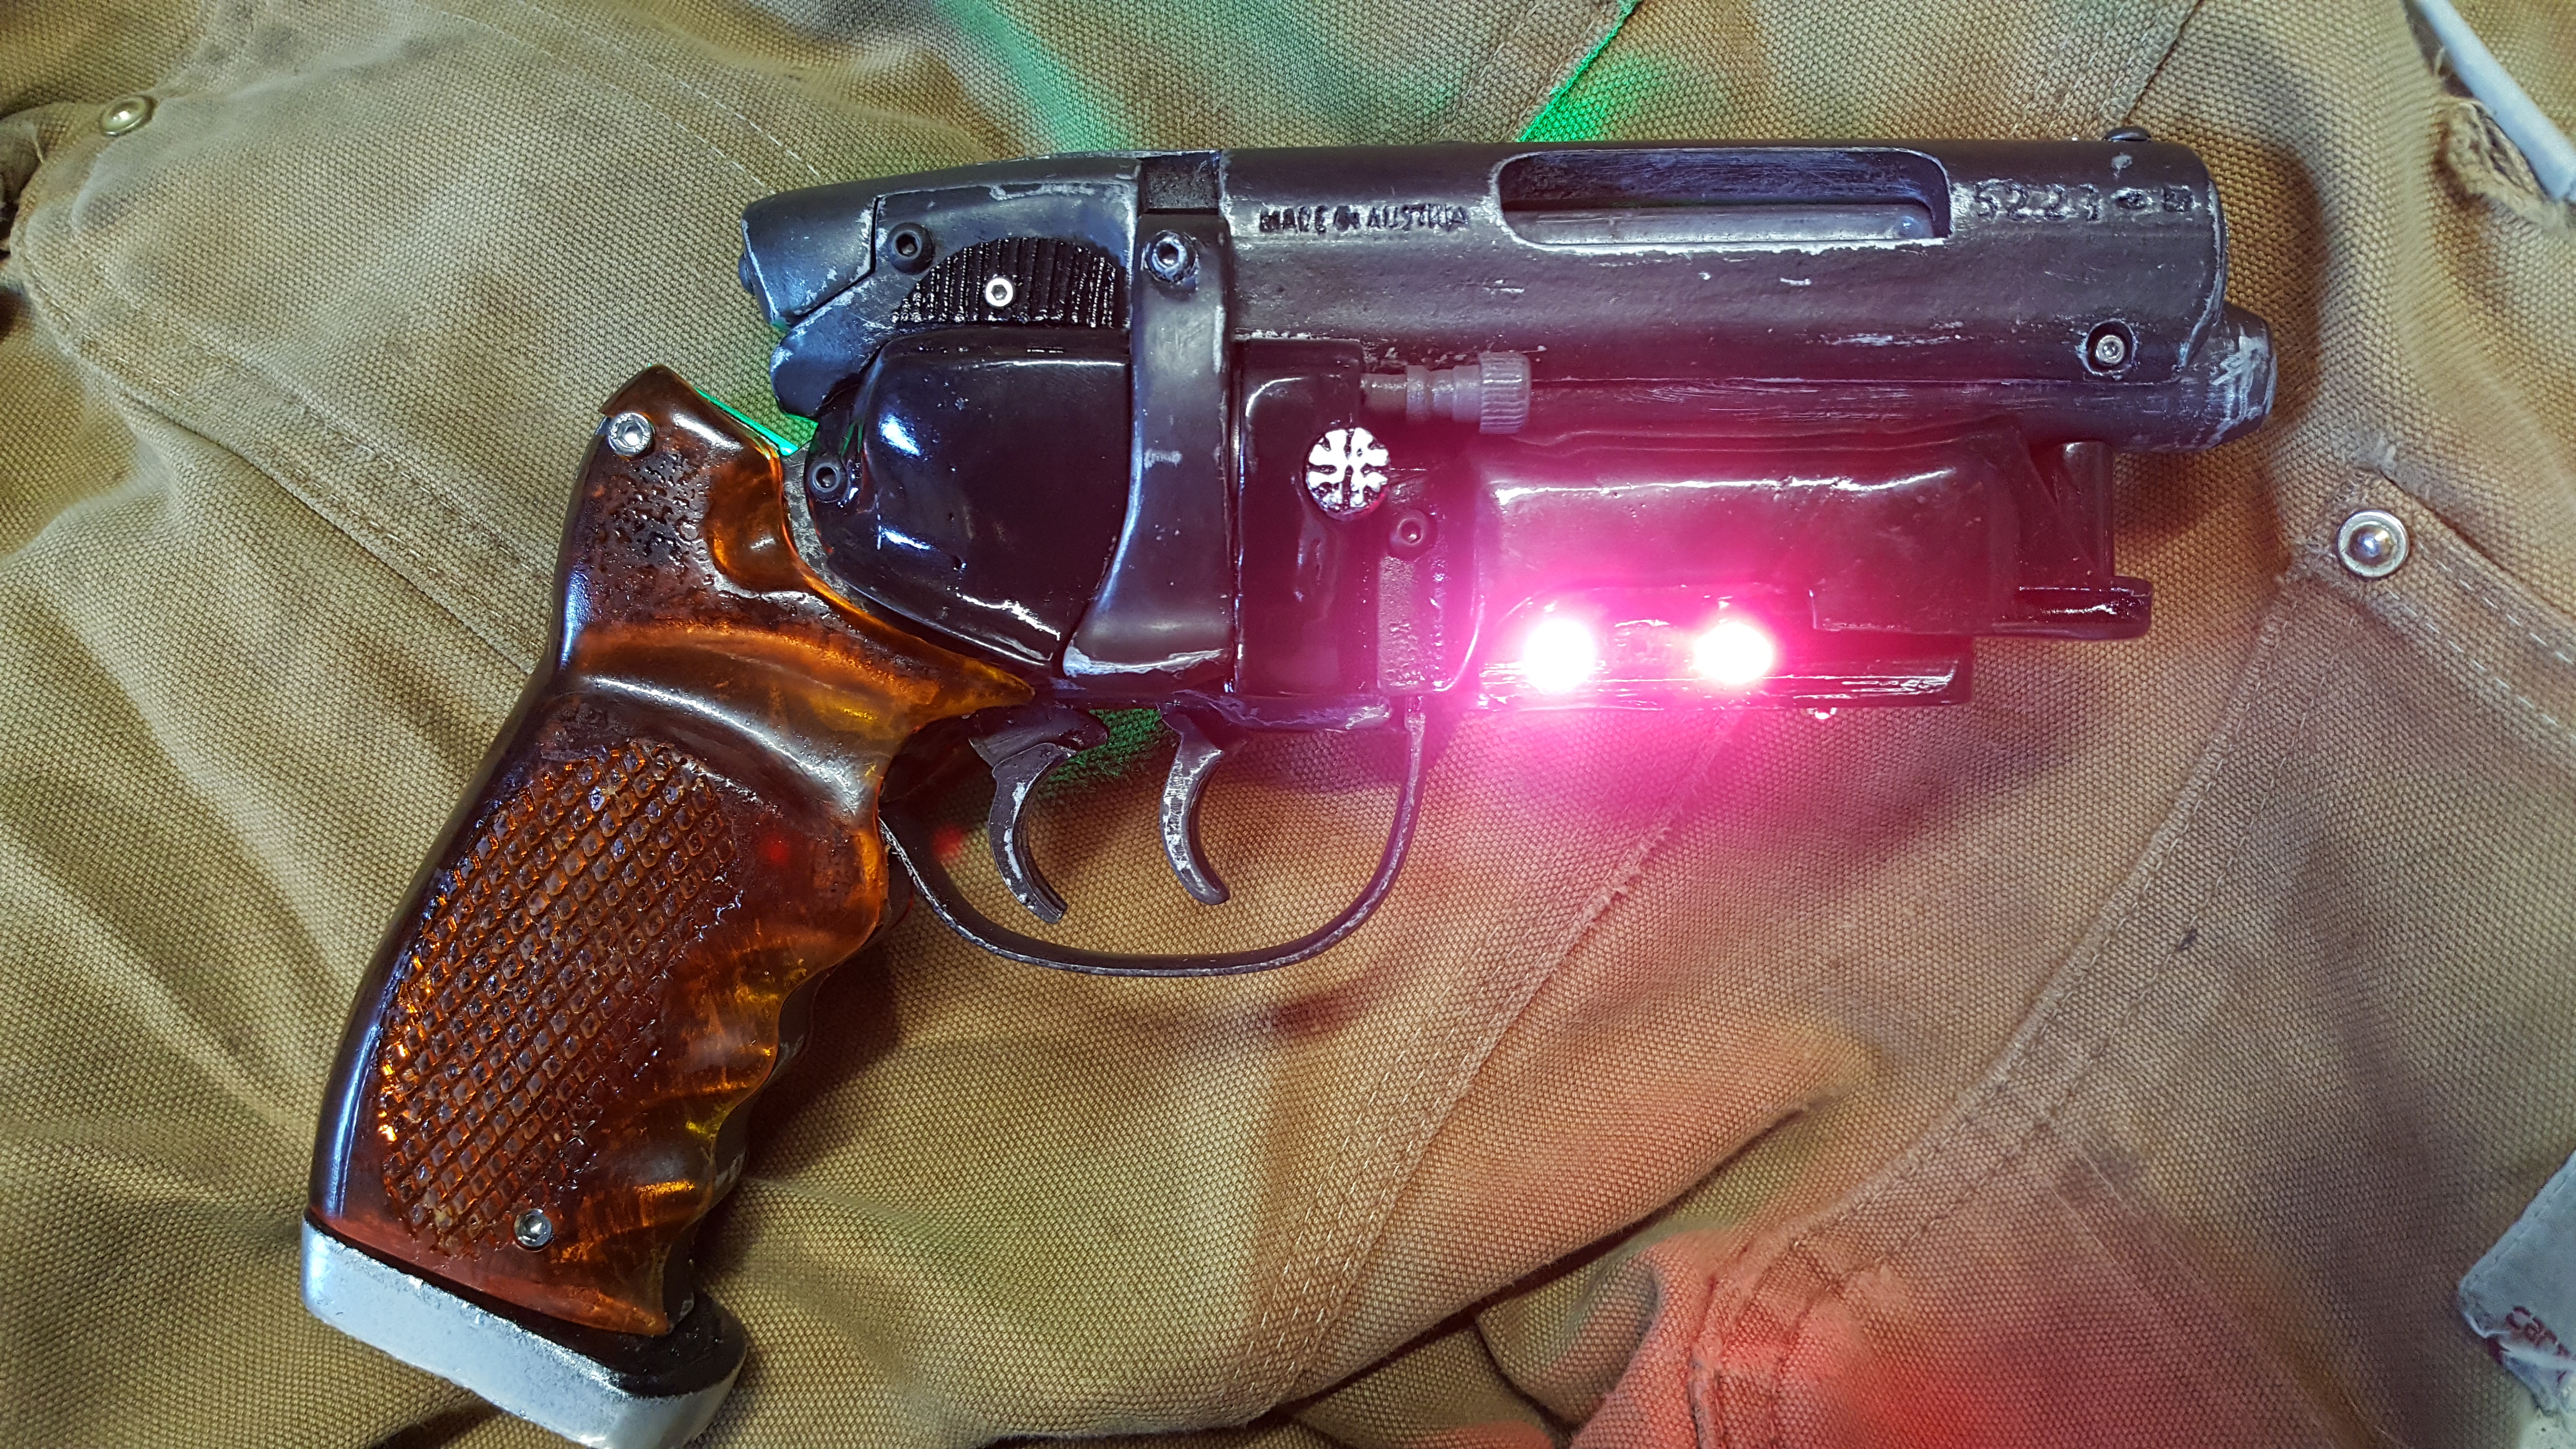
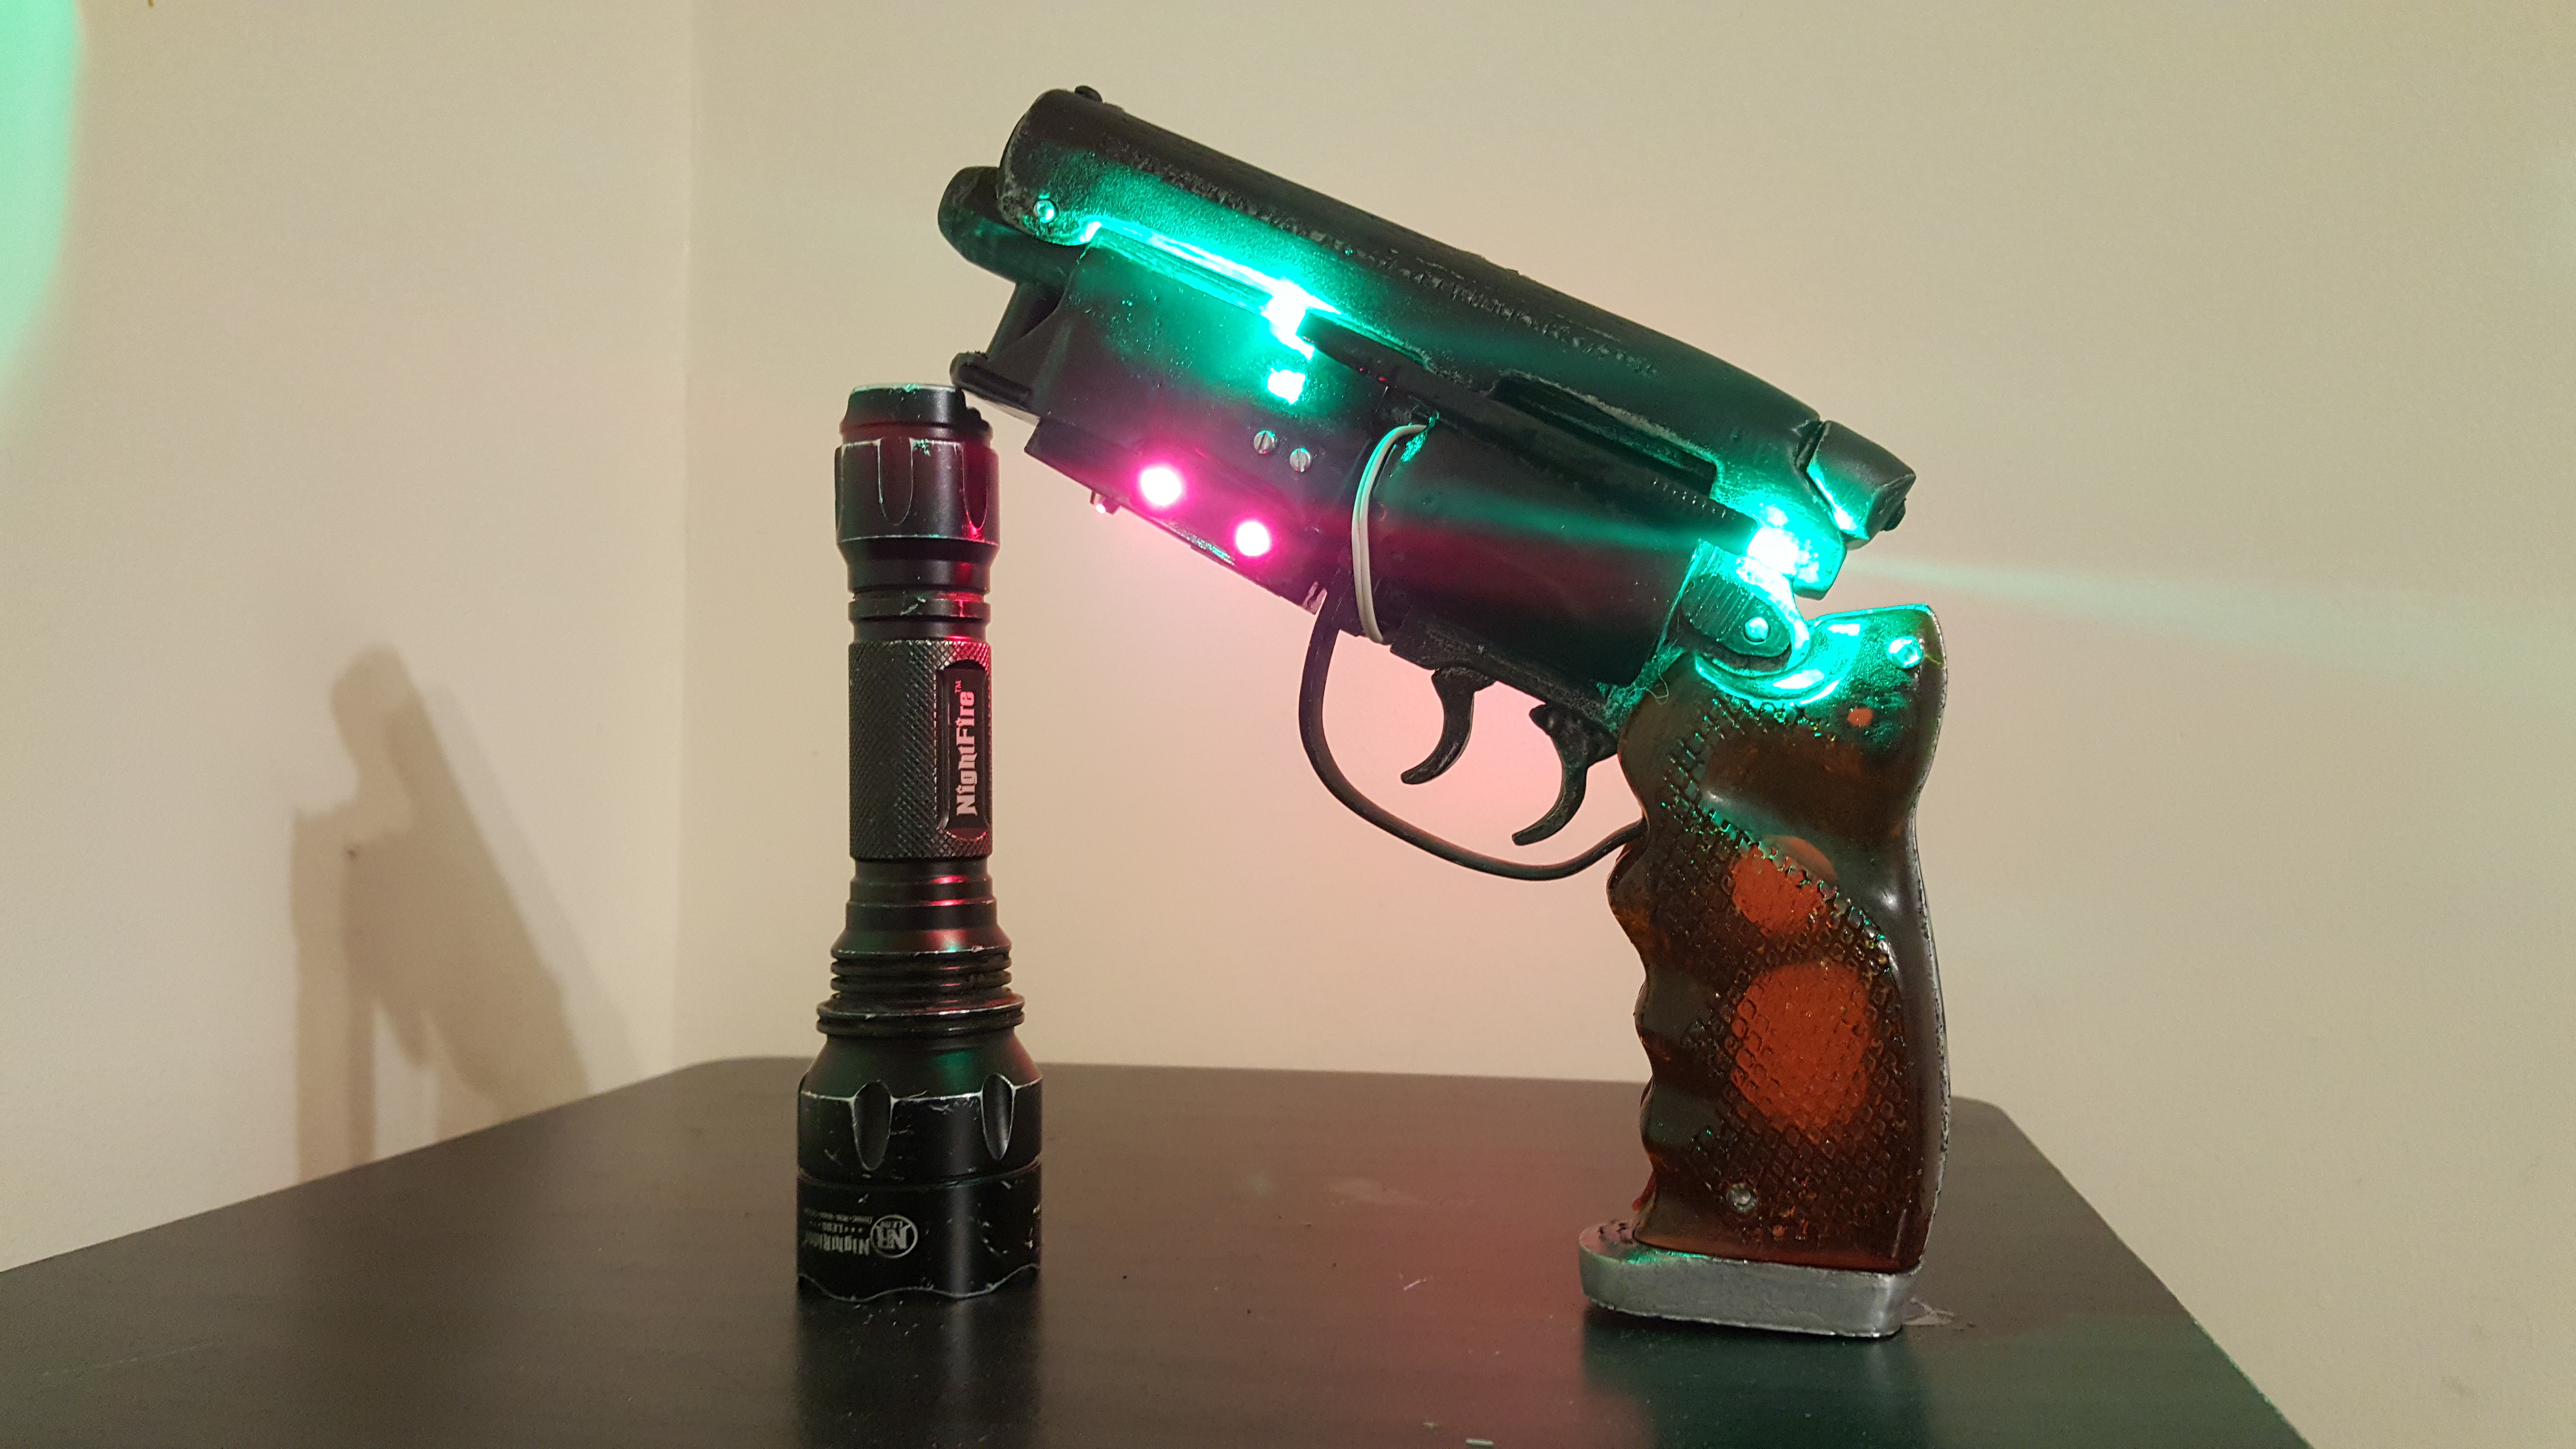
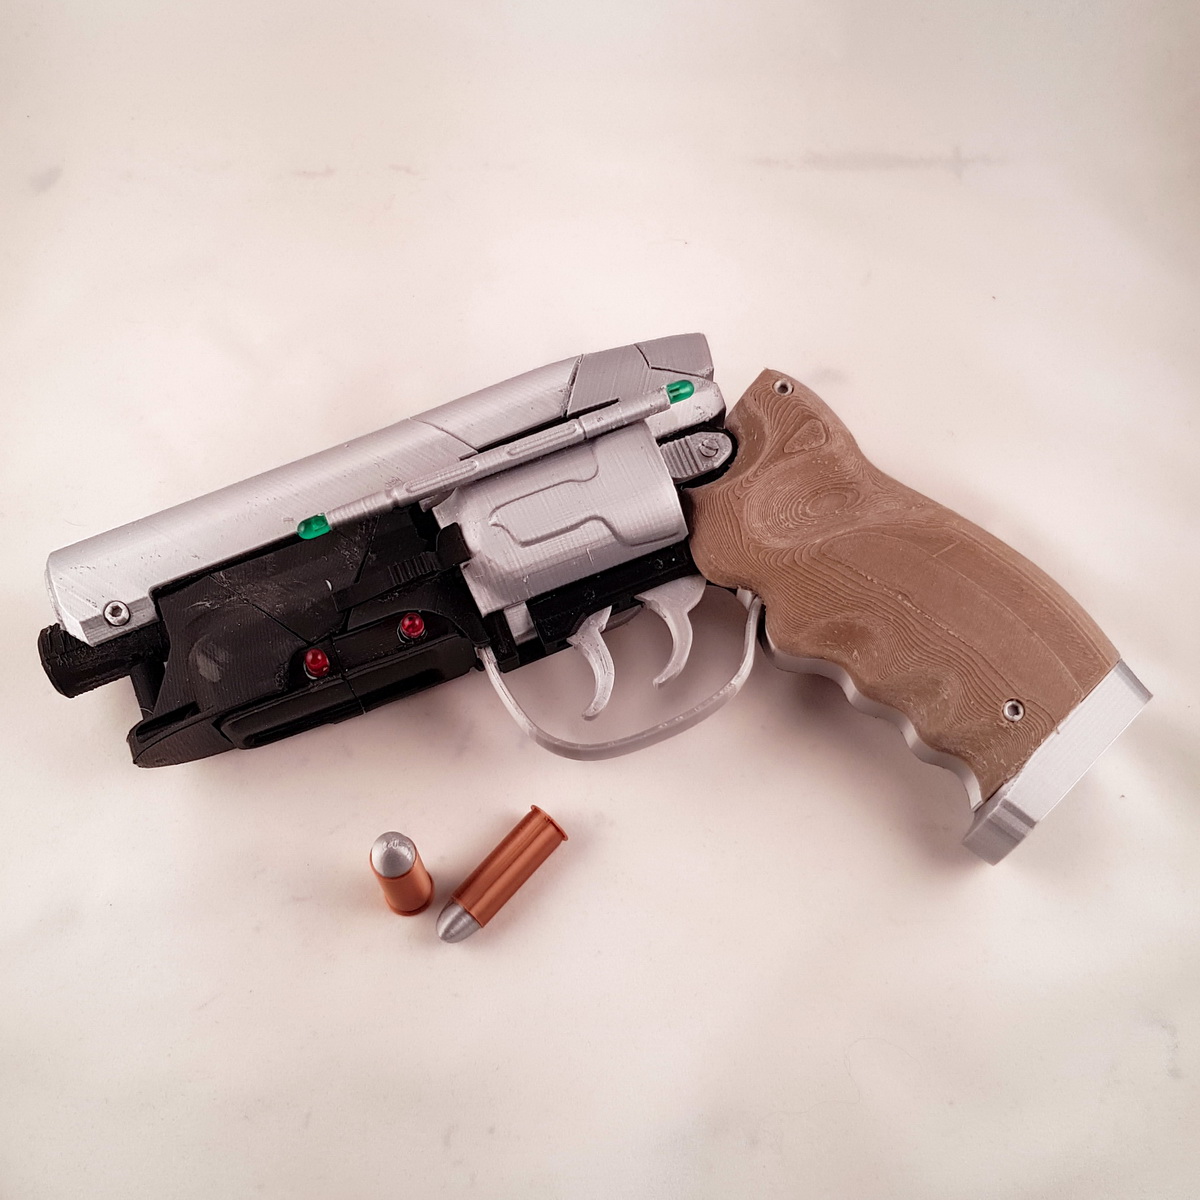
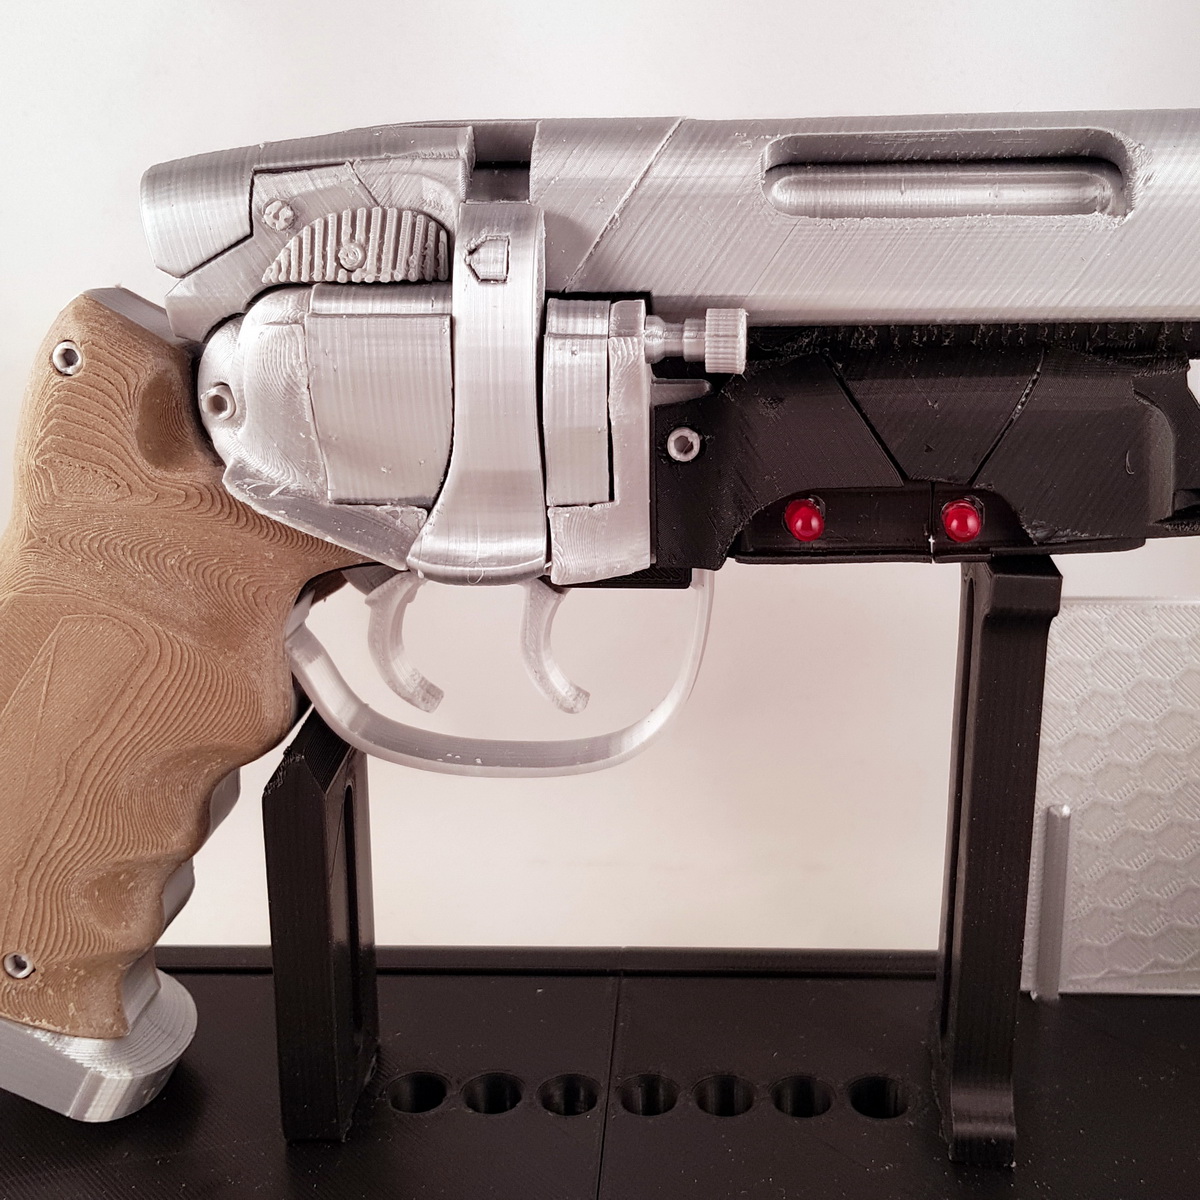
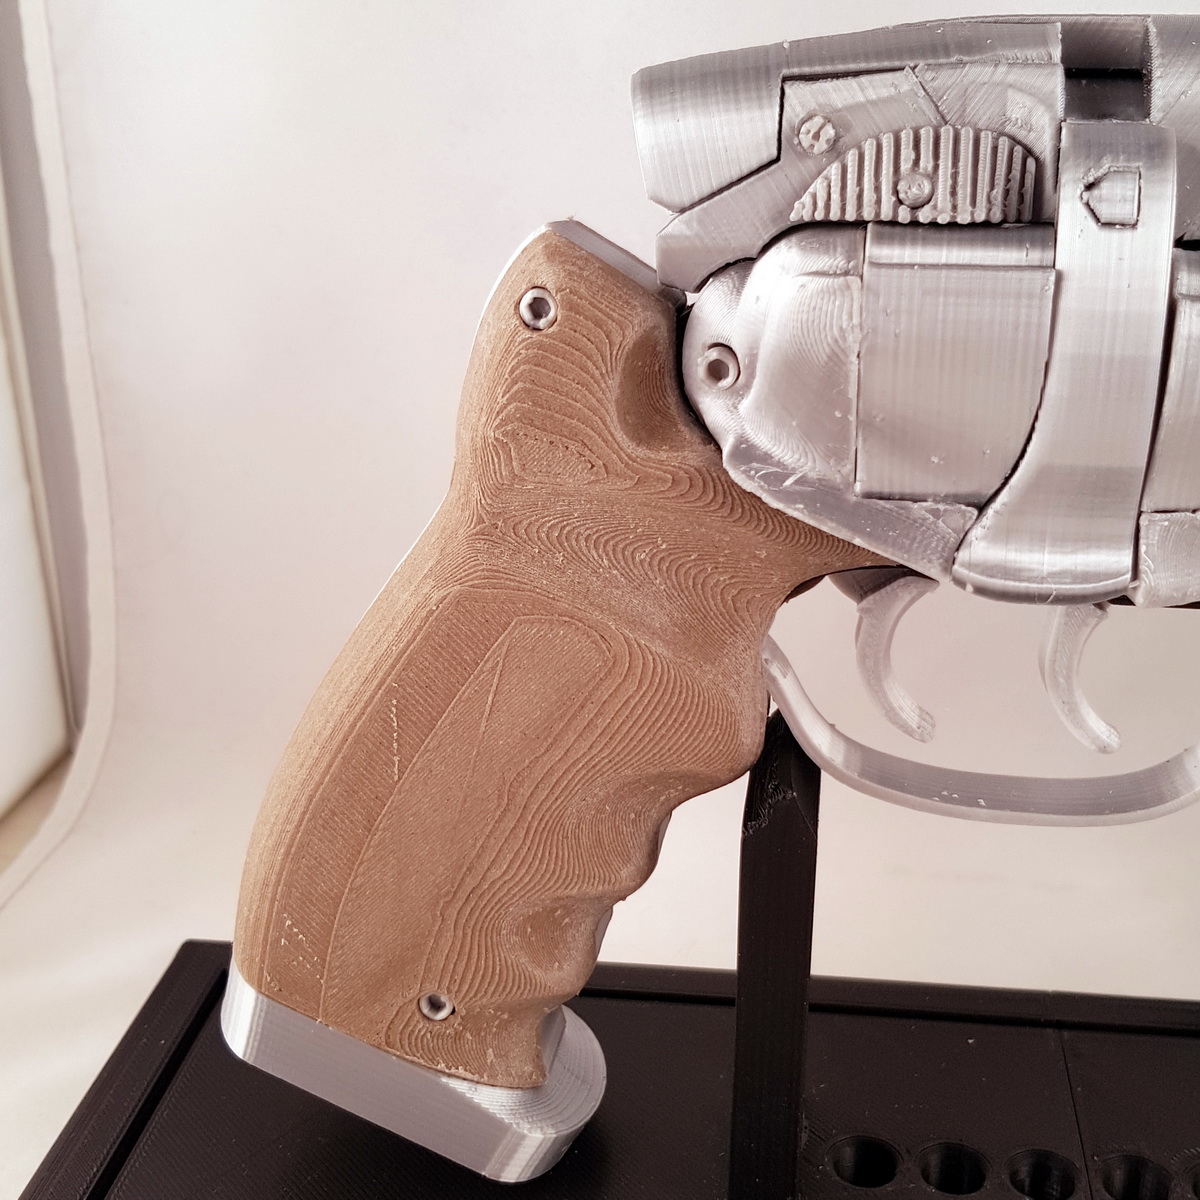
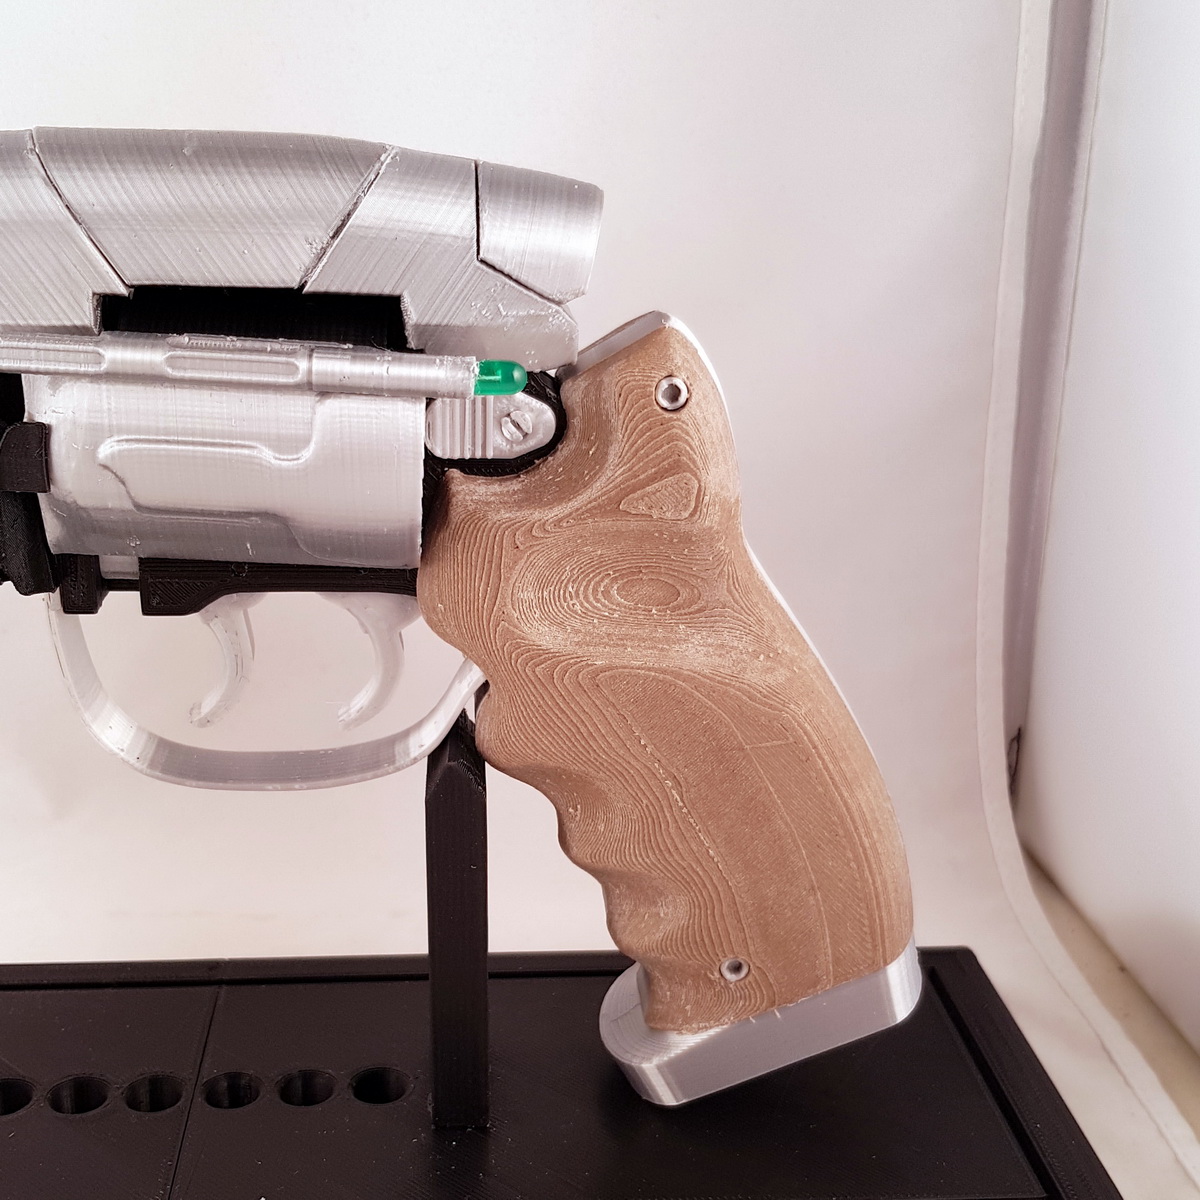
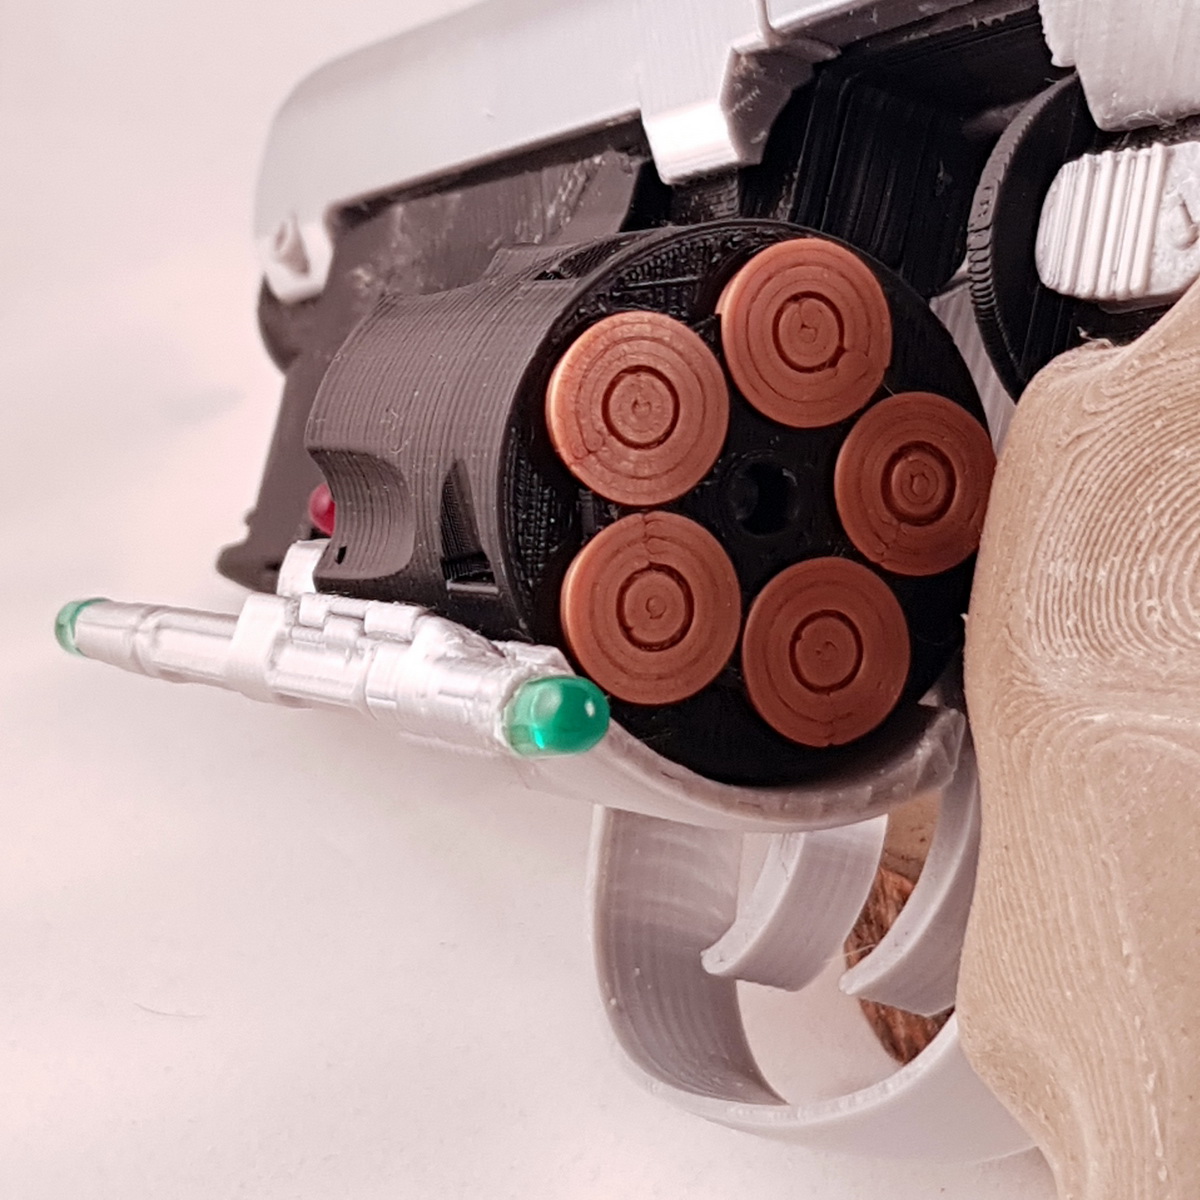
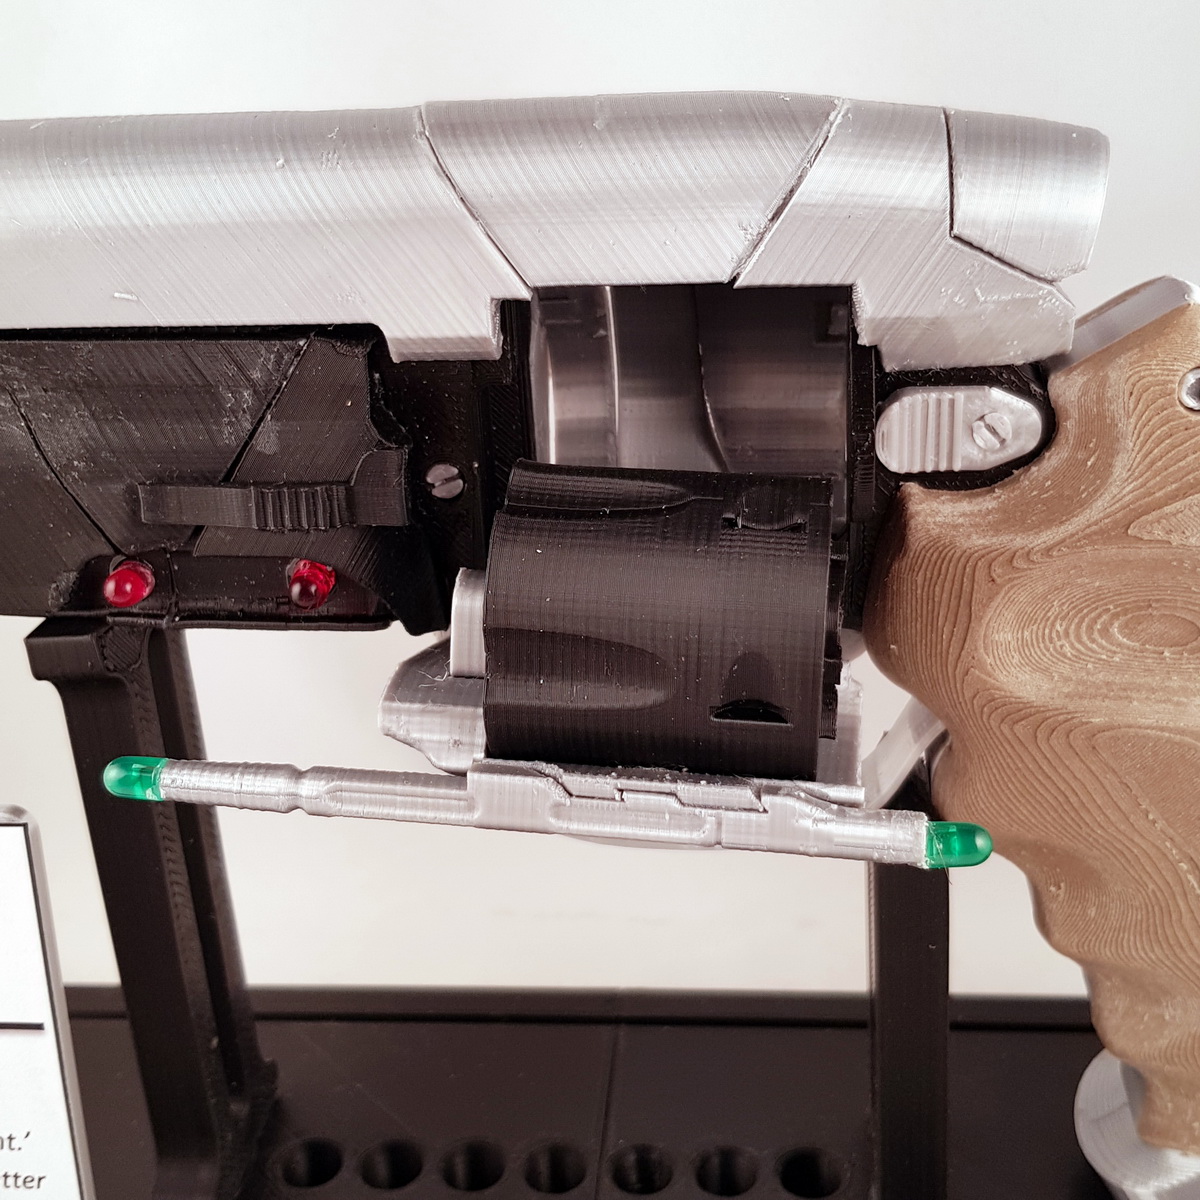
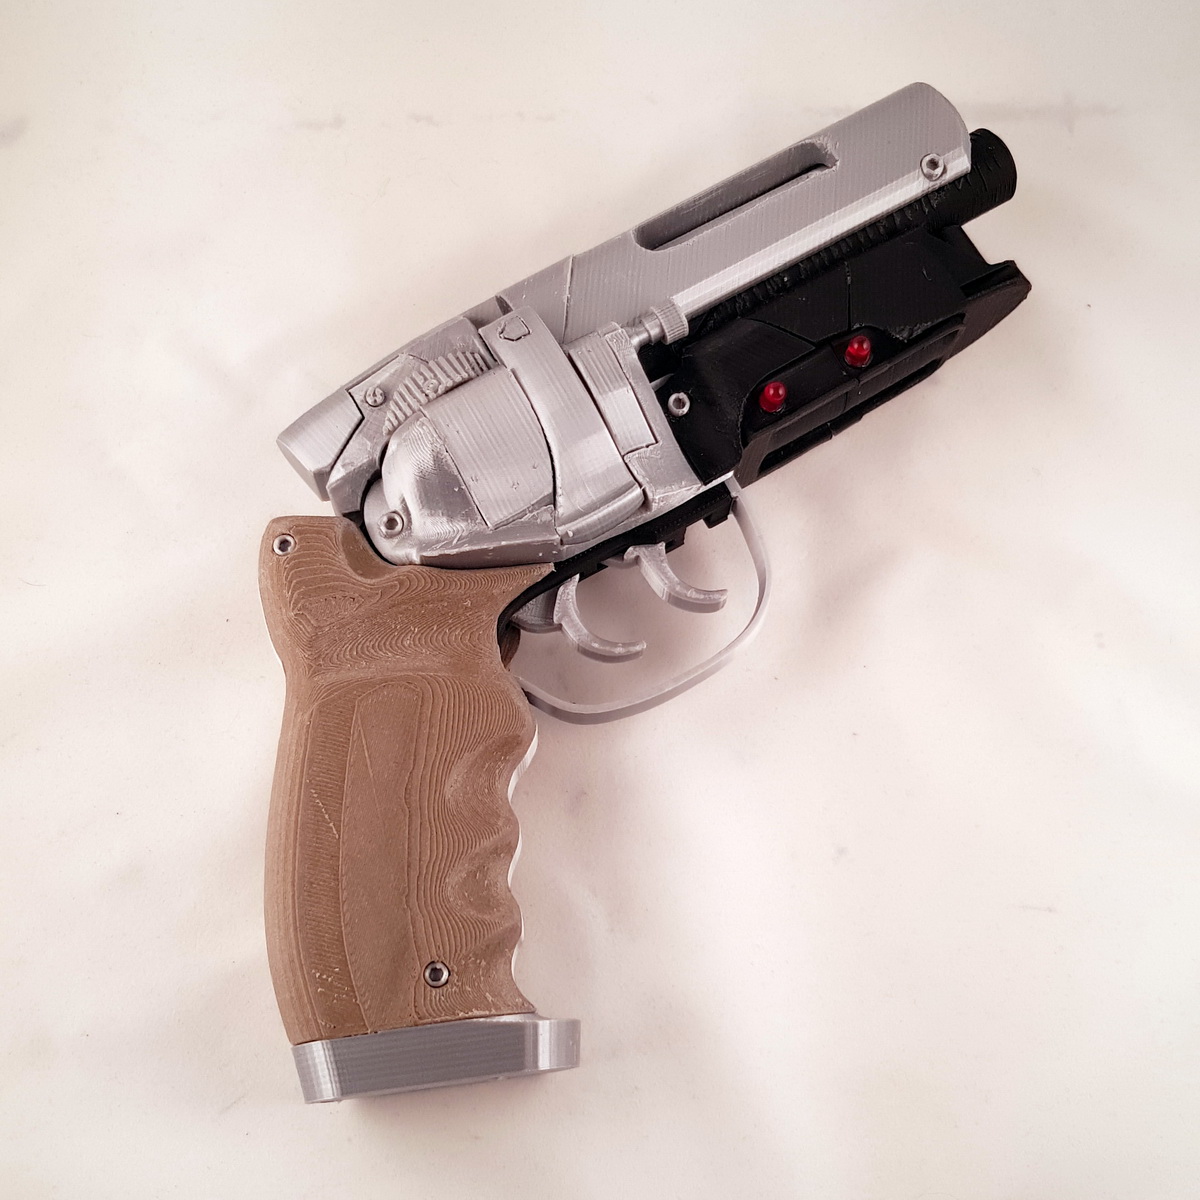
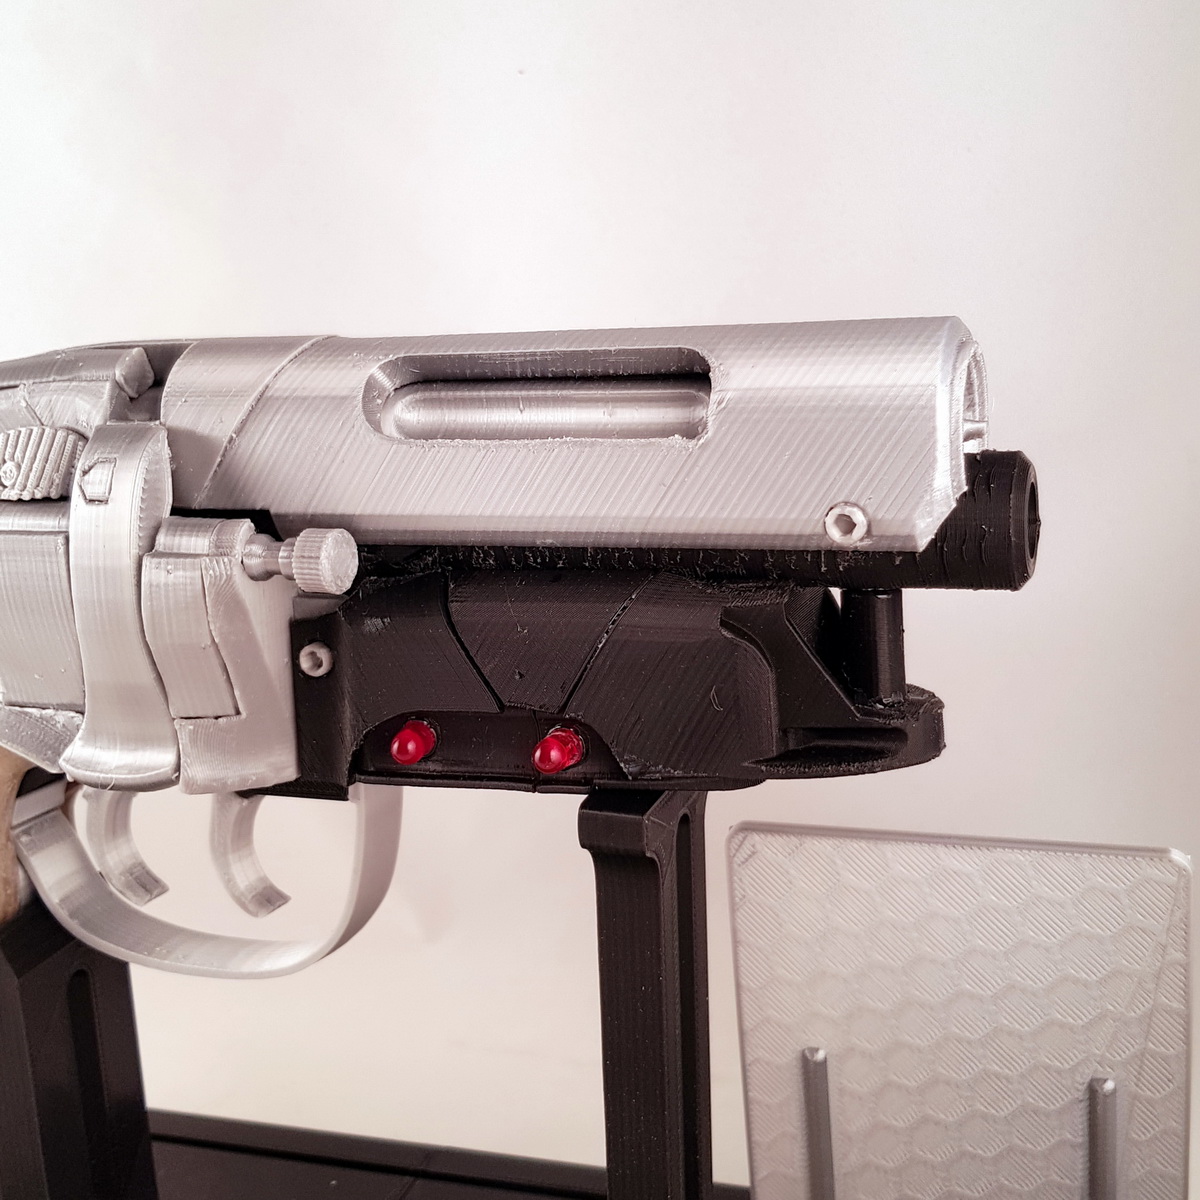
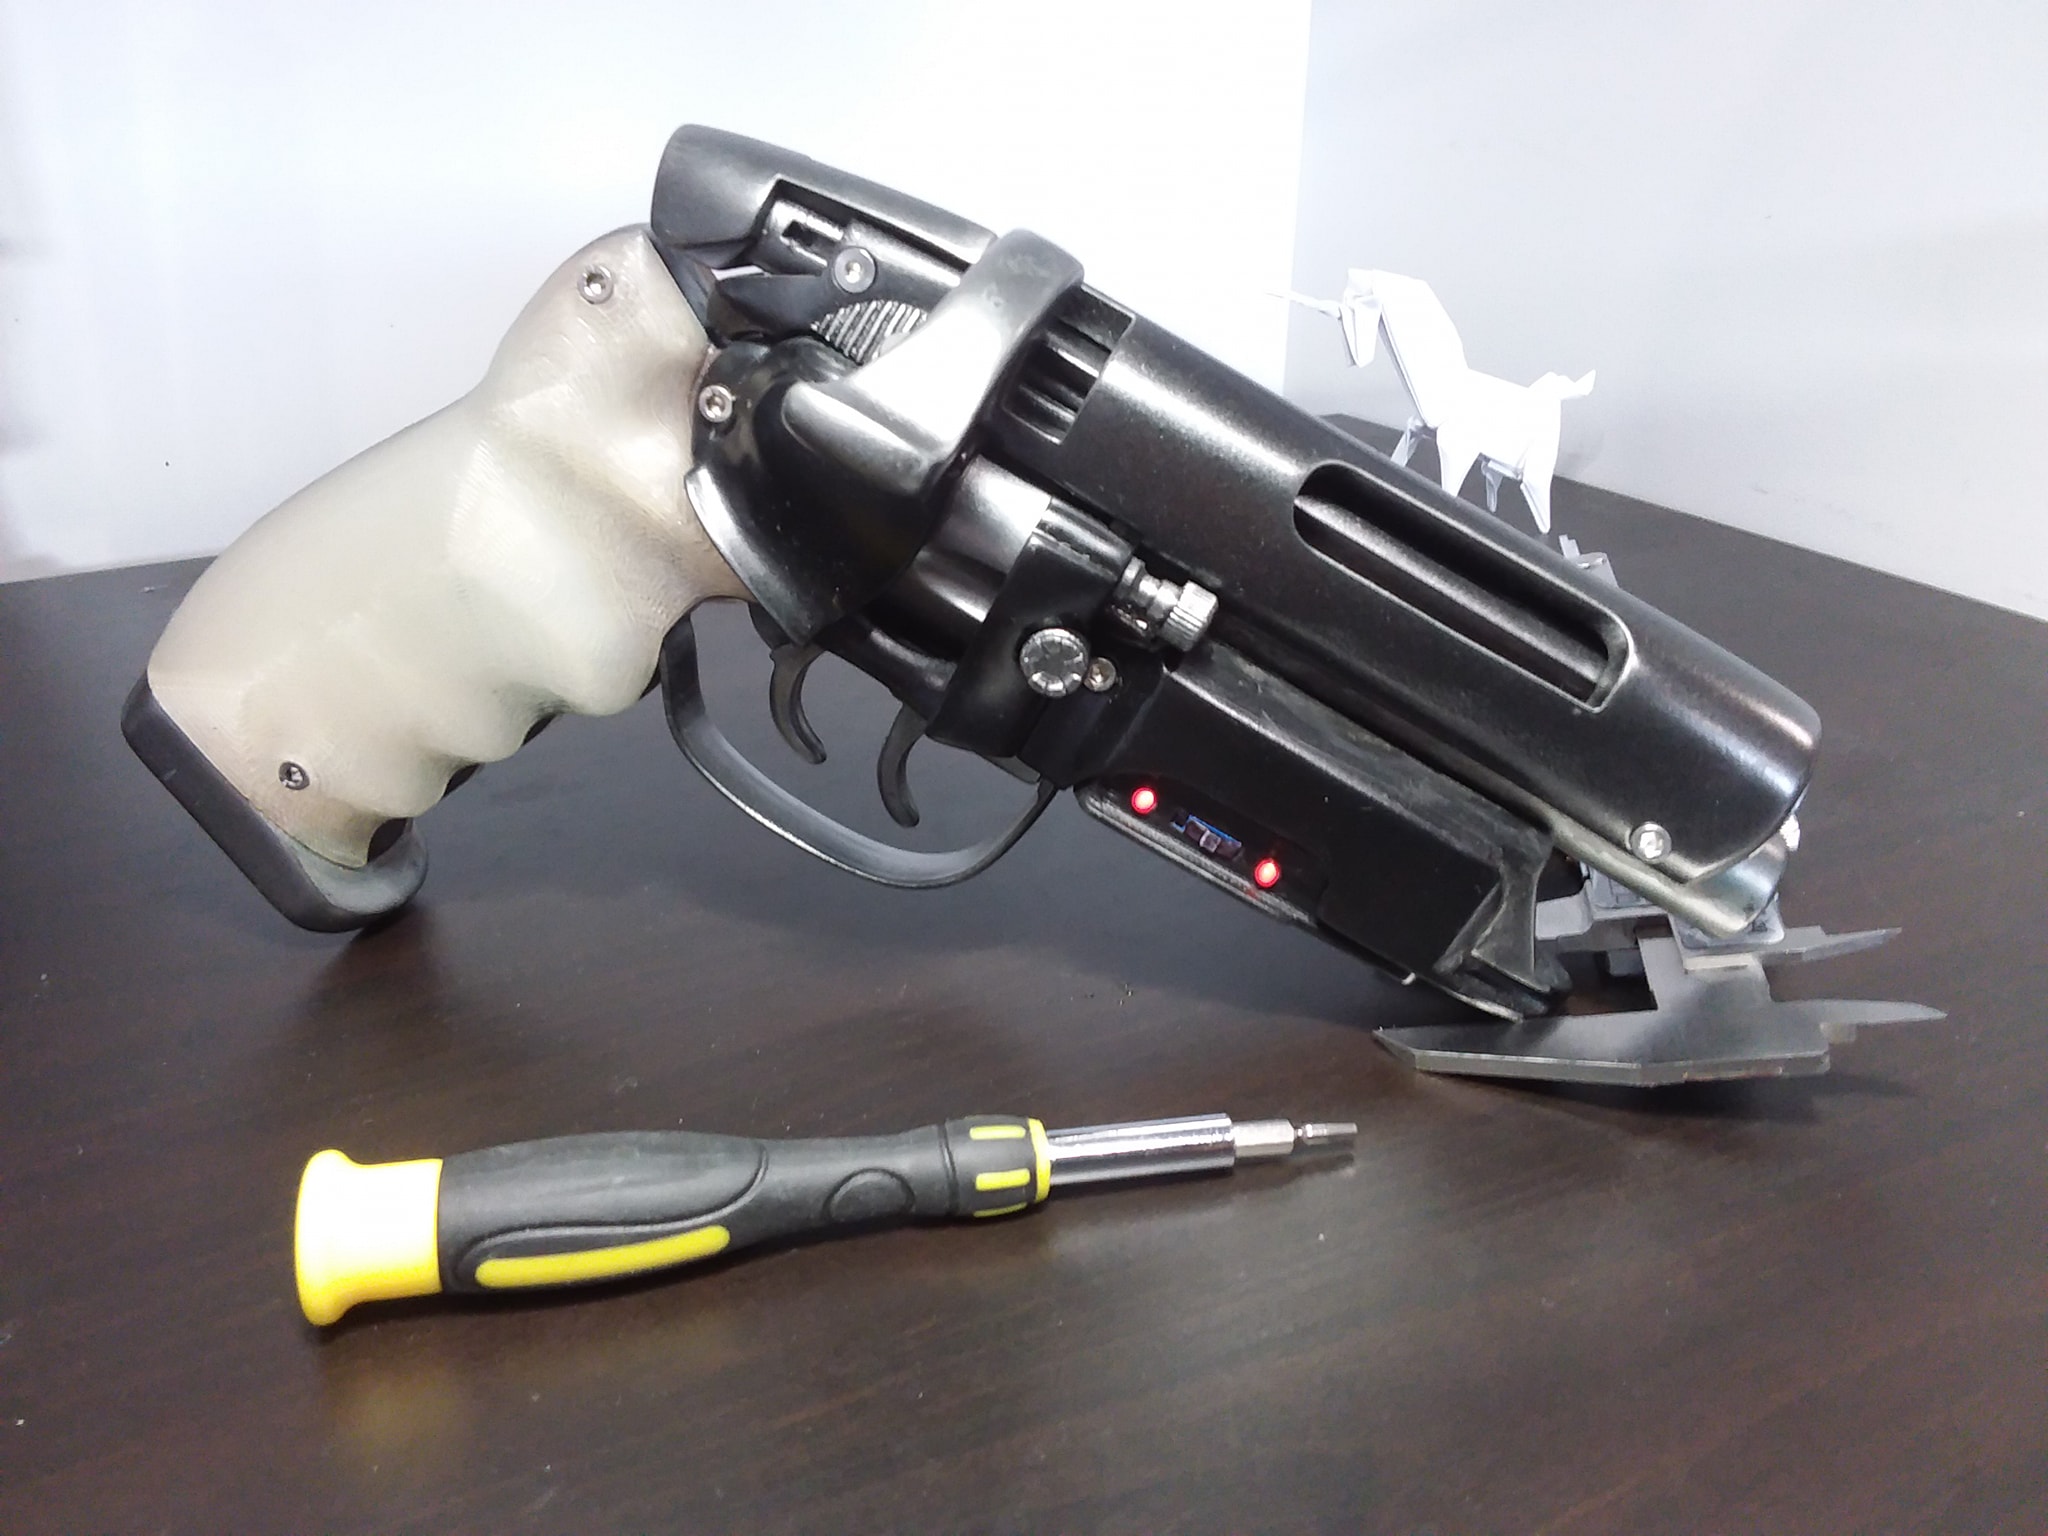
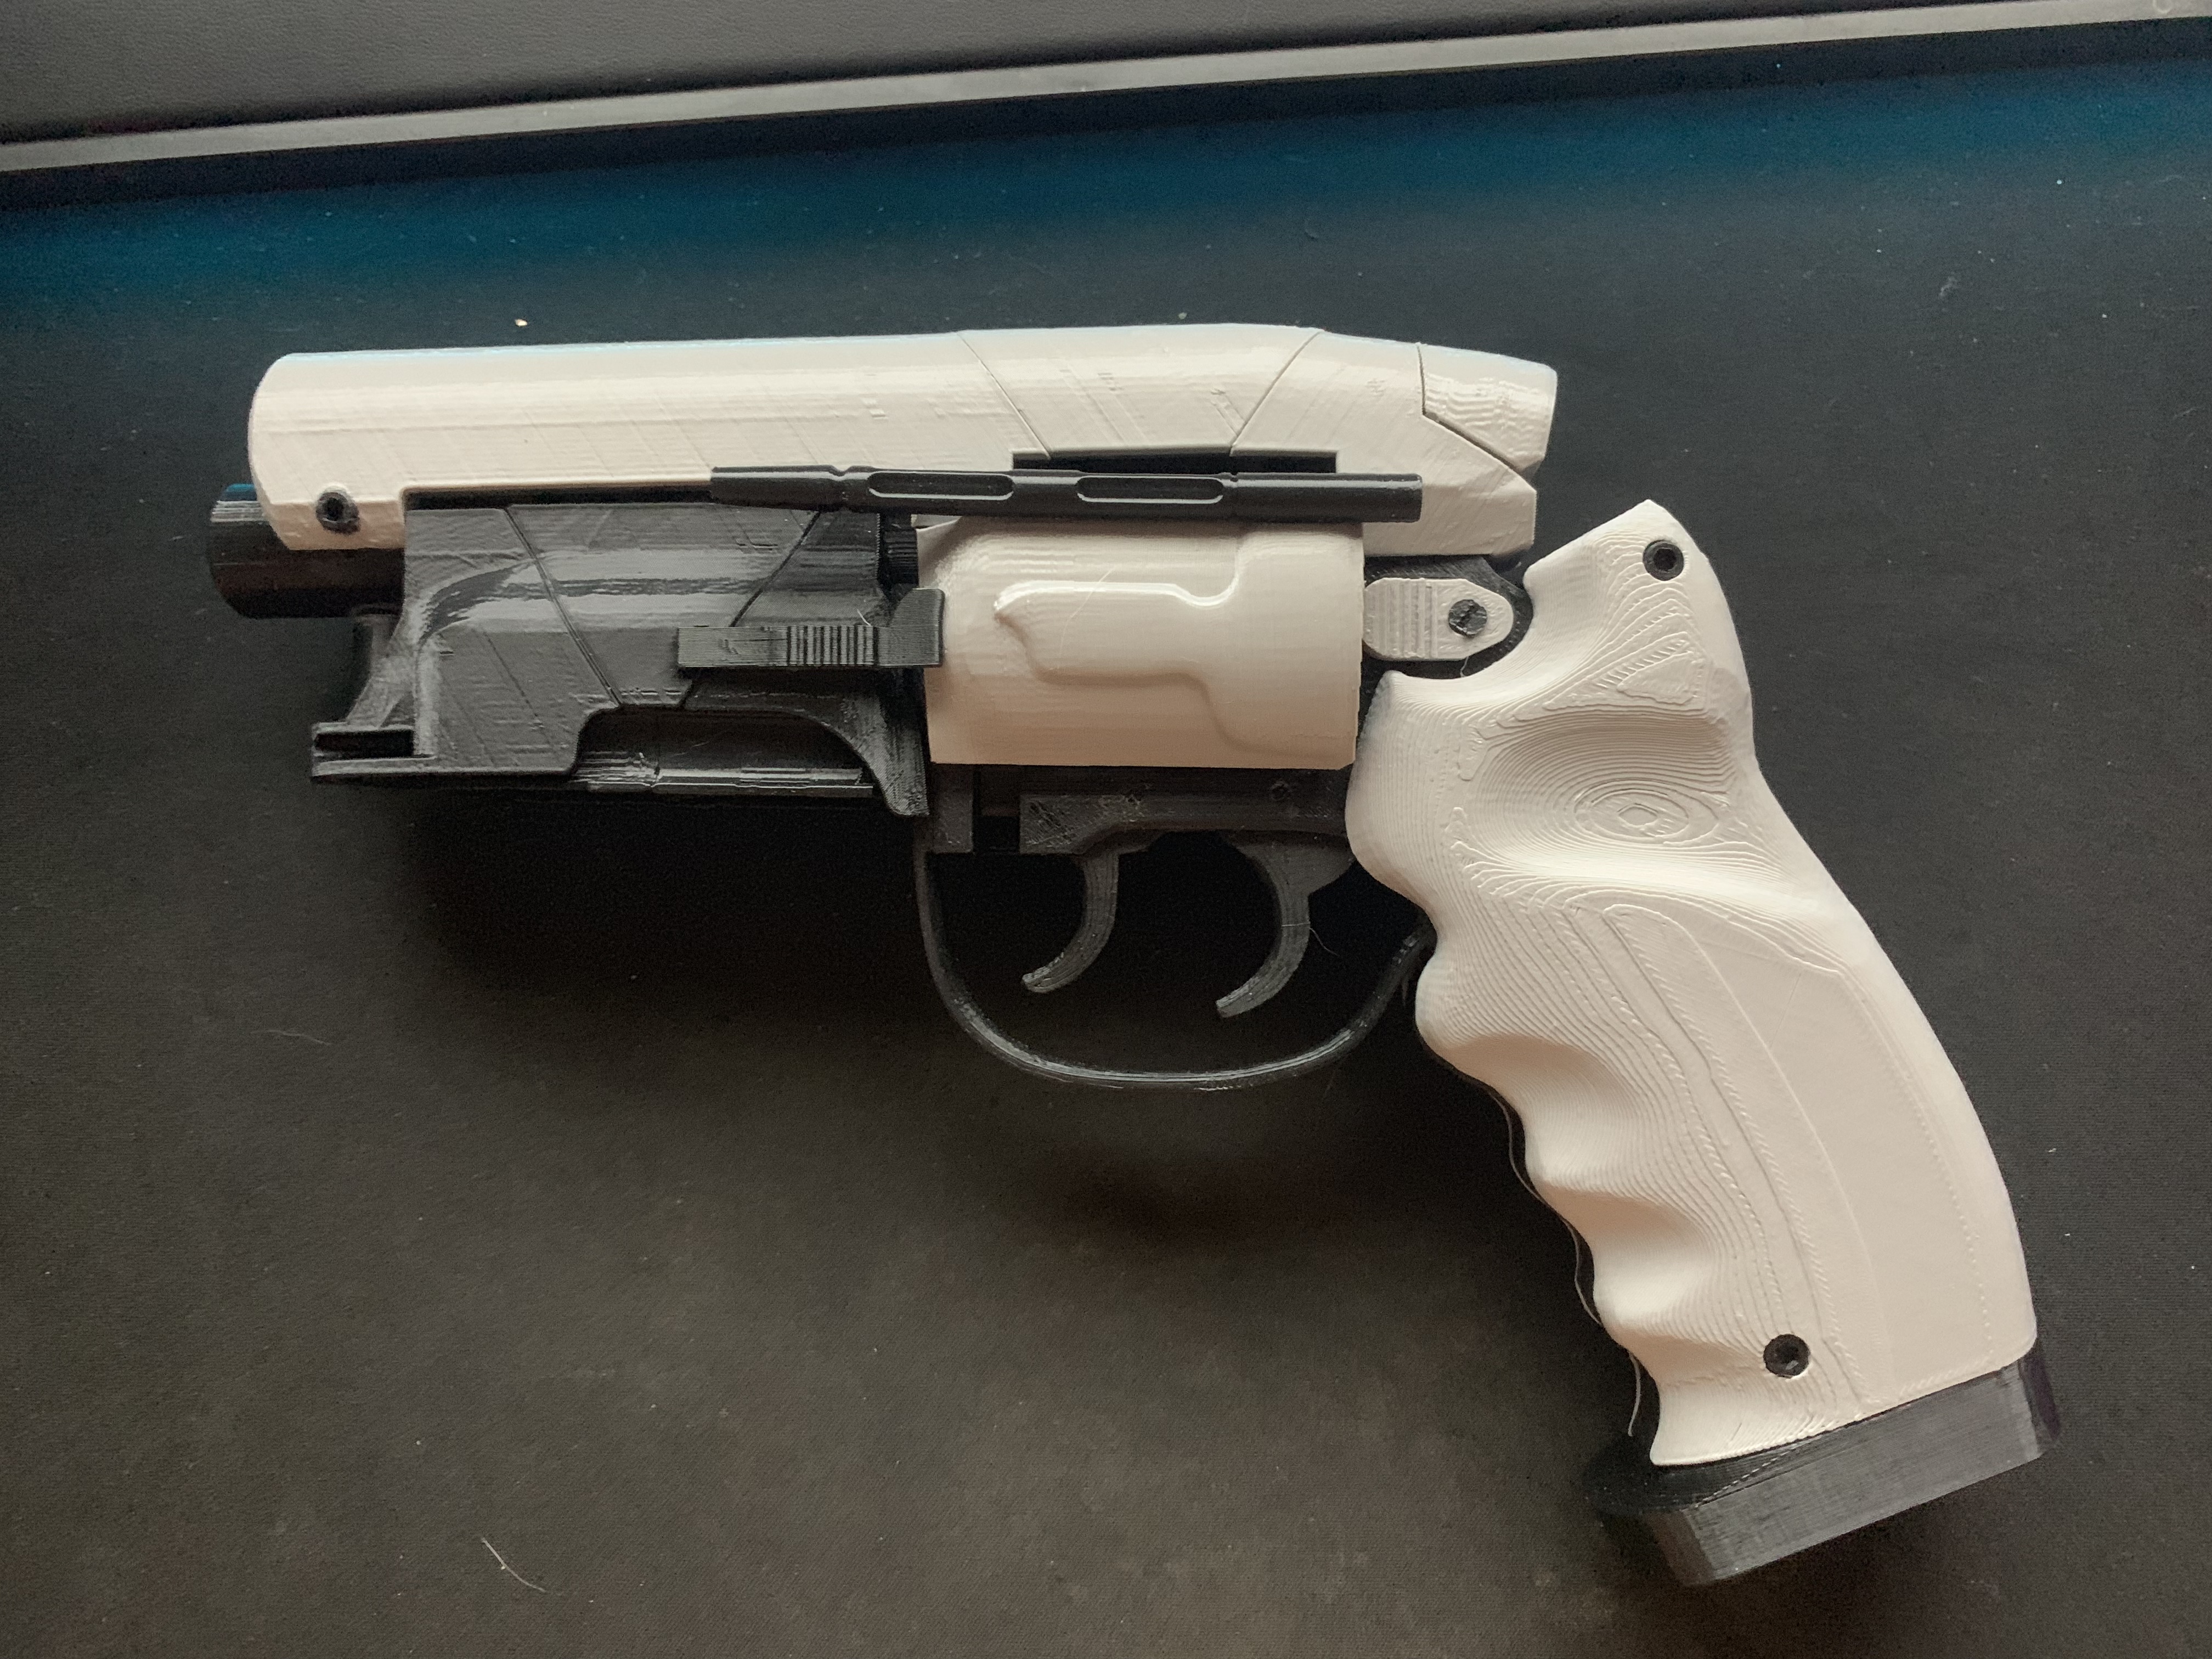
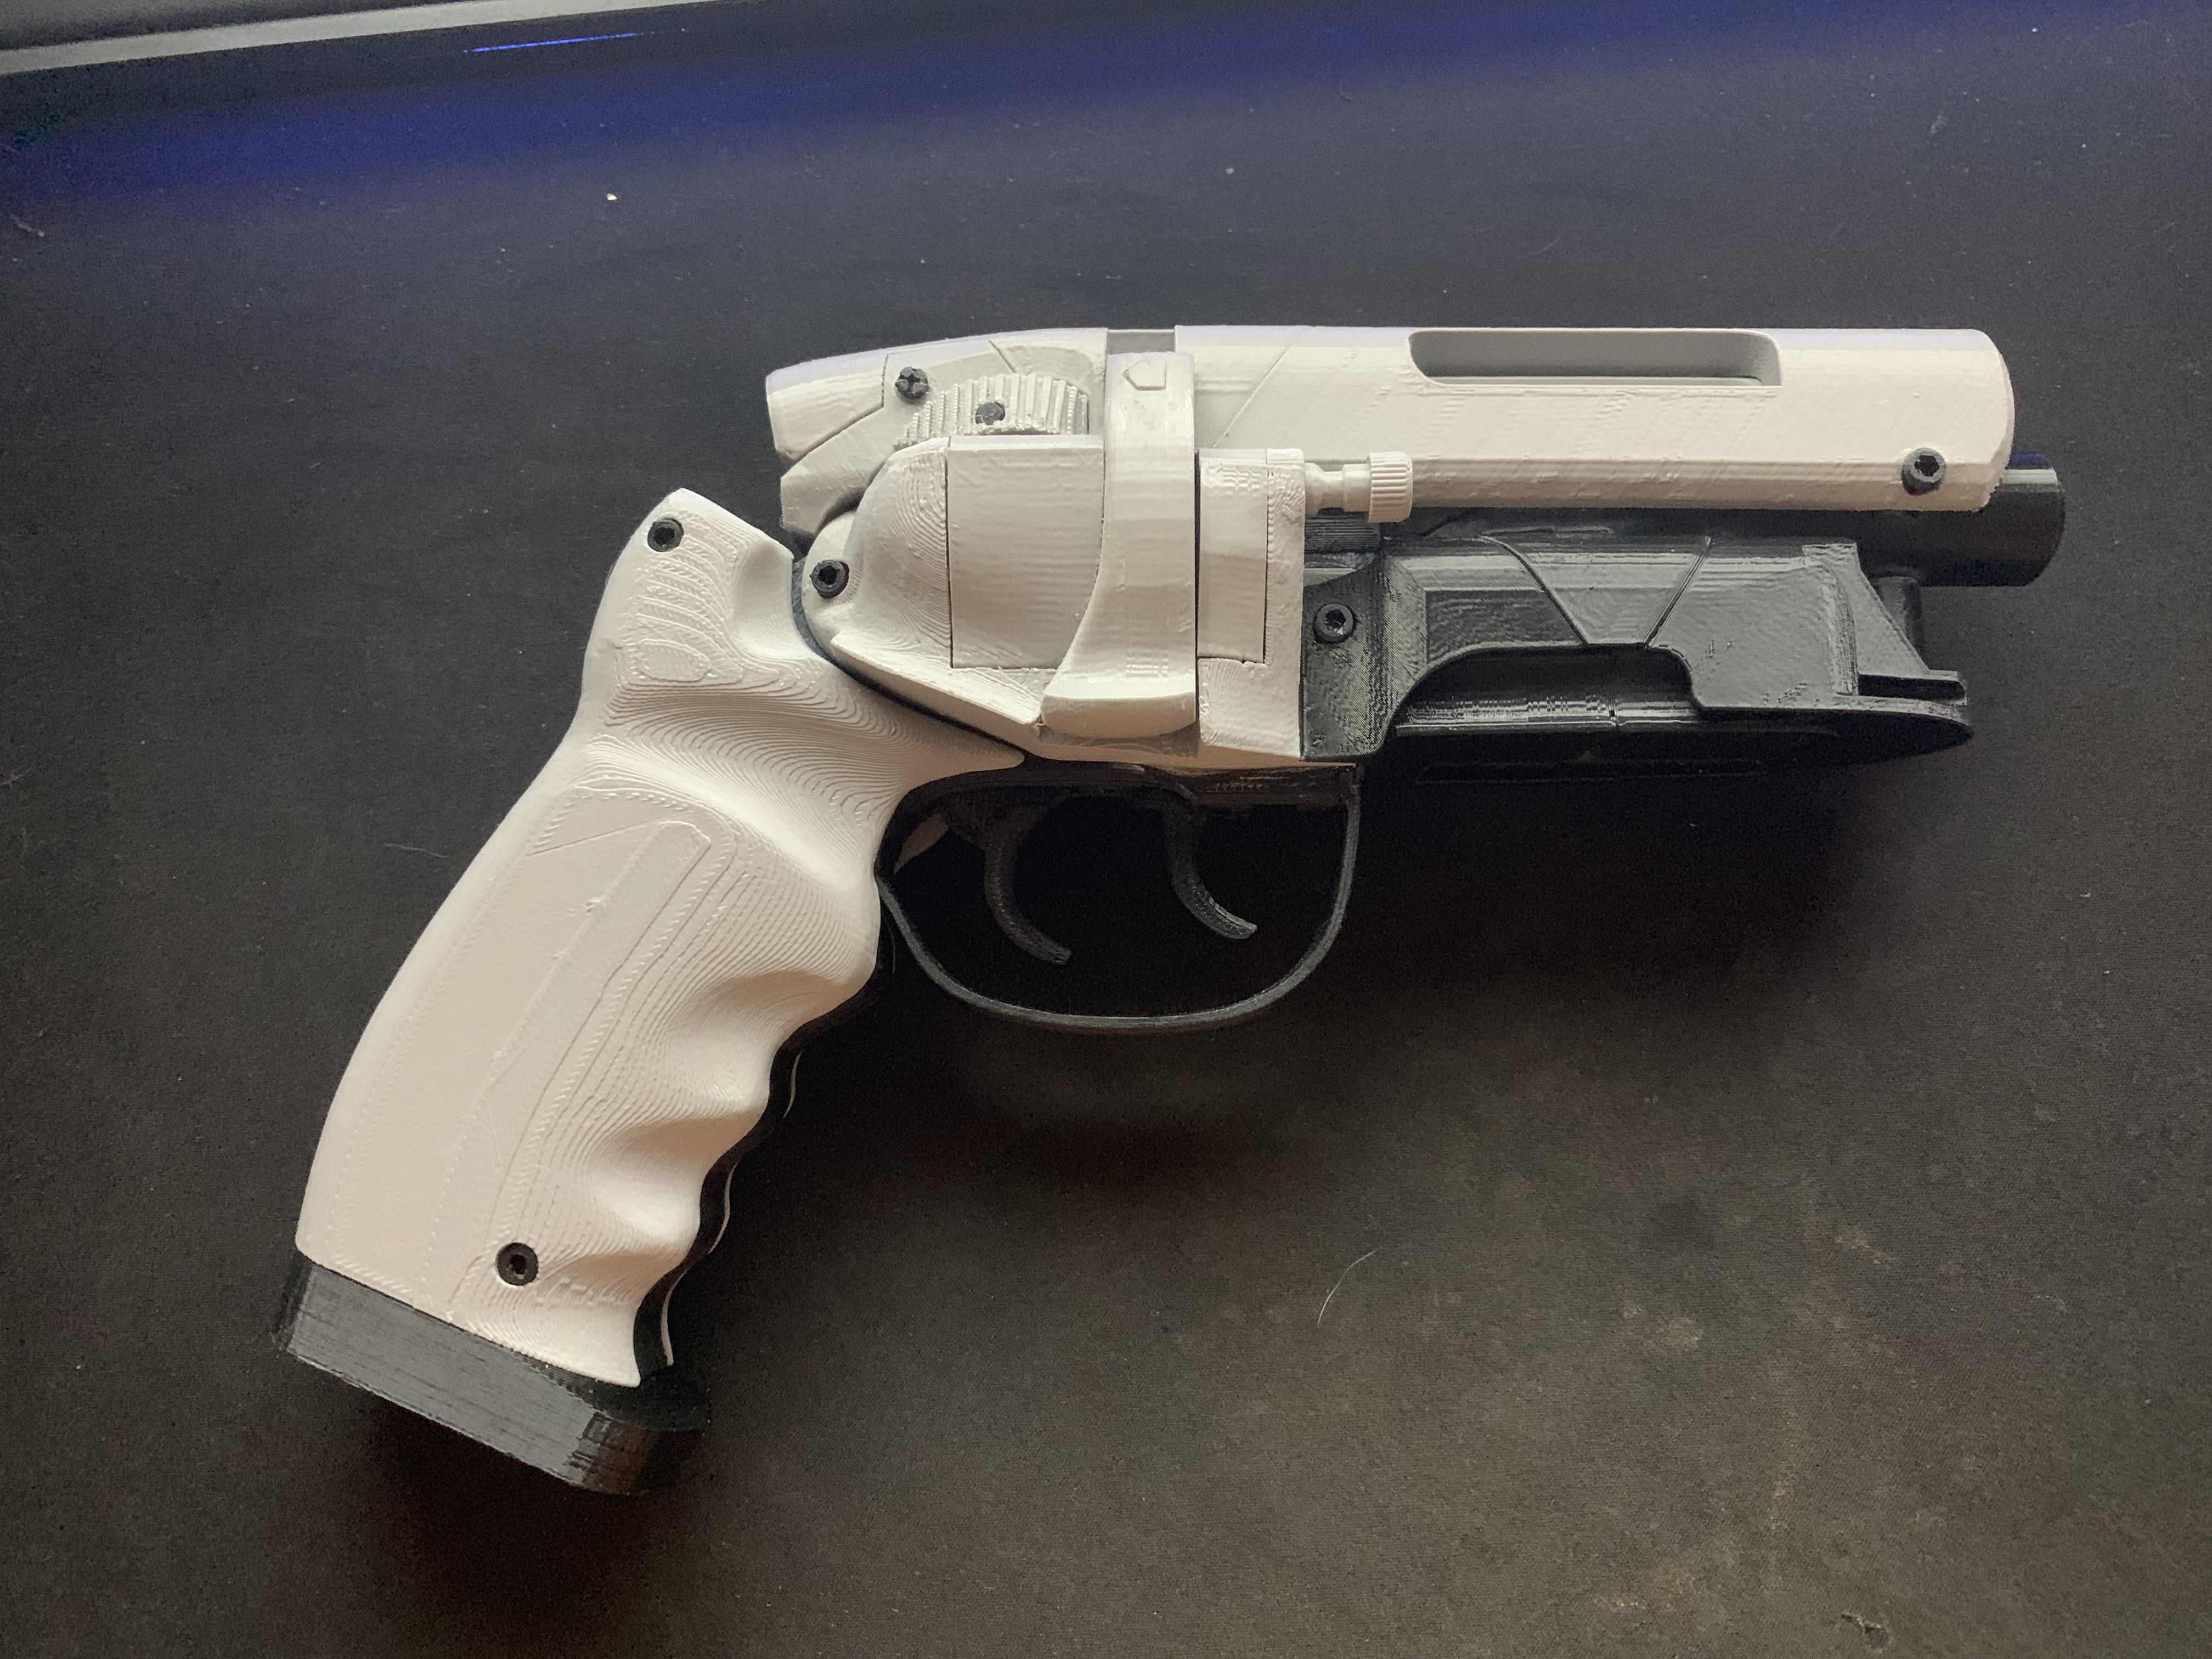
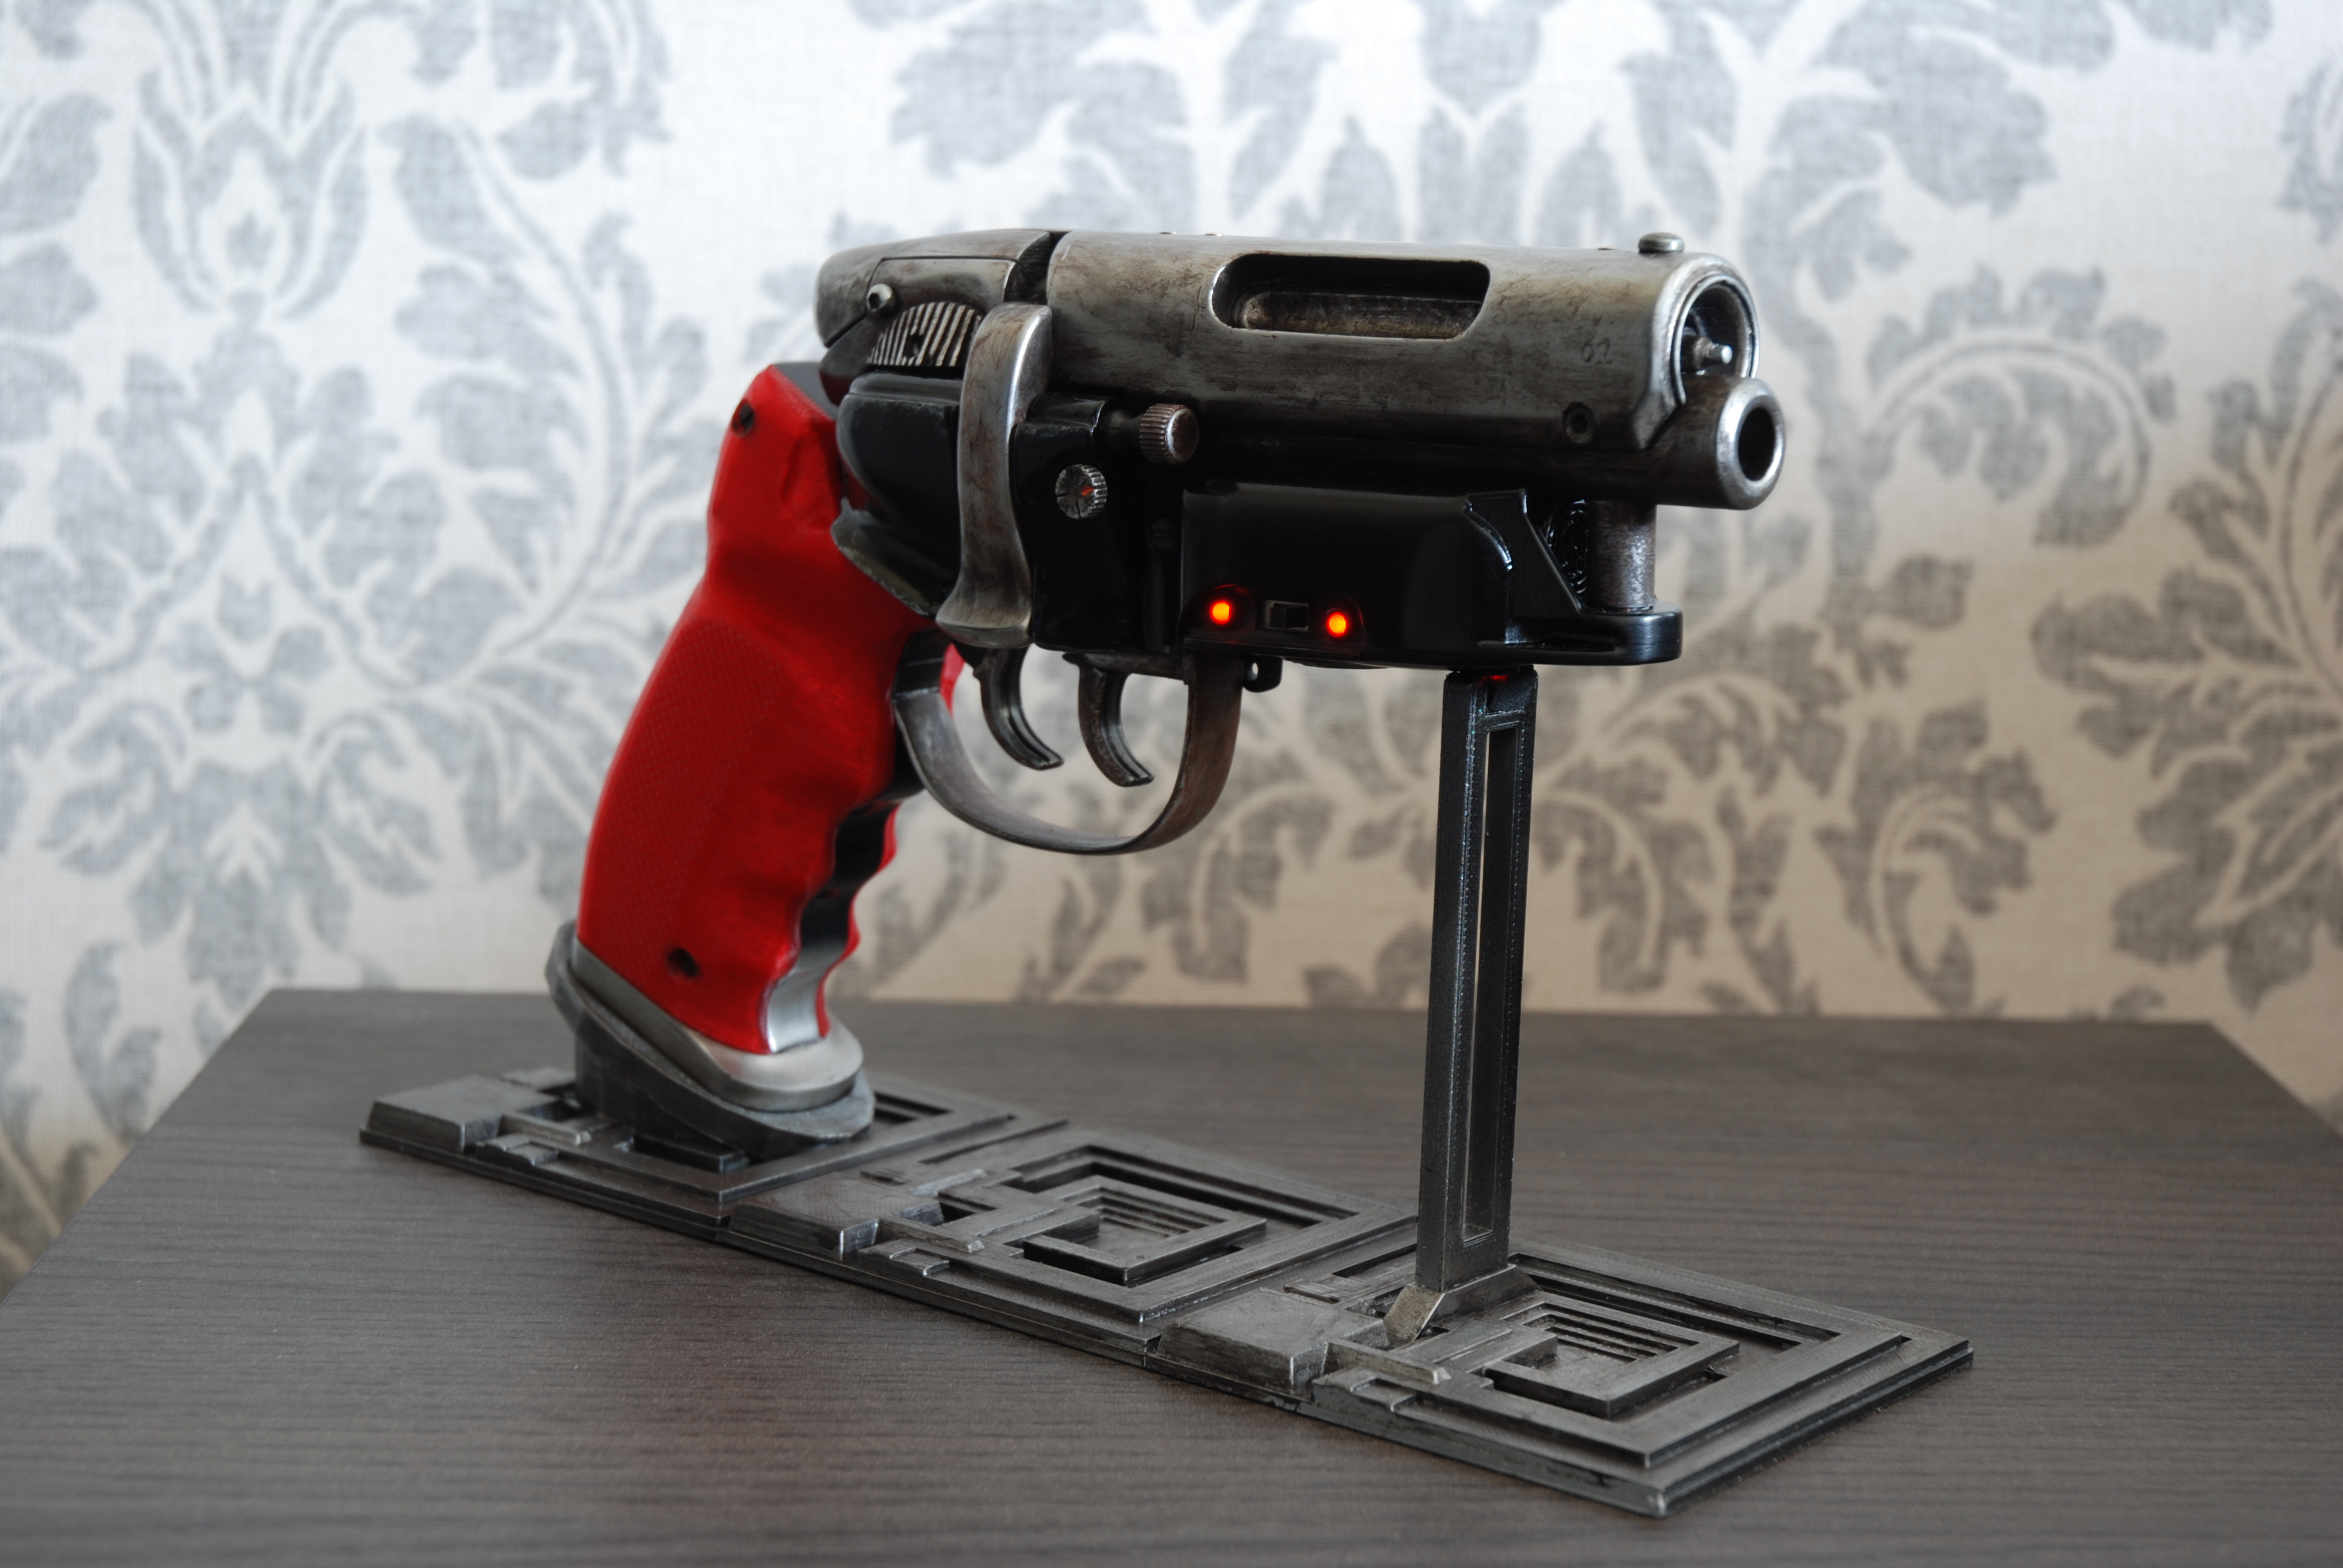
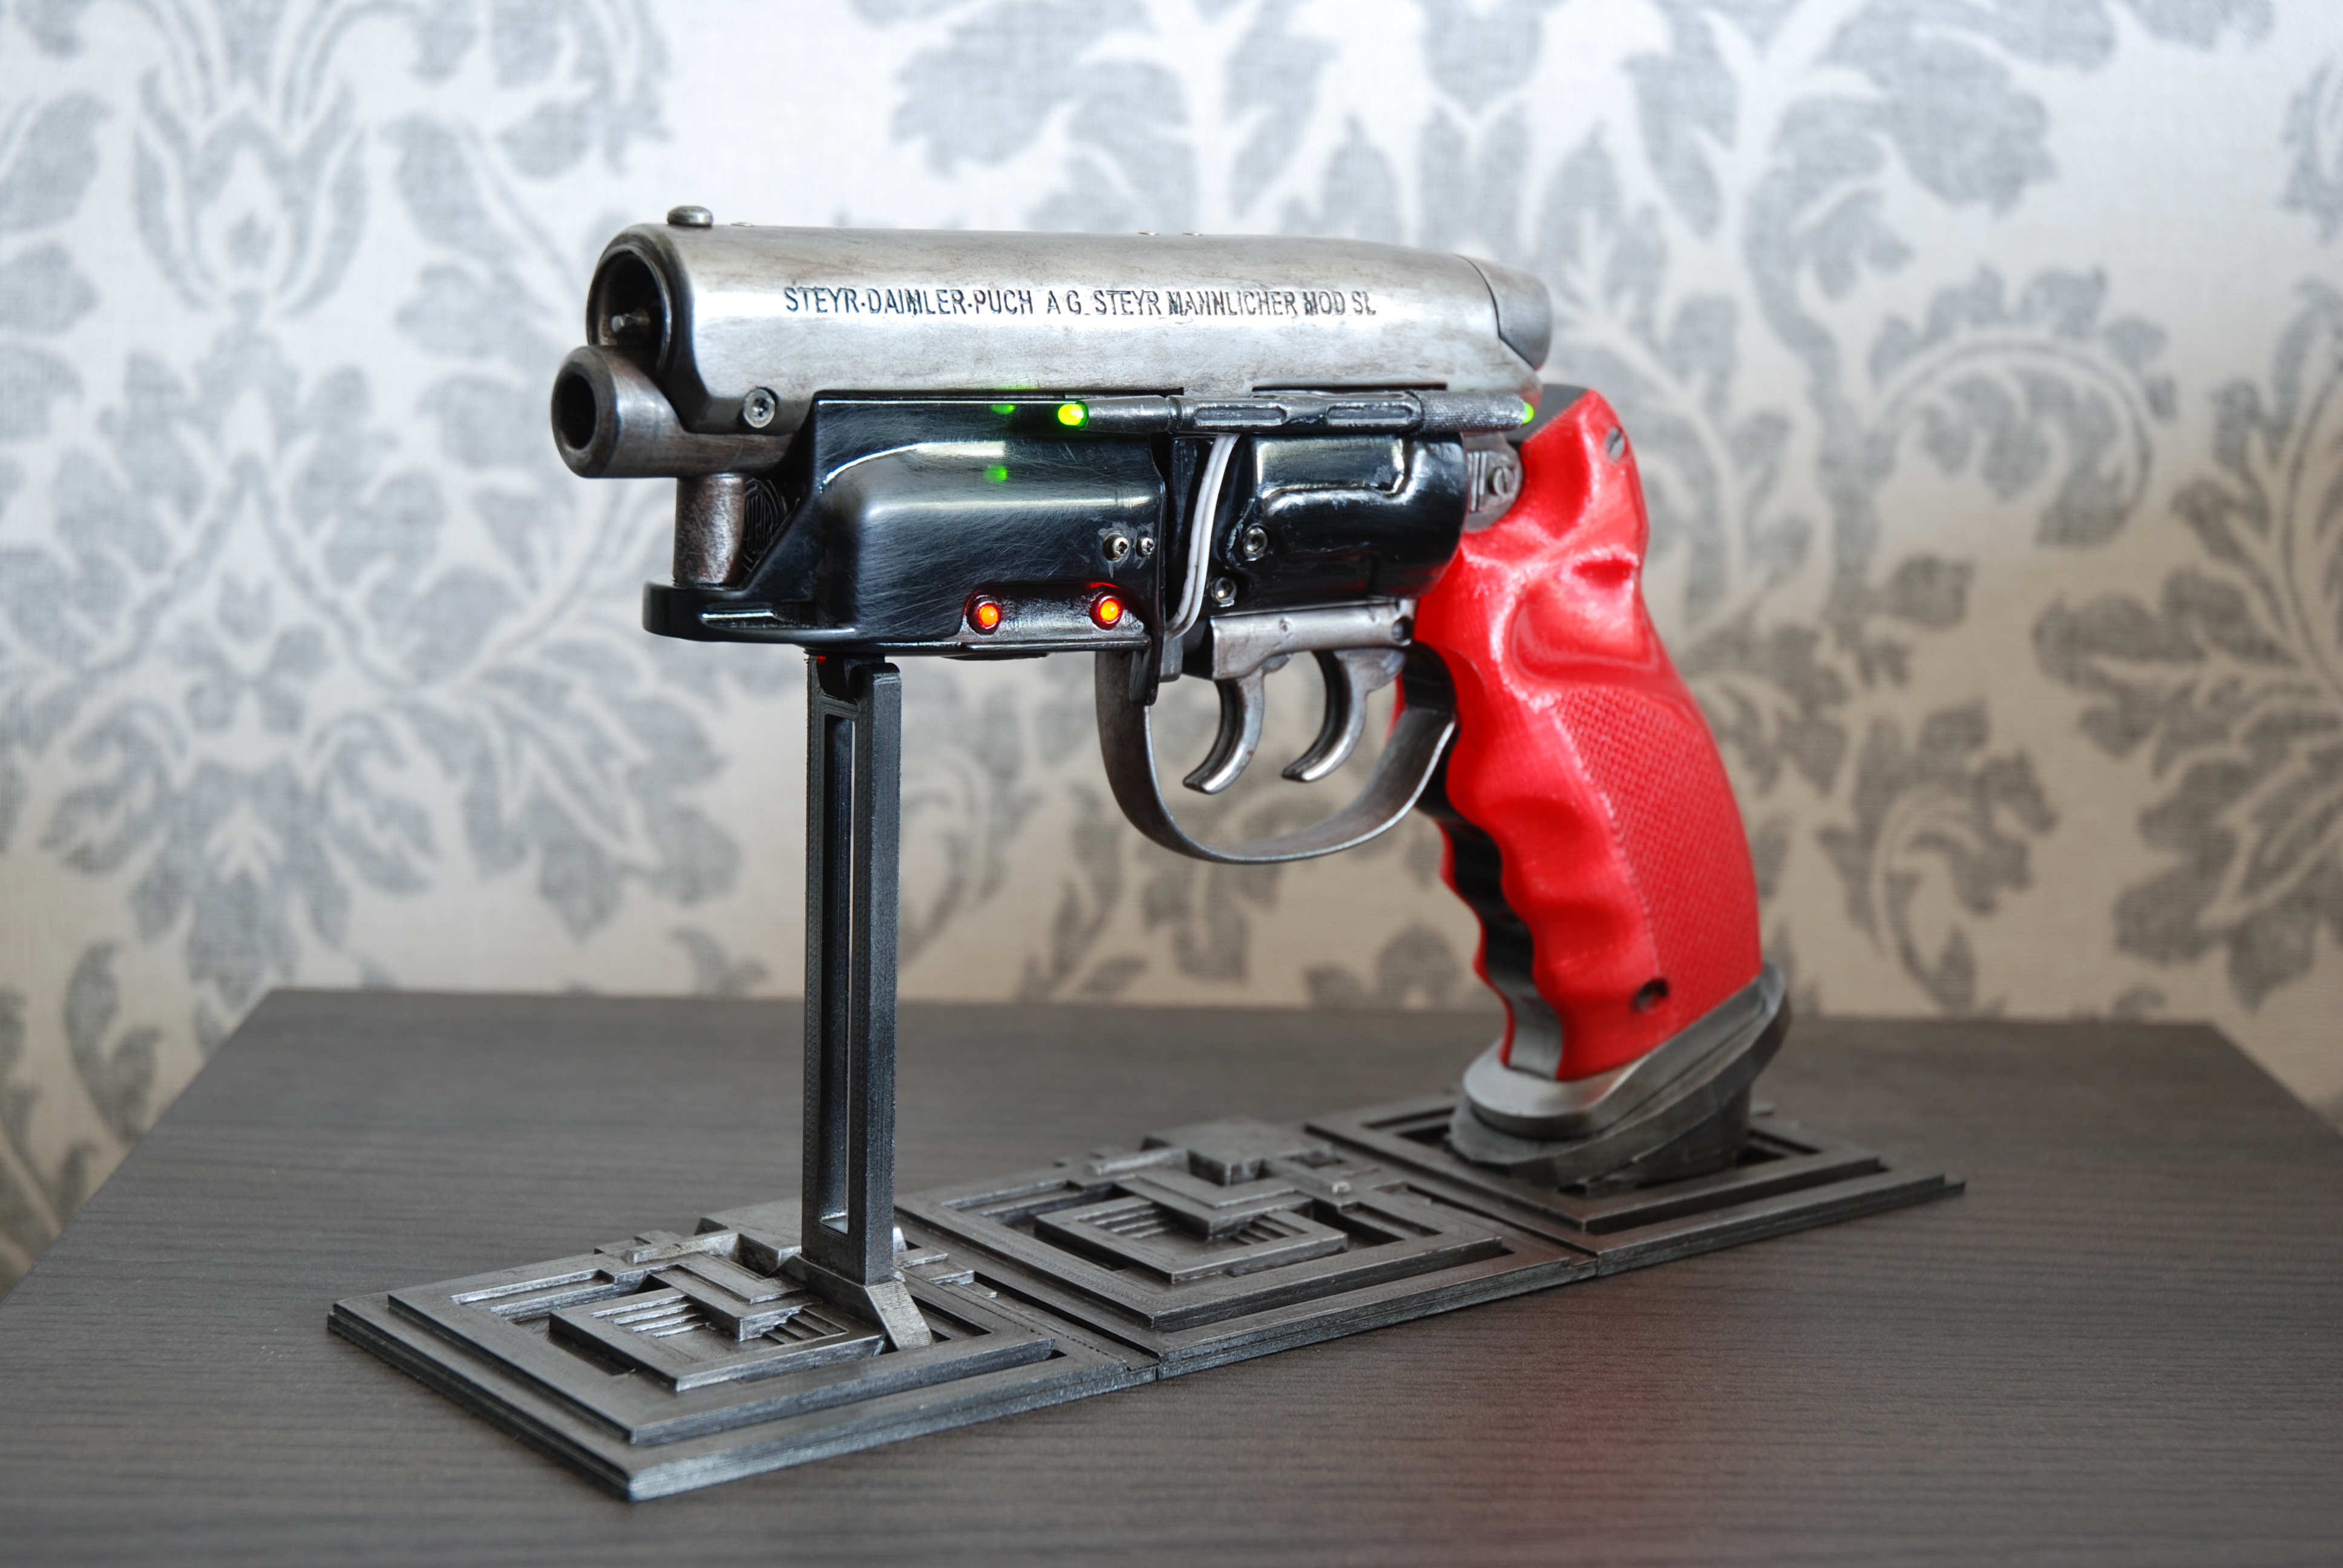
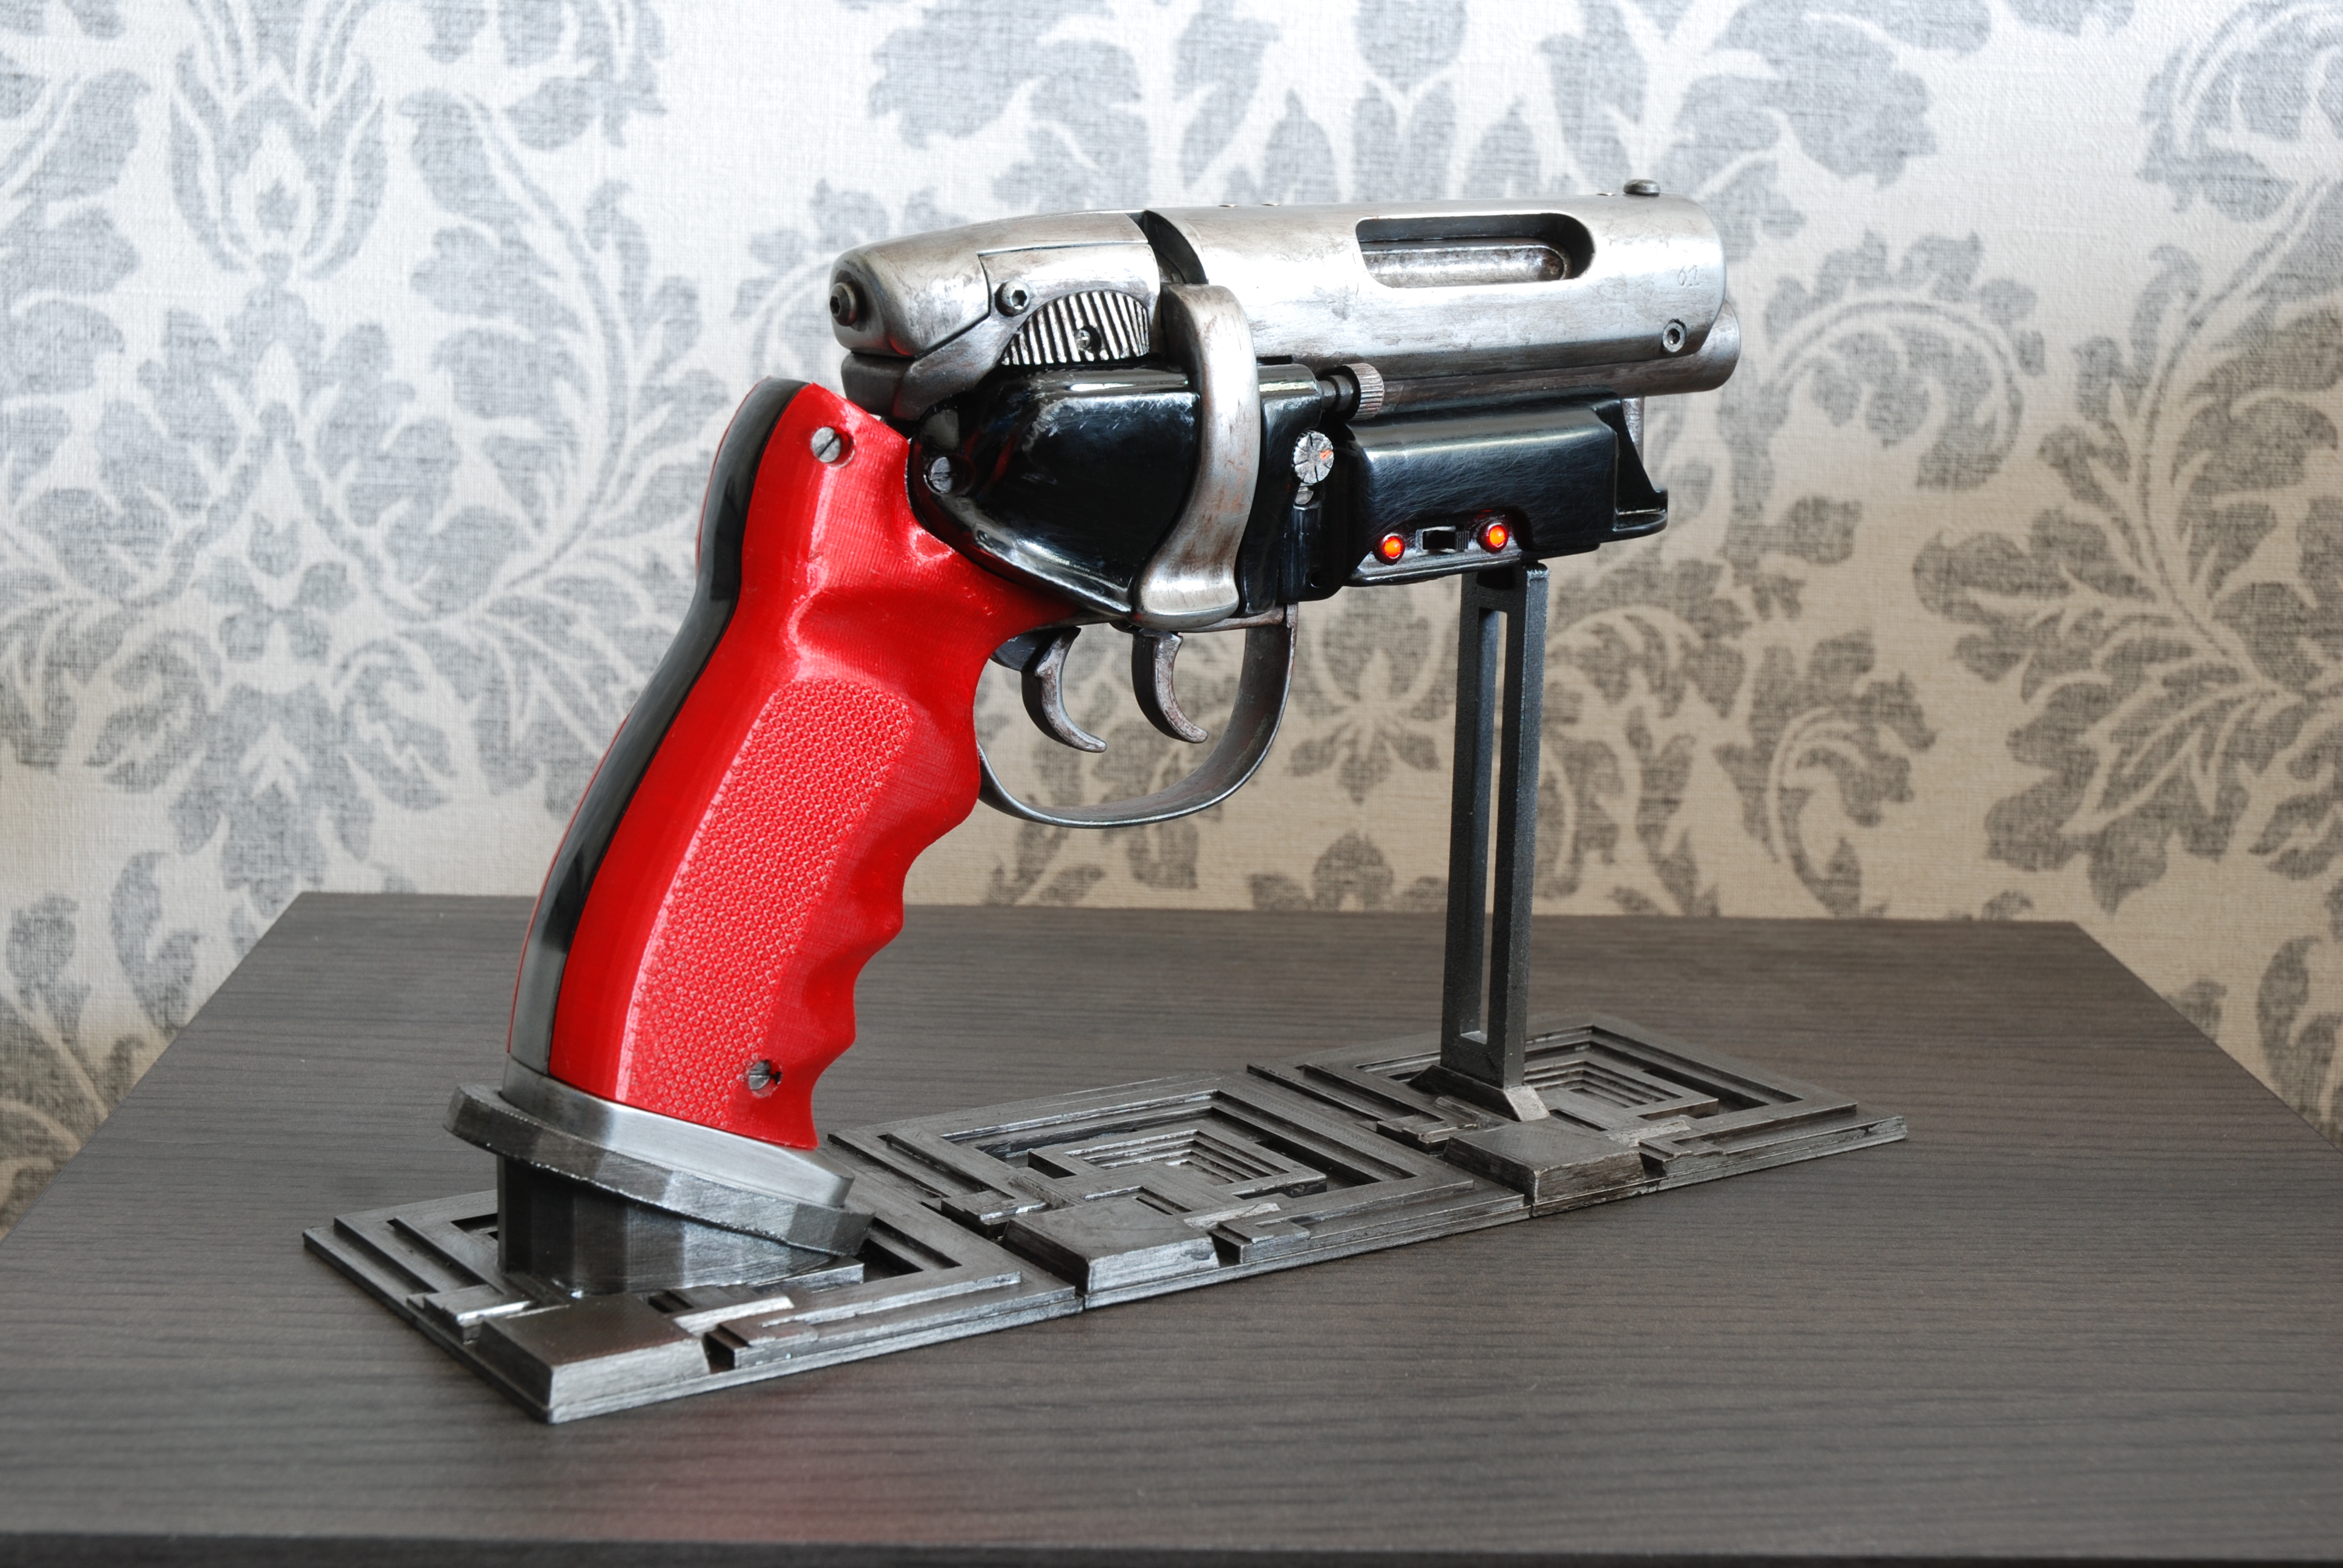
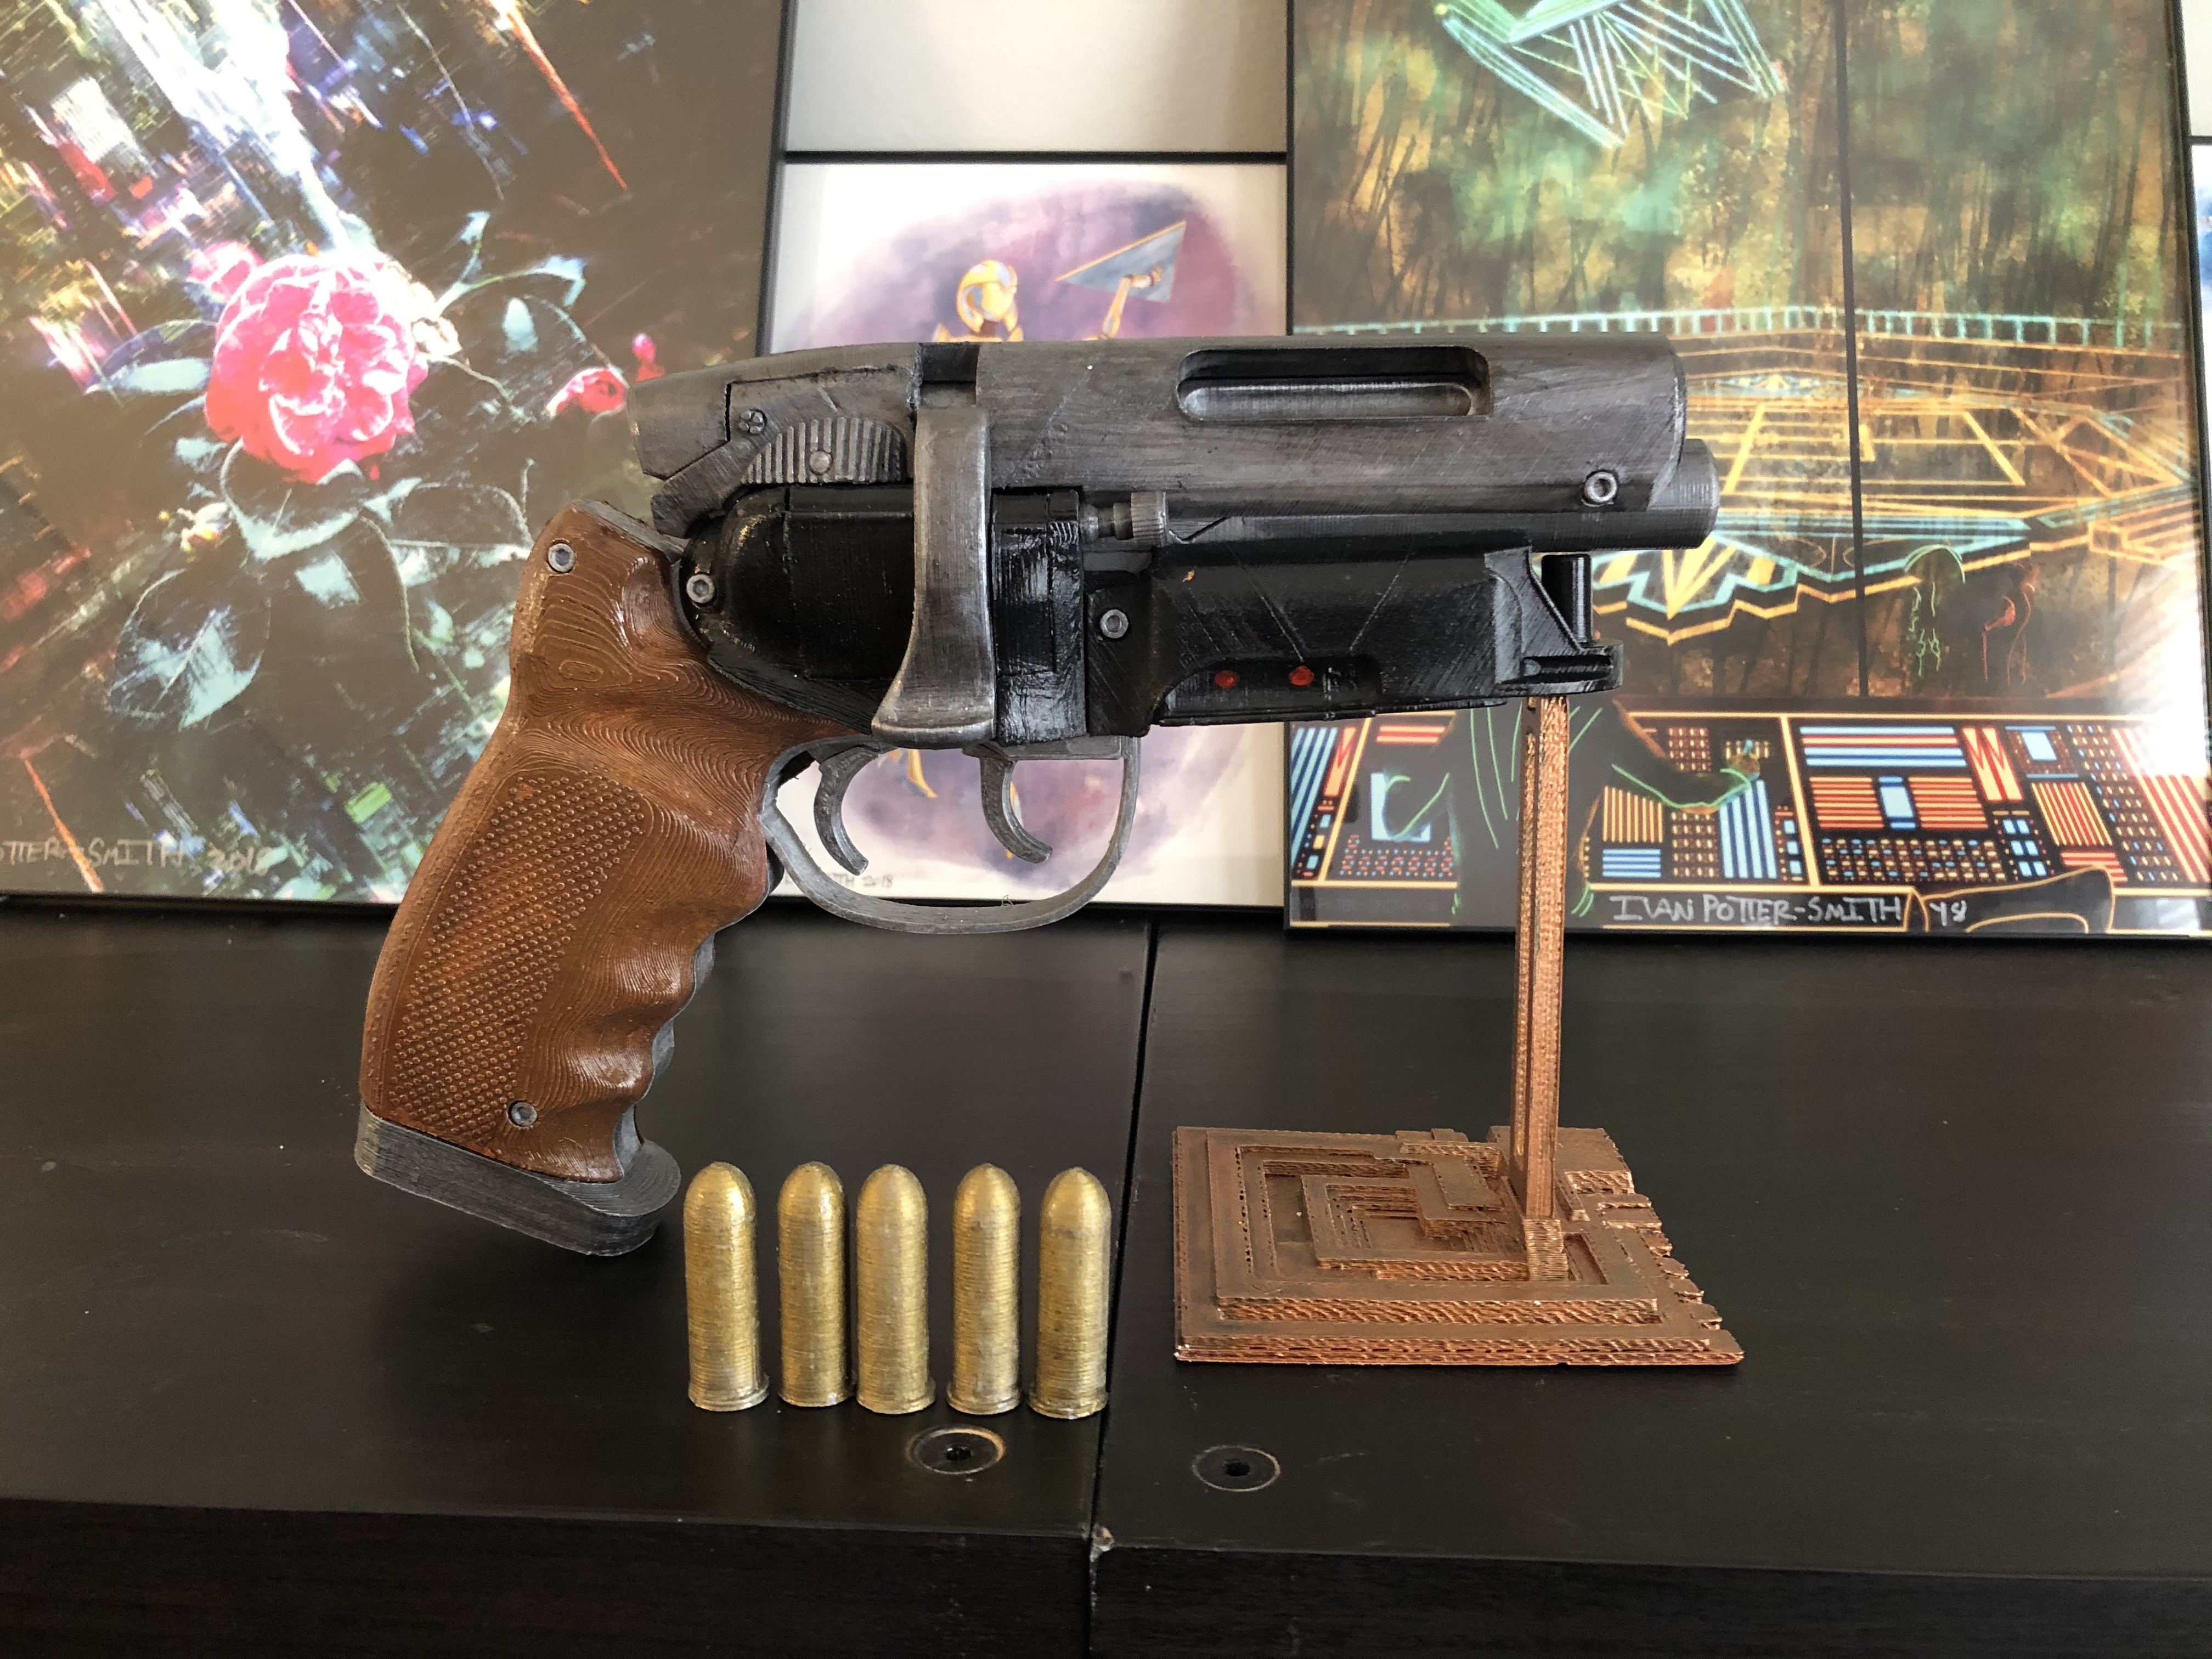
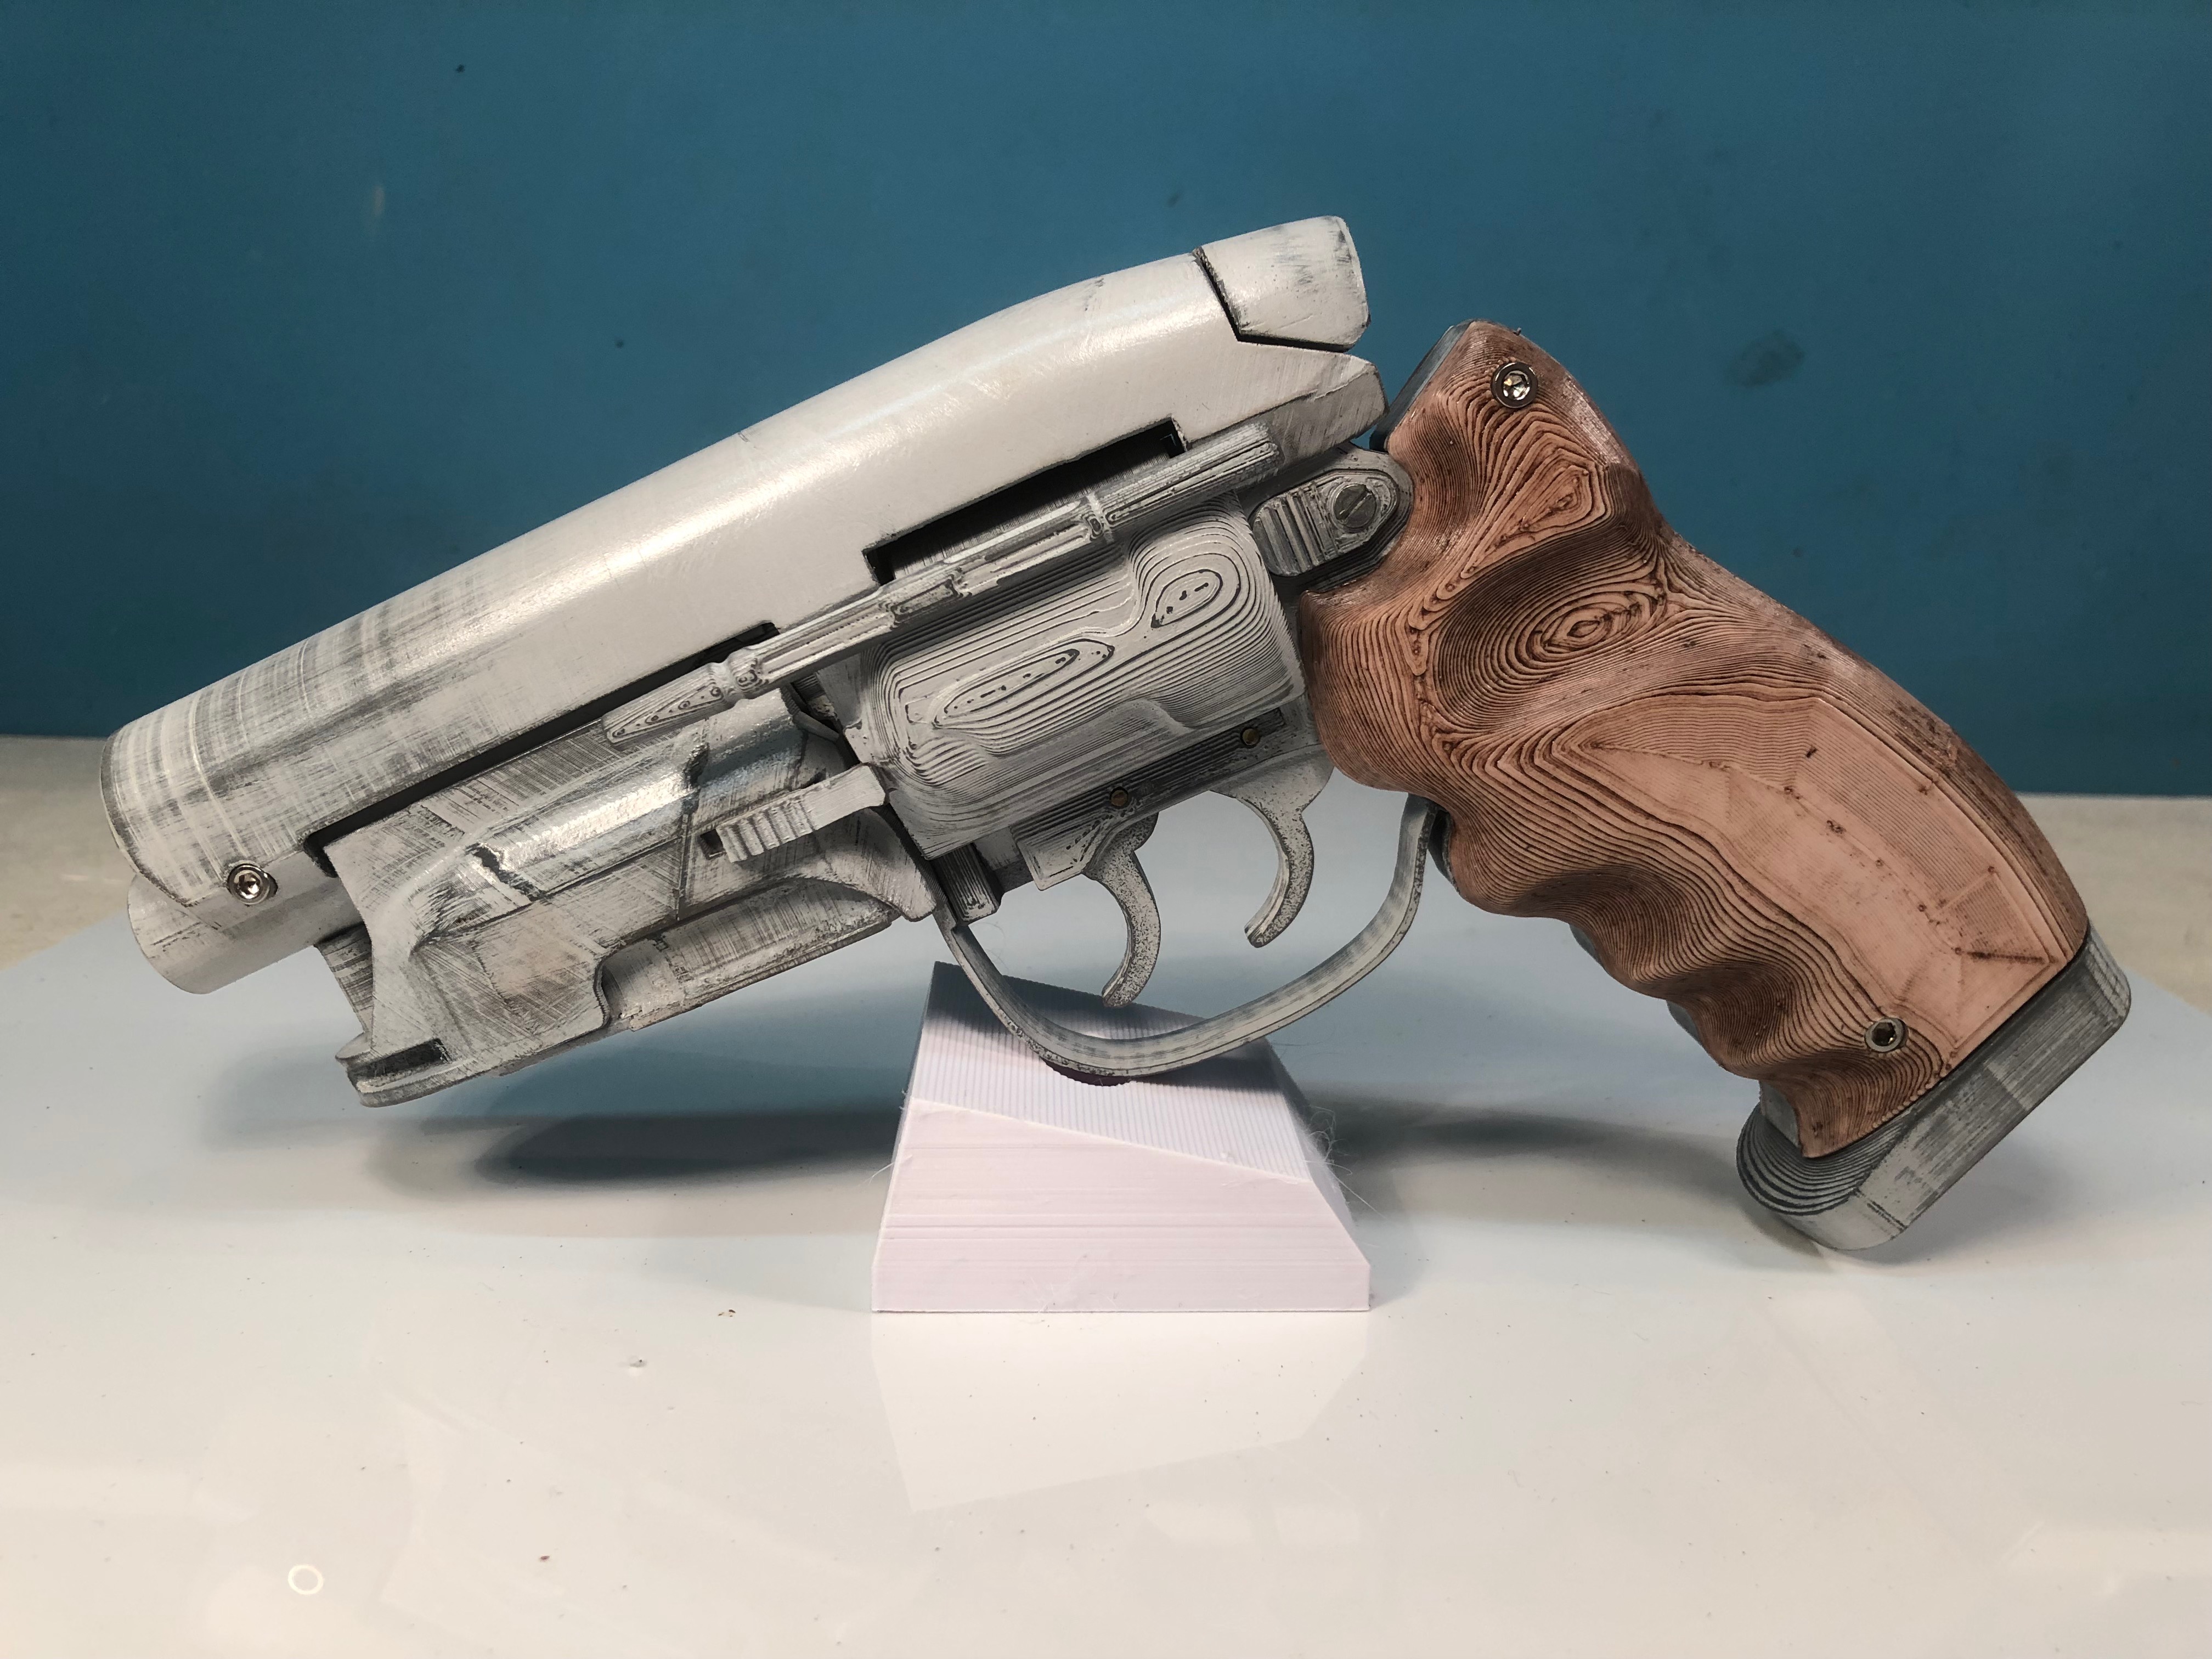
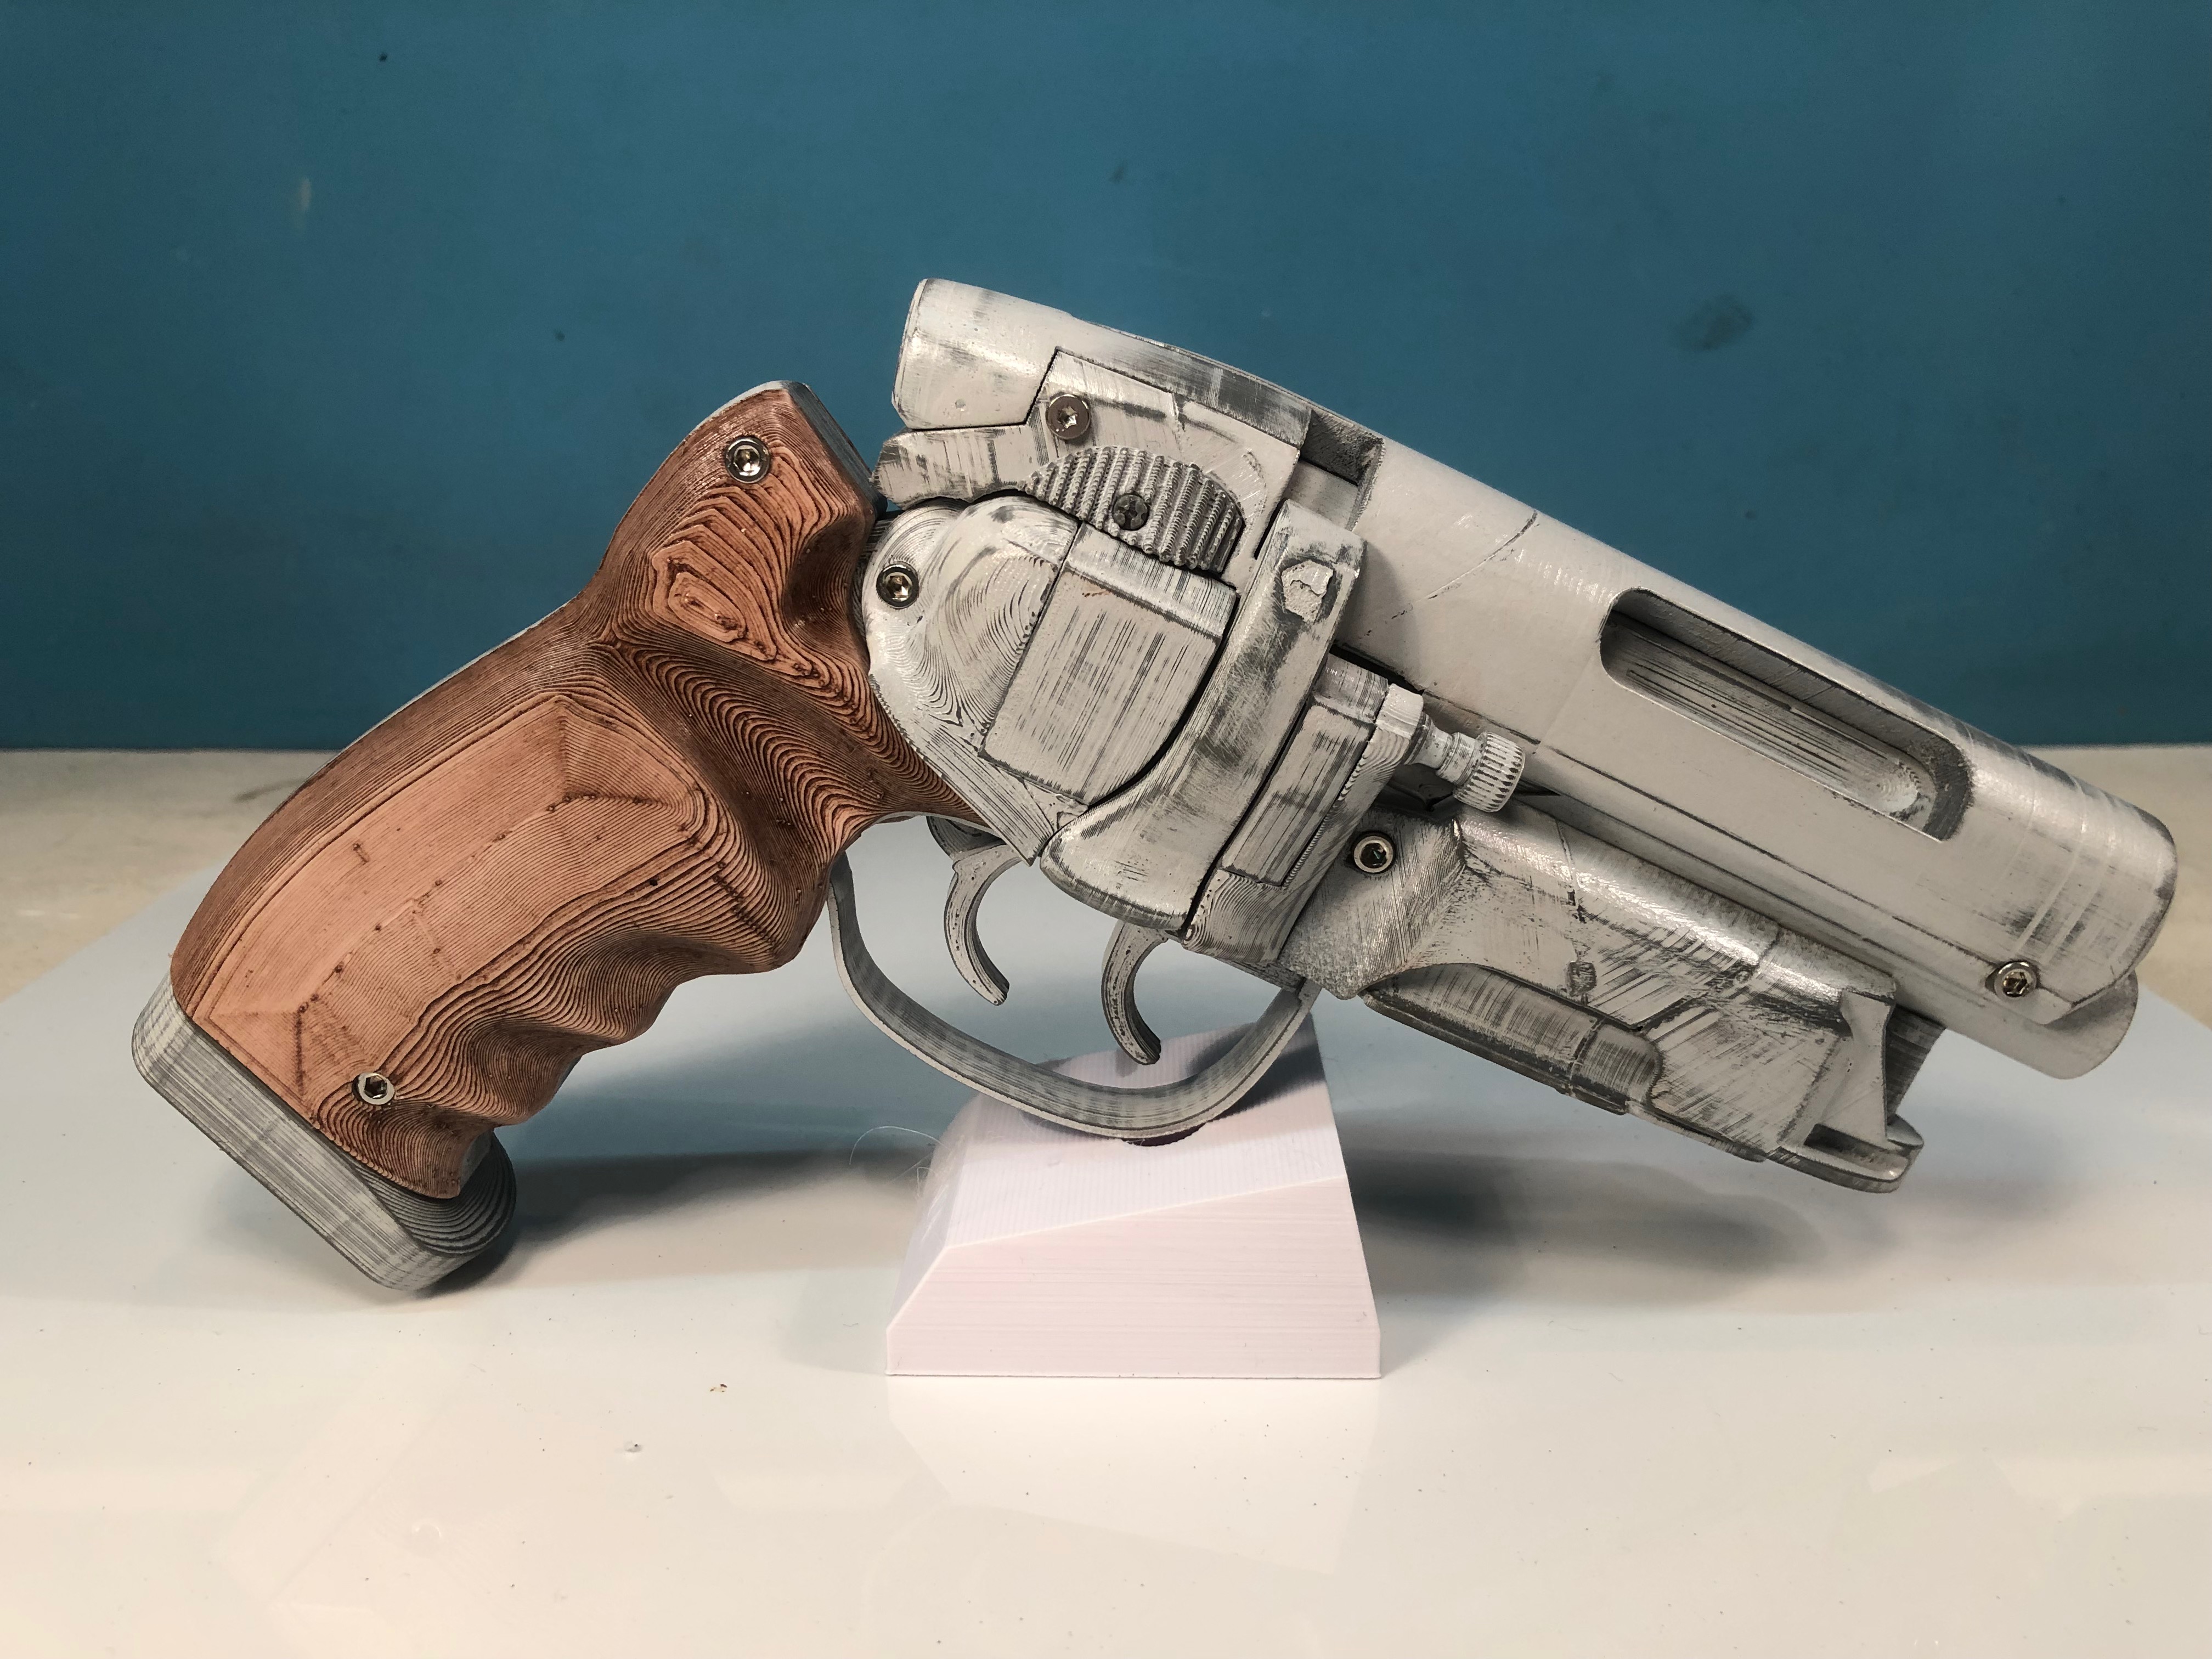
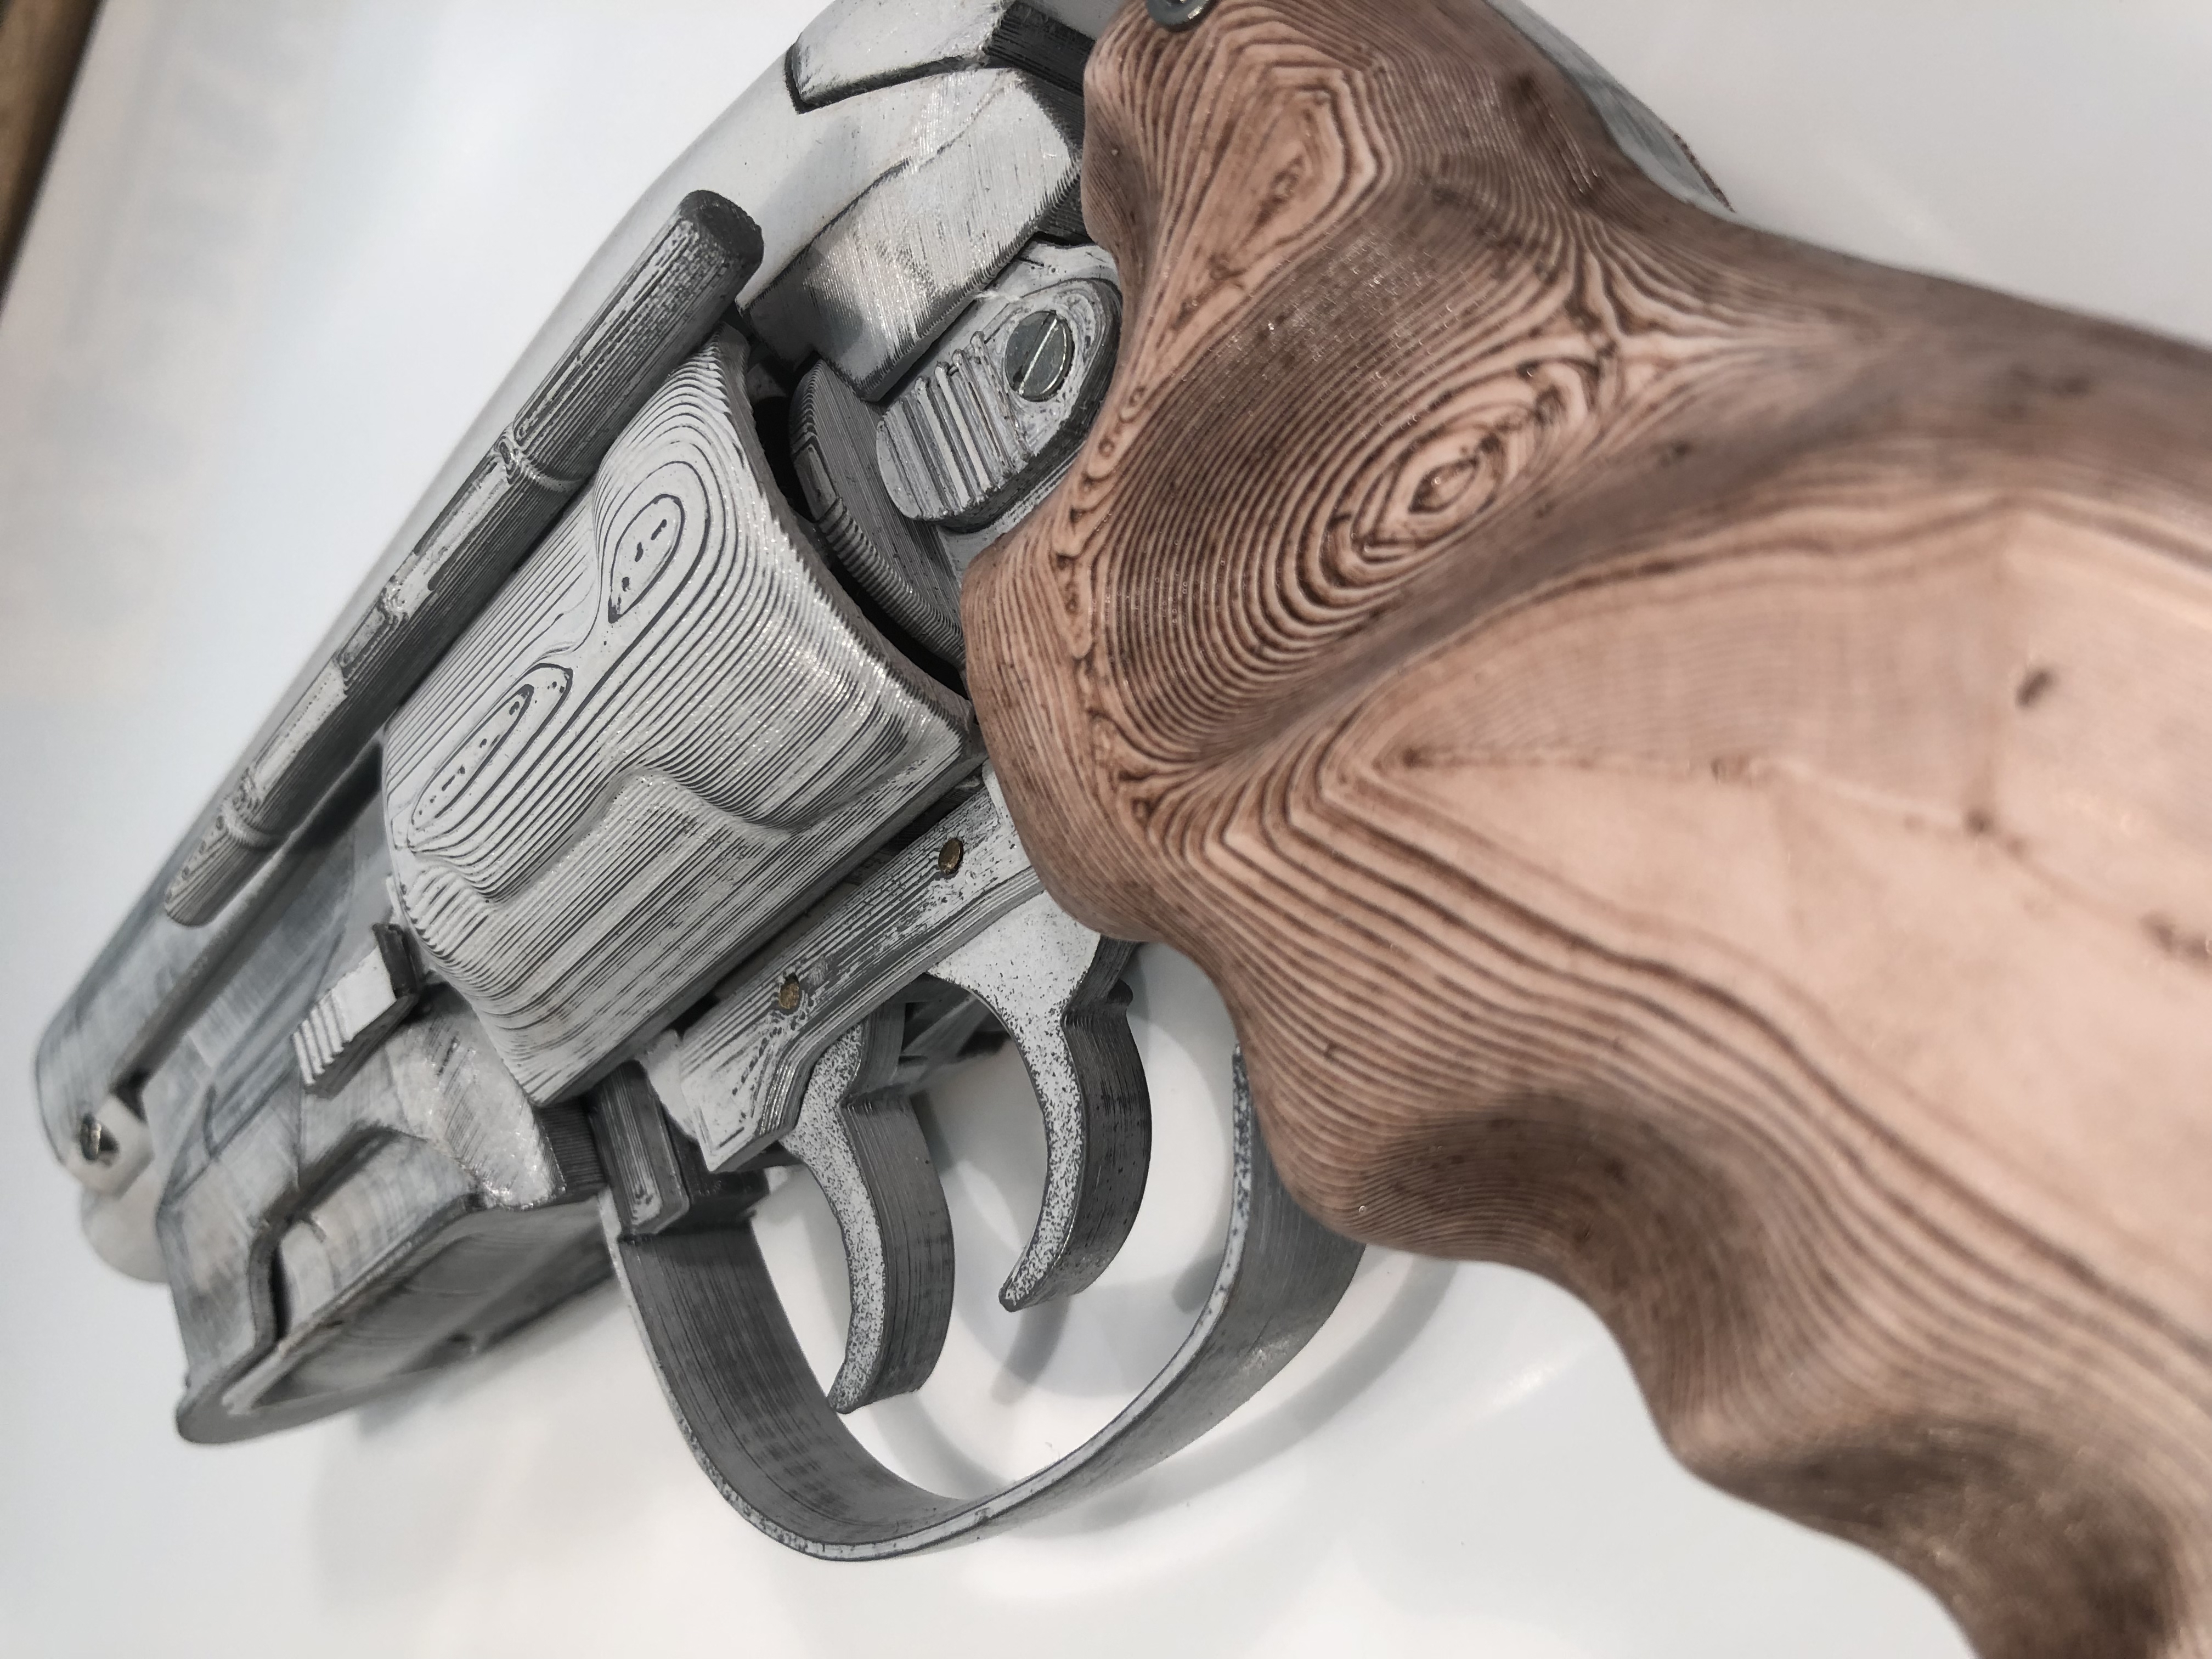
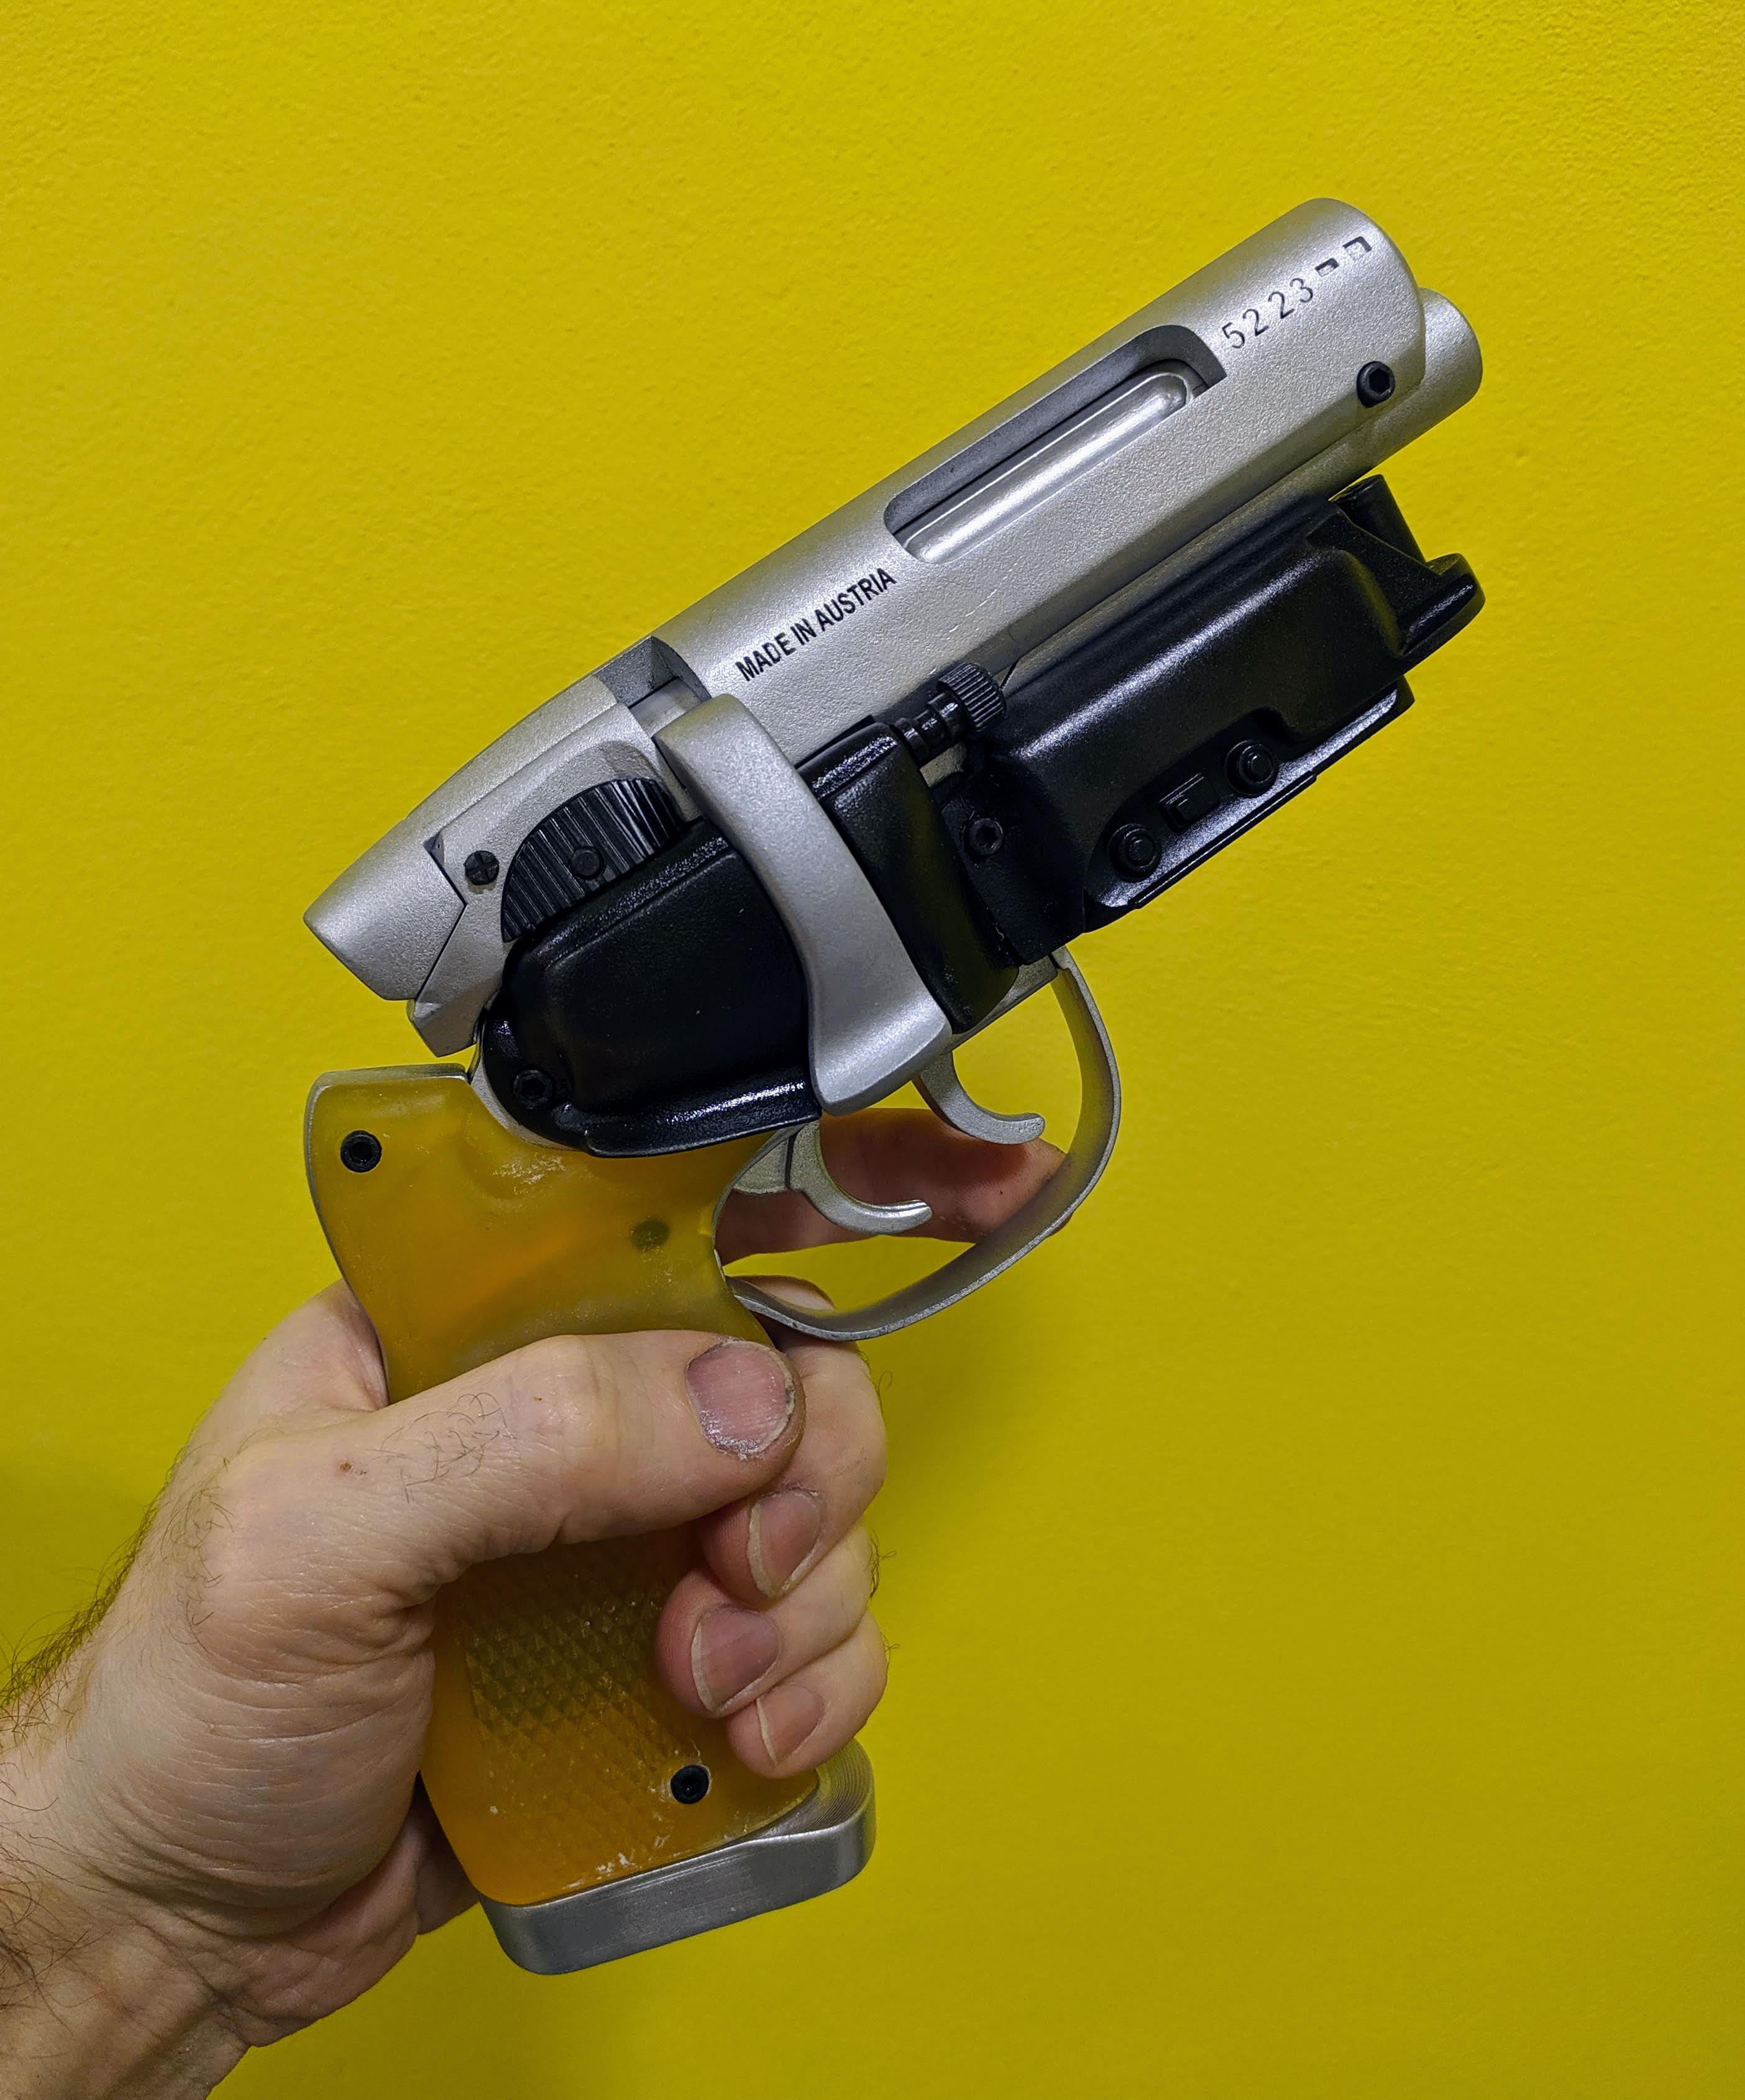
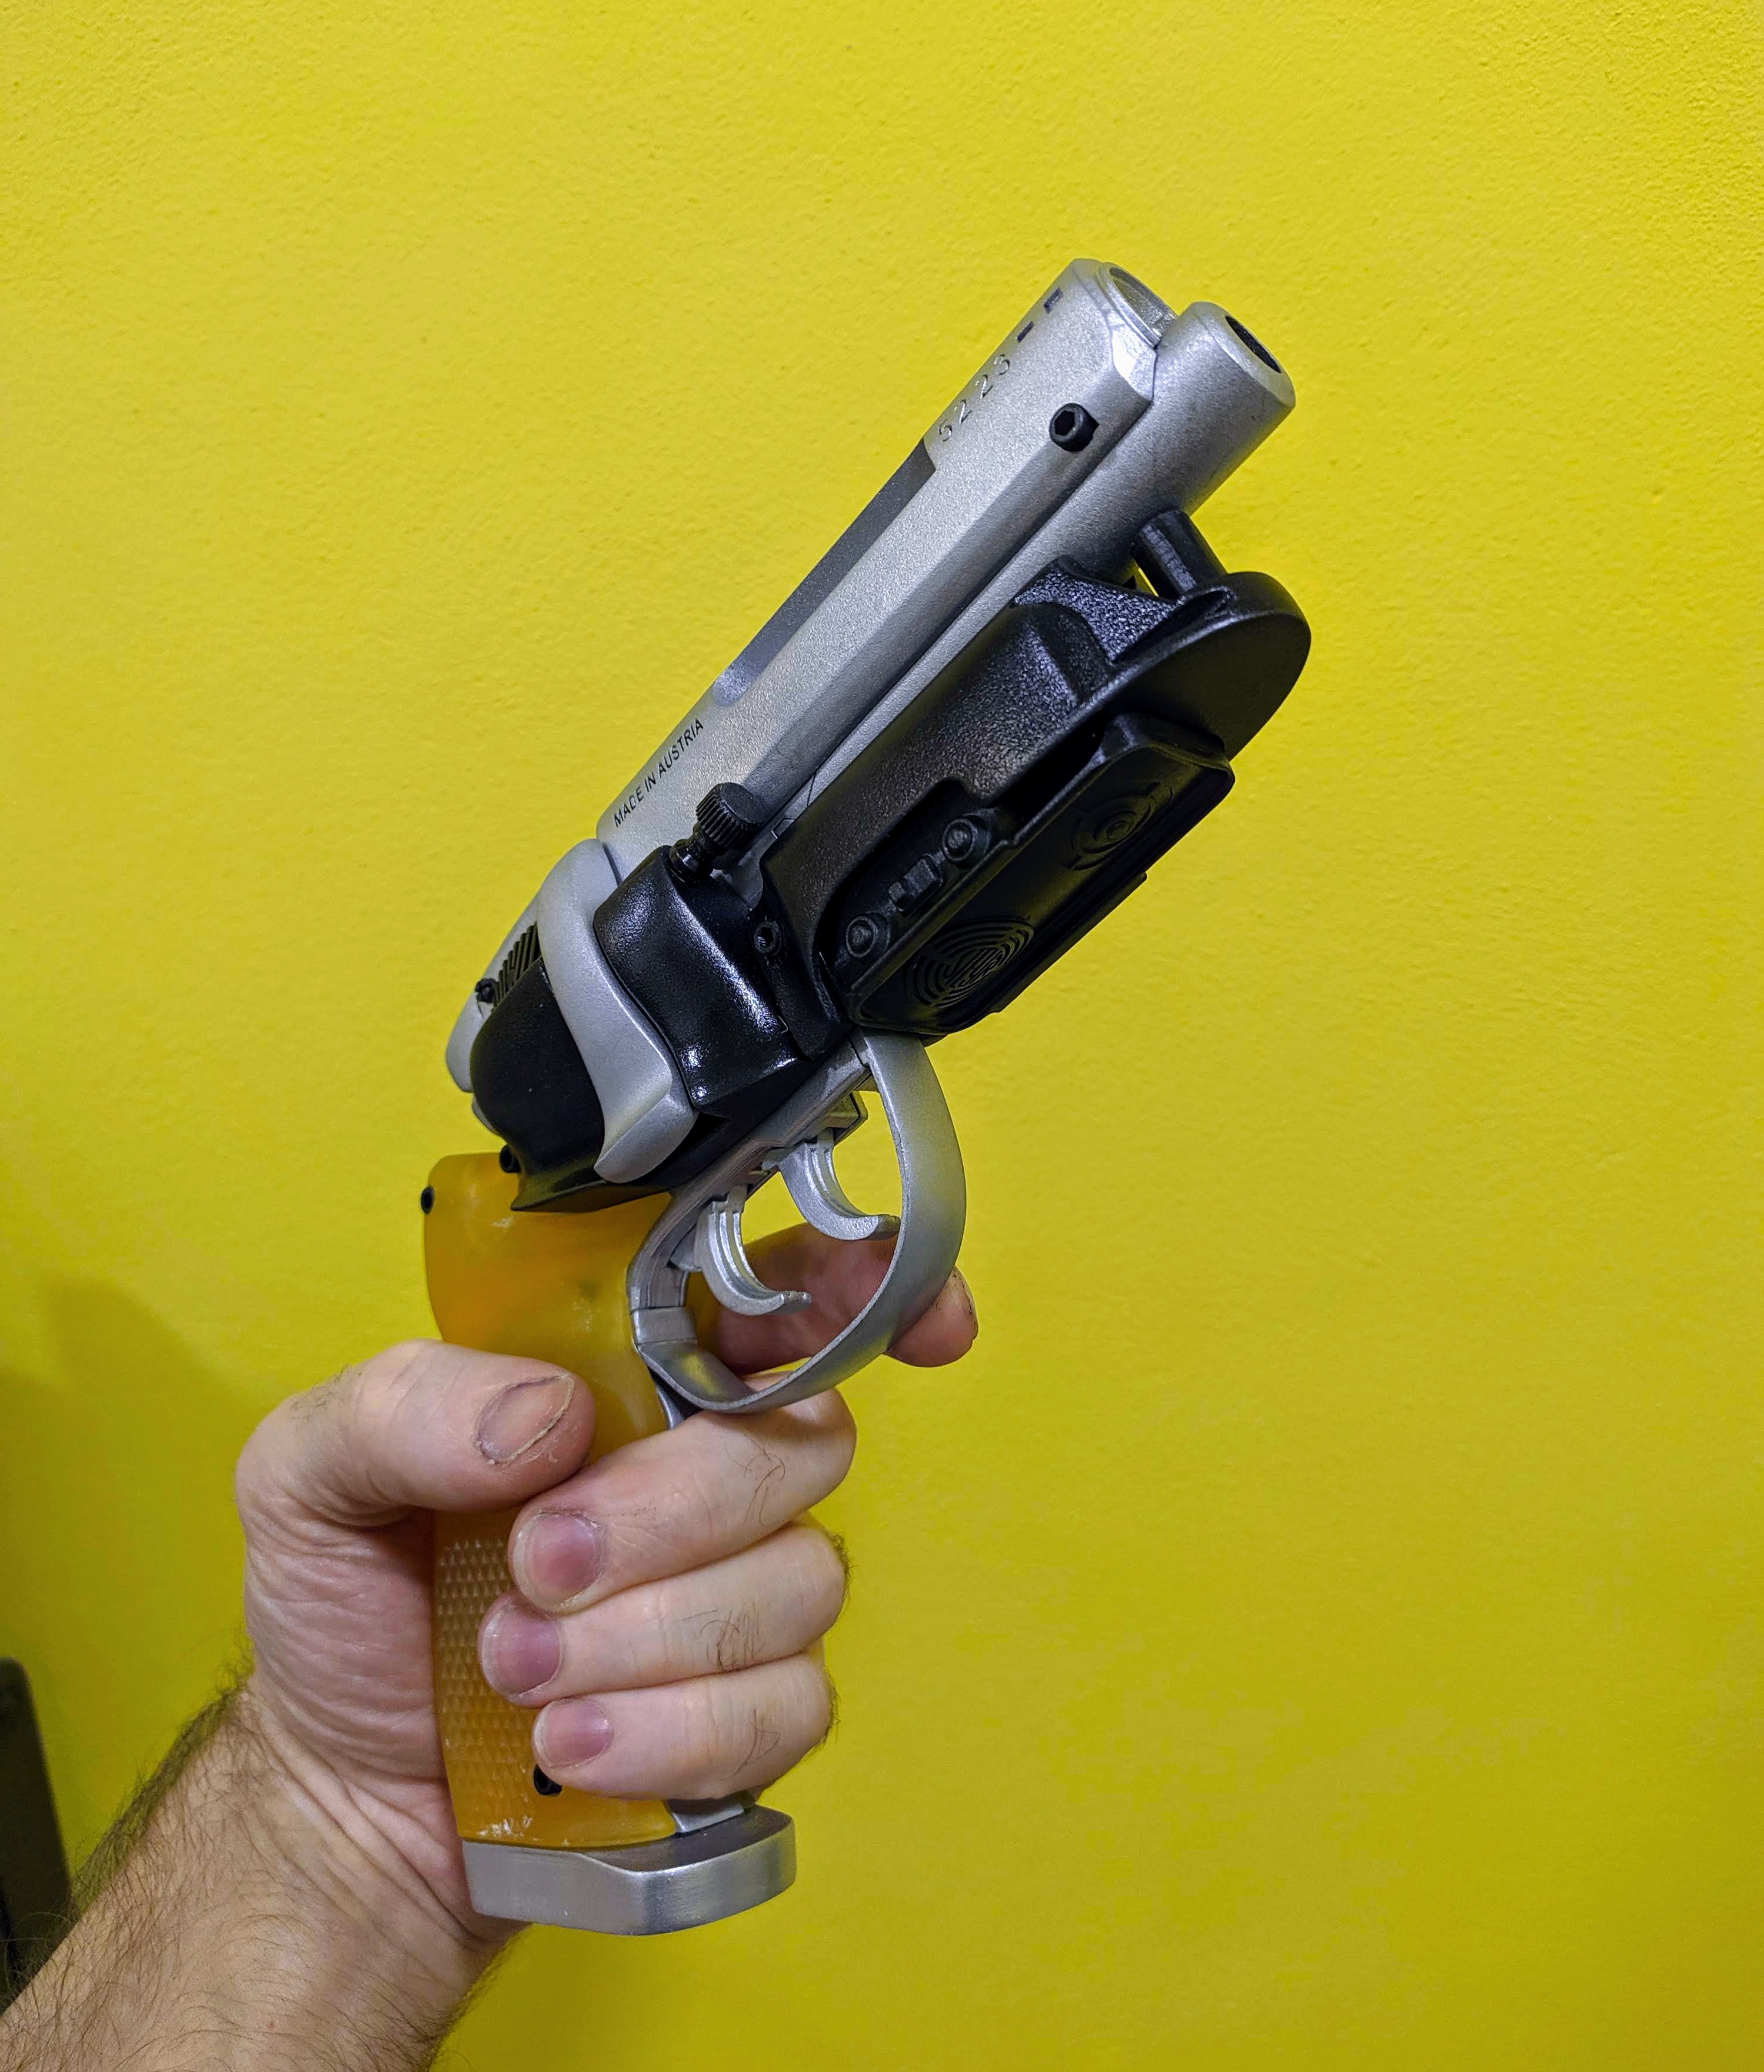
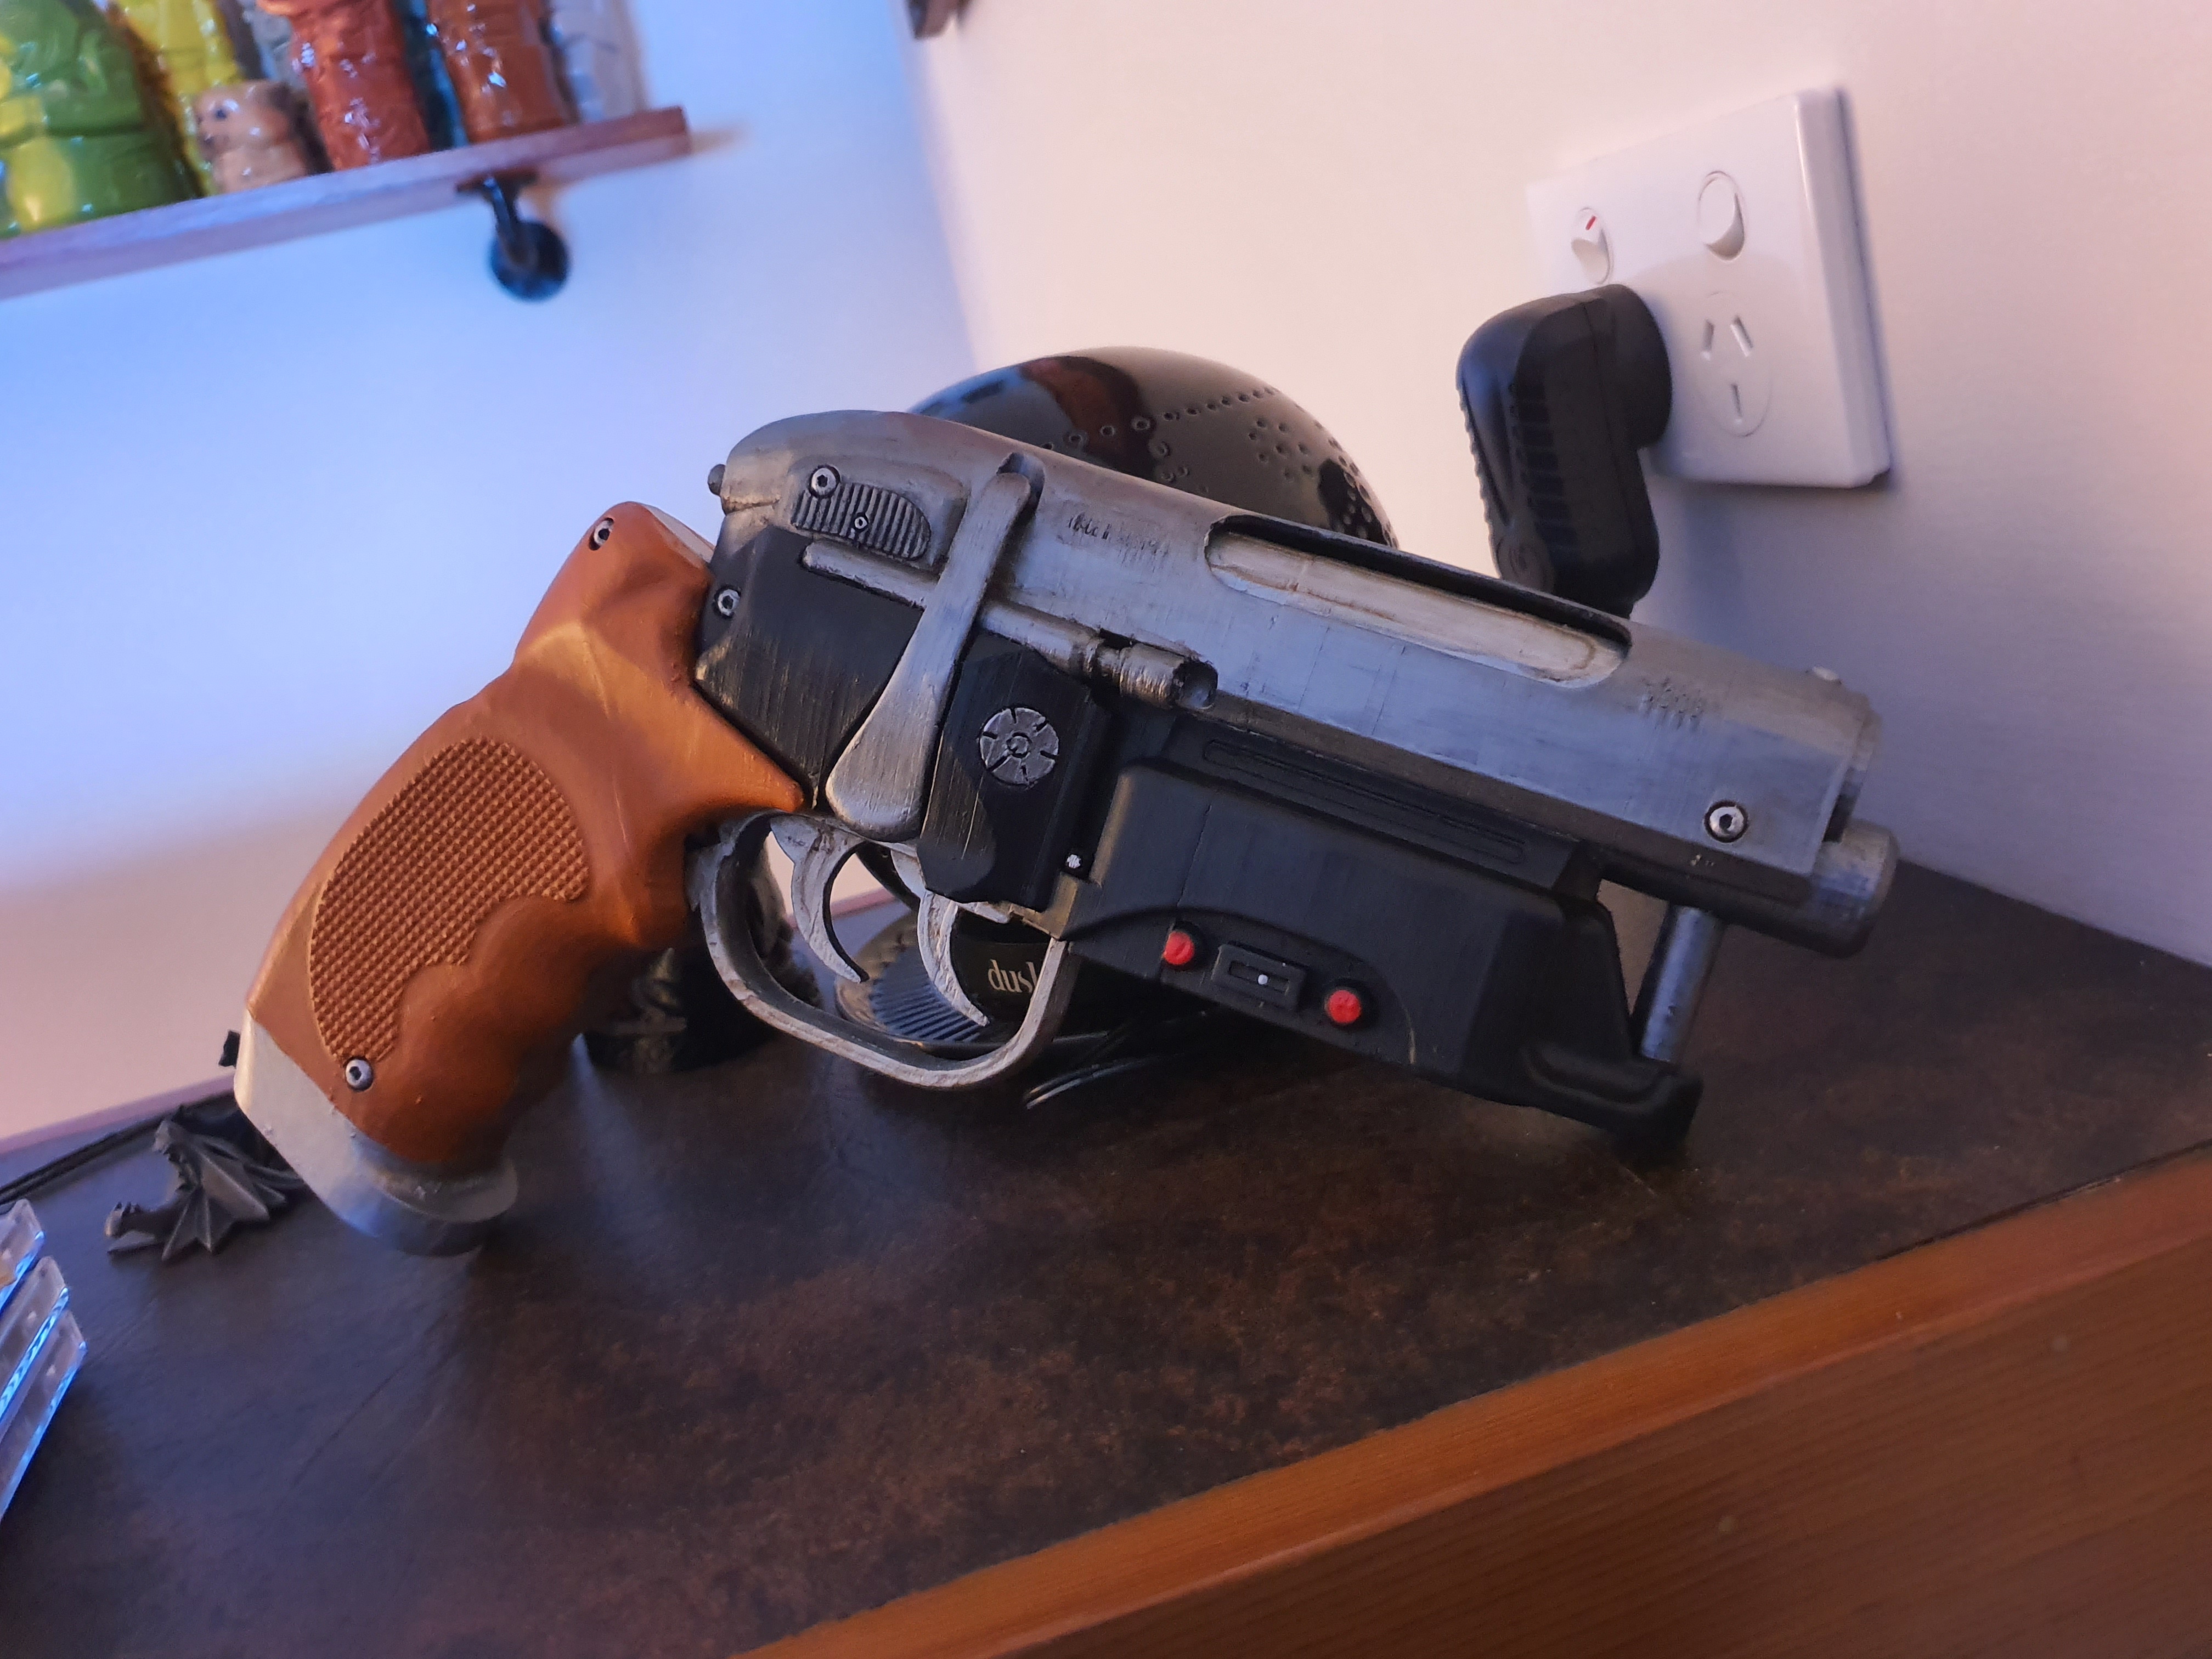
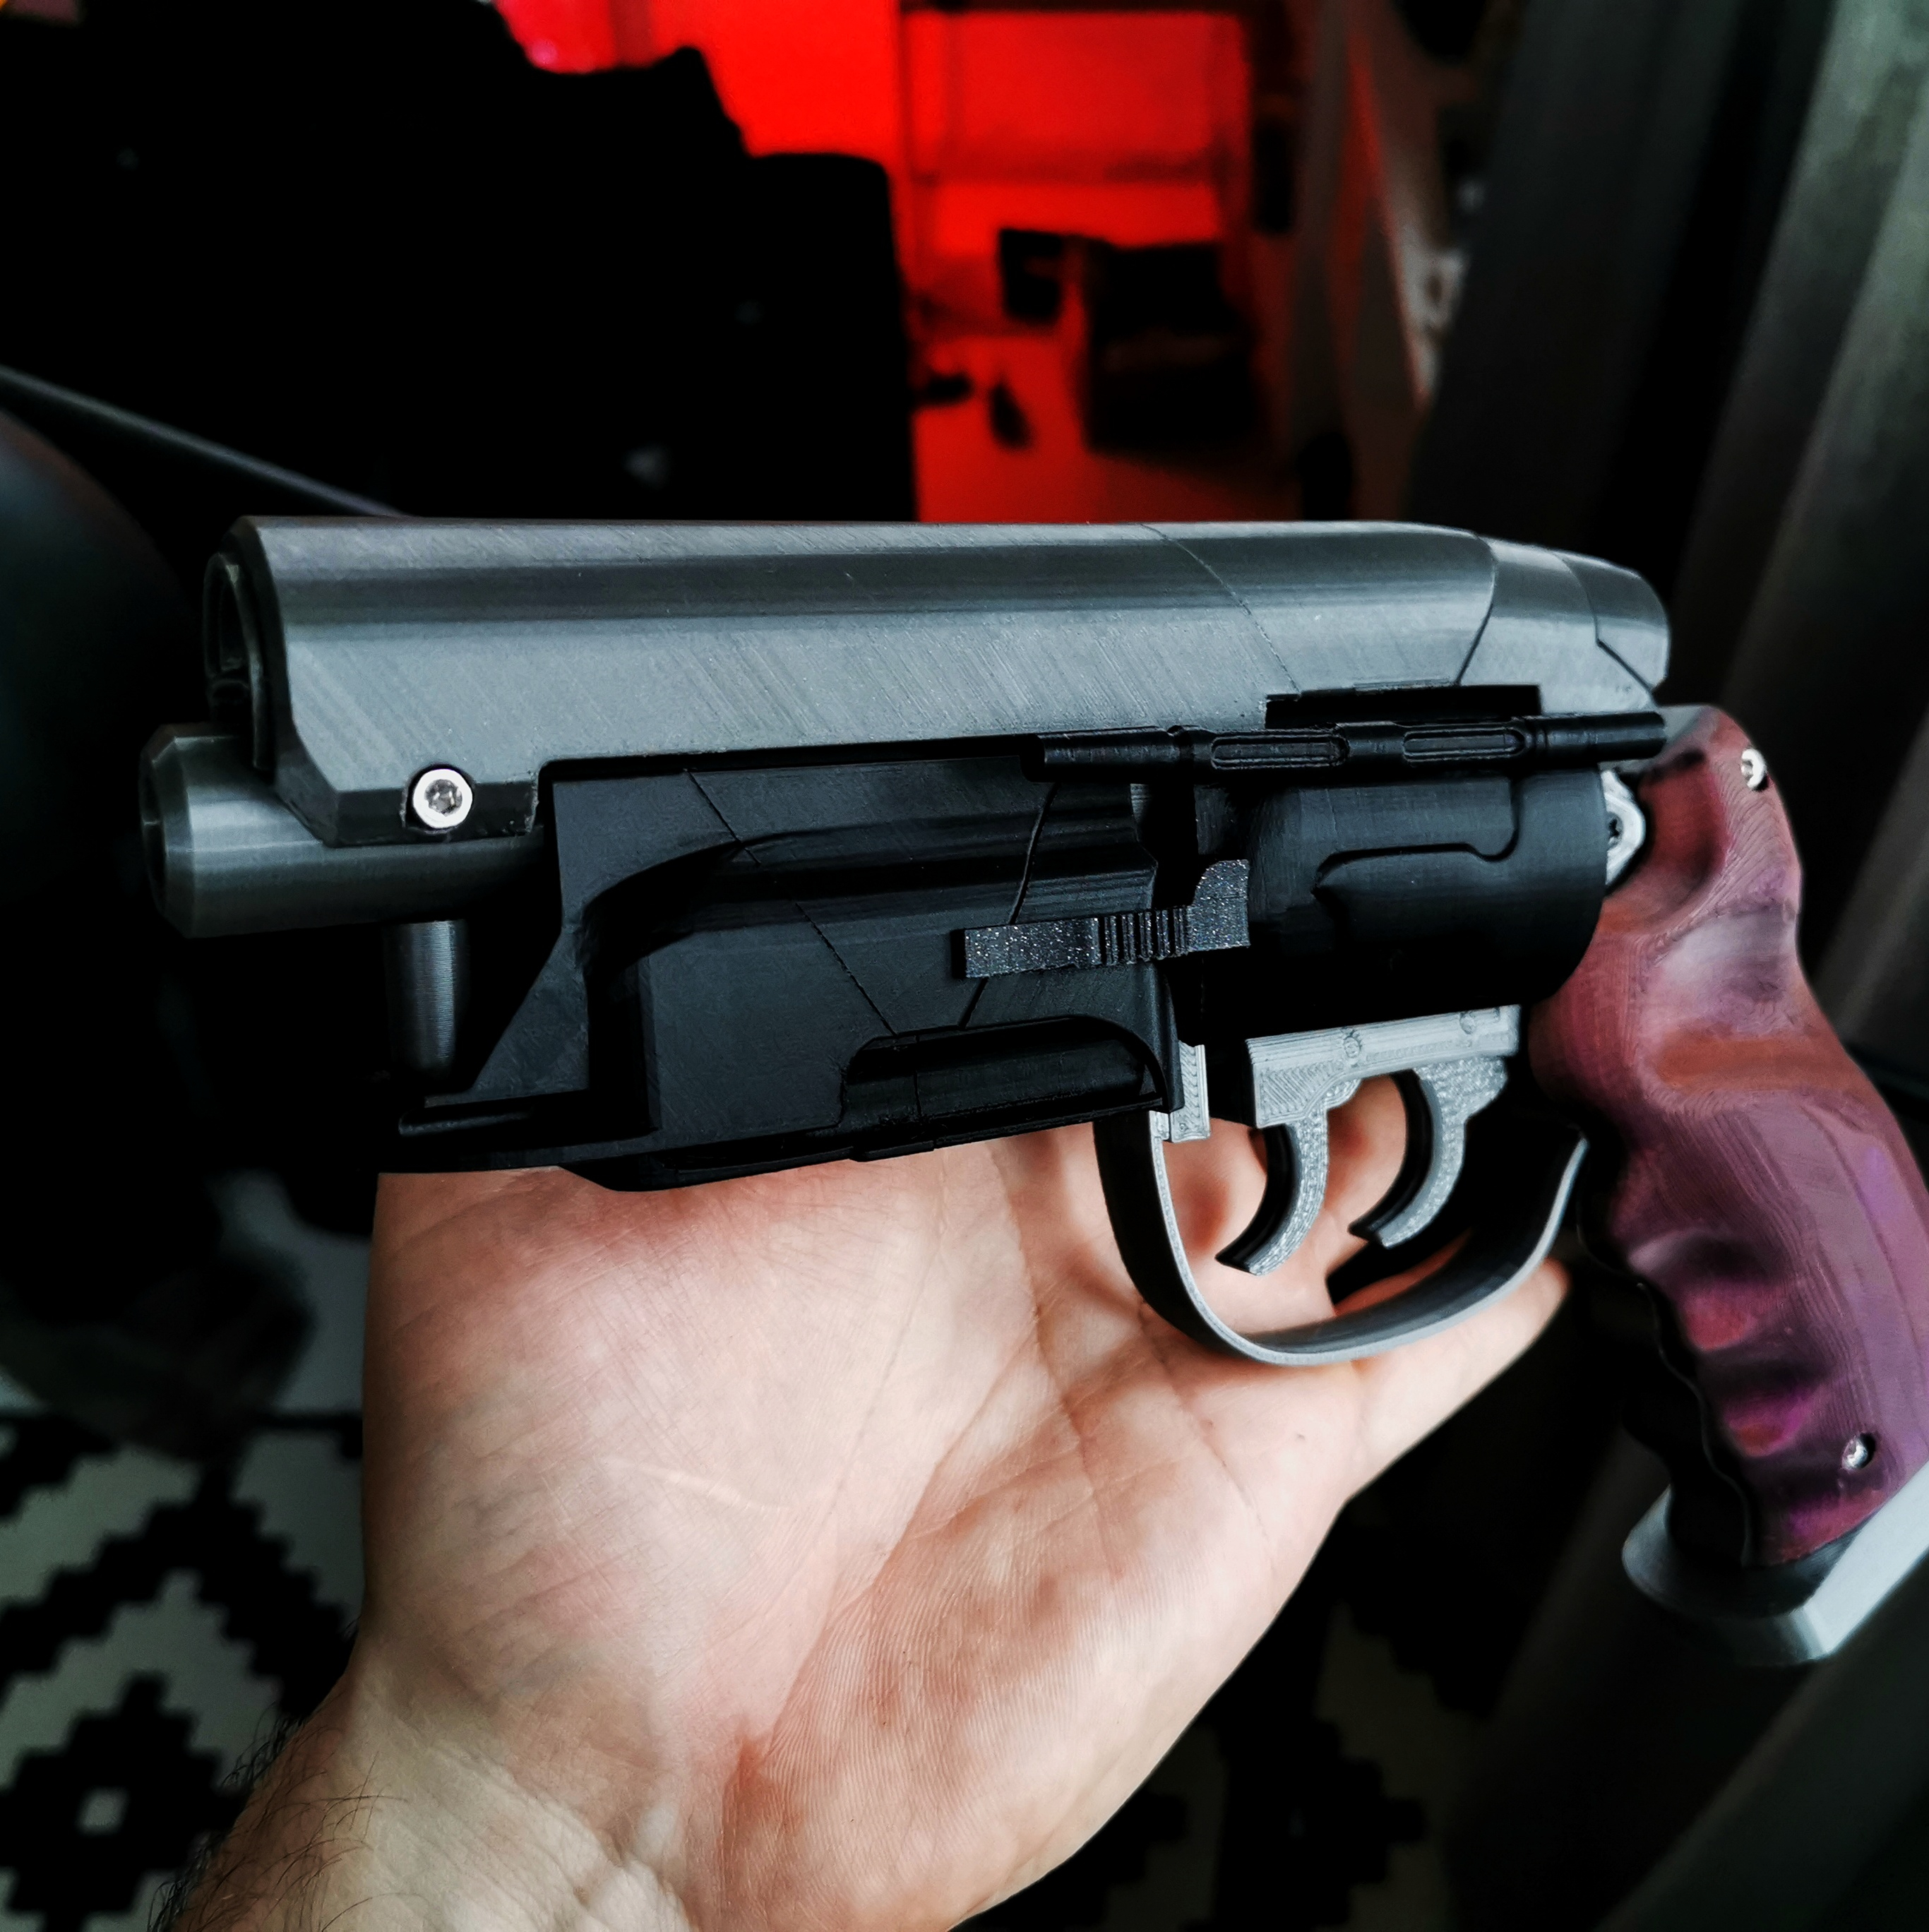
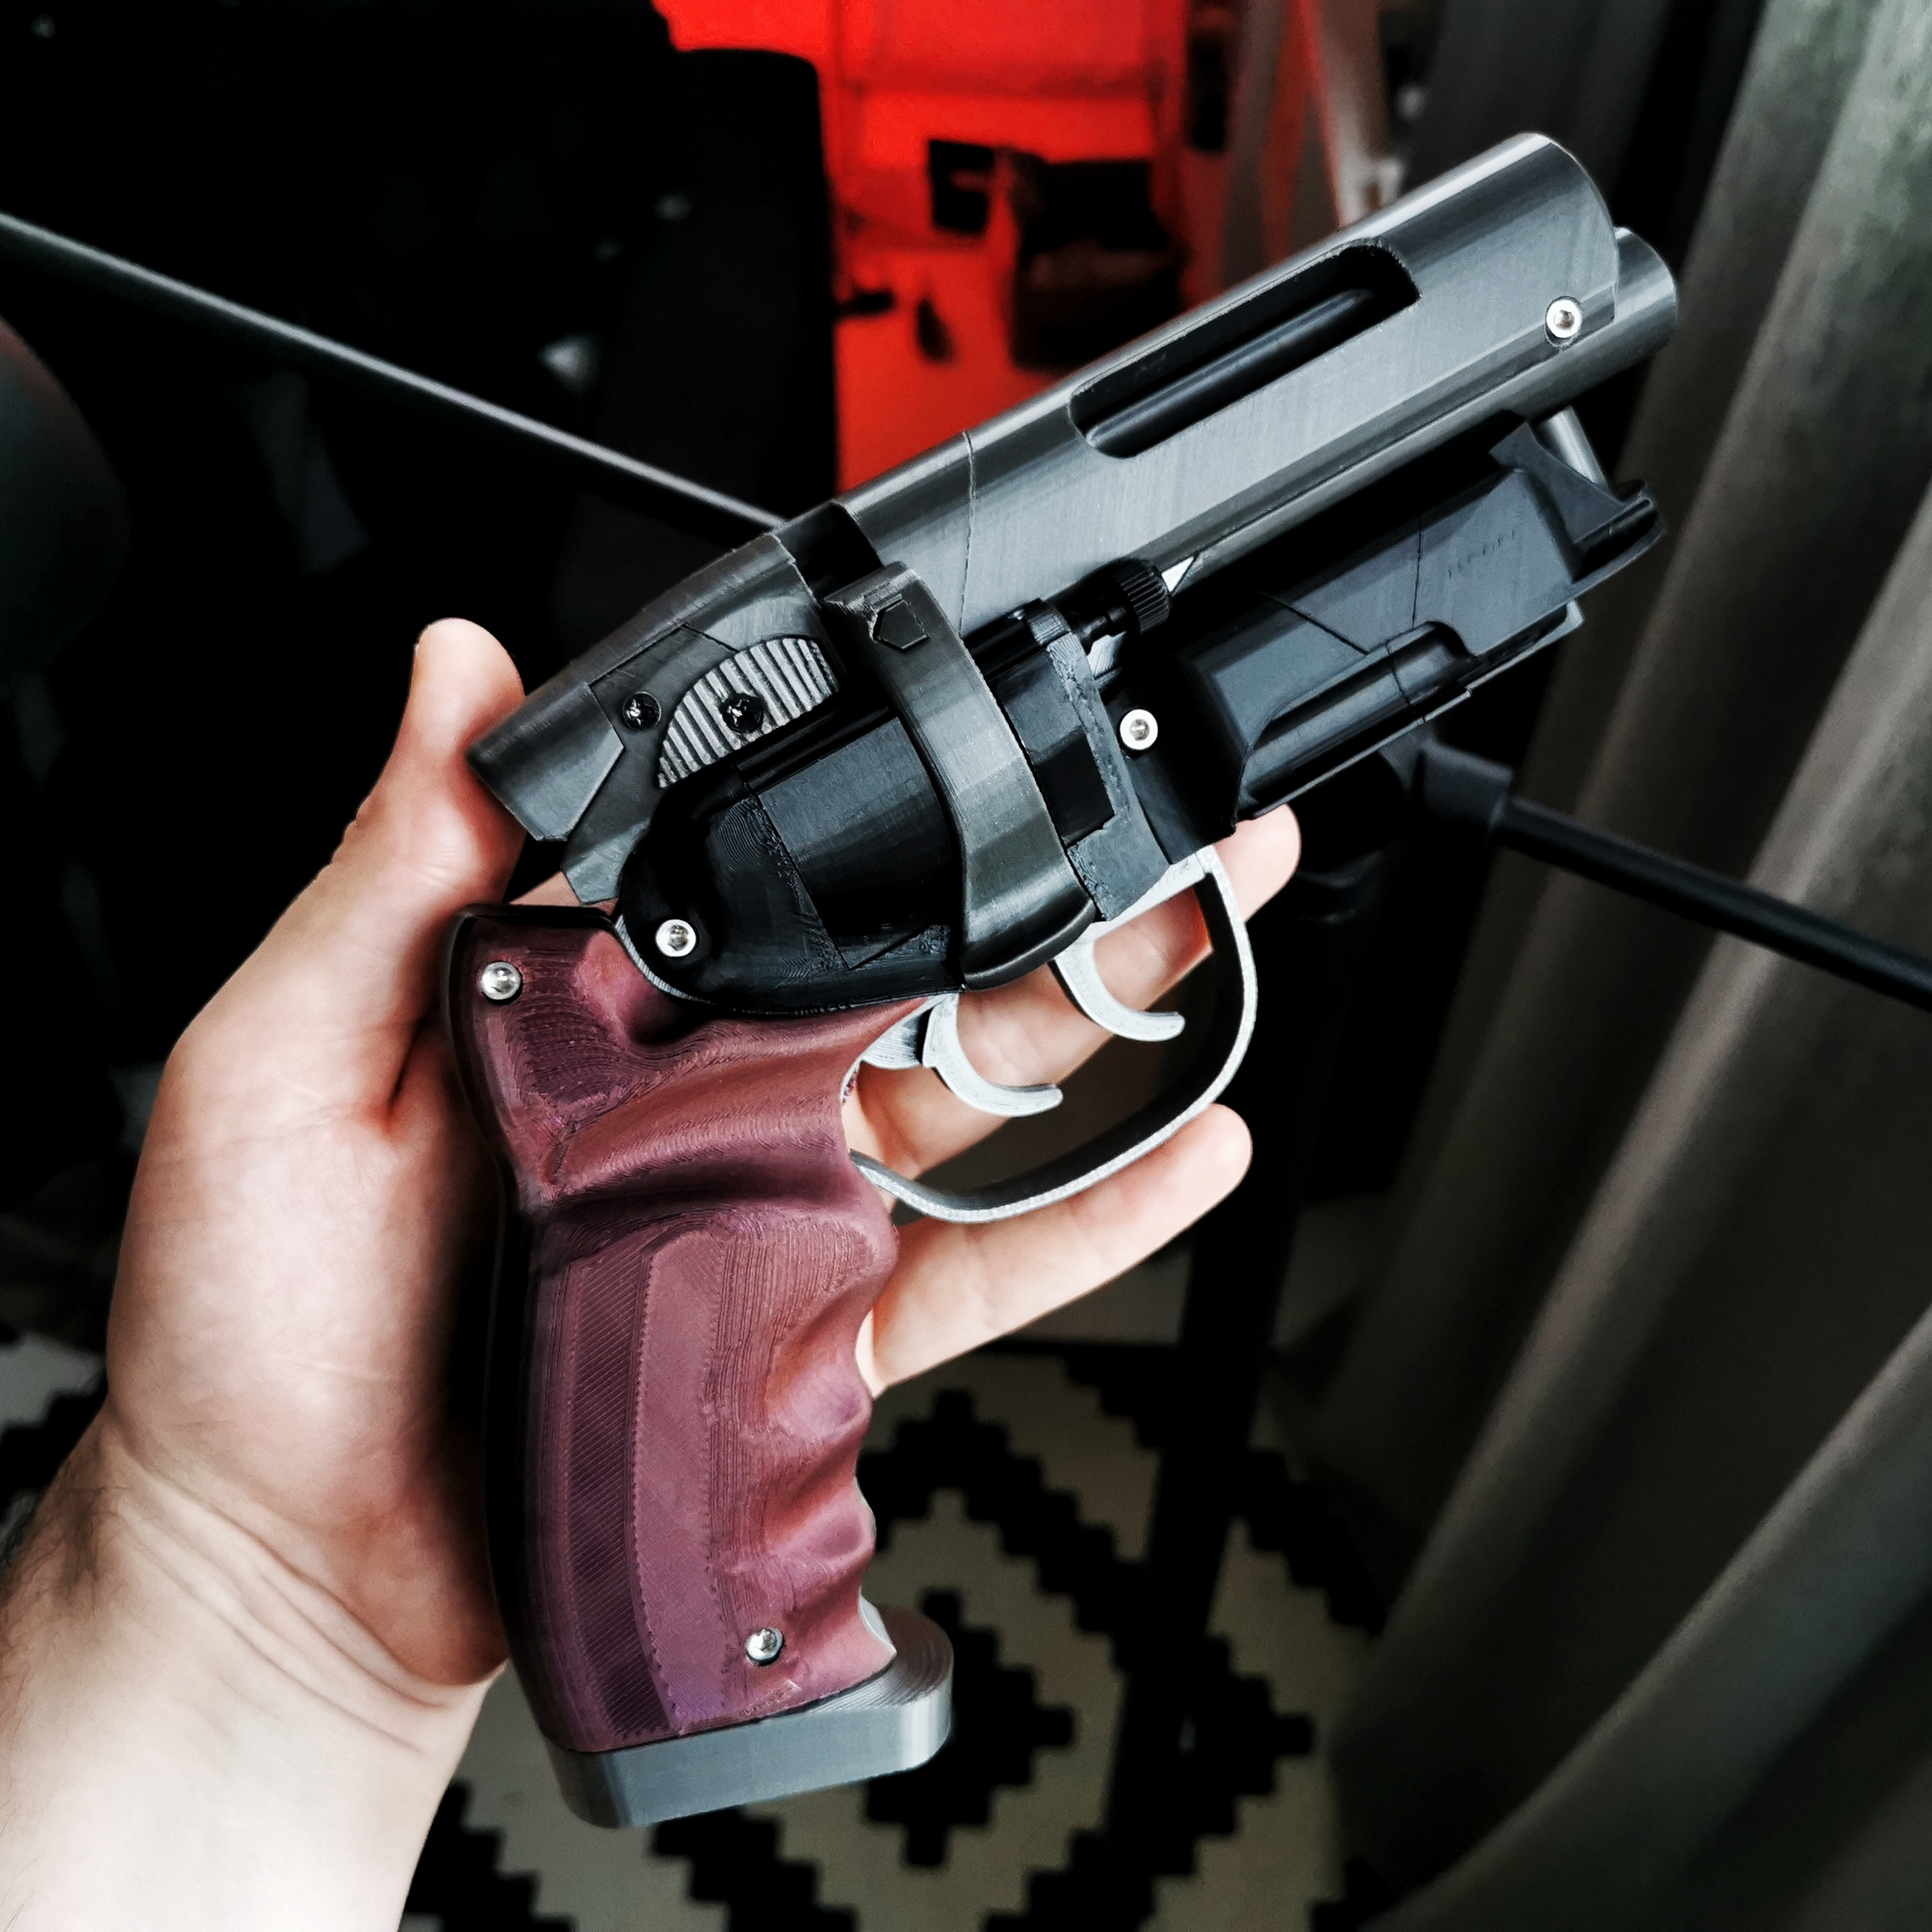
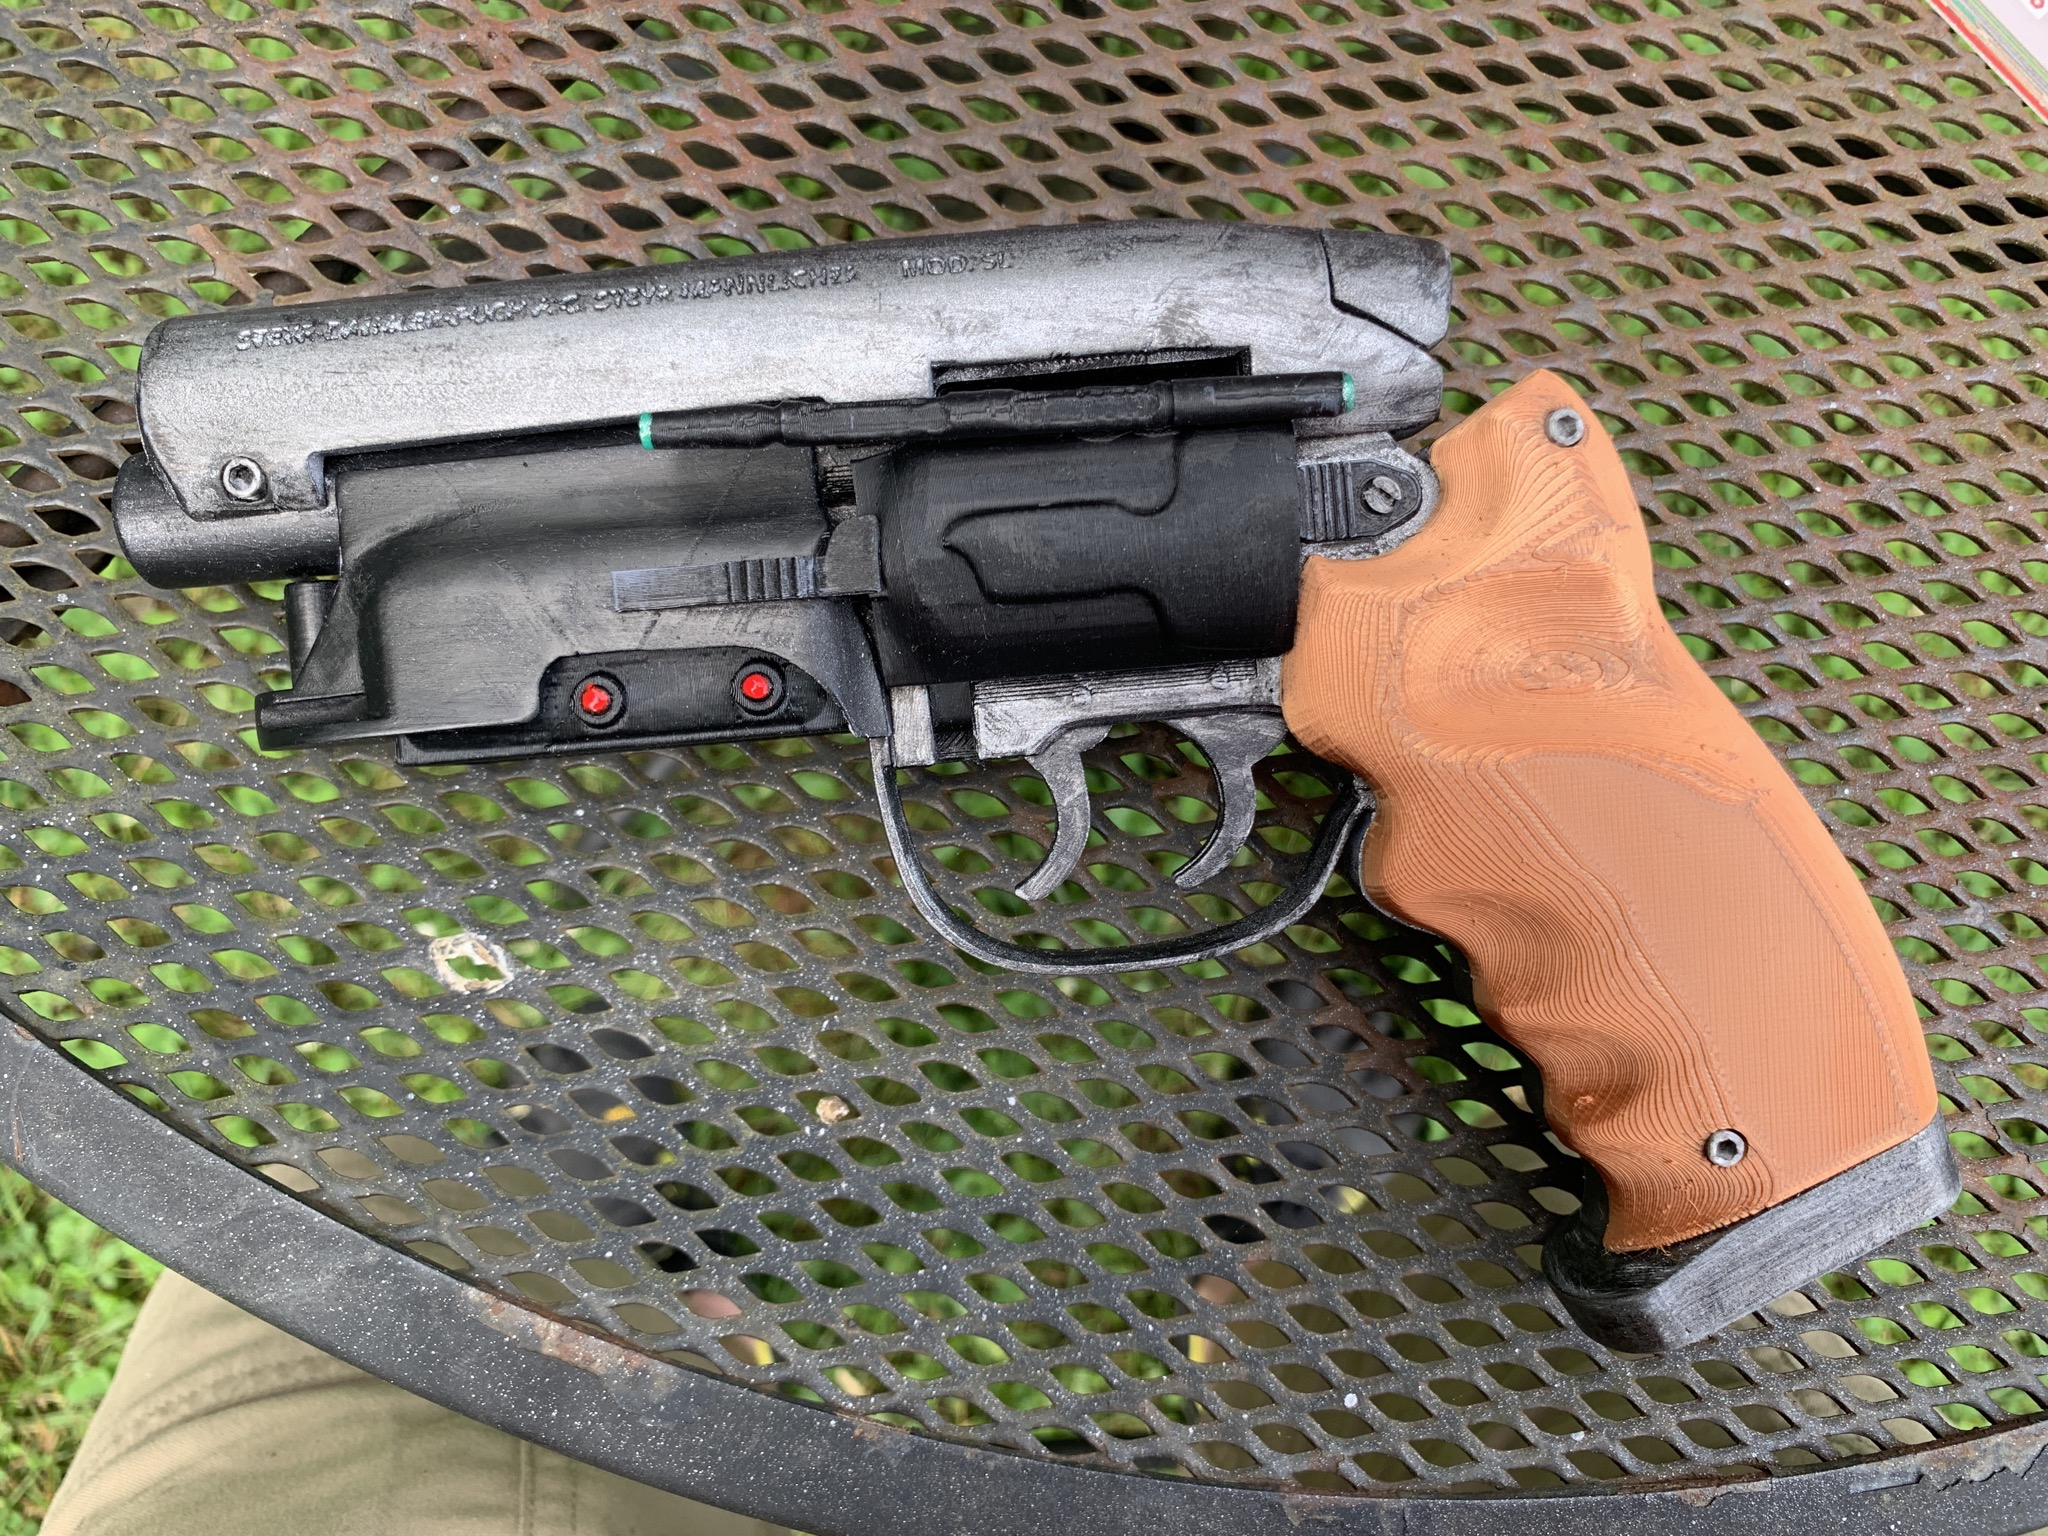
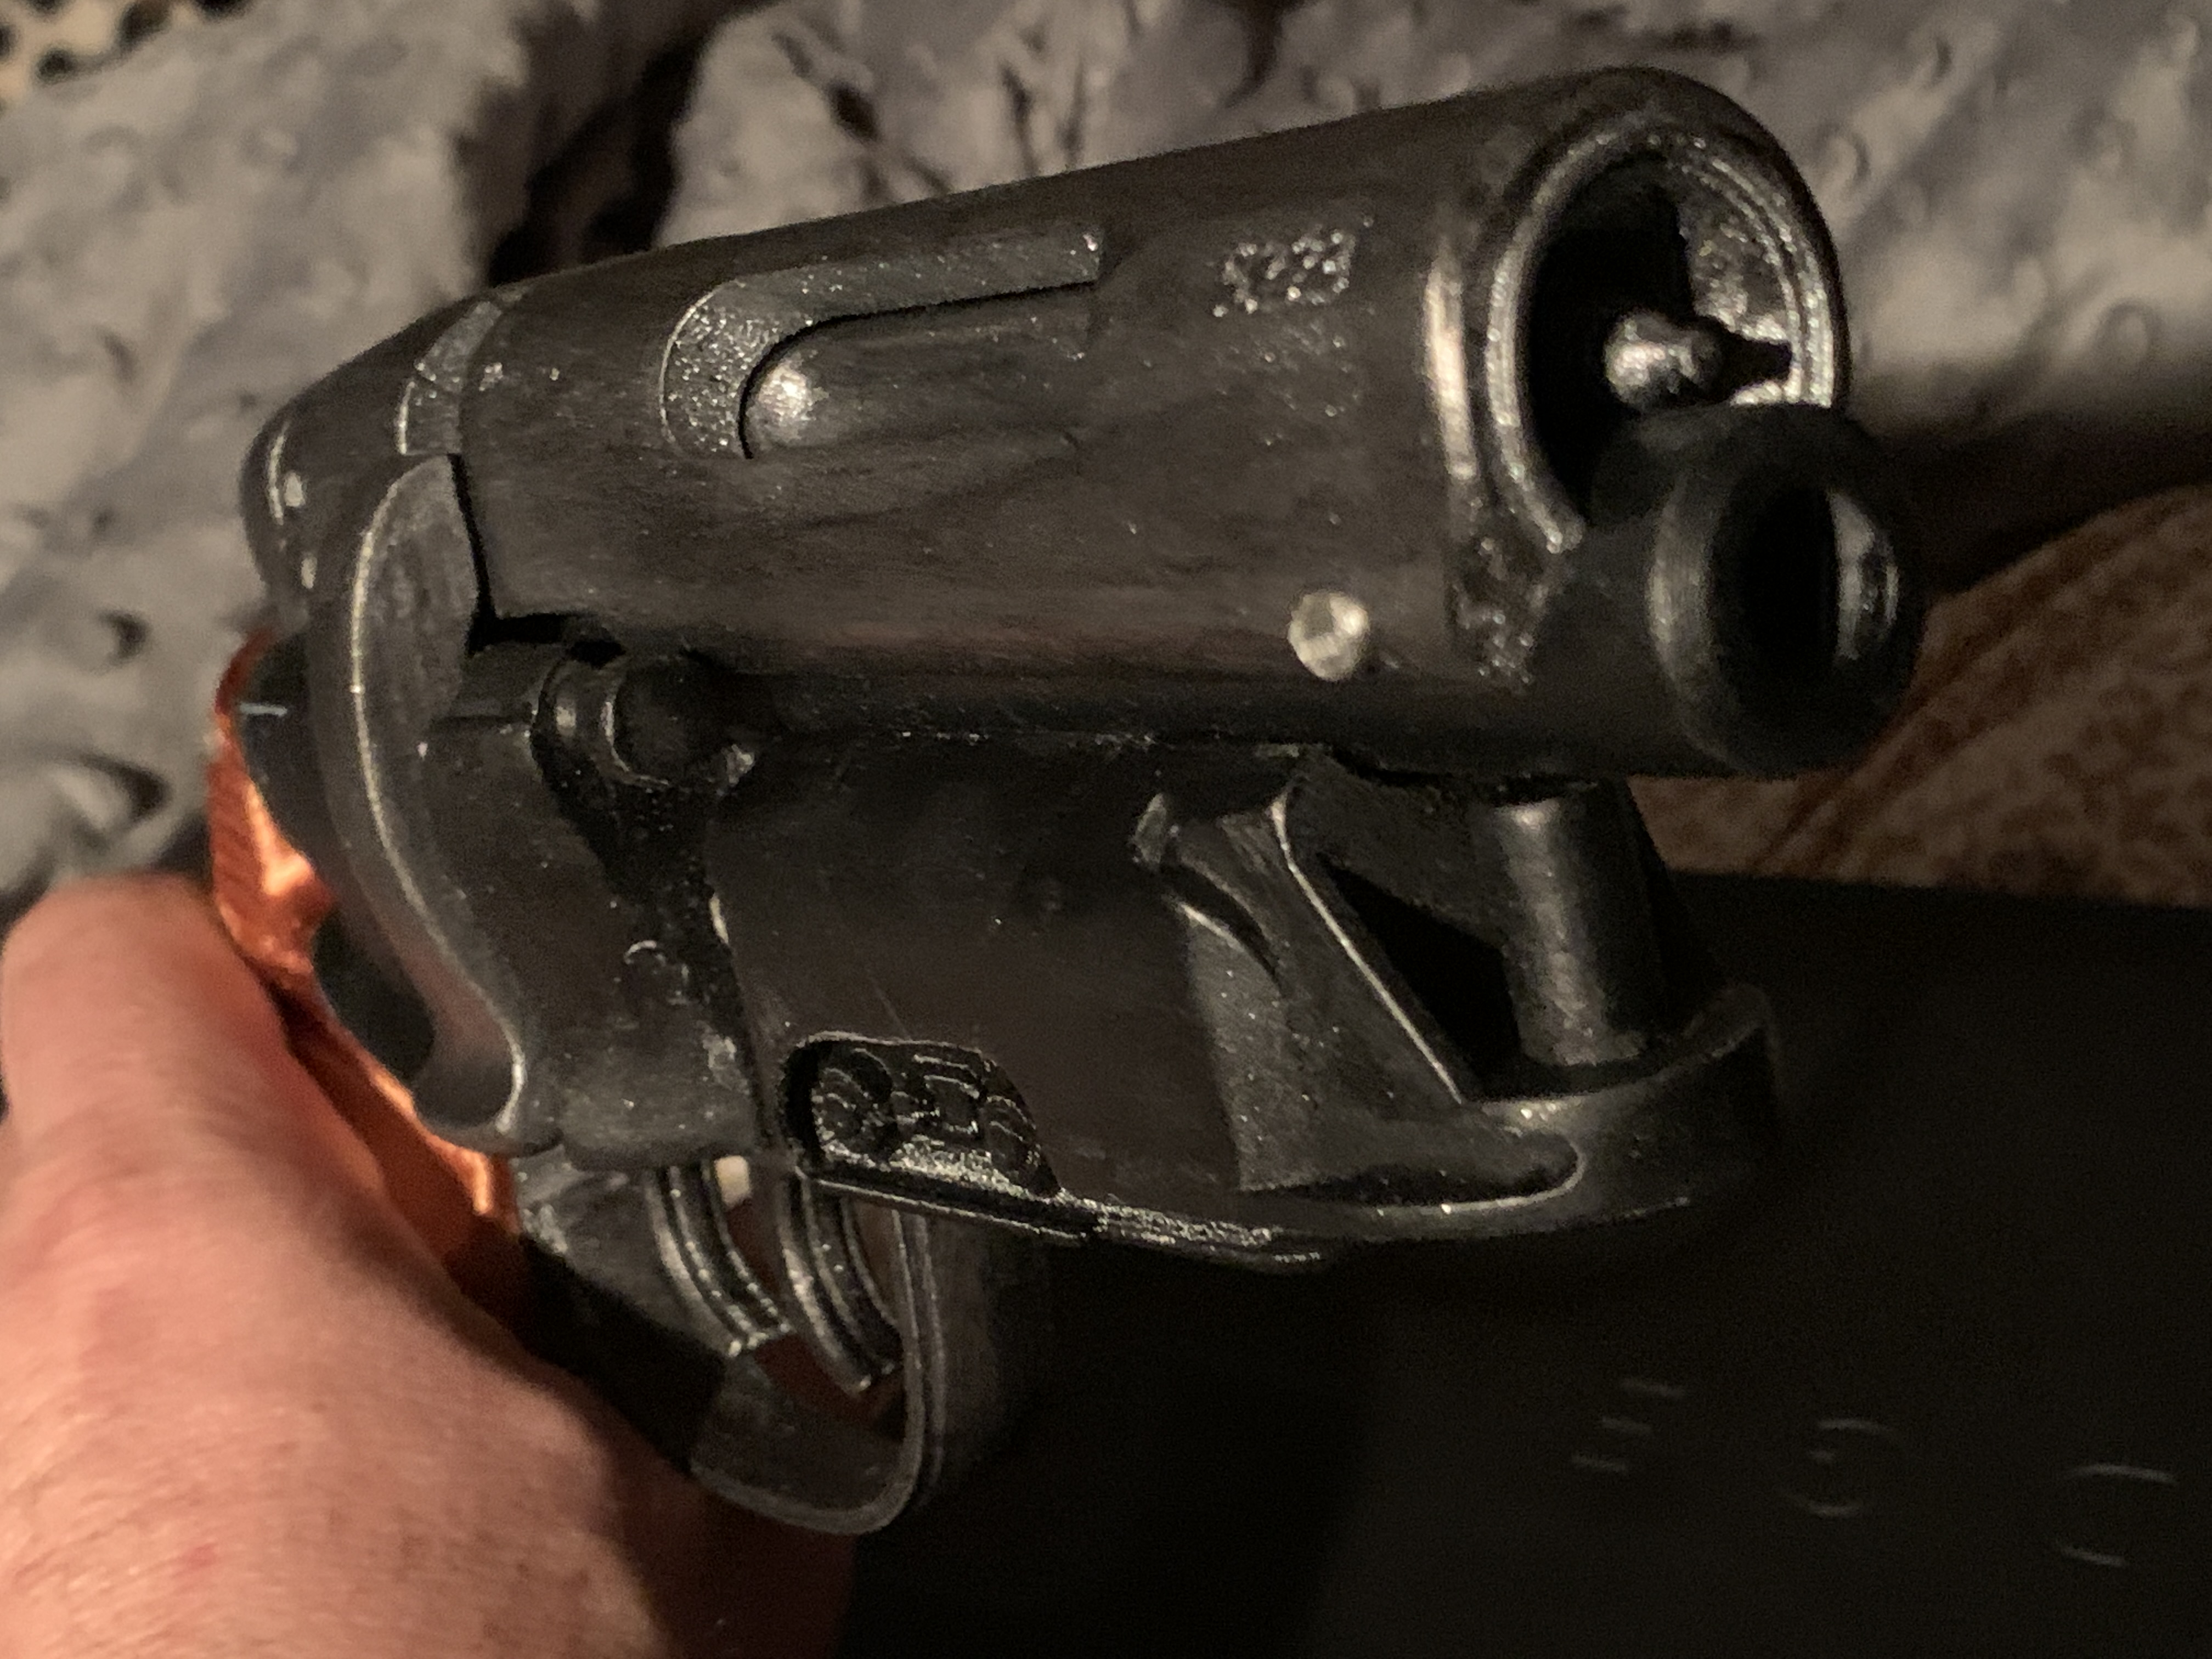
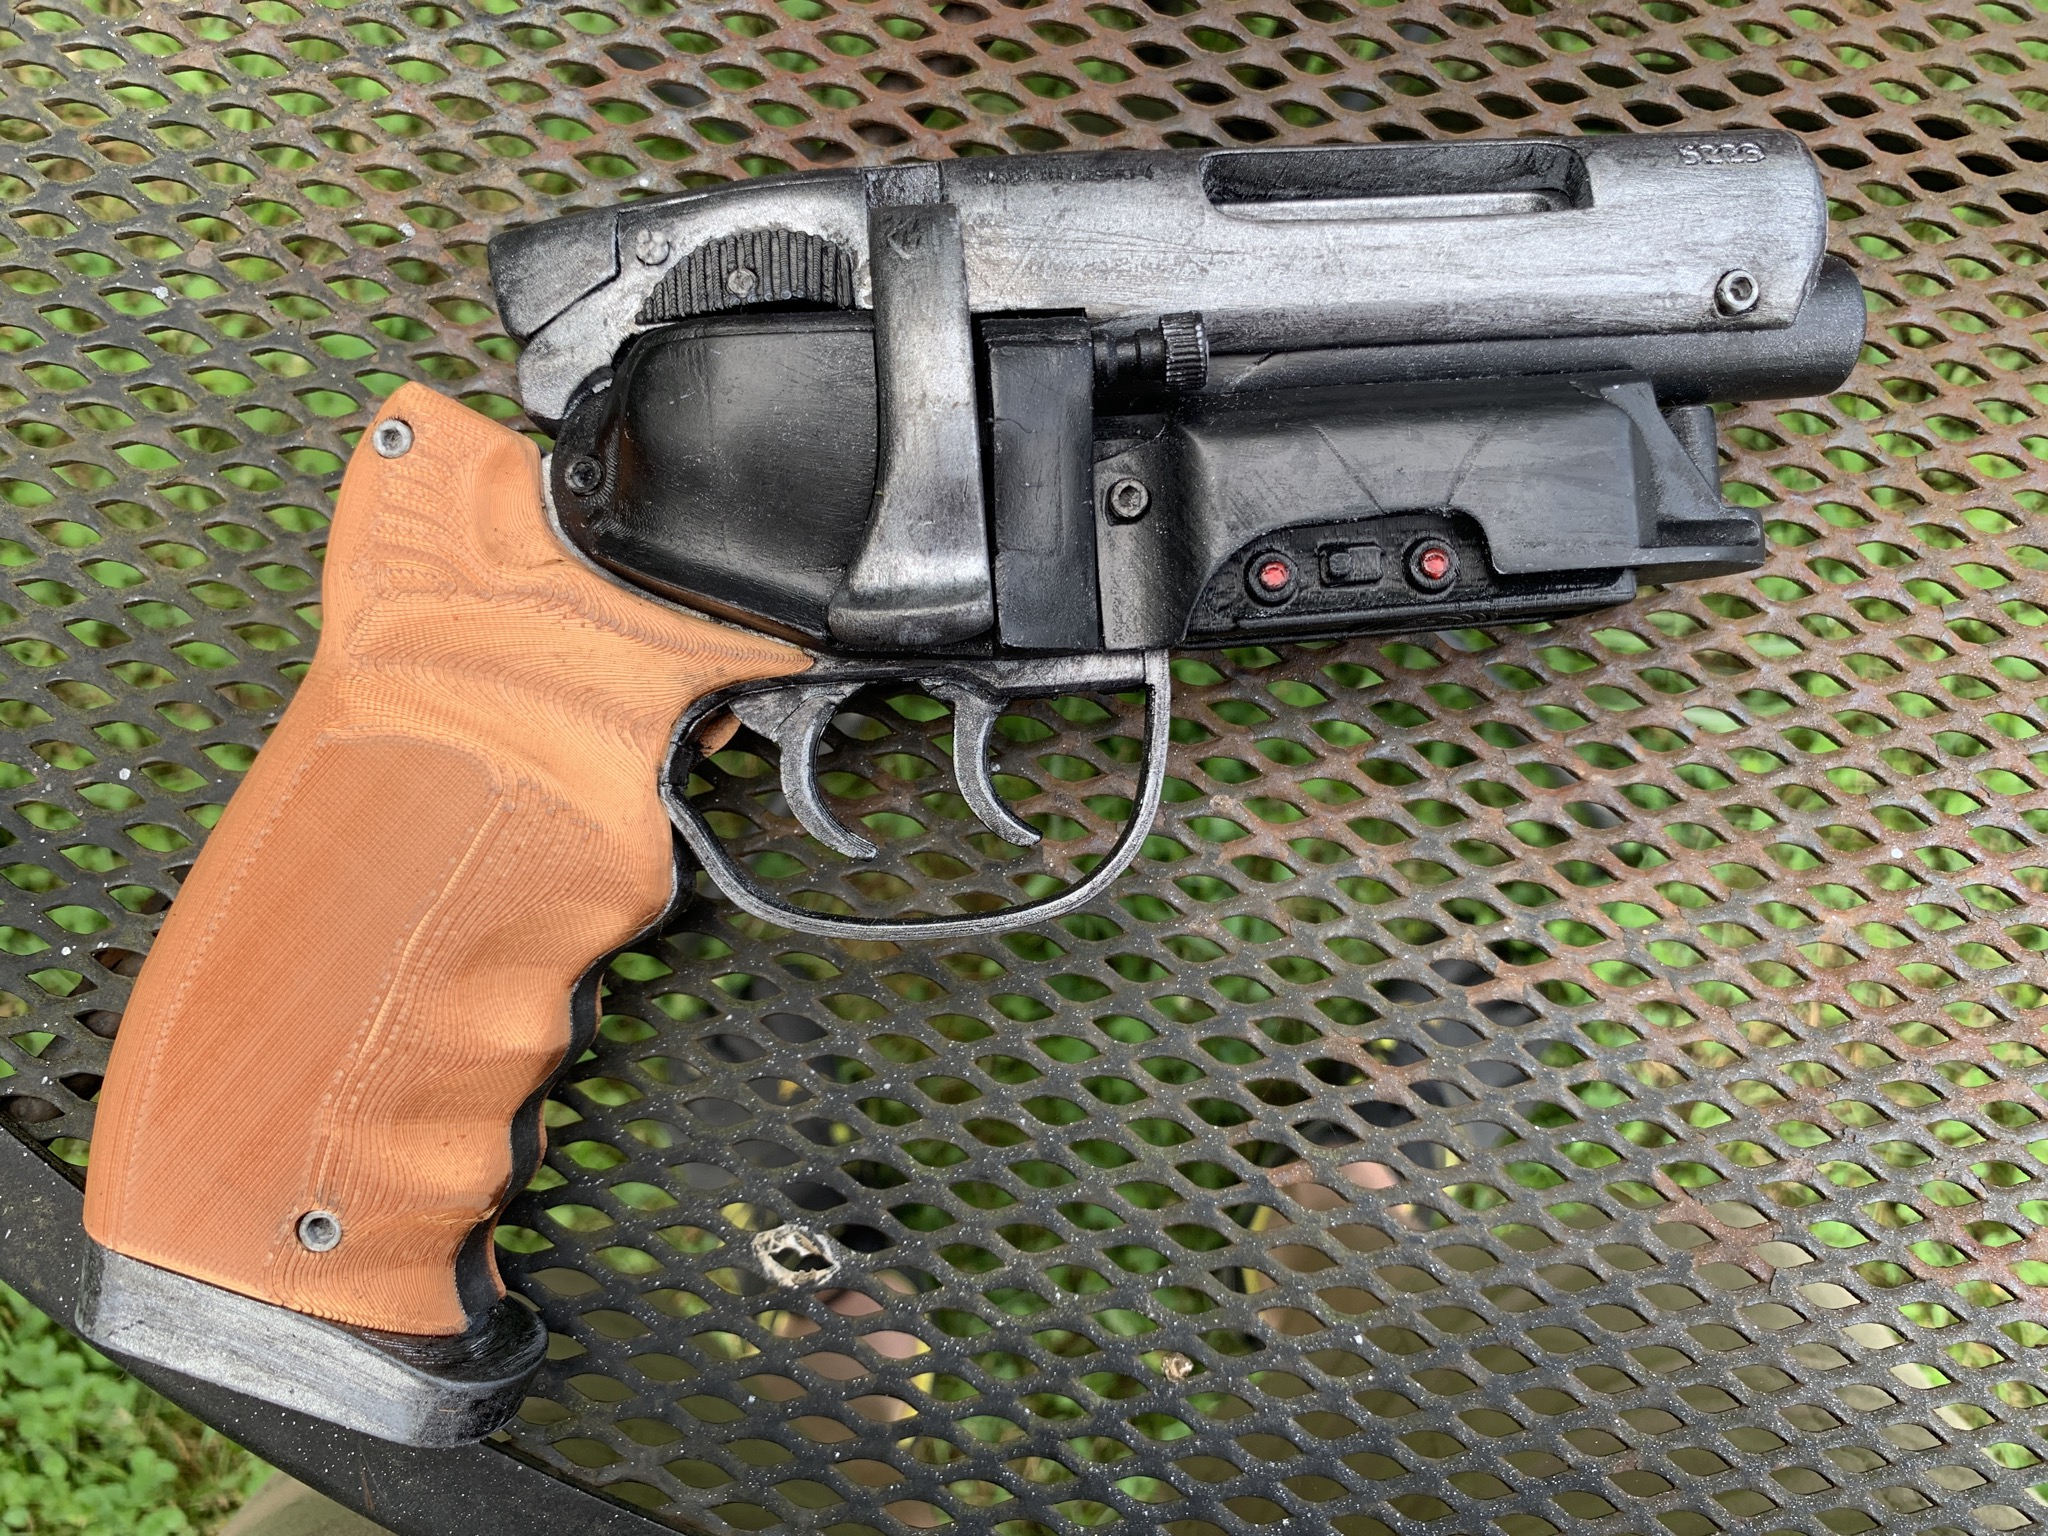
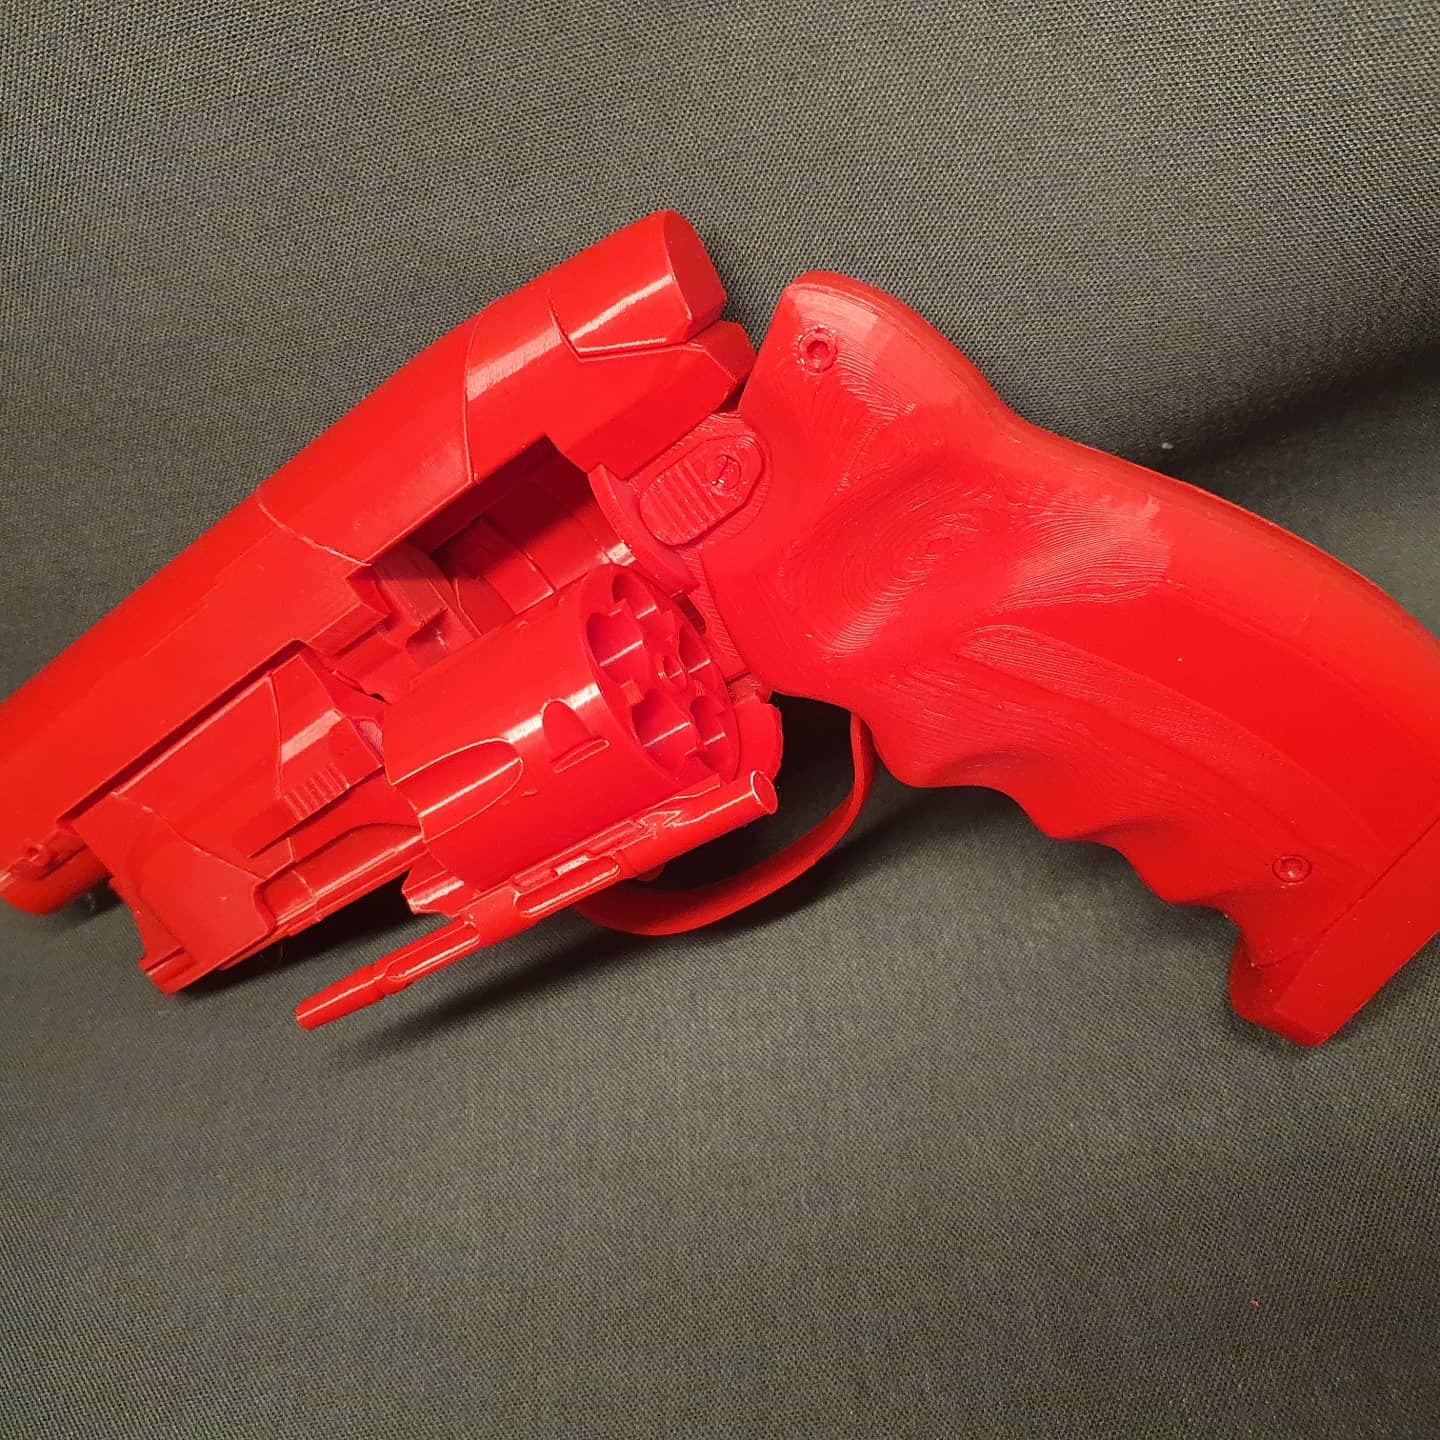
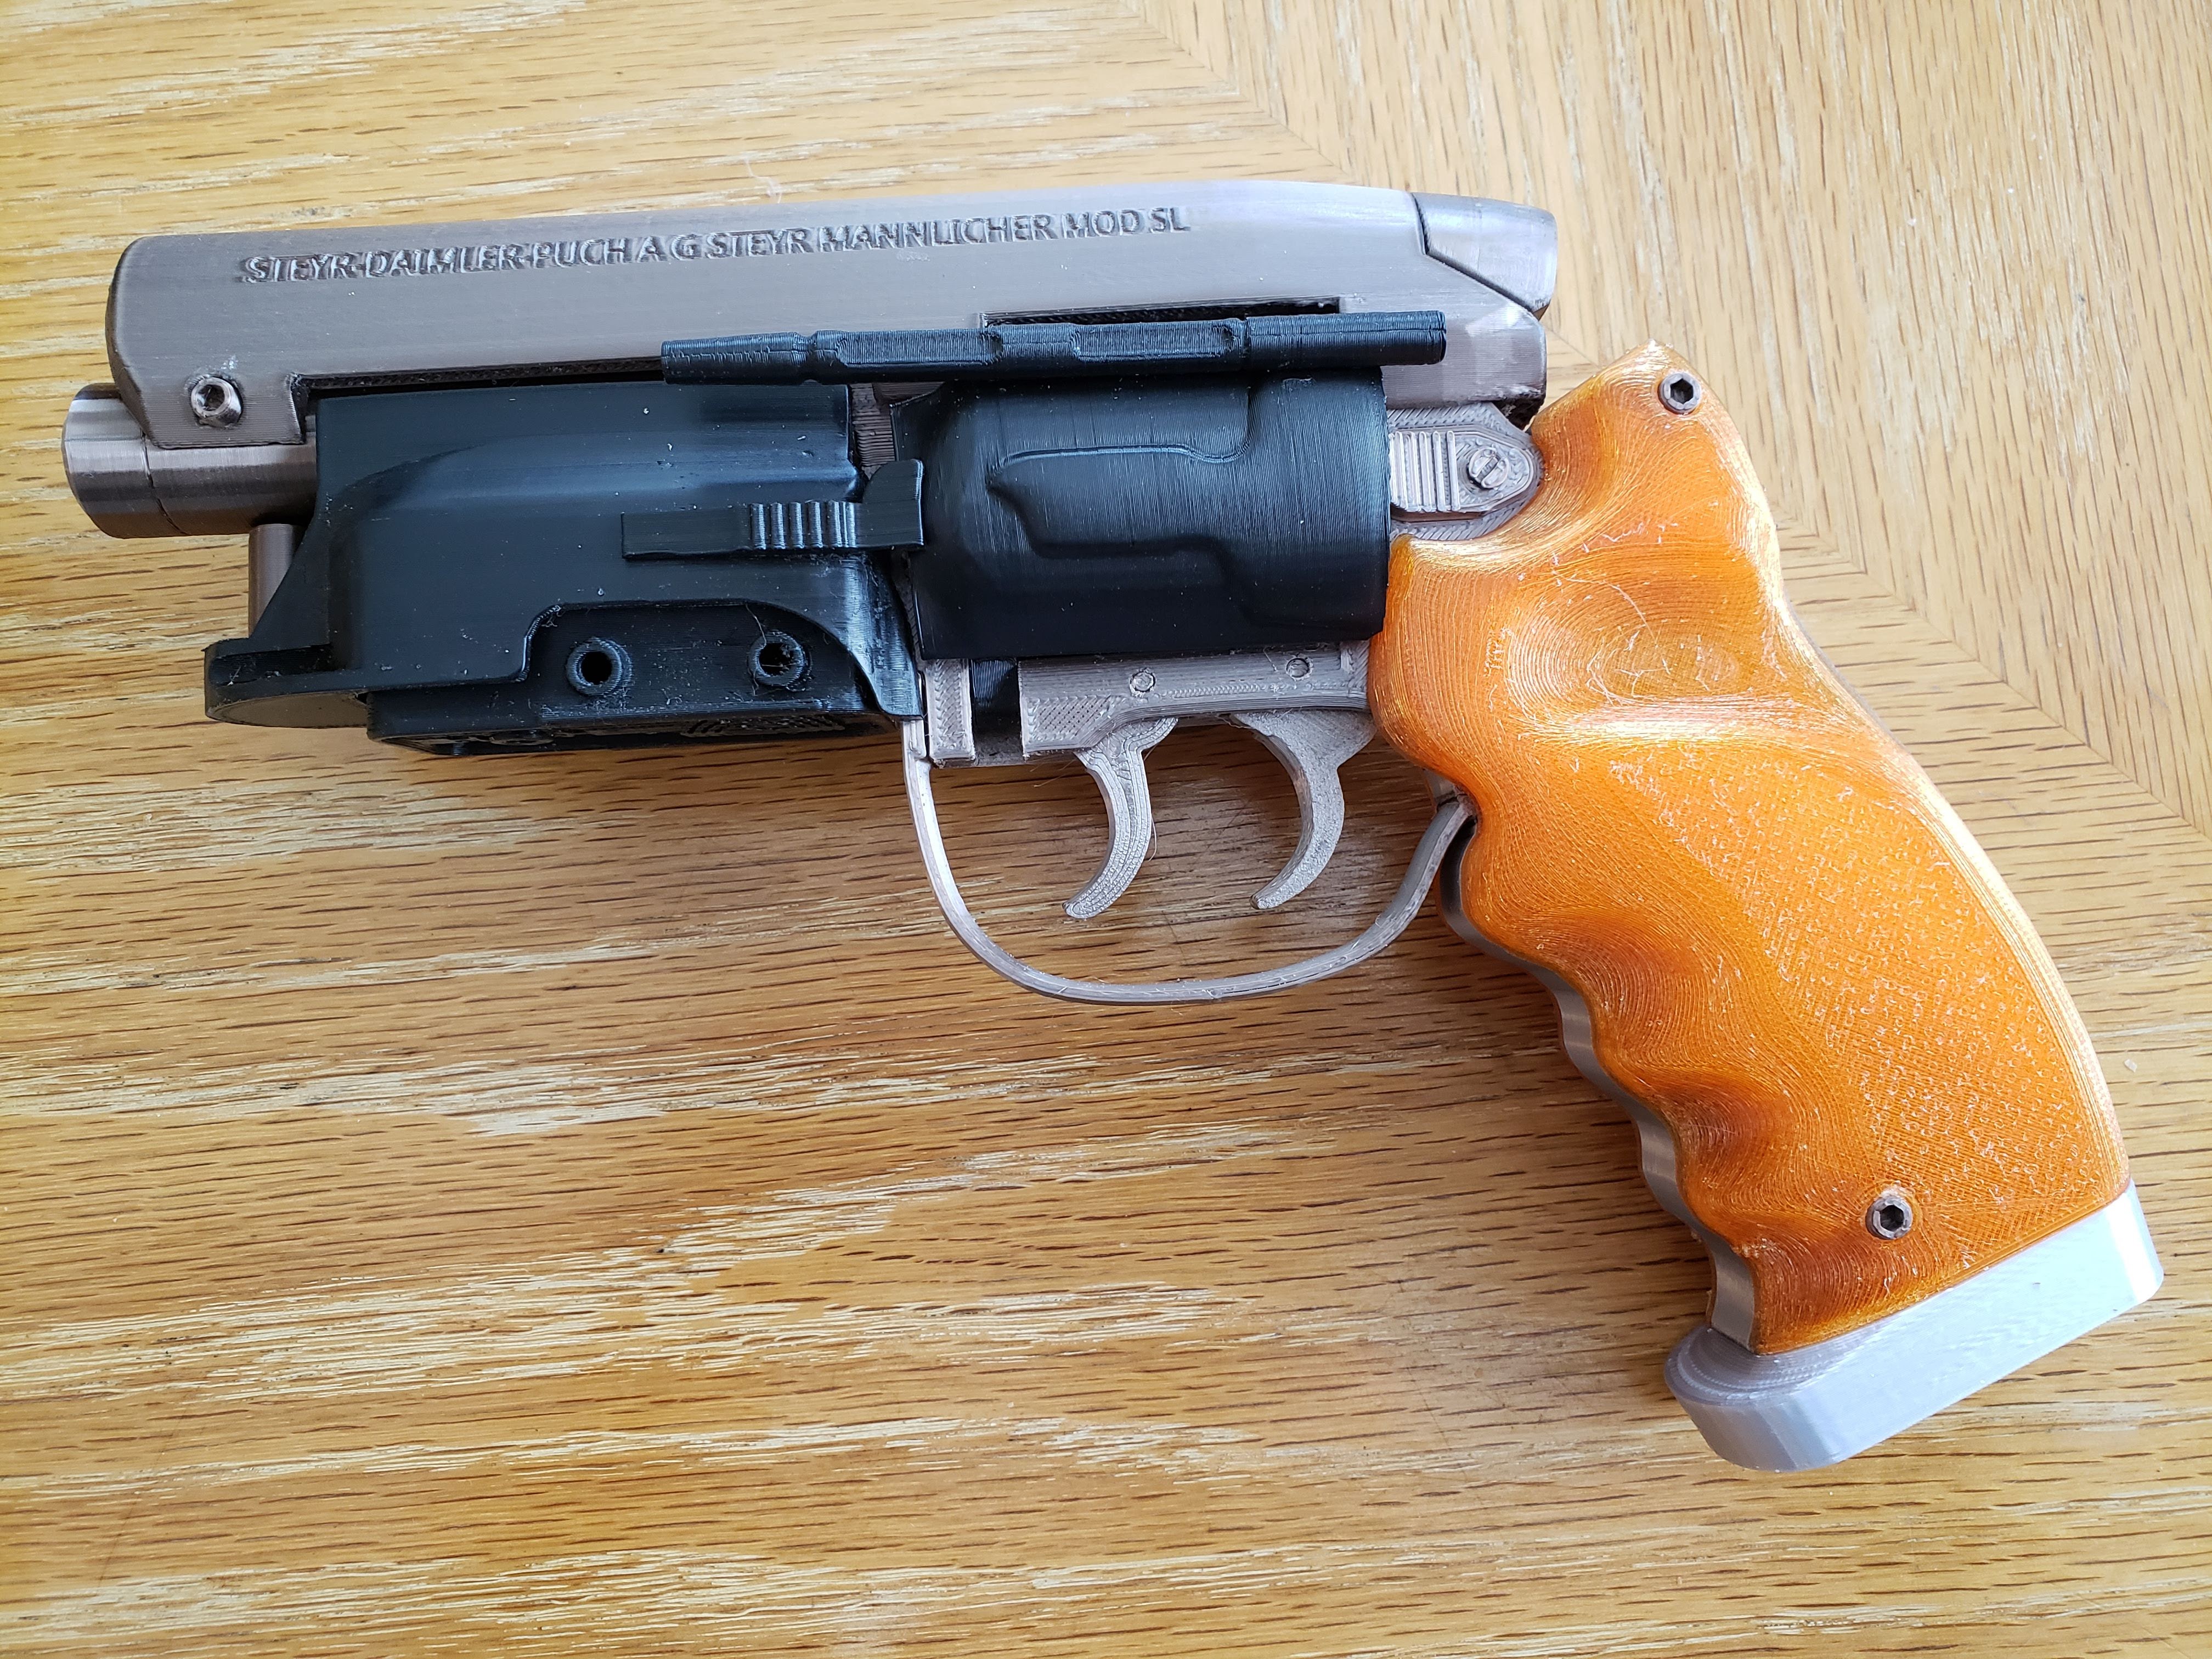
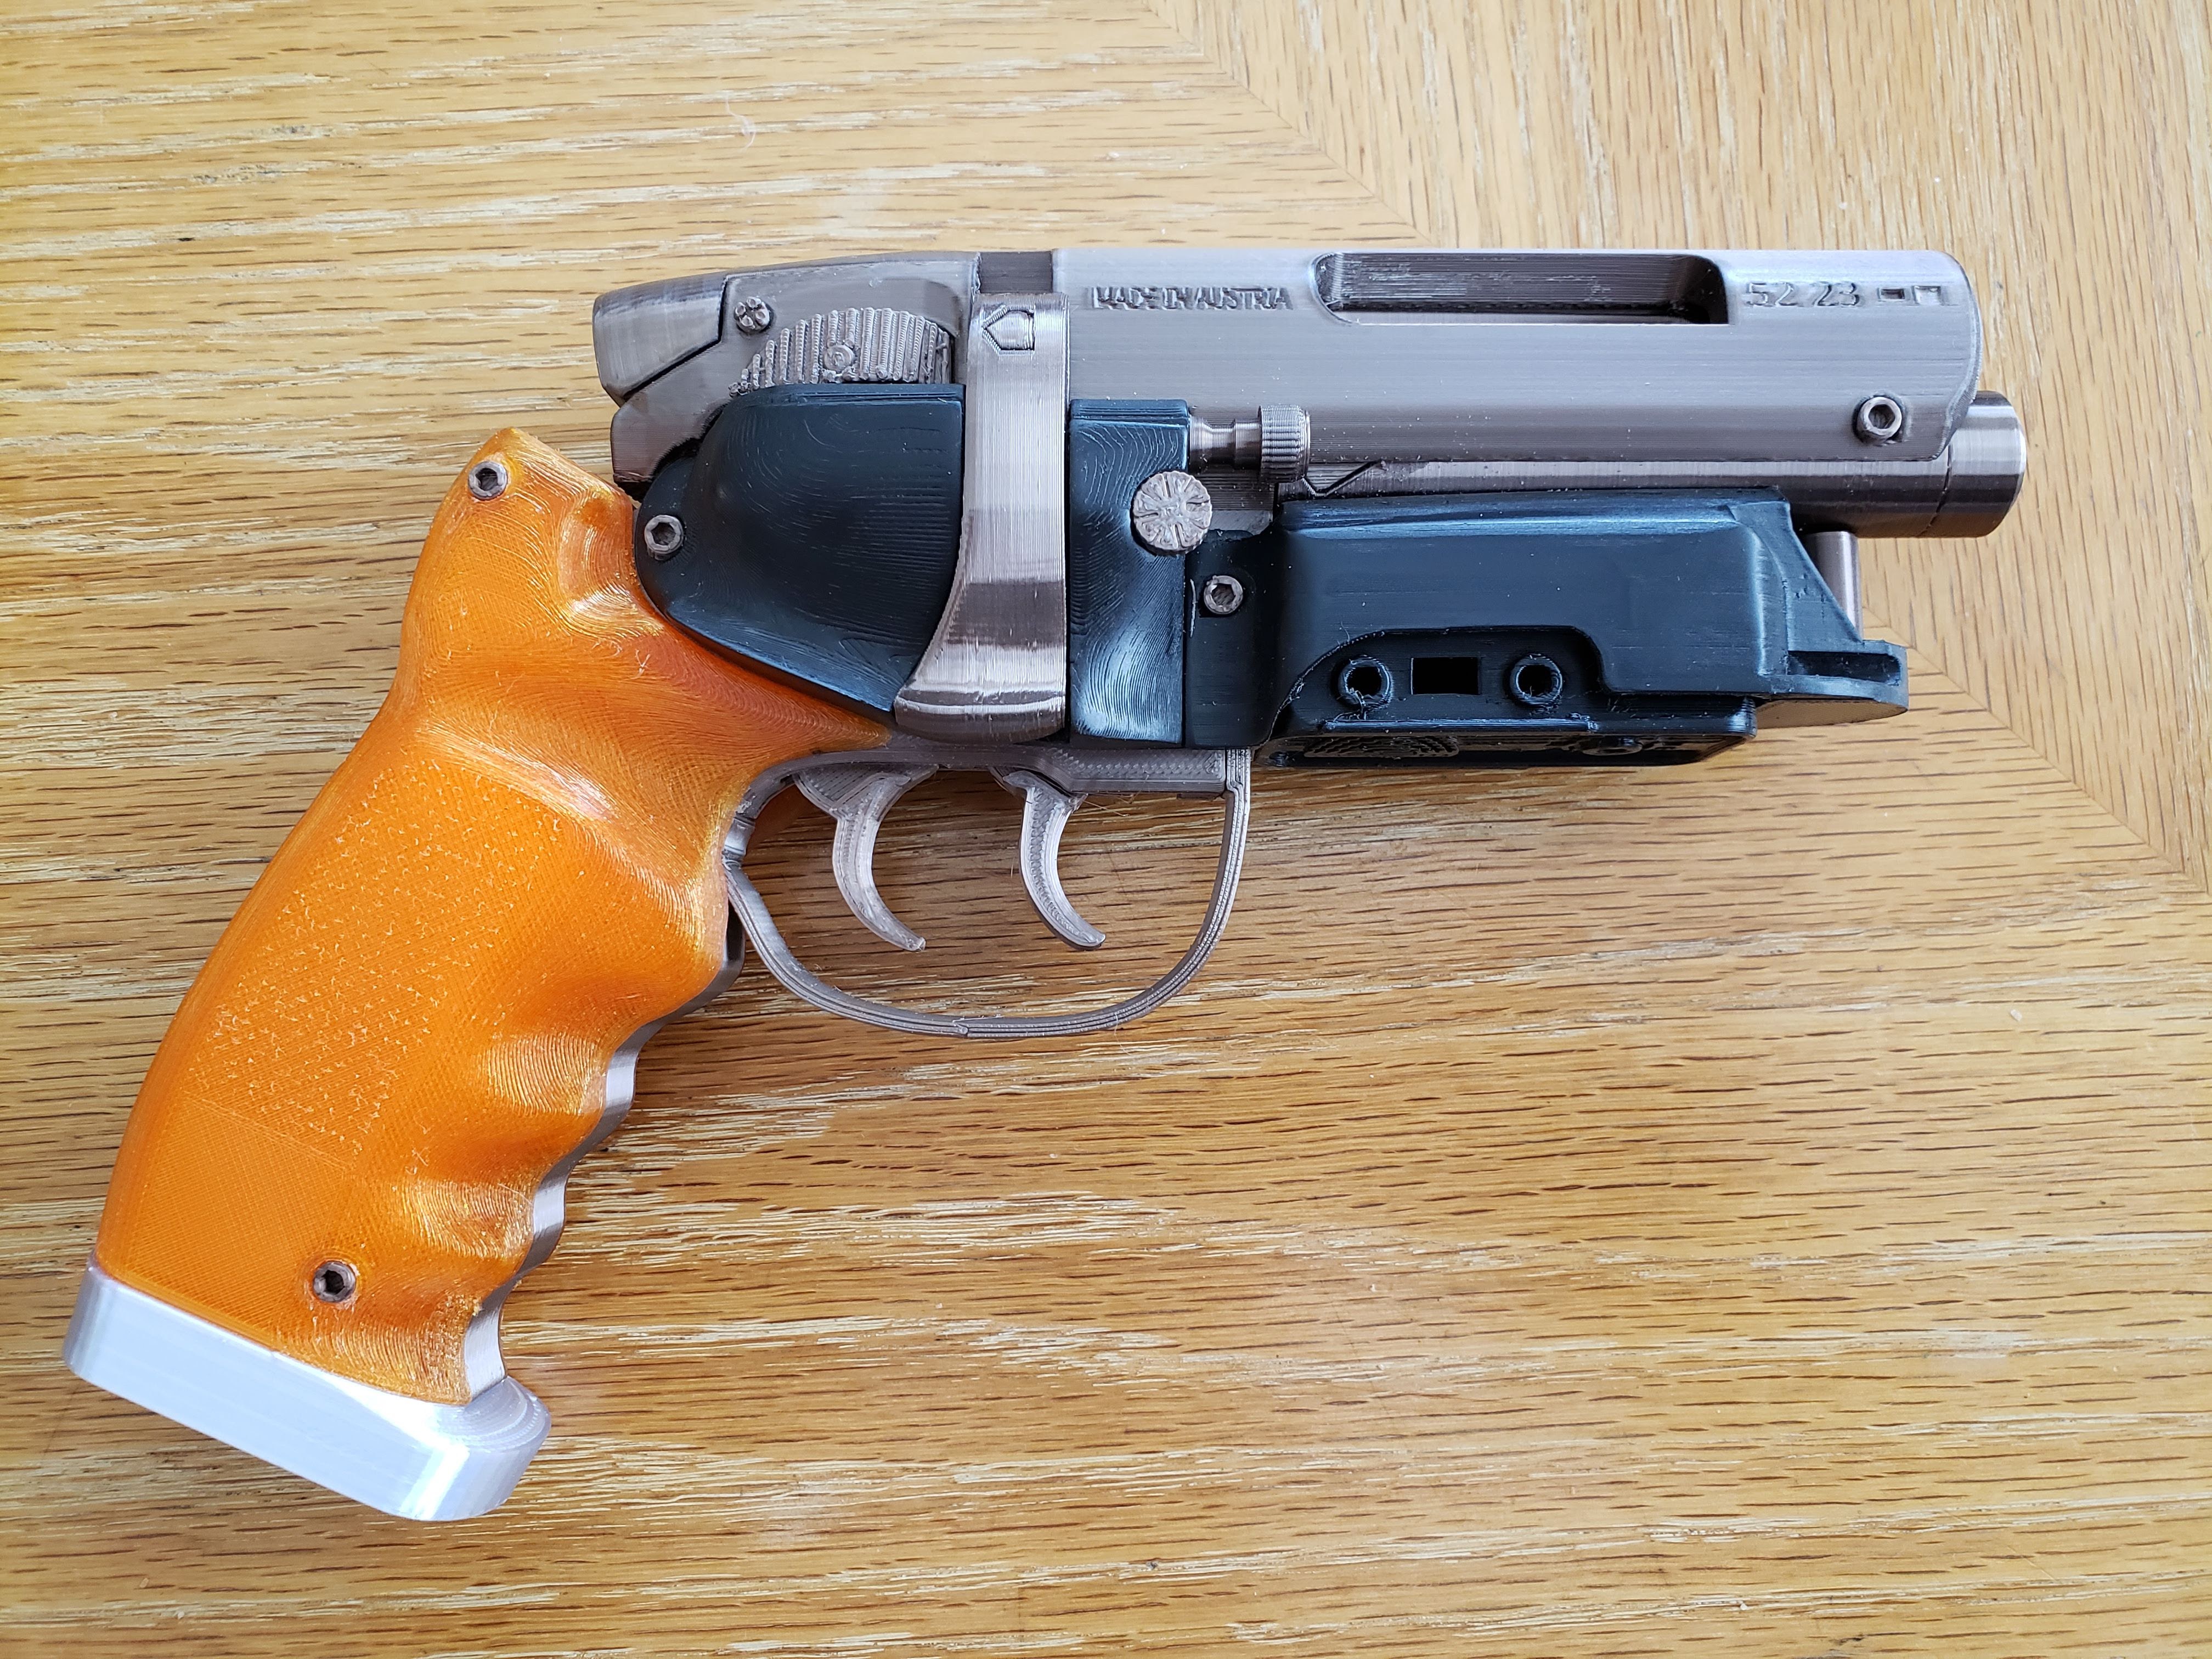
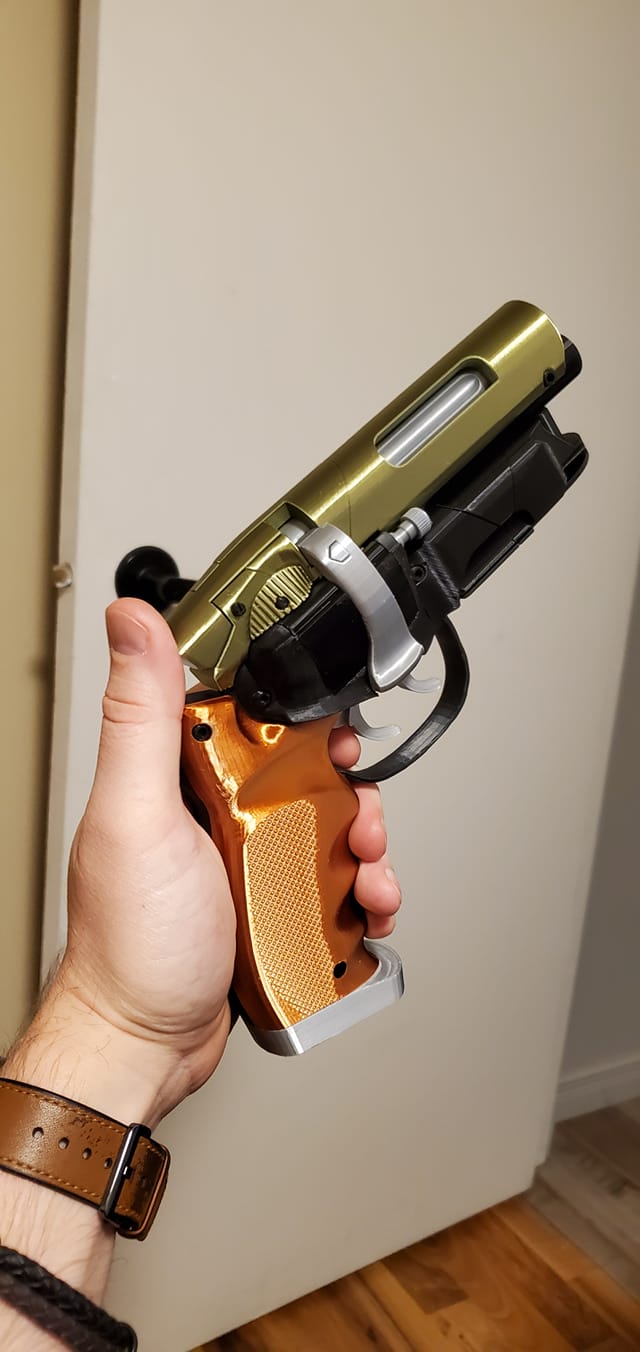
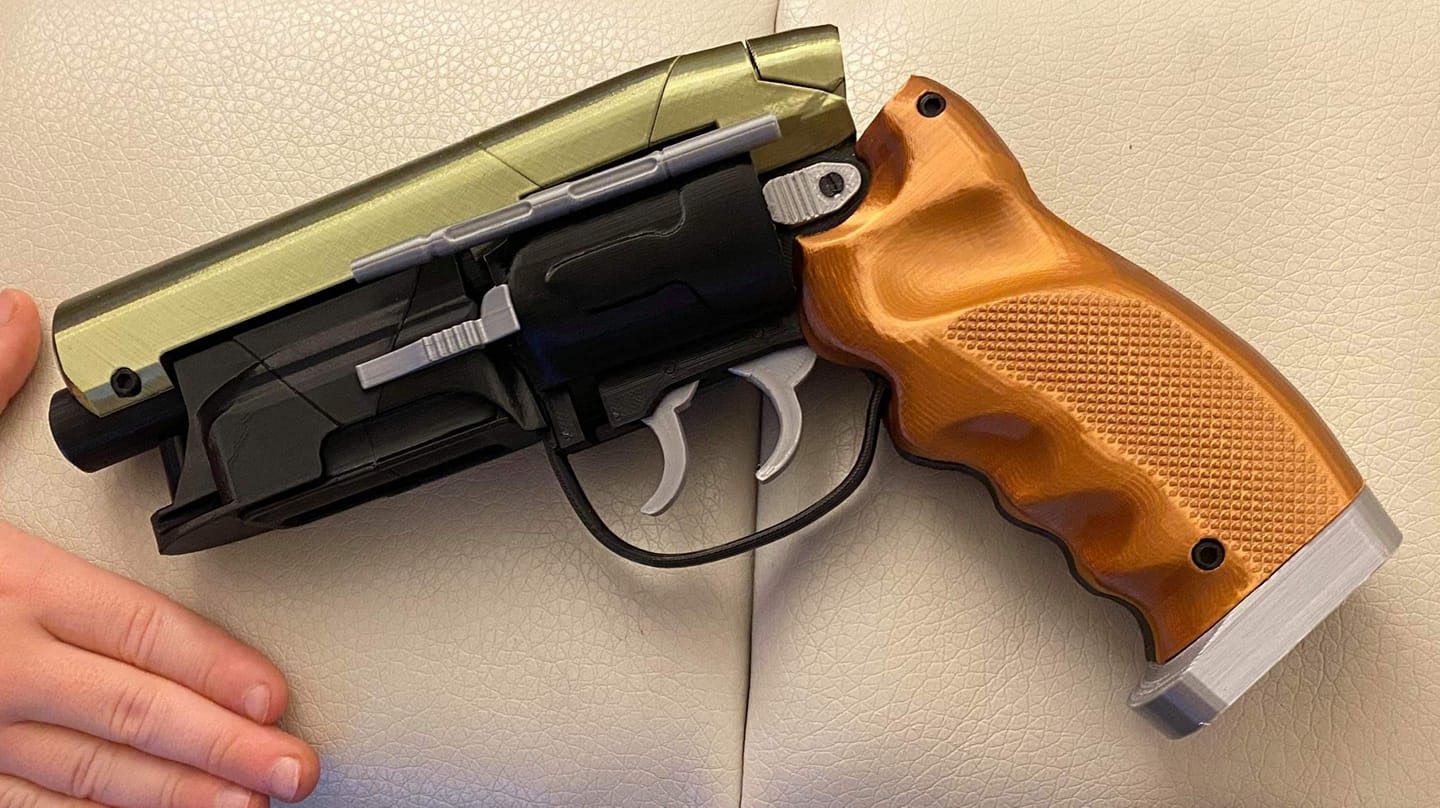
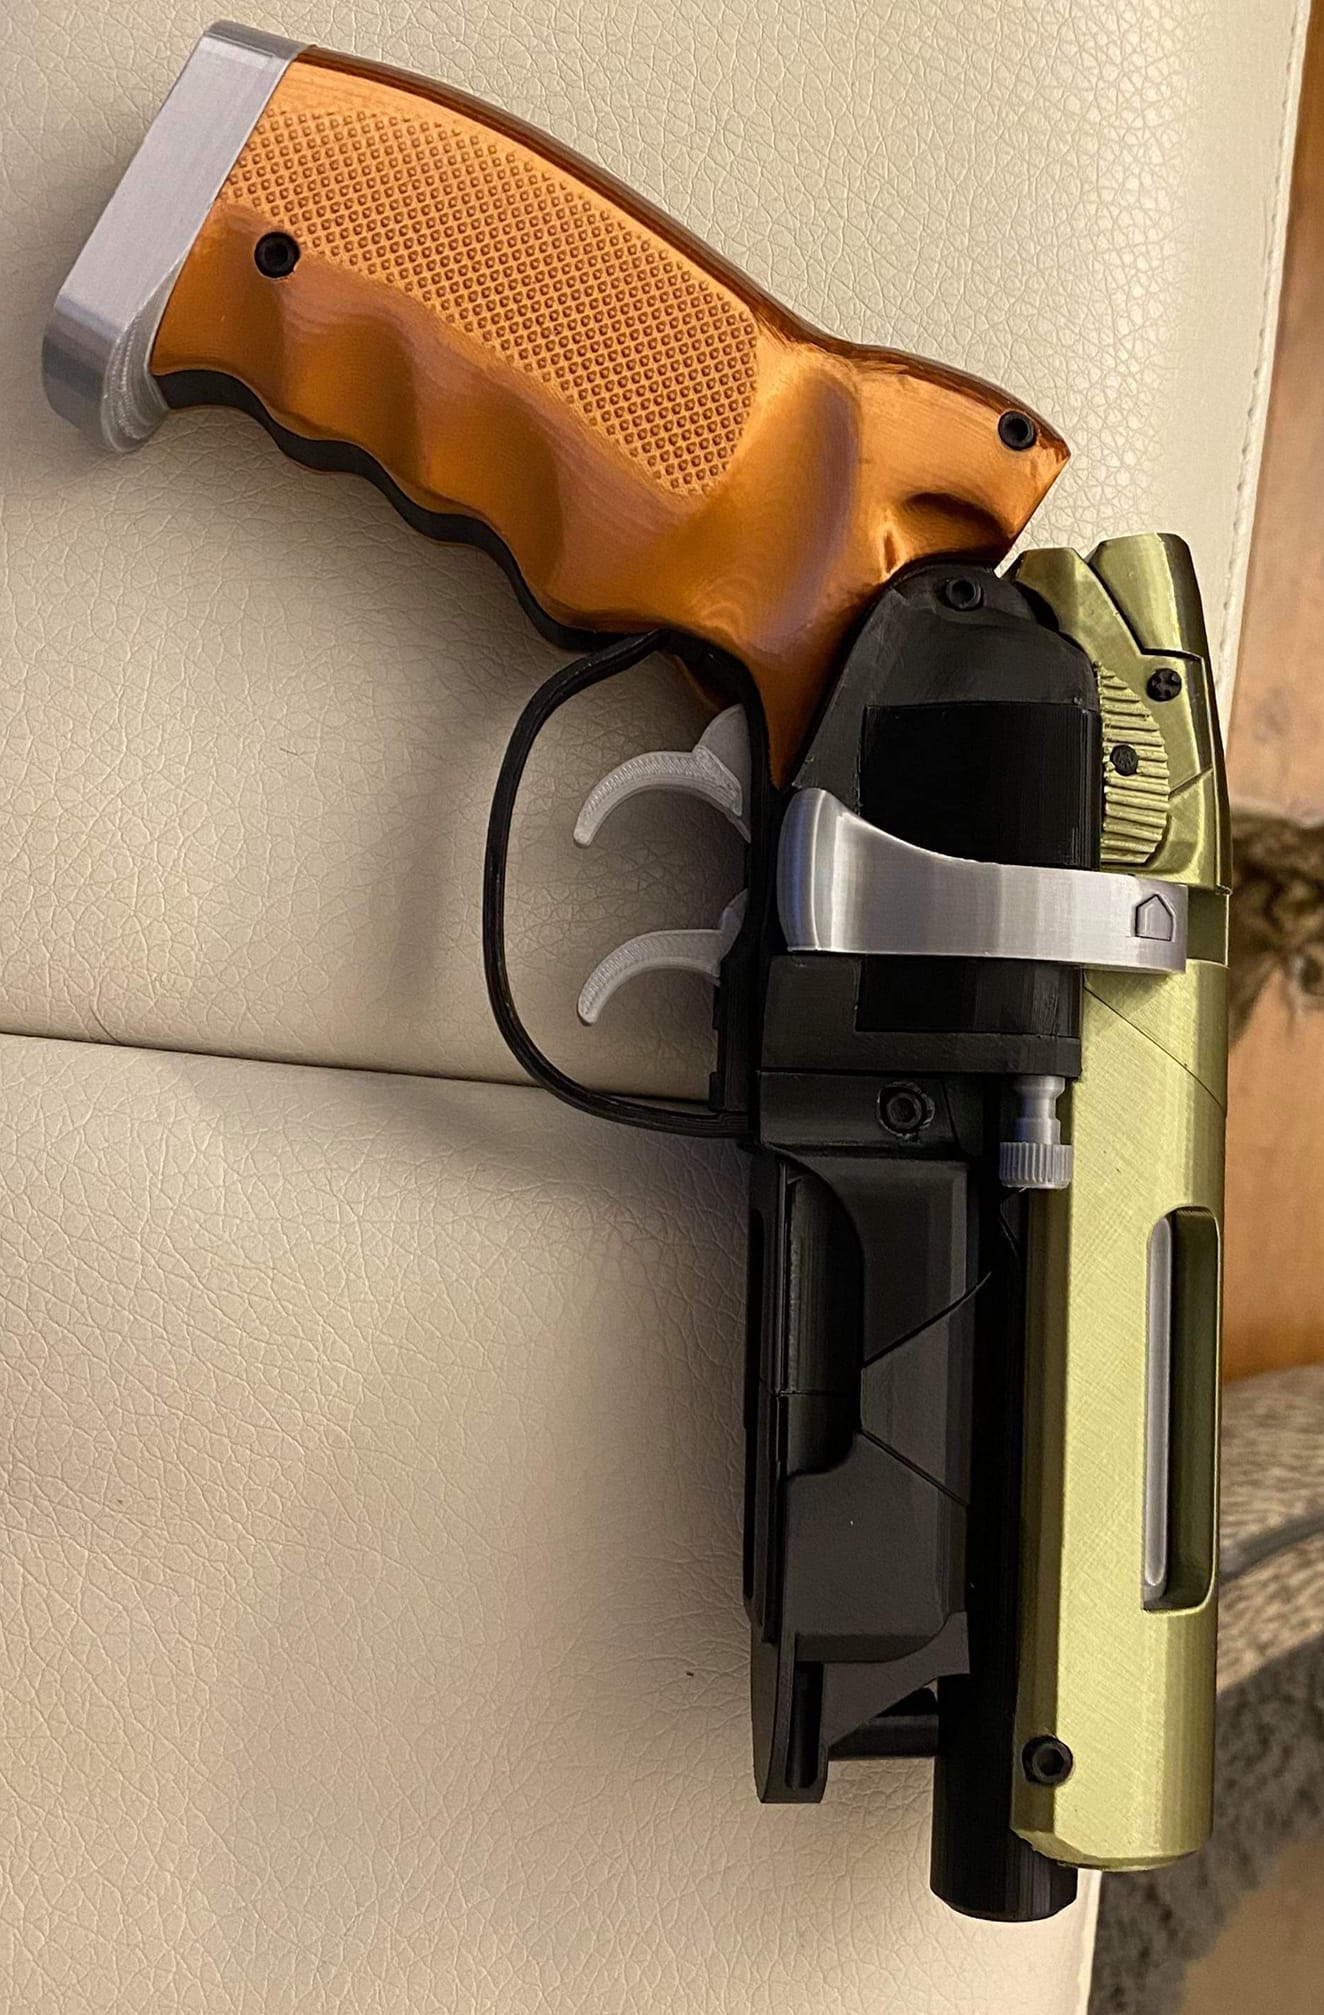
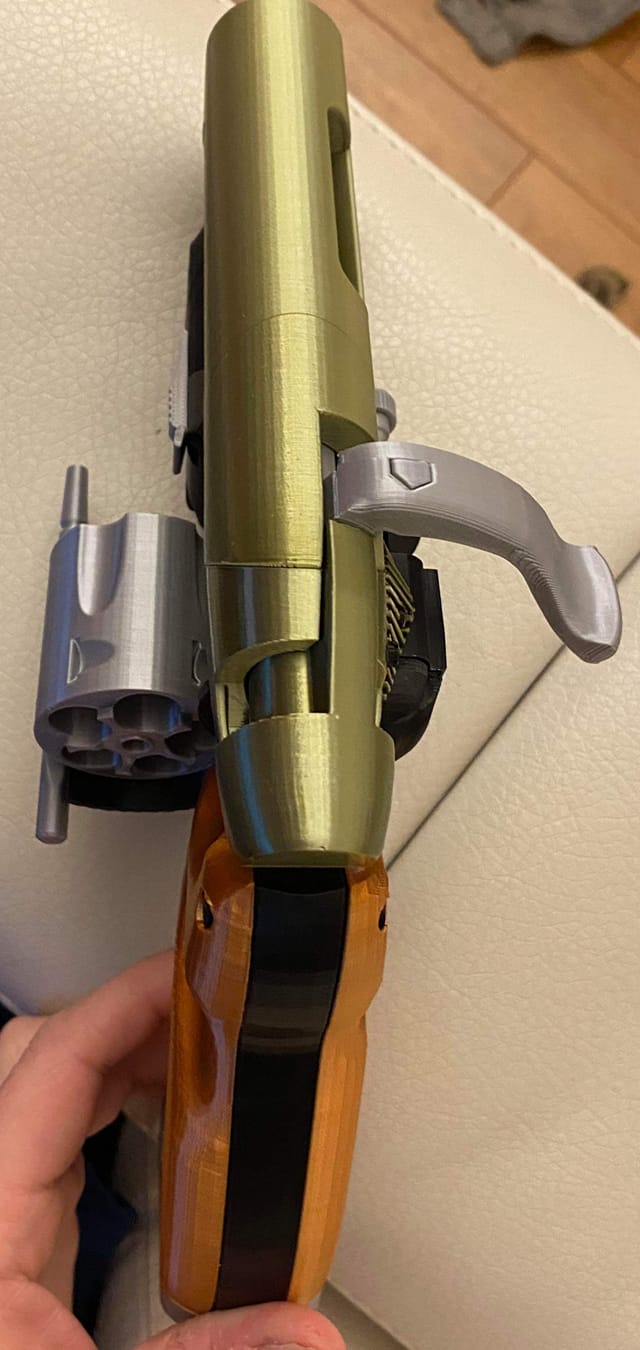
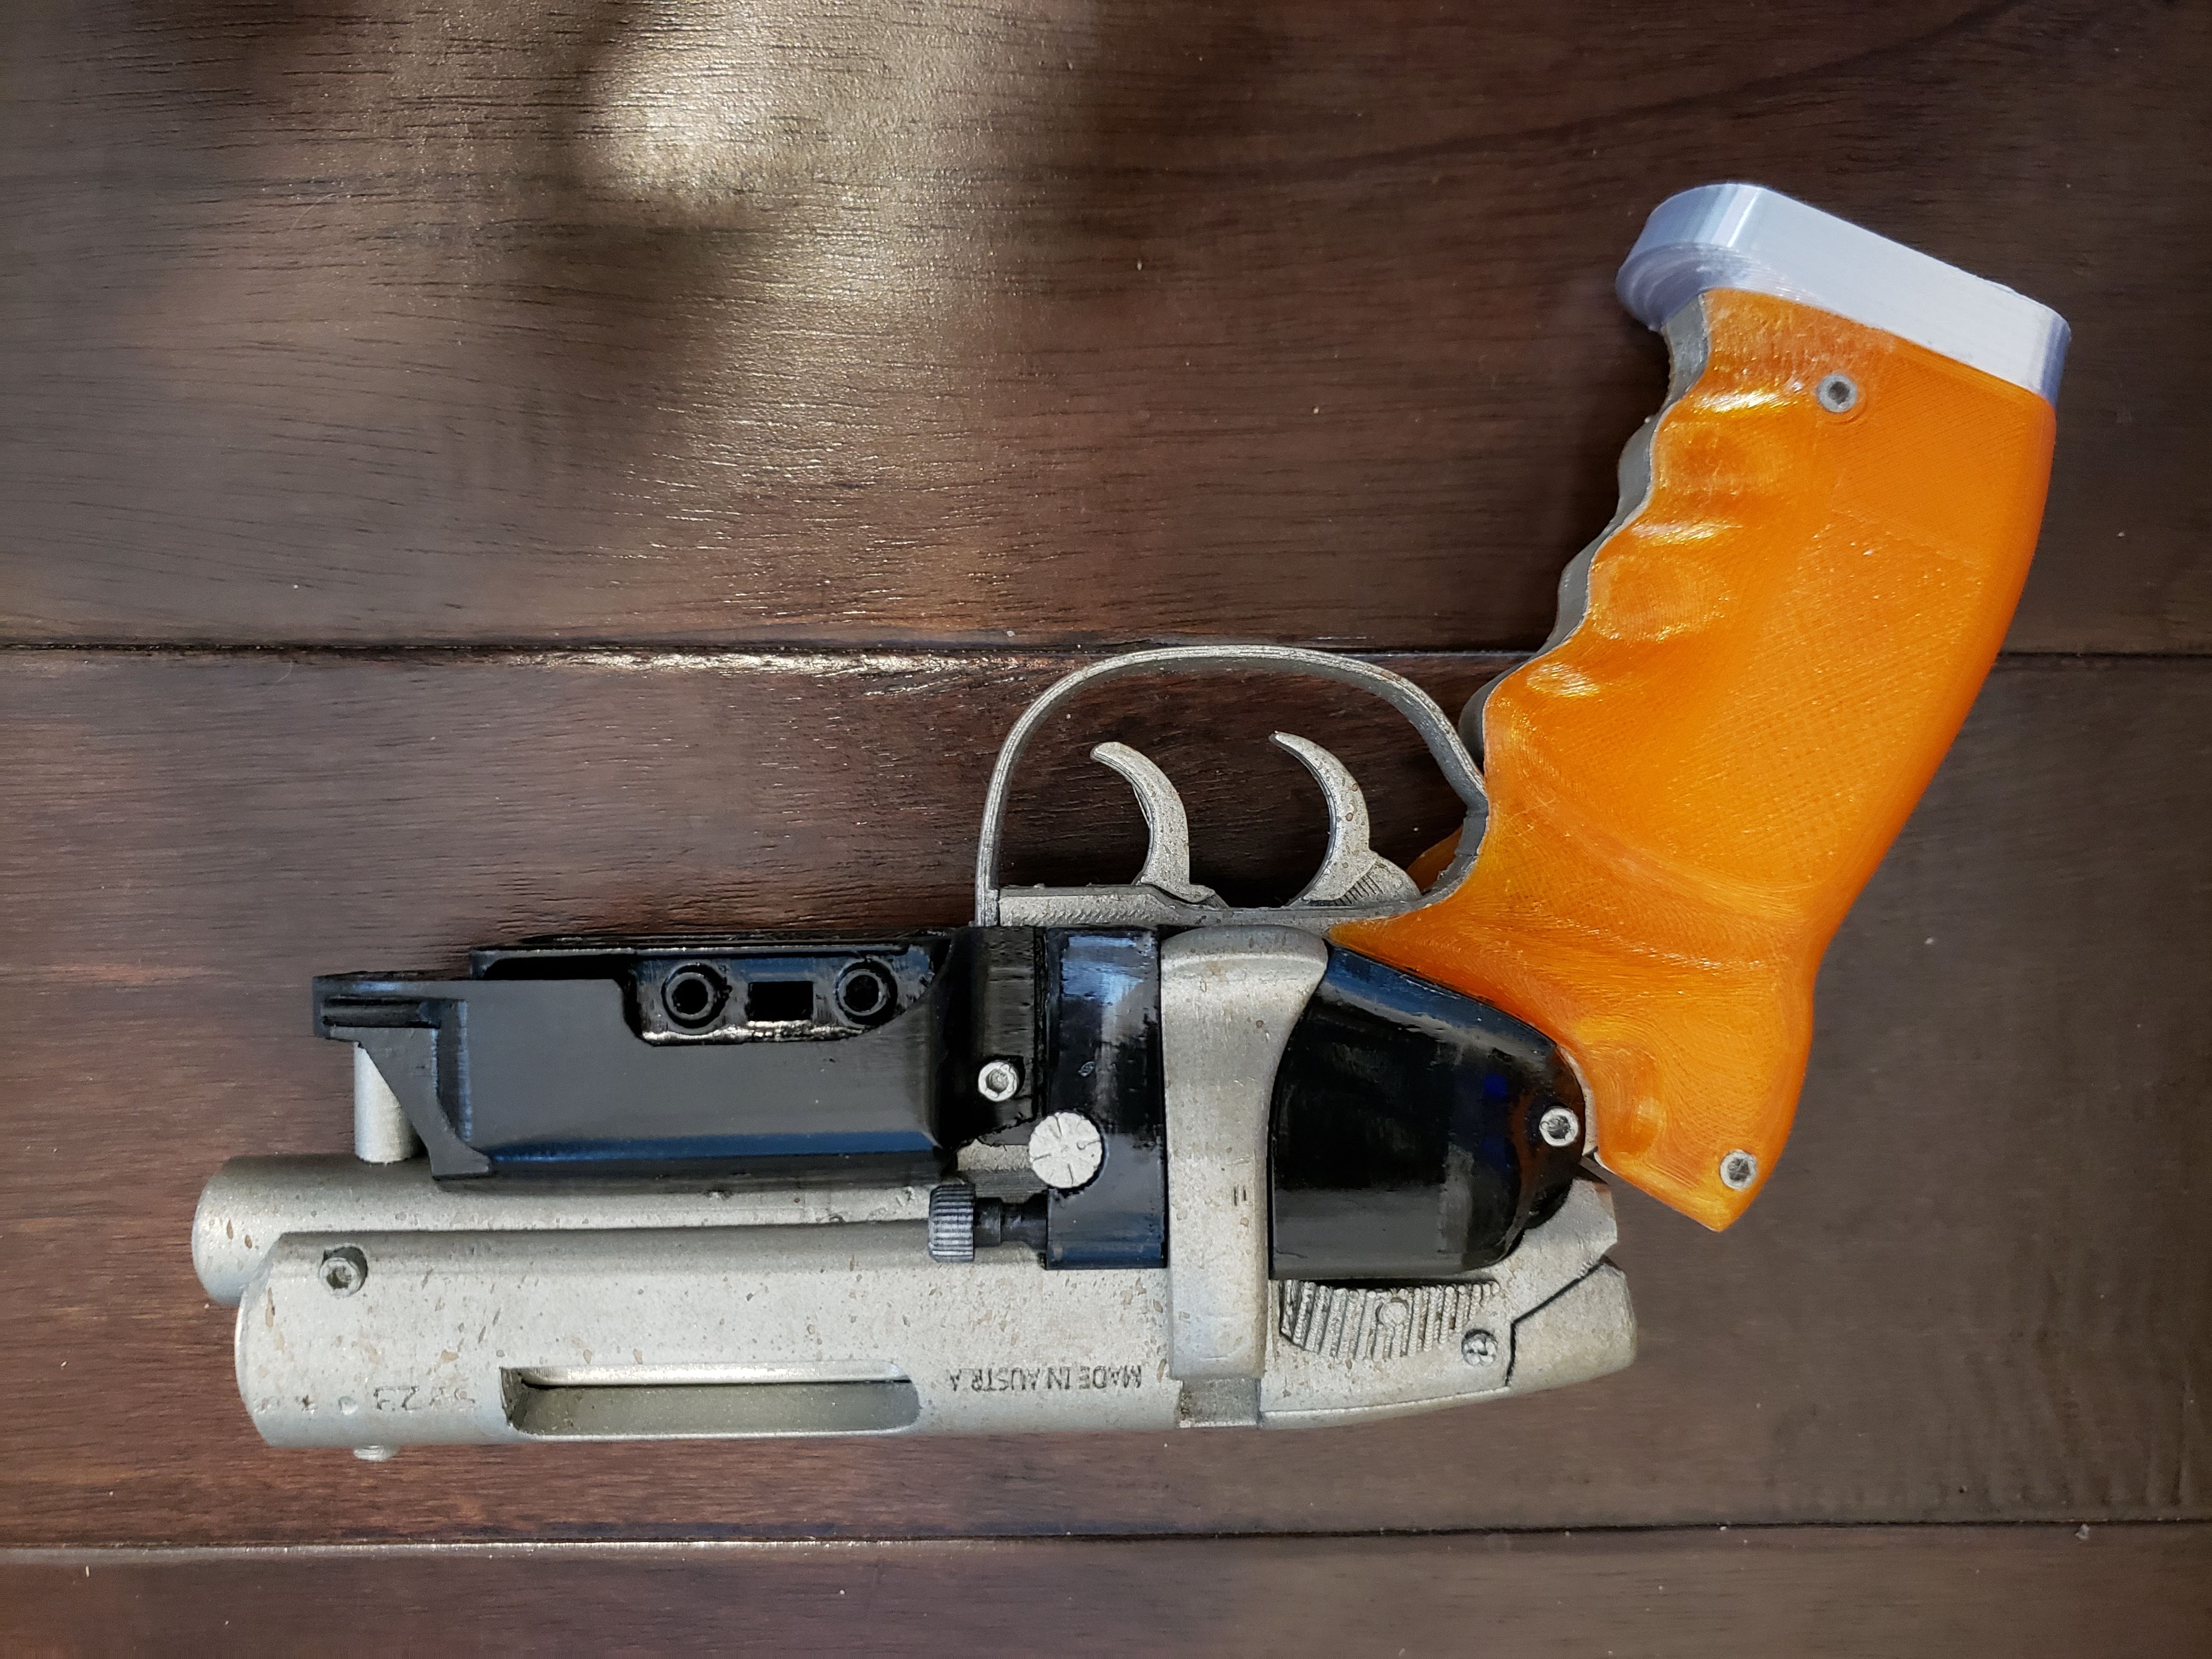
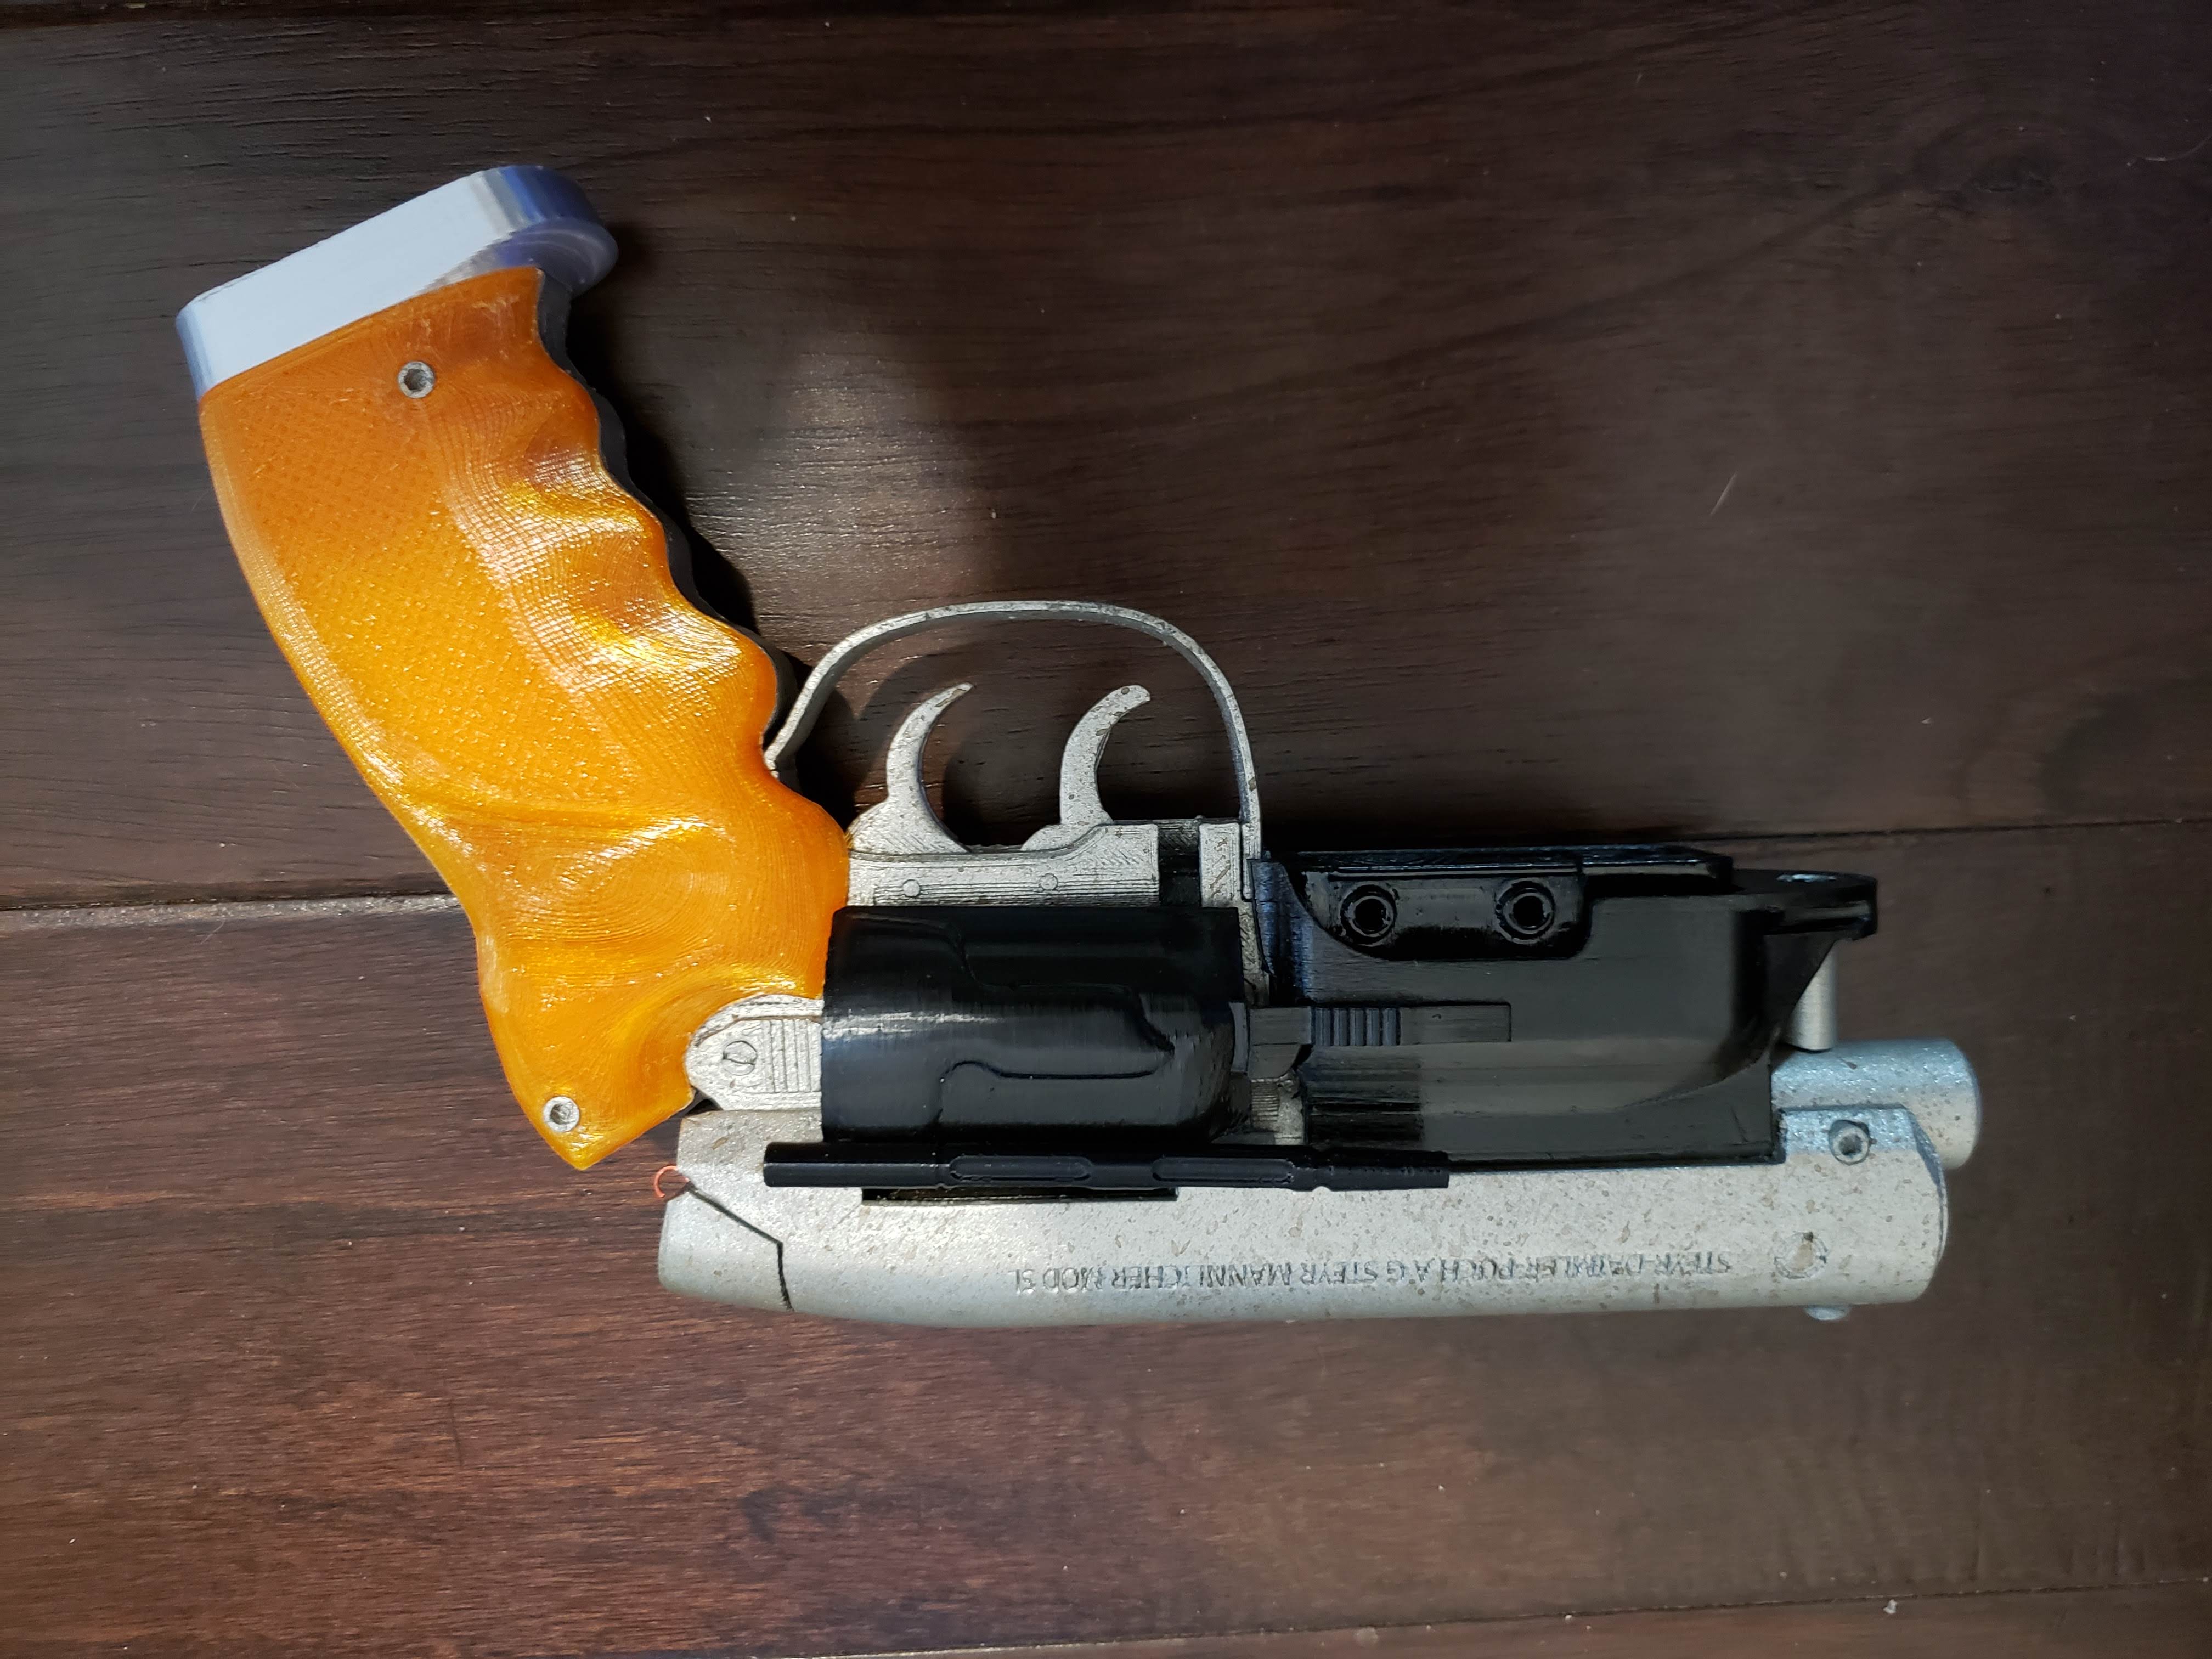
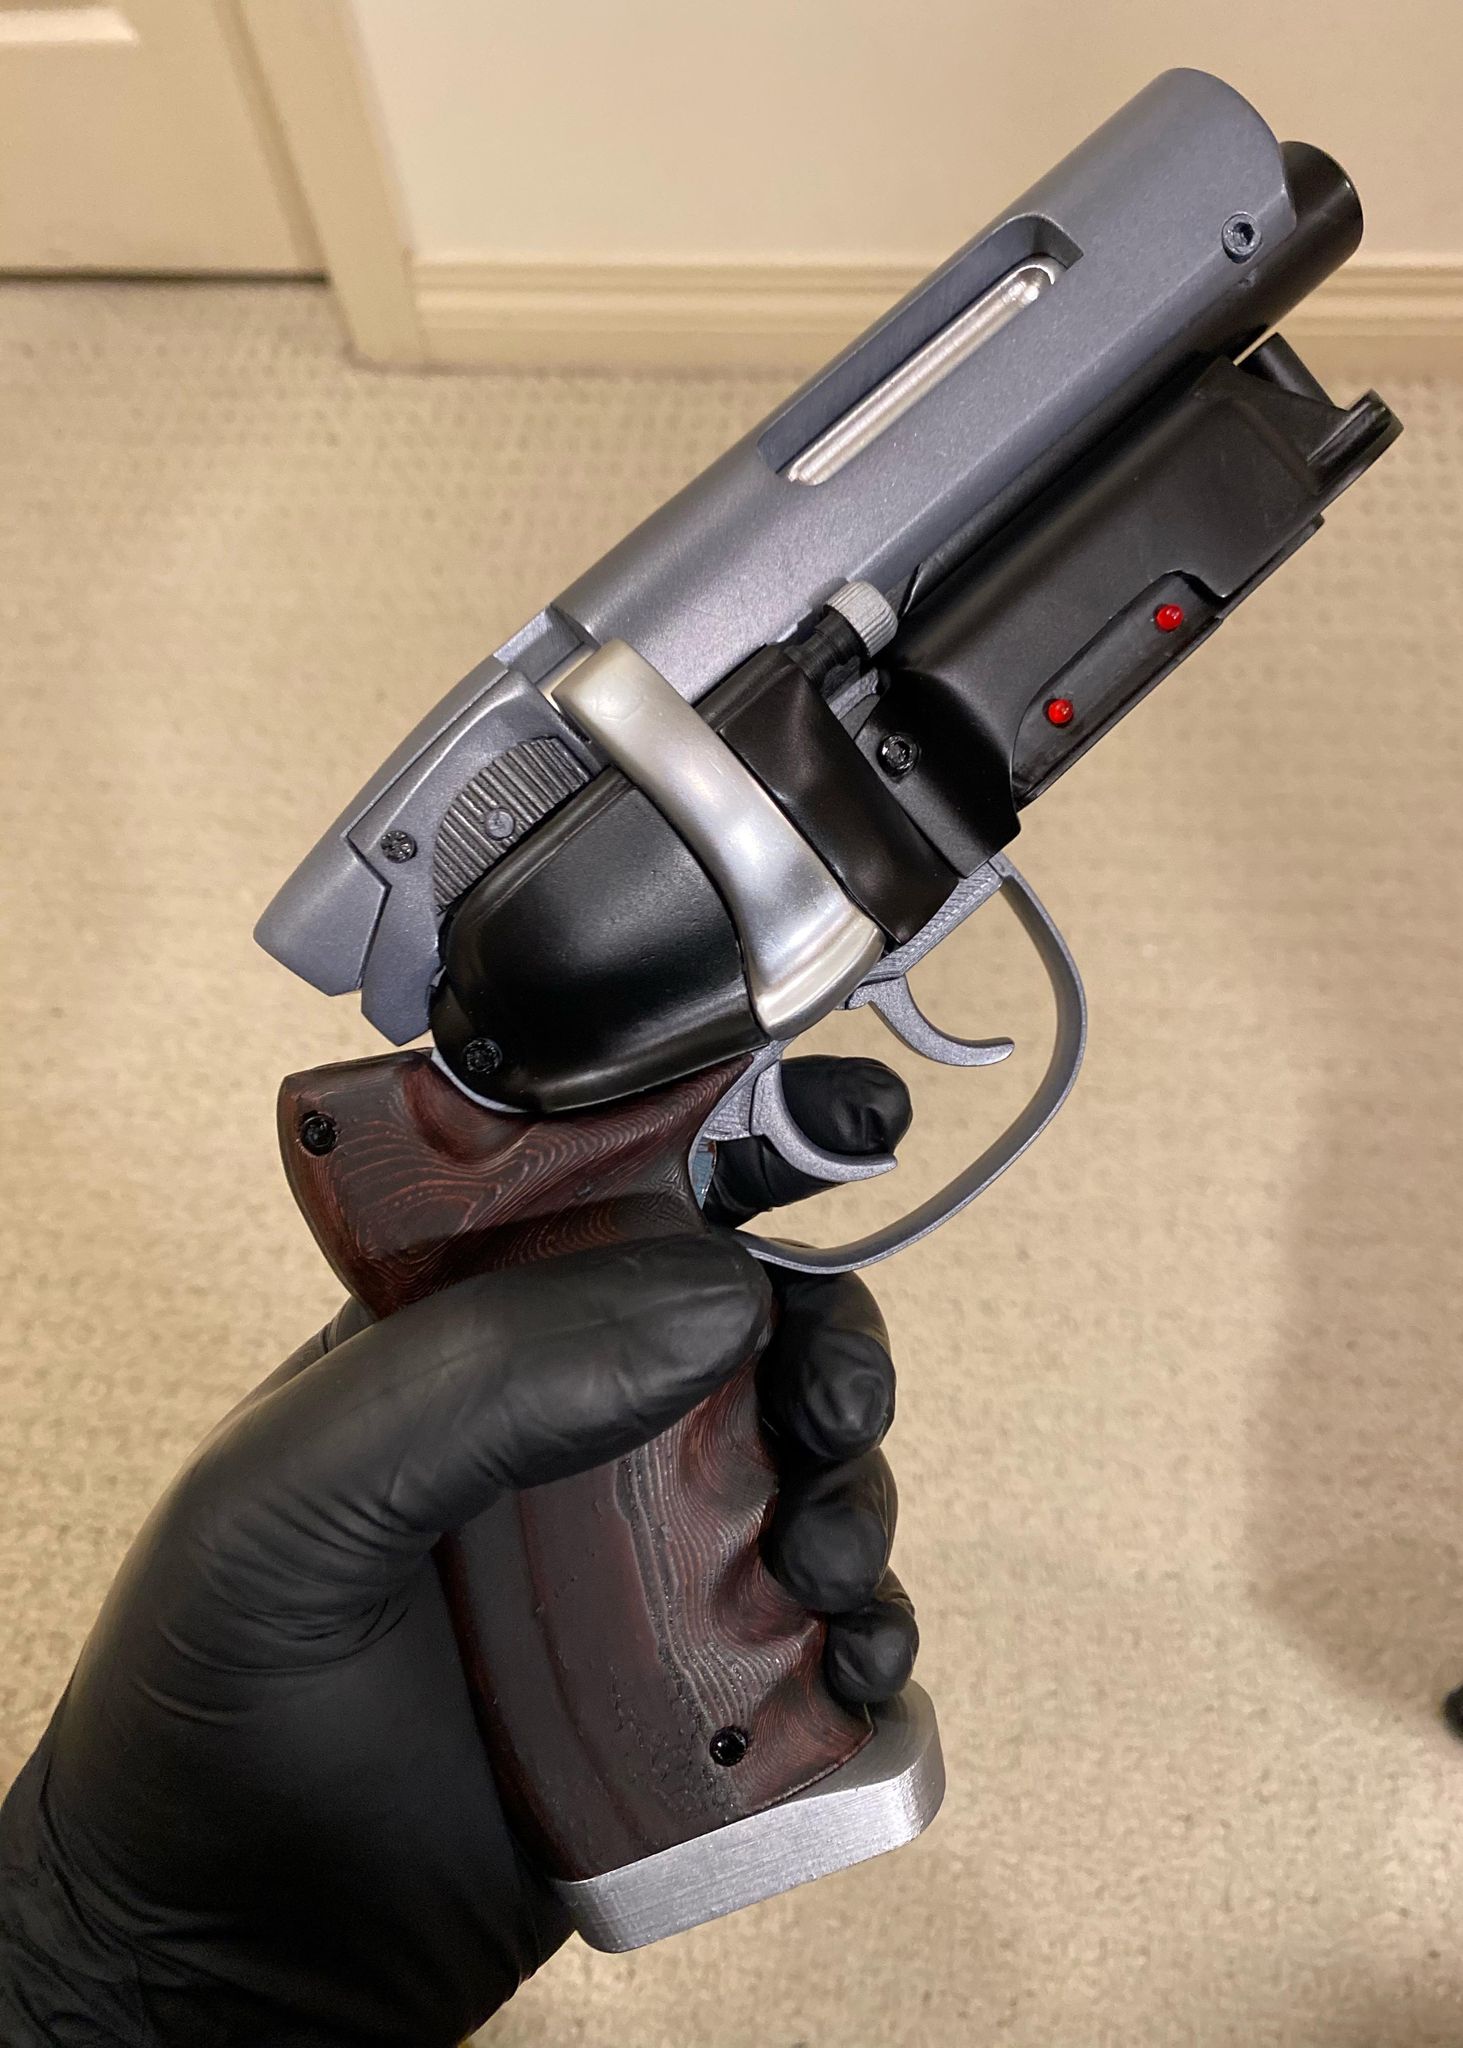
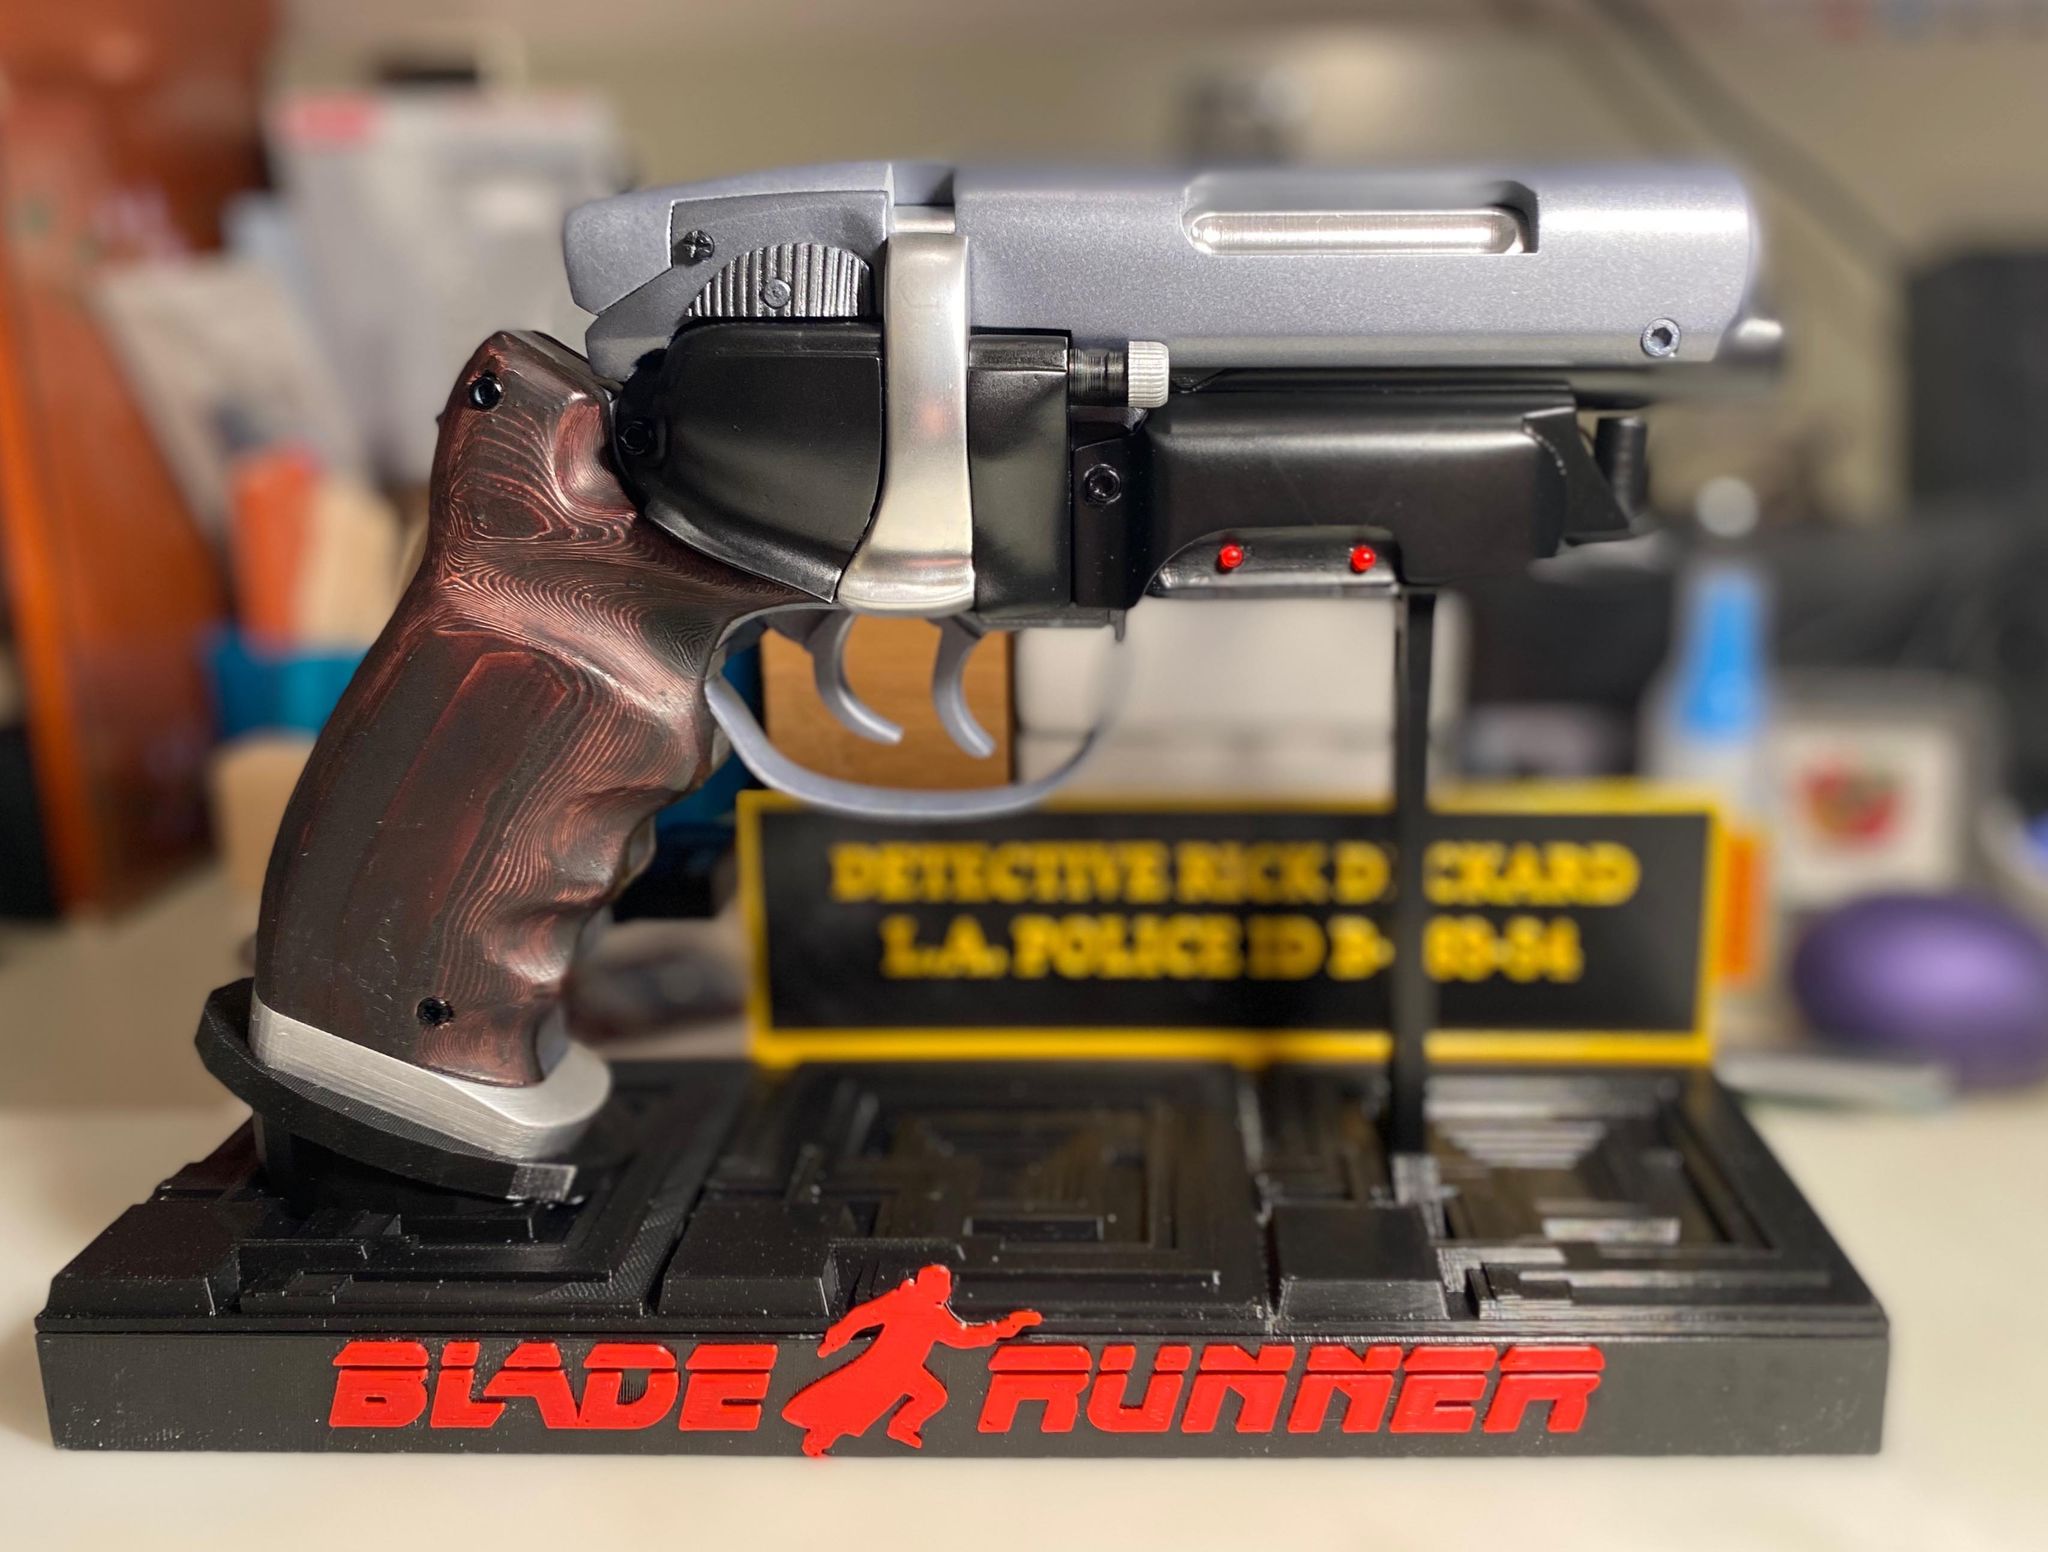
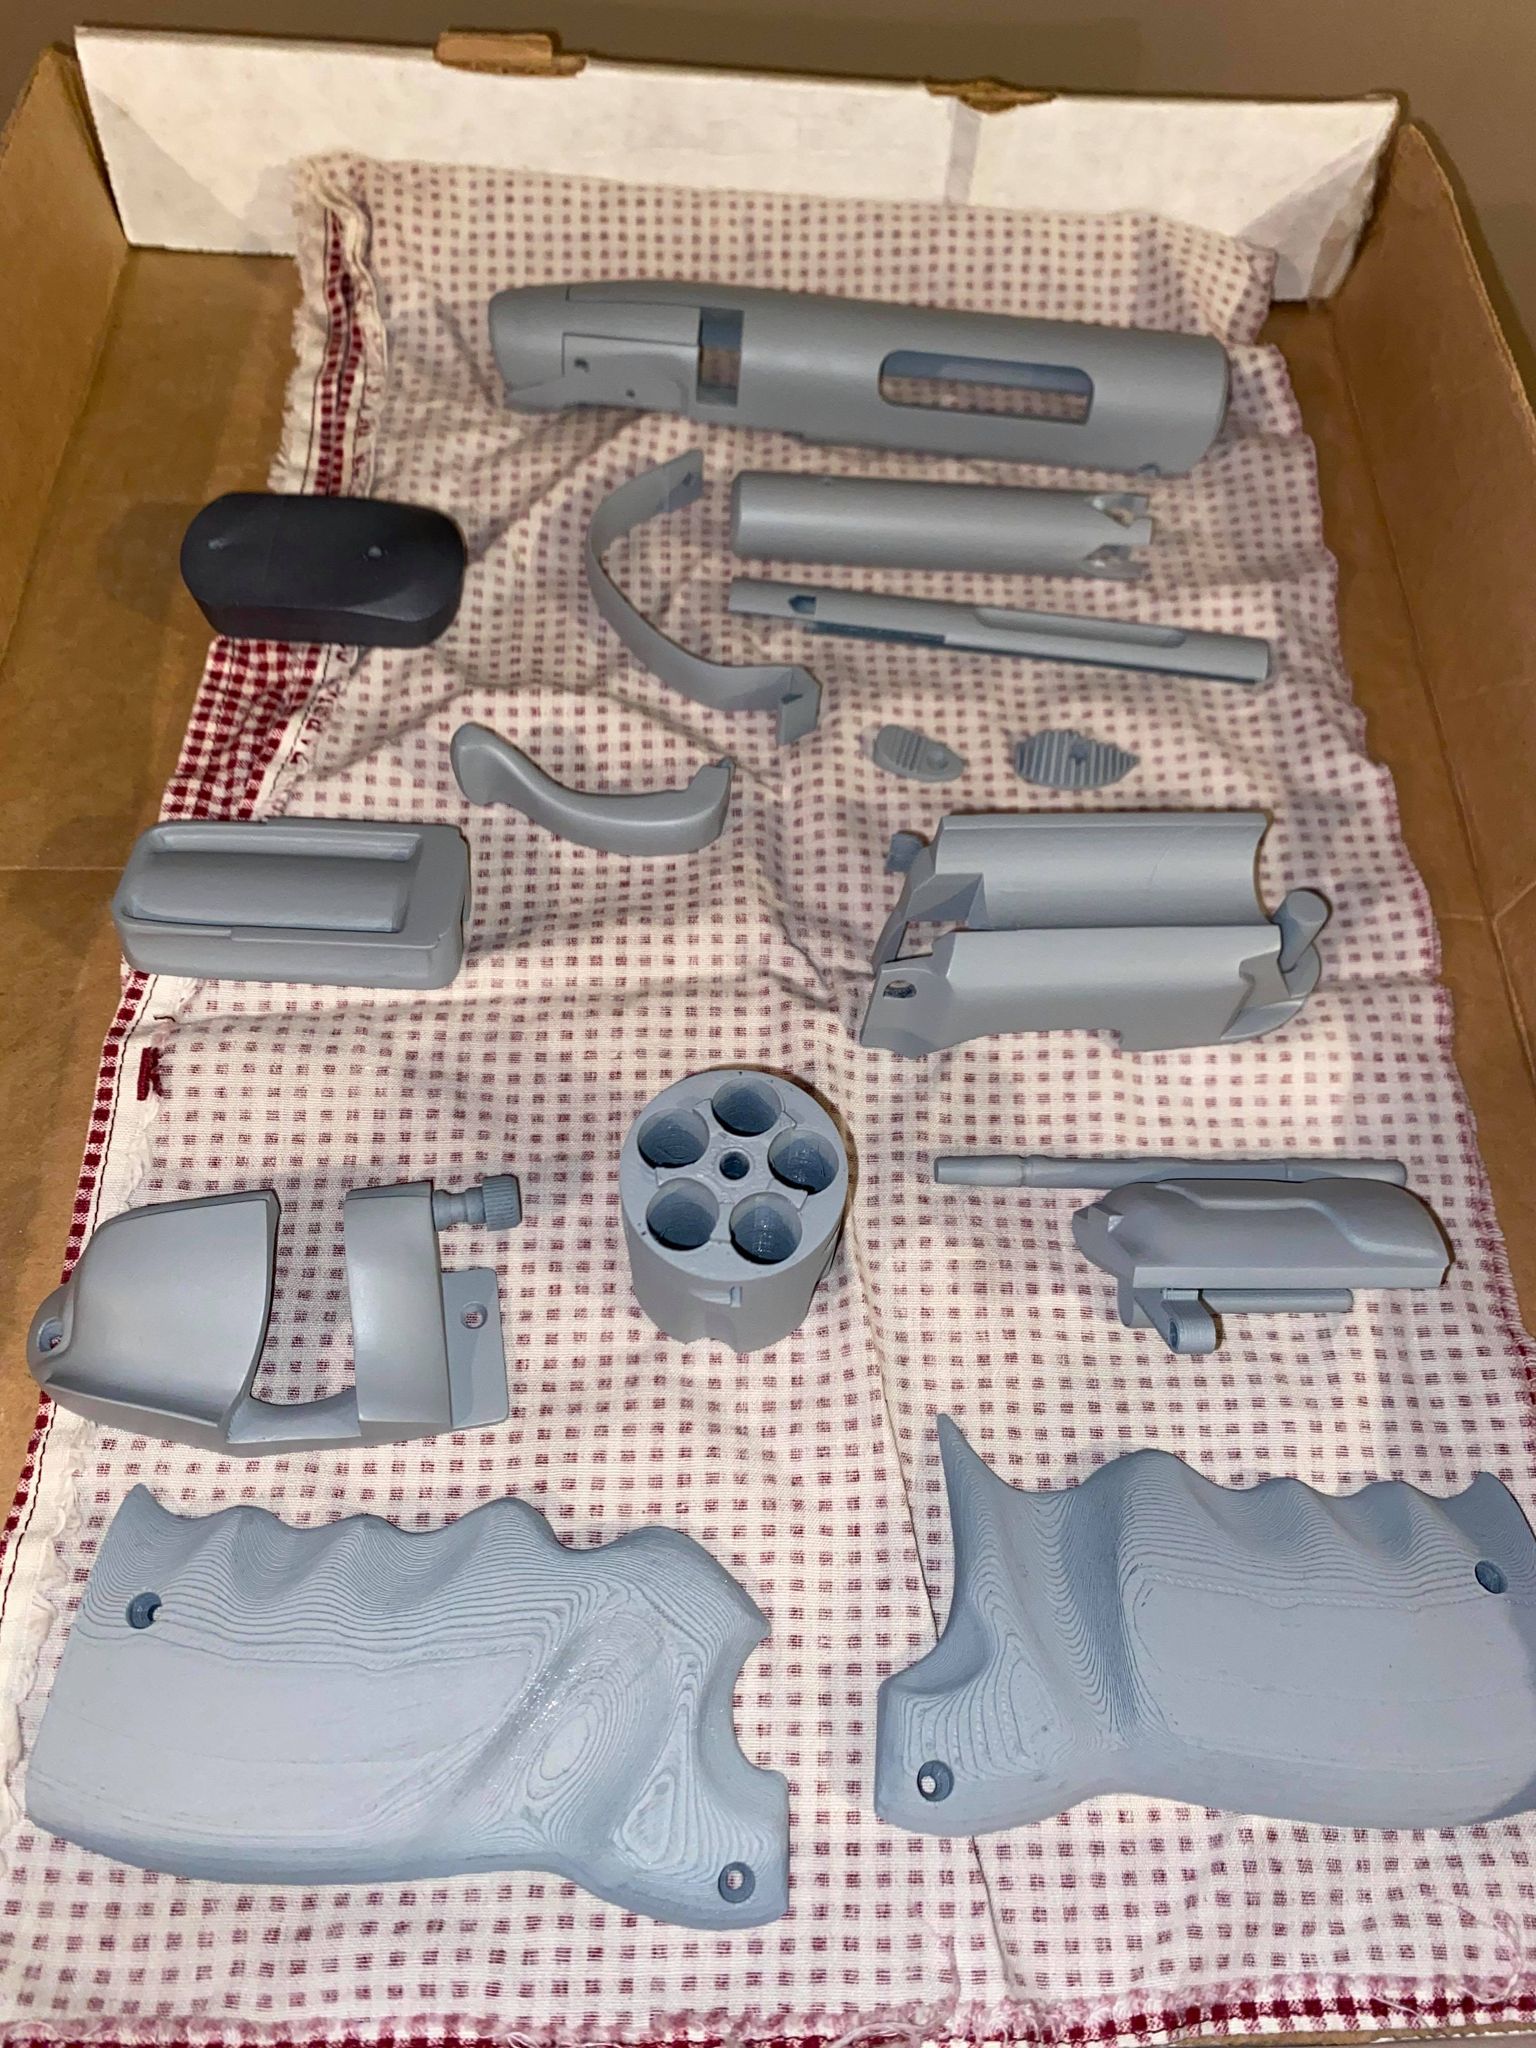
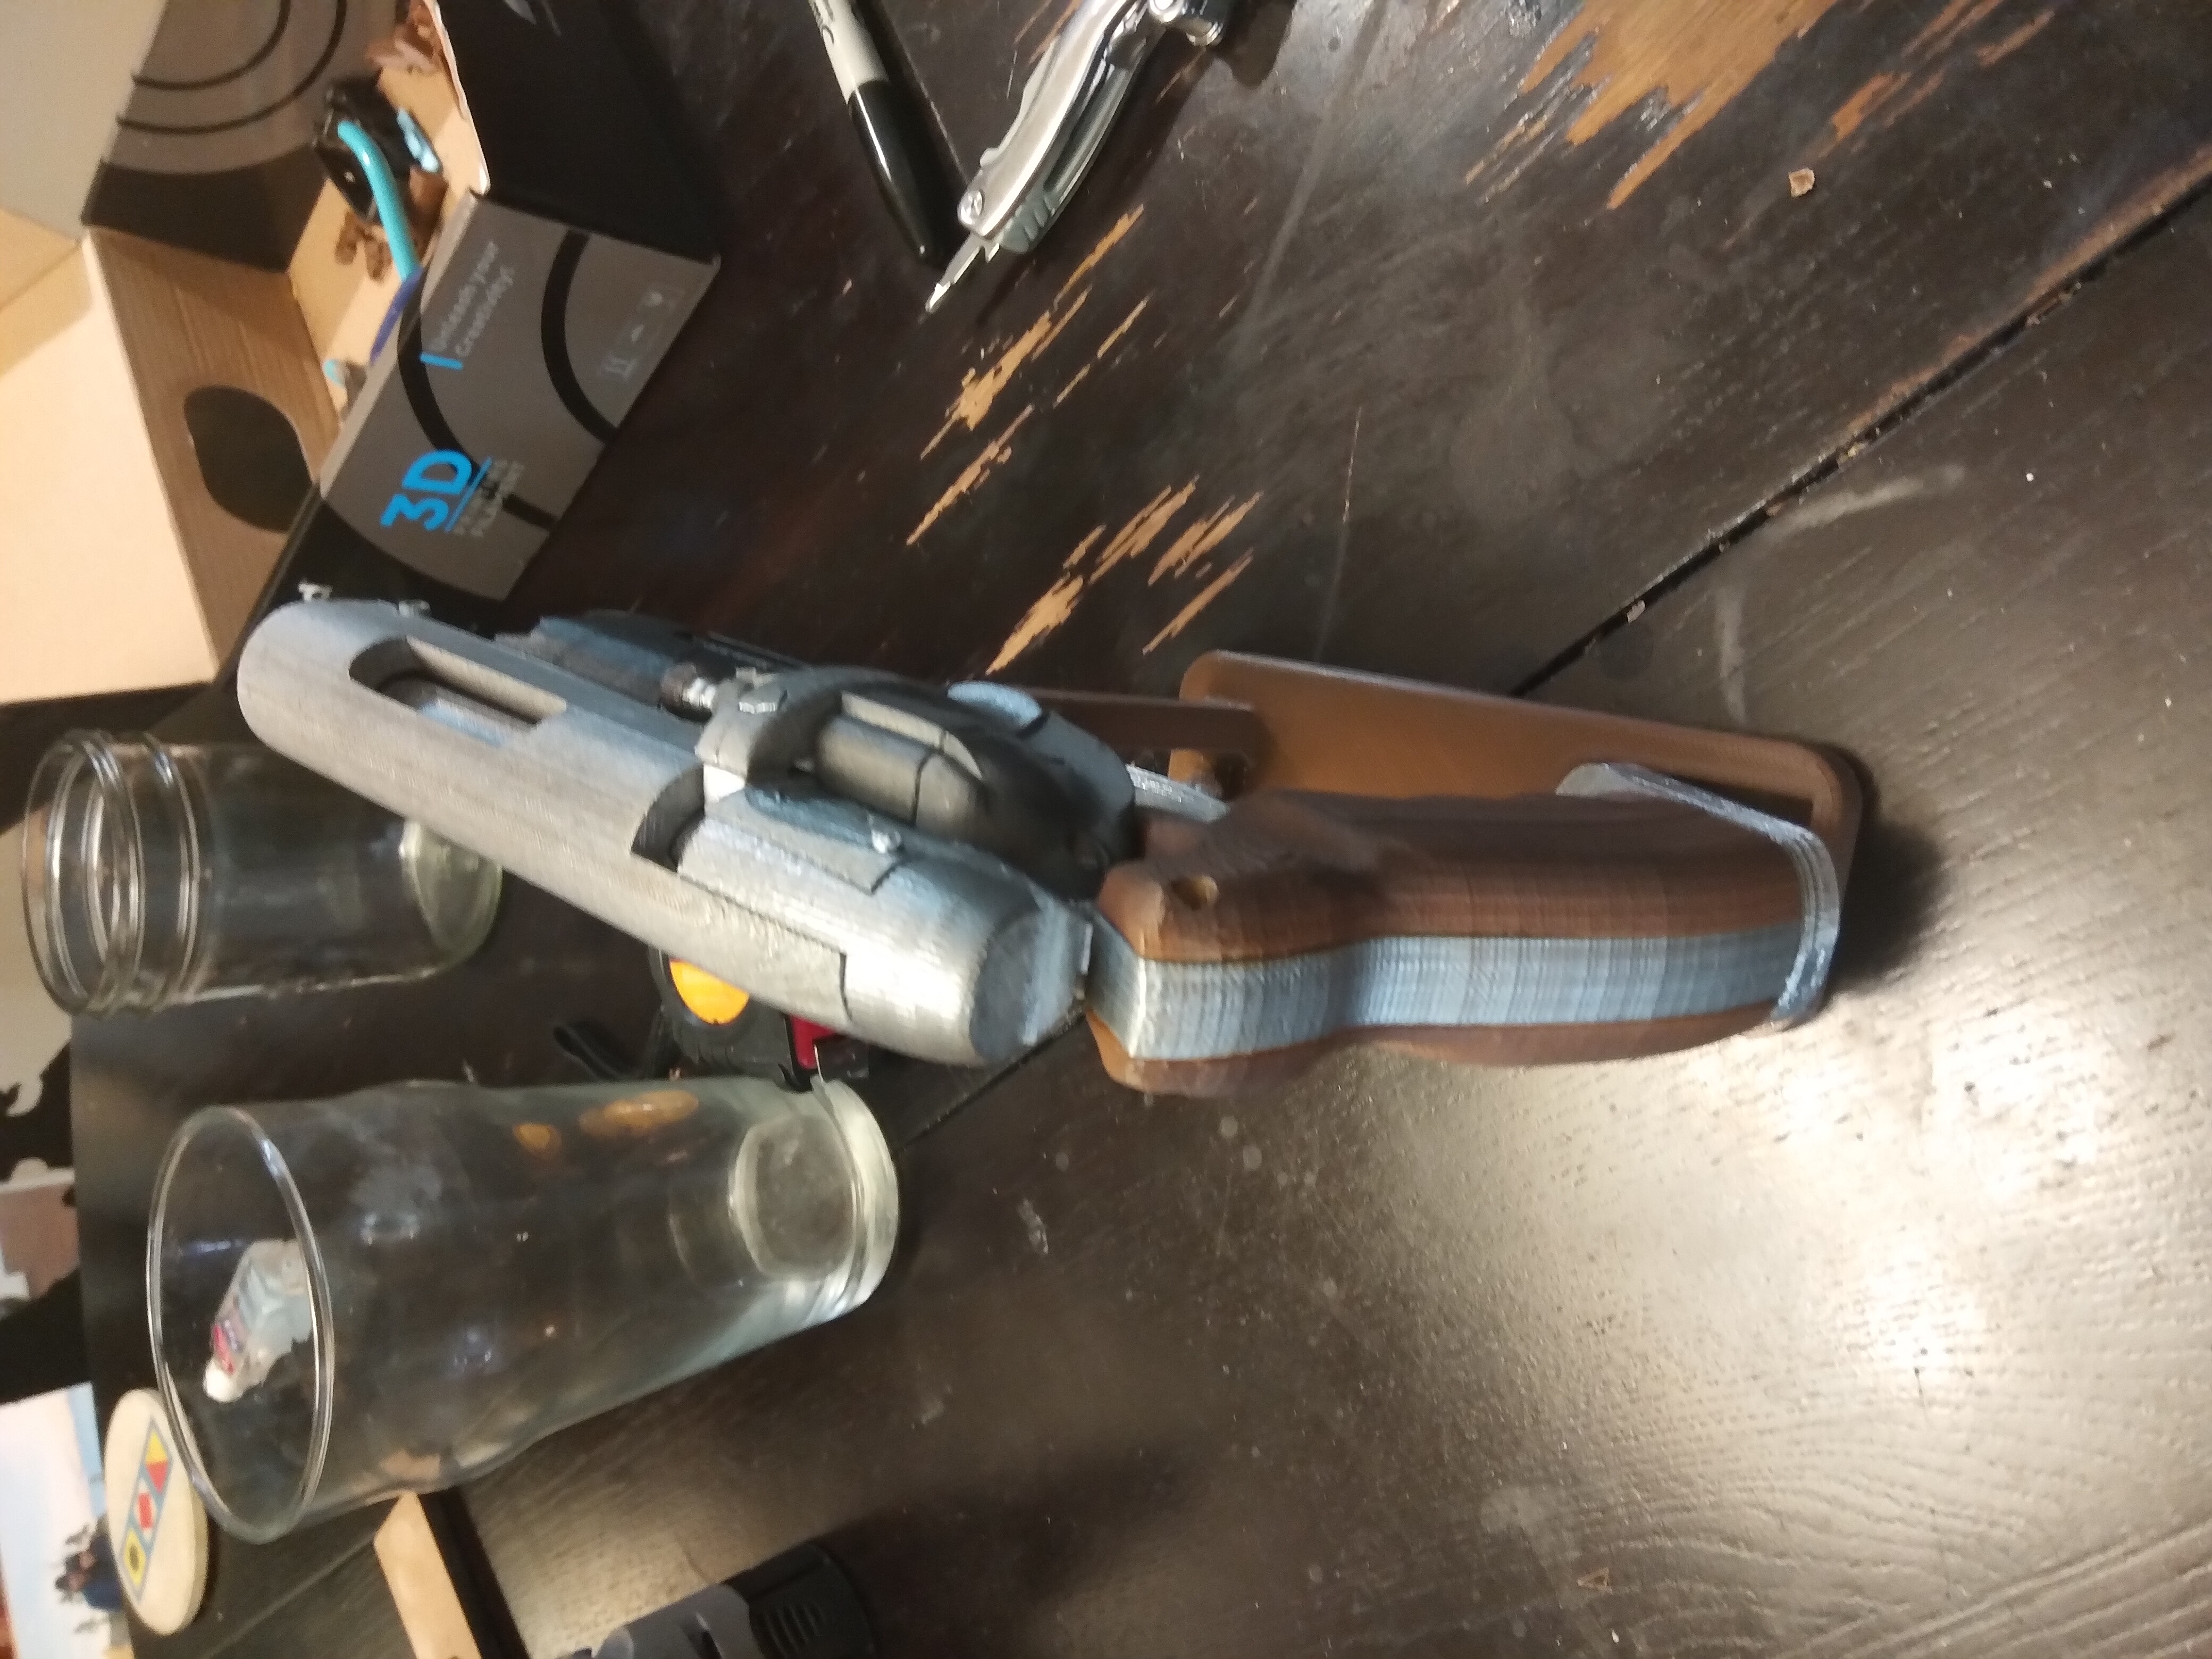
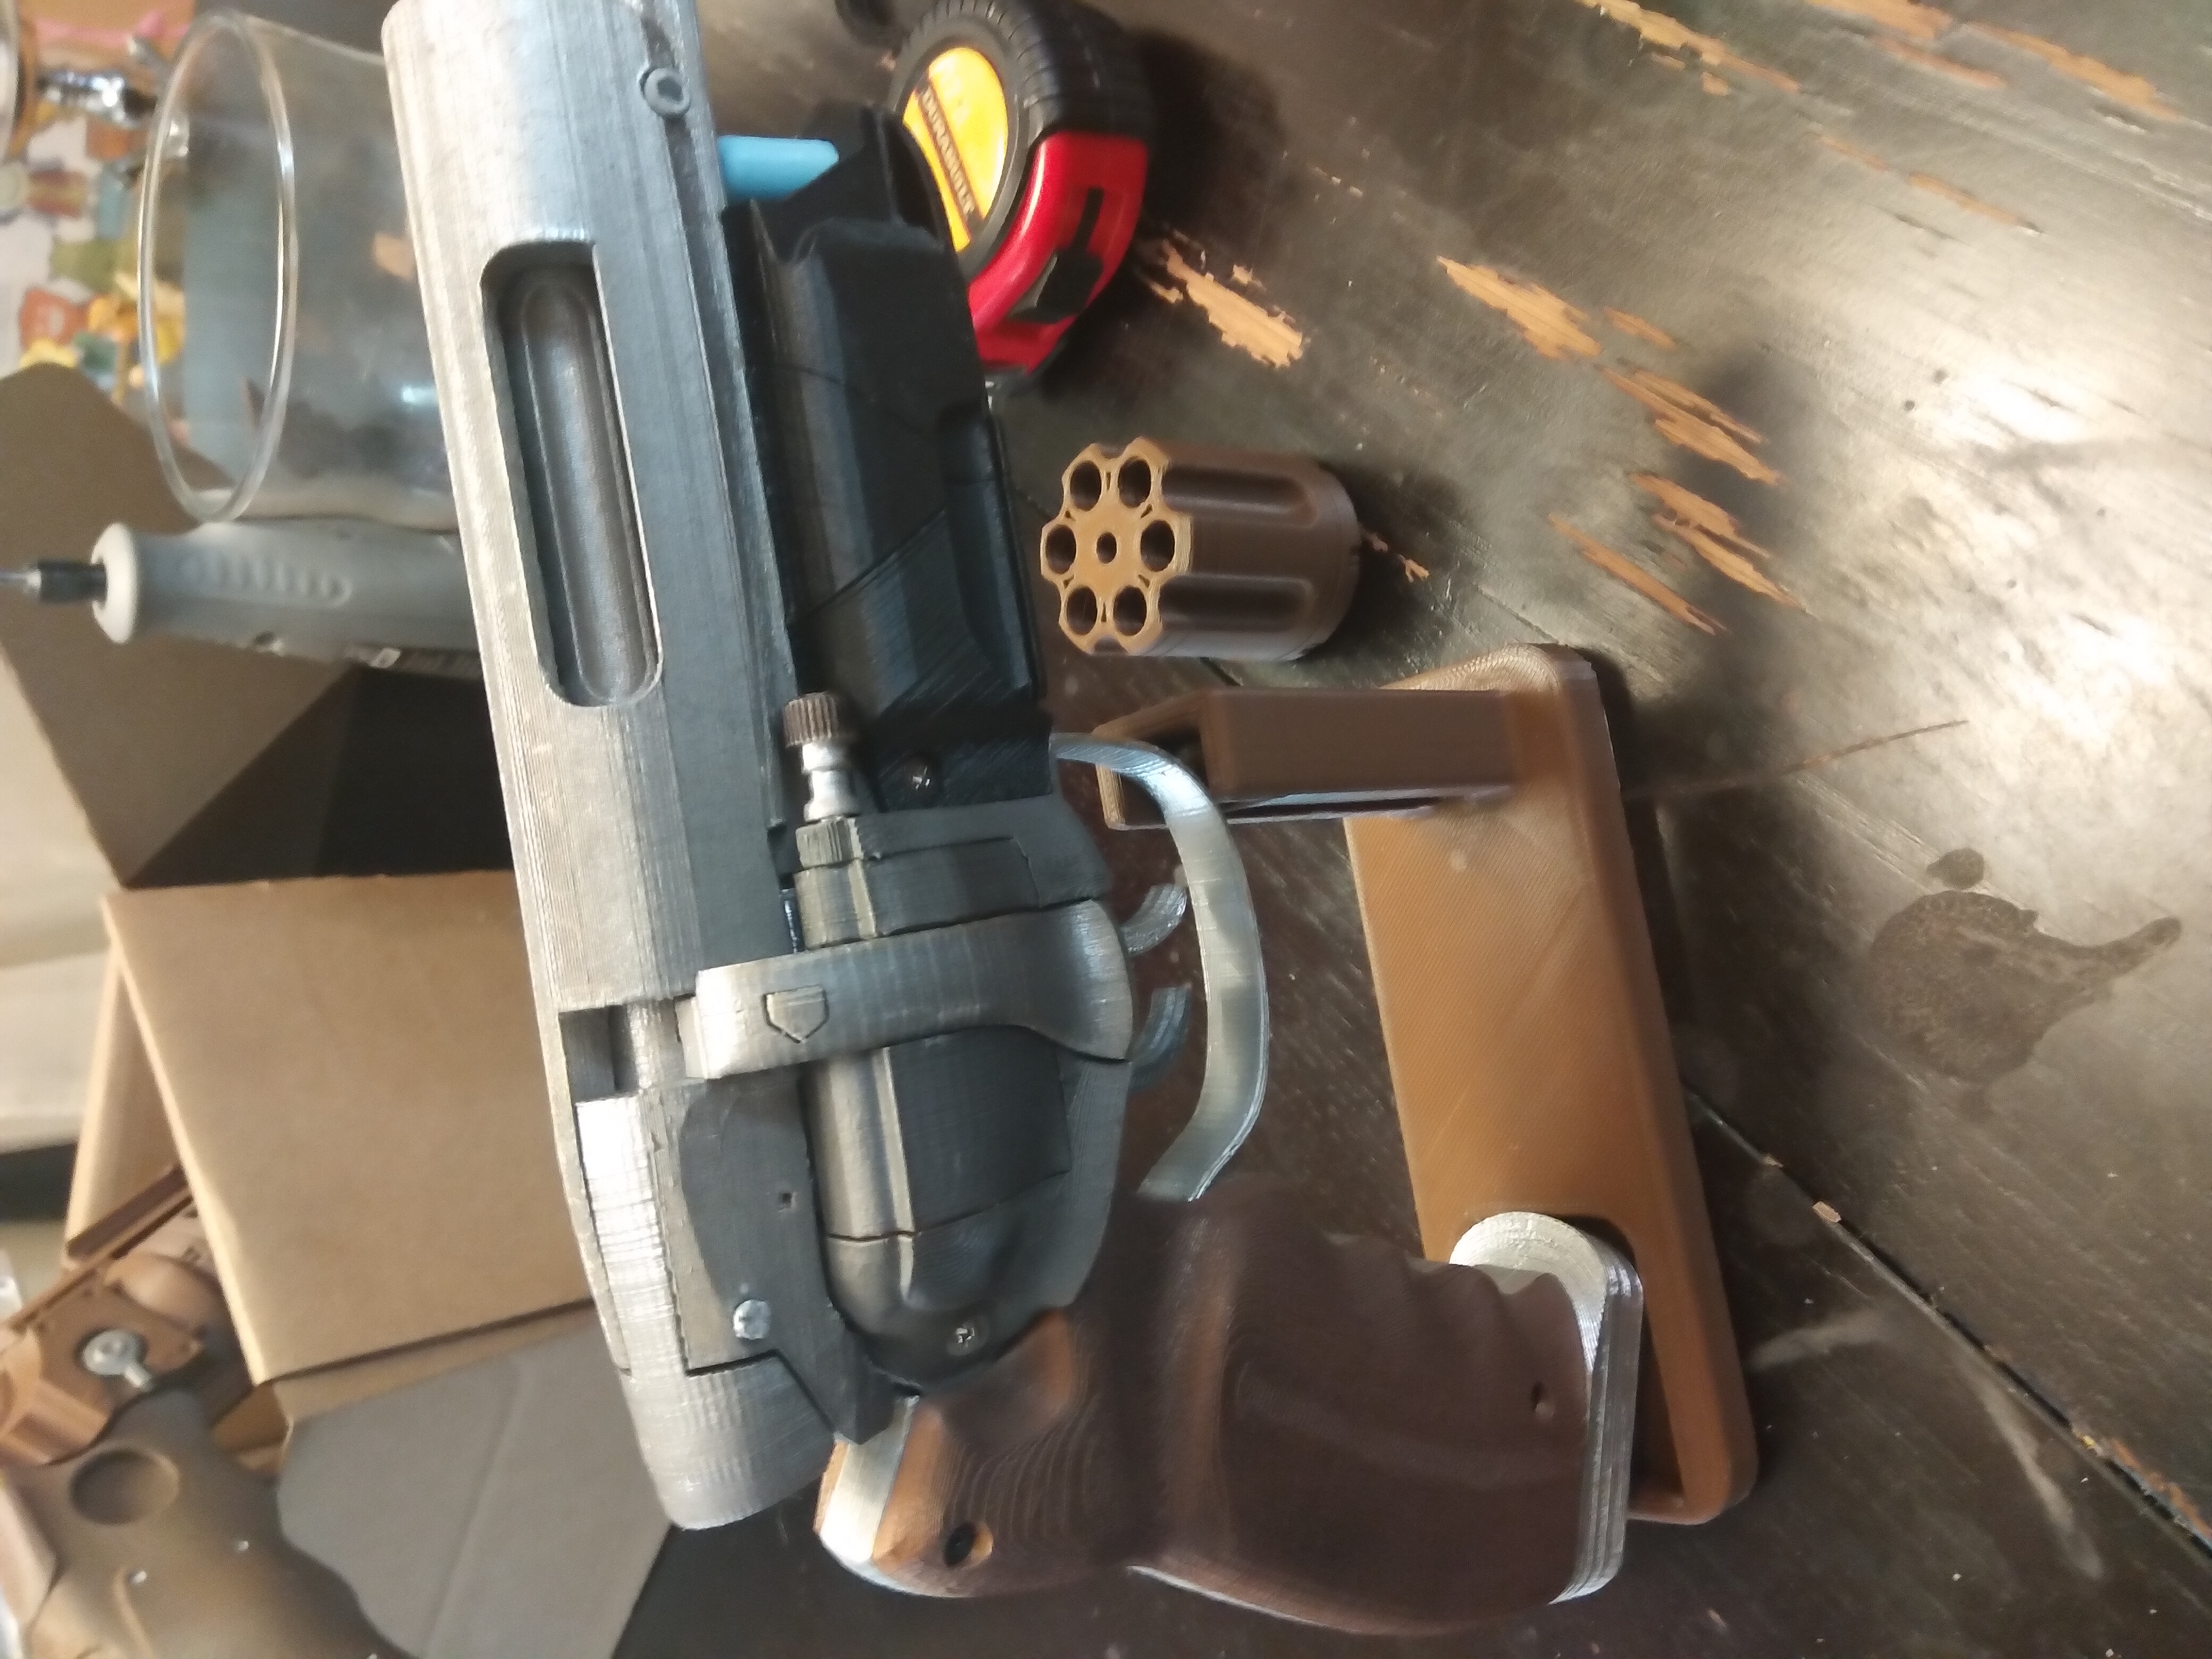
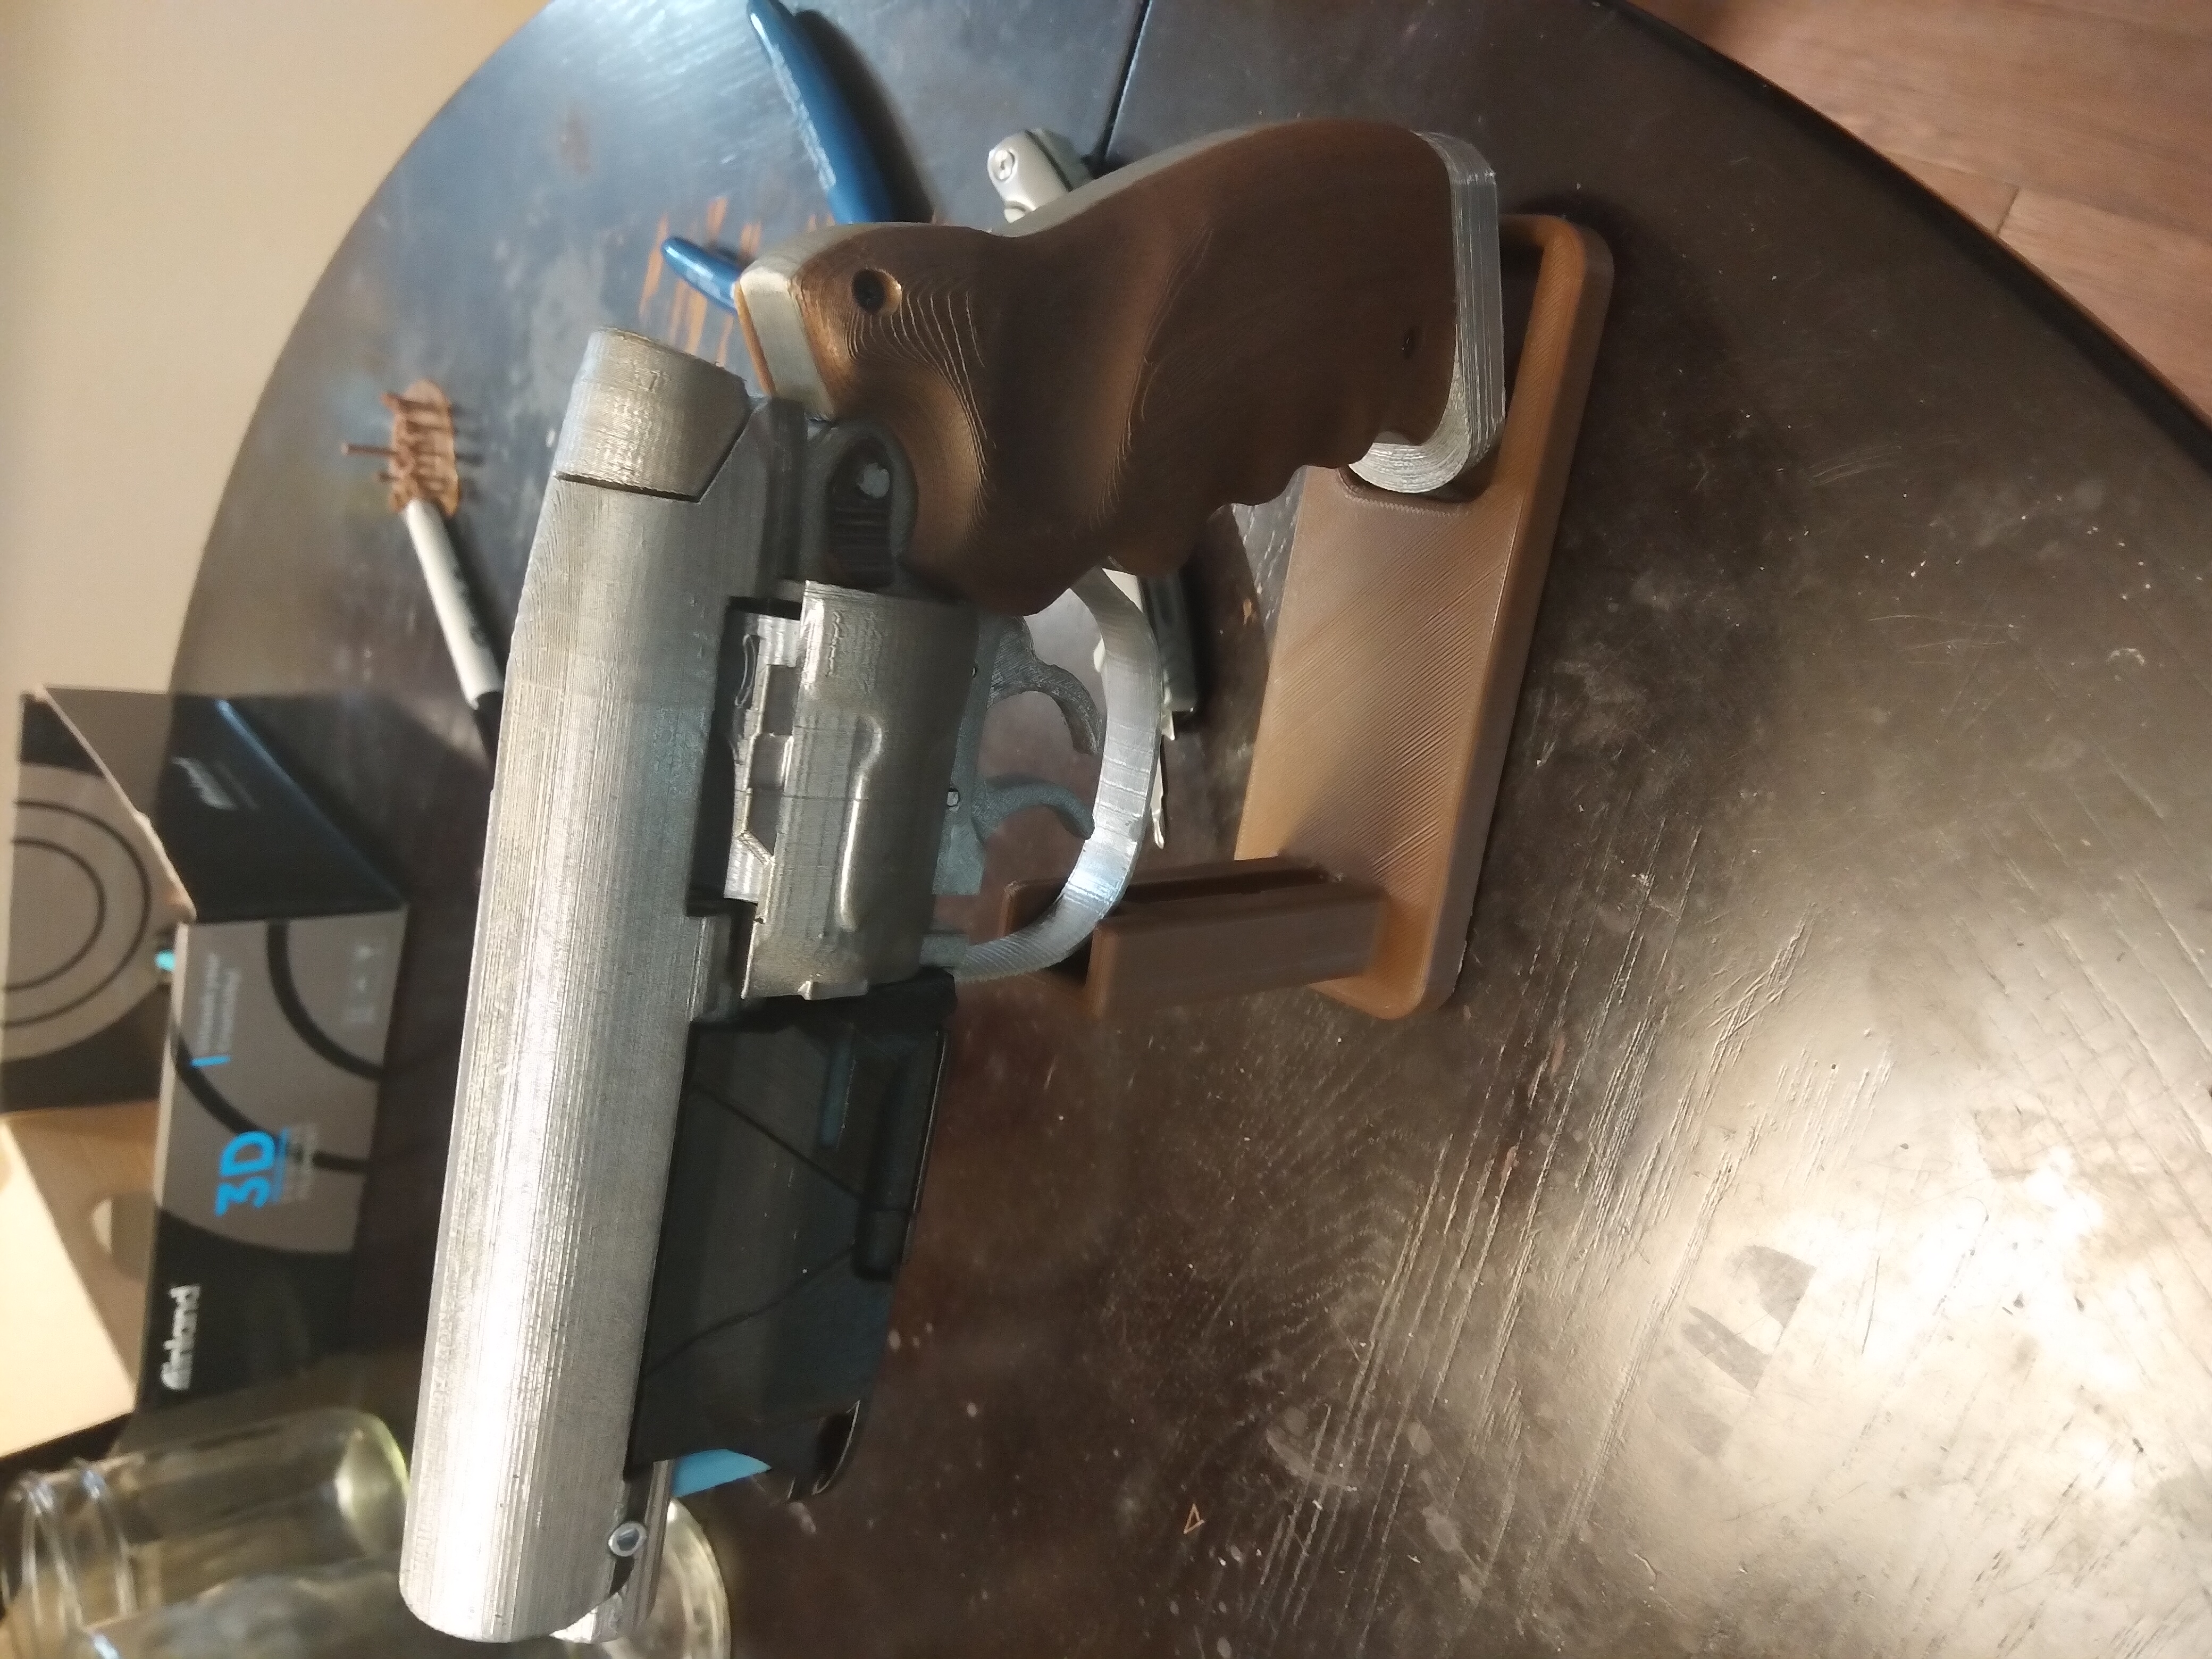
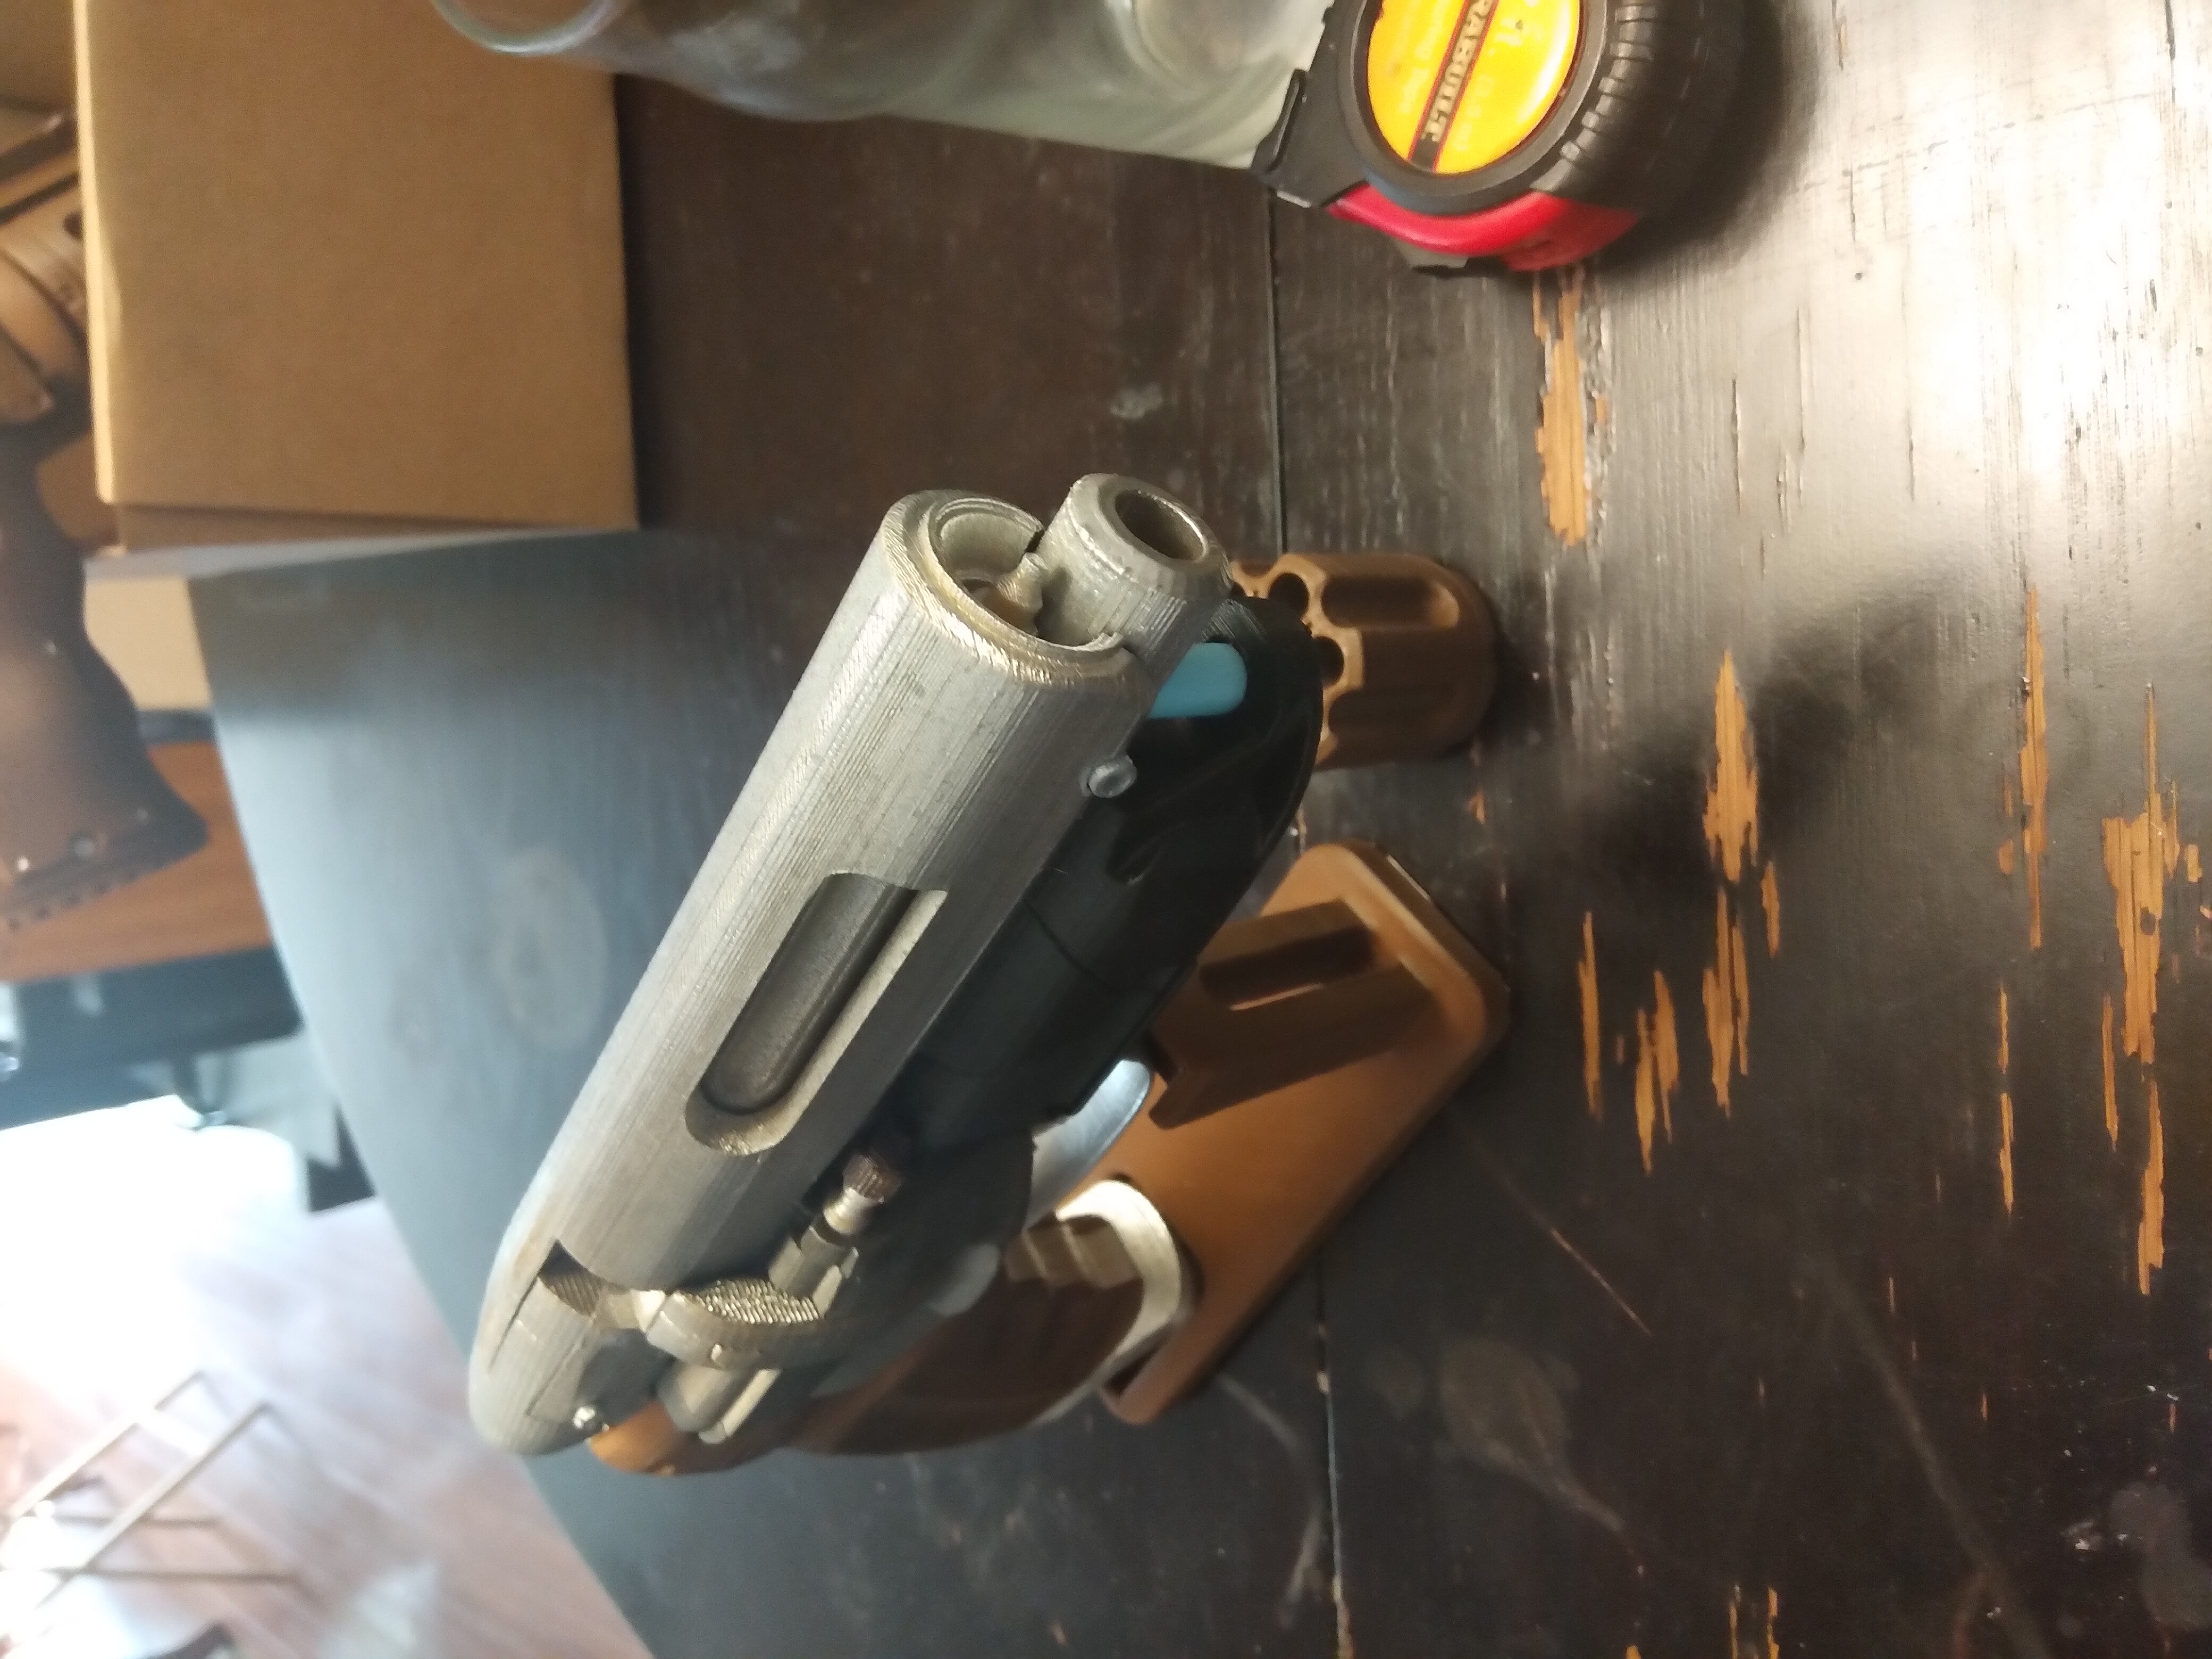
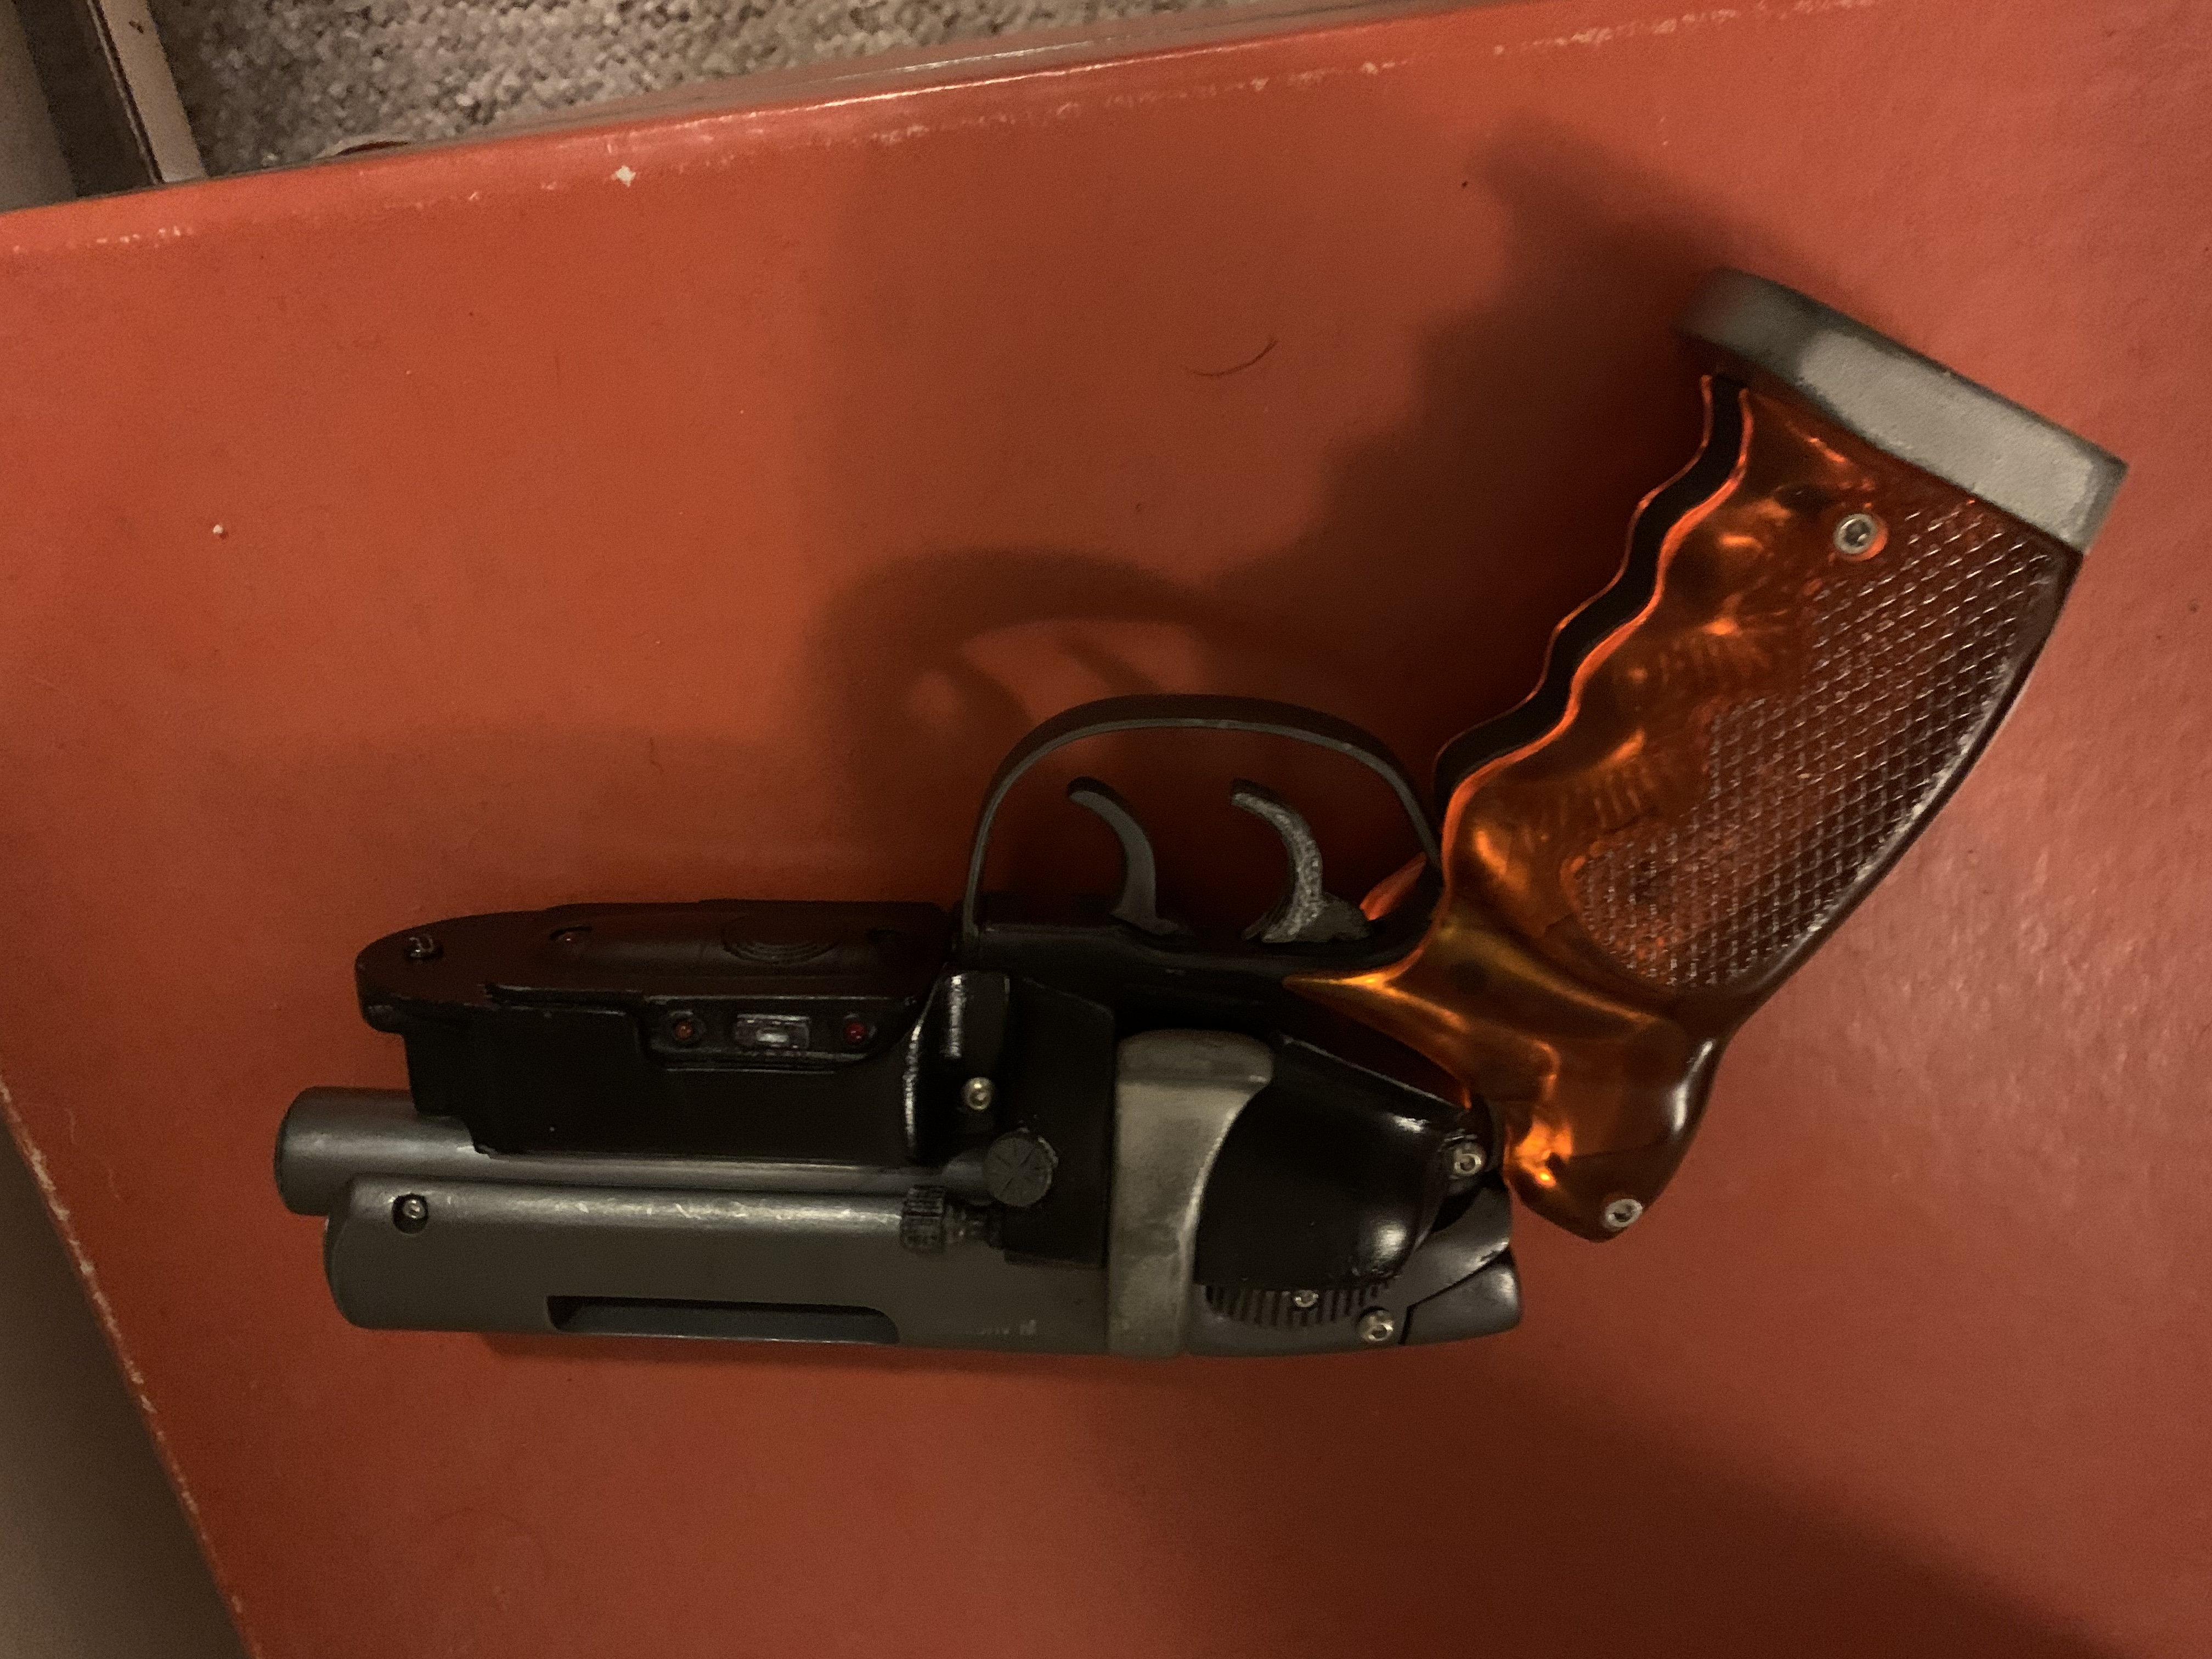
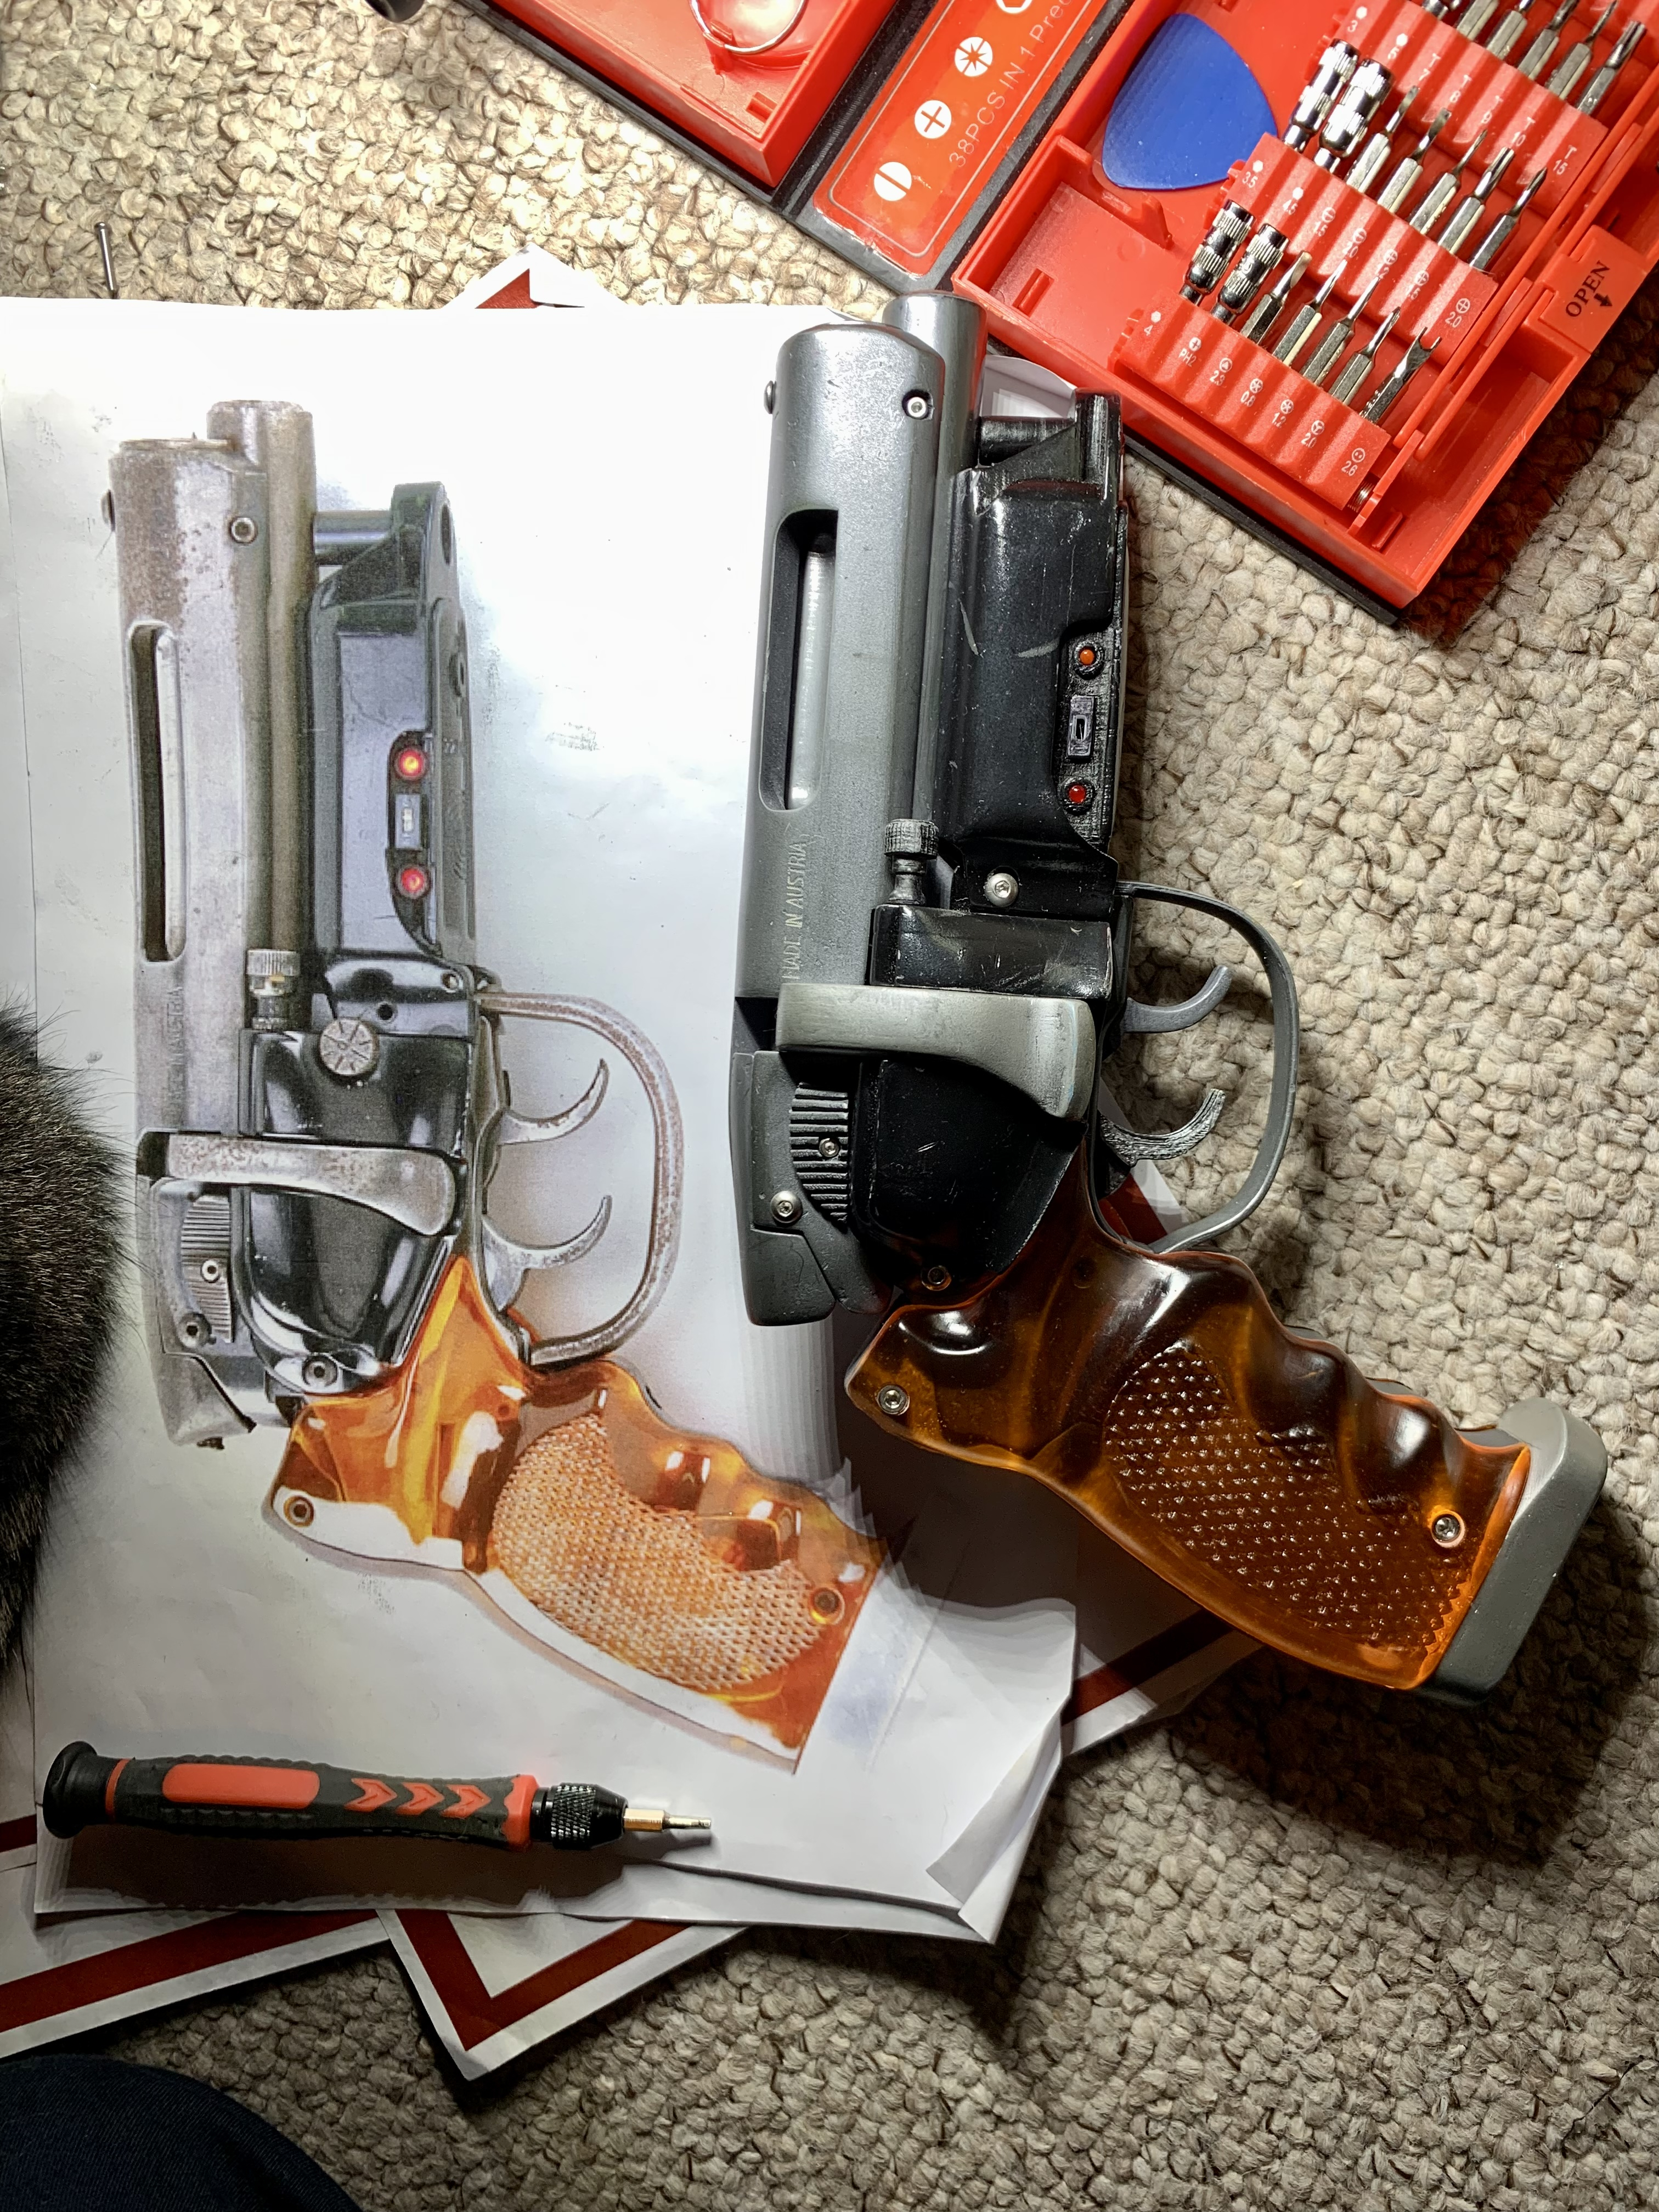
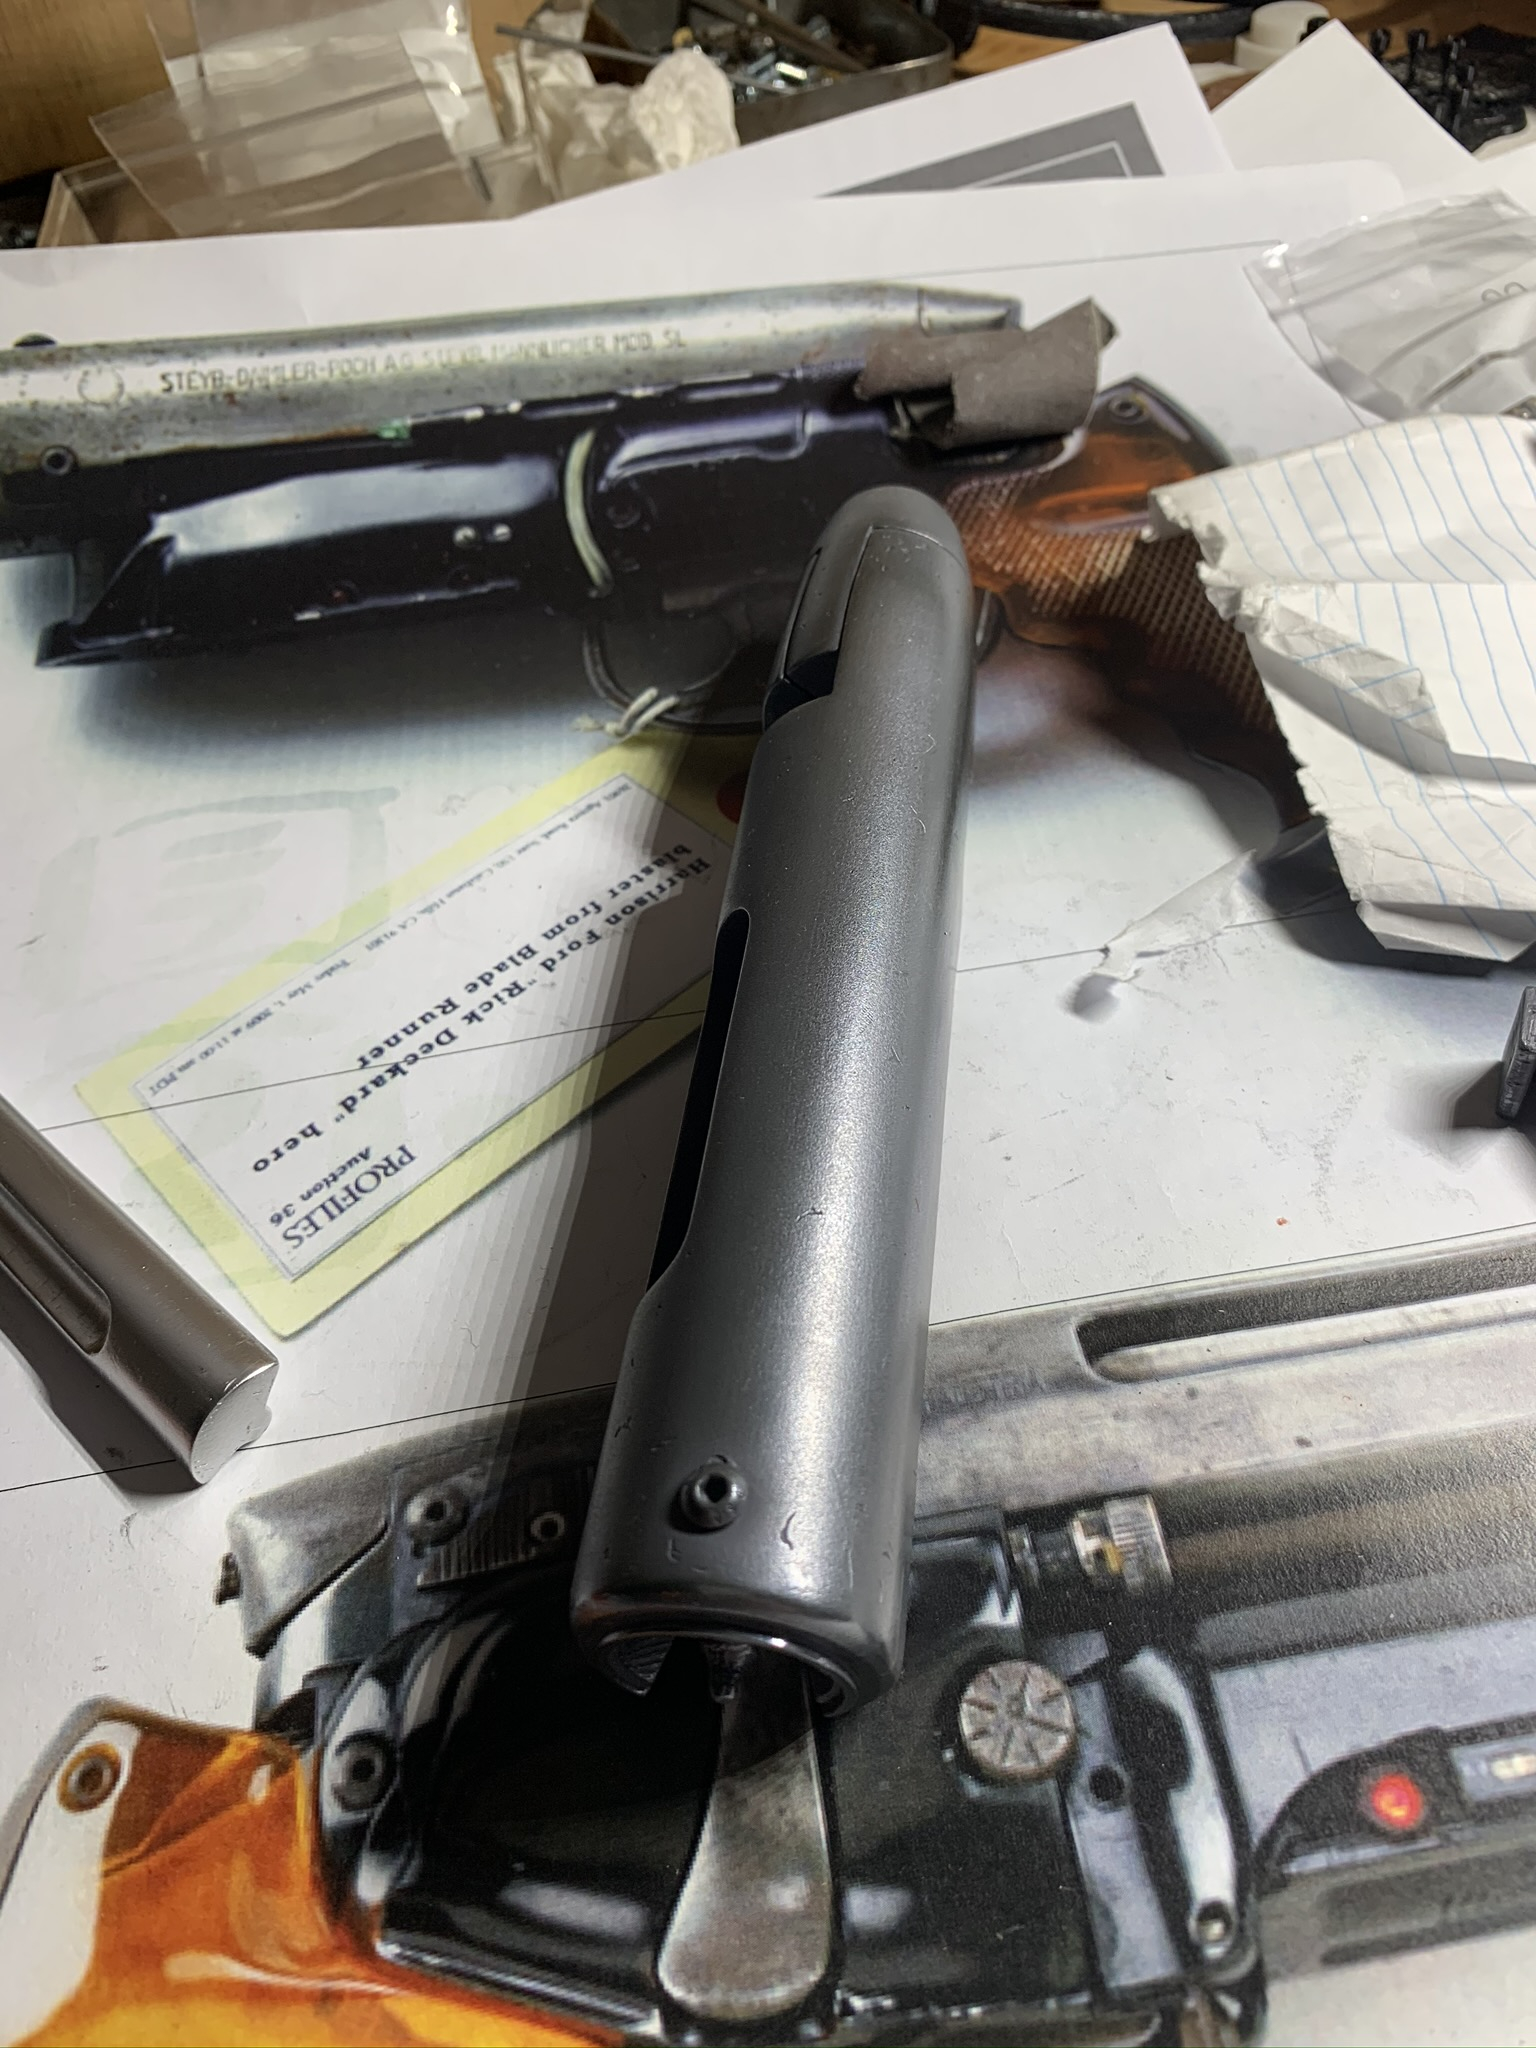
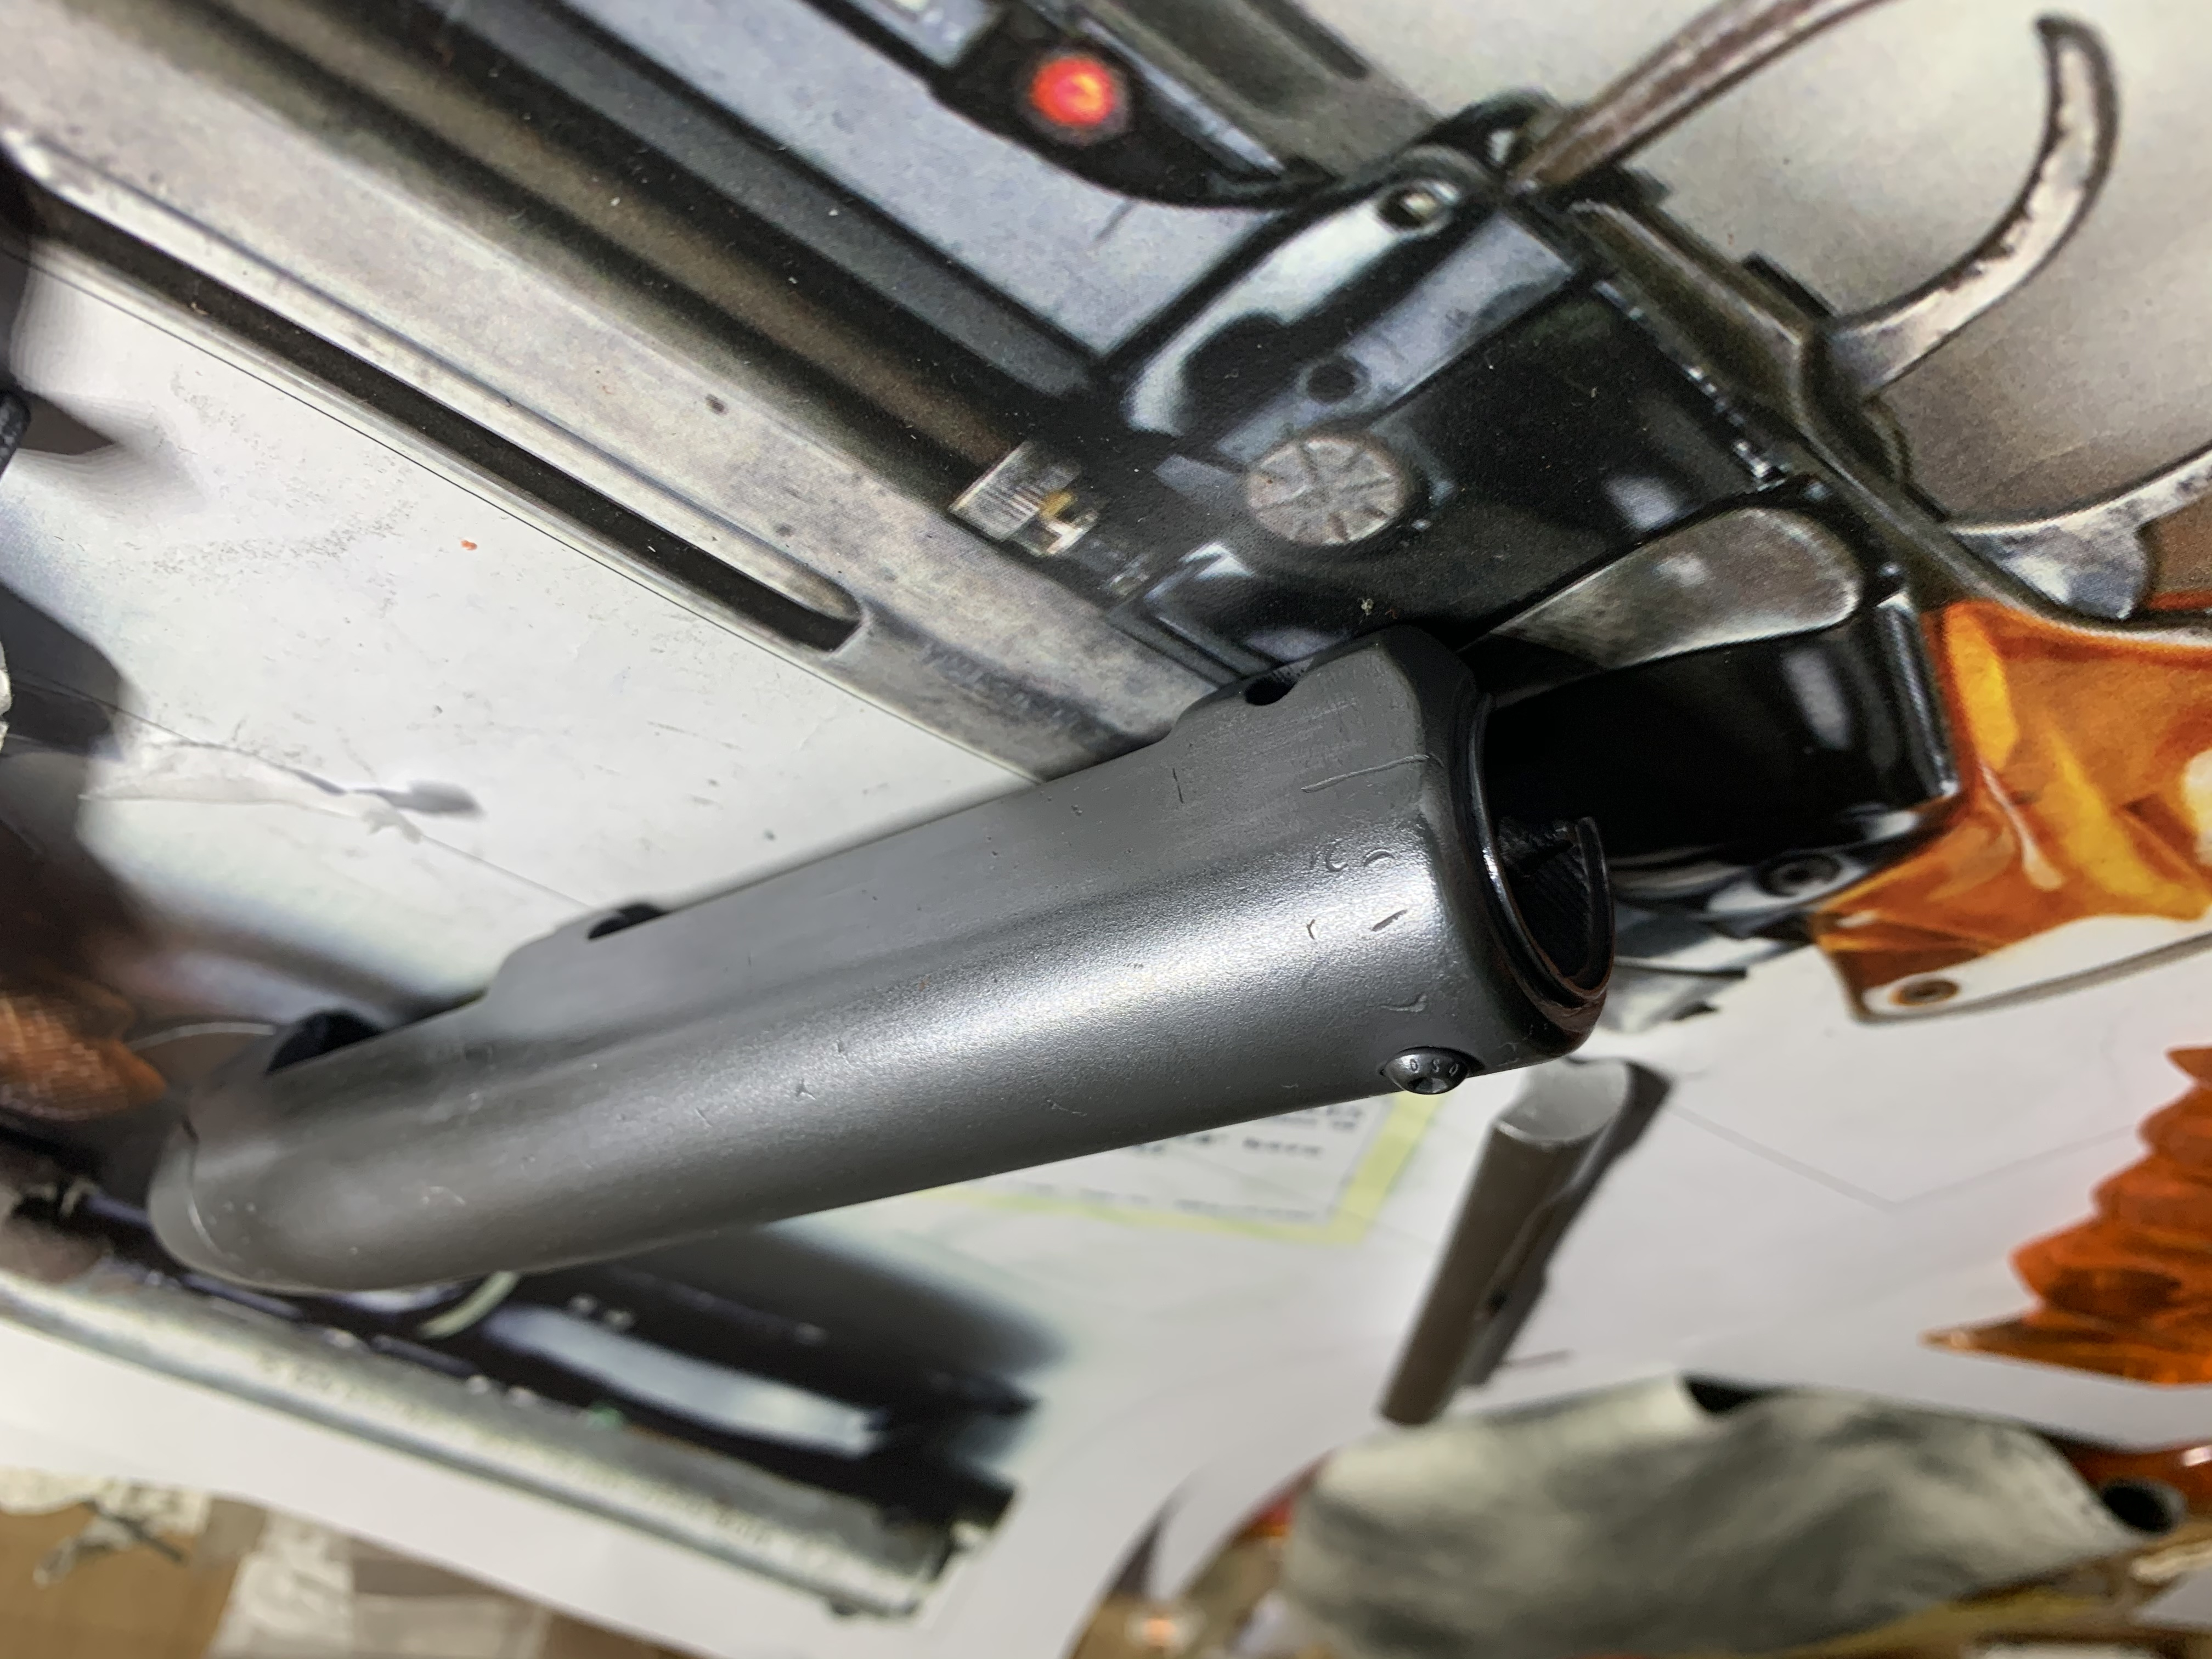
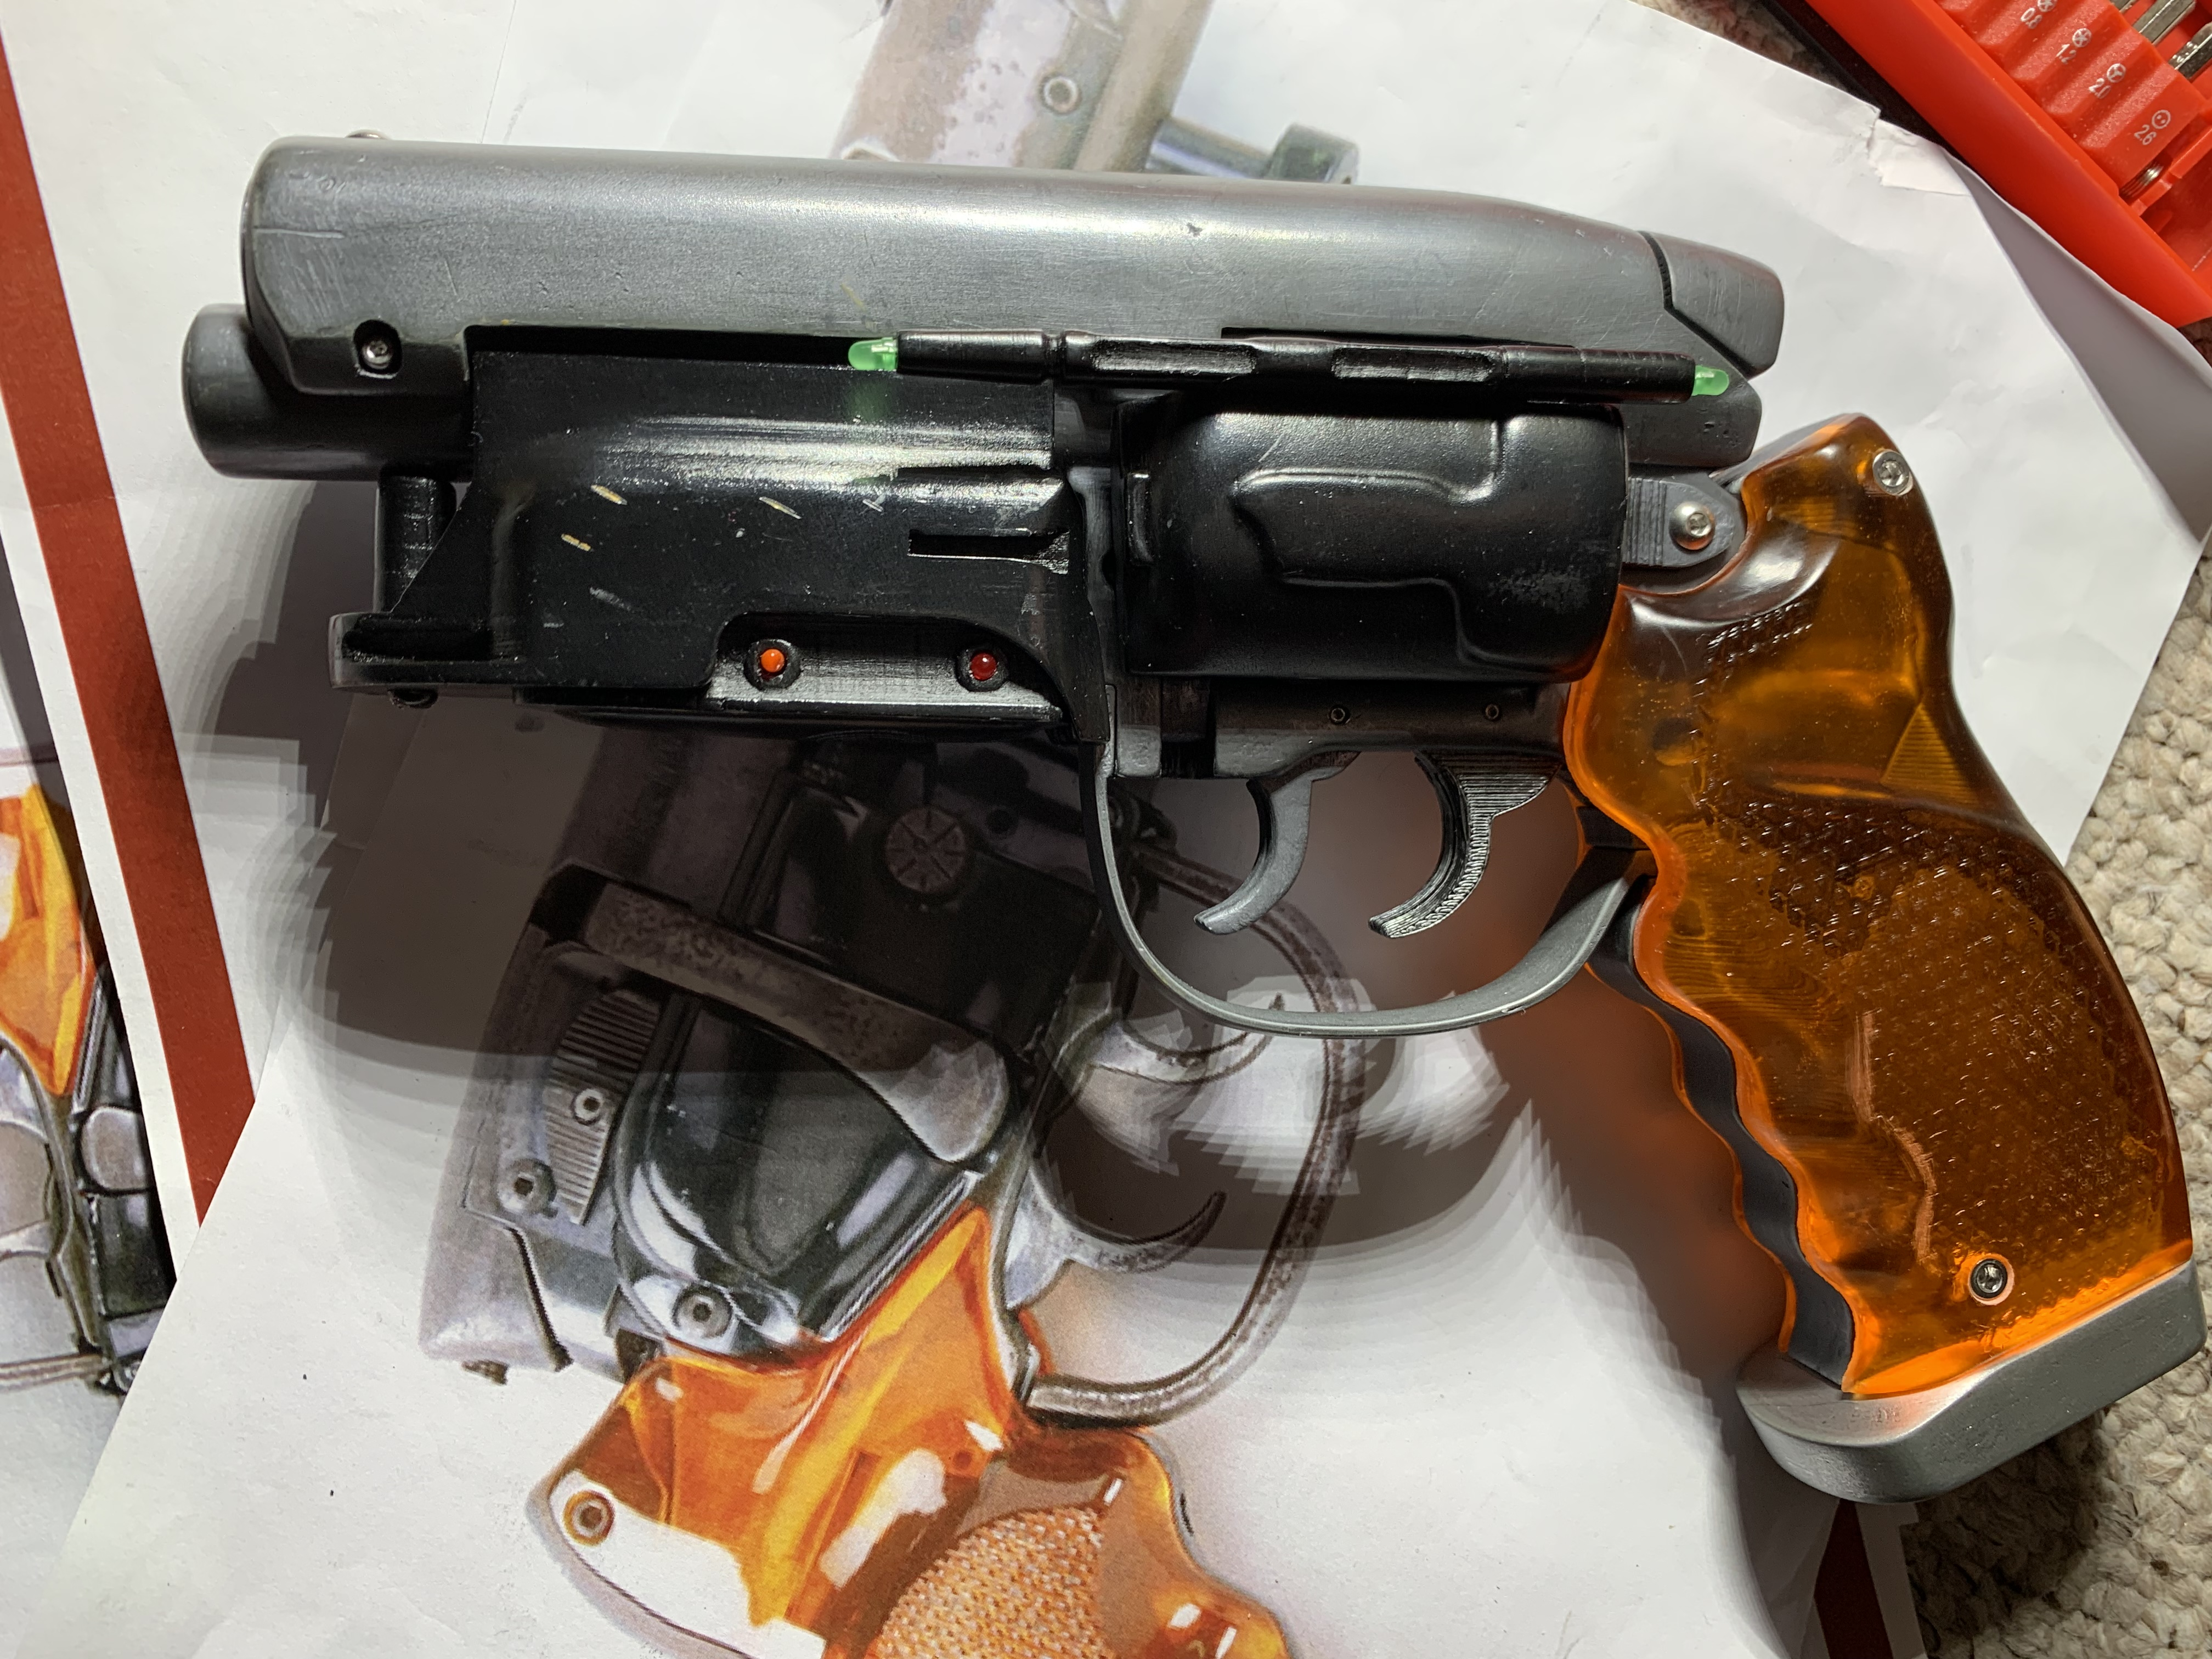
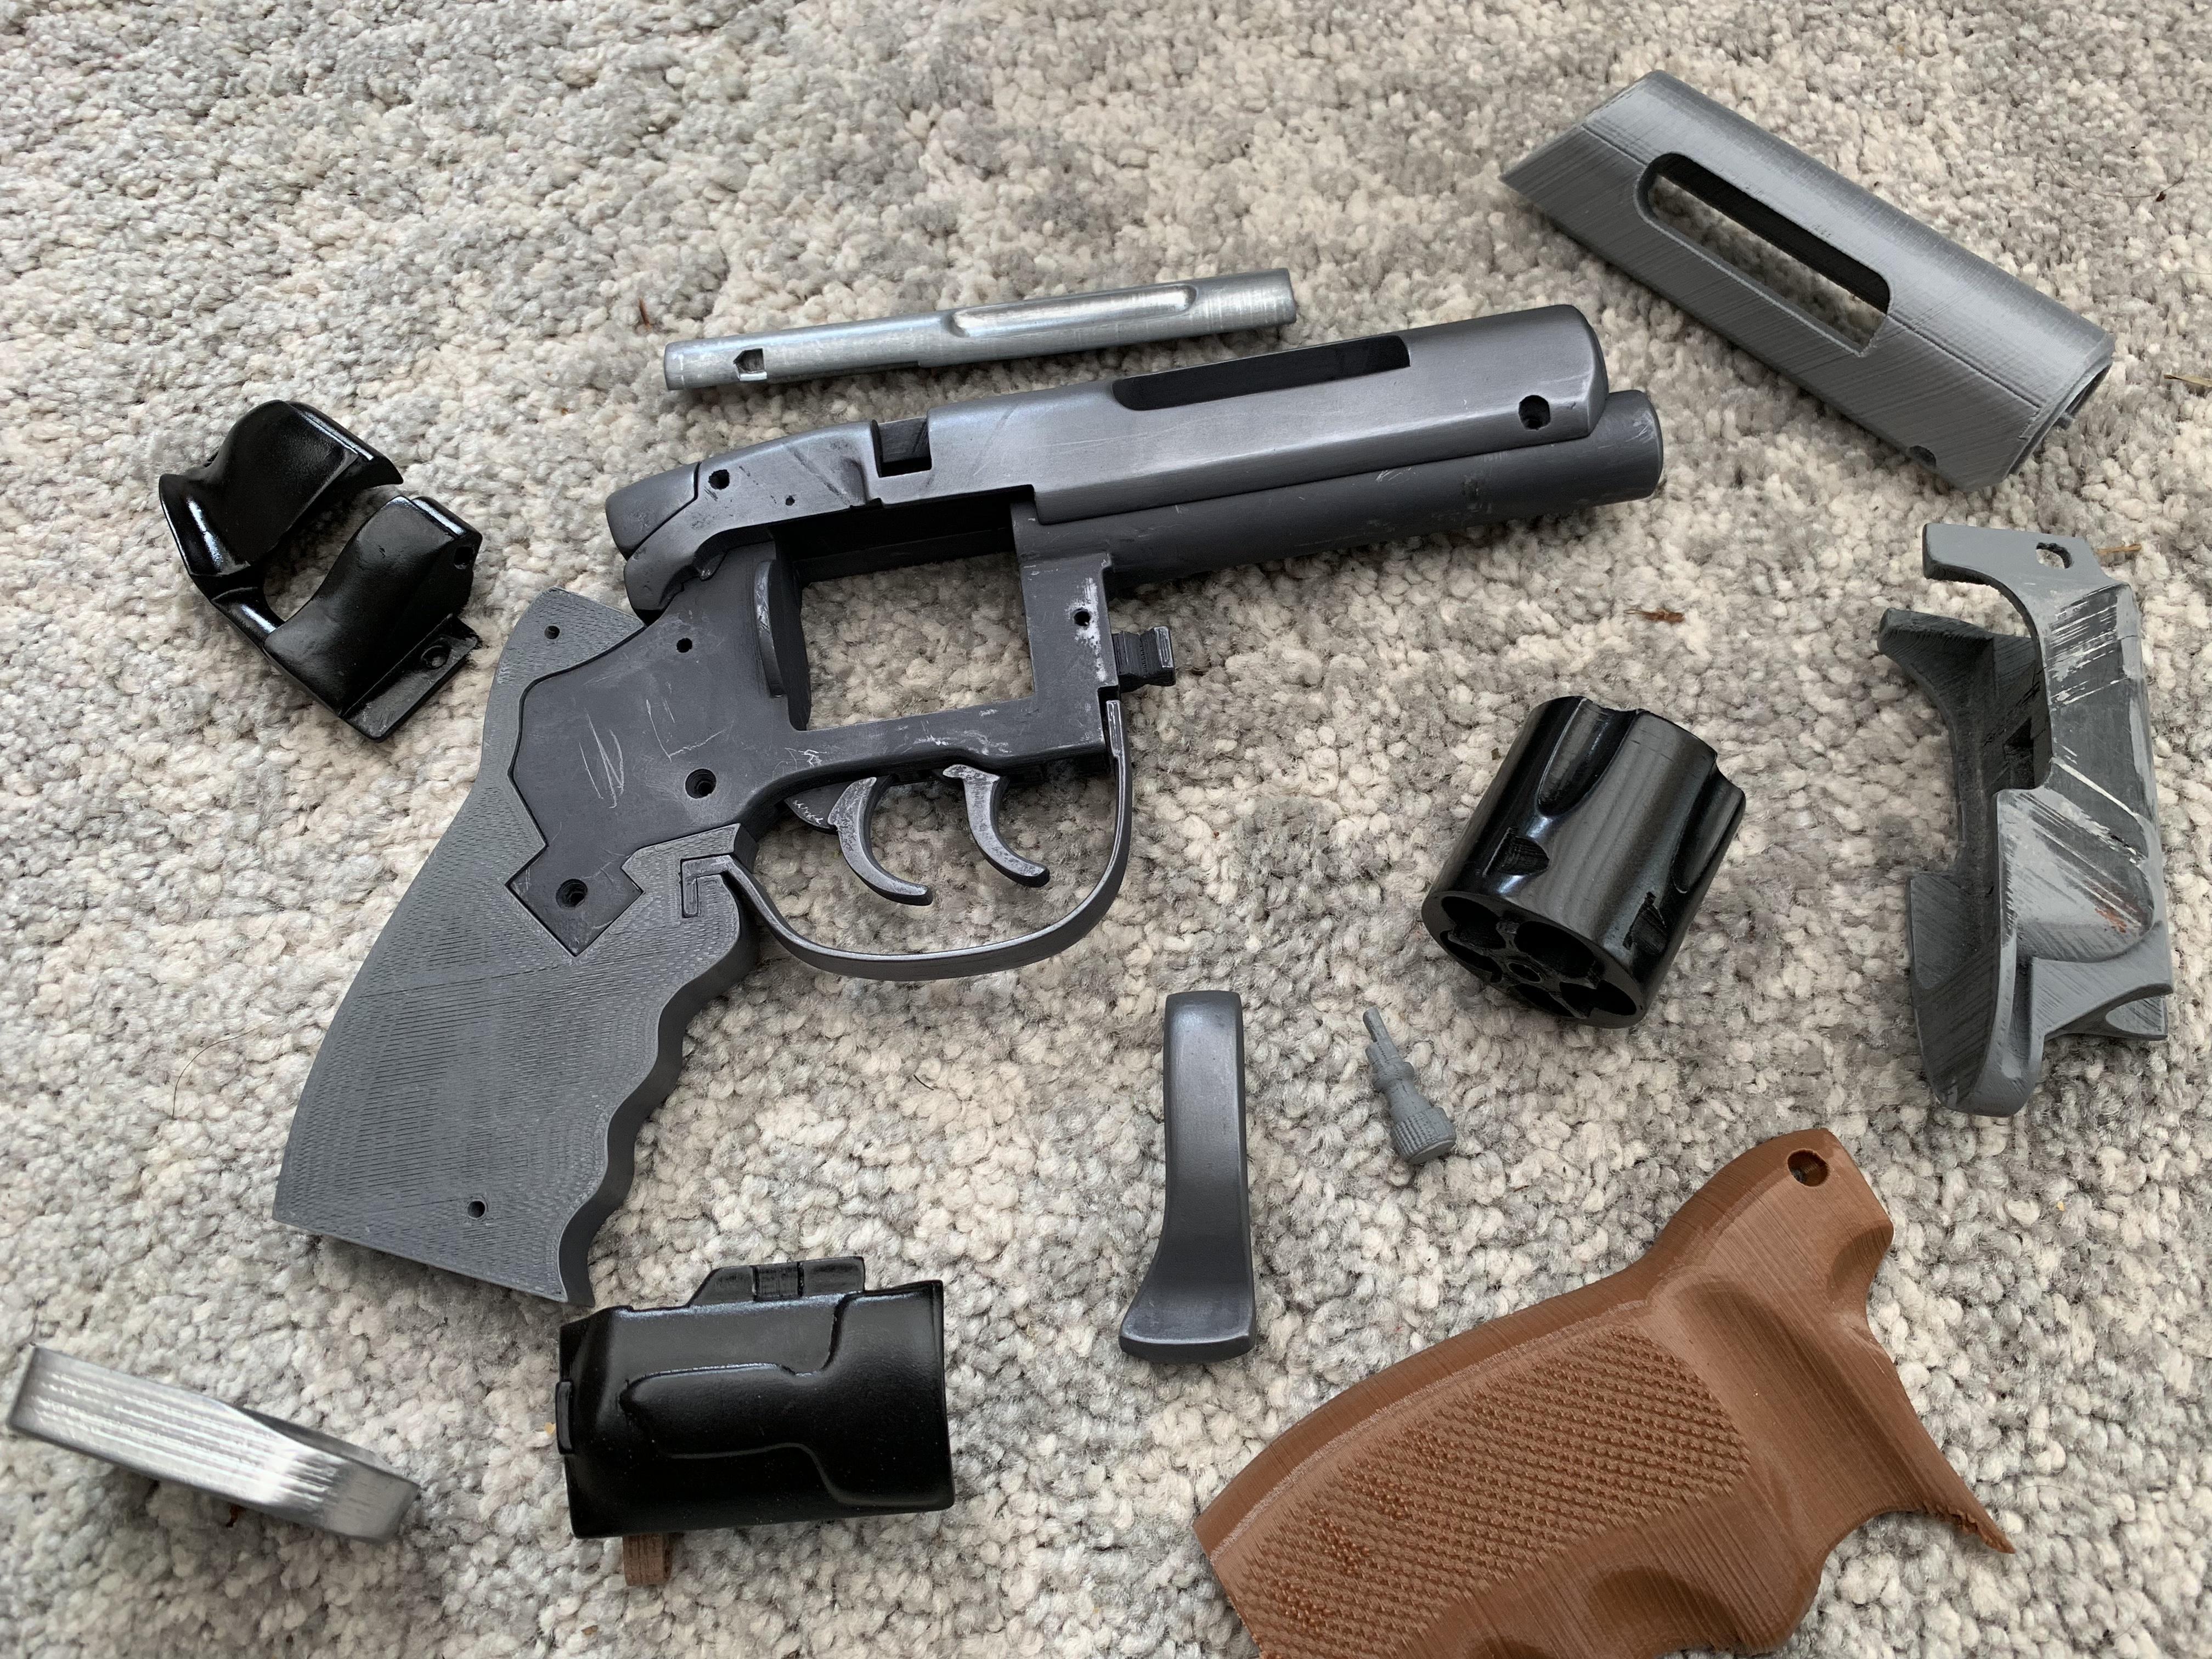
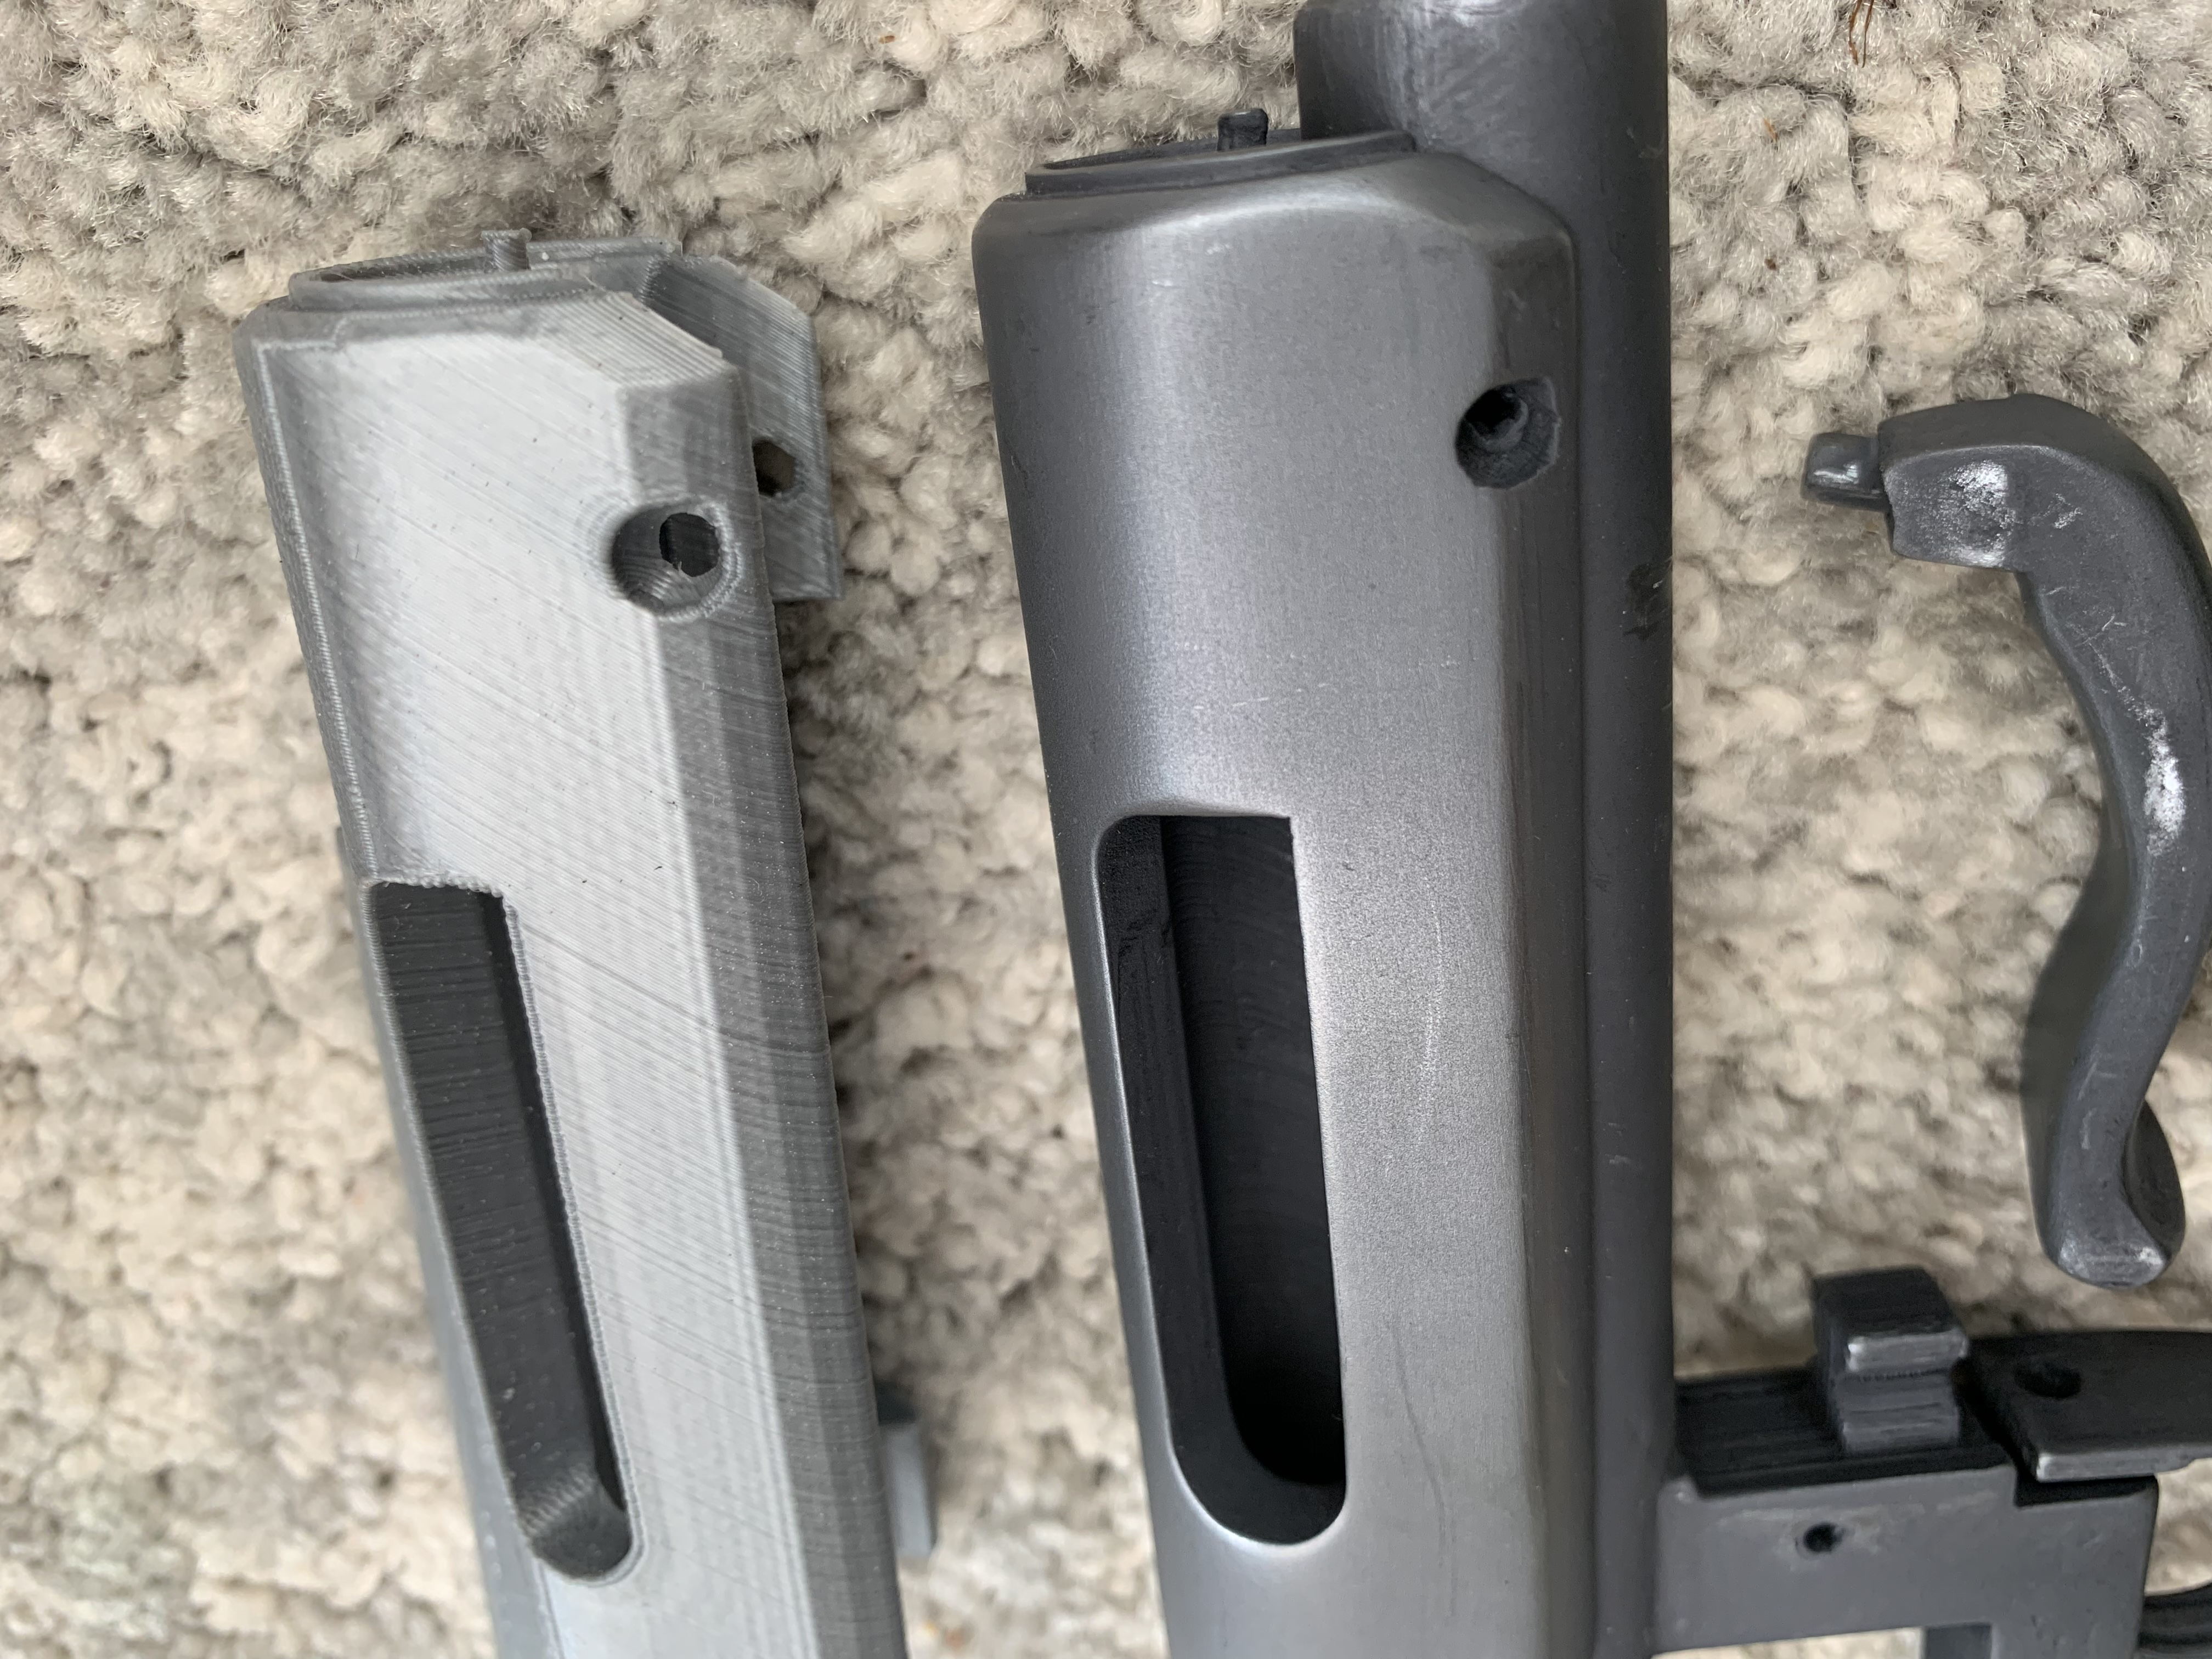
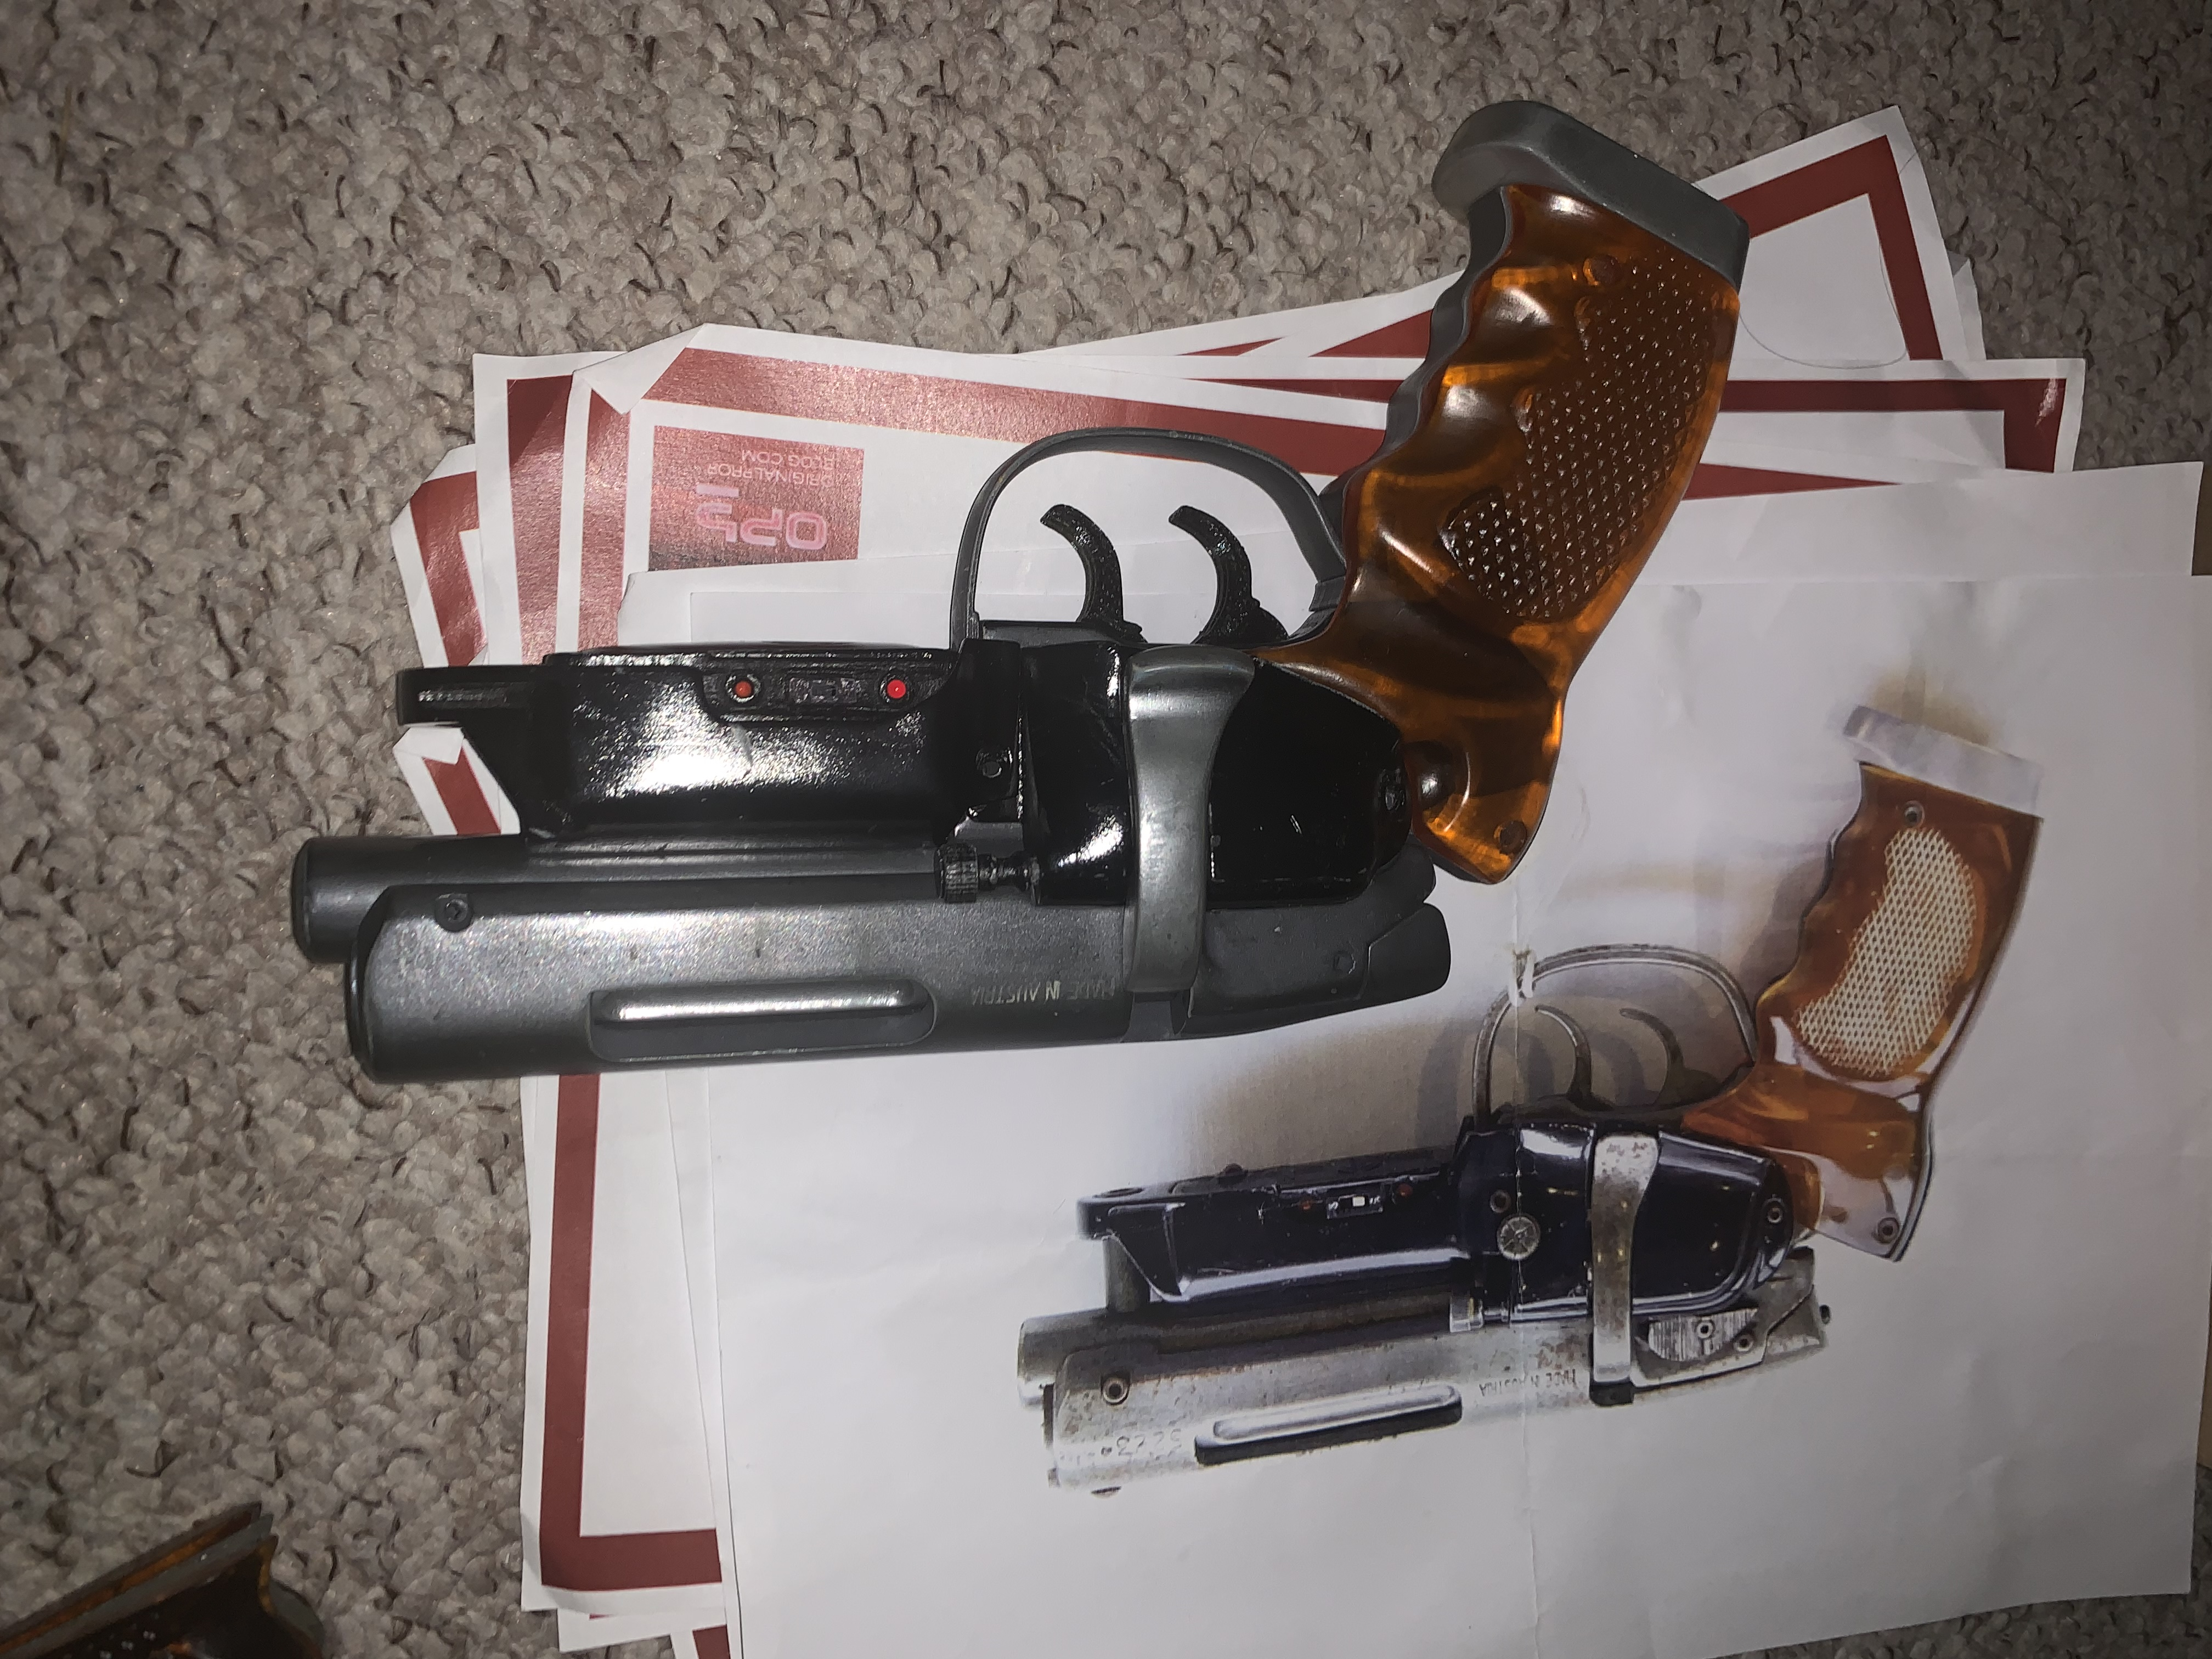
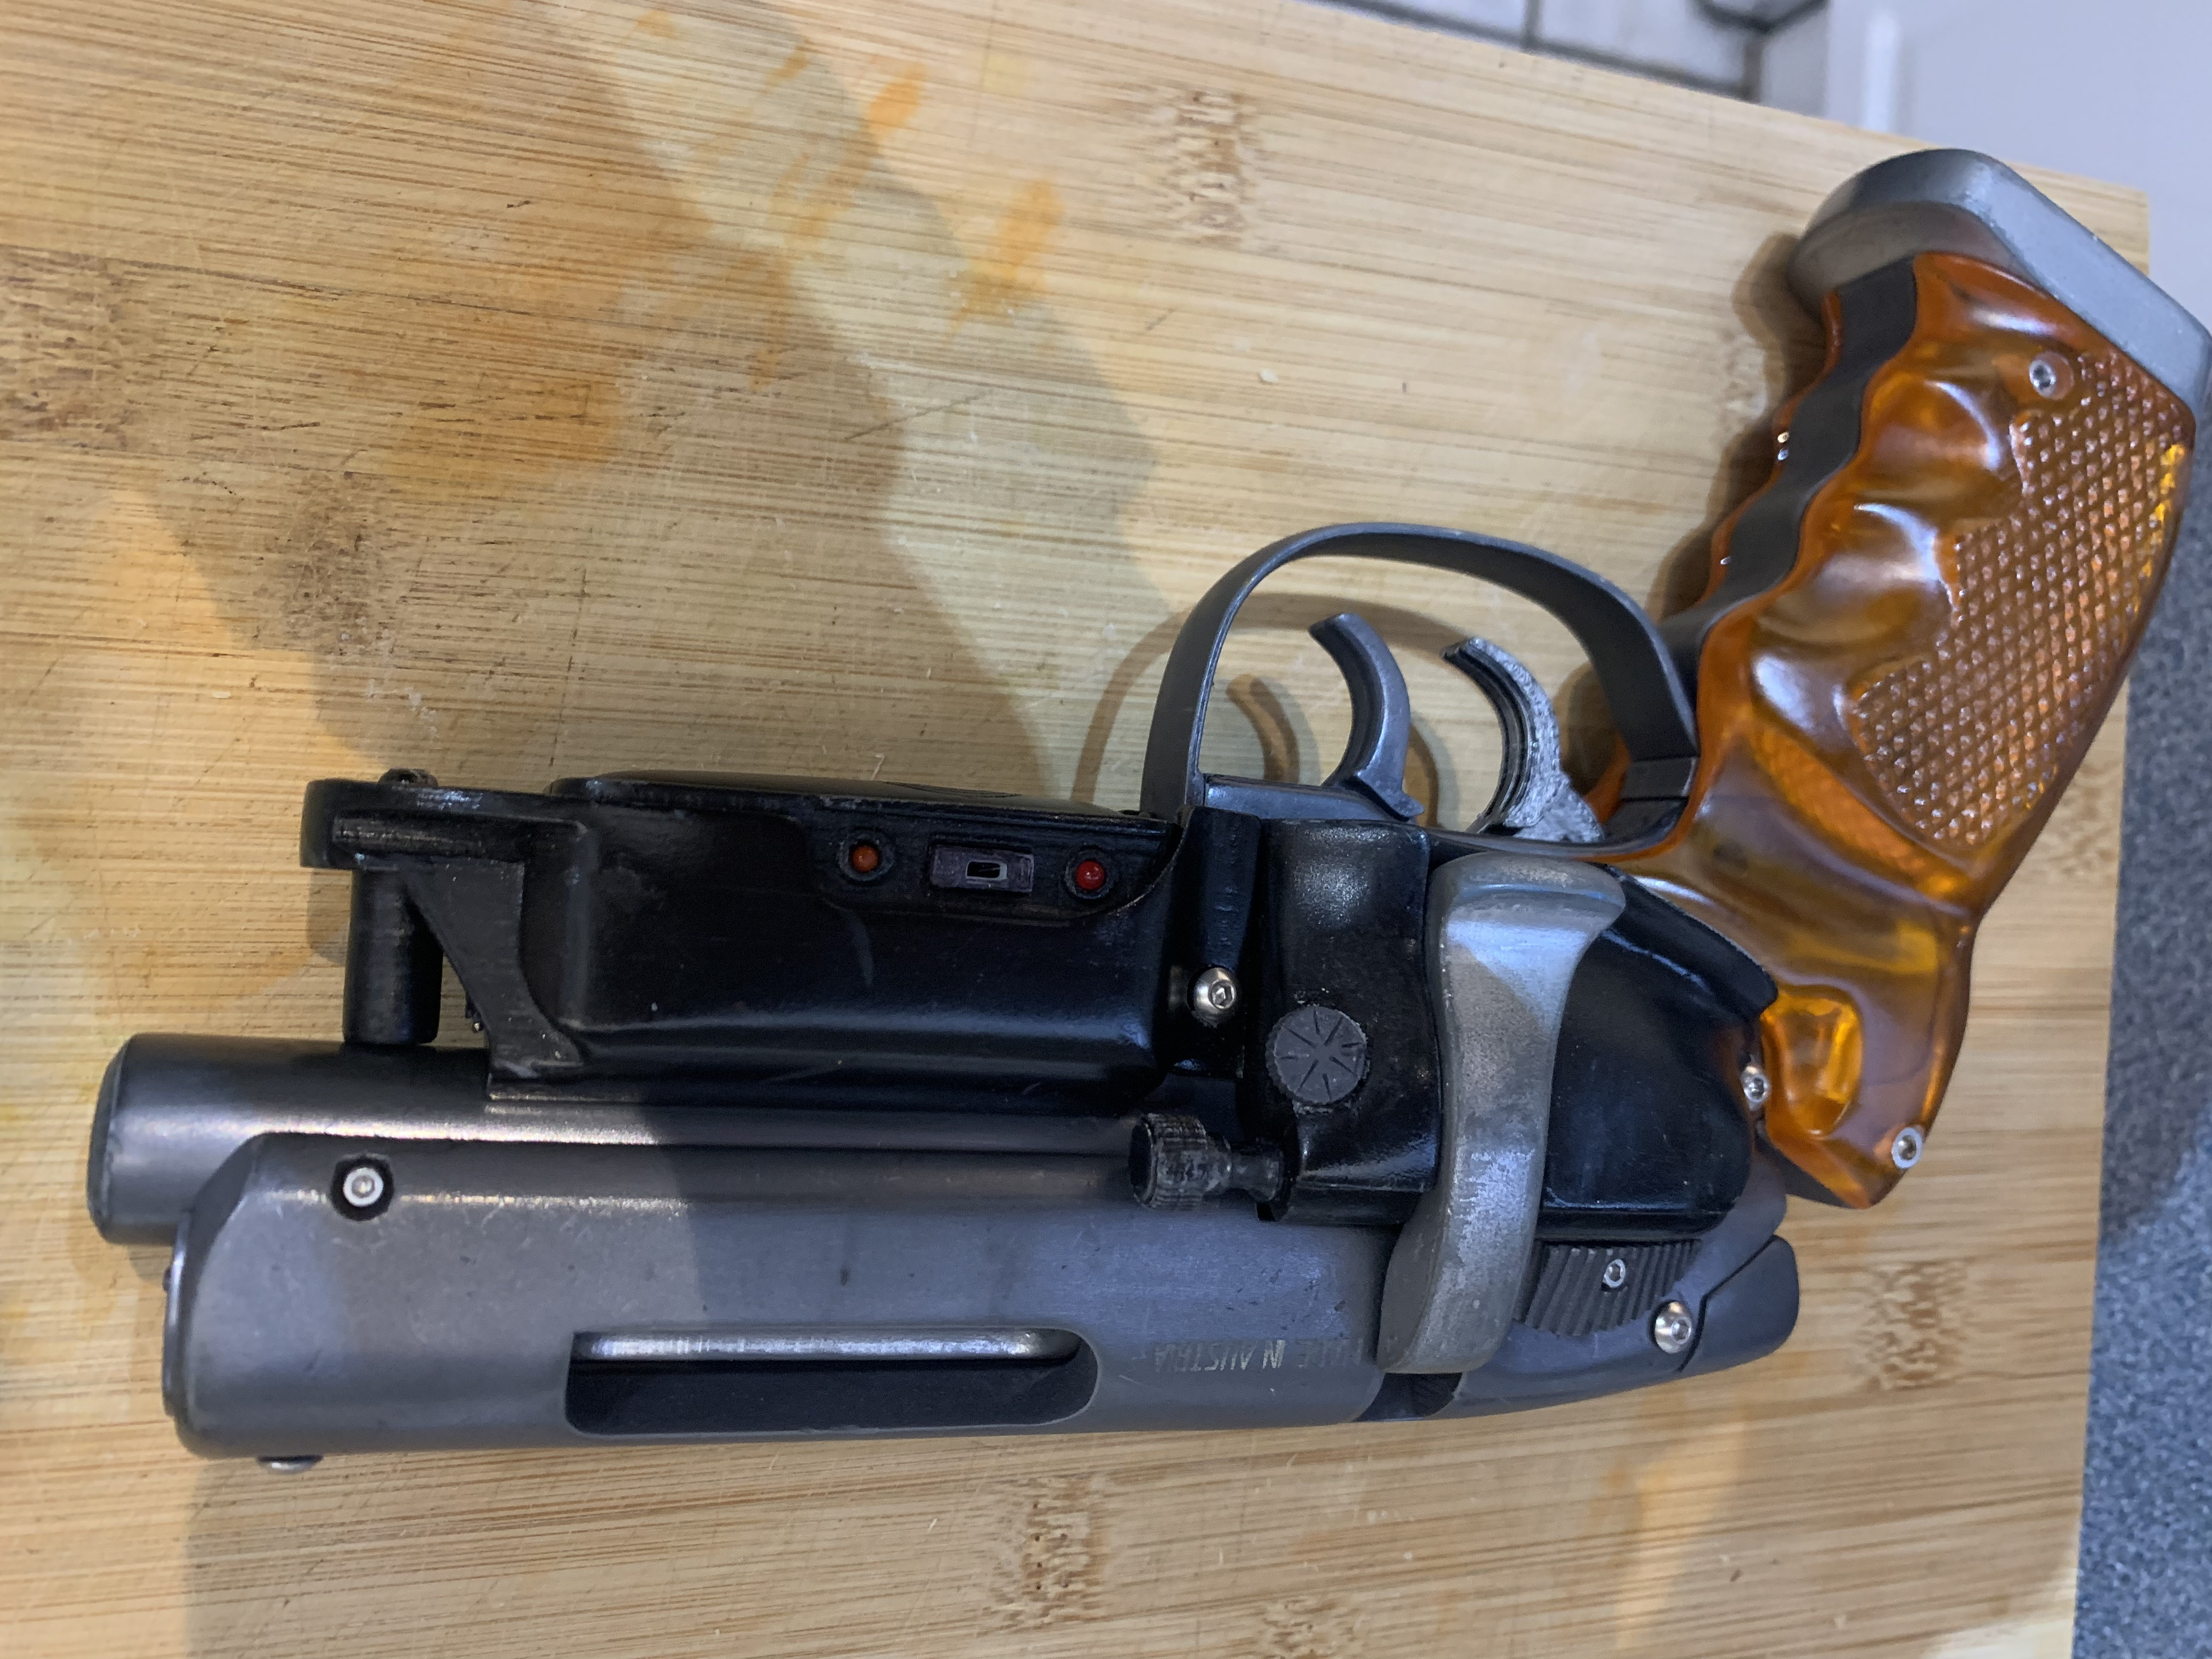
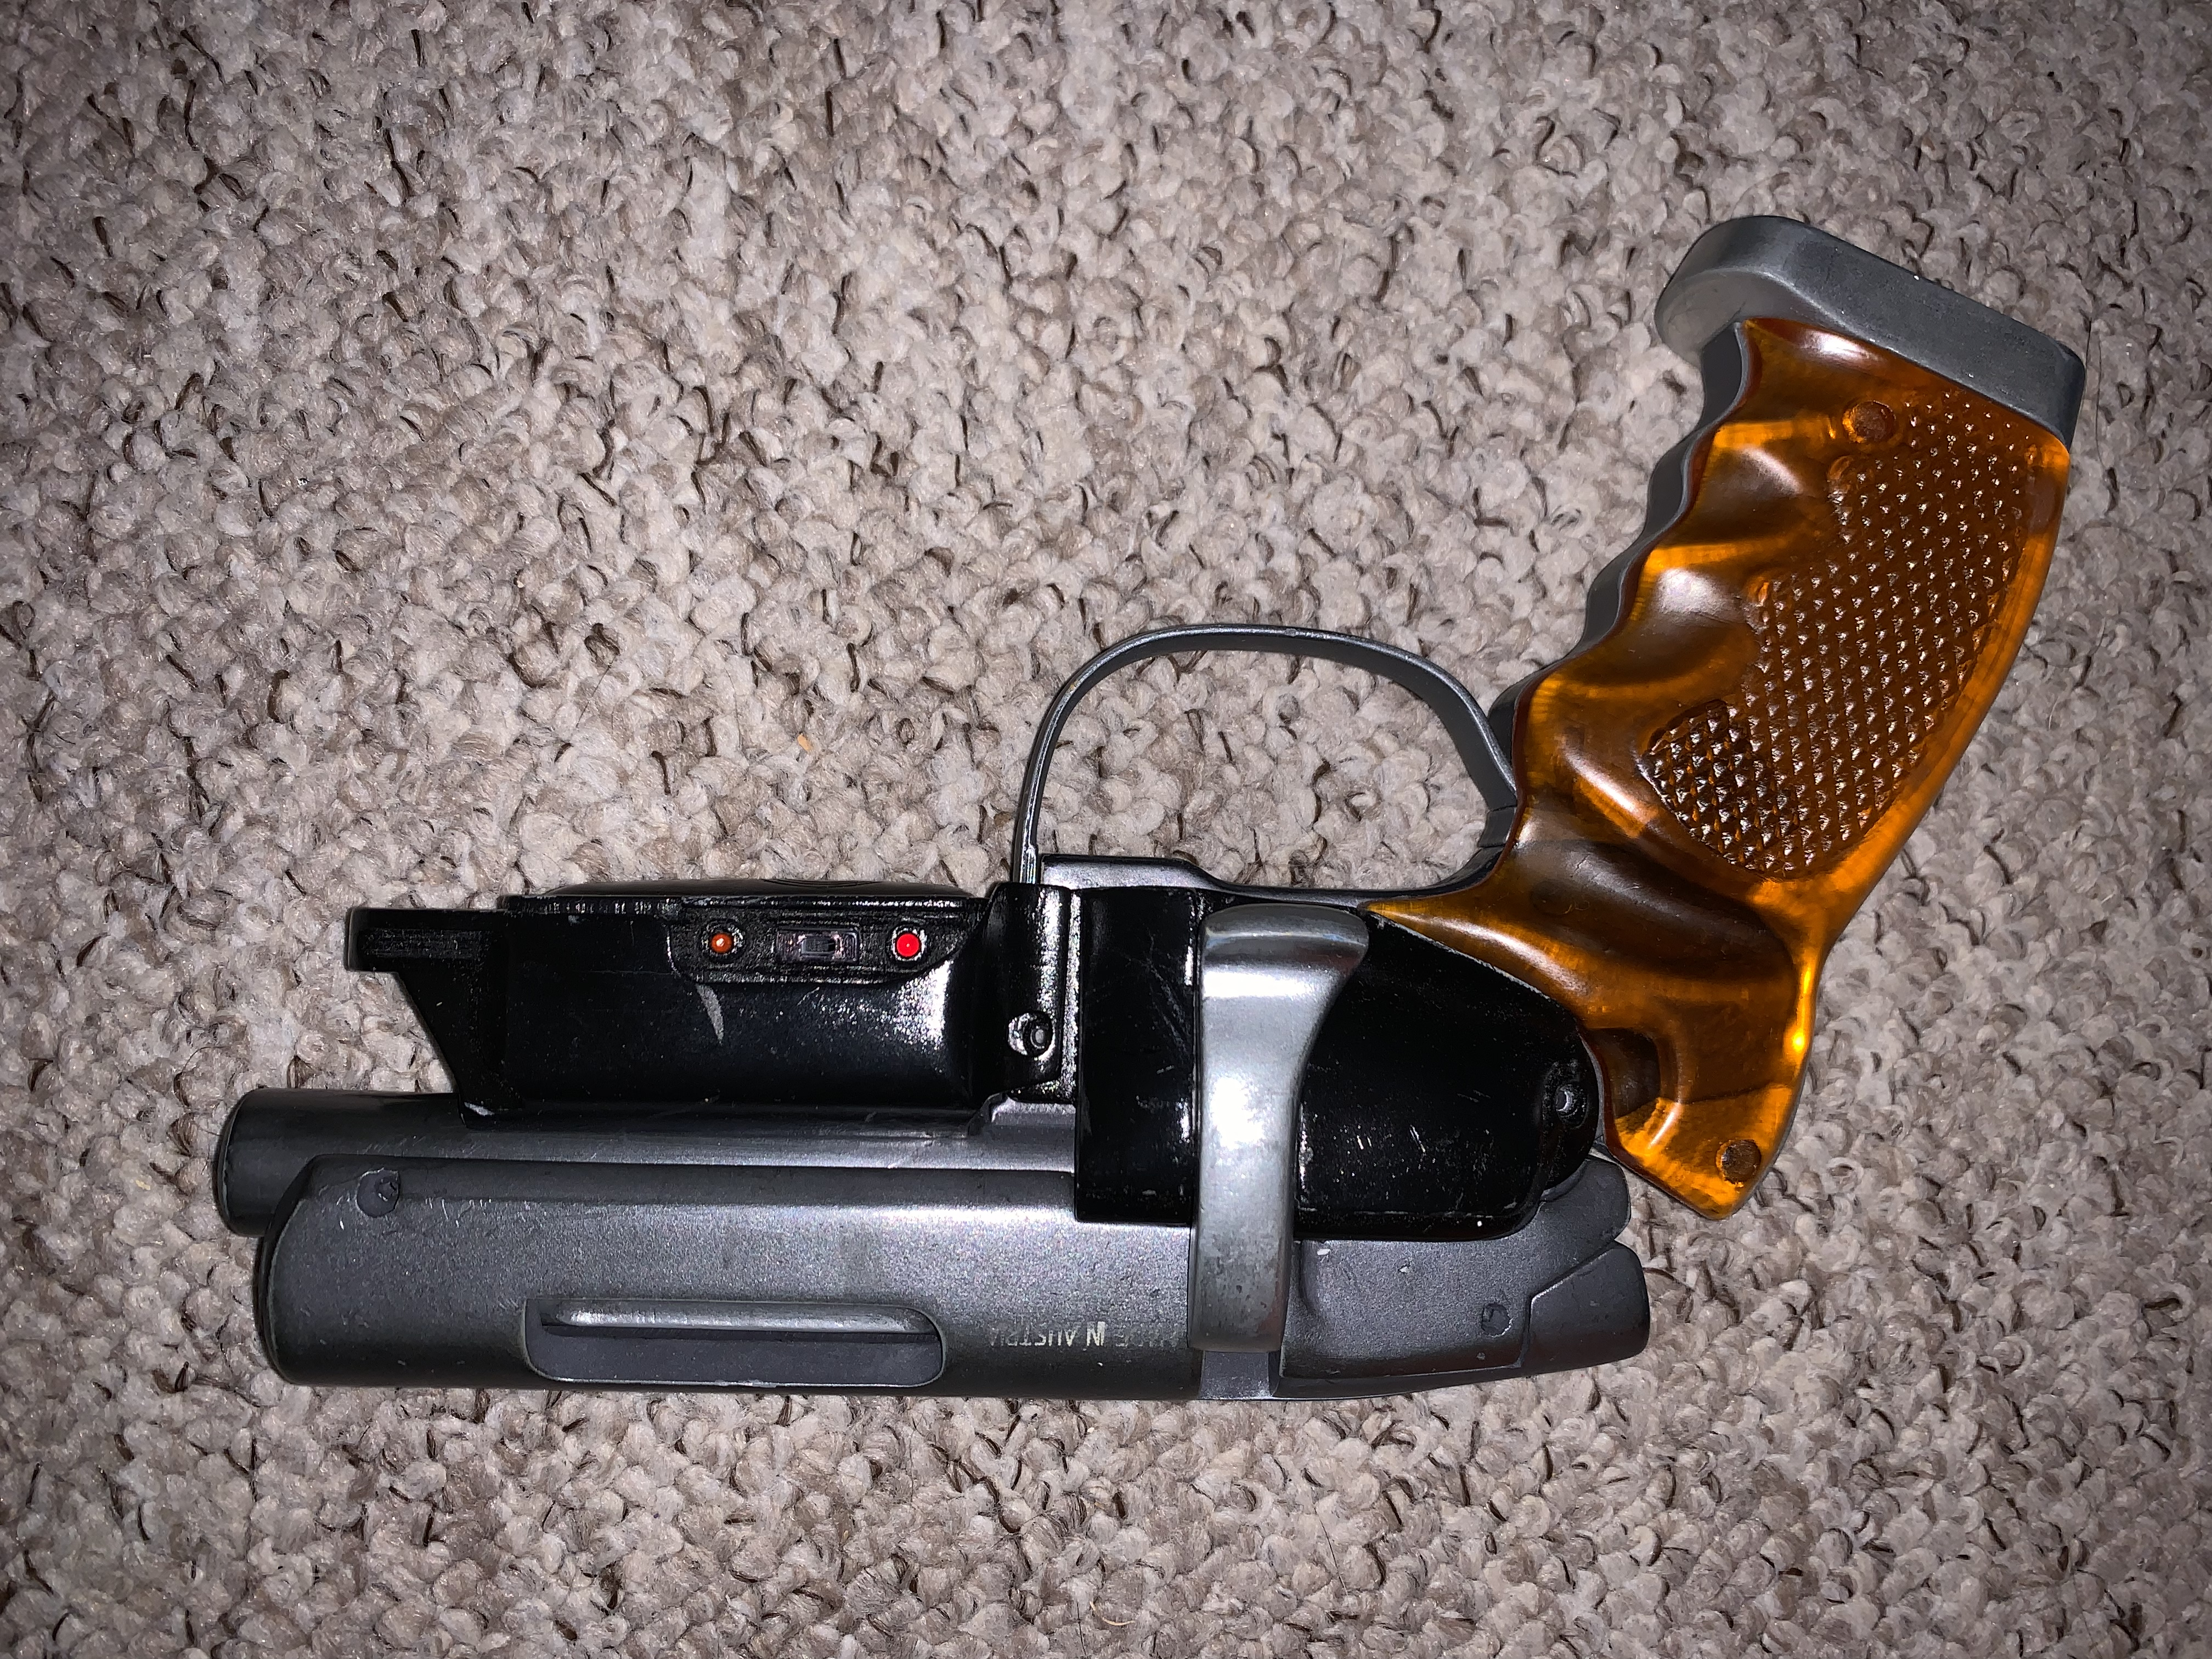
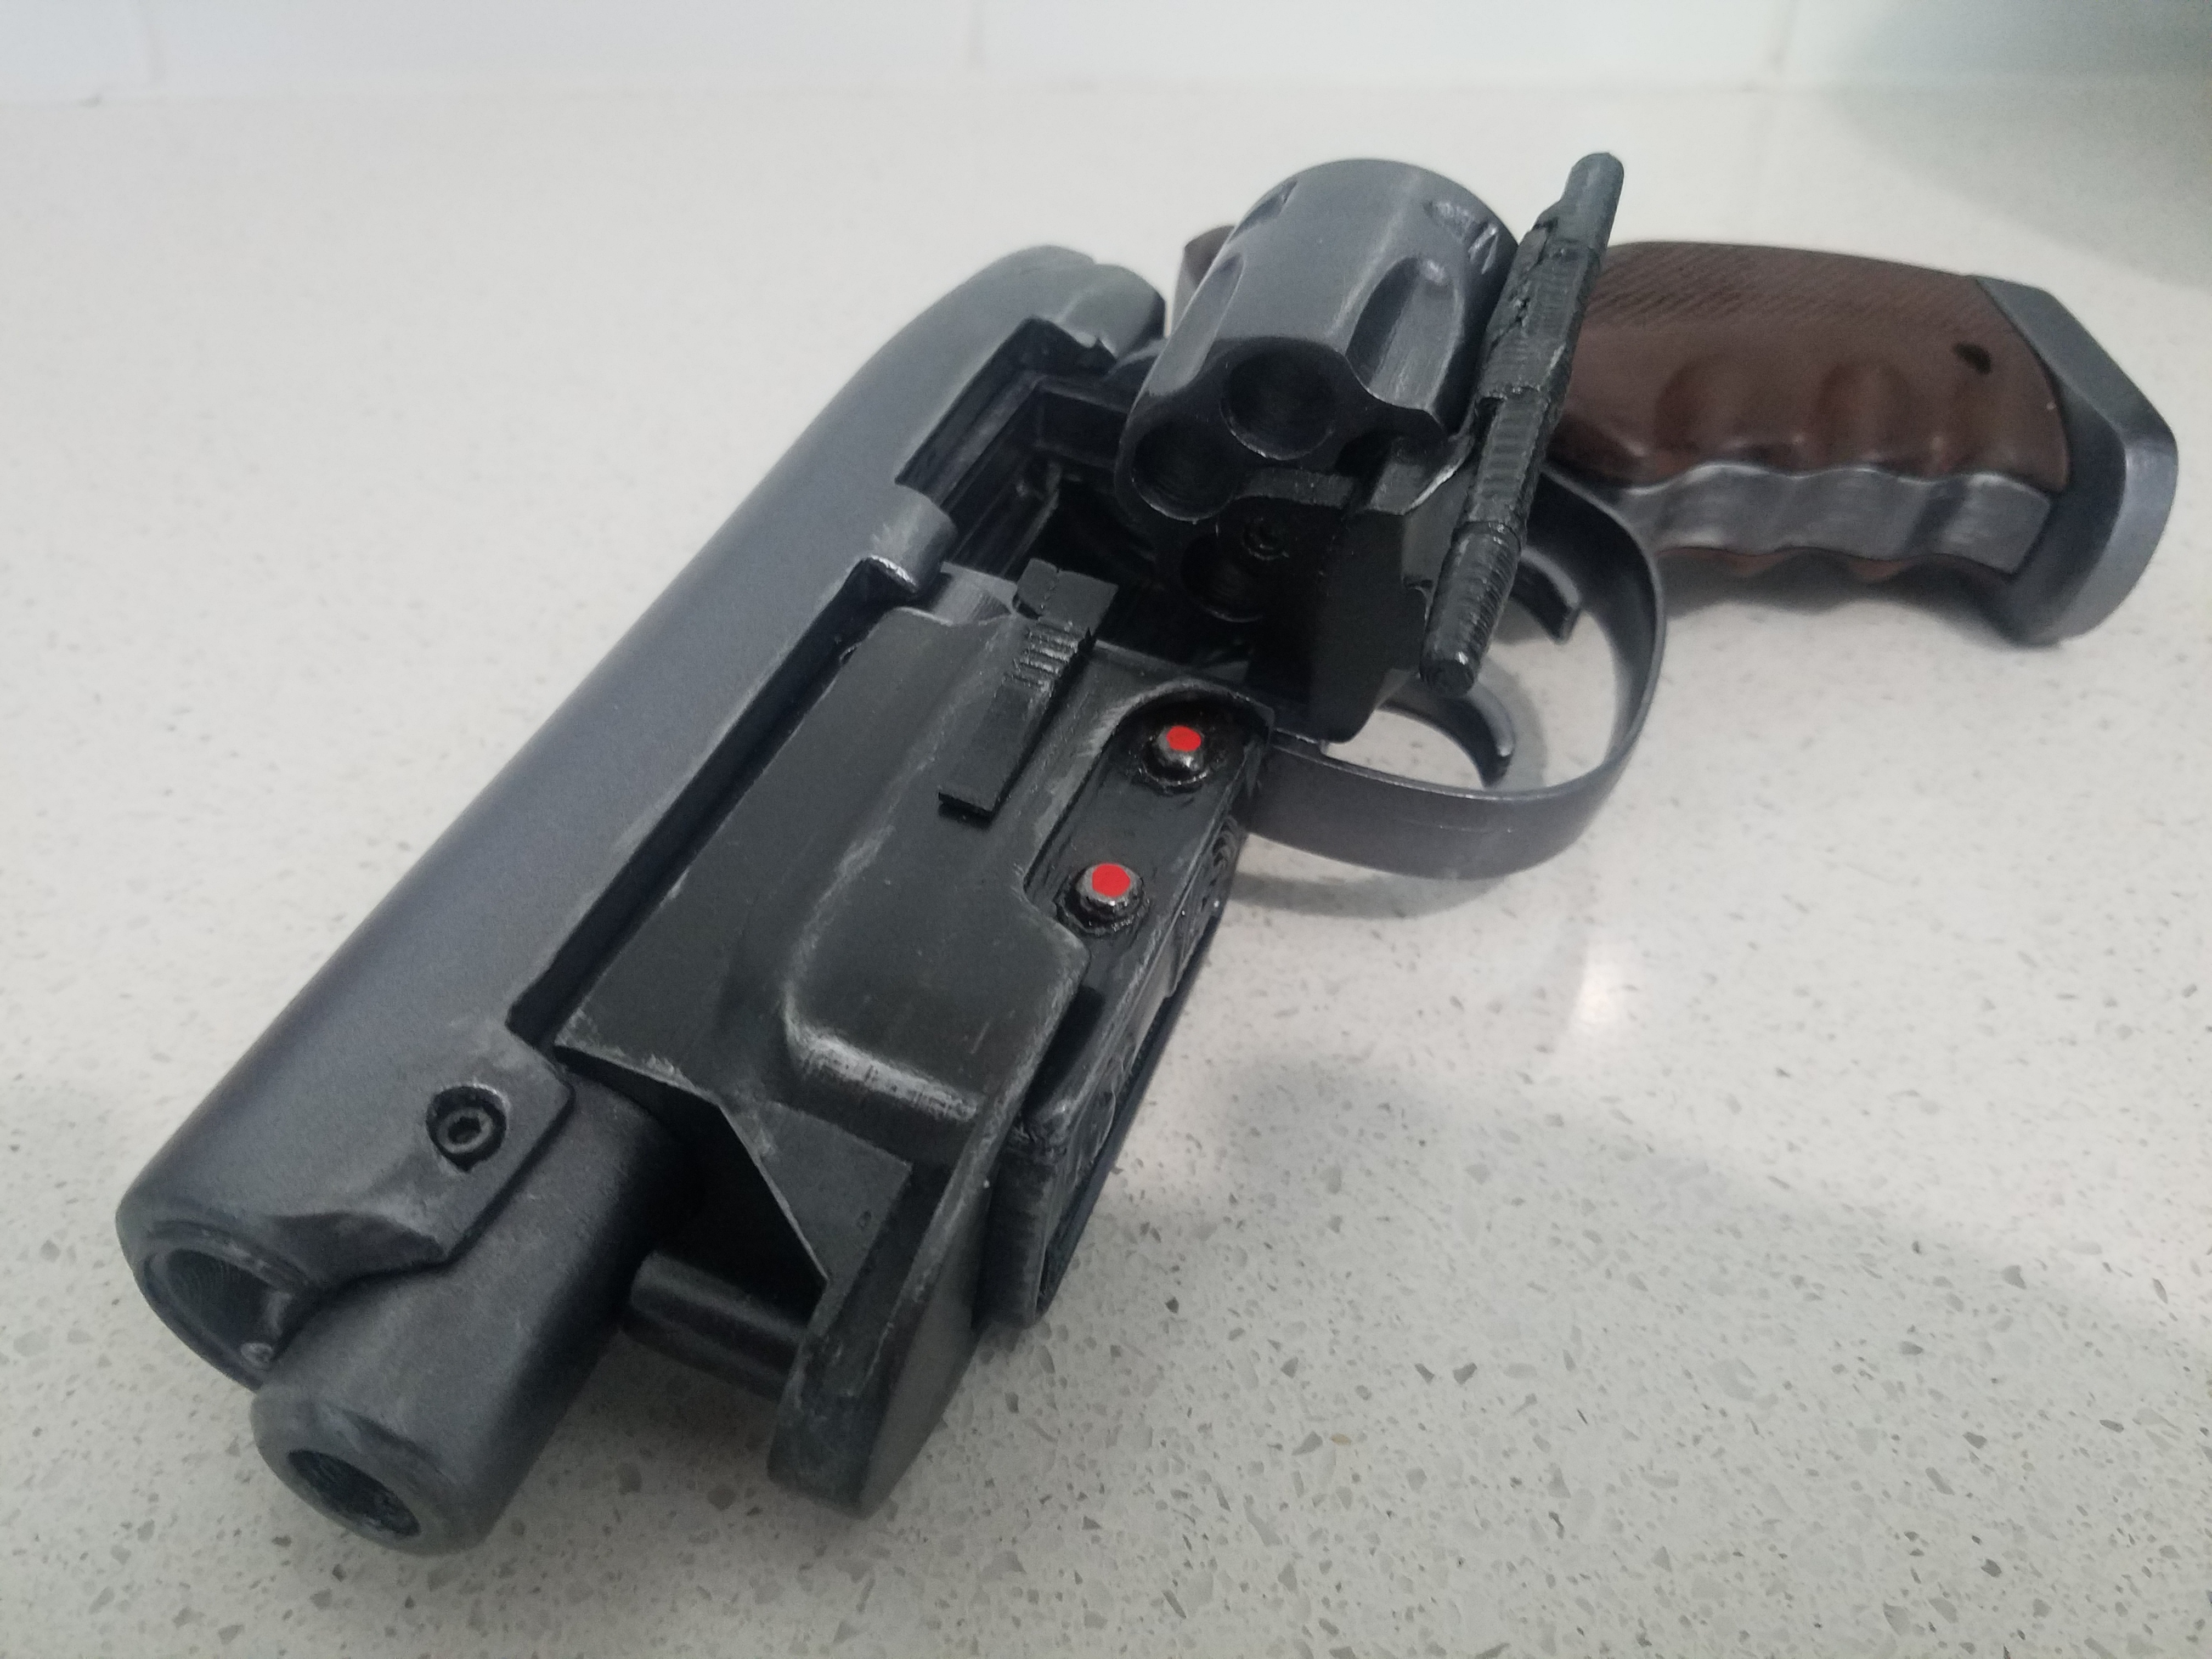
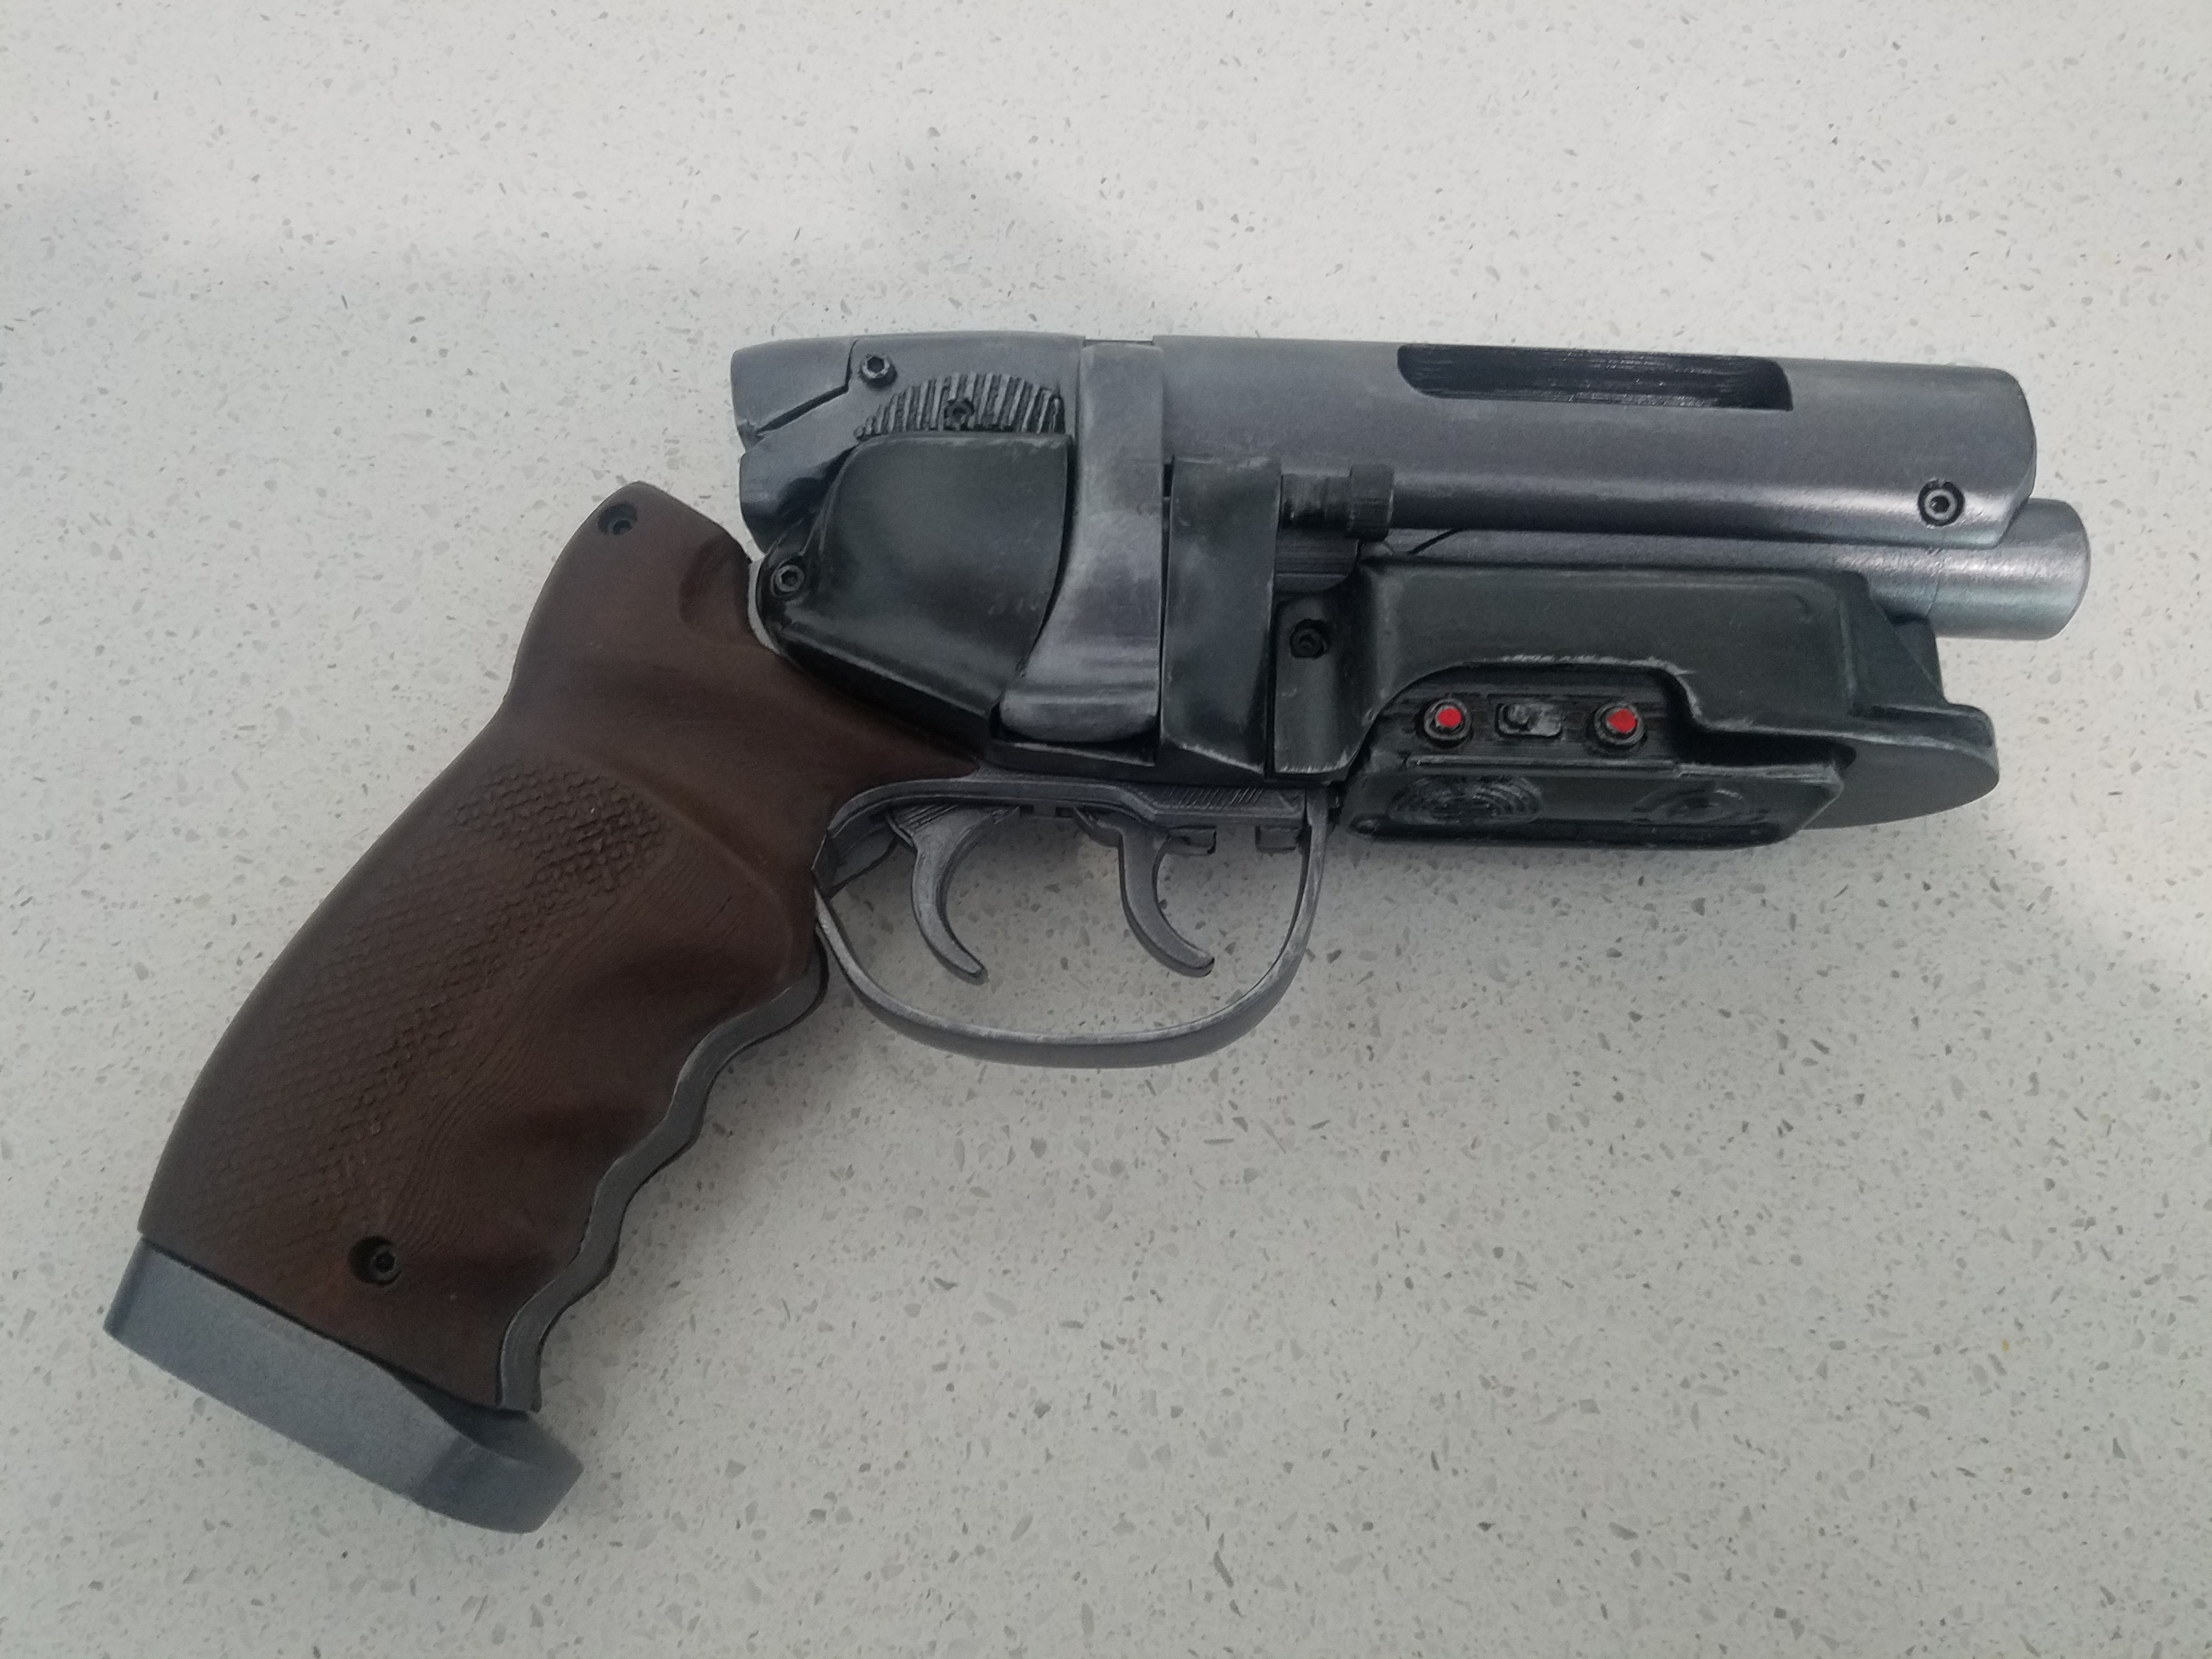
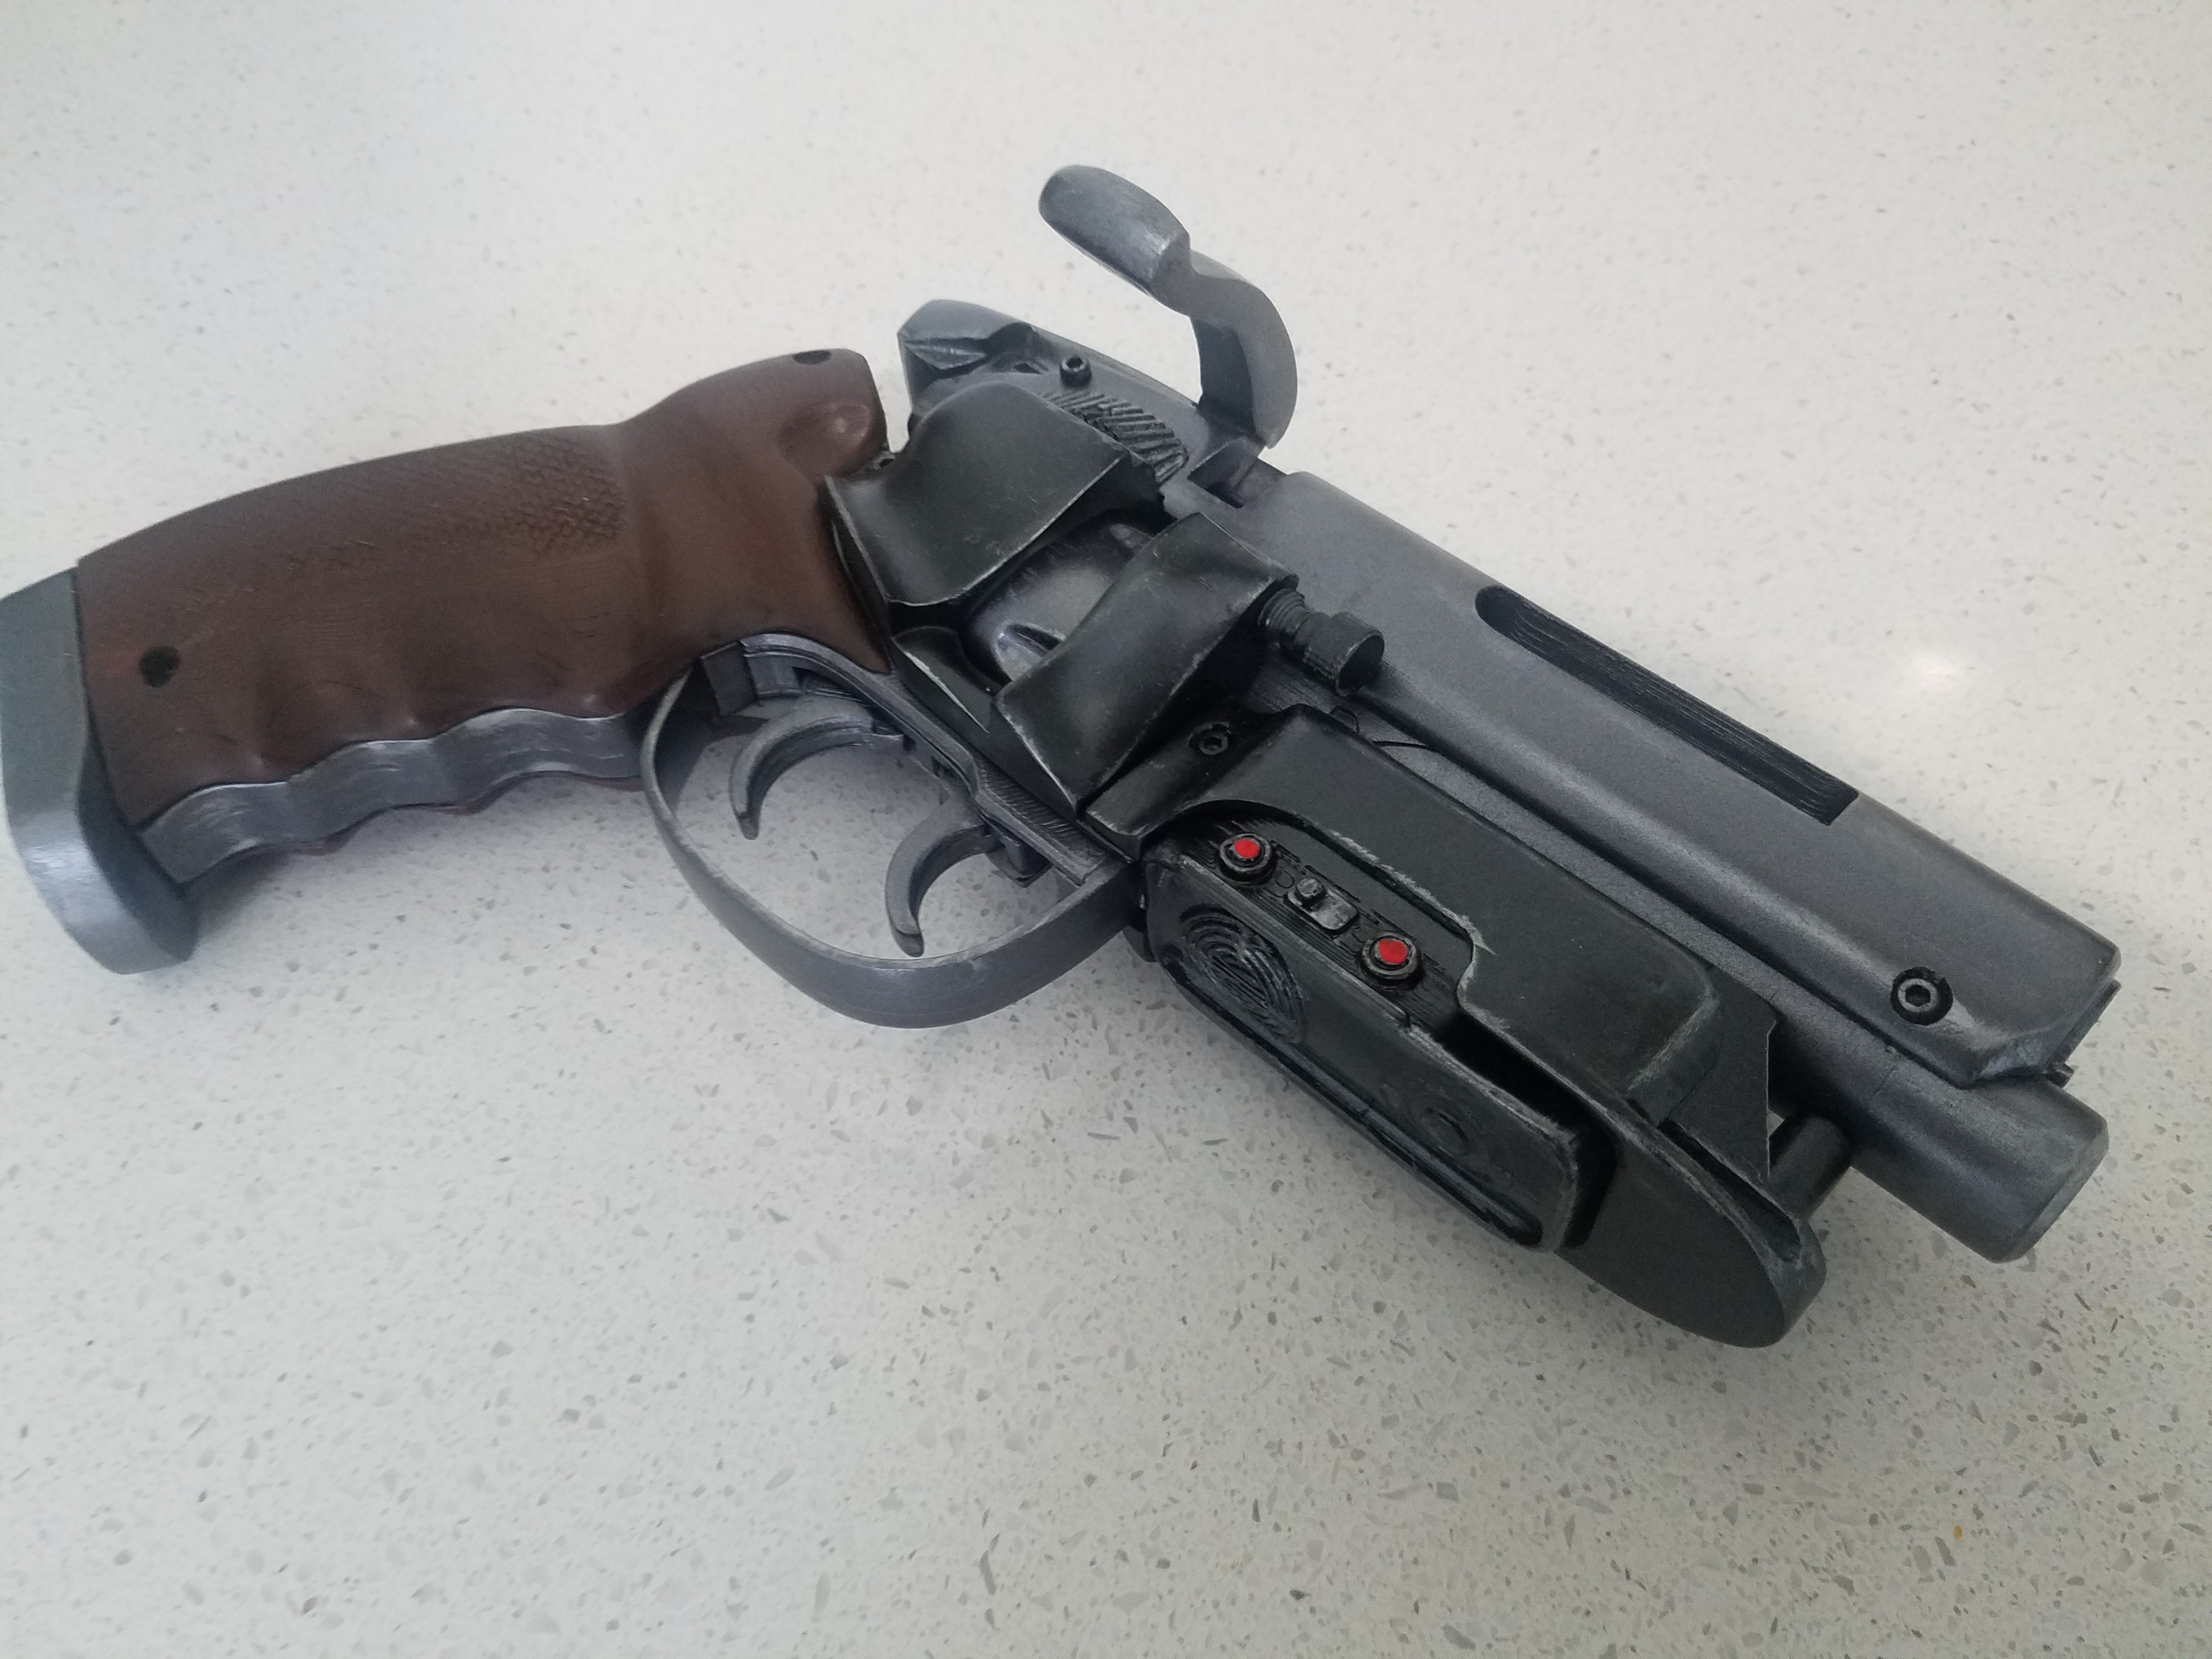
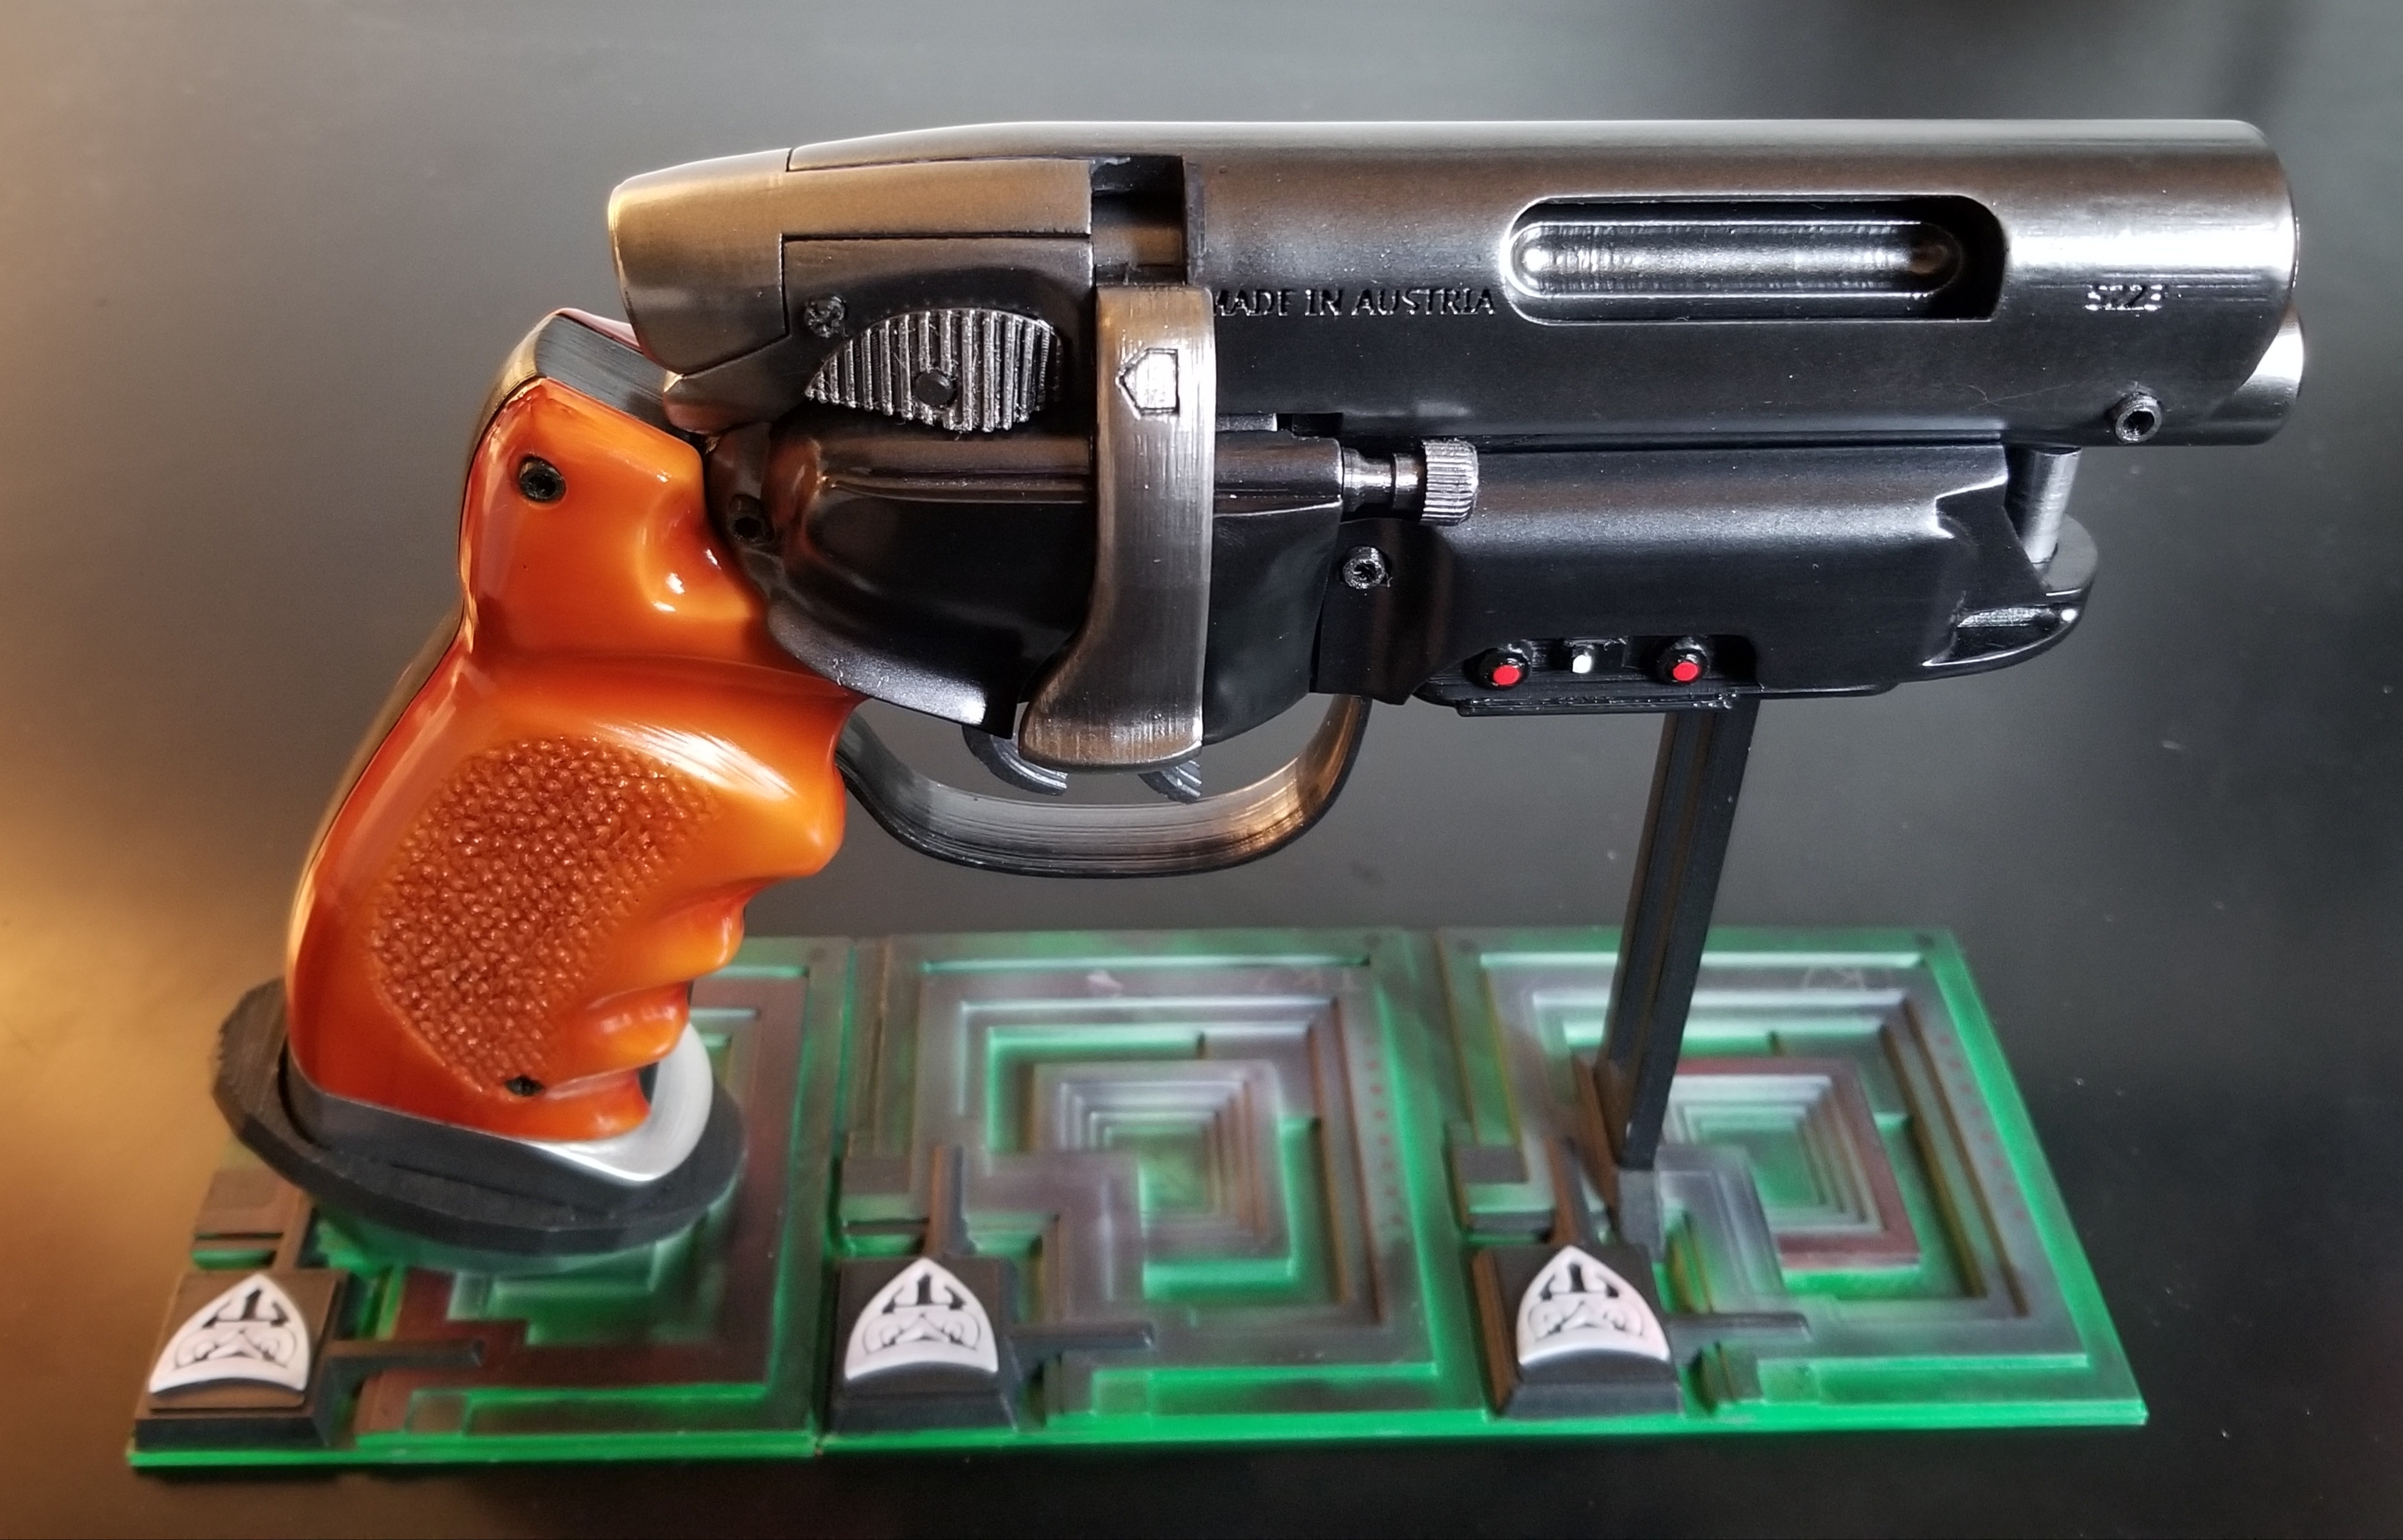
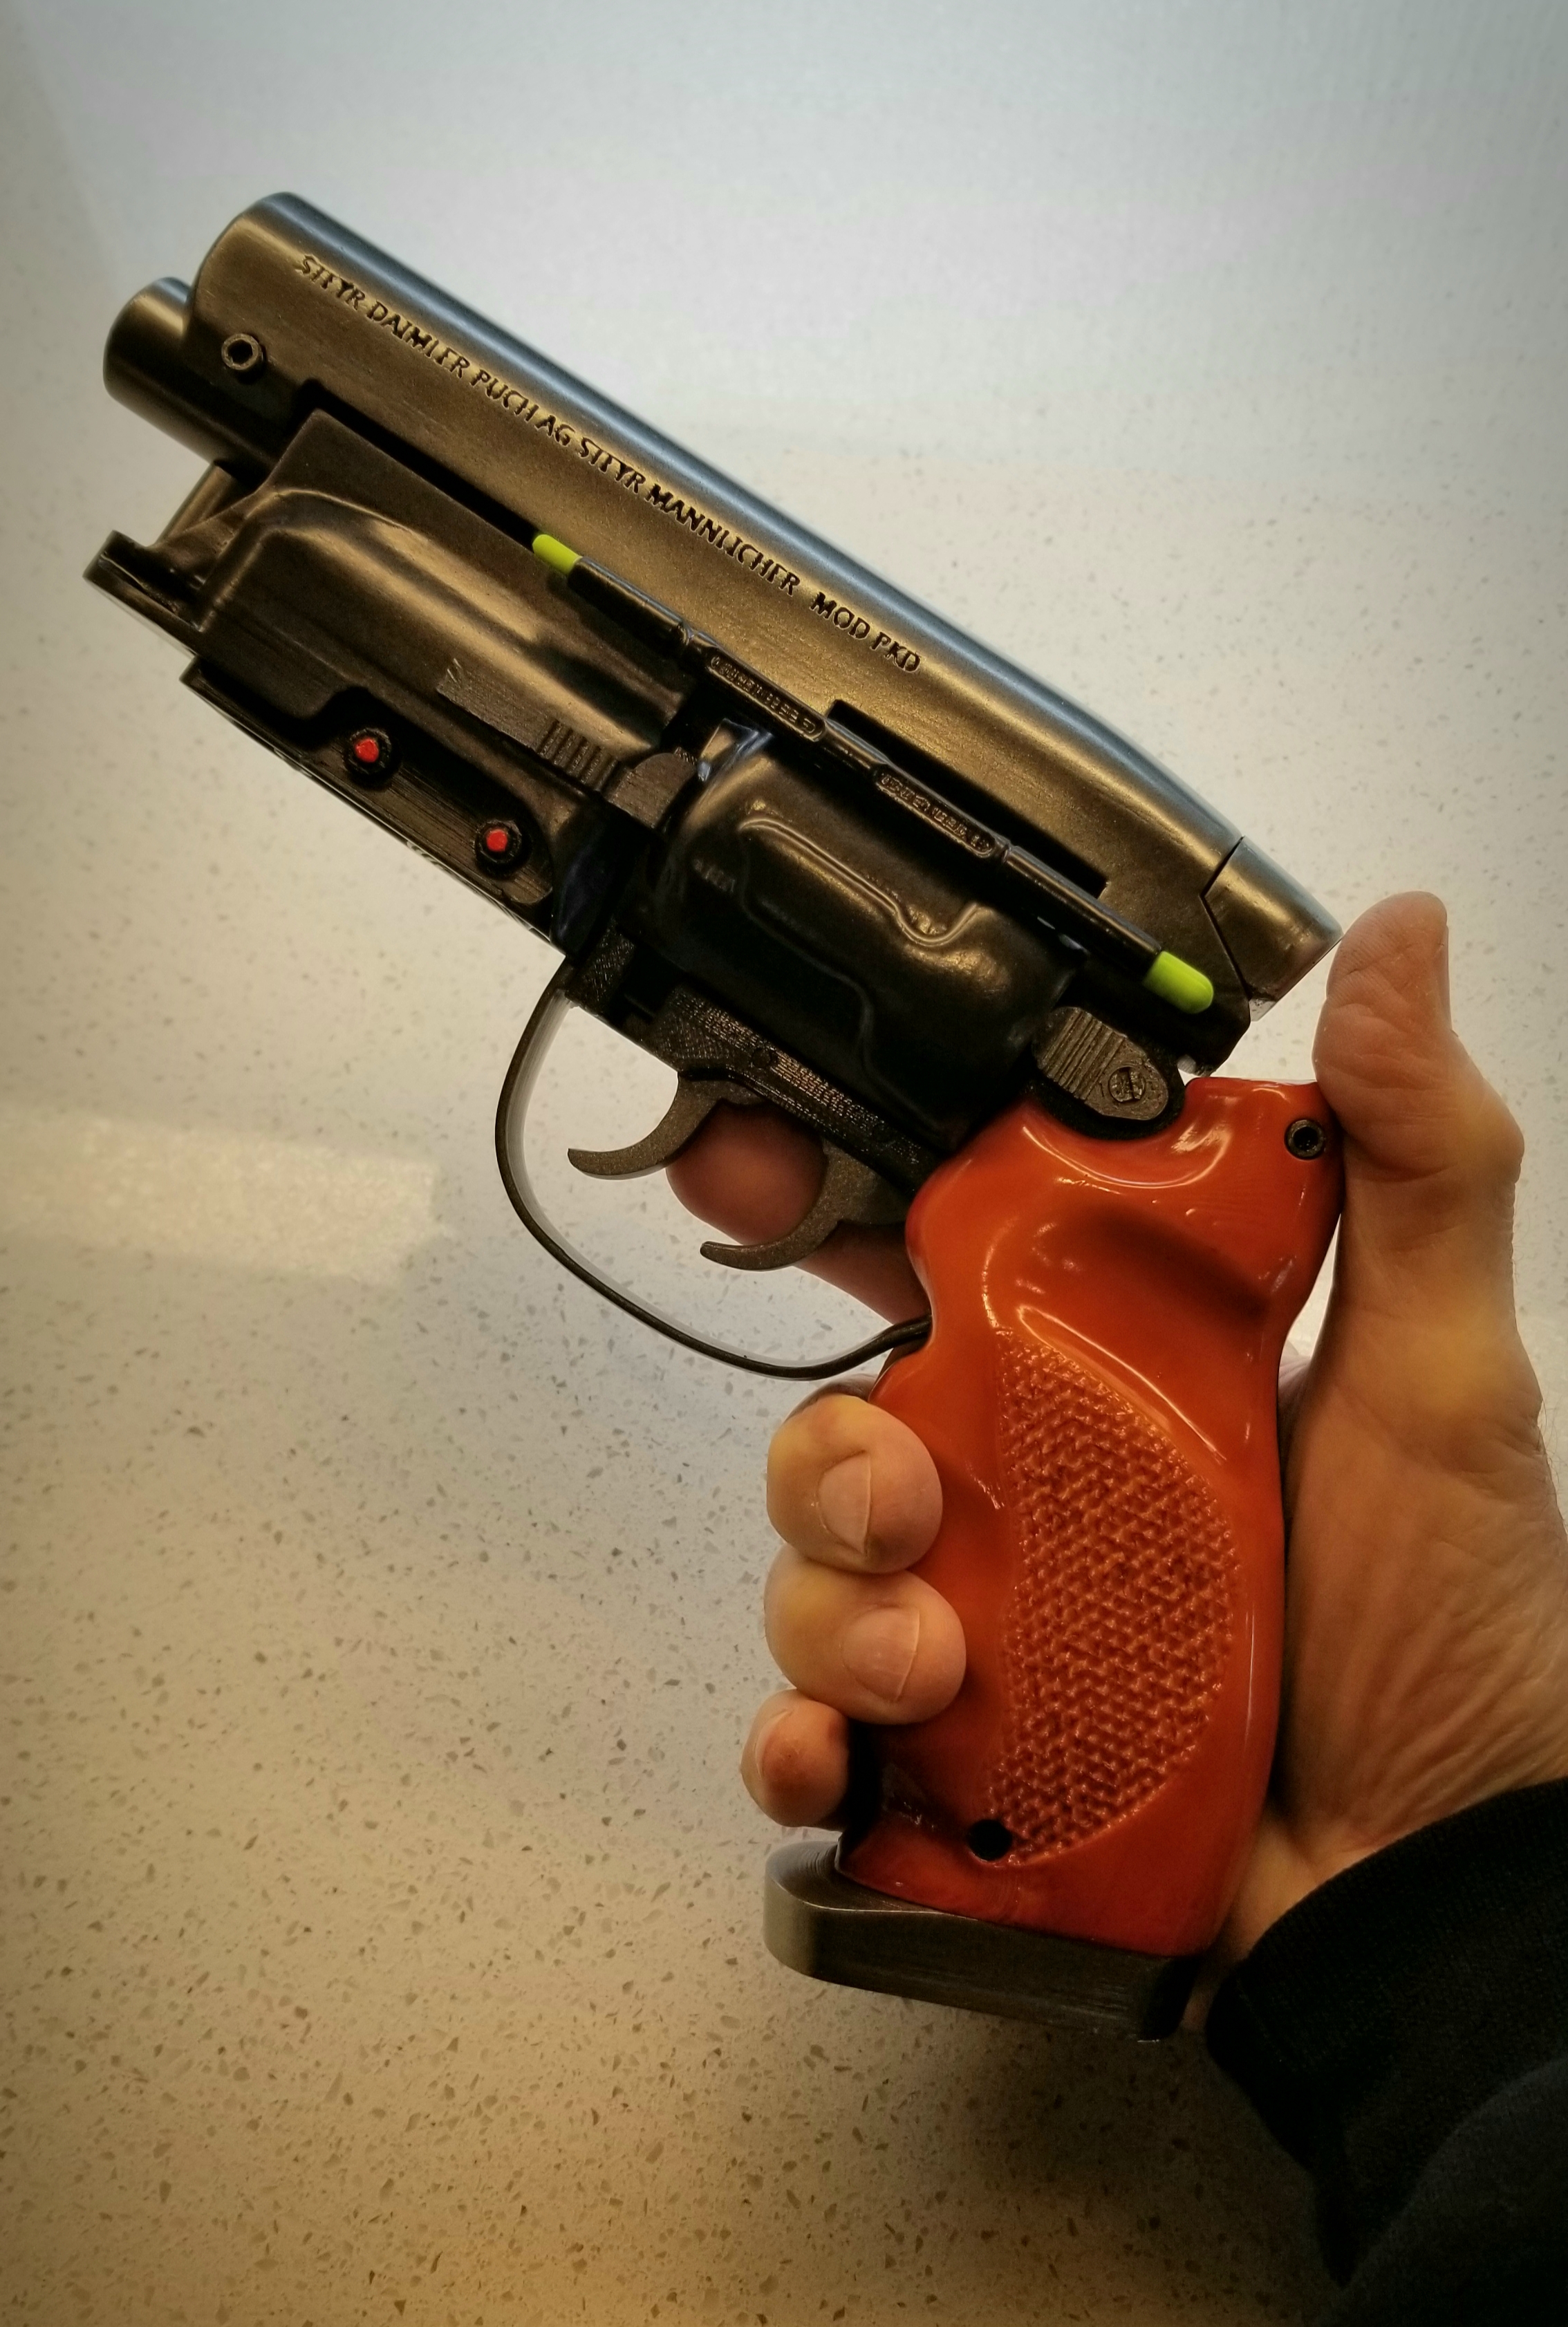
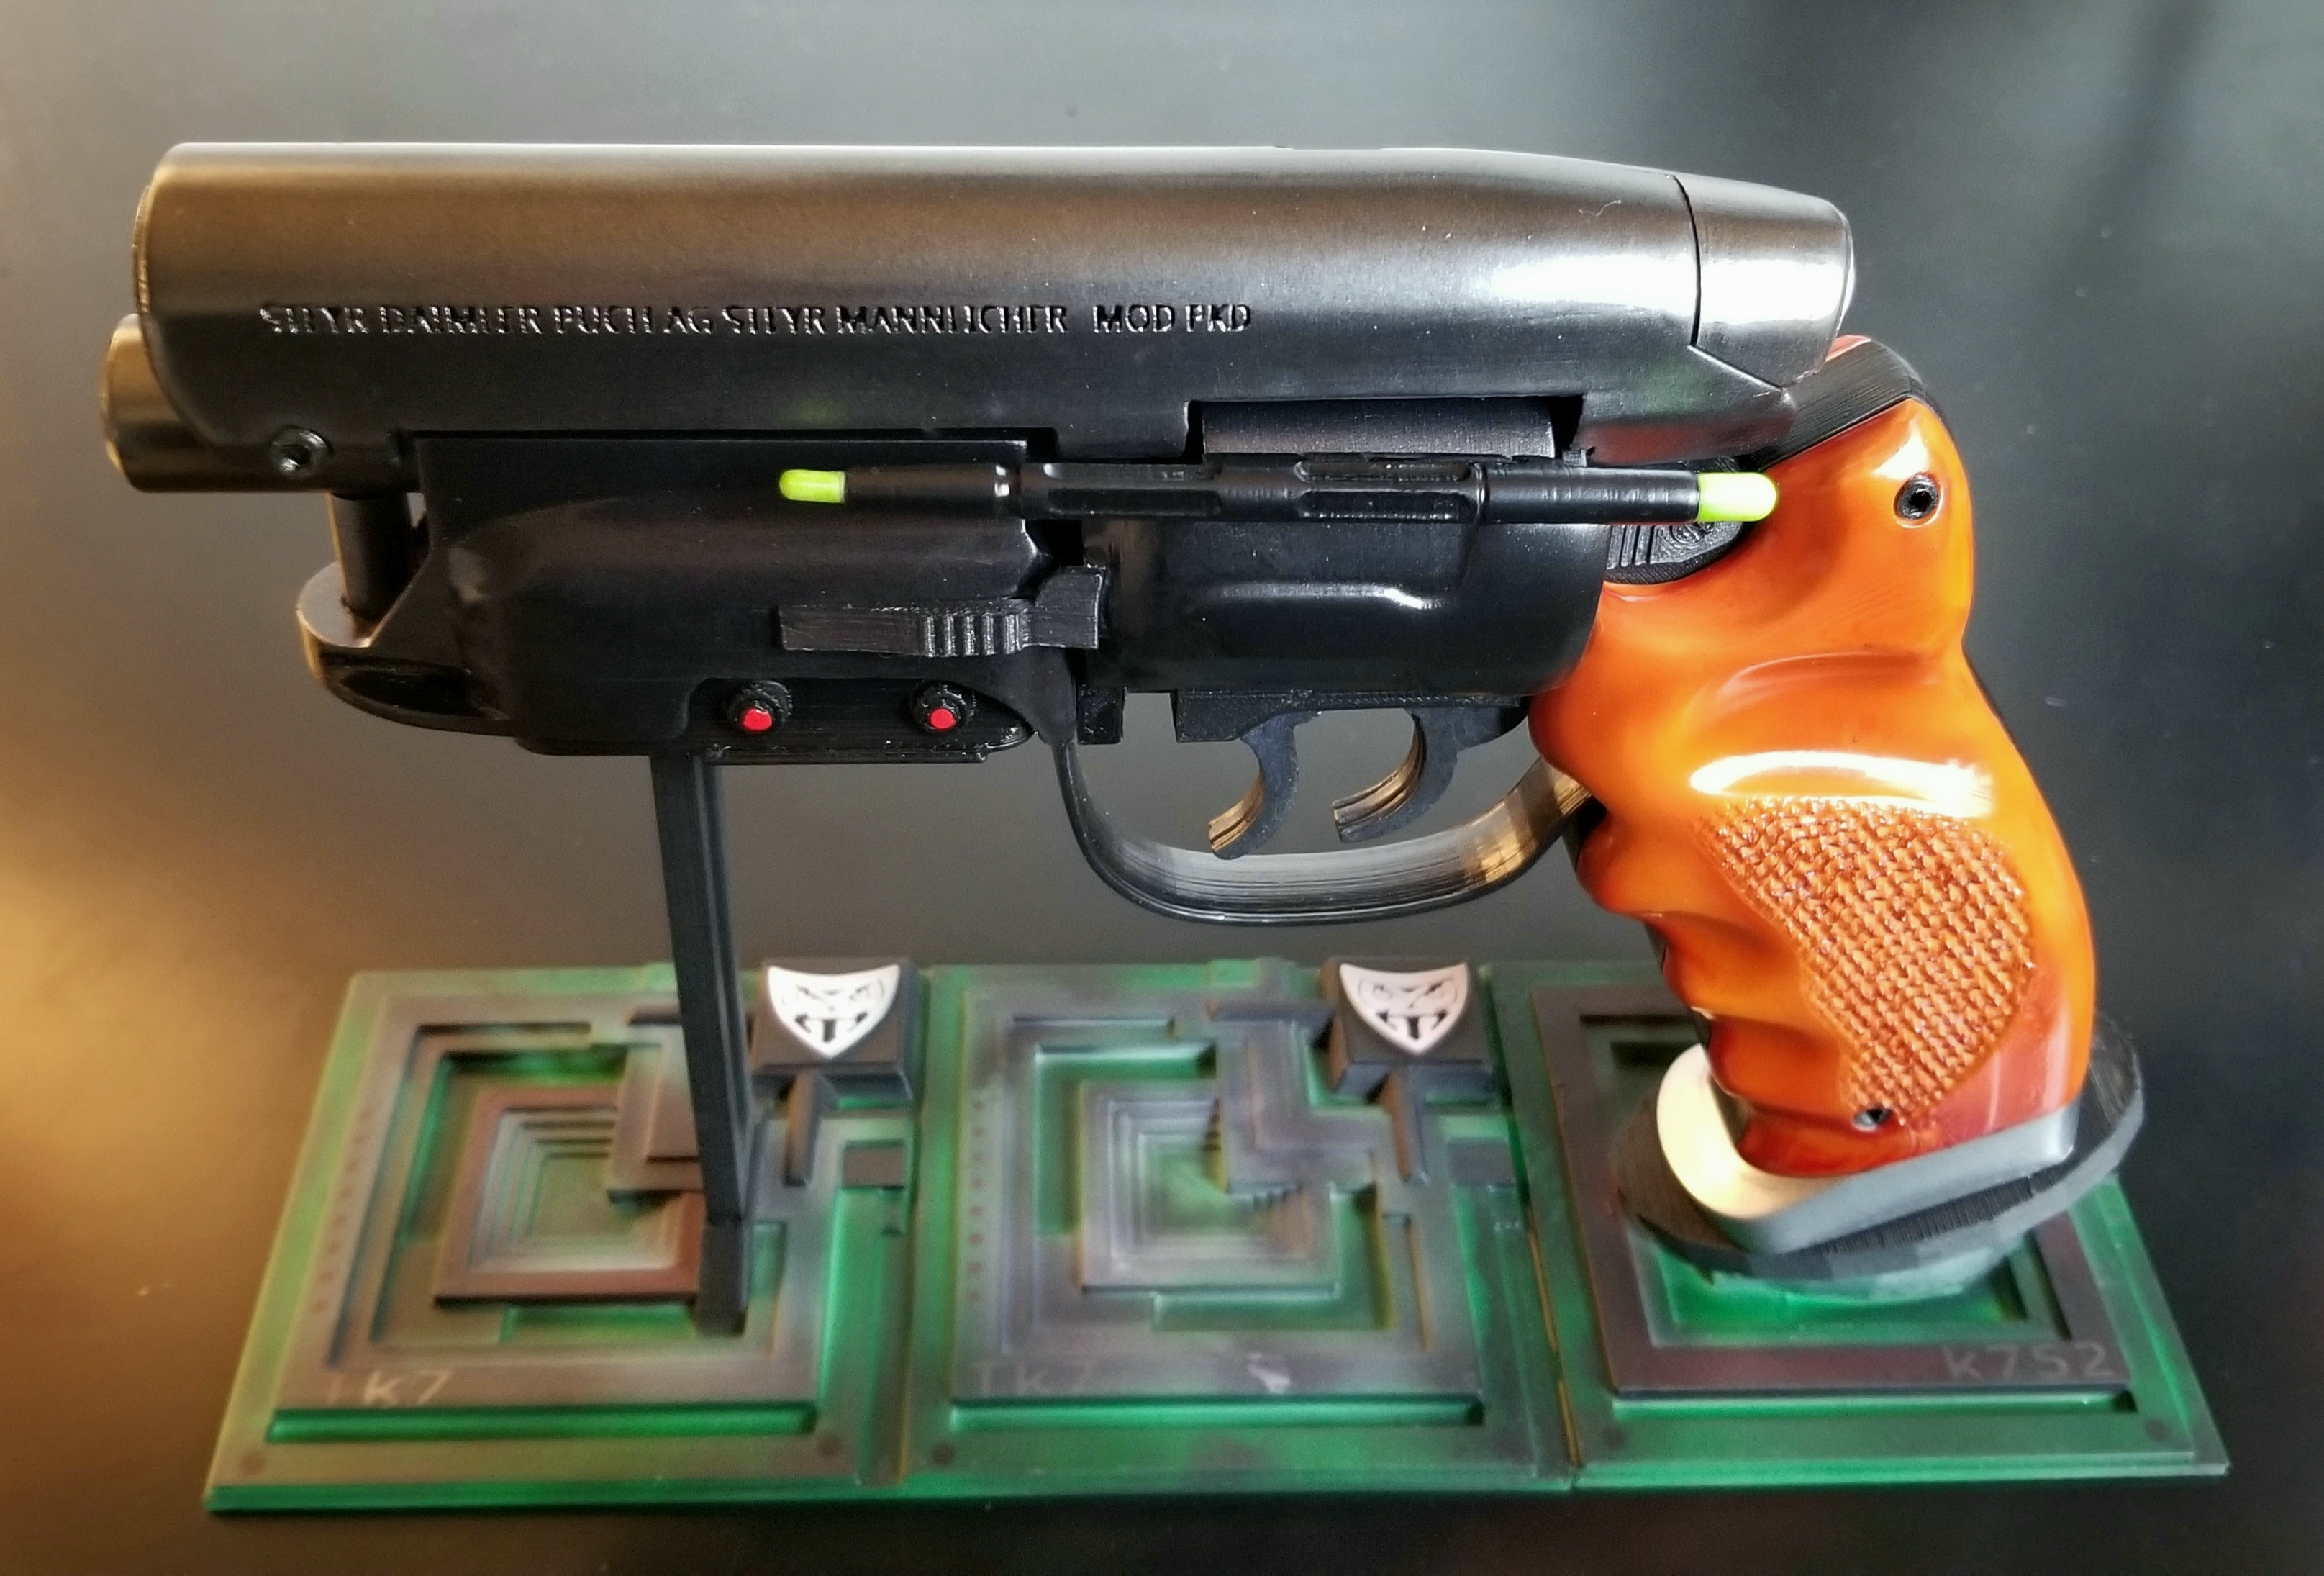
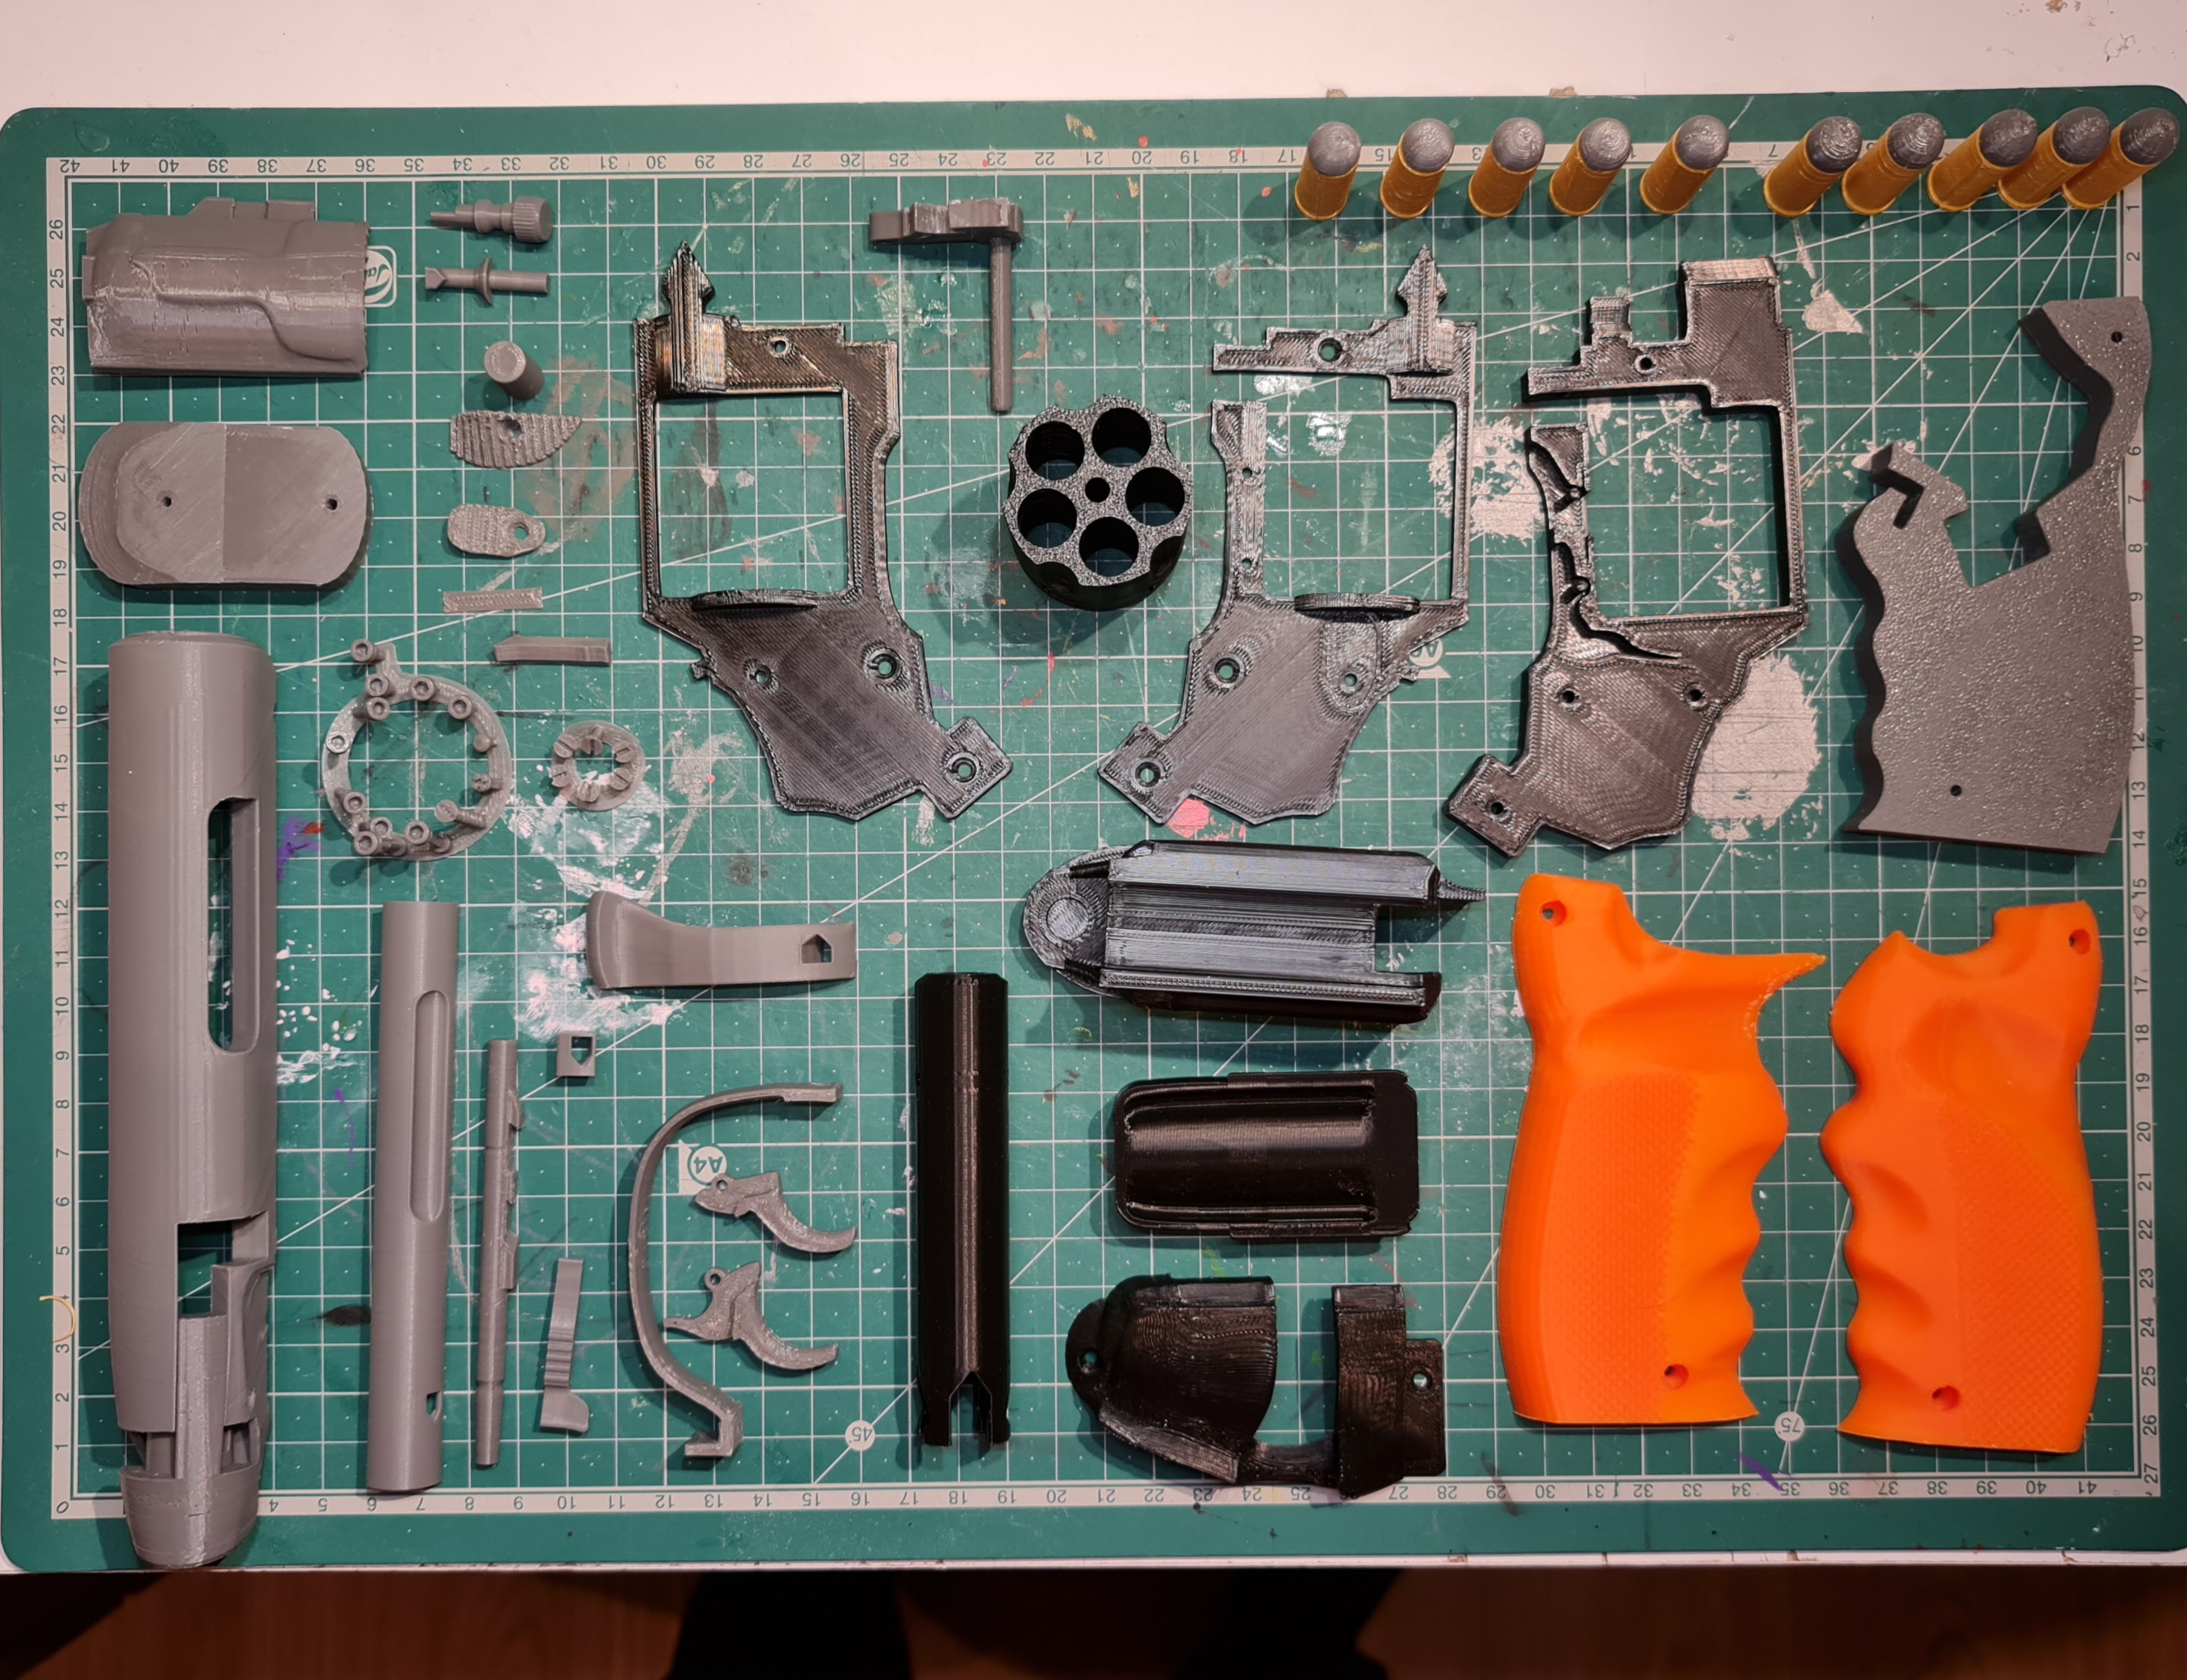
This gun has taken a lot of time and printing and design work! It has working double triggers, bolt action, flip down and spinning barrell and is fully assembled! I am really pleased with the way it came out and thought I would share it with you all.
Send in your printed pictures as I would love to see how you get on with your very own blaster!
Rick Deckard is a bounty hunter with the San Francisco Police Department, who goes after "andys" as they are called. He begins the story as a selfish, self-involved cop who sees no value in android life. His experiences within the novel cause him to develop empathy towards androids and all living things.
Deckard is married to Iran who is one of the more empathetic characters in the novel. She is able to allow herself to go into a depression and sadness with others over the state of humanity, and is able to find the empathy necessary to care for an electric toad at the end of the novel.
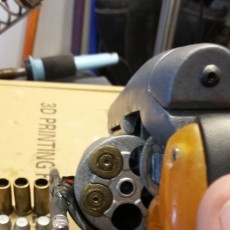
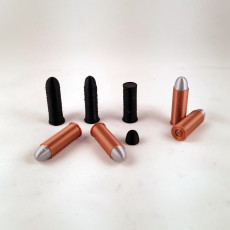
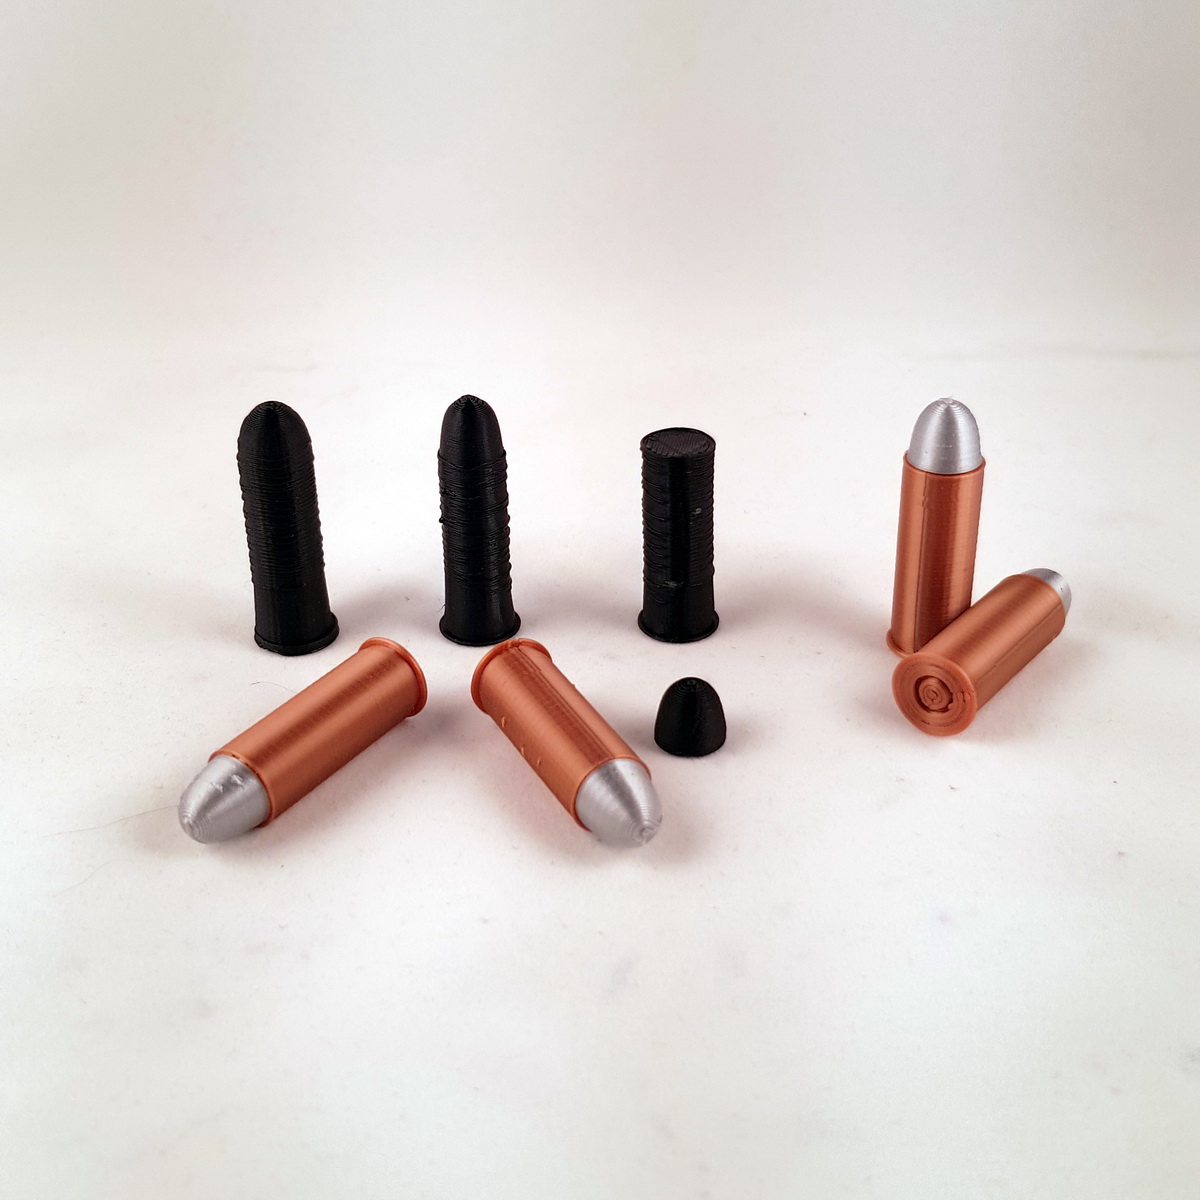
Edit : User EdwardHood has designed a bullet to fit the chamber, here's the link
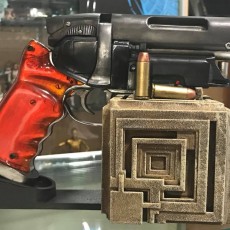
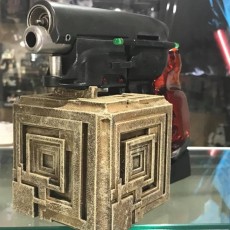
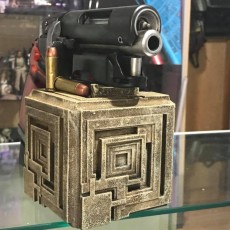
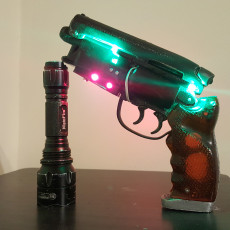
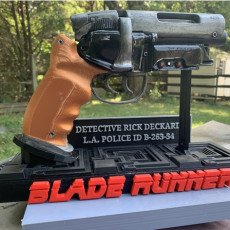
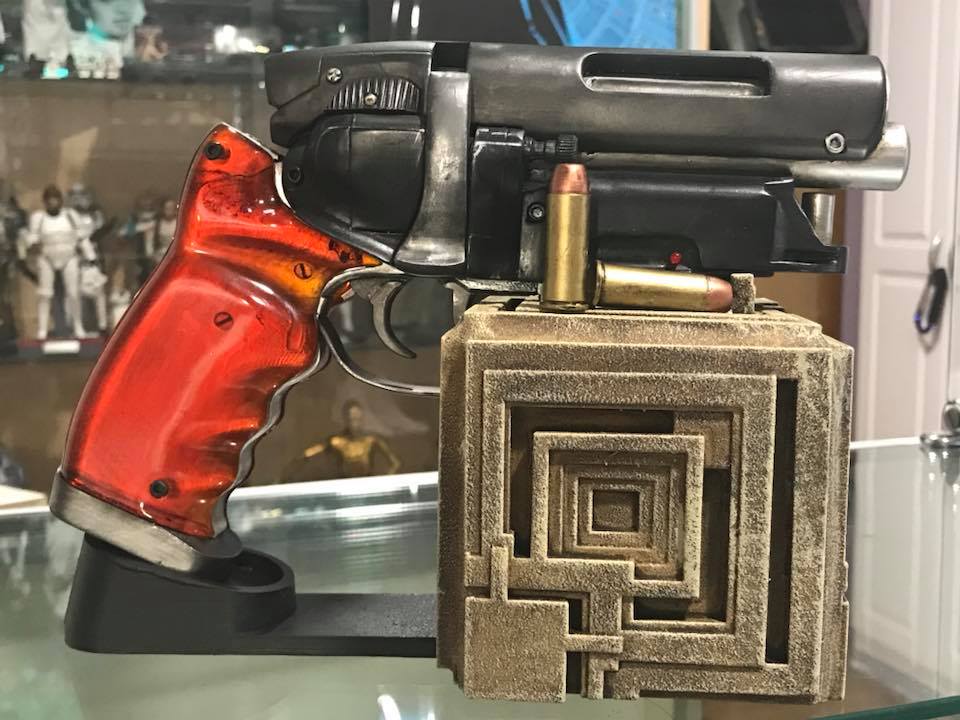
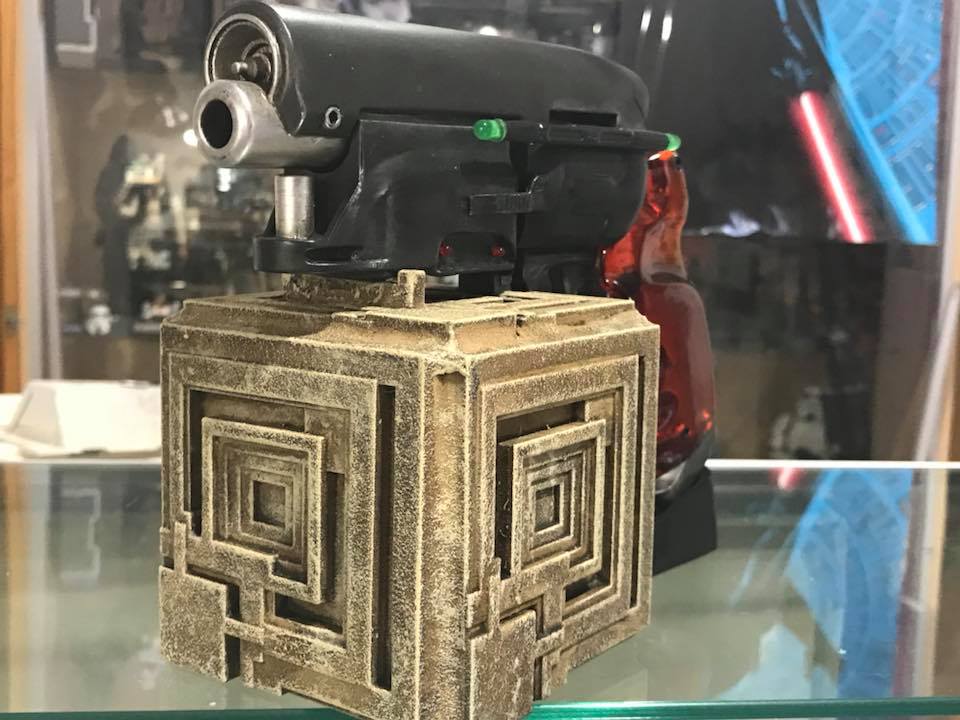
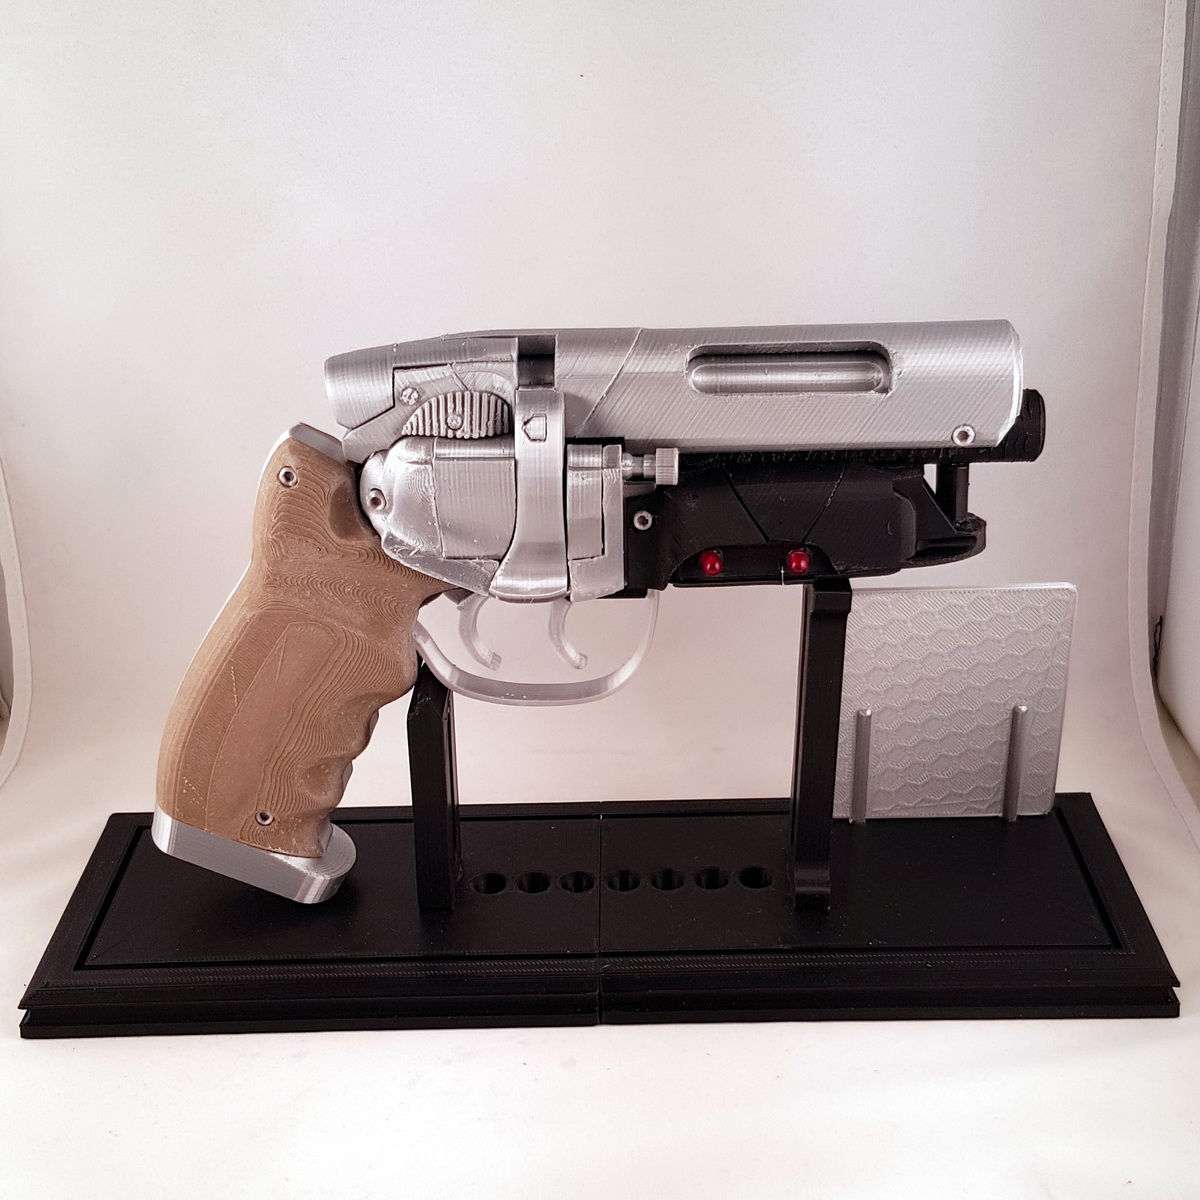
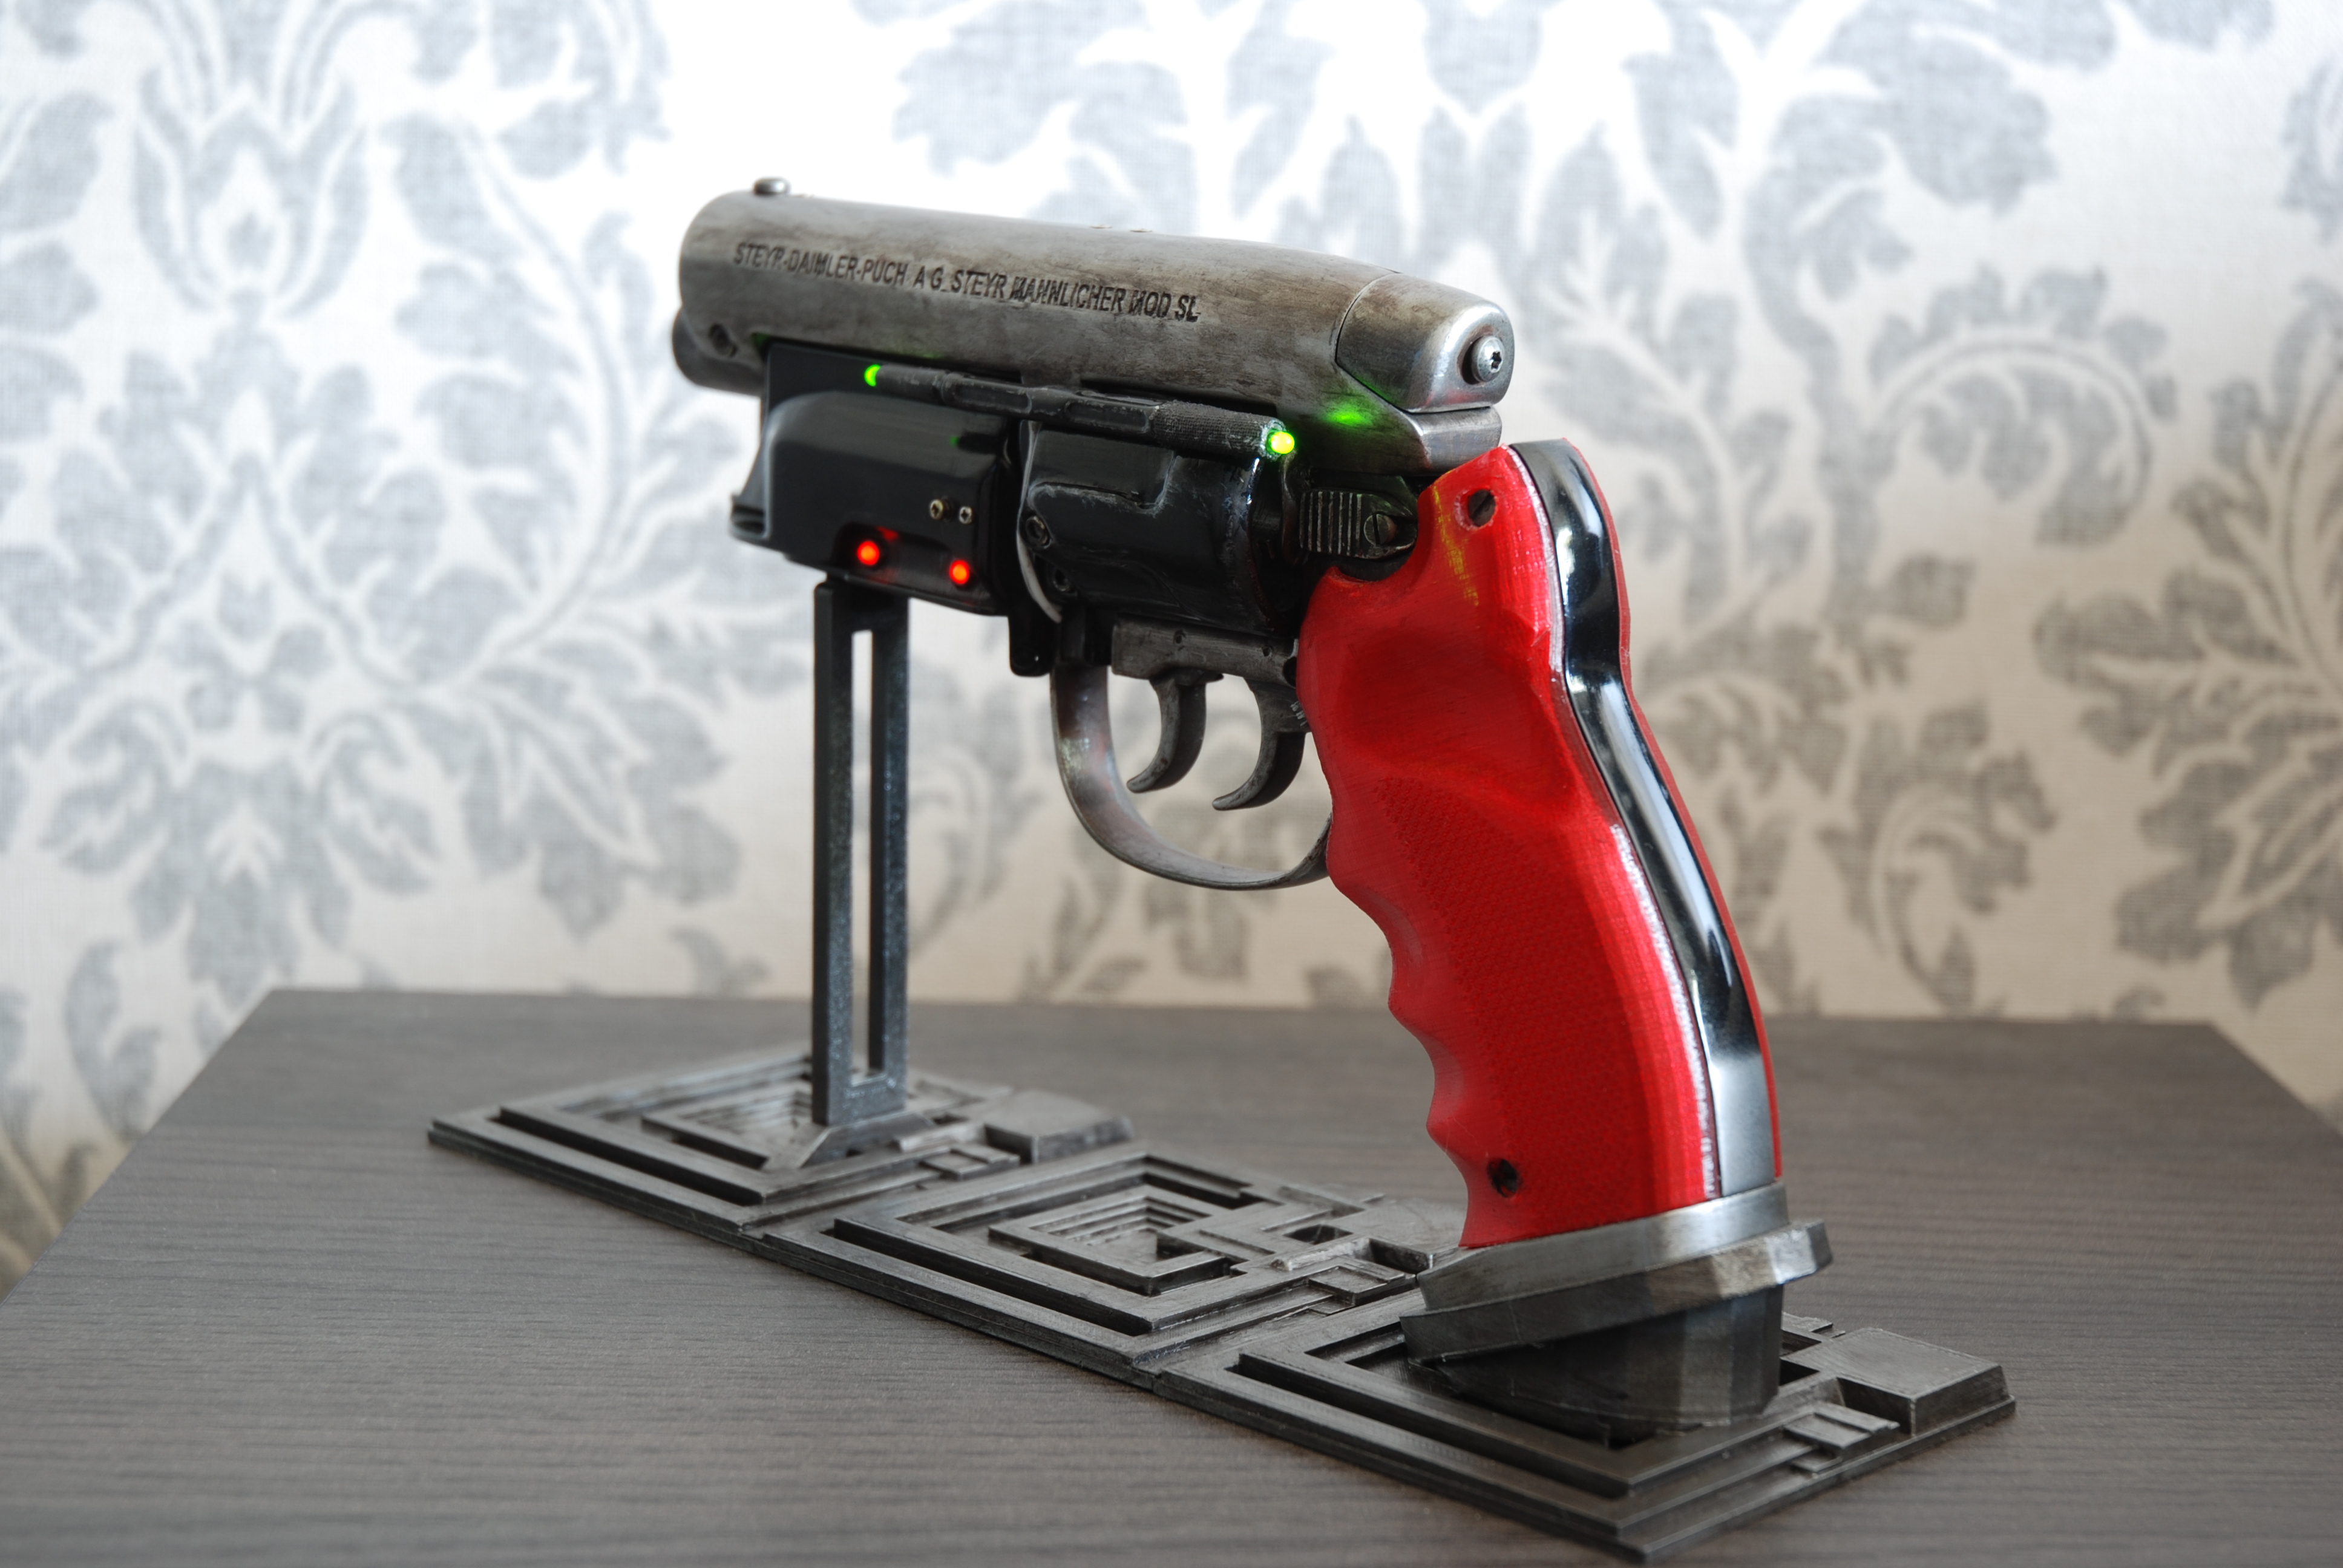
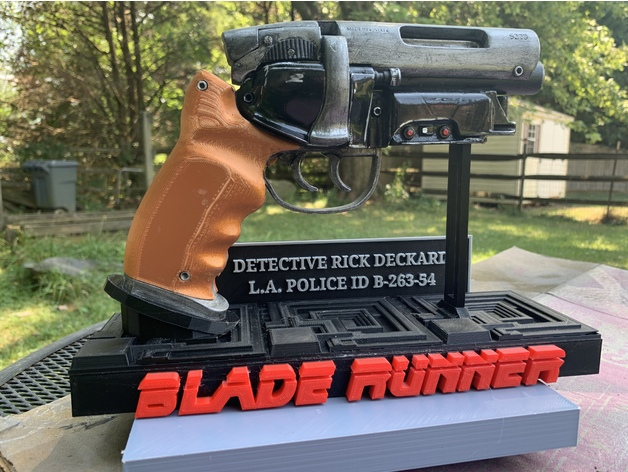
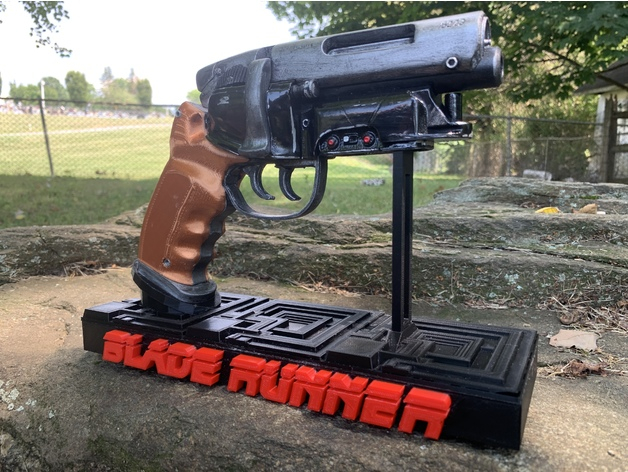
Edit : And User HeyFUbuddy has designed an awesome stand, here's the link.
Edit : Mike Milner ( tk6831 ) has produced a modified version of one of the components underneath the barrel. Here's the link
Edit : Gav Lewis ( GavLewis ) has put together grooved versions of the handle pieces. Here


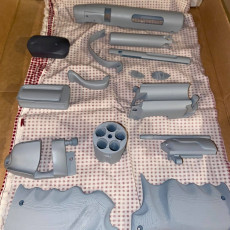
I have included a Detailed PDF of all of the print times and assembly instructions so download and take a look!
| 发表的日期 | 03/03/2015 |
| 让时间去下载 | 1100 - 1250 分钟 |
| 材料数量 | 160g |
| 尺寸大小 | 230 x 50 x 15mm |
| 打印工艺 | FDM |
| 复杂程度 | pages.object.complexitydifficult |


Printed by rejamison, using PLA and using 2.5mm screws instead of the pegs.
Printed by codeczombie on a Form 1+ Parts where fused together by codeczombie themselves, so that it would print all in one go.
Printed with Colorfabb PLA/PHA Natural on UM2.
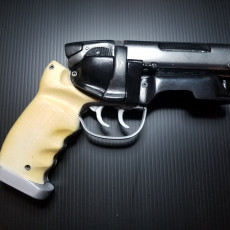
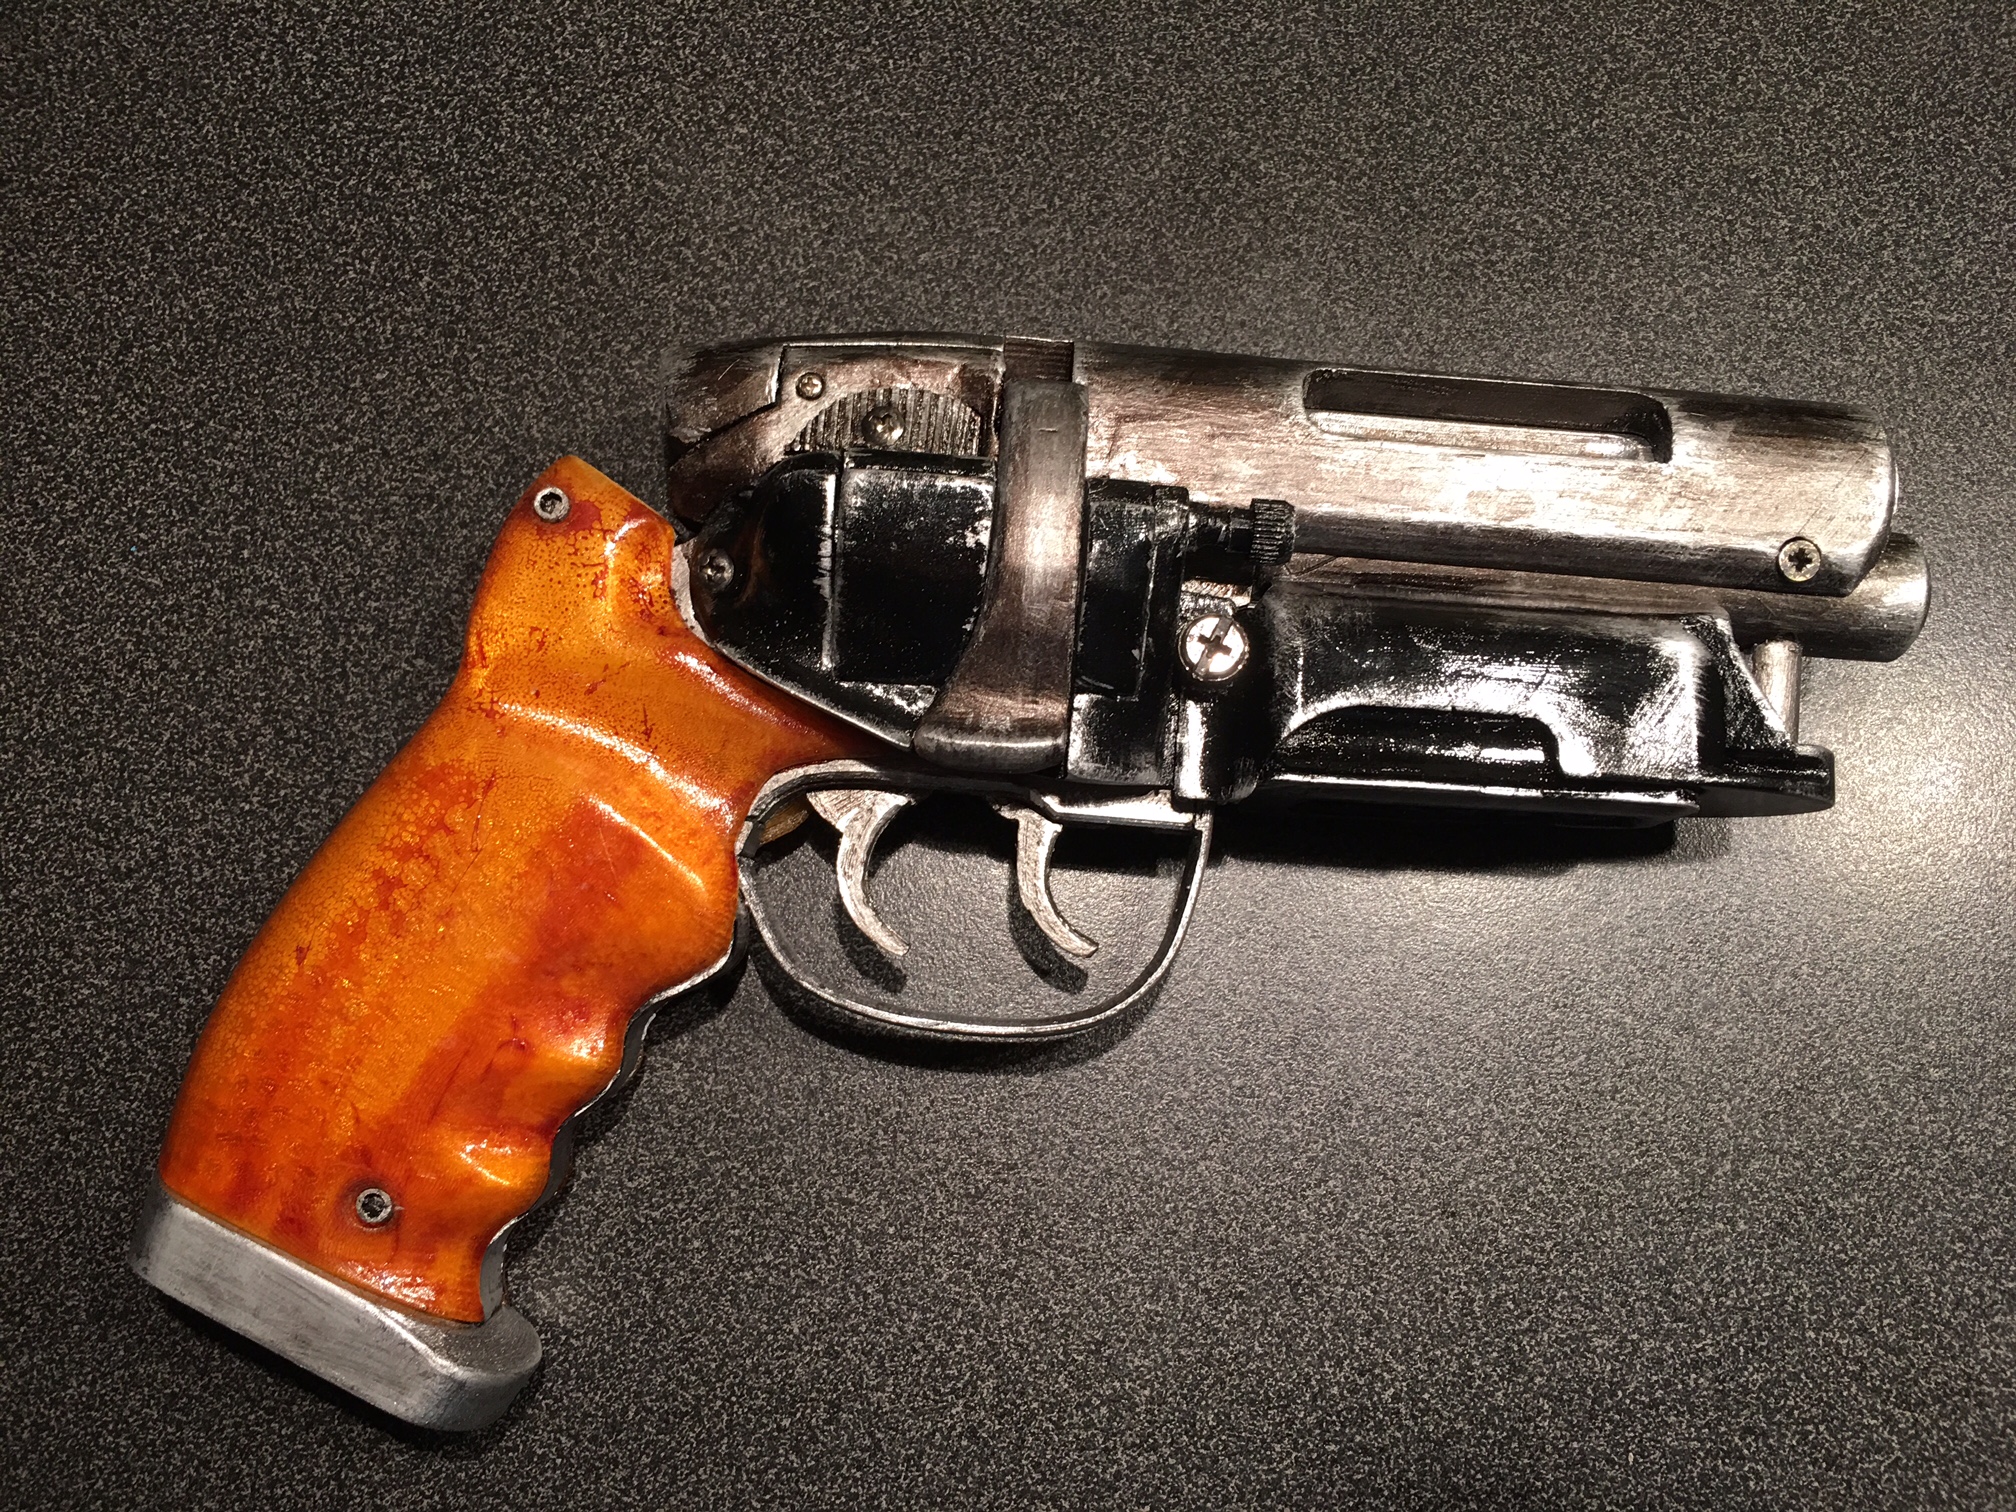
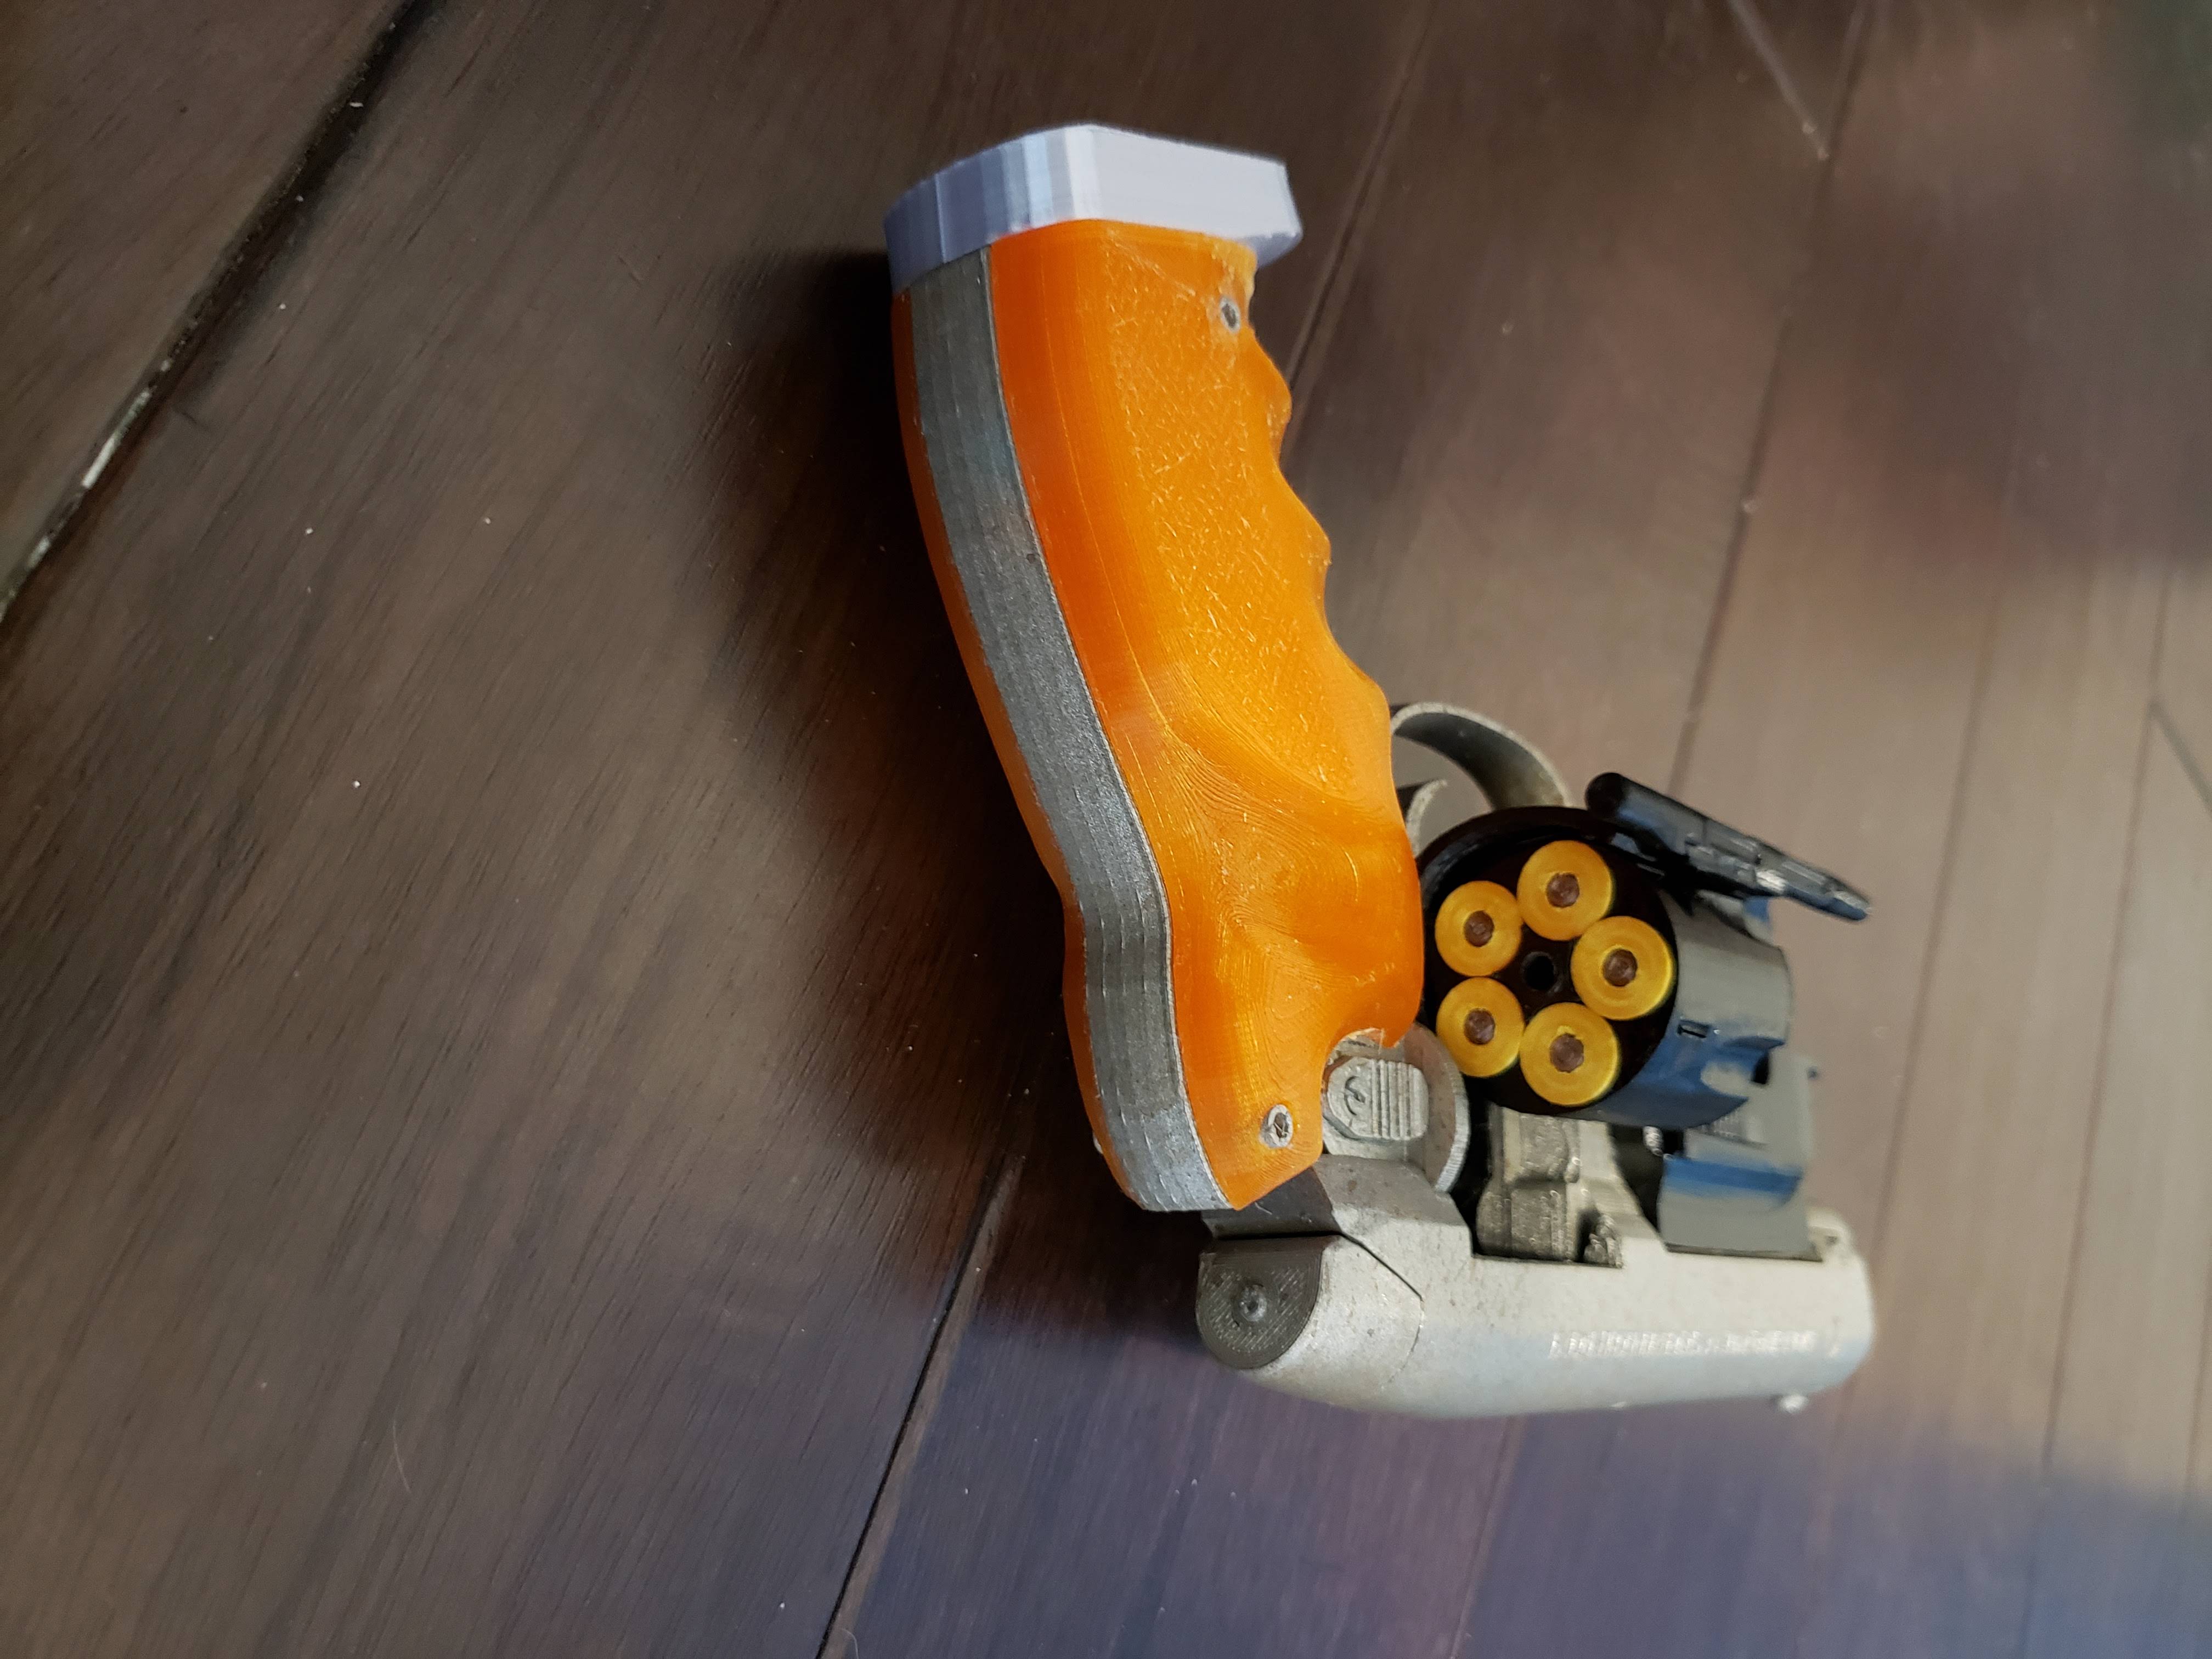
My finished model, I printed the hand grips and then cast them to make the amber versions on the final model.
Printed so nice I did it twice.
No paint, just colored filament.
my first major print - more paint detail to add by hand , very pleased with how it's turned out nice one Andrew !!!
Love your model! This is my take on it. Cheers!
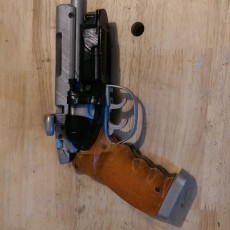
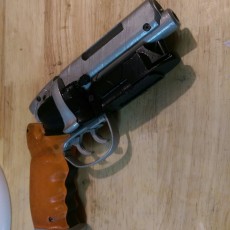
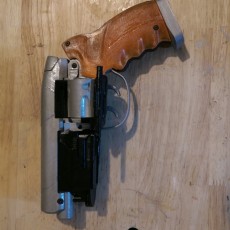
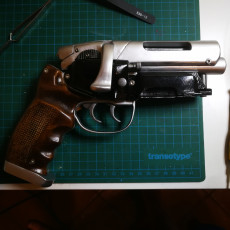
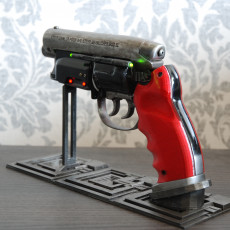
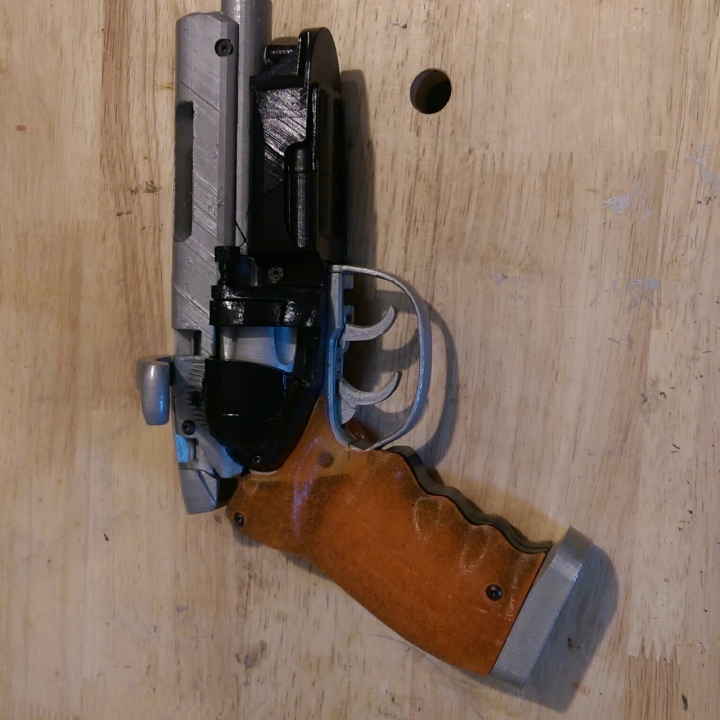
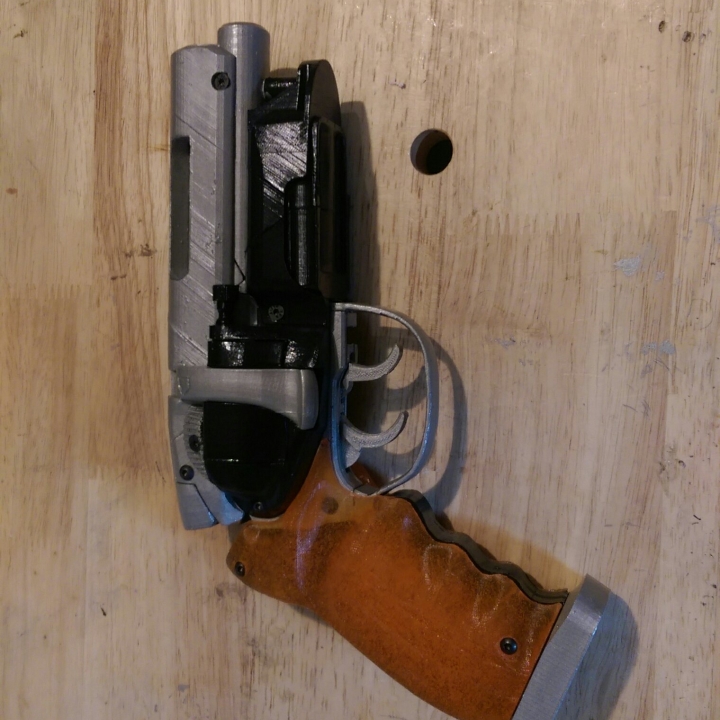
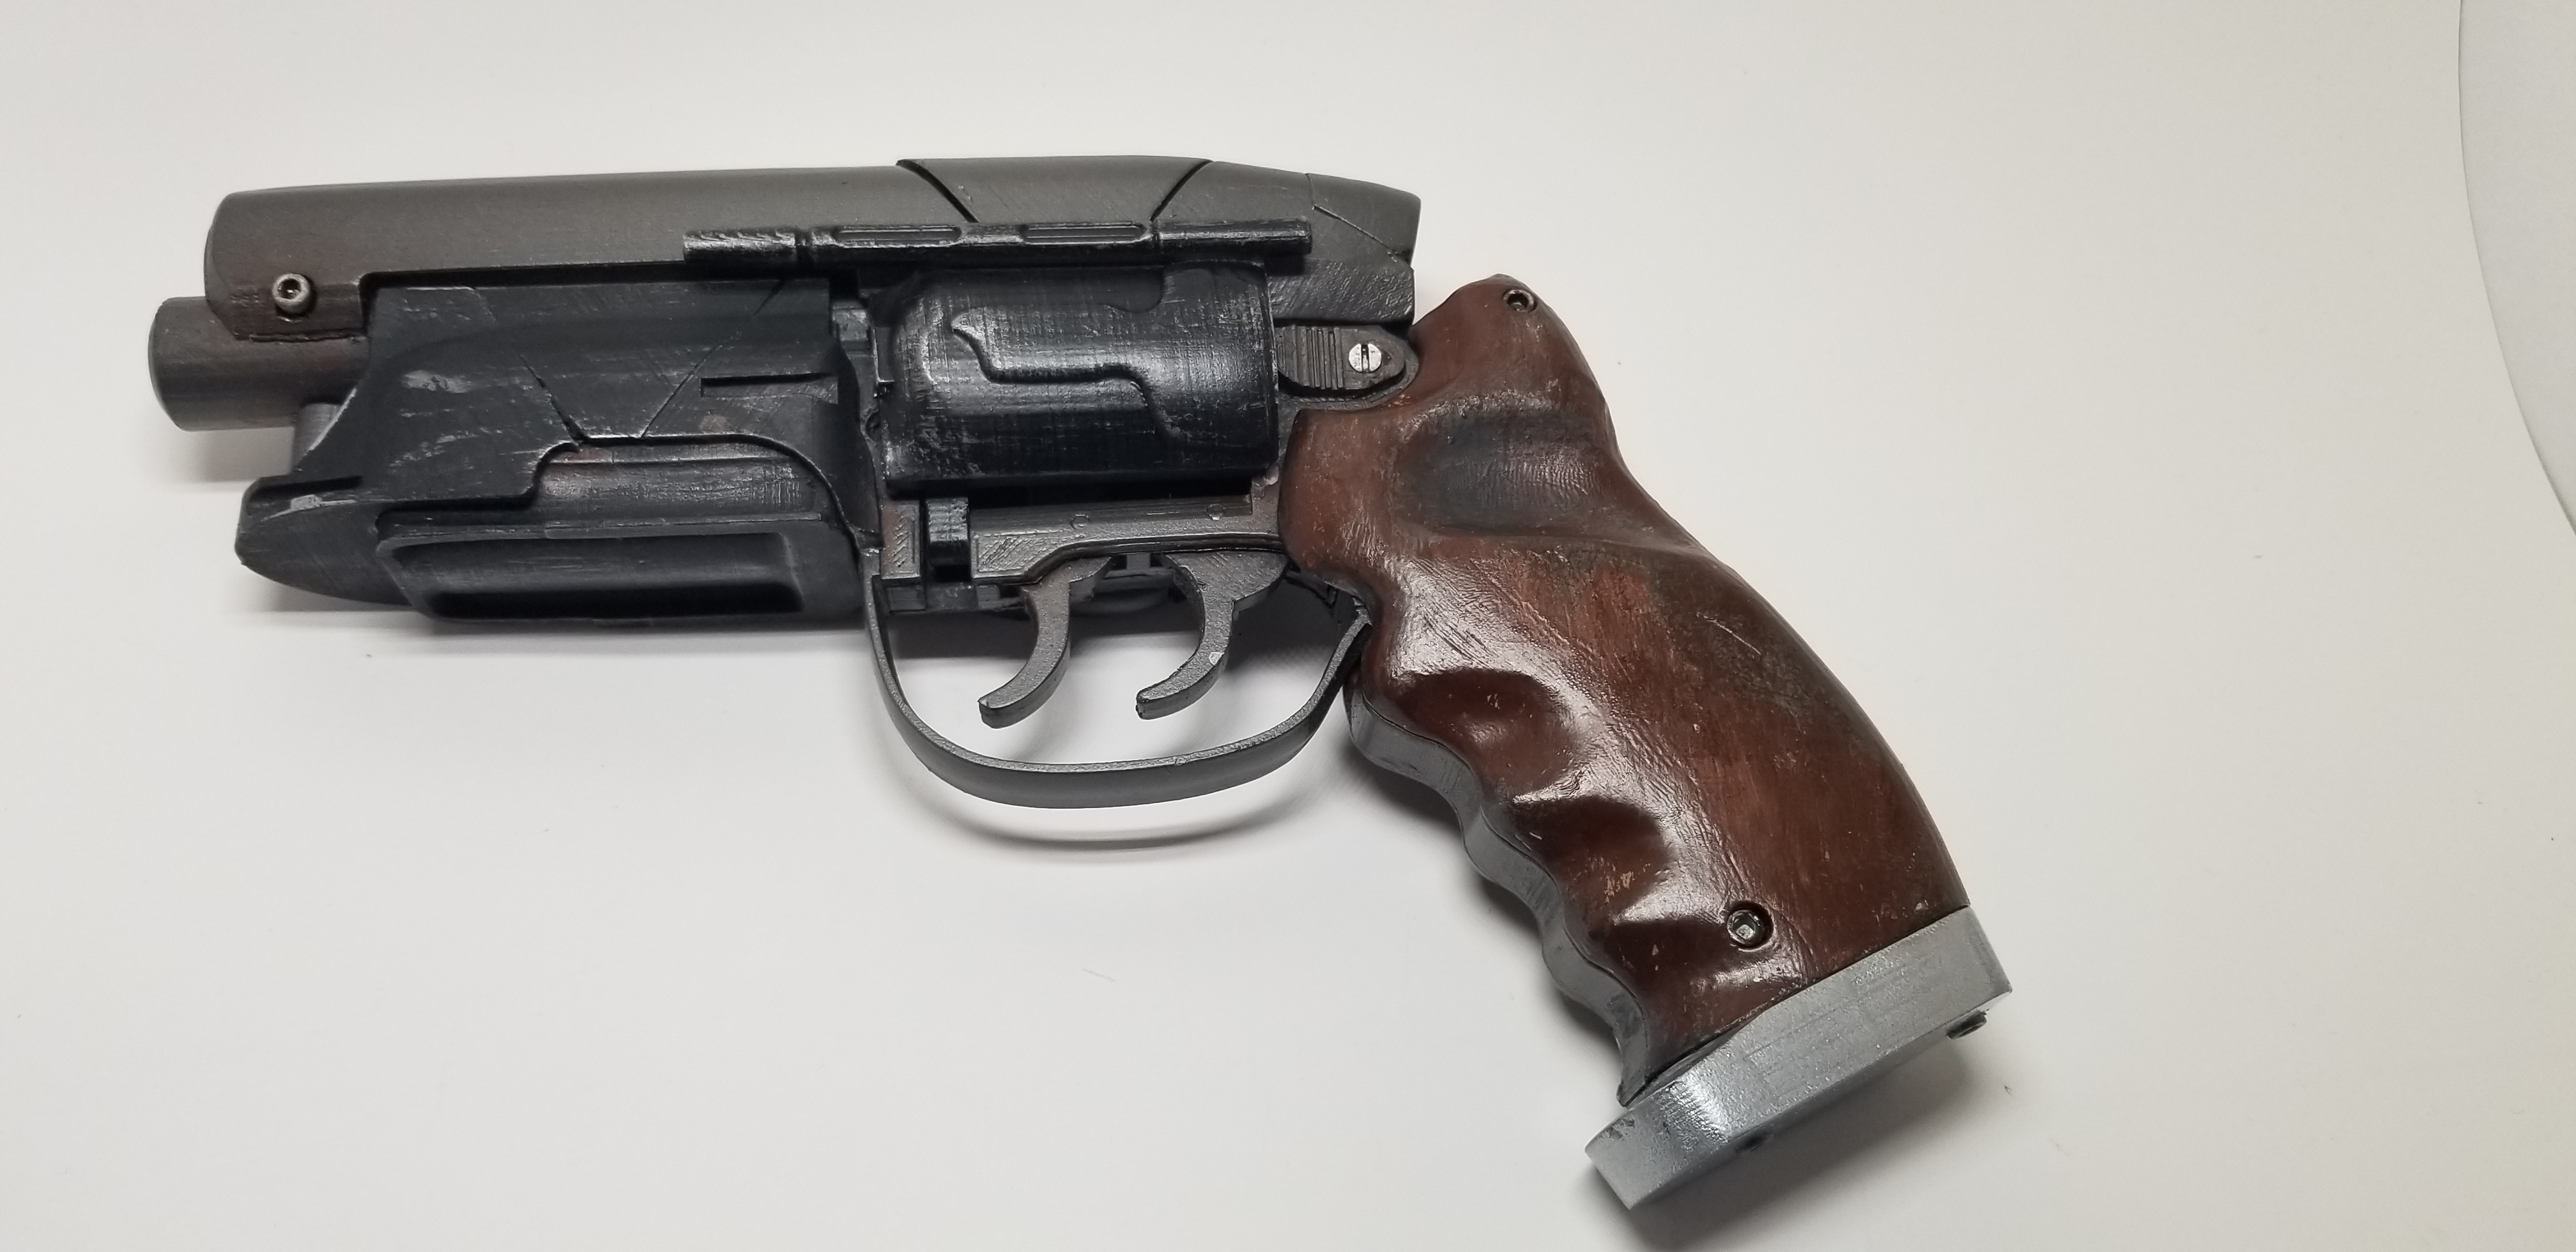
Just finished. Printed with Dark grey ABS, gloss black PLA, Laywood and Aluminium/PLA. Really happy with the way it turned out!
Still need to add the bolts and a couple of tiny pieces. But, after a long day n a lot of driving, a bit of stress relief putting this together was just what I needed. Cheers for the model, big props to your cutting skills dude! I'll post after it's been painted, weathered and all of the grain has been emphasised on the grips. Printing them at 200m and the rest at 100M really makes a nice contrast. Regards Jay UK
Some parts were made in ABS but mostly it's PLA. Did it a bit thicker to add more weight. Really fun to build and the blueprints were great!
Hi guys This is a really nice design and models well with some minor fettling
Really nice work on the files Sir. This is my take. I'm currently moulding some amber grips for it.
AWESOME design, thanks for sharing!
printed out on the monoprice maker ultimate and painted with rub n buff
Awesome design. Printed in PLA and painted with acrylic craft paint and various weathering techniques. I'm calling this on Holdens Blaster as there are some obvious differences between this one and Deckards. :)
Black Shaxon PLA, Brown Monoprice PLA and Prusa Rapunzel Silver PLA
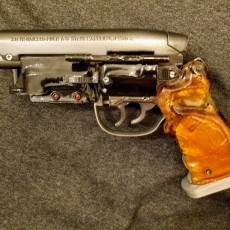
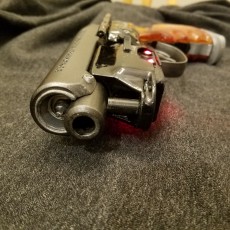
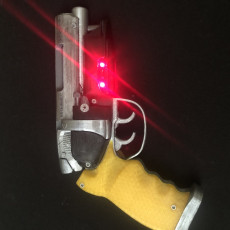
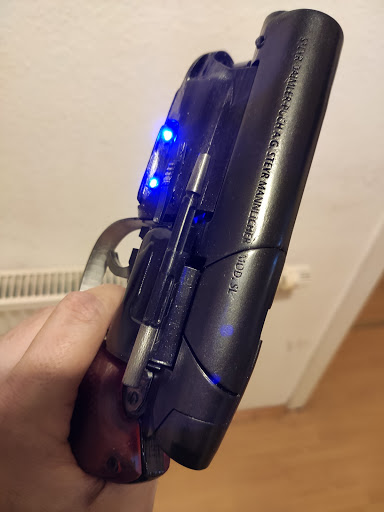
Love this gun. parts fit together good. I did make a new mag for it with the LEDs.
Great model! I assembled with M3 and M2.5 screws which worked great. The only issues I had were the trigger pins breaking off. I had to add some metal pins to finish the assembly.
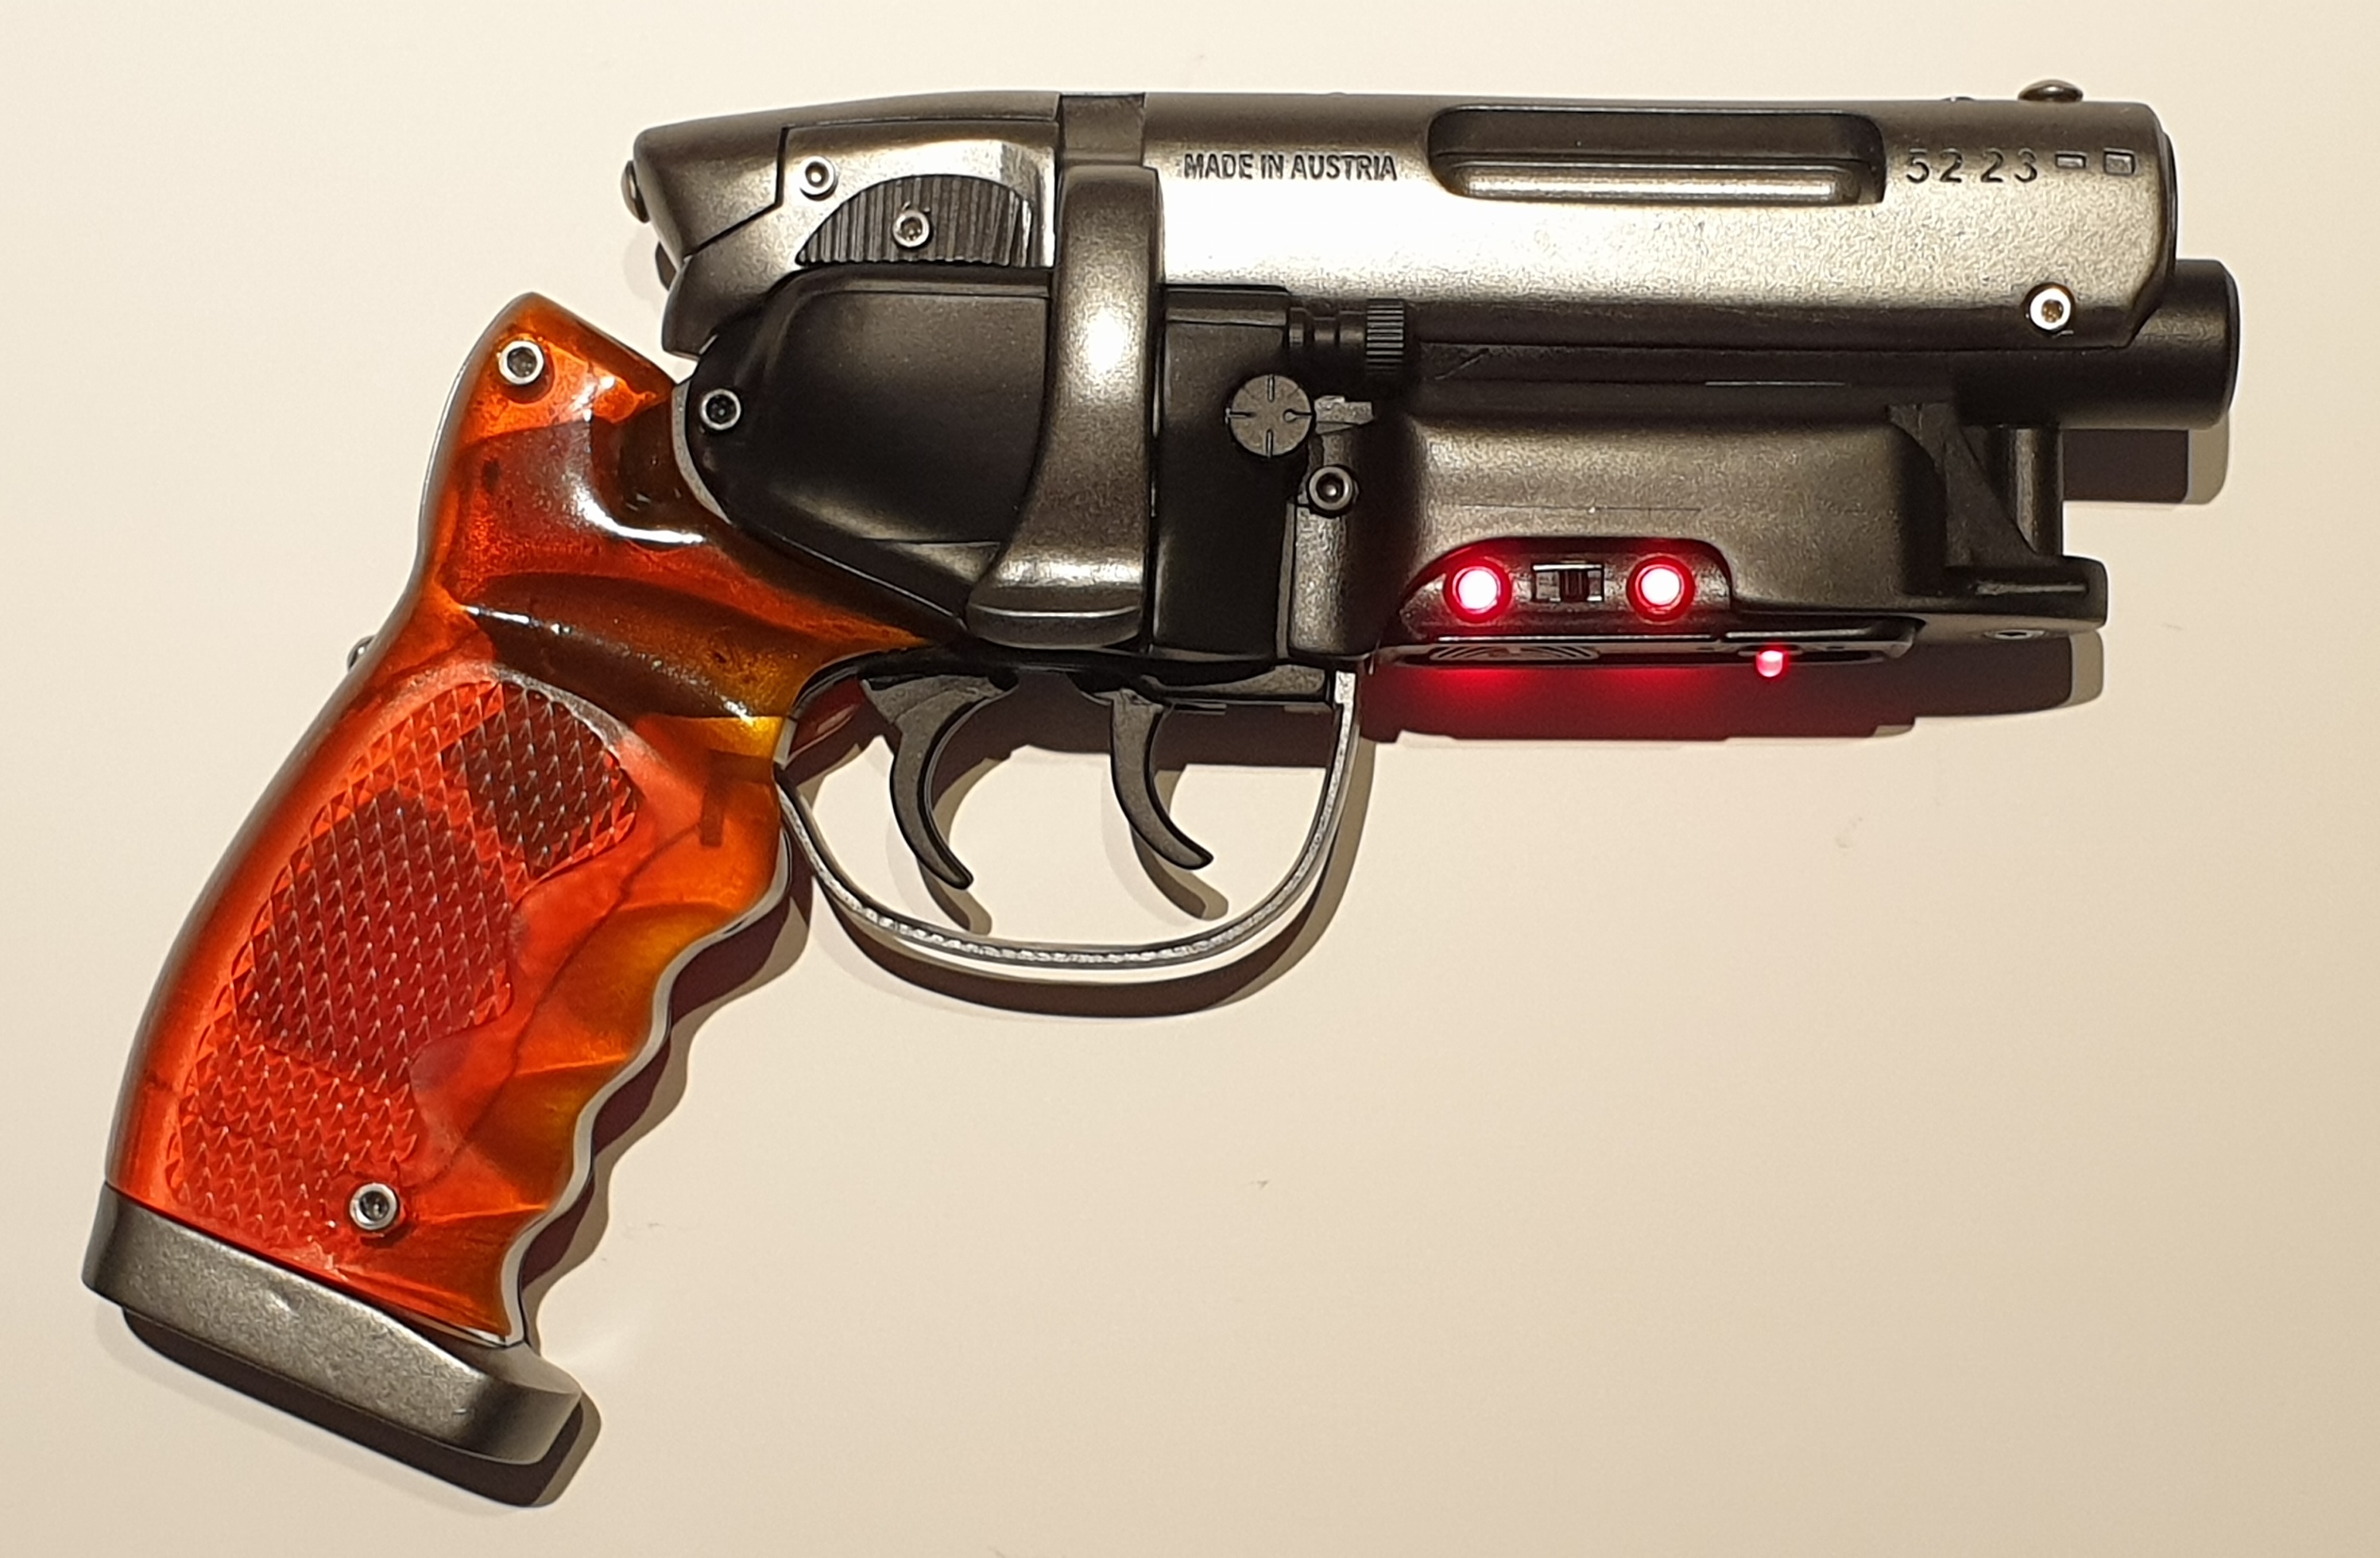
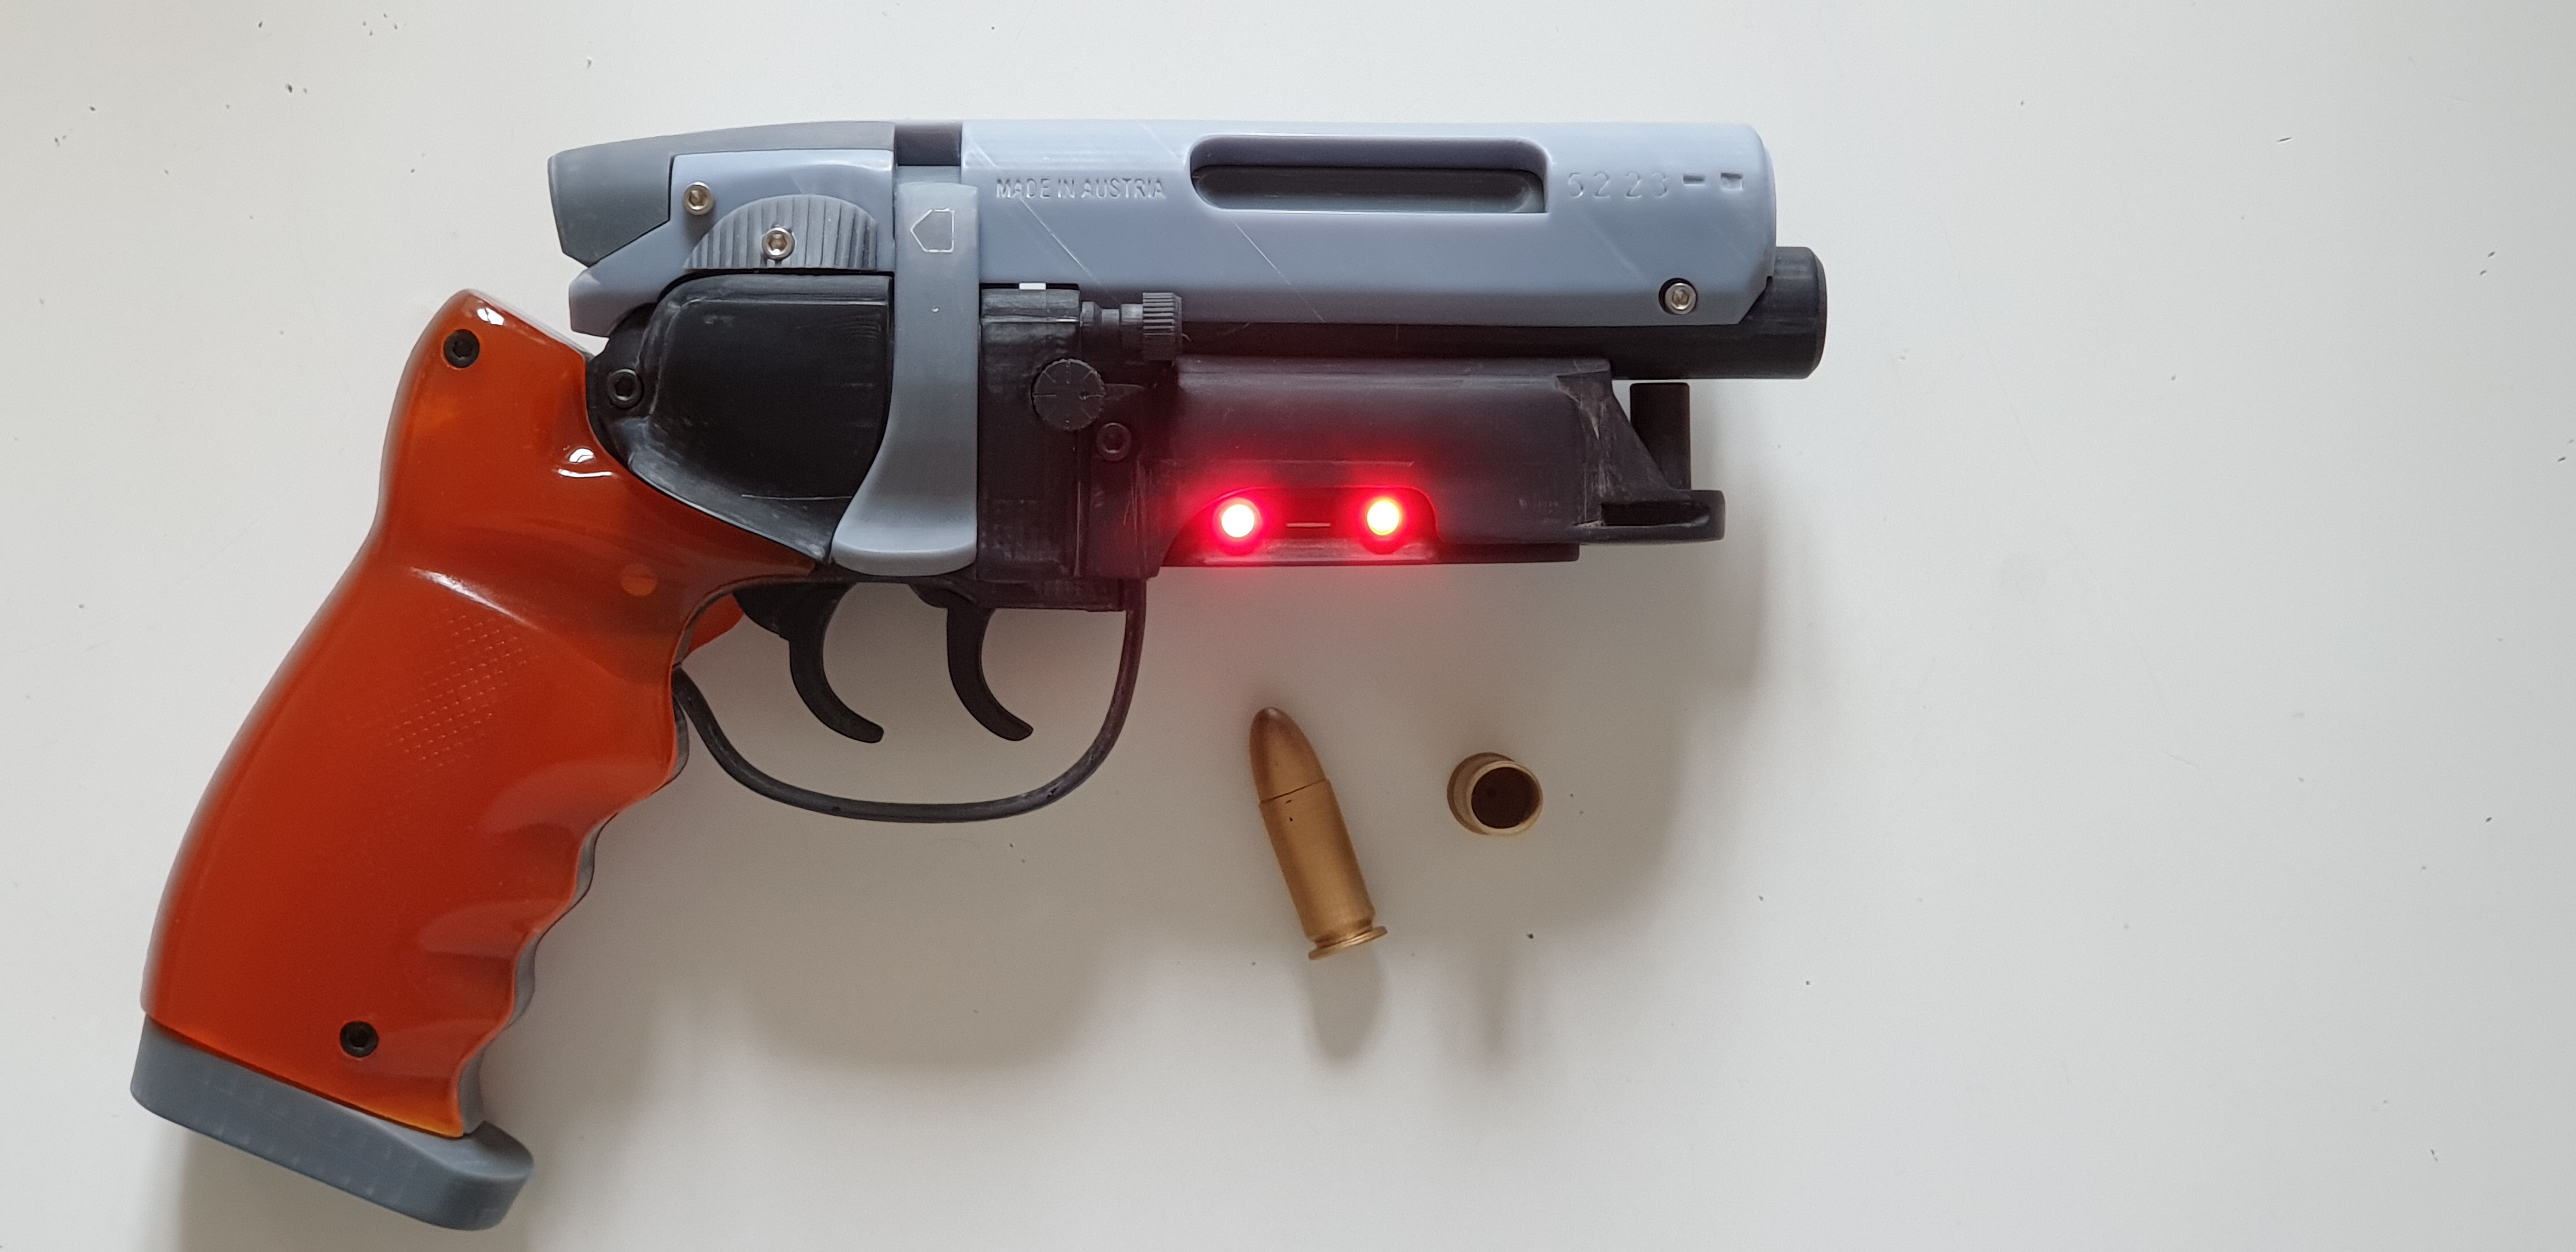
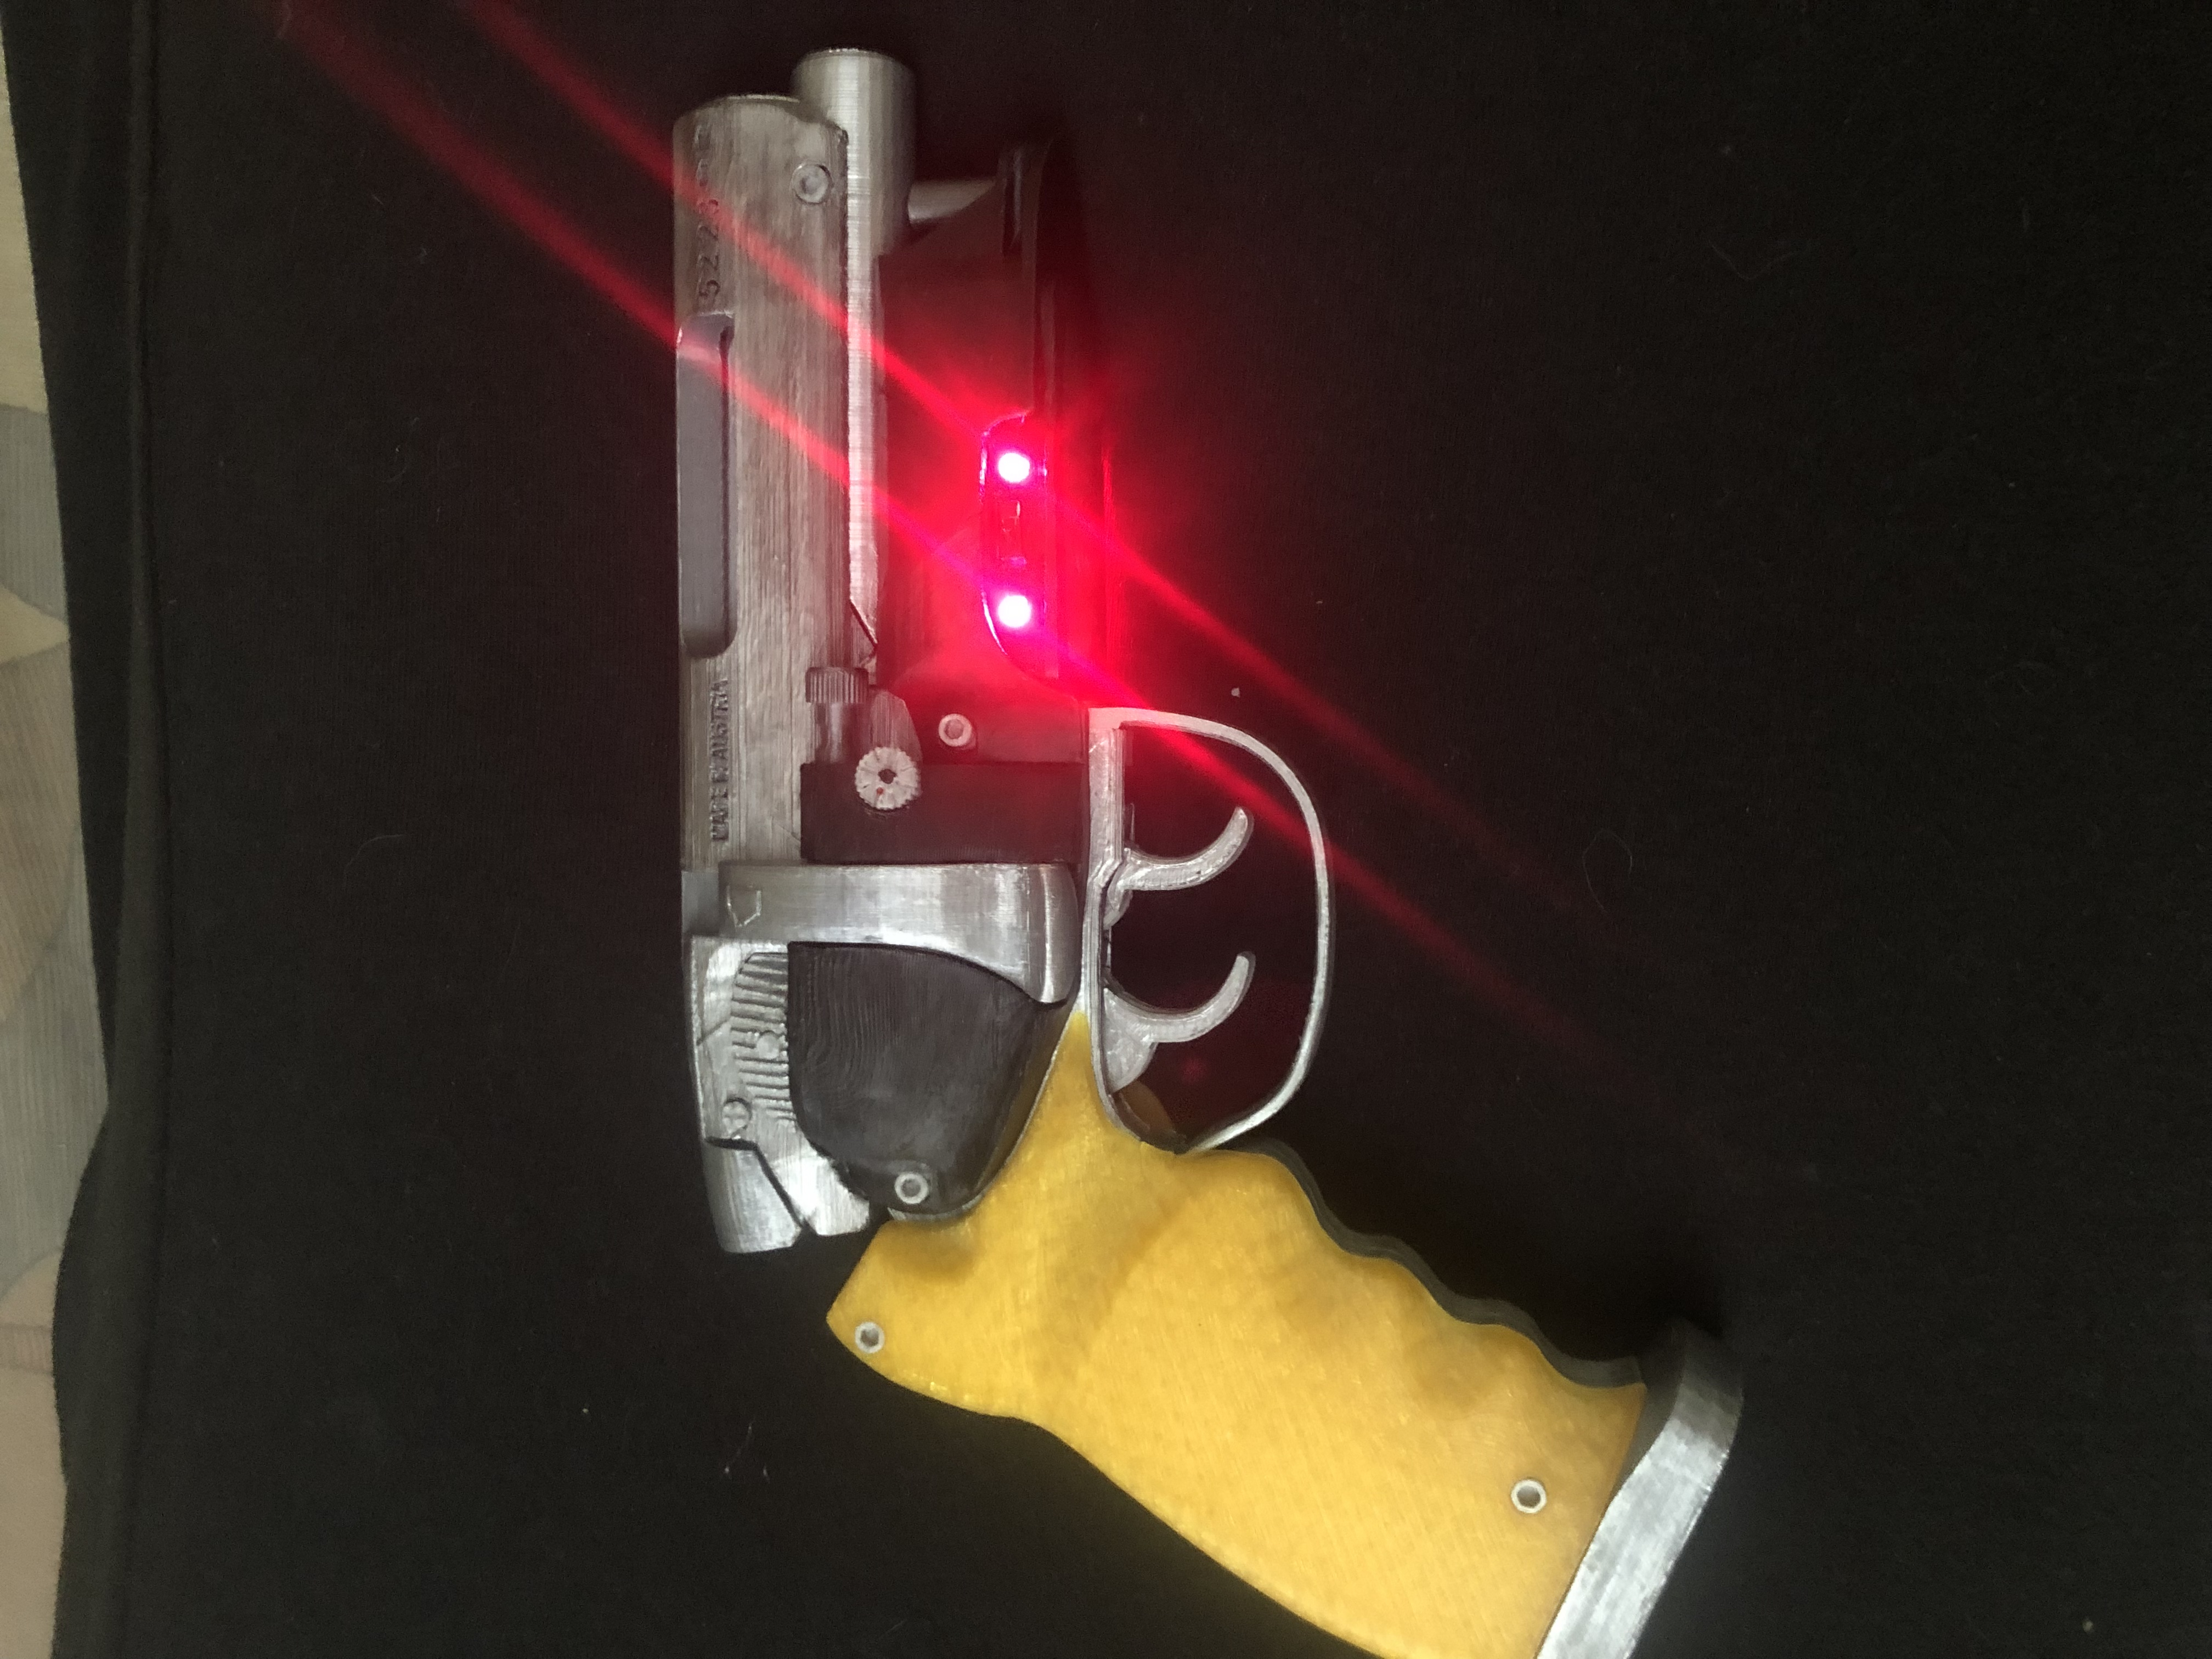
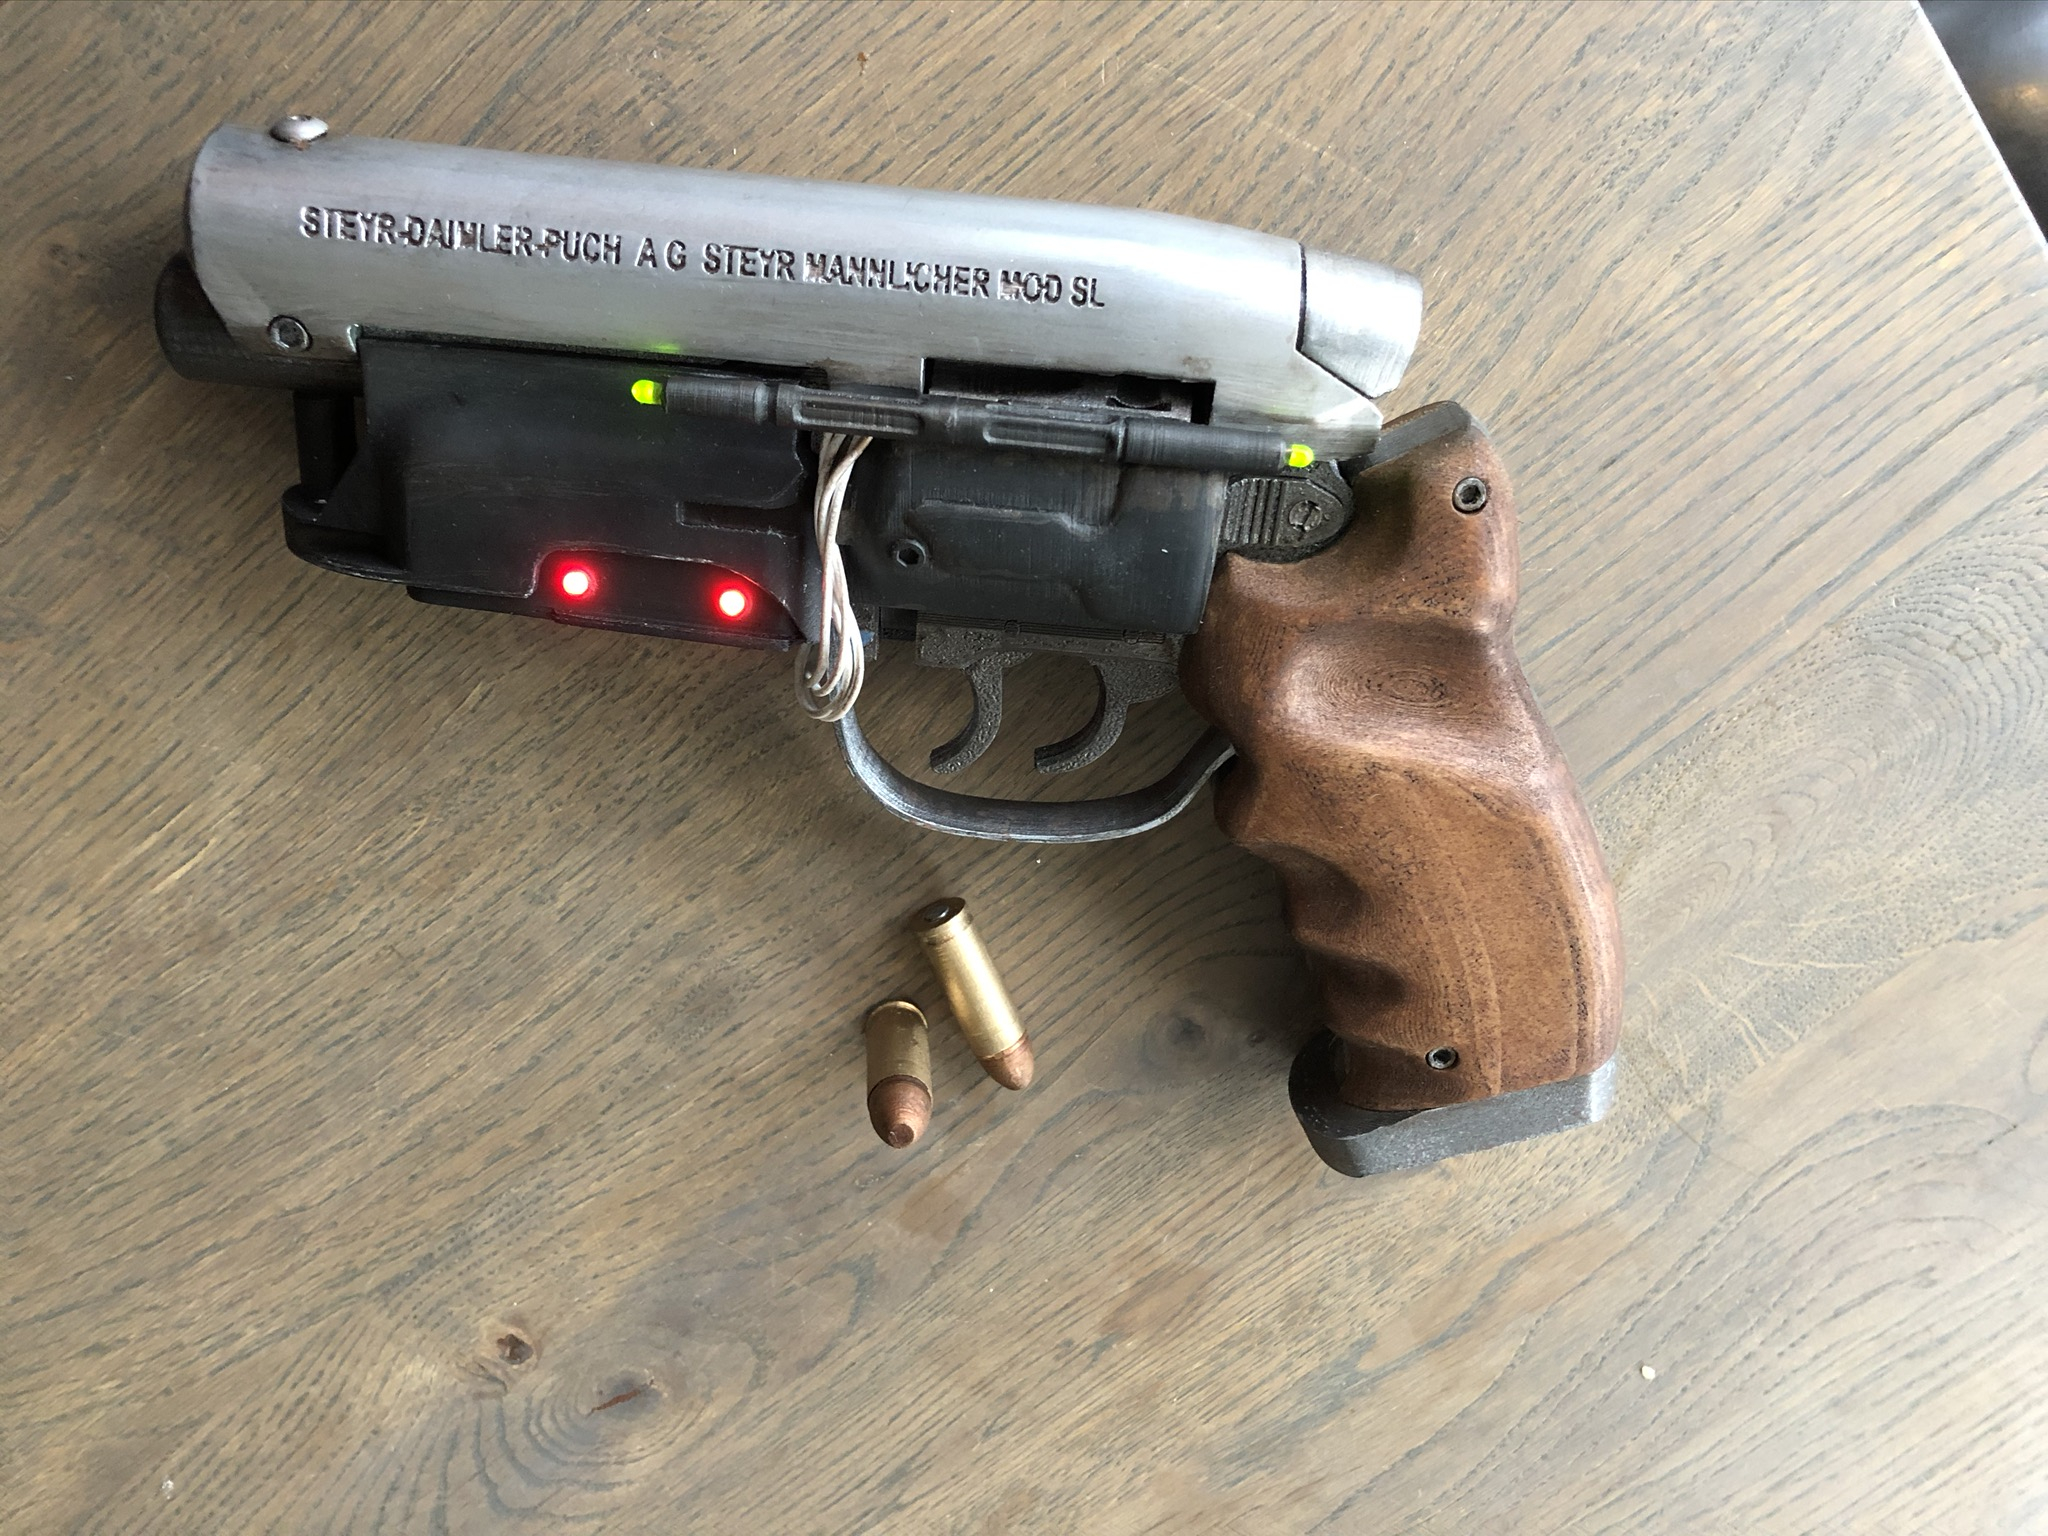
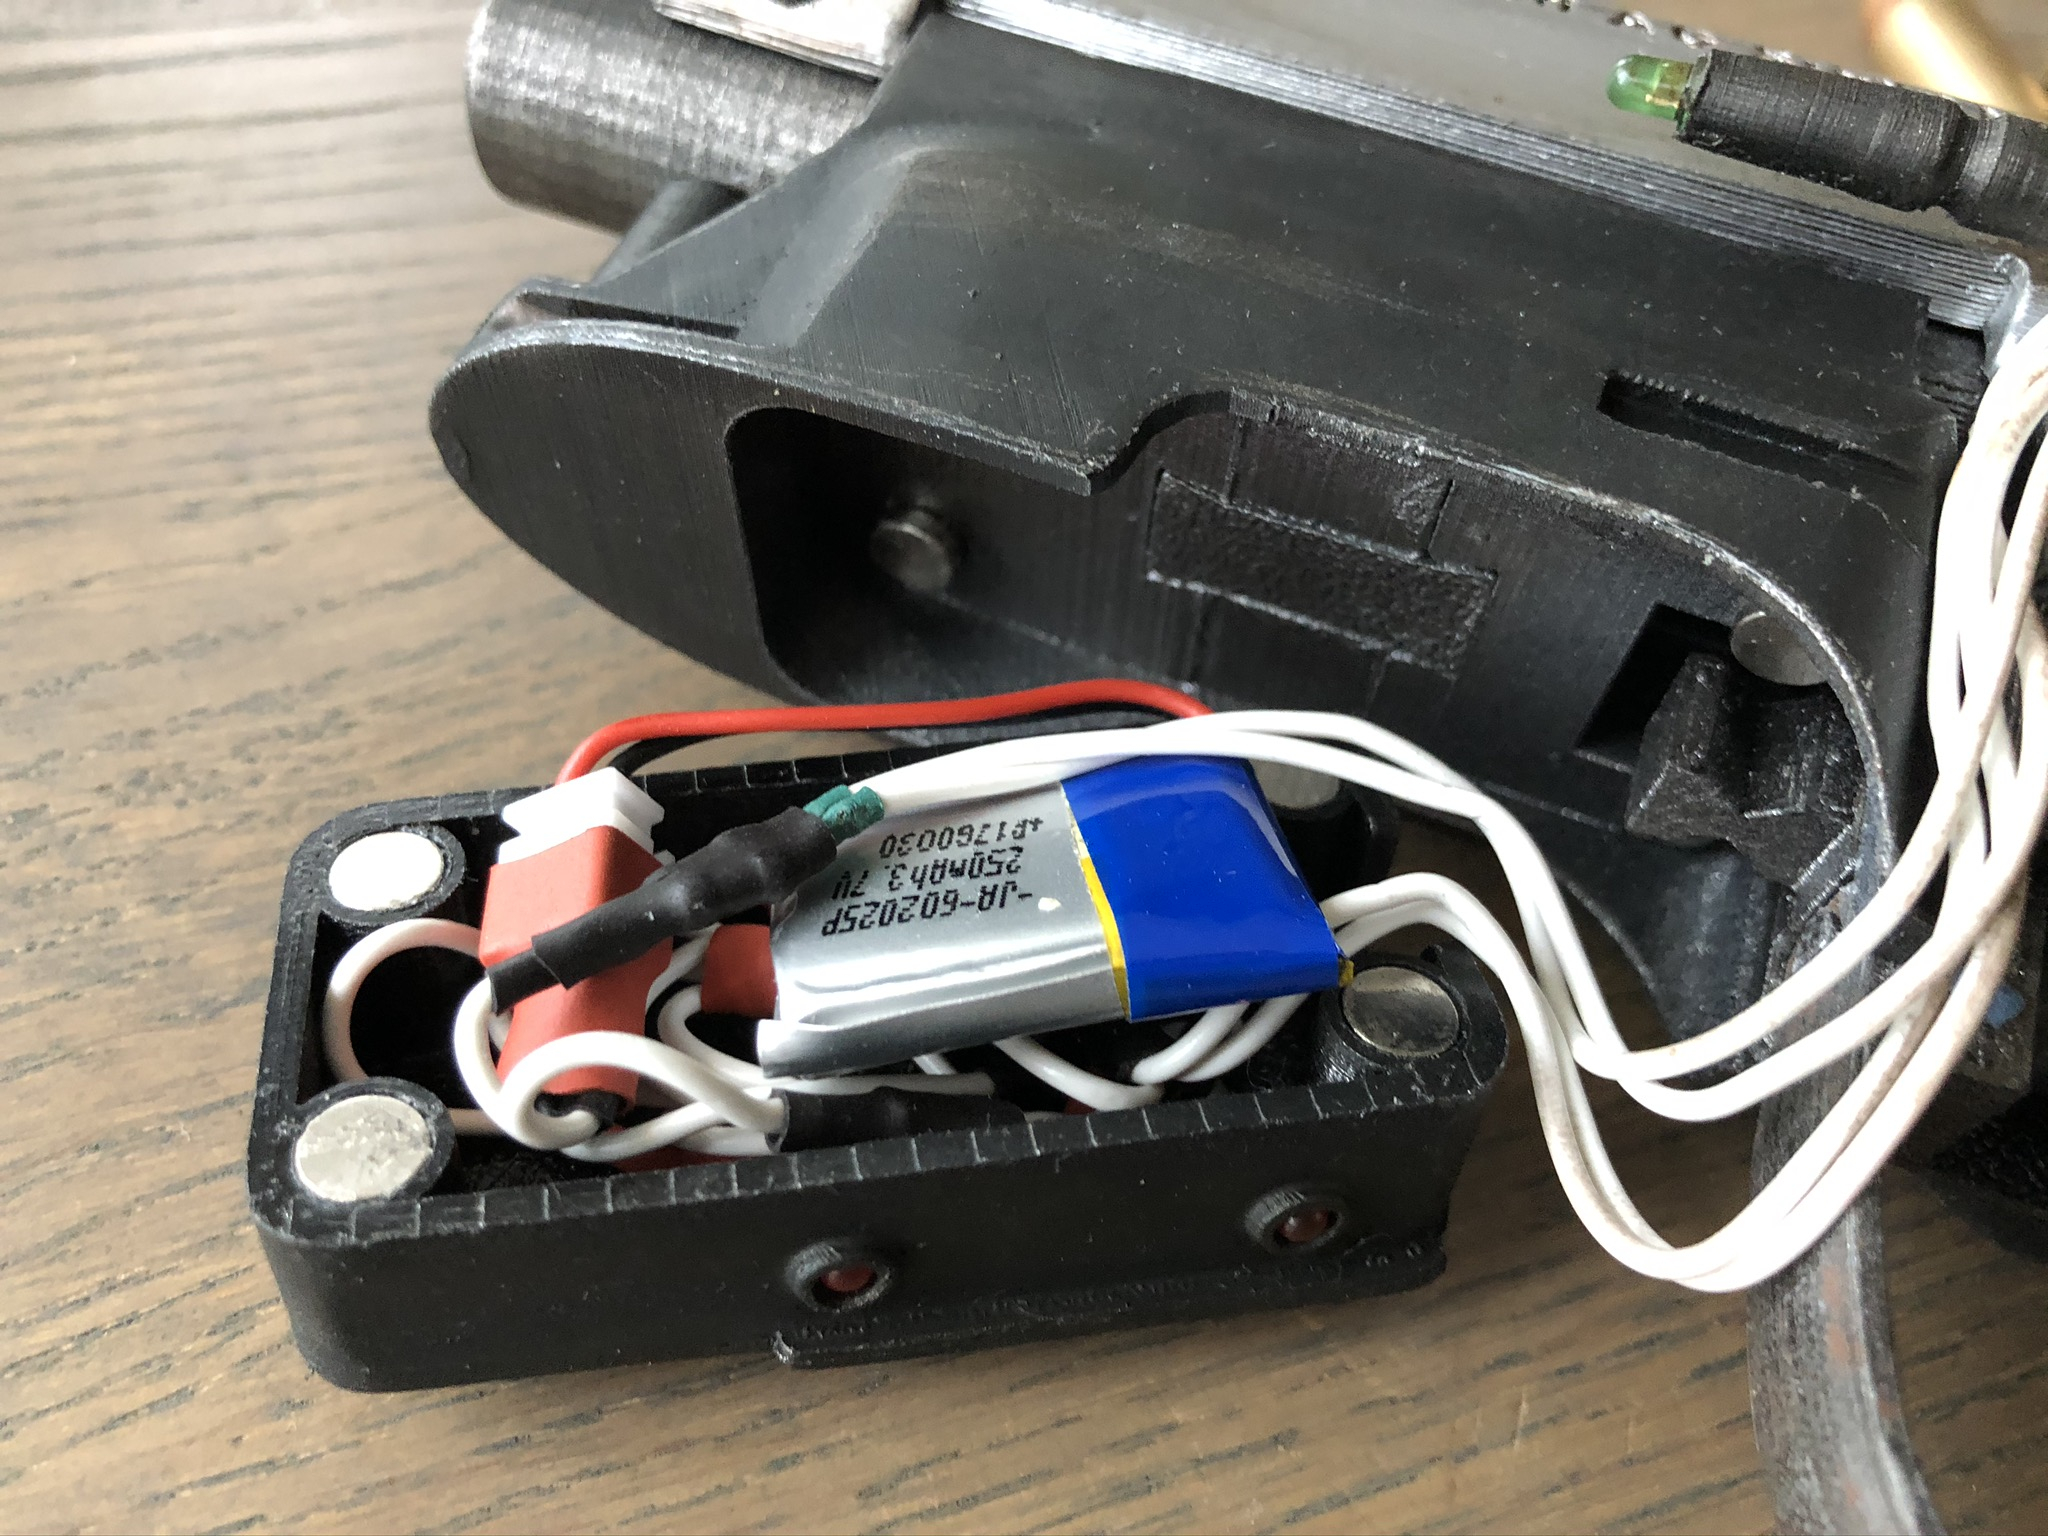
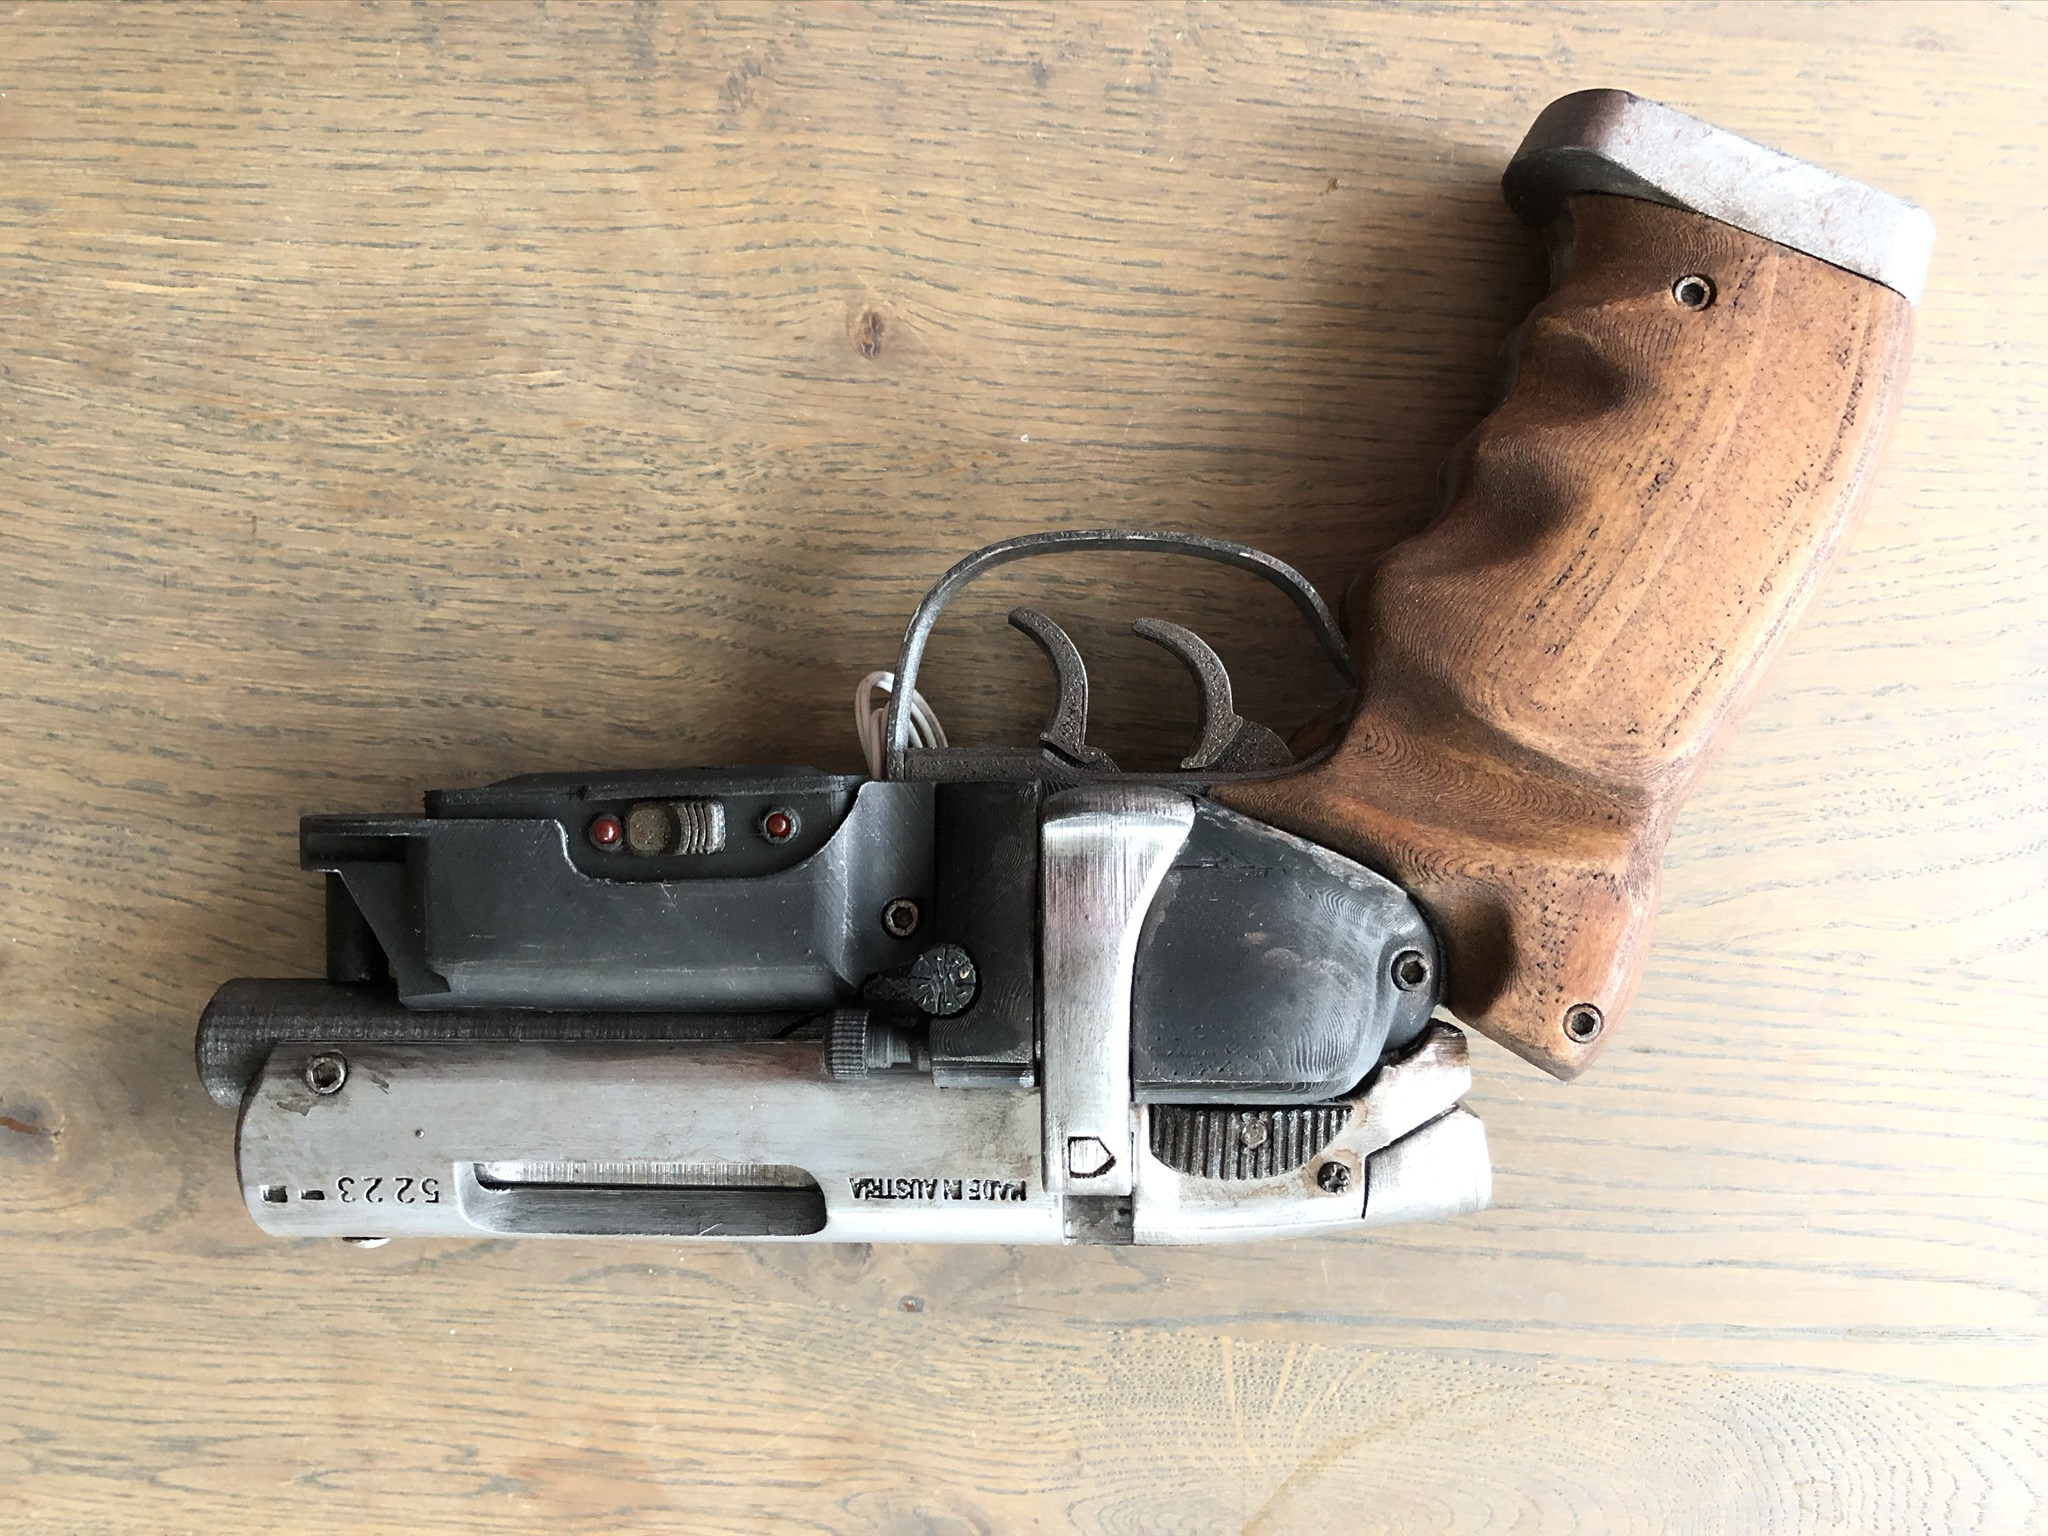
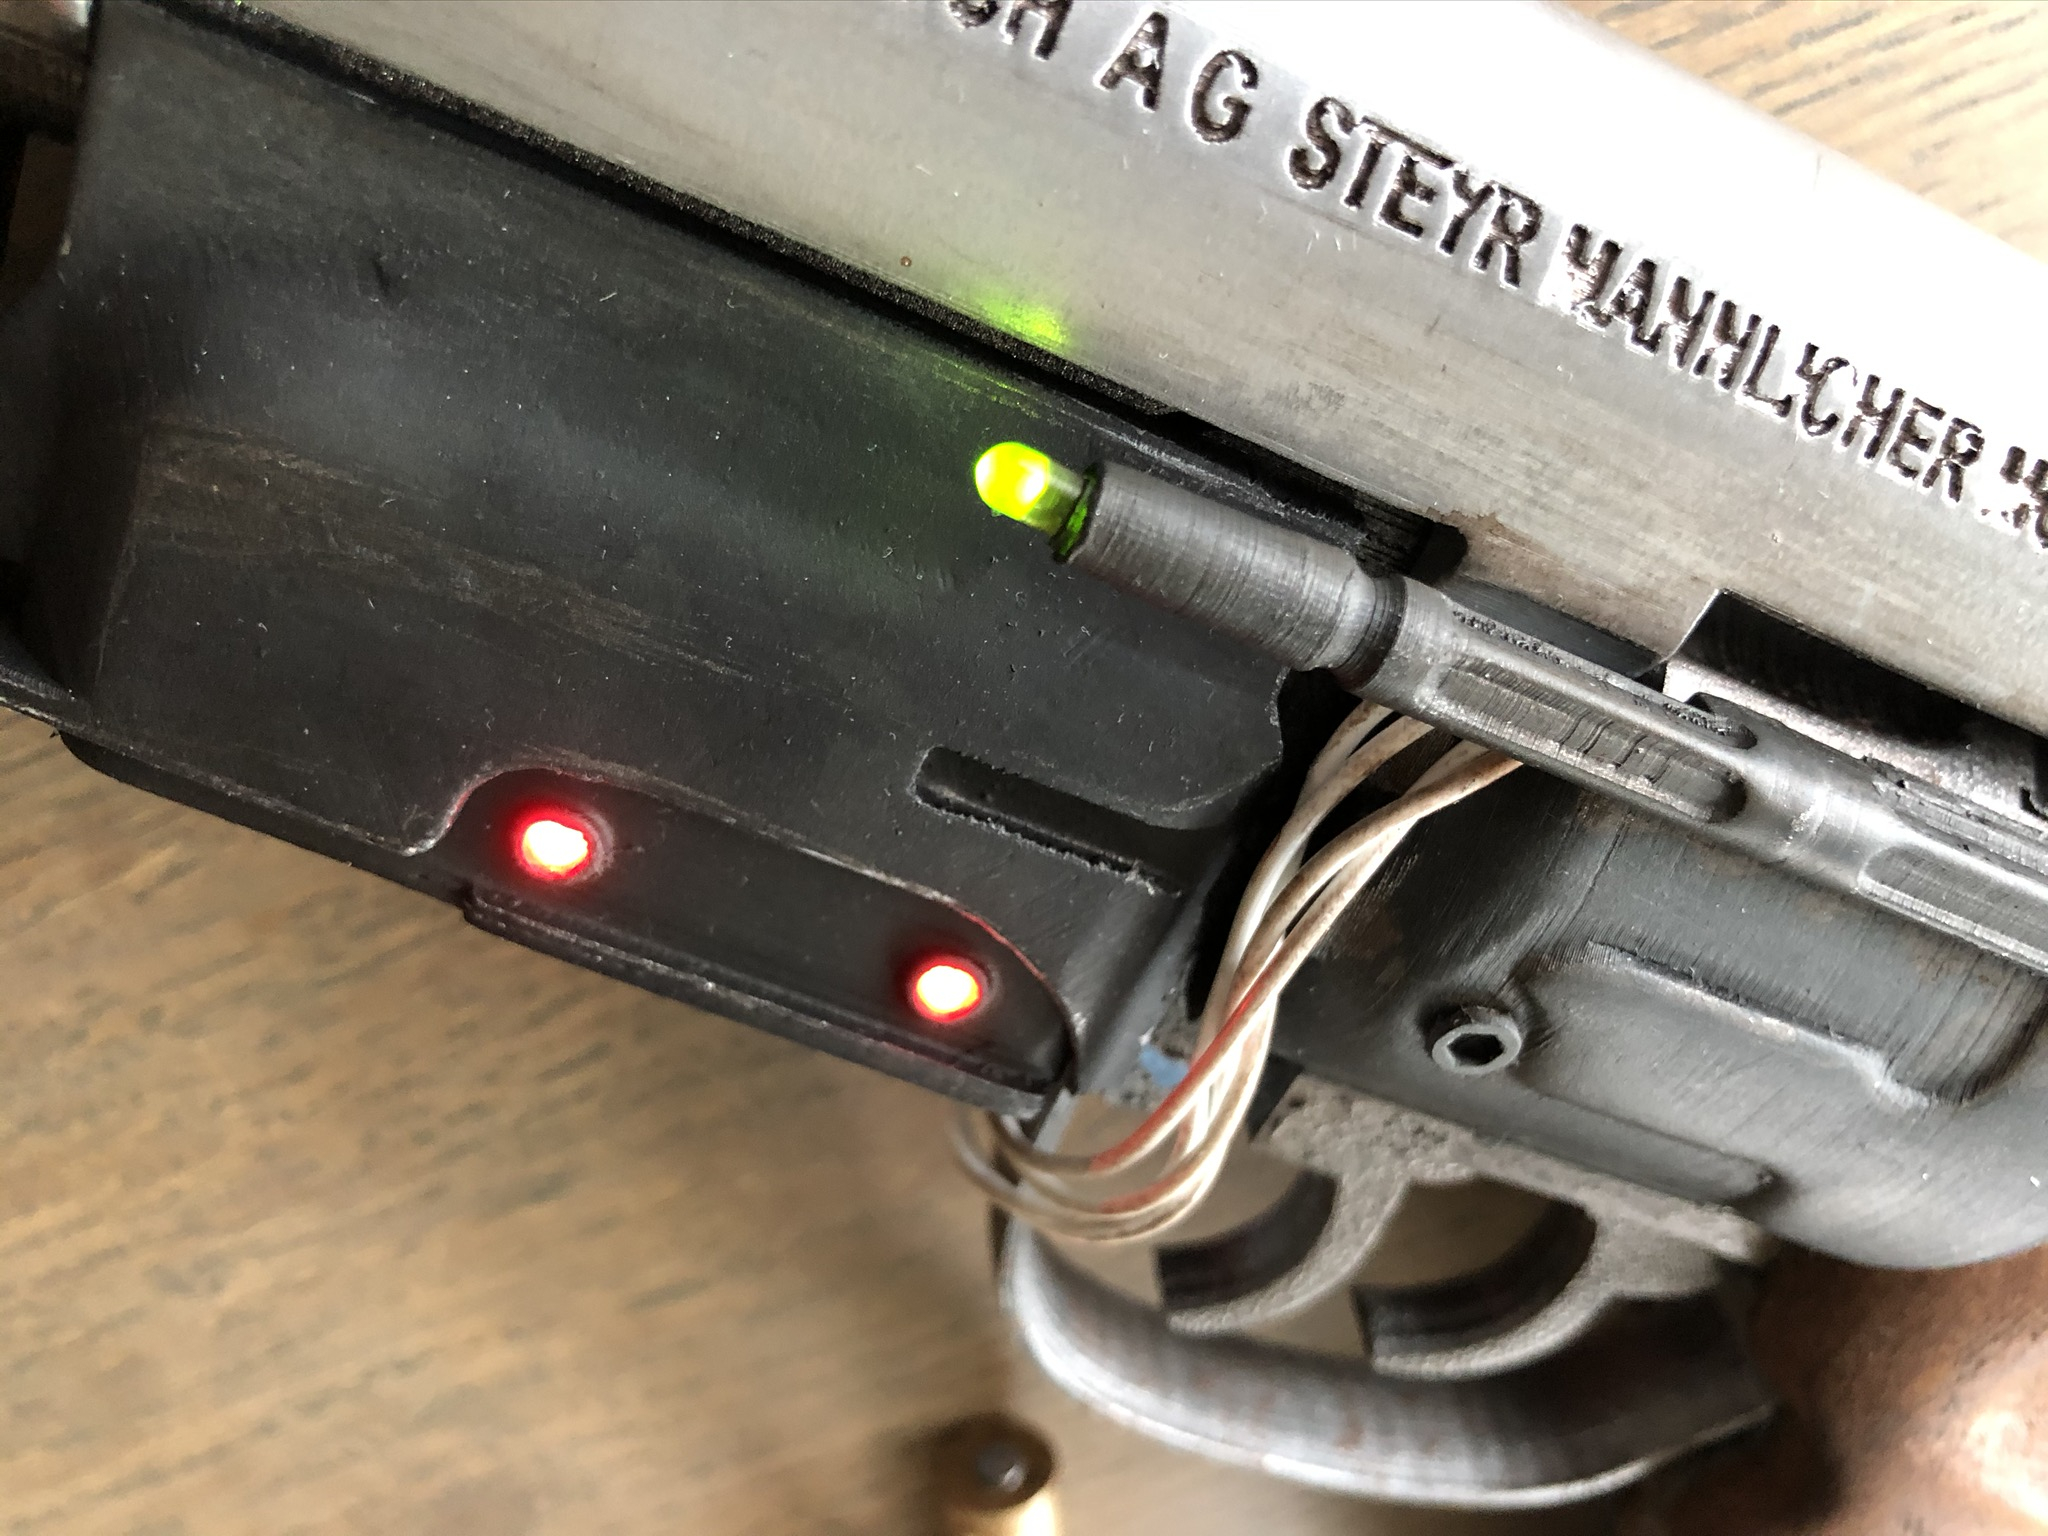
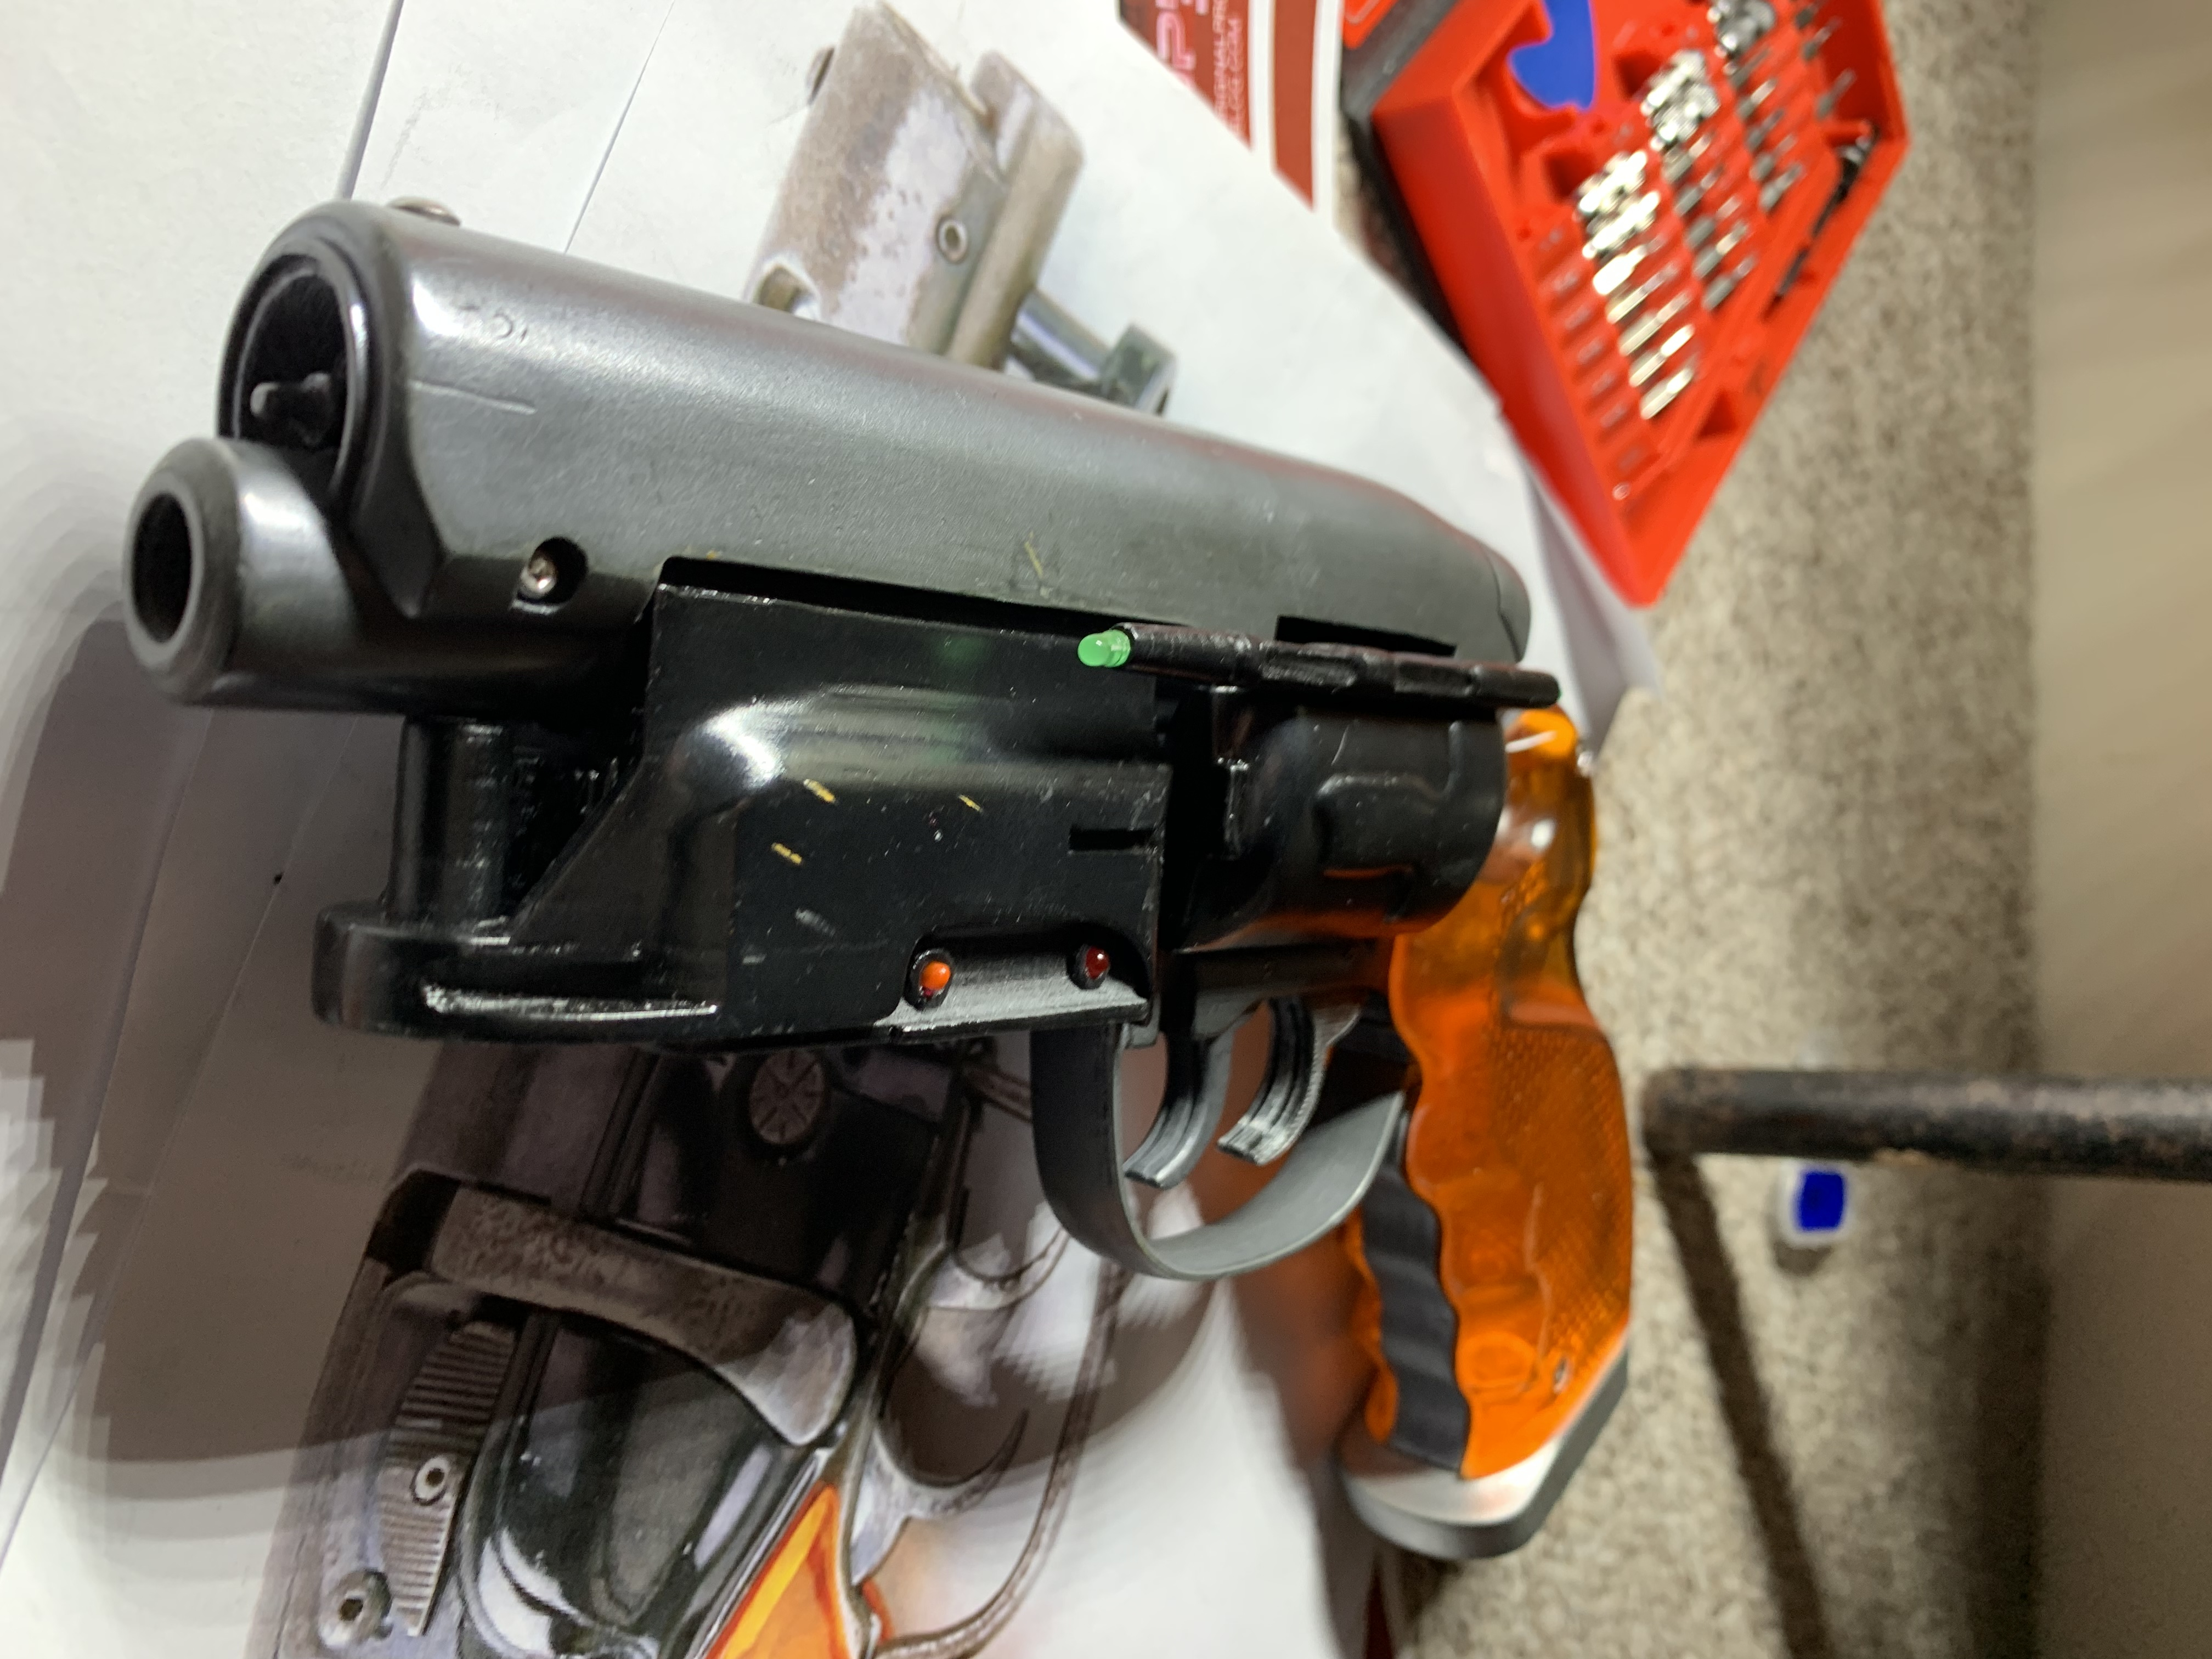
Many thanks to Andrew for his wonderful work. We did our best to realize the best 3D printed replica of the Deckard blaster, and we'll create one upgrade kit to share the parts we re-designed (for example, the complete top part with all the original texts Made in Austria, 5223, etc.) and also the working LED laser box. Thank you very much Andrew.
Tried some PETG for the springs, but not sure they worked any better then PLA or PLA+
not the most accurate , but its a great model, and an easy print ,.....grips turned out like crap,....don't try casting with 5 minute epoxy folks, ...doesn't look good at all, I used a flat black, dark silver and spray chrome to finish the blaster,....the spray chrome really sucks too :( scratches right off and cant use clear coat on it. led box and led rod thingy are held on with magnets and easily removable, I used an adafruit coincell board to power the leds, made my own bullets too,...still painting those
Printed on my modified cr-10 then used filler primer + sanding + airbrush for the coloring. The grips were silicone molded and cast in resin
Hand painted - first effort!
My first ever complex 3d print like this, it came out perfectly with no supports. Amazing work Andrew!
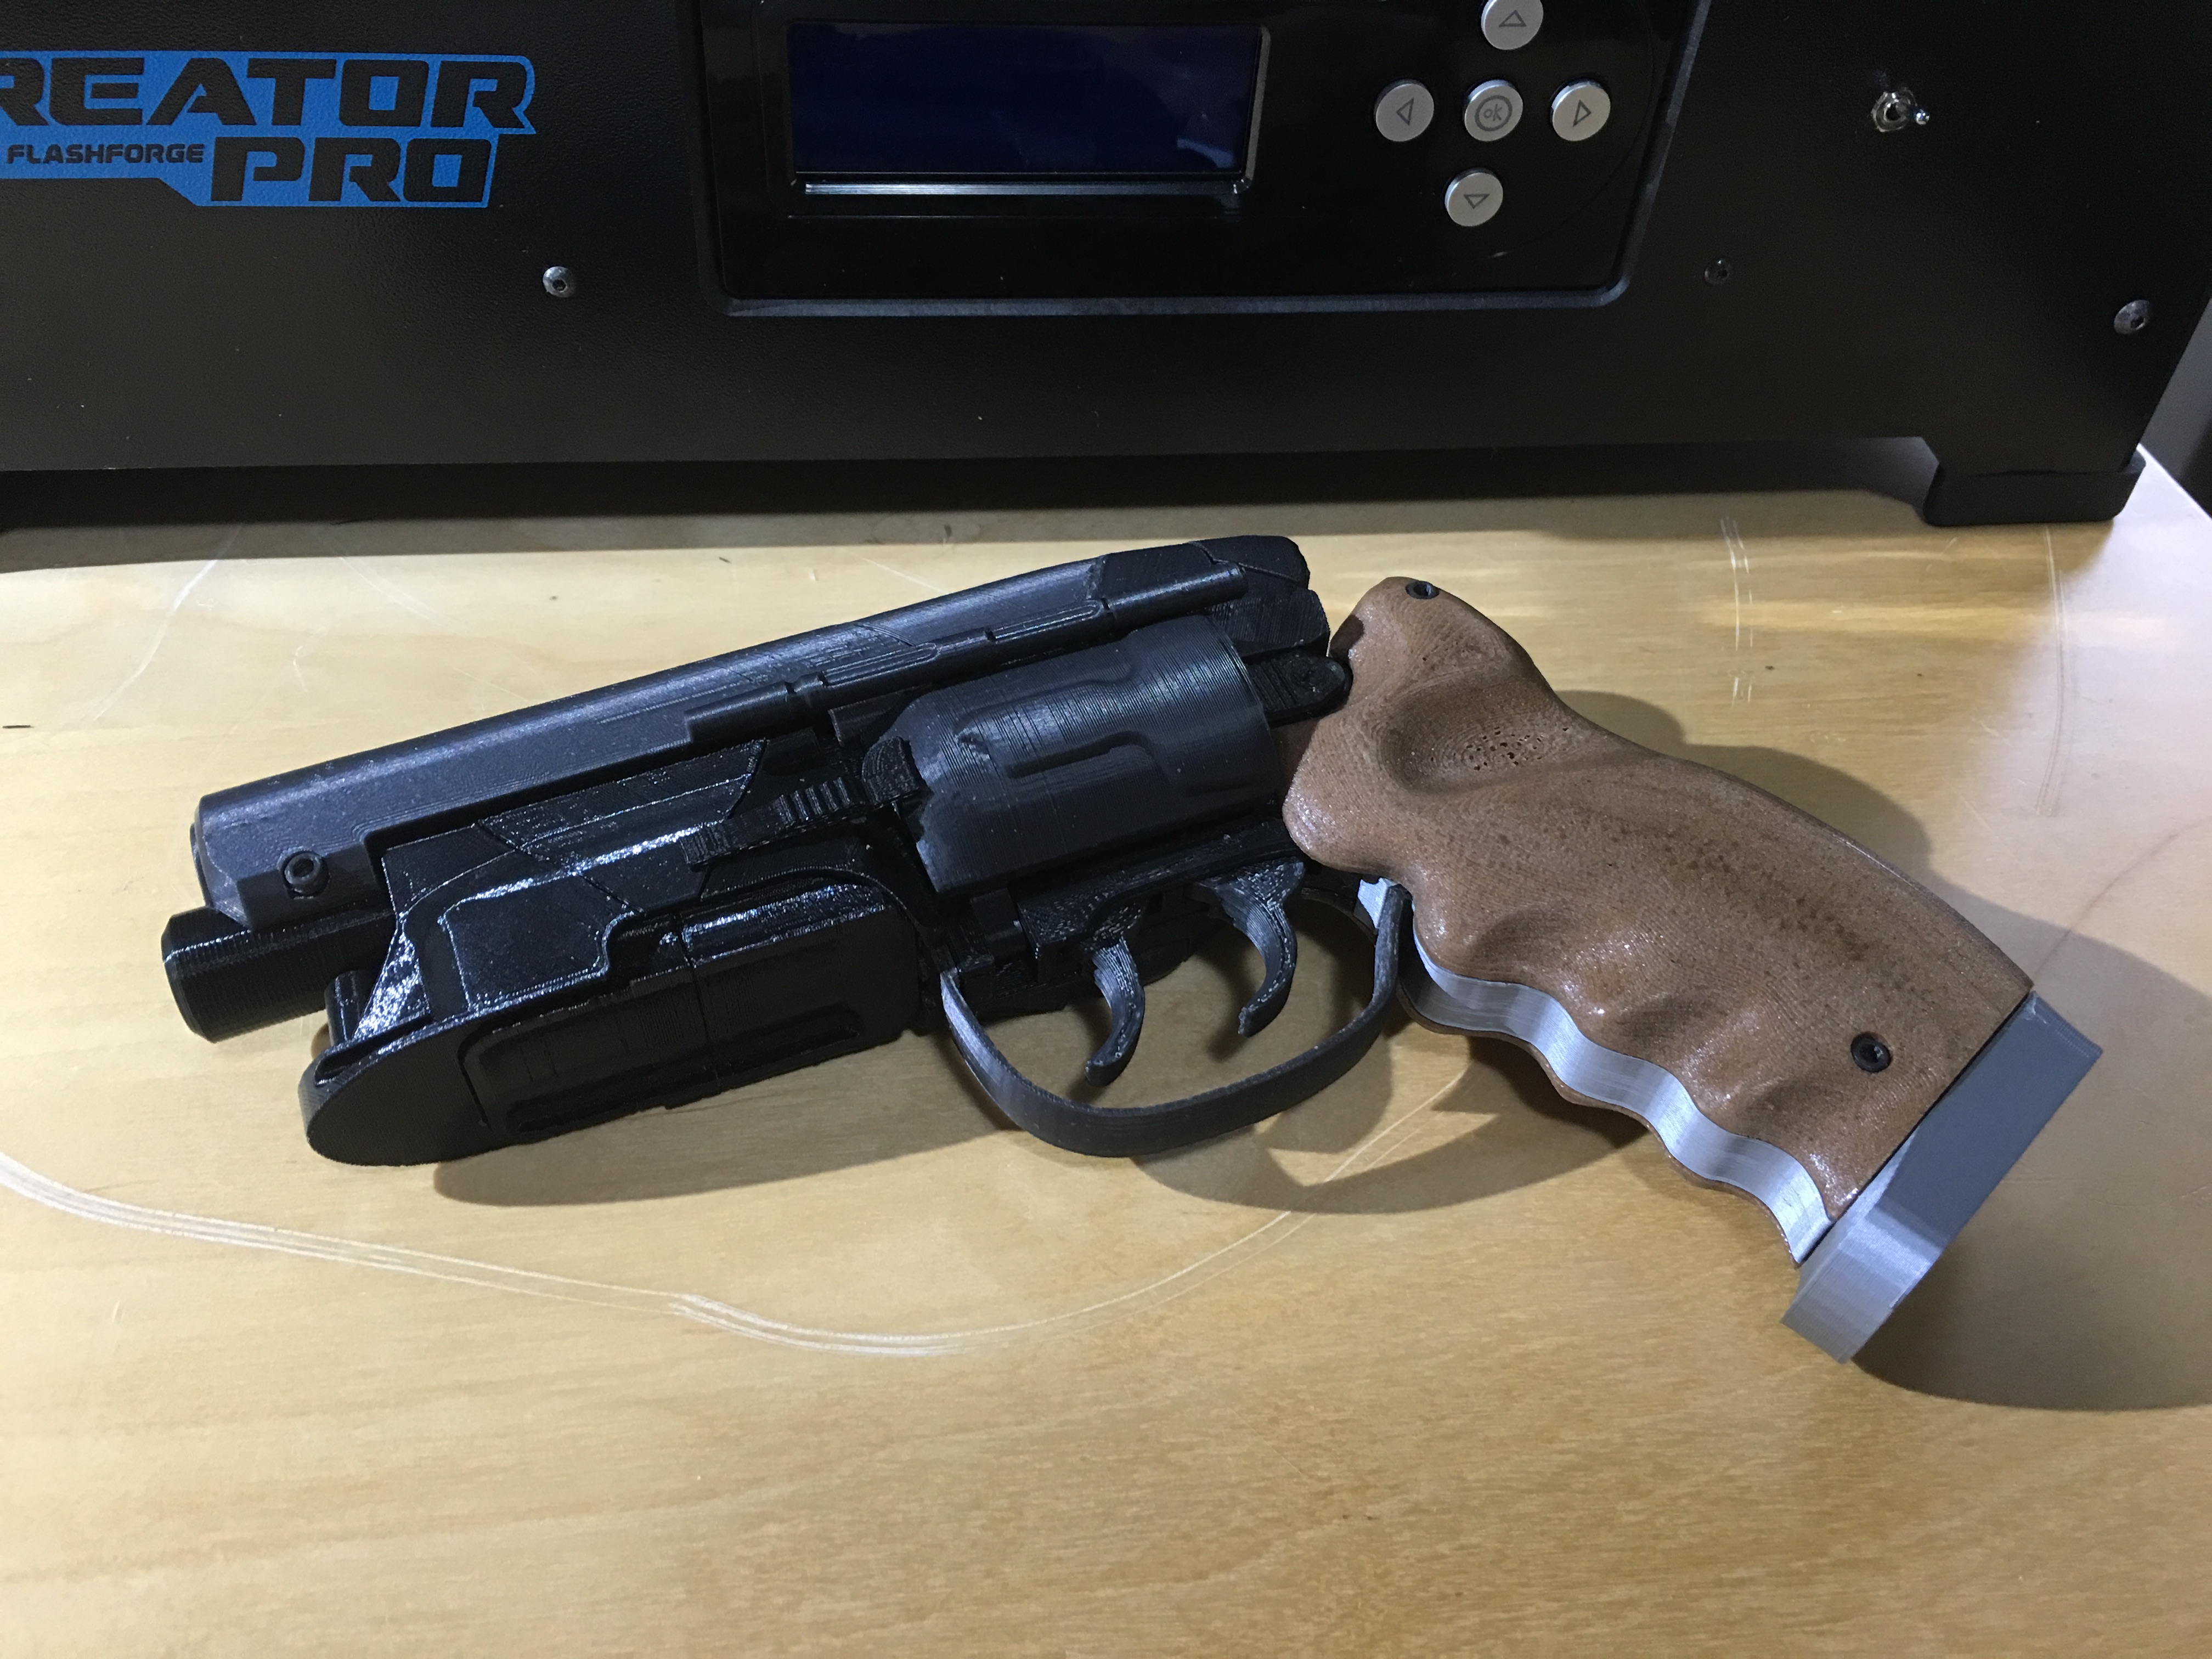
I printed this on the Ender-2 and used woodfill filament on the grips of the gun.
awesome model. Thanks very much!
Printed on Ender 3. Combined a few of the meshes by hand to improve overall appearance right off printer with no post finishing. This really feels great in the hand. Thank you for such an awesome model!
Thought you might like these @andrewforster ;)
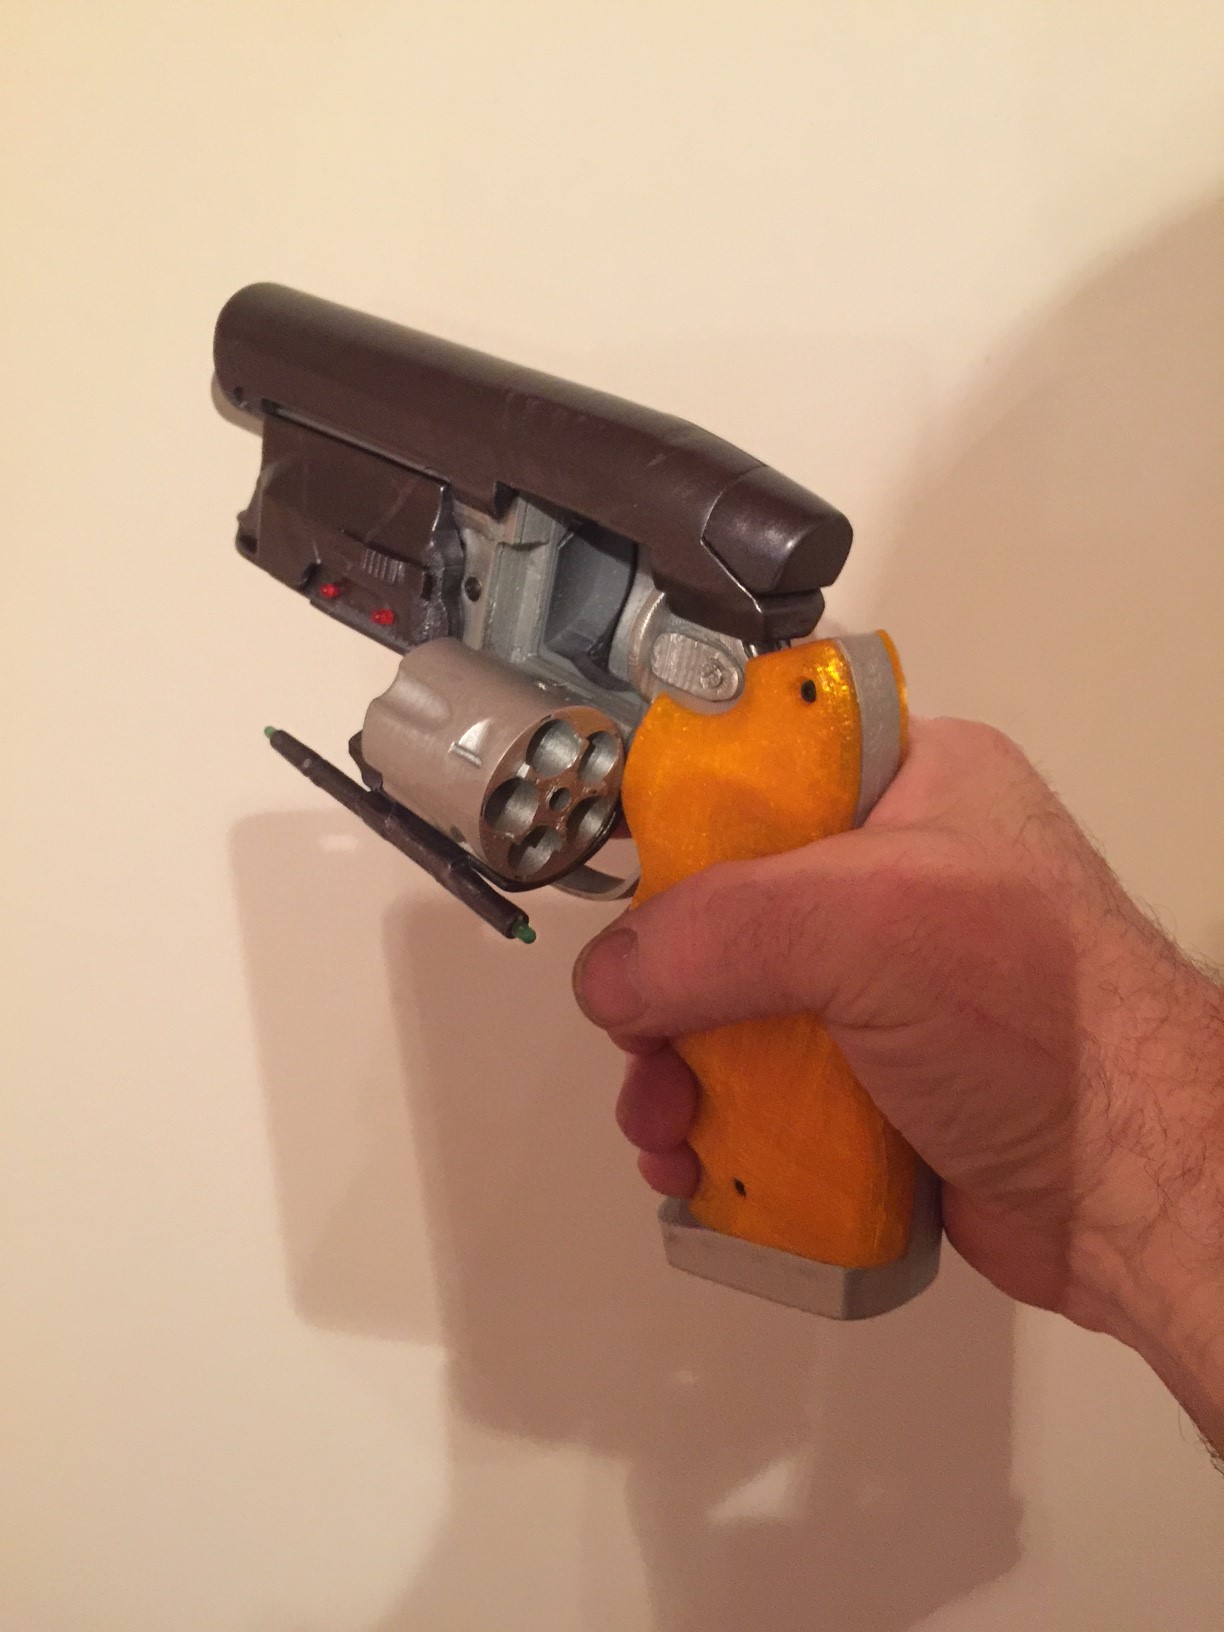
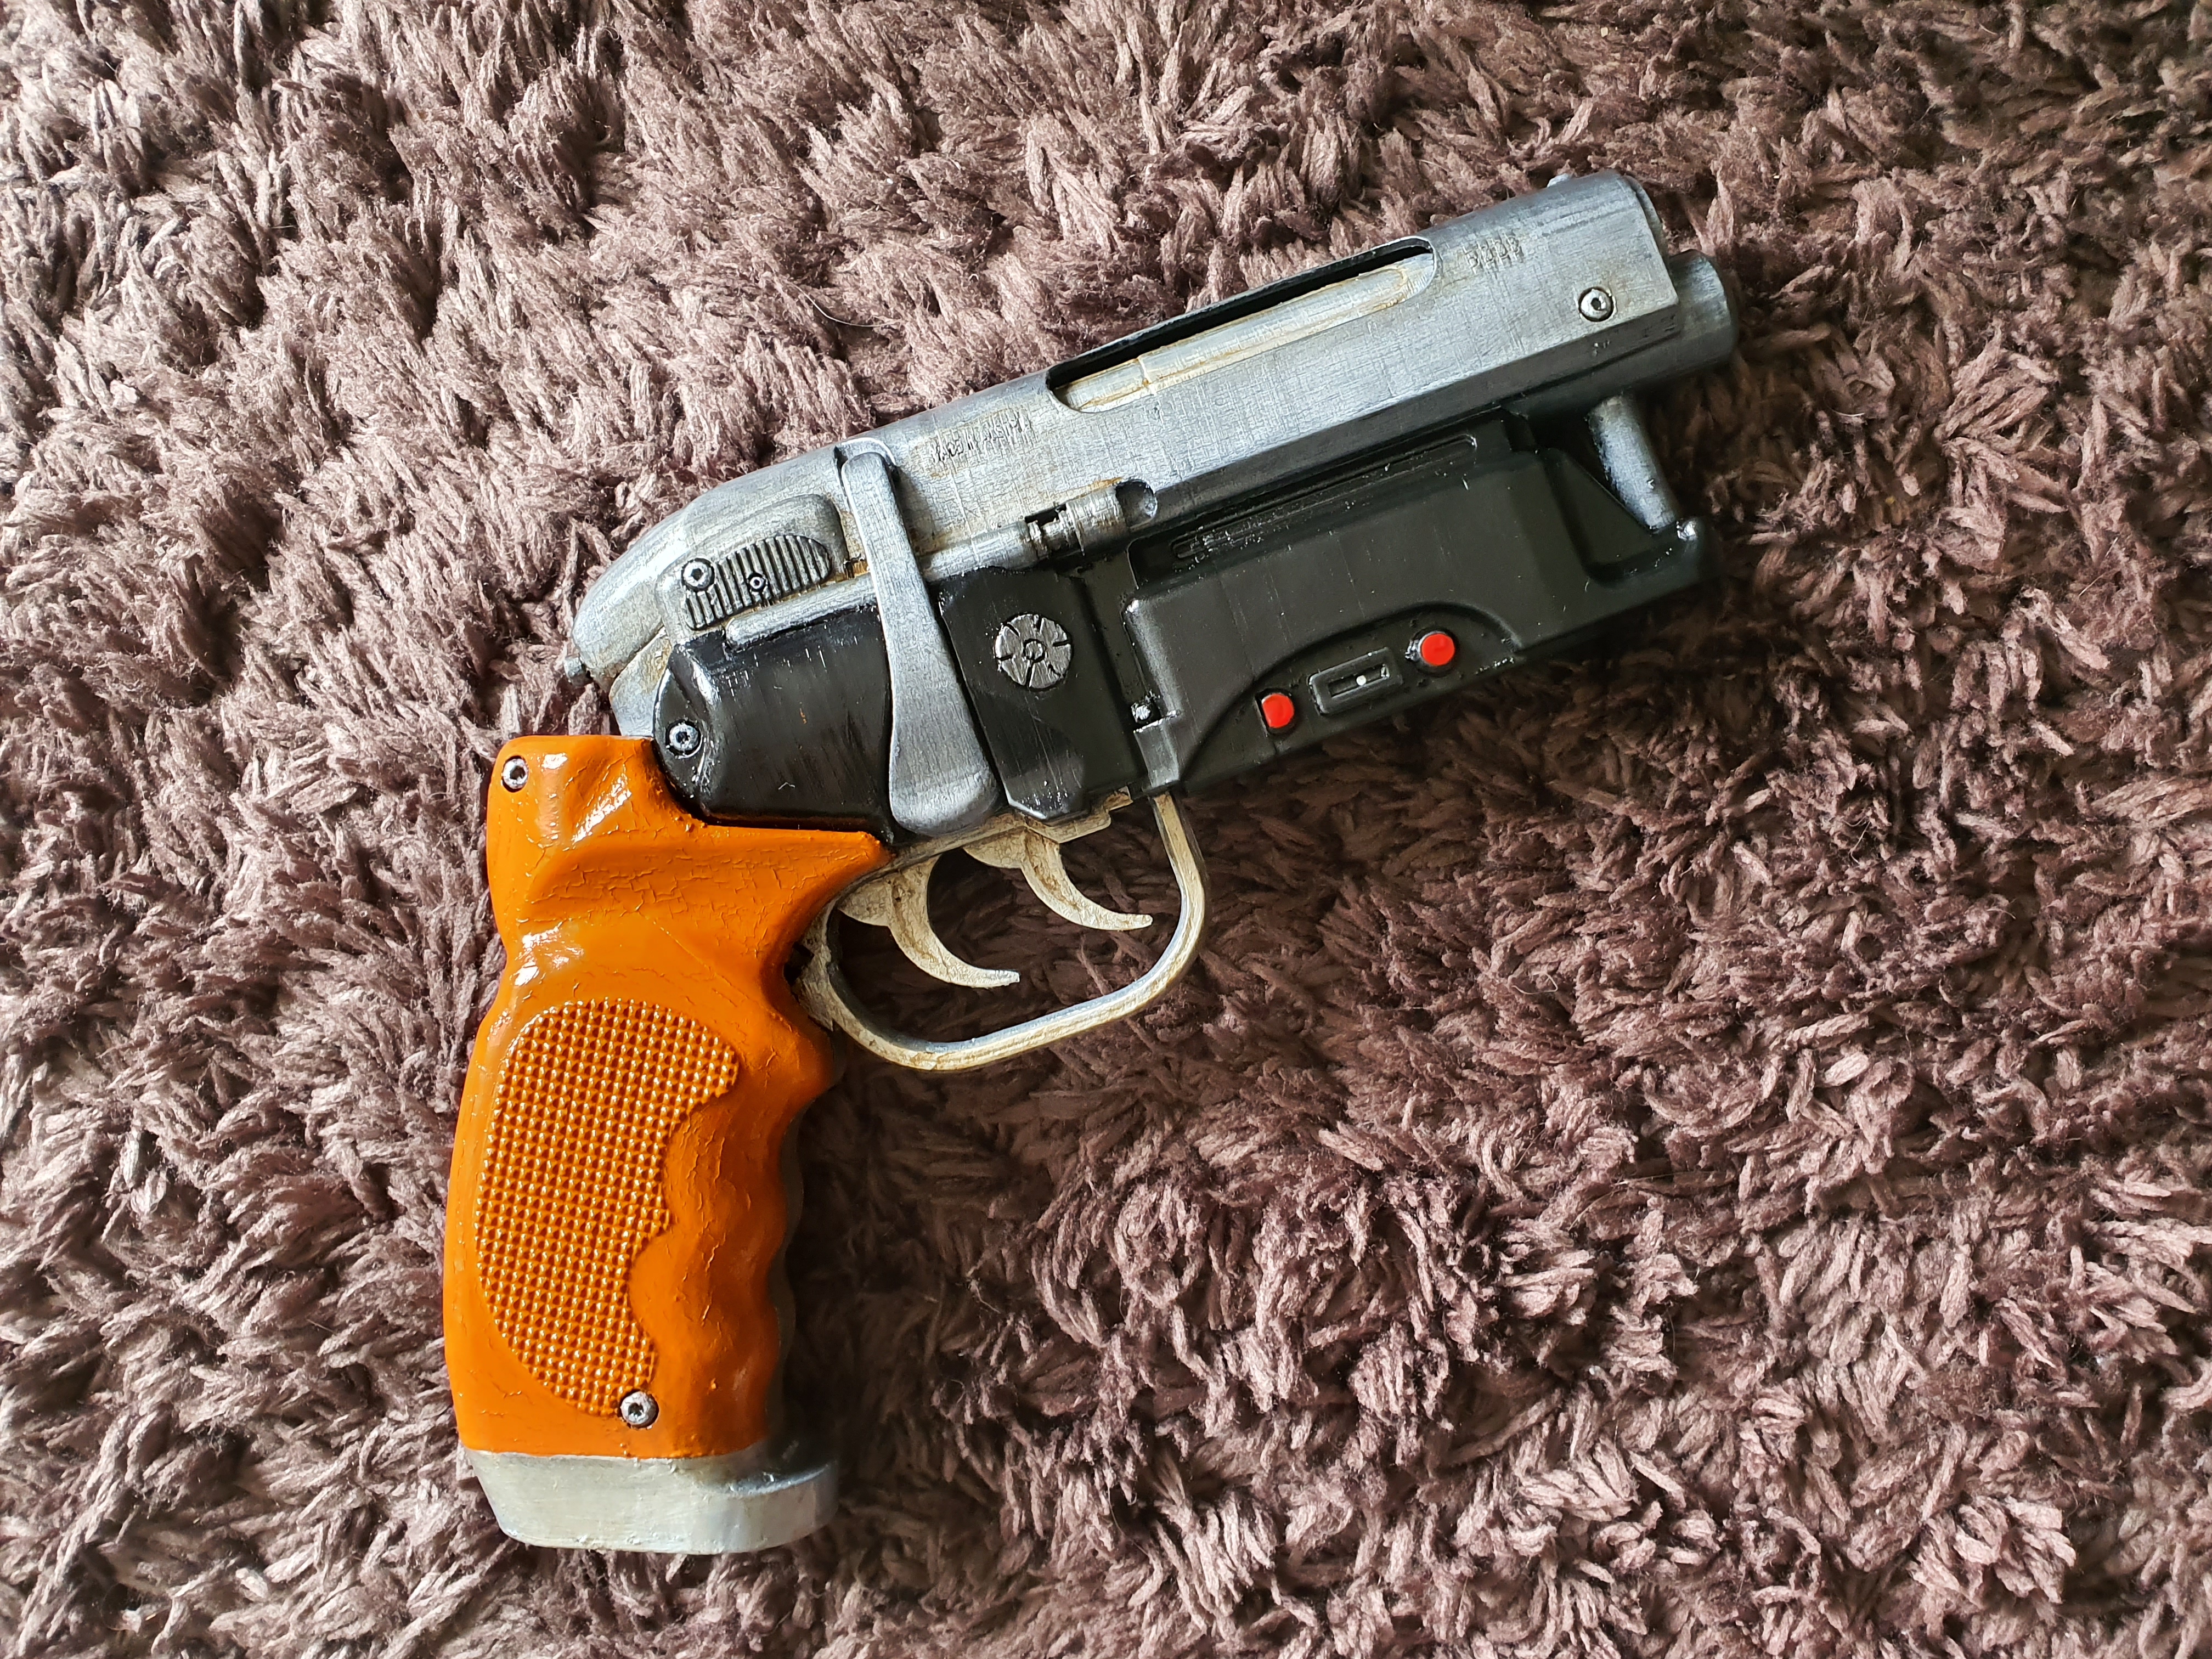
Just wanted to thank you on a great file you provided. I was able to make this for a friend as a gift. I modified the revolver to accept some .44 dummy rounds that I cast resin copies so it did not weigh too much when opening the revolver side. I cast a mold of your grips and made amber clear resin ones. Used a display from Thingiverse to display it. Thanks again!
fully assembled just before painting and painted after reprinting grips with transparent resin, sanding back of the bolt to be more close to the original. I used all the "upgraded parts" available for the wonderful original model.
i printed this over a weeks period of time. Then spent another week sanding and painting it. It was a lot of fun doing this project.
Thank you for the amazing model and all you hard work! I made this one using some remixed parts. I made a few build mistakes but would like to correct it in a second one in the near future.
Thank you for designing this wonderful prop! As you can see i haven't finished the pieces yet and I changed the color scheme, but the design printed wonderfully!
This print came out very nicely, I've never painted a print before so I can't wait to learn on this model!
Had fun assembling and painting it. Tried to go for a Ivory effect on the grips over the amber.
Just finished painting Andrews print.. My first time printing and painting a prop! Nice fit! Did add real screws and bolts plus I did print a second knob which I drilled and fitted to the side of the magazine cover. Fun build!
This is my second attempt at this model. Spent more time sanding and prepping the parts. Made better molds for the grips and cast in resin. Sanded with 220, 800, and 1500 grit sand paper.
If someone can make me some resin grips molds for this piece... i fail everytime.
Printed in ABS. These are the worst quality prints of a batch. I cast my own resin grips with some issues (shrinkage) . Still some small accuracy details I would like to change. Awesome design, just needs a few alterations and upgrades to get it to perfect.
Awesome design. Needs a few upgrades and accuracy changes but overall amazing.
I loved to make this. Had a great time, all fitted very good and a great result.
Thank you for your work on this, it was a lot of fun to put together
I haven't owned my 3d printer for long, but this is definitely my favorite print so far.
Lots of post-processing with layered paints and a weathering pass. Modified some parts and added others. Could really use some resin grips but will do for now. I'm pleased and I guess that's most important. Thank You for providing this fabulous model to work with.
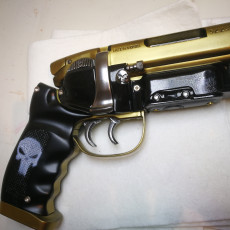
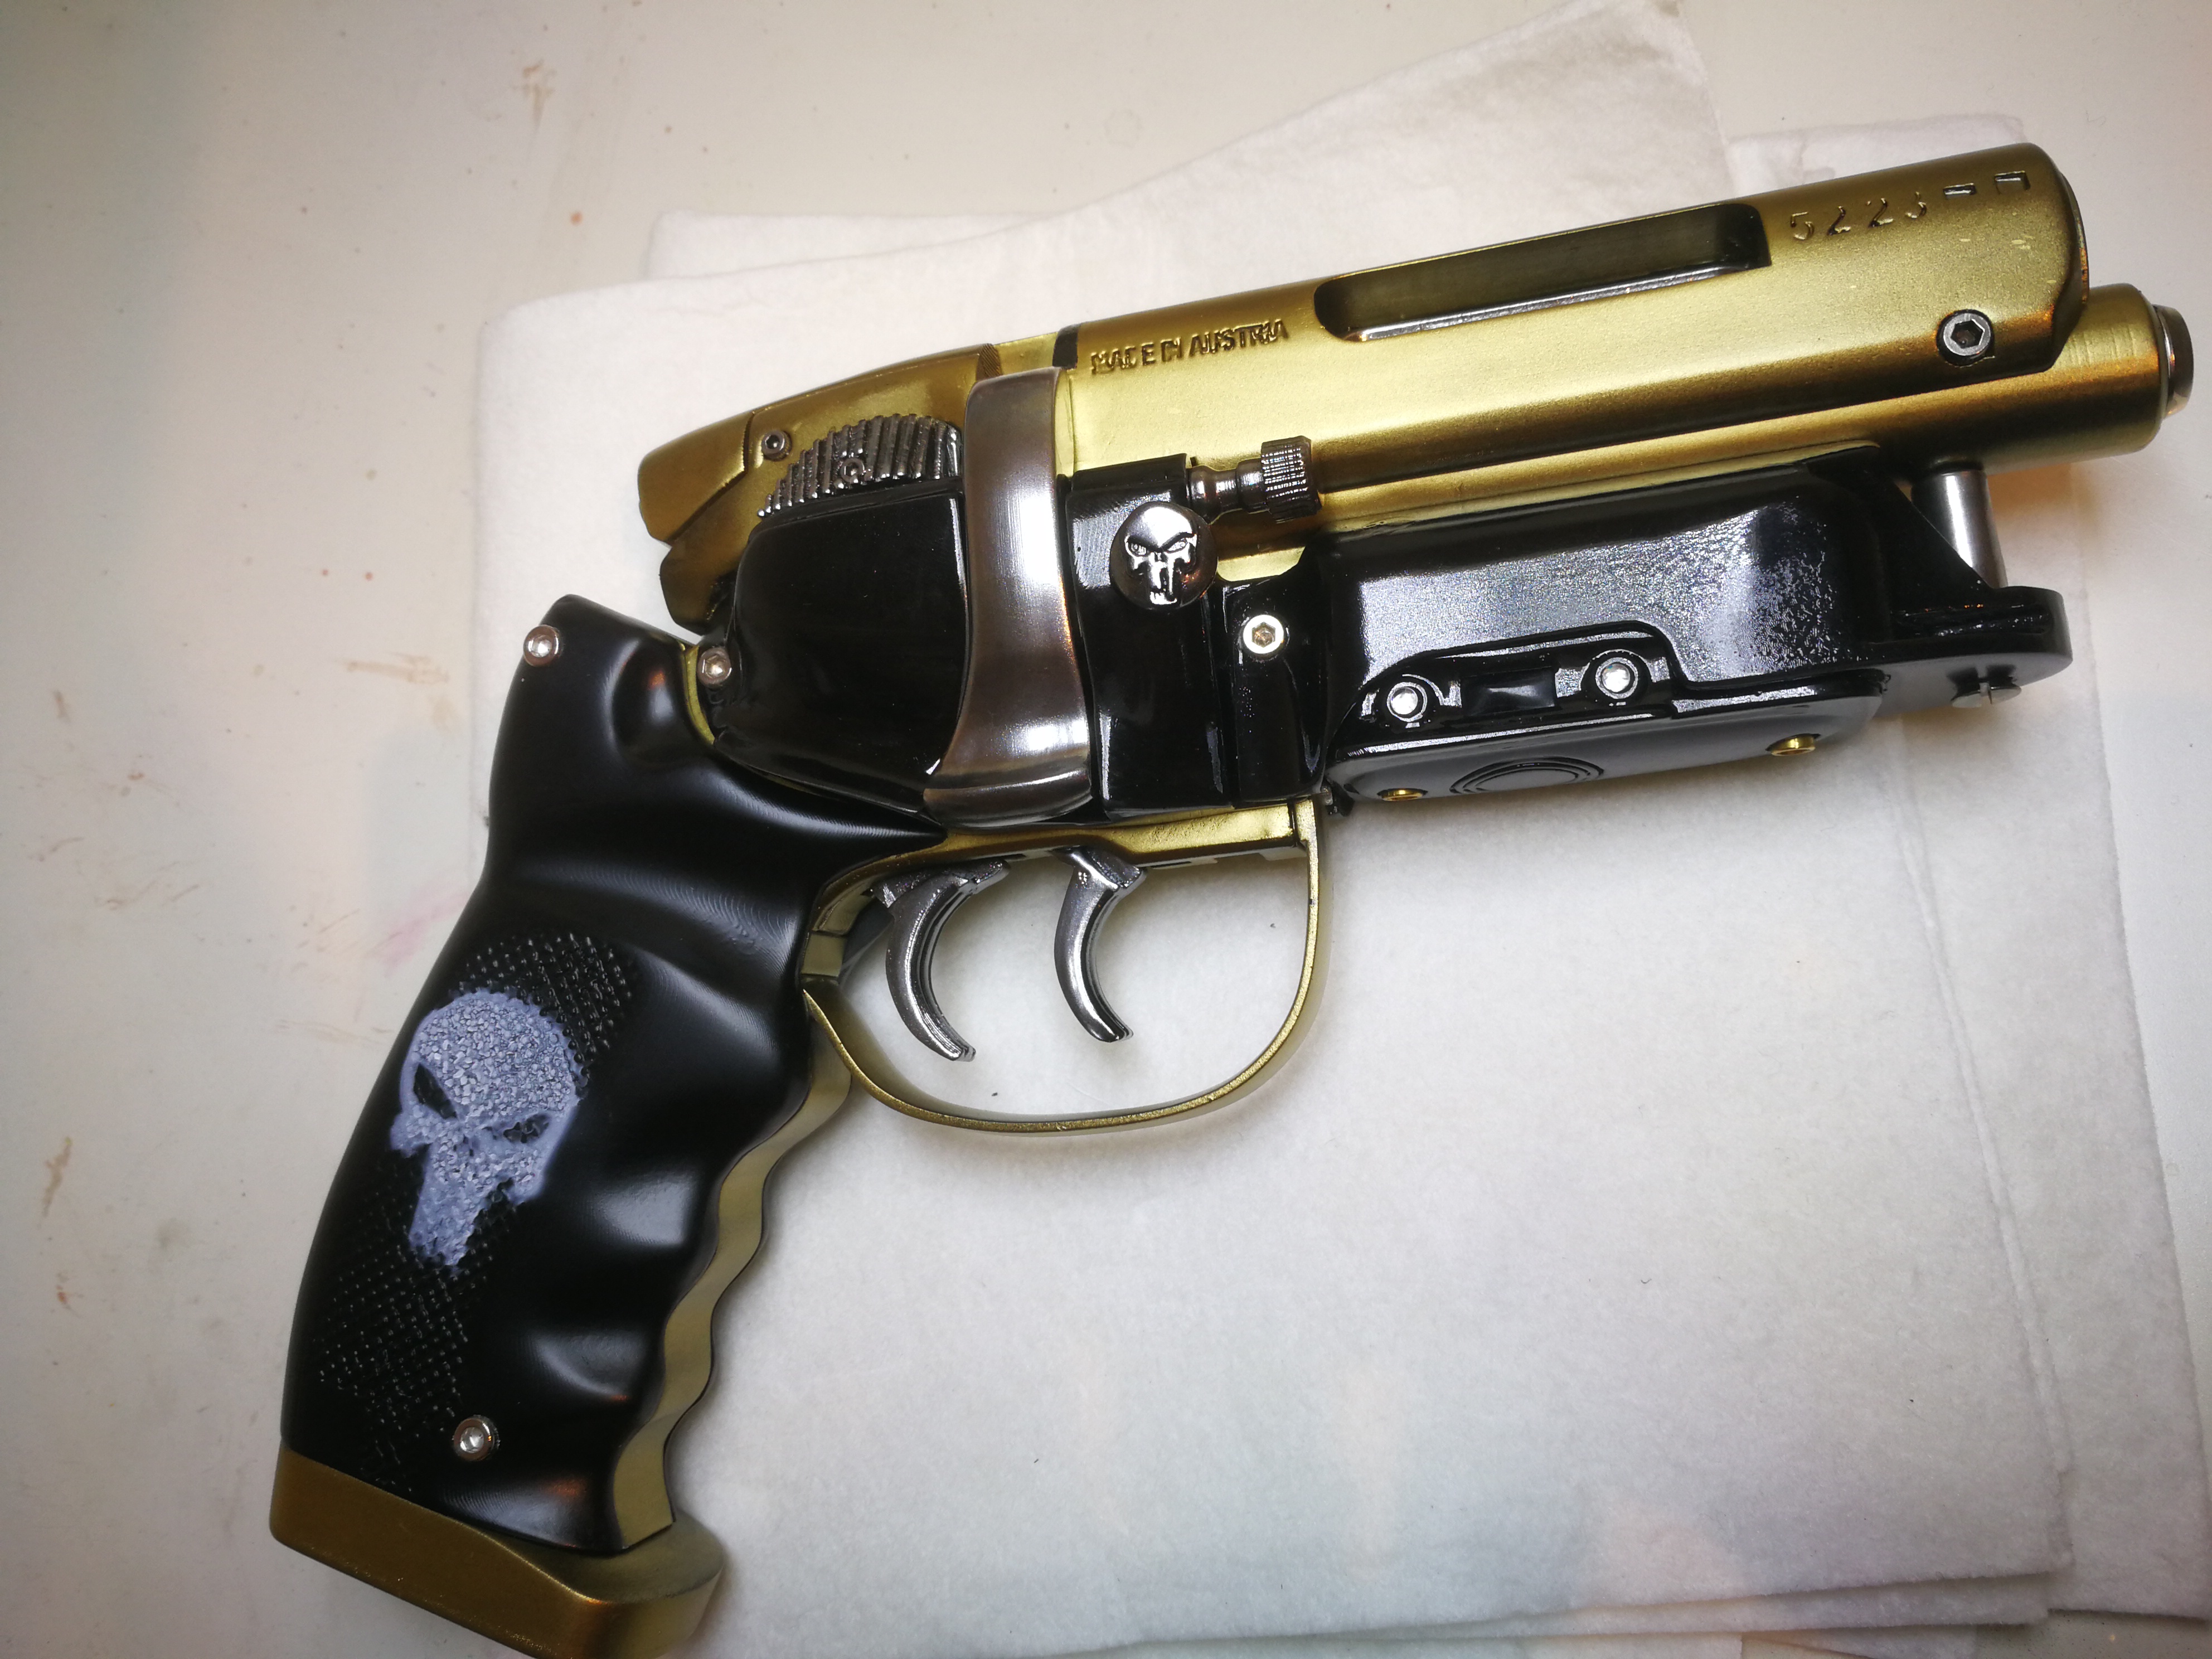
Printed another one of Andrews design.. Made a punisher theme of the gun this time around. Now have 4 in total - the model is perfect although I made some mods to accomodate for batteries and wiring. Thank you again Andrew for a nice model!
I had an absolute blast printing this one out! Thanks for the amazing model.
Thanks for this. Here is my take on the piece. As you can see I did not go the realistic route but rather opted to make it more about the print than the accuracy in the finish. I think It came out quite good. Let me know what you think.
thanks for the great model
Thank you for designing. Here is my take
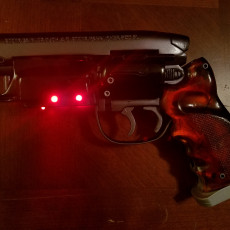
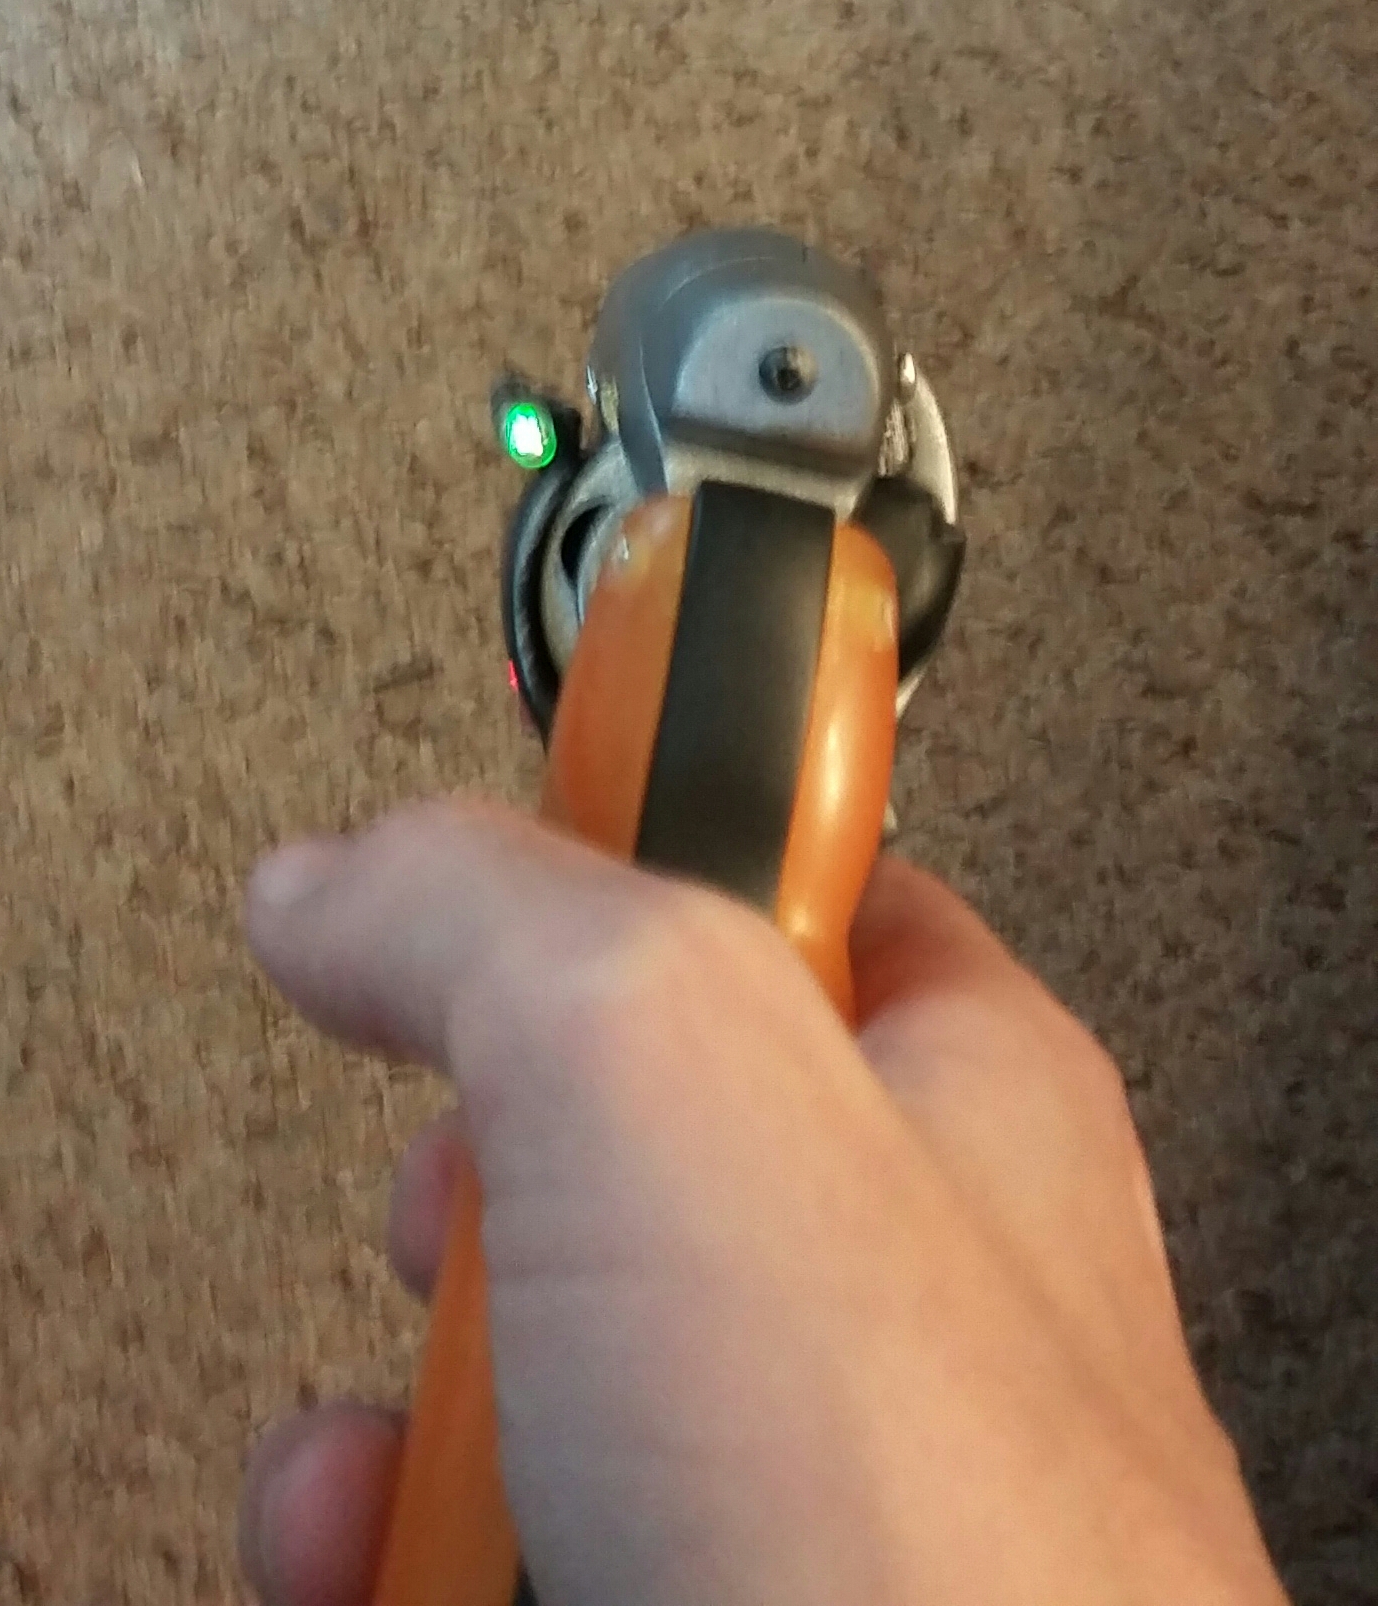
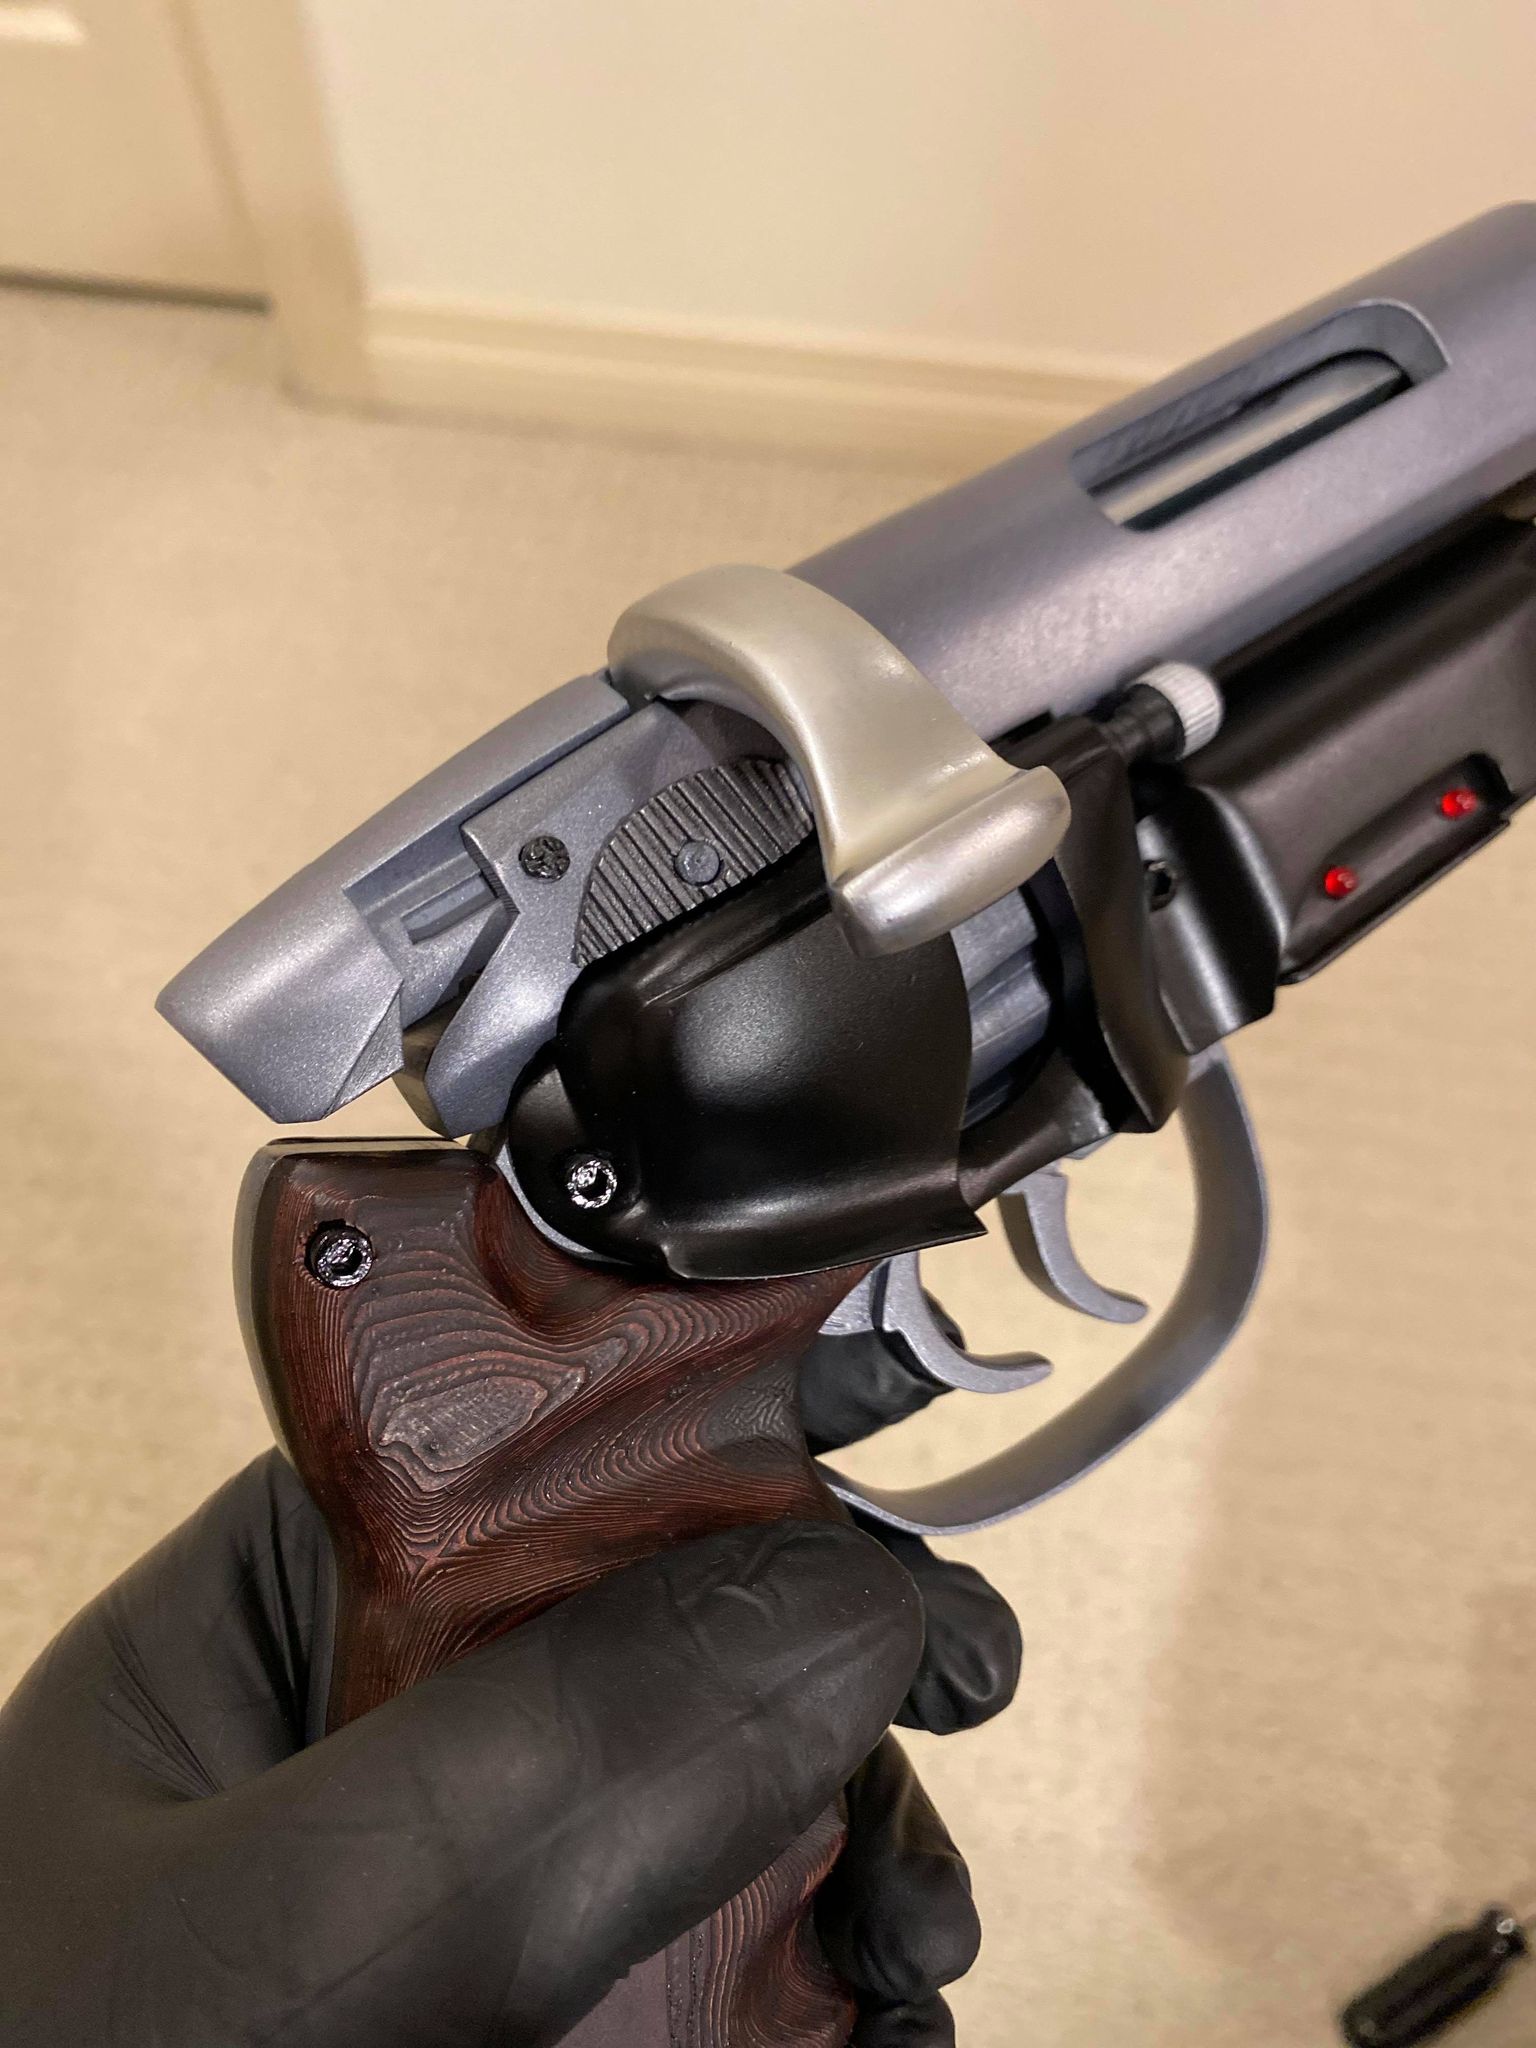
Here is my version. I remade the magazine to have magnets so it stays close. It also has the battery. I also created a slot for the on/off switch and the button. Then I created some bullets to go with it. I also hollowed out the F001_2 so it could house the green LED plus the cables (Those cables can be seen on the real screen used prop (check at 03:54 at https://www.youtube.com/watch?v=ITiJkdL5QEQ ). The grips are printed in wood filament and stained as I didn't have any proper transparent plastic.
This took nearly 4 days to print. Painted with acrylics.
Thanks a lot Andrew, this was a fun project! Didn't sand and paint mine. I printed the majority of parts at 0.1mm height and this is raw PLA. I used Prusa's mystic brown PLA for the grips and love how well it fits.
Still weathering for a well used look.
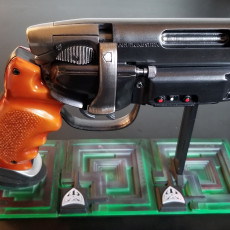
FANTASTIC model! Thank you! I created some addons if anyone is interested in risers for the stand and a plaque for Deckard...https://www.thingiverse.com/thing:4540512
ty its great. its for a friend and have tagged you in my post!
I took a crack at making this myself attempting to do it with materials that wouldn't require painting. I initially printed it out with the parts listed here plus the textured grips and the modified under barrel components. Then found a fused version from Guido Maurizio, but it was incorrectly fused. Luckily someone had posted a link to Andrew's properly fused models, so I used Guido's text on the upper barrel as a template and updated the model to emboss that on the side. I also printed the right chamber cover dial Guido had (after scaling it down a bit) and modelled a notch in the right chamber cover for that. The last part I printed were the grips, which I printed with 100% infill since they use translucent orange, so that also gives the gun some weight which is nice. (Took about 9 hours each to print, though, since I also slowed the speed down to aid in translucency). I will also admit I had to sand a few parts down, so even though I didn't paint this, I did spray down the parts I sanded with some clear enamel I have. I think it worked out well, though, since it gives the black parts a matted look. I still need to add the LED lights to the under barrel compartment, but aside from that it worked out well. The only problem is the trigger springs did not work out well at all, so the triggers have no return action to them. Minor detail. Part of the issue may be that I printed those thin bits in PETG since I was afraid PLA would snap under the pressure. I have to compliment Andrew on creating this. I appreciate how clever some of the solutions were to getting the right on it.
Only filament, no paint!
I decided to do a 2nd revision using PETG (for durability) and painting it (since there are no "shiny" PETG filaments). I did use PLA for the side grips, bottom of the grip and the bullets, though, since I already had the right color filament for them and I wasn't worried about durability as much on those parts. On top of the painting, I decided to experiment with a little weathering. As reference I was using pictures of the original prop from when it was put up for auction, plus video Adam Savage made of a visit to the guy that bought it. That gun had weathering/rust on the exposed metal parts that I tried to simulate. (Not a master painter, by any means). Among the changes to the model that I added: Next to the text on the left side of the chamber I put a symbol that was on the original. On the right side, I put some text toward the end of the it that included a 2 digit number, a dot, and an odd symbol. On the top of the chamber there was a screw that I added. On the back of the slide there was a screw that I added. For the post from the underbarrel fitting to the bottom of the barrel, I punched it through the underbarrel fitting, curved it where it meets the barrel, and put a "hex" indentation on the bottom. I made my own bullets with a full rim, and updated the cylinder on the gun so the full rim fit. I updated the small dial on the right side of the cylinder housing so it's a little more accurate to what is on the original gun. I still need to work on the LED electronics to fit in the housing under the barrel, and one or two things "not quite right" but it worked out alright overall. At some put I'll try to upload the remixed parts.
Thanks for the files!
Printed with recycled PLA from filaments.ca. Fit and finish done by a buddy of mine.
I had issues with some of the pins and had to find alternatives. It came out beautifully however.
I upgraded some parts and made mould for amber resin grips. Humbrol metalcote is amazing. Doing another one. Thanks for the amazing model by Andrew Forster.
Thanks so much for uploading this. I changed some parts and am trying another one.
I’m doing another one. Made some alterations on this one. Cool model-thanks
There wasa lot of post production and I'm still working on a better replication of the grips but what a great model to work with. Much appreciation to Andrew for the quality model and instructions and a few of the remixes for options on some parts.
Andrew, your design is a delight! I also used your "fused" elements and added some engraved text to the barrel cover.
Just found this model, all printed just waiting for bolts and paint :D
sanding time! and building time!
I reassembled Andrew's Blaster in Cinema4D, exported in OBJ format, imported it in Zbrush, dynameshed it, poly-decimated and exported as a single piece, then printed on a Form1+ SLA 3D printer. Each are 6.5cm and 4cm long.